seats FORD EXPLORER 2009 4.G Owners Manual
[x] Cancel search | Manufacturer: FORD, Model Year: 2009, Model line: EXPLORER, Model: FORD EXPLORER 2009 4.GPages: 407, PDF Size: 3.47 MB
Page 6 of 407
Do not add friction modifier compounds or special break-in oils since
these additives may prevent piston ring seating. SeeEngine oilin the
Maintenance and Specificationschapter for more information on oil
usage.
SPECIAL NOTICES
New Vehicle Limited Warranty
For a detailed description of what is covered and what is not covered by
your vehicle’s New Vehicle Limited Warranty, refer to theWarranty
Guide/Customer Information Guidethat is provided to you along with
yourOwner’s Guide.
Special instructions
For your added safety, your vehicle is fitted with sophisticated electronic
controls.
WARNING:Please read the sectionAirbag Supplemental
Restraint System (SRS)in theSeating and Safety Restraints
chapter. Failure to follow the specific warnings and instructions could
result in personal injury.
WARNING:Front seat mounted rear-facing child or infant seats
shouldNEVERbe placed in front of an active passenger airbag.
Service Data Recording
Service data recorders in your vehicle are capable of collecting and
storing diagnostic information about your vehicle. This potentially
includes information about the performance or status of various systems
and modules in the vehicle, such as engine, throttle, steering or brake
systems. In order to properly diagnose and service your vehicle, Ford
Motor Company, Ford of Canada, and service and repair facilities may
access vehicle diagnostic information through a direct connection to your
vehicle when diagnosing or servicing your vehicle.
2009 Explorer(exp)
Owners Guide, 1st Printing
USA(fus)
Introduction
6
Page 37 of 407
TRACK/FOLDER MODE:Available only on MP3 discs in CD mode.
In track mode, press
SEEK, SEEKto scroll through all tracks on
the disc
In folder mode, press
SEEK, SEEKto scroll through tracks
within the selected folder.
Press
FOLDER, FOLDERto access the previous/next folder (if
available).
Press OK to close and return to the main menu.
COMPRESS (Compression):Available only in CD/MP3 mode. Press
MENU until COMPRESS ON/OFF appears in the display.
Use
//SEEK, SEEKto toggle ON/OFF. When COMPRESS
is ON, the system will bring the soft and loud CD passages together for a
more consistent listening level. Press OK to close and return to the main
menu.
ALL SEATS (Occupancy mode):Use
/to select and optimize
sound for ALL SEATS, DRIVERS SEAT or REAR SEATS. Press OK to
close and return to the main menu.
SINGLE PLAY/DUAL PLAY (if equipped):If SINGLE PLAY is ON,
press
/for DUAL PLAY. For further information on Single
Play/Dual Play, please refer to theFamily Entertainment DVD system
later in this chapter.
4.AUX:Press repeatedly to cycle
through FES/DVD (if equipped),
LINE IN (auxiliary audio mode),
SYNC (if equipped) and SAT1, SAT2 and SAT3 modes (satellite radio, if
equipped).
For location and further information on auxiliary audio mode, refer to
Auxiliary input jacklater in this chapter.
Satellite radio is available only with a valid SIRIUS radio
subscription. Check with your authorized dealer for availability.
If your vehicle is equipped with a Family Entertainment System (FES)
please refer to theFamily Entertainment DVD systemlater in this
chapter.
If your vehicle is equipped with the SYNC, please refer to theSYNC
supplement for further information.
2009 Explorer(exp)
Owners Guide, 1st Printing
USA(fus)
Entertainment Systems
37
Page 79 of 407
Do not operate video games or video equipment if the power cords
and/or cables are broken, split or damaged. Carefully place cords and/or
cables where they will not be stepped on or interfere with the operation
of seats and/or compartments.
Disconnect video games and video equipment power cords and/or cables
when not in use.
Avoid touching auxiliary input jacks with your fingers. Do not blow on
them or allow them to get wet or dirty.
Do not clean any part of the DVD player with benzene, lacquer thinner,
acetone, or any other solvent.
Federal Communication Commission (FCC) Compliance
Changes or modifications not approved by Ford Lincoln-Mercury could
void user’s authority to operate the equipment. This equipment has been
tested and found to comply with the limits for a Class B digital device,
pursuant to Part 15 of the FCC Rules. These limits are designed to
provide reasonable protection against harmful interference in a
residential installation. This equipment generates, uses and can radiate
radio frequency energy and, if not installed and used in accordance with
the instructions, may cause harmful interference and radio
communications.
However, there is no guarantee that interference will not occur in a
particular installation. If this equipment does cause harmful interference
to radio or television reception, which can be determined by turning the
equipment off and on, the user is encouraged to consult the dealer or an
experienced radio/TV technician for help.
Care and service of the DVD player
Environmental extremes
DVD players which are subjected to harsh environmental conditions may
be damaged or perform at less than maximum capability. To avoid these
outcomes, whenever possible avoid exposing your DVD player to:
•extremely hot or cold temperatures.
•direct sunlight.
•high humidity.
•a dusty environment.
•locations where strong magnetic fields are generated.
2009 Explorer(exp)
Owners Guide, 1st Printing
USA(fus)
Entertainment Systems
79
Page 82 of 407
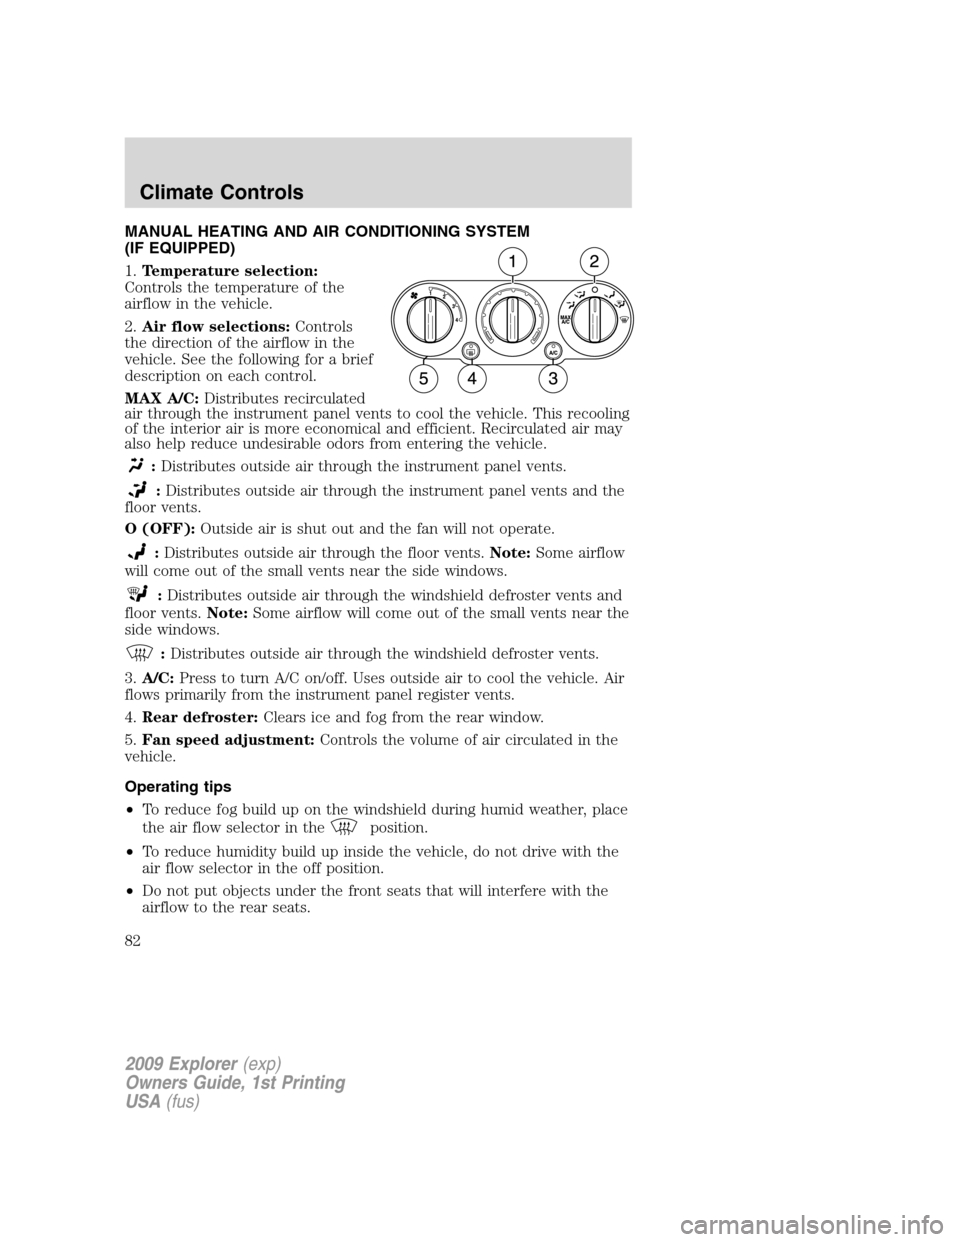
MANUAL HEATING AND AIR CONDITIONING SYSTEM
(IF EQUIPPED)
1.Temperature selection:
Controls the temperature of the
airflow in the vehicle.
2.Air flow selections:Controls
the direction of the airflow in the
vehicle. See the following for a brief
description on each control.
MAX A/C:Distributes recirculated
air through the instrument panel vents to cool the vehicle. This recooling
of the interior air is more economical and efficient. Recirculated air may
also help reduce undesirable odors from entering the vehicle.
:Distributes outside air through the instrument panel vents.
:Distributes outside air through the instrument panel vents and the
floor vents.
O (OFF):Outside air is shut out and the fan will not operate.
:Distributes outside air through the floor vents.Note:Some airflow
will come out of the small vents near the side windows.
:Distributes outside air through the windshield defroster vents and
floor vents.Note:Some airflow will come out of the small vents near the
side windows.
:Distributes outside air through the windshield defroster vents.
3.A/C:Press to turn A/C on/off. Uses outside air to cool the vehicle. Air
flows primarily from the instrument panel register vents.
4.Rear defroster:Clears ice and fog from the rear window.
5.Fan speed adjustment:Controls the volume of air circulated in the
vehicle.
Operating tips
•To reduce fog build up on the windshield during humid weather, place
the air flow selector in the
position.
•To reduce humidity build up inside the vehicle, do not drive with the
air flow selector in the off position.
•Do not put objects under the front seats that will interfere with the
airflow to the rear seats.
2009 Explorer(exp)
Owners Guide, 1st Printing
USA(fus)
Climate Controls
82
Page 86 of 407
17.Temperature conversion:
Press to toggle between Fahrenheit
and Celsius temperature on the
DATC display only. The set point temperatures in Celsius will be
displayed in half-degree increments.
Operating tips
•To reduce fog build up on the windshield during humid weather, place
the air flow selector in the
position.
•To reduce humidity build up inside the vehicle, do not drive with the
air flow selector in OFF or with recirculated air engaged.
•Do not put objects under the front seats that will interfere with the
airflow to the rear seats.
•Remove any snow, ice or leaves from the air intake area at the base of
the windshield.
•To improve the A/C cool down, drive with the windows slightly open
for 2–3 minutes after start up or until the vehicle has been “aired out.”
•If you are driving during extreme high ambient temperatures and
idling for extended periods of time in gear, it is recommended to run
the A/C in the MAX A/C position, adjust the blower fan speed to the
lowest setting, turn off the rear A/C unit and put the vehicle’s
transmission into the P (Park) to continue to receive cool air from
your A/C system.
For maximum cooling performance:
•Select and A/C and recirculated air. Use recirculated air with A/C to
provide a cooler airflow.
•Move the temperature control to the coolest setting.
To allow side window defogging and demisting while warming up the
vehicle cabin:
1. Select
.
2. Select A/C.
3. Set the temperature control to maintain comfort.
4. Set the fan speed to the highest setting.
5. Direct the outer instrument panel vents towards the side windows. To
increase airflow to the outer instrument panel vents, close the vents
located in the middle of the instrument panel.
F C
2009 Explorer(exp)
Owners Guide, 1st Printing
USA(fus)
Climate Controls
86
Page 104 of 407
WARNING:Use only soft cups in the cupholder. Hard objects
can injure you in a collision.
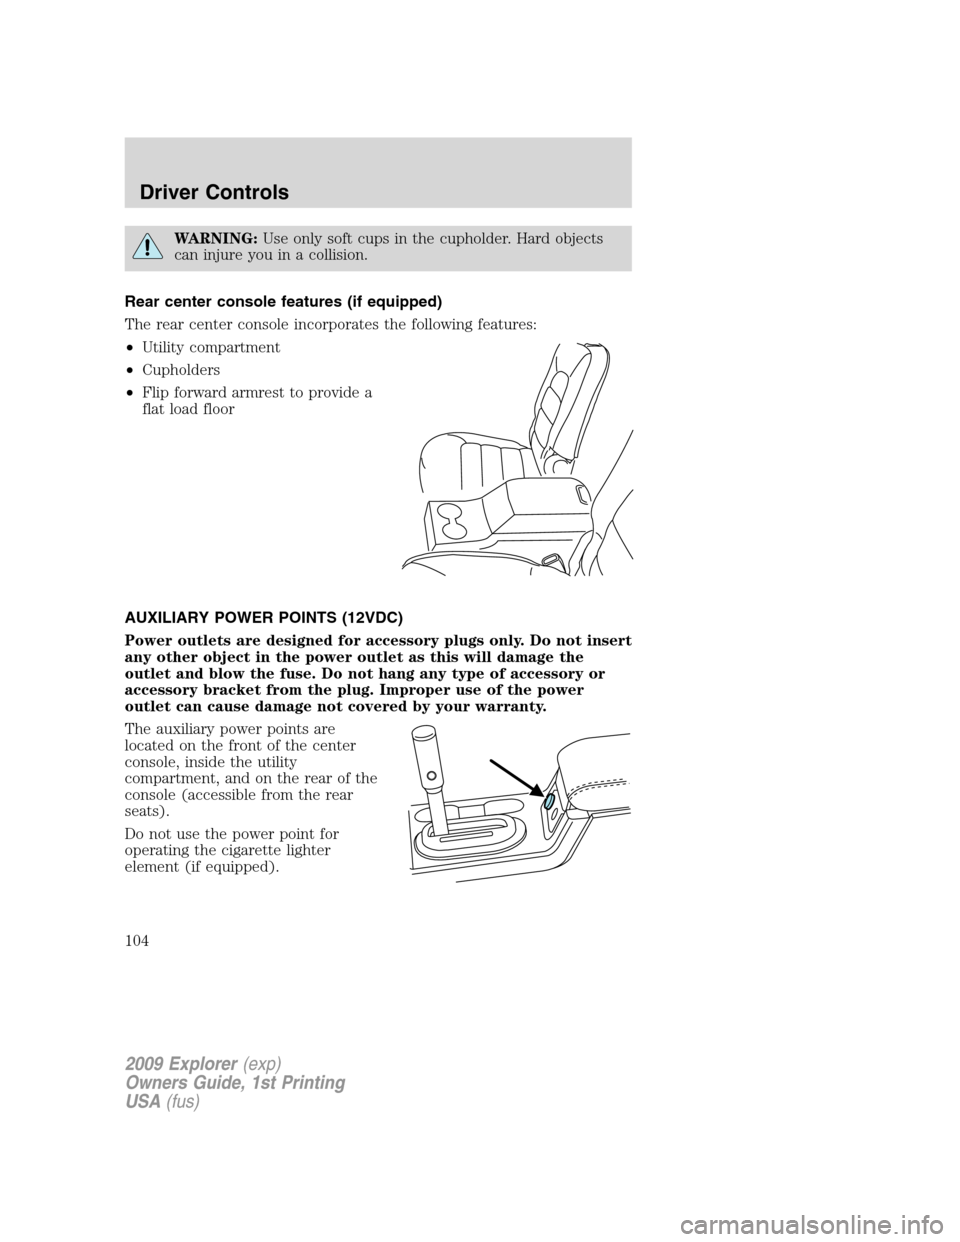
Rear center console features (if equipped)
The rear center console incorporates the following features:
•Utility compartment
•Cupholders
•Flip forward armrest to provide a
flat load floor
AUXILIARY POWER POINTS (12VDC)
Power outlets are designed for accessory plugs only. Do not insert
any other object in the power outlet as this will damage the
outlet and blow the fuse. Do not hang any type of accessory or
accessory bracket from the plug. Improper use of the power
outlet can cause damage not covered by your warranty.
The auxiliary power points are
located on the front of the center
console, inside the utility
compartment, and on the rear of the
console (accessible from the rear
seats).
Do not use the power point for
operating the cigarette lighter
element (if equipped).
2009 Explorer(exp)
Owners Guide, 1st Printing
USA(fus)
Driver Controls
104
Page 161 of 407
Locking the doors/liftgate
1. Pressand release to lock all the doors and liftgate. The lamps will
flash.Note:If any door, the liftgate or the liftgate glass are not closed
properly, the lamps will not flash.
2. Press
and release again within three seconds to confirm that all the
doors are closed and locked.Note:The doors will lock again, the horn
will chirp and the lamps flash once.
Note:If any door, the liftgate or the liftgate glass are not closed
properly, the horn will make two quick chirps.
Opening the liftgate window
Press
to unlatch the liftgate window.
Car finder
Press
twice within three seconds. The horn will chirp and the turn
lamps will flash. It is recommended that this method be used to locate
your vehicle, rather than using the panic alarm.
Sounding a panic alarm
Press
to activate the alarm. The horn will sound and the parklamps
will flash for a maximum of three minutes. Press again or turn the
ignition to the on position to deactivate, or wait for the alarm to timeout
in three minutes.
Note:The panic alarm will only operate when the ignition is in the off
position .
Memory seats/adjustable pedals/easy entry-exit feature
(if equipped)
The remote entry system can also control the memory seat /adjustable
pedals/easy entry-exit feature.
Press
to automatically move the seat and adjustable pedals to the
desired memory position (the seat position corresponds to the
transmitter being used).
Activating the memory seat feature
To activate this feature:
1. Position the seat and adjustable pedals to the position desired.
2009 Explorer(exp)
Owners Guide, 1st Printing
USA(fus)
Locks and Security
161
Page 176 of 407
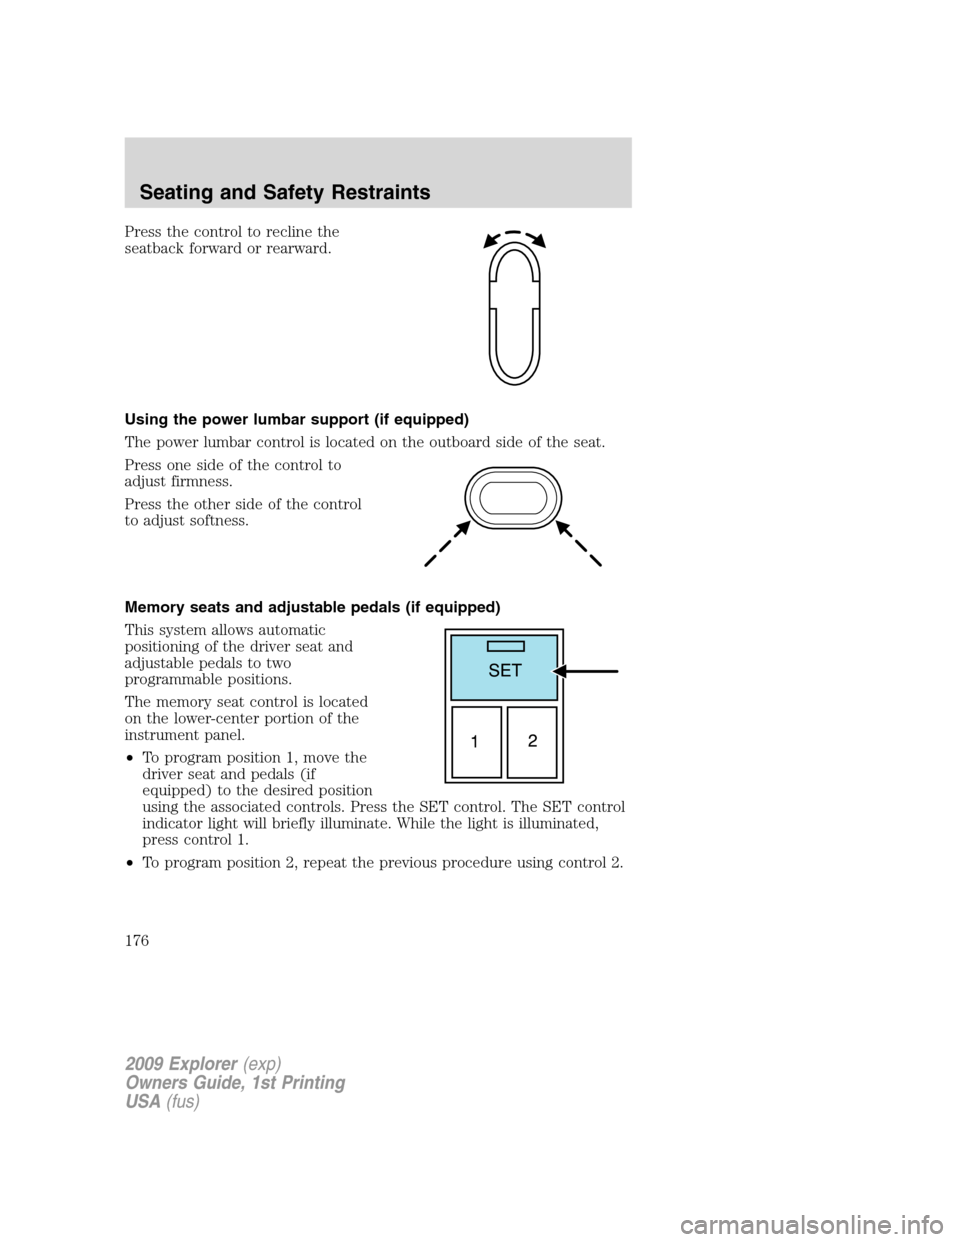
Press the control to recline the
seatback forward or rearward.
Using the power lumbar support (if equipped)
The power lumbar control is located on the outboard side of the seat.
Press one side of the control to
adjust firmness.
Press the other side of the control
to adjust softness.
Memory seats and adjustable pedals (if equipped)
This system allows automatic
positioning of the driver seat and
adjustable pedals to two
programmable positions.
The memory seat control is located
on the lower-center portion of the
instrument panel.
•To program position 1, move the
driver seat and pedals (if
equipped) to the desired position
using the associated controls. Press the SET control. The SET control
indicator light will briefly illuminate. While the light is illuminated,
press control 1.
•To program position 2, repeat the previous procedure using control 2.
2009 Explorer(exp)
Owners Guide, 1st Printing
USA(fus)
Seating and Safety Restraints
176
Page 178 of 407
Deactivating/activating the easy access/easy out feature
The easy entry/exit feature can be turned off or on through the vehicle
message center (if equipped). If your vehicle does not have a message
center, the feature can be turned off or on through the following process:
1. Put the key into the ignition (The driver seat may move forward if the
easy entry/exit feature is activated).
2. Place the ignition key into the on position (do not start the vehicle).
When the vehicle is in the on position, the interior and exterior lights,
the climate controls, and the radio are functional without the engine
started. SeeProgramming remote transmittersfor ignition switch
diagram.
3. Turn the ignition key to the off position.
4. Cycle the ignition key between the off position and the on position a
total of three times ending with the ignition in the off position.
5. Engage the forward or rearward seat switch.
6. Remove the ignition key from the ignition switch. (The driver seat
may move rearward if the easy entry/exit feature is activated).
Steps 2 through 6 must be performed within a 20 second period. The
easy entry/exit feature will be deactivated. Repeating the above process
will also reactivate the easy entry/exit feature.
Heated seats (if equipped)
WARNING:Persons who are unable to feel pain to the skin
because of advanced age, chronic illness, diabetes, spinal cord
injury, medication, alcohol use, exhaustion, or other physical
conditions, must exercise care when using the seat heater. The seat
heater may cause burns even at low temperatures, especially if used
for long periods of time. Do not place anything on the seat that
insulates against heat, such as a blanket or cushion, because this may
cause the seat heater to overheat. Do not puncture the seat with pins,
needles, or other pointed objects because this may damage the heating
element which may cause the seat heater to overheat. An overheated
seat may cause serious personal injury.
Note:Do not do the following:
•Place heavy objects on the seat
•Operate the seat heater if water or any other liquid is spilled on the
seat. Allow the seat to dry thoroughly.
2009 Explorer(exp)
Owners Guide, 1st Printing
USA(fus)
Seating and Safety Restraints
178
Page 179 of 407
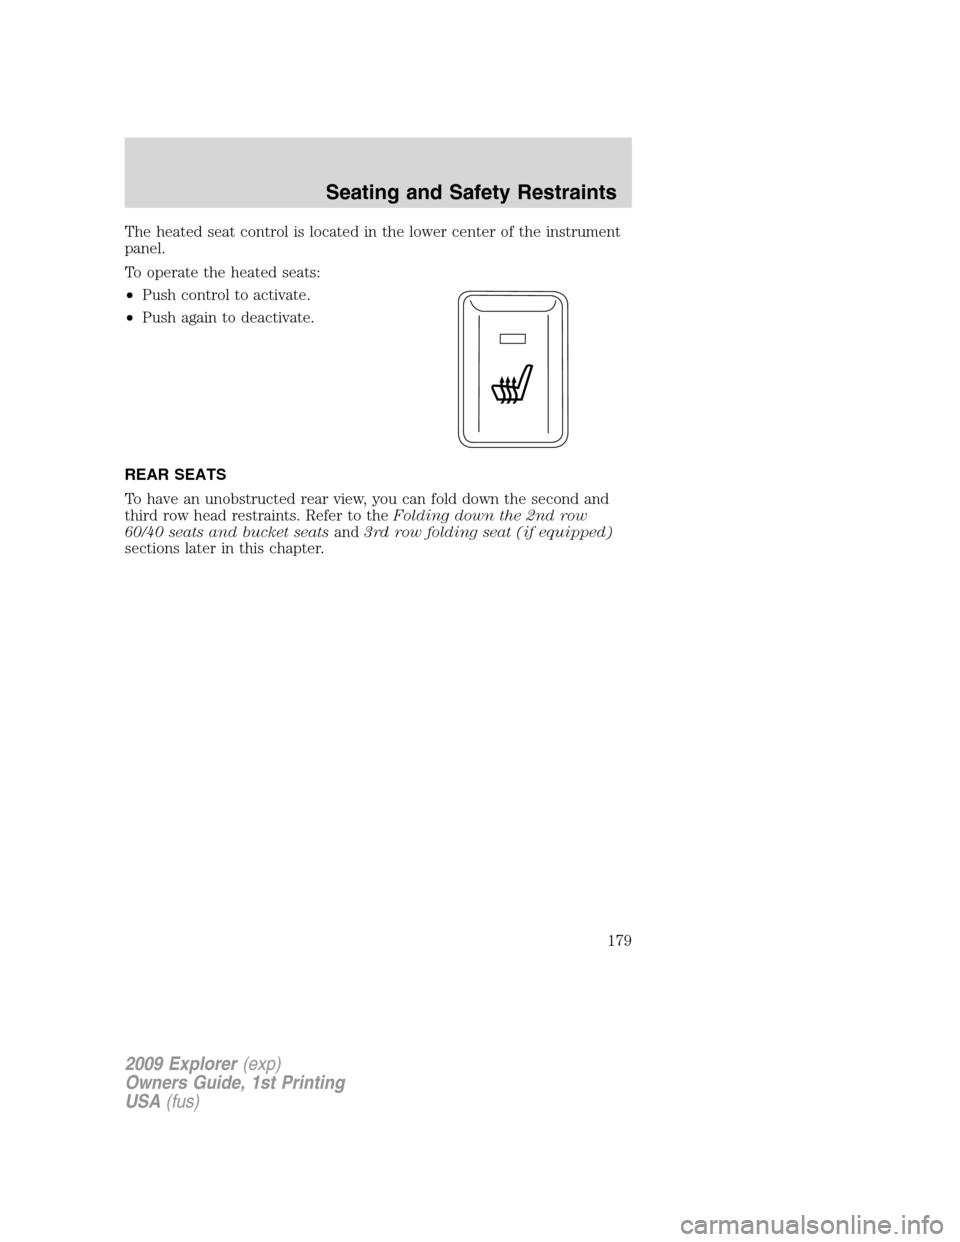
The heated seat control is located in the lower center of the instrument
panel.
To operate the heated seats:
•Push control to activate.
•Push again to deactivate.
REAR SEATS
To have an unobstructed rear view, you can fold down the second and
third row head restraints. Refer to theFolding down the 2nd row
60/40 seats and bucket seatsand3rd row folding seat (if equipped)
sections later in this chapter.
2009 Explorer(exp)
Owners Guide, 1st Printing
USA(fus)
Seating and Safety Restraints
179