ABS FORD EXPLORER 2016 5.G Owners Manual
[x] Cancel search | Manufacturer: FORD, Model Year: 2016, Model line: EXPLORER, Model: FORD EXPLORER 2016 5.GPages: 541, PDF Size: 6.51 MB
Page 100 of 541
On (white light): Illuminates when you
switch on the adaptive cruise control
system. Turns off when the speed control
system is turned off.
Engaged (green light): Illuminates when
you engage the adaptive cruise control
system. Turns off when you disengage the
speed control system.
Anti-Lock Braking System
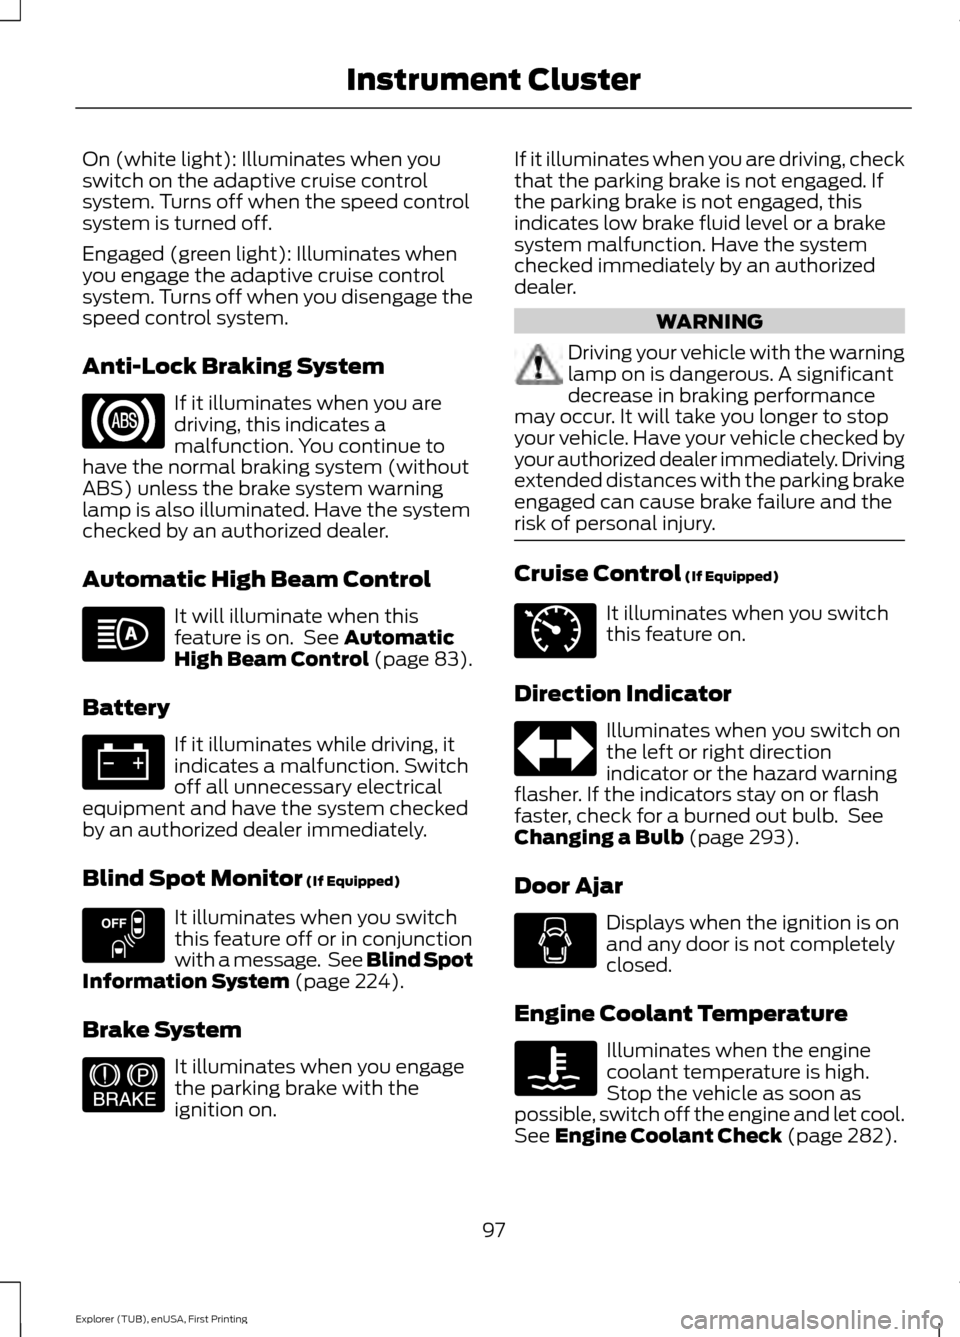
If it illuminates when you are
driving, this indicates a
malfunction. You continue to
have the normal braking system (without
ABS) unless the brake system warning
lamp is also illuminated. Have the system
checked by an authorized dealer.
Automatic High Beam Control It will illuminate when this
feature is on. See Automatic
High Beam Control (page 83).
Battery If it illuminates while driving, it
indicates a malfunction. Switch
off all unnecessary electrical
equipment and have the system checked
by an authorized dealer immediately.
Blind Spot Monitor
(If Equipped) It illuminates when you switch
this feature off or in conjunction
with a message. See Blind Spot
Information System
(page 224).
Brake System It illuminates when you engage
the parking brake with the
ignition on. If it illuminates when you are driving, check
that the parking brake is not engaged. If
the parking brake is not engaged, this
indicates low brake fluid level or a brake
system malfunction. Have the system
checked immediately by an authorized
dealer. WARNING
Driving your vehicle with the warning
lamp on is dangerous. A significant
decrease in braking performance
may occur. It will take you longer to stop
your vehicle. Have your vehicle checked by
your authorized dealer immediately. Driving
extended distances with the parking brake
engaged can cause brake failure and the
risk of personal injury. Cruise Control
(If Equipped)
It illuminates when you switch
this feature on.
Direction Indicator Illuminates when you switch on
the left or right direction
indicator or the hazard warning
flasher. If the indicators stay on or flash
faster, check for a burned out bulb. See
Changing a Bulb
(page 293).
Door Ajar Displays when the ignition is on
and any door is not completely
closed.
Engine Coolant Temperature Illuminates when the engine
coolant temperature is high.
Stop the vehicle as soon as
possible, switch off the engine and let cool.
See
Engine Coolant Check (page 282).
97
Explorer (TUB), enUSA, First Printing Instrument Cluster E151262 E144522 E71340
Page 144 of 541
WARNINGS
Install the head restraint properly to
help minimize the risk of neck injury
in the event of a crash.
Note:
Adjust the seatback to an upright
driving position before adjusting the head
restraint. Adjust the head restraint so that
the top of it is level with the top of your head
and as far forward as possible. Make sure
that you remain comfortable. If you are
extremely tall, adjust the head restraint to
its highest position.
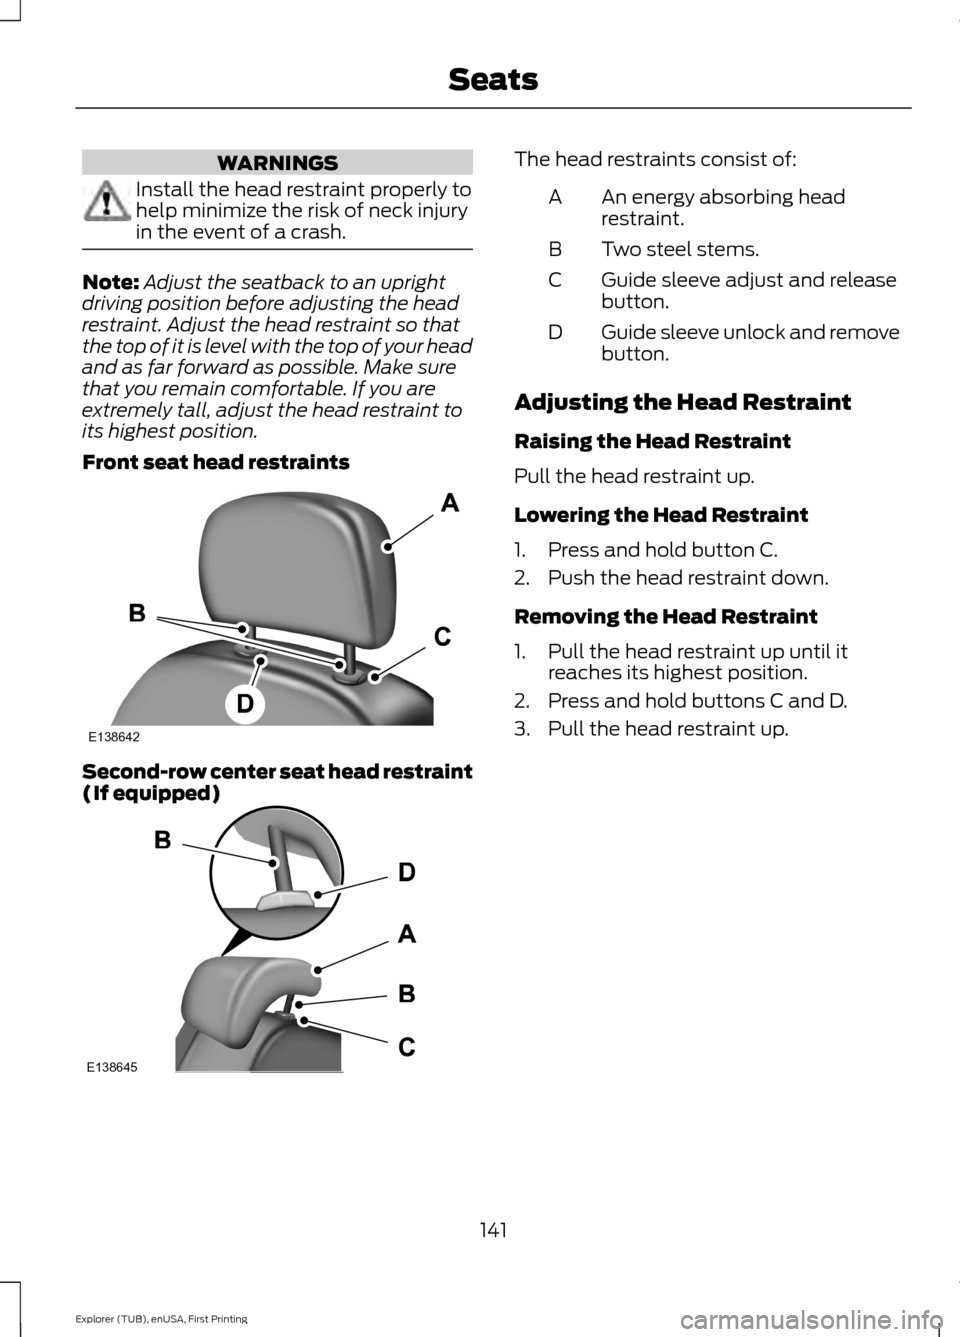
Front seat head restraints Second-row center seat head restraint
(If equipped) The head restraints consist of:
An energy absorbing head
restraint.
A
Two steel stems.
B
Guide sleeve adjust and release
button.
C
Guide sleeve unlock and remove
button.
D
Adjusting the Head Restraint
Raising the Head Restraint
Pull the head restraint up.
Lowering the Head Restraint
1. Press and hold button C.
2. Push the head restraint down.
Removing the Head Restraint
1. Pull the head restraint up until it reaches its highest position.
2. Press and hold buttons C and D.
3. Pull the head restraint up.
141
Explorer (TUB), enUSA, First Printing SeatsE138642 E138645
Page 145 of 541
Installing the Head Restraint
Align the steel stems into the guide sleeves
and push the head restraint down until it
locks.
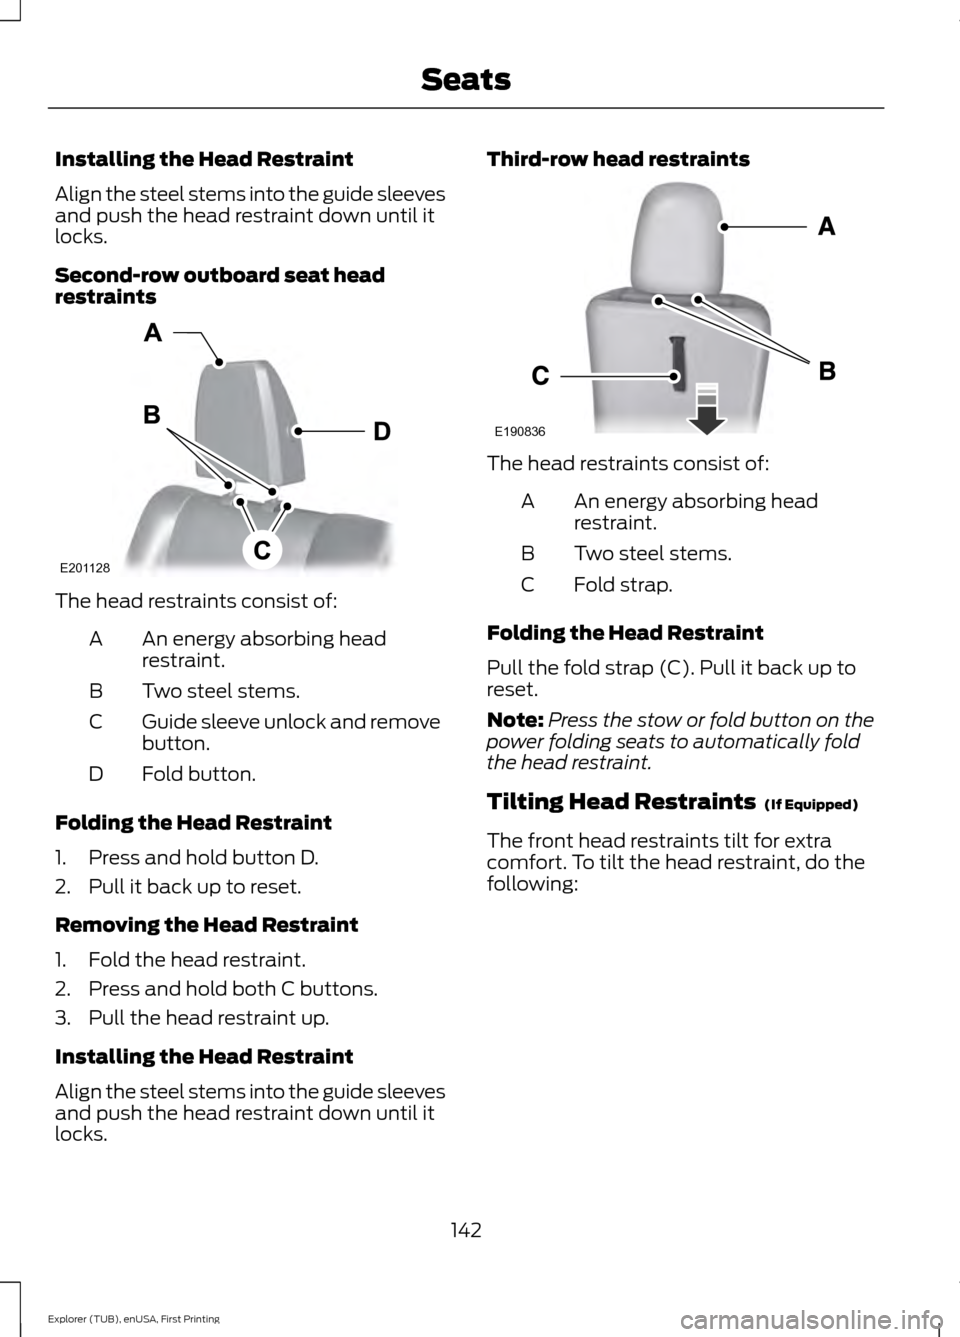
Second-row outboard seat head
restraints
The head restraints consist of:
An energy absorbing head
restraint.
A
Two steel stems.
B
Guide sleeve unlock and remove
button.
C
Fold button.
D
Folding the Head Restraint
1. Press and hold button D.
2. Pull it back up to reset.
Removing the Head Restraint
1. Fold the head restraint.
2. Press and hold both C buttons.
3. Pull the head restraint up.
Installing the Head Restraint
Align the steel stems into the guide sleeves
and push the head restraint down until it
locks. Third-row head restraints
The head restraints consist of:
An energy absorbing head
restraint.
A
Two steel stems.
B
Fold strap.
C
Folding the Head Restraint
Pull the fold strap (C). Pull it back up to
reset.
Note: Press the stow or fold button on the
power folding seats to automatically fold
the head restraint.
Tilting Head Restraints (If Equipped)
The front head restraints tilt for extra
comfort. To tilt the head restraint, do the
following:
142
Explorer (TUB), enUSA, First Printing SeatsE201128 E190836
Page 174 of 541
SAFETY PRECAUTIONS
WARNINGS
Do not overfill the fuel tank. The
pressure in an overfilled tank may
cause leakage and lead to fuel spray
and fire. The fuel system may be under
pressure. If you hear a hissing sound
near the fuel filler door (Easy Fuel
capless fuel system), do not refuel until
the sound stops. Otherwise, fuel may spray
out, which could cause serious personal
injury. Automotive fuels can cause serious
injury or death if misused or
mishandled.
Flow of fuel through a fuel pump
nozzle can produce static electricity.
This can cause a fire if you are filling
an ungrounded fuel container. Fuel ethanol and gasoline may
contain benzene, which is a
cancer-causing agent.
When refueling always shut the
engine off and never allow sparks or
open flames near the filler neck.
Never smoke or use a cell phone while
refueling. Fuel vapor is extremely
hazardous under certain conditions. Avoid
inhaling excess fumes. Observe the following guidelines when
handling automotive fuel:
•
Extinguish all smoking materials and
any open flames before refueling your
vehicle.
• Always turn off the vehicle before
refueling. •
Automotive fuels can be harmful or
fatal if swallowed. Fuel such as
gasoline is highly toxic and if
swallowed can cause death or
permanent injury. If fuel is swallowed,
call a physician immediately, even if no
symptoms are immediately apparent.
The toxic effects of fuel may not be
visible for hours.
• Avoid inhaling fuel vapors. Inhaling too
much fuel vapor of any kind can lead
to eye and respiratory tract irritation.
In severe cases, excessive or prolonged
breathing of fuel vapor can cause
serious illness and permanent injury.
• Avoid getting fuel liquid in your eyes. If
fuel is splashed in the eyes, remove
contact lenses (if worn), flush with
water for 15 minutes and seek medical
attention. Failure to seek proper
medical attention could lead to
permanent injury.
• Fuels can also be harmful if absorbed
through the skin. If fuel is splashed on
the skin, clothing or both, promptly
remove contaminated clothing and
wash skin thoroughly with soap and
water. Repeated or prolonged skin
contact with fuel liquid or vapor causes
skin irritation.
• Be particularly careful if you are taking
“Antabuse ” or other forms of disulfiram
for the treatment of alcoholism.
Breathing gasoline vapors, or skin
contact could cause an adverse
reaction. In sensitive individuals, serious
personal injury or sickness may result.
If fuel is splashed on the skin, promptly
wash skin thoroughly with soap and
water. Consult a physician immediately
if you experience an adverse reaction.
171
Explorer (TUB), enUSA, First Printing Fuel and Refueling
Page 191 of 541
Driving on Snow and Ice
WARNING
If you are driving in slippery
conditions that require tire chains or
cables, then it is critical that you drive
cautiously. Keep speeds down, allow for
longer stopping distances and avoid
aggressive steering to reduce the chances
of a loss of vehicle control which can lead
to serious injury or death. If the rear end of
the vehicle slides while cornering, steer in
the direction of the slide until you regain
control of the vehicle. Note:
Excessive tire slippage can cause
driveline damage.
4WD vehicles have advantages over 2WD
vehicles in snow and ice but can skid like
any other vehicle.
Should you start to slide while driving on
snowy or icy roads, turn the steering wheel
in the direction of the slide until you regain
control.
Avoid sudden applications of power and
quick changes of direction on snow and
ice. Apply the accelerator slowly and
steadily when starting from a full stop.
Avoid sudden braking as well. Although an
4WD vehicle may accelerate better than
a two-wheel drive vehicle in snow and ice,
it won ’t stop any faster, because as in other
vehicles, braking occurs at all four wheels.
Do not become overconfident as to road
conditions.
Make sure you allow sufficient distance
between you and other vehicles for
stopping. Drive slower than usual and
consider using one of the lower gears. In
emergency stopping situations, apply the
brake steadily. Since your vehicle is
equipped with a four wheel (ABS), do not
“pump ” the brakes. See Hints on Driving
With Anti-Lock Brakes (page 189). Maintenance and Modifications
The suspension and steering systems on
your vehicle have been designed and
tested to provide predictable performance
whether loaded or empty and durable load
carrying capability. For this reason, Ford
Motor Company strongly recommends that
you do not make modifications such as
adding or removing parts (such as lowering
kits or stabilizer bars) or by using
replacement parts not equivalent to the
original factory equipment.
Any modifications to a vehicle that raise
the center of gravity can make it more likely
the vehicle will rollover as a result of a loss
of control. Ford Motor Company
recommends that caution be used with
any vehicle equipped with a high load or
device (such as ladder or luggage racks).
Failure to maintain your vehicle properly
may void the warranty, increase your repair
cost, reduce vehicle performance and
operational capabilities and adversely
affect driver and passenger safety.
Frequent inspection of vehicle chassis
components is recommended if the vehicle
is subjected to off-highway usage.
188
Explorer (TUB), enUSA, First Printing Four-Wheel Drive
(If Equipped)
Page 199 of 541
USING HILL DESCENT
CONTROL
Principle of operation
WARNINGS
Hill descent control cannot control
descent in all surface conditions and
circumstances, such as ice or
extremely steep grades. Hill descent
control is a driver assist system and cannot
substitute for good judgment by the driver.
Failure to do so may result in loss of vehicle
control, crash or serious injury. Hill descent control does not provide
hill hold at zero miles per hour (0
kilometers per hour). When stopped,
the parking brake must be applied or the
vehicle must be placed in P (Park) or it
may roll away. Hill descent control allows the driver to set
and maintain vehicle speed while
descending steep grades in various surface
conditions.
Hill descent control can maintain vehicle
speeds on downhill grades between 3 mph
(5 km/h)
and 20 mph (32 km/h). Above
20 mph (32 km/h), the system remains
armed, but descent speed cannot be set
or maintained.
Hill descent control requires a cooling
down interval after a period of sustained
use. The amount of time that the feature
can remain active before cooling varies
with conditions. The system provides a
warning in the message center and a chime
sounds when the system is about to
disengage for cooling. At this time,
manually apply the brakes as needed to
maintain descent speed. Using hill descent control Press and release the hill
descent button located in the
center of the terrain
management control. A light in the control
illuminates and a chime sounds when this
feature activates.
To increase descent speed, press the
accelerator pedal until you reach the
desired speed. To decrease descent speed,
press the brake pedal until you reach the
desired speed.
Whether accelerating or decelerating, once
you reach the desired descent speed,
remove your feet from the pedals and hill
descent control maintains the chosen
vehicle speed.
Note: You may observe noise from the ABS
pump motor during hill descent control
operation. This is a normal characteristic of
the ABS and should be no reason for
concern.
Hill descent modes
• At speeds below
20 mph (32 km/h):
When you press the Hill Descent
Control and Hill Descent Control
activates, HILL DESCENT CONTROL
ACTIVE
appears in the message
center for several seconds.
• At speeds below
20 mph (32 km/h):
When you press the Hill Descent
Control switch and conditions are not
correct for hill descent activation, the
Hill Descent Control system enables,
the light on the button is solid and HILL
DESCENT CONTROL READY
displays in the message center for
several seconds.
196
Explorer (TUB), enUSA, First Printing Terrain Response
(If Equipped)
Page 201 of 541
PRINCIPLE OF OPERATION
WARNINGS
To help avoid personal injury, please
read and understand the limitations
of the system as contained in this
section. Sensing is only an aid for some
(generally large and fixed) objects when
moving on a flat surface at parking speeds.
Certain objects with surfaces that absorb
ultrasonic waves, surrounding vehicle's
parking aid systems, traffic control
systems, fluorescent lamps, inclement
weather, air brakes, and external motors
and fans may also affect the function of
the sensing system; this may include
reduced performance or a false activation. To help avoid personal injury, always
use caution when in reverse (R) and
when using the sensing system.
This system is not designed to
prevent contact with small or moving
objects. The system is designed to
provide a warning to assist the driver in
detecting large stationary objects to avoid
damaging your vehicle. The system may
not detect smaller objects, particularly
those close to the ground. Certain add-on devices such as large
trailer hitches, bike or surfboard racks
and any device that may block the
normal detection zone of the system, may
create false beeps. Note:
Keep the sensors, located on the
bumper or fascia, free from snow, ice and
large accumulations of dirt. If the sensors
are covered, the system ’s accuracy can be
affected. Do not clean the sensors with
sharp objects.
Note: If your vehicle sustains damage to
the bumper or fascia, leaving it misaligned
or bent, the sensing zone may be altered
causing inaccurate measurement of
obstacles or false alarms. Note:
The sensing system cannot be turned
off when a MyKey is present. See Principle
of Operation (page 54).
Note: If you attach certain add-on devices
such as a trailer or bike rack, the rear sensing
system may detect that add-on device and
therefore provide warnings. It is suggested
that you disable the rear sensing system
when you attach an add-on device to your
vehicle to prevent these warnings.
The sensing system warns the driver of
obstacles within a certain range of your
vehicle. The system turns on automatically
whenever you switch the ignition on.
The system can be switched off through
the information display menu or from the
pop-up message that appears once you
shift the transmission into reverse (R). See
General Information
(page 101).
Note: On vehicles with front parking aid you
can use the parking aid switch to switch the
system off.
If a fault is present in the system, a warning
message appears in the information
display. See
Information Messages
(page 115).
REAR PARKING AID
The rear sensors are only active when the
transmission is in reverse (R). As your
vehicle moves closer to the obstacle, the
rate of the audible warning increases.
When the obstacle is less than
12 in
(30 cm) away, the warning sounds
continuously. If the system detects a
stationary or receding object farther than
12 in (30 cm)
from the corners of the
bumper, the tone sounds for only three
seconds. Once the system detects an
object approaching, the warning sounds
again.
198
Explorer (TUB), enUSA, First Printing Parking Aids
Page 205 of 541
•
The anti-lock brake system is
activated.
• The traction control system is
activated.
ACTIVE PARK ASSIST
Parallel Parking, Perpendicular
Parking, Park Out Assist WARNINGS
You must remain in your vehicle
when the system turns on. You are
responsible at all times for
controlling your vehicle, supervising the
system and intervening if required. Failure
to take care may result in the loss of
control of your vehicle, serious personal
injury or death. The sensors may not detect objects
in heavy rain or other conditions that
cause disruptive reflections.
Note:
The driver is always responsible for
controlling the vehicle, supervising the
system and intervening if required by
grabbing the steering wheel or pushing the
active park assist button.
The system detects an available parallel
or perpendicular parking space and
automatically steers your vehicle into the
space (hands-free) while you control the
accelerator, gearshift and brakes. The
system visually and audibly guides you to
park your vehicle.
If you are uncomfortable with the proximity
to any vehicle or object, you may choose
to override the system.
Park Out Assist automatically steers your
vehicle out of a parallel parking space
(hands-free) while you control the
accelerator, gearshift and brakes. The
system visually and audibly guides you to
enter traffic. Note:
The Blind Spot Information System
does not detect traffic alongside or behind
your vehicle during a park assist maneuver.
The system may not correctly operate in
any of the following conditions:
• You use a spare tire or a tire
significantly worn more than the other
tires.
• You use a unauthorized tire size.
• You try to park on a tight curve.
• Something passes between the front
bumper and the parking space (a
pedestrian or cyclist).
• The edge of the neighboring parked
vehicle is high off the ground (for
example, a bus, tow truck or flatbed
truck).
• The weather conditions are poor
(heavy rain, snow, fog, etc).
Note: Keep the sensors, located on the
bumper or fascia, free from snow, ice and
large accumulations of dirt. Covered sensors
can affect the system's accuracy. Do not
clean the sensors with sharp objects.
Note: The sensors may not detect objects
with surfaces that absorb ultrasonic waves
or cause ultrasonic interference (motorcycle
exhaust, truck air brakes or horns).
Do not use the system if:
• You have attached a foreign object
(bike rack or trailer) to the front or rear
of your vehicle or close to the sensors.
• You have attached an overhanging
object (surfboard) to the roof.
• A foreign object damages or obstructs
the front or rear bumper or side
sensors.
• The correct tire size is not in use on your
vehicle (for example, a mini-spare tire).
202
Explorer (TUB), enUSA, First Printing Parking Aids
Page 226 of 541
•
The road has no or poor lane markings
in the camera field-of-view.
• The camera is obscured or unable to
detect the lane markings due to
environmental conditions (significant
sun angles, shadows, snow, heavy rain
or fog), traffic conditions (following a
large vehicle that is blocking or
shadowing the lane), or vehicle
conditions (poor headlamp
illumination).
See Troubleshooting for additional
information.
Green: Indicates that the system is
available or ready to provide a warning or
intervention, on the indicated side(s). Yellow: Indicates that the system is
providing or has just provided a lane
keeping aid intervention.
Red: Indicates that the system is providing
or has just provided a lane keeping alert
warning.
The system can be temporarily suppressed
at any time by the following:
•
Quick braking.
• Fast acceleration.
• Using the turn signal indicator.
• Evasive steering maneuver.
Troubleshooting Why is the feature not available (line markings are gray) when I can see the lane markings
on the road?
Vehicle speed is outside the operational range of the feature
Sun is shining directly into the camera lens
Quick intentional lane change
Staying too close to the lane marking
Driving at high speeds in curves
The last Alert warning or Aid intervention occurred a short time ago
Ambiguous lane markings (mainly in construction zones)
Rapid transition from light to dark or vice versa
Sudden offset in lane markings
ABS or AdvanceTrac activation
Camera blockage due to dirt, grime, fog, frost or water on the windshield
Driving too close to the vehicle in front of you
Transitioning between no lane markings to lane markings or vice versa
Standing water on the road
Faint lane markings (partial yellow lane markings on concrete roads)
223
Explorer (TUB), enUSA, First Printing Driving Aids
Page 373 of 541
System data cannot be accessed without
special equipment and access to the
vehicle's SYNC module. Ford Motor
Company and Ford of Canada will not
access the system data for any purpose
other than as described absent consent, a
court order, or where required by law
enforcement, other government
authorities, or other third parties acting
with lawful authority. Other parties may
seek to access the information
independently of Ford Motor Company and
Ford of Canada. For further privacy
information, see the section on 911 Assist.
See SYNC™ Applications and Services
(page 384). USING VOICE RECOGNITION
This system helps you control many
features using voice commands. This
allows you to keep your hands on the
wheel and focus on what is around you.
Initiating a Voice Session Press the voice button. A list of
available voice commands
appears in the display.
Global Voice Commands
These voice commands are always
available. You can say them at any time. Global voice commands
This command ends the voice session. You
can also cancel a session by holding the
voice button for two or more seconds.
(cancel | exit)
This command provides you with hints,
examples and instructions.
Help
This command restarts the voice session
from the initial starting point.
(main menu | start again)
You can say any of the voice commands that appear within open and close brackets that
are separated by |. For example, where; (cancel | exit) appears you say; cancel or exit.
Helpful Hints
• Make sure the interior of your vehicle is
as quiet as possible. Wind noise from
open windows and road vibrations may
prevent the system from correctly
recognizing spoken commands.
• Before giving a voice command, wait
for the system announcement to finish,
followed by a single tone. Any
command spoken before this does not
register with the system. •
Speak naturally, without long pauses
between words.
• You can interrupt the system at any
time while it is speaking by pressing the
voice button. You can cancel a voice
session by pressing and holding the
voice button.
370
Explorer (TUB), enUSA, First Printing SYNC™
(If Equipped)E142599