warning light FORD EXPLORER 2016 5.G Owners Manual
[x] Cancel search | Manufacturer: FORD, Model Year: 2016, Model line: EXPLORER, Model: FORD EXPLORER 2016 5.GPages: 541, PDF Size: 6.51 MB
Page 5 of 541
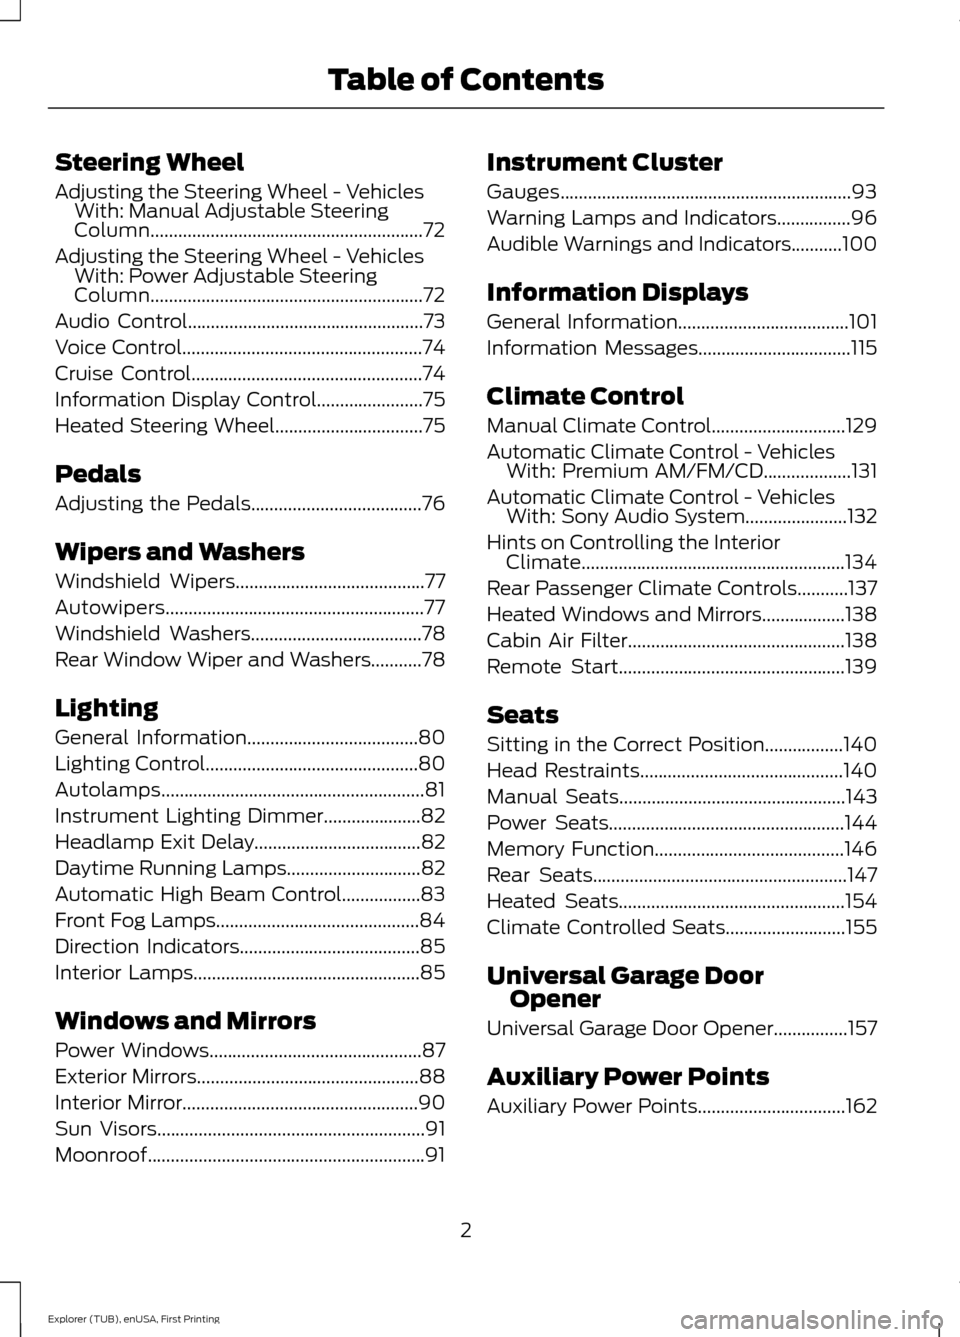
Steering Wheel
Adjusting the Steering Wheel - Vehicles
With: Manual Adjustable Steering
Column...........................................................72
Adjusting the Steering Wheel -
Vehicles
With: Power Adjustable Steering
Column...........................................................72
Audio Control...................................................73
Voice Control
....................................................74
Cruise Control
..................................................74
Information Display Control.......................75
Heated Steering Wheel................................75
Pedals
Adjusting the Pedals
.....................................76
Wipers and Washers
Windshield Wipers
.........................................77
Autowipers........................................................77
Windshield Washers
.....................................78
Rear Window Wiper and Washers...........78
Lighting
General Information
.....................................80
Lighting Control
..............................................80
Autolamps
.........................................................81
Instrument Lighting Dimmer.....................82
Headlamp Exit Delay
....................................82
Daytime Running Lamps
.............................82
Automatic High Beam Control.................83
Front Fog Lamps............................................84
Direction Indicators
.......................................85
Interior Lamps
.................................................85
Windows and Mirrors
Power Windows
..............................................87
Exterior Mirrors
................................................88
Interior Mirror...................................................90
Sun Visors
..........................................................91
Moonroof............................................................91 Instrument Cluster
Gauges...............................................................93
Warning Lamps and Indicators................96
Audible Warnings and Indicators
...........100
Information Displays
General Information.....................................101
Information Messages
.................................115
Climate Control
Manual Climate Control.............................129
Automatic Climate Control -
Vehicles
With: Premium AM/FM/CD...................131
Automatic Climate Control -
Vehicles
With: Sony Audio System......................132
Hints on Controlling the Interior Climate.........................................................134
Rear Passenger Climate Controls...........137
Heated Windows and Mirrors..................138
Cabin Air Filter
...............................................138
Remote Start.................................................139
Seats
Sitting in the Correct Position
.................140
Head Restraints............................................140
Manual Seats
.................................................143
Power Seats
...................................................144
Memory Function
.........................................146
Rear Seats
.......................................................147
Heated Seats.................................................154
Climate Controlled Seats..........................155
Universal Garage Door Opener
Universal Garage Door Opener................157
Auxiliary Power Points
Auxiliary Power Points................................162
2
Explorer (TUB), enUSA, First Printing Table of Contents
Page 11 of 541
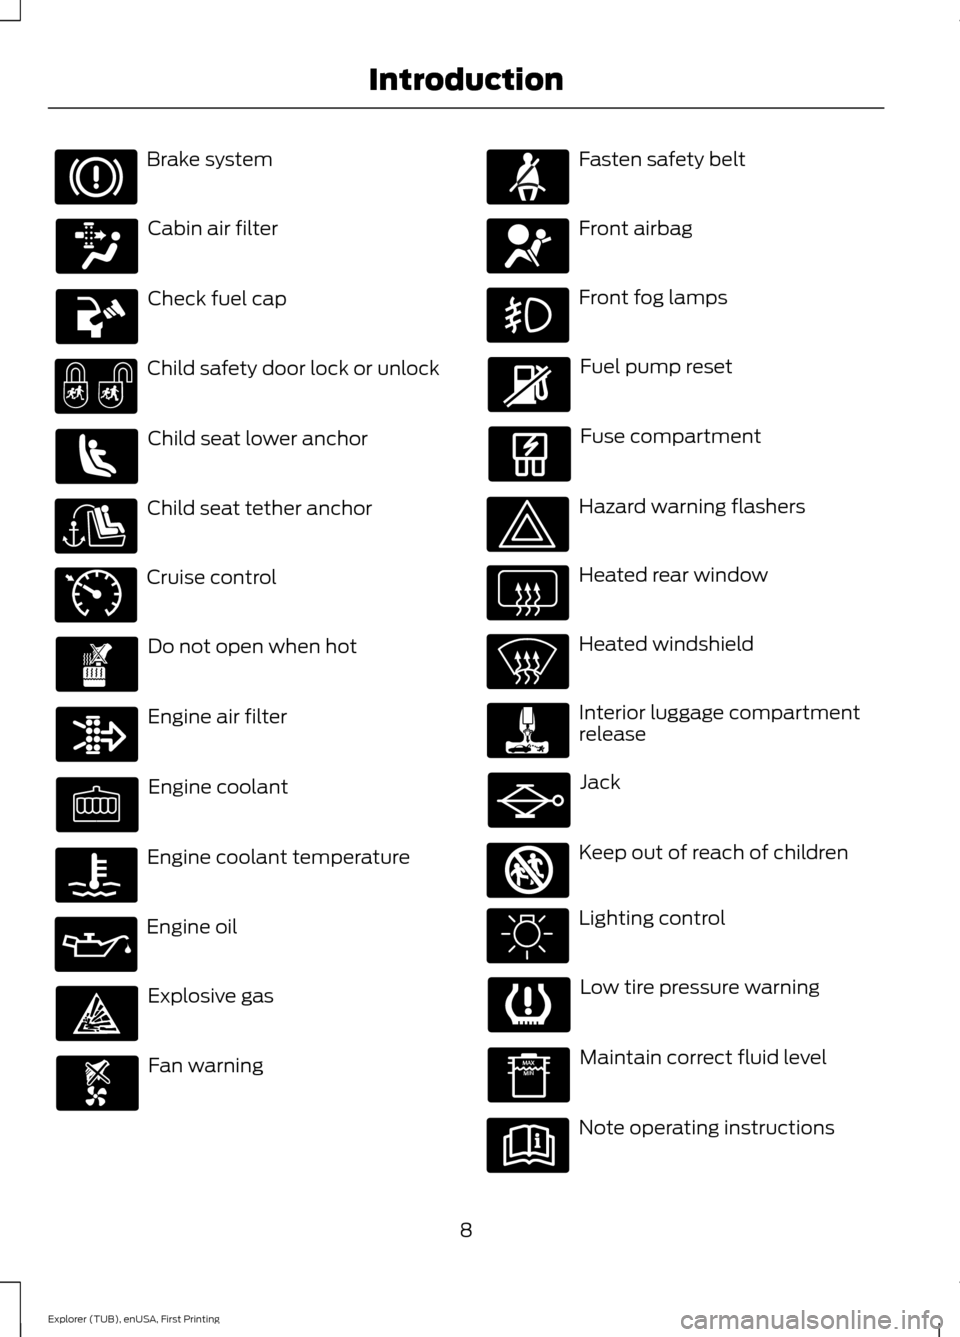
Brake system
Cabin air filter
Check fuel cap
Child safety door lock or unlock
Child seat lower anchor
Child seat tether anchor
Cruise control
Do not open when hot
Engine air filter
Engine coolant
Engine coolant temperature
Engine oil
Explosive gas
Fan warning Fasten safety belt
Front airbag
Front fog lamps
Fuel pump reset
Fuse compartment
Hazard warning flashers
Heated rear window
Heated windshield
Interior luggage compartment
release
Jack
Keep out of reach of children
Lighting control
Low tire pressure warning
Maintain correct fluid level
Note operating instructions
8
Explorer (TUB), enUSA, First Printing Introduction E71340 E161353
Page 15 of 541
Warranty on Replacement Parts
Genuine Ford and Motorcraft replacement
parts are the only replacement parts that
benefit from a Ford Warranty. Damage
caused to your vehicle as a result of the
failure of non-Ford parts may not be
covered by the Ford Warranty. For
additional information, refer to the terms
and conditions of the Ford Warranty.
SPECIAL NOTICES
New Vehicle Limited Warranty
For a detailed description of what is
covered and what is not covered by your
vehicle
’s New Vehicle Limited Warranty,
refer to the Warranty Manual that is
provided to you along with your Owner ’s
Manual.
Special Instructions
For your added safety, your vehicle is fitted
with sophisticated electronic controls. WARNINGS
You risk death or serious injury to
yourself and others if you do not
follow the instruction highlighted by
the warning symbol. Failure to follow the
specific warnings and instructions could
result in personal injury. Front seat mounted rear-facing child
or infant seats should NEVER be
placed in front of an active
passenger airbag. On-board Diagnostics (OBD-II)
Your vehicle
’s On-board Diagnostics
(OBD-II) system has a data port for
diagnostics, repair and reprogramming
services with diagnostic scan tools.
Installing a non-Ford-approved
aftermarket OBD plug-in device that uses
the port during normal driving, for example remote insurance company monitoring,
remote vehicle diagnostics, telematics or
engine reprogramming, may cause
interference or damage to vehicle systems.
We do not recommend or endorse the use
of any non-Ford-approved aftermarket
OBD plug-in devices. The vehicle Warranty
may not cover damage caused by any
non-Ford-approved aftermarket OBD
plug-in device.
Notice to Owners of Pickup Trucks
and Utility Type Vehicles
WARNING
Utility vehicles have a significantly
higher rollover rate than other types
of vehicles.
Before you drive your vehicle, please read
this Owner
’s Guide carefully. Your vehicle
is not a passenger car. As with other
vehicles of this type, failure to operate this
vehicle correctly may result in loss of
vehicle control, vehicle rollover, personal
injury or death.
Using Your Vehicle With a
Snowplow
Do not use this vehicle for
snowplowing.
Your vehicle is not equipped with a
snowplowing package.
Using Your Vehicle as an
Ambulance
Do not use this vehicle as an
ambulance.
Your vehicle is not equipped with the Ford
Ambulance Preparation Package.
12
Explorer (TUB), enUSA, First Printing Introduction
Page 20 of 541
Use a child safety seat (sometimes called
an infant carrier, convertible seat, or
toddler seat) for Infants, toddlers or
children weighing 40 pounds (18
kilograms) or less (generally age four or
younger)
INSTALLING CHILD SEATS
Using Lap and Shoulder Belts
WARNINGS
Airbags can kill or injure a child in a
child seat. Never place a rear-facing
child seat in front of an active airbag.
If you must use a forward-facing child seat
in the front seat, move the seat upon which
the child seat is installed all the way back. Airbags can kill or injure a child in a
child seat. Children 12 and under
should be properly restrained in the
rear seat whenever possible. Depending on where you secure a
child restraint, and depending on the
child restraint design, you may block
access to certain safety belt buckle
assemblies and LATCH lower anchors,
rendering those features potentially
unusable. To avoid risk of injury, occupants
should only use seating positions where
they are able to be properly restrained. When installing a child safety seat with
combination lap and shoulder belts:
•
Use the correct safety belt buckle for
that seating position.
• Insert the belt tongue into the proper
buckle until you hear a snap and feel it
latch. Make sure the tongue is securely
fastened in the buckle.
• Keep the buckle release button
pointing up and away from the safety
seat, with the tongue between the child
seat and the release button, to prevent
accidental unbuckling. •
Place the vehicle seat upon which the
child seat will be installed in the upright
position.
• For second-row seating positions,
adjust the recliner slightly to improve
child seat fit. If needed, remove the
head restraints.
• For third-row seating positions, stow
the head restraints to improve child
seat fit. See Head Restraints (page
140).
• Put the safety belt in the automatic
locking mode. See Step 5. This vehicle
does not require the use of a locking
clip.
Perform the following steps when
installing the child seat with combination
lap and shoulder belts:
Note: Although the child seat illustrated is
a forward facing child seat, the steps are
the same for installing a rear facing child
seat.
Note: The lock-off device on some child
restraints may not accommodate the
shoulder portion of the inflatable safety belt.
Follow all instructions provided by the
manufacturer of the child restraint regarding
the necessary and proper use of the lock-off
device. In some instances these devices
have been provided only for use in vehicles
with safety belt systems that would
otherwise require a locking clip.
17
Explorer (TUB), enUSA, First Printing Child Safety
Page 34 of 541
PRINCIPLE OF OPERATION
WARNINGS
Always drive and ride with your
seatback upright and the lap belt
snug and low across the hips.
To reduce the risk of injury, make
sure children sit where they can be
properly restrained.
Never let a passenger hold a child on
his or her lap while your vehicle is
moving. The passenger cannot
protect the child from injury in a crash. All occupants of your vehicle,
including the driver, should always
properly wear their safety belts, even
when an airbag supplemental restraint
system is provided. Failure to properly wear
your safety belt could seriously increase
the risk of injury or death. It is extremely dangerous to ride in a
cargo area, inside or outside of a
vehicle. In a crash, people riding in
these areas are more likely to be seriously
injured or killed. Do not allow people to ride
in any area of your vehicle that is not
equipped with seats and safety belts. Be
sure everyone in your vehicle is in a seat
and using a safety belt properly. In a rollover crash, an unbelted
person is significantly more likely to
die than a person wearing a safety
belt. Each seating position in your vehicle
has a specific safety belt assembly
which is made up of one buckle and
one tongue that are designed to be used
as a pair. 1) Use the shoulder belt on the
outside shoulder only. Never wear the
shoulder belt under the arm. 2) Never
swing the safety belt around your neck over
the inside shoulder. 3) Never use a single
belt for more than one person. WARNINGS
When possible, all children 12 years
old and under should be properly
restrained in a rear seating position.
Failure to follow this could seriously
increase the risk of injury or death. Safety belts and seats can become
hot in a vehicle that has been closed
up in sunny weather; they could burn
a small child. Check seat covers and
buckles before you place a child anywhere
near them. Front and rear seat occupants,
including pregnant women, should
wear safety belts for optimum
protection in an accident. All seating positions in your vehicle have
lap and shoulder safety belts. All
occupants of the vehicle should always
properly wear their safety belts, even when
an airbag supplemental restraint system
is provided.
The safety belt system consists of:
•
Lap and shoulder safety belts.
• Shoulder safety belt with automatic
locking mode, (except driver safety belt
and rear inflatable safety belt).
• Height adjuster at the front outboard
seating positions.
• Safety belt pretensioner at the front
outboard seating positions.
• Belt tension sensor at the front
outboard passenger seating position. •
Safety belt warning light and chime. •
Crash sensors and monitoring system
with readiness indicator.
31
Explorer (TUB), enUSA, First Printing Safety Belts
Page 36 of 541
Pregnant women should always wear their
safety belt. The lap belt portion of a
combination lap and shoulder belt should
be positioned low across the hips below
the belly and worn as tight as comfort will
allow. The shoulder belt should be
positioned to cross the middle of the
shoulder and the center of the chest.
Safety Belt Locking Modes
WARNINGS
After any vehicle crash, the safety
belt system at all passenger seating
positions must be checked by an
authorized dealer to verify that the
automatic locking retractor feature for
child seats is still functioning properly. In
addition, all safety belts should be checked
for proper function. Belt and retractor assembly must be
replaced if the safety belt assembly
automatic locking retractor feature
or any other safety belt function is not
operating properly when checked by an
authorized dealer. Failure to replace the
belt and retractor assembly could increase
the risk of injury in crashes. All safety restraints in the vehicle are
combination lap and shoulder belts. The
driver safety belt has the vehicle sensitive
locking mode. The front outboard
passenger and rear seat safety belts have
both the vehicle sensitive locking mode
and the automatic locking mode. Vehicle Sensitive Mode
This is the normal retractor mode, which
allows free shoulder belt length
adjustment to your movements and
locking in response to vehicle movement.
For example, if the driver brakes suddenly
or turns a corner sharply, or the vehicle
receives an impact of about 5 mph
(8 km/h) or more, the combination safety
belts will lock to help reduce forward
movement of the driver and passengers.
In addition, the retractor is designed to lock
if the webbing is pulled out too quickly. If
this occurs, let the belt retract slightly and
pull webbing out again in a slow and
controlled manner.
Automatic Locking Mode
In this mode, the shoulder belt is
automatically pre-locked. The belt will still
retract to remove any slack in the shoulder
belt. The automatic locking mode is not
available on the driver safety belt.
When to Use the Automatic Locking
Mode
This mode should be used any time a child
safety seat, except a booster, is installed
in passenger front or rear seating positions.
Children 12 years old and under should be
properly restrained in a rear seating
position whenever possible. See
Child
Safety (page 15).
How to Use the Automatic Locking
Mode
Non-inflatable safety belts
33
Explorer (TUB), enUSA, First Printing Safety Belts
Page 37 of 541
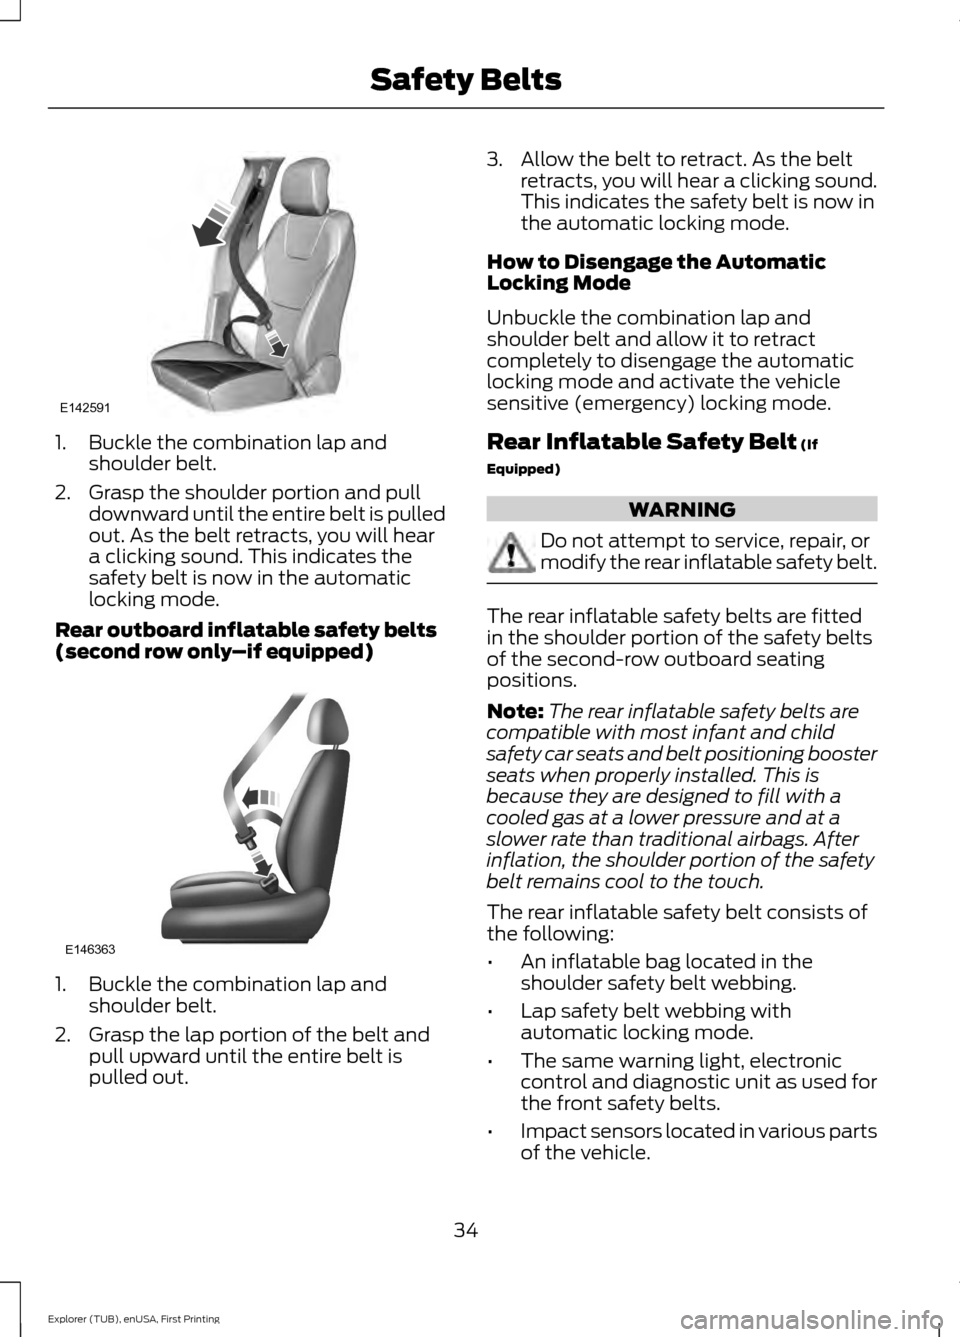
1. Buckle the combination lap and
shoulder belt.
2. Grasp the shoulder portion and pull downward until the entire belt is pulled
out. As the belt retracts, you will hear
a clicking sound. This indicates the
safety belt is now in the automatic
locking mode.
Rear outboard inflatable safety belts
(second row only –if equipped)1. Buckle the combination lap and
shoulder belt.
2. Grasp the lap portion of the belt and pull upward until the entire belt is
pulled out. 3. Allow the belt to retract. As the belt
retracts, you will hear a clicking sound.
This indicates the safety belt is now in
the automatic locking mode.
How to Disengage the Automatic
Locking Mode
Unbuckle the combination lap and
shoulder belt and allow it to retract
completely to disengage the automatic
locking mode and activate the vehicle
sensitive (emergency) locking mode.
Rear Inflatable Safety Belt (If
Equipped) WARNING
Do not attempt to service, repair, or
modify the rear inflatable safety belt.
The rear inflatable safety belts are fitted
in the shoulder portion of the safety belts
of the second-row outboard seating
positions.
Note:
The rear inflatable safety belts are
compatible with most infant and child
safety car seats and belt positioning booster
seats when properly installed. This is
because they are designed to fill with a
cooled gas at a lower pressure and at a
slower rate than traditional airbags. After
inflation, the shoulder portion of the safety
belt remains cool to the touch.
The rear inflatable safety belt consists of
the following:
• An inflatable bag located in the
shoulder safety belt webbing.
• Lap safety belt webbing with
automatic locking mode.
• The same warning light, electronic
control and diagnostic unit as used for
the front safety belts.
• Impact sensors located in various parts
of the vehicle.
34
Explorer (TUB), enUSA, First Printing Safety BeltsE142591 E146363
Page 39 of 541
SAFETY BELT HEIGHT
ADJUSTMENT
WARNING
Position the safety belt height
adjuster so that the belt rests across
the middle of your shoulder. Failure
to adjust the safety belt properly could
reduce the effectiveness of the safety belt
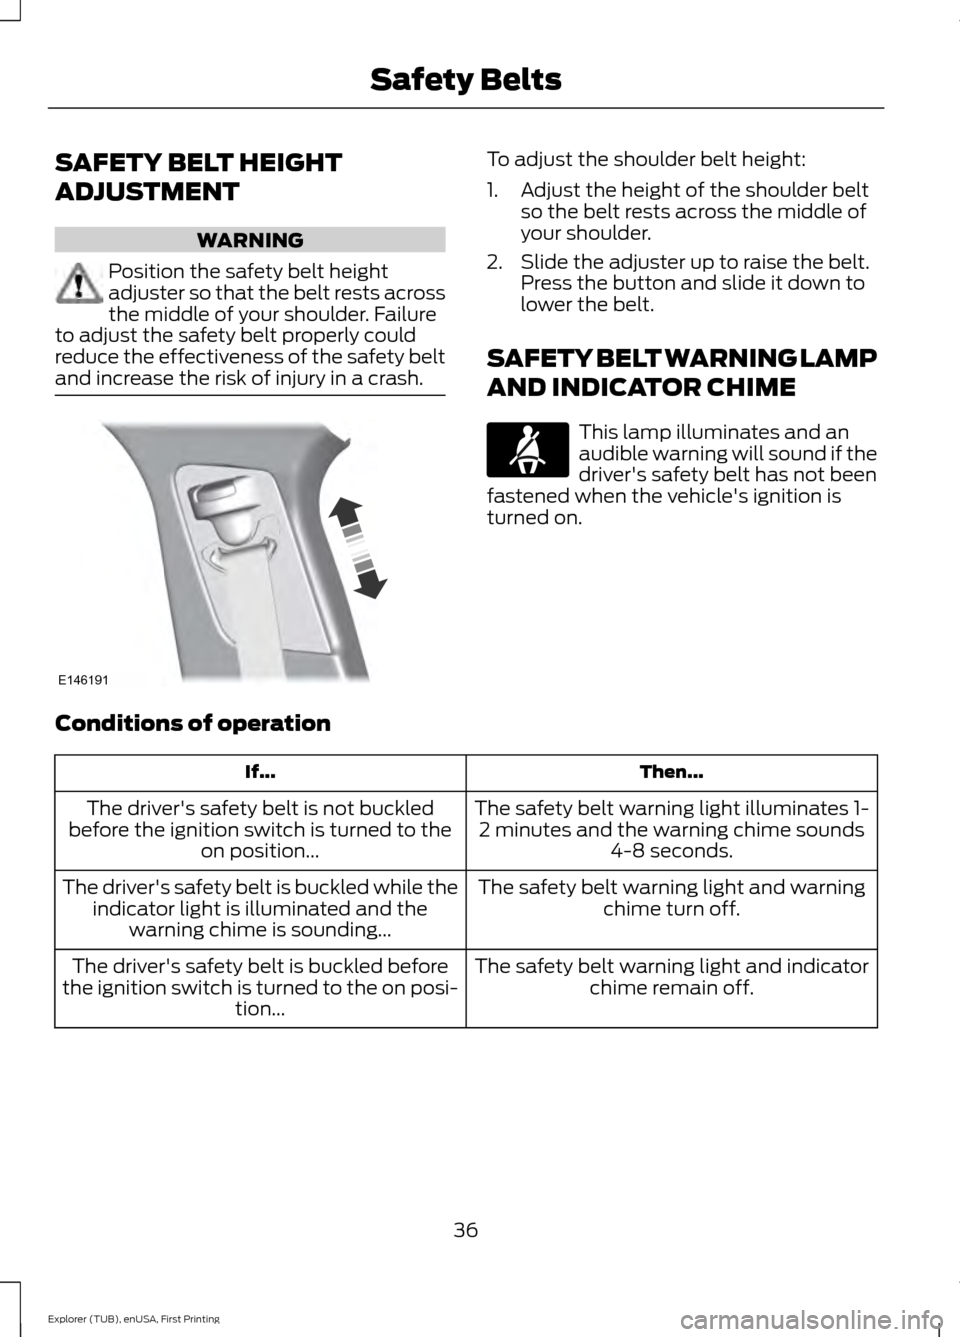
and increase the risk of injury in a crash. To adjust the shoulder belt height:
1. Adjust the height of the shoulder belt
so the belt rests across the middle of
your shoulder.
2. Slide the adjuster up to raise the belt. Press the button and slide it down to
lower the belt.
SAFETY BELT WARNING LAMP
AND INDICATOR CHIME This lamp illuminates and an
audible warning will sound if the
driver's safety belt has not been
fastened when the vehicle's ignition is
turned on.
Conditions of operation Then...
If...
The safety belt warning light illuminates 1-2 minutes and the warning chime sounds 4-8 seconds.
The driver's safety belt is not buckled
before the ignition switch is turned to the on position...
The safety belt warning light and warningchime turn off.
The driver's safety belt is buckled while the
indicator light is illuminated and the warning chime is sounding...
The safety belt warning light and indicatorchime remain off.
The driver's safety belt is buckled before
the ignition switch is turned to the on posi- tion...
36
Explorer (TUB), enUSA, First Printing Safety BeltsE146191
Page 40 of 541
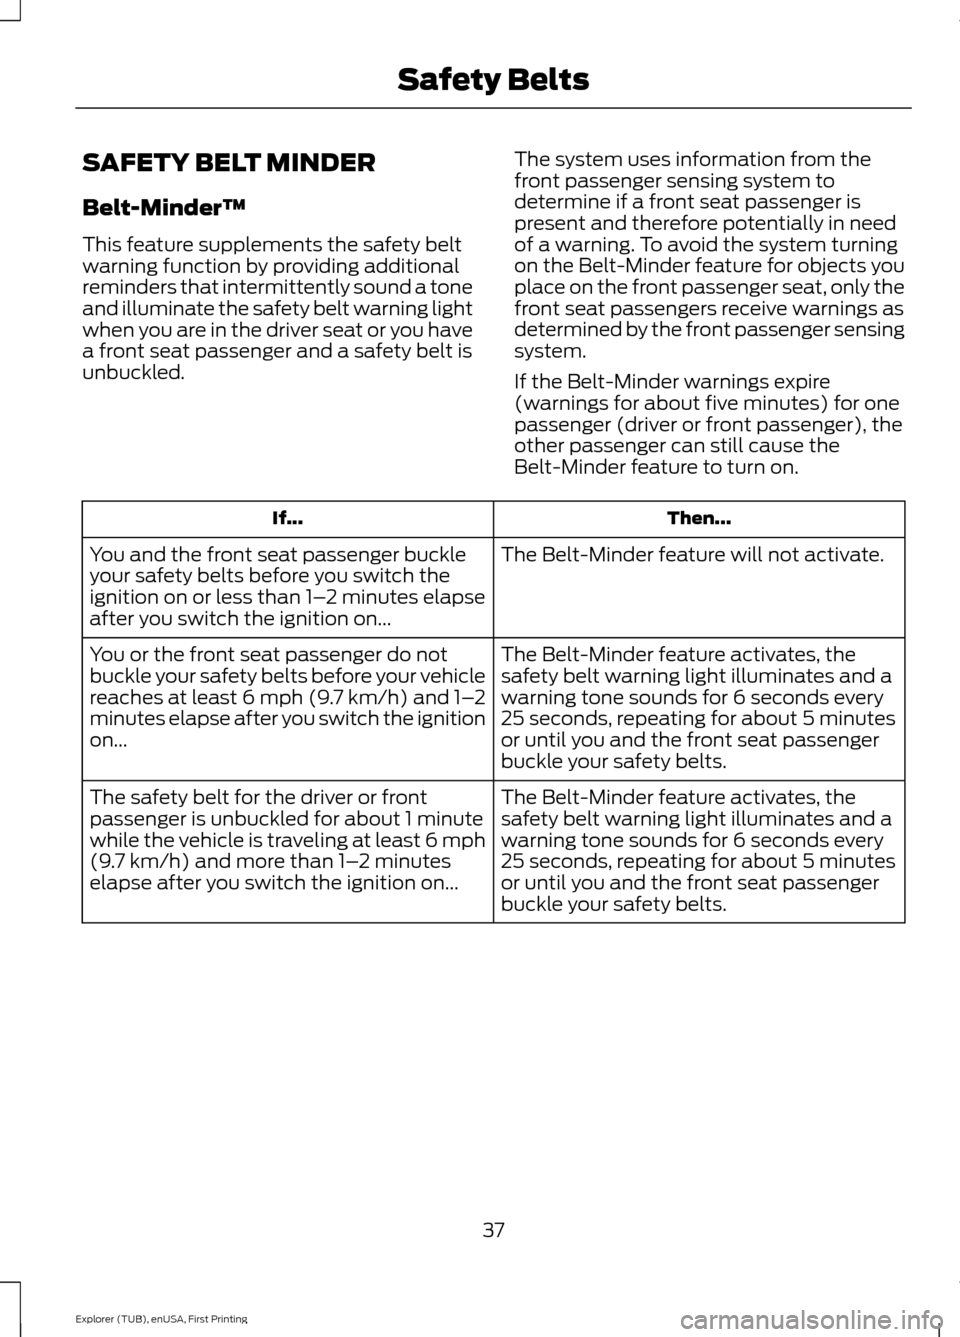
SAFETY BELT MINDER
Belt-Minder™
This feature supplements the safety belt
warning function by providing additional
reminders that intermittently sound a tone
and illuminate the safety belt warning light
when you are in the driver seat or you have
a front seat passenger and a safety belt is
unbuckled.
The system uses information from the
front passenger sensing system to
determine if a front seat passenger is
present and therefore potentially in need
of a warning. To avoid the system turning
on the Belt-Minder feature for objects you
place on the front passenger seat, only the
front seat passengers receive warnings as
determined by the front passenger sensing
system.
If the Belt-Minder warnings expire
(warnings for about five minutes) for one
passenger (driver or front passenger), the
other passenger can still cause the
Belt-Minder feature to turn on. Then...
If...
The Belt-Minder feature will not activate.
You and the front seat passenger buckle
your safety belts before you switch the
ignition on or less than 1– 2 minutes elapse
after you switch the ignition on...
The Belt-Minder feature activates, the
safety belt warning light illuminates and a
warning tone sounds for 6 seconds every
25 seconds, repeating for about 5 minutes
or until you and the front seat passenger
buckle your safety belts.
You or the front seat passenger do not
buckle your safety belts before your vehicle
reaches at least 6 mph (9.7 km/h) and 1–
2
minutes elapse after you switch the ignition
on...
The Belt-Minder feature activates, the
safety belt warning light illuminates and a
warning tone sounds for 6 seconds every
25 seconds, repeating for about 5 minutes
or until you and the front seat passenger
buckle your safety belts.
The safety belt for the driver or front
passenger is unbuckled for about 1 minute
while the vehicle is traveling at least 6 mph
(9.7 km/h) and more than 1–
2 minutes
elapse after you switch the ignition on...
37
Explorer (TUB), enUSA, First Printing Safety Belts
Page 41 of 541
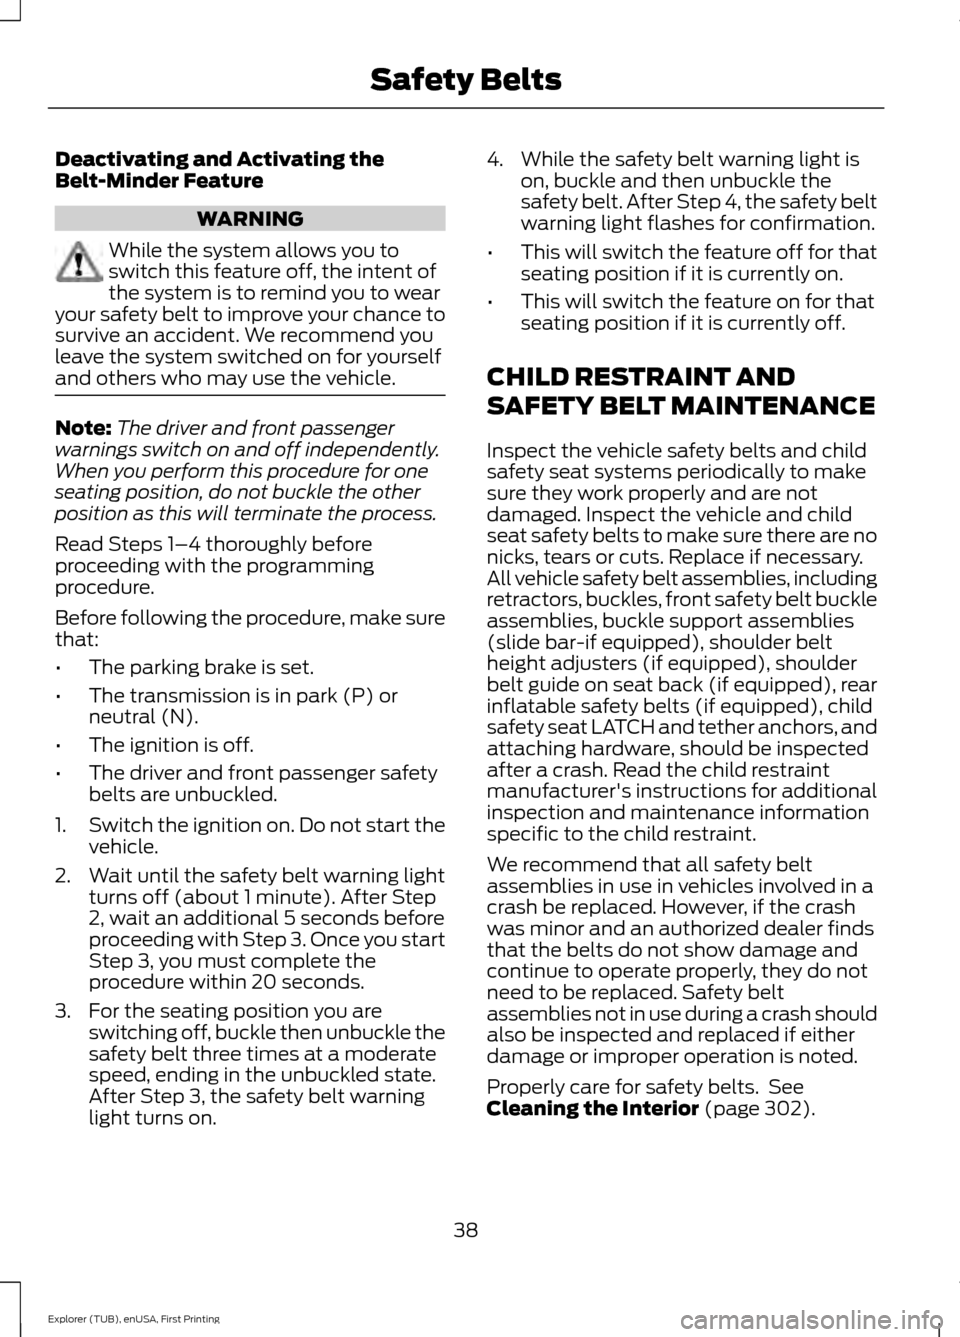
Deactivating and Activating the
Belt-Minder Feature
WARNING
While the system allows you to
switch this feature off, the intent of
the system is to remind you to wear
your safety belt to improve your chance to
survive an accident. We recommend you
leave the system switched on for yourself
and others who may use the vehicle. Note:
The driver and front passenger
warnings switch on and off independently.
When you perform this procedure for one
seating position, do not buckle the other
position as this will terminate the process.
Read Steps 1–4 thoroughly before
proceeding with the programming
procedure.
Before following the procedure, make sure
that:
• The parking brake is set.
• The transmission is in park (P) or
neutral (N).
• The ignition is off.
• The driver and front passenger safety
belts are unbuckled.
1. Switch the ignition on. Do not start the
vehicle.
2. Wait until the safety belt warning light turns off (about 1 minute). After Step
2, wait an additional 5 seconds before
proceeding with Step 3. Once you start
Step 3, you must complete the
procedure within 20 seconds.
3. For the seating position you are switching off, buckle then unbuckle the
safety belt three times at a moderate
speed, ending in the unbuckled state.
After Step 3, the safety belt warning
light turns on. 4. While the safety belt warning light is
on, buckle and then unbuckle the
safety belt. After Step 4, the safety belt
warning light flashes for confirmation.
• This will switch the feature off for that
seating position if it is currently on.
• This will switch the feature on for that
seating position if it is currently off.
CHILD RESTRAINT AND
SAFETY BELT MAINTENANCE
Inspect the vehicle safety belts and child
safety seat systems periodically to make
sure they work properly and are not
damaged. Inspect the vehicle and child
seat safety belts to make sure there are no
nicks, tears or cuts. Replace if necessary.
All vehicle safety belt assemblies, including
retractors, buckles, front safety belt buckle
assemblies, buckle support assemblies
(slide bar-if equipped), shoulder belt
height adjusters (if equipped), shoulder
belt guide on seat back (if equipped), rear
inflatable safety belts (if equipped), child
safety seat LATCH and tether anchors, and
attaching hardware, should be inspected
after a crash. Read the child restraint
manufacturer's instructions for additional
inspection and maintenance information
specific to the child restraint.
We recommend that all safety belt
assemblies in use in vehicles involved in a
crash be replaced. However, if the crash
was minor and an authorized dealer finds
that the belts do not show damage and
continue to operate properly, they do not
need to be replaced. Safety belt
assemblies not in use during a crash should
also be inspected and replaced if either
damage or improper operation is noted.
Properly care for safety belts. See
Cleaning the Interior (page 302).
38
Explorer (TUB), enUSA, First Printing Safety Belts