ESP FORD EXPLORER 2016 5.G Quick Reference Guide
[x] Cancel search | Manufacturer: FORD, Model Year: 2016, Model line: EXPLORER, Model: FORD EXPLORER 2016 5.GPages: 10, PDF Size: 5.65 MB
Page 1 of 10

fordowner.com (U . S .)ford.ca (C a n a d a)
LEARN MORE ABOUT YOUR
NEW VEHICLE
To put QR tags to work for you, use your mobile
phone’s browser or app store link to download a
QR tag reader. Then follow the directions to scan the
QR tag and see your vehicle’s features come to life.2016
QUICK REFERENCE GUIDE
EXPLORER
This Quick Reference Guide is not intended to
replace your vehicle Owner’s Manual which
contains more detailed information concerning the
features of your vehicle, as well as important safety
warnings designed to help reduce the risk of injury
to you and your passengers. Please read your entire
Owner’s Manual carefully as you begin learning
about your new vehicle and refer to the appropriate
chapters when questions arise. All information
contained in this Quick Reference Guide was
accurate at the time of duplication. We reserve
the right to change features, operation and/or
functionality of any vehicle specification at any
time. Your Ford dealer is the best source for the
most current information. For detailed operating
and safety information, please consult your
Owner’s Manual.
UNITED STATES Ford Customer Relationship Center
1-800-392-3673 (FORD)
(TDD for the hearing
impaired: 1-800-232-5952)
fordowner.com
@FordService
CANADA Ford Customer Relationship Centre
1-800-565-3673 (FORD)
ford.ca
@FordServiceCA
April 2015
First Printing
Quick Reference Guide
Explorer
Litho in U.S.A.
GL2J 19G217 AA
WARNING: Driving while distracted can result in loss of
vehicle control, crash and injury. We strongly recommend
that you use extreme caution when using any device
that may take your focus off the road. Your primary
responsibility is the safe operation of your vehicle. We
recommend against the use of any hand-held device
while driving and encourage the use of voice-operated
systems when possible. Make sure you are aware of all
applicable local laws that may affect the use of
electronic devices while driving.
Page 6 of 10

1011*if equipped*if equipped
CLIMATE
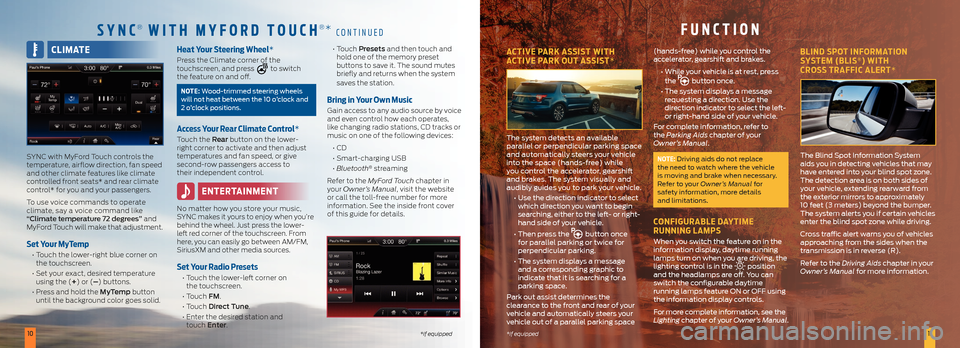
SYNC with MyFord Touch controls the
temperature, airflow direction, fan speed
and other climate features like climate
controlled front seats* and rear climate
control* for you and your passengers.
To use voice commands to operate
climate, say a voice command like
“Climate temperature 72 degrees” and
MyFord Touch will make that adjustment.
Set Your MyTemp
• Touch the lower-right blue corner on
the touchscreen.
• Set your exact, desired temperature
using the (+) or (–) buttons.
• Press and hold the MyTemp button
until the background color goes solid.
Heat Your Steering Wheel*
Press the Climate corner of the
touchscreen, and press to switch
the feature on and off.
NOTE: Wood-trimmed steering wheels
will not heat between the 10 o’clock and
2 o’clock positions.
Access Your Rear Climate Control*
Touch the Rear button on the lower-
right corner to activate and then adjust
temperatures and fan speed, or give
second-row passengers access to
their independent control.
ENTERTAINMENT
No matter how you store your music,
SYNC makes it yours to enjoy when you’re
behind the wheel. Just press the lower-
left red corner of the touchscreen. From
here, you can easily go between AM/FM,
SiriusXM and other media sources.
Set Your Radio Presets
• Touch the lower-left corner on
the touchscreen.
• Touch FM.
• Touch Direct Tune.
• Enter the desired station and
touch Enter.
• Touch Presets and then touch and
hold one of the memory preset
buttons to save it. The sound mutes
briefly and returns when the system
saves the station.
Bring in Your Own Music
Gain access to any audio source by voice
and even control how each operates,
like changing radio stations, CD tracks or
music on one of the following devices:
• CD
• Smart-charging USB
• Bluetooth
® streaming
Refer to the MyFord Touch chapter in
your Owner’s Manual, visit the website
or call the toll-free number for more
information. See the inside front cover
of this guide for details.
SYNC® WITH M YFORD TOUCH®* CONTINUEDFUNCTION
ACTIVE PARK ASSIST WITH
ACTIVE PARK OUT ASSIST*
The system detects an available
parallel or perpendicular parking space
and automatically steers your vehicle
into the space (hands-free) while
you control the accelerator, gearshift
and brakes. The system visually and
audibly guides you to park your vehicle.
• Use the direction indicator to select
which direction you want to begin
searching, either to the left- or right-
hand side of your vehicle.
• Then press the
button once
for parallel parking or twice for
perpendicular parking.
• The system displays a message
and a corresponding graphic to
indicate that it is searching for a
parking space.
Park out assist determines the
clearance to the front and rear of your
vehicle and automatically steers your
vehicle out of a parallel parking space (hands-free) while you control the
accelerator, gearshift and brakes.
• While your vehicle is at rest, press
the
button once.
• The system displays a message
requesting a direction. Use the
direction indicator to select the left-
or right-hand side of your vehicle.
For complete information, refer to
the Parking Aids chapter of your
Owner’s Manual.
NOTE: Driving aids do not replace
the need to watch where the vehicle
is moving and brake when necessary.
Refer to your Owner’s Manual for
safety information, more details
and limitations.
CONFIGURABLE DAYTIME
RUNNING LAMPS
When you switch the feature on in the
information display, daytime running
lamps turn on when you are driving, the
lighting control is in the
position
and the headlamps are off. You can
switch the configurable daytime
running lamps feature ON or OFF using
the information display controls.
For more complete information, see the
Lighting chapter of your Owner’s Manual.
BLIND SPOT INFORMATION
SYSTEM (BLIS®) WITH
CROSS TRAFFIC ALERT*
The Blind Spot Information System
aids you in detecting vehicles that may
have entered into your blind spot zone.
The detection area is on both sides of
your vehicle, extending rearward from
the exterior mirrors to approximately
10 feet (3 meters) beyond the bumper.
The system alerts you if certain vehicles
enter the blind spot zone while driving.
Cross traffic alert warns you of vehicles
approaching from the sides when the
transmission is in reverse (R).
Refer to the Driving Aids chapter in your
Owner’s Manual for more information.
Page 8 of 10

1415*if equipped
*if equipped
FLAT-FOLDING THIRD-ROW SEAT*
NOTE: Make sure that the area under
the seat is free of objects before
stowing it.
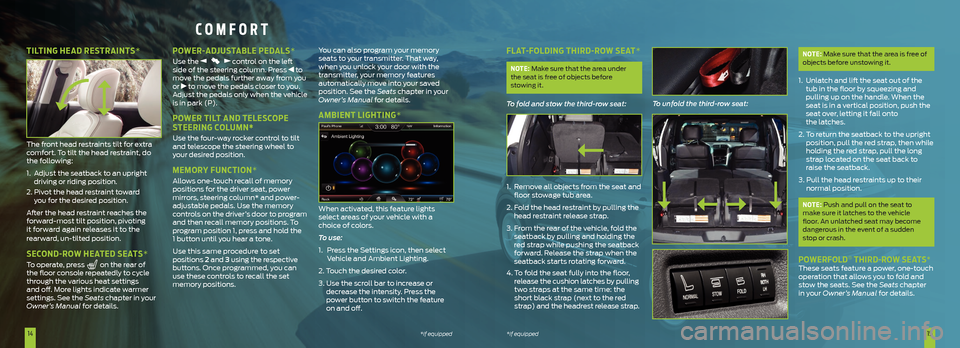
To fold and stow the third-row seat:
1. Remove all objects from the seat and
floor stowage tub area.
2. Fold the head restraint by pulling the
head restraint release strap.
3. From the rear of the vehicle, fold the
seatback by pulling and holding the
red strap while pushing the seatback
forward. Release the strap when the
seatback starts rotating forward.
4. To fold the seat fully into the floor,
release the cushion latches by pulling
two straps at the same time: the
short black strap (next to the red
strap) and the headrest release strap. To unfold the third-row seat:
NOTE: Make sure that the area is free of
objects before unstowing it.
1. Unlatch and lift the seat out of the
tub in the floor by squeezing and
pulling up on the handle. When the
seat is in a vertical position, push the
seat over, letting it fall onto
the latches.
2. To return the seatback to the upright
position, pull the red strap, then while
holding the red strap, pull the long
strap located on the seat back to
raise the seatback.
3. Pull the head restraints up to their
normal position.
NOTE: Push and pull on the seat to
make sure it latches to the vehicle
floor. An unlatched seat may become
dangerous in the event of a sudden
stop or crash.
POWERFOLD® THIRD-ROW SEATS* These seats feature a power, one-touch
operation that allows you to fold and
stow the seats. See the Seats chapter
in your Owner’s Manual for details.
COMFORT
TILTING HEAD RESTRAINTS*
The front head restraints tilt for extra
comfort. To tilt the head restraint, do
the following:
1. Adjust the seatback to an upright
driving or riding position.
2. Pivot the head restraint toward
you for the desired position.
After the head restraint reaches the
forward-most tilt position, pivoting
it forward again releases it to the
rearward, un-tilted position.
SECOND-ROW HEATED SEATS*
To operate, press on the rear of
the floor console repeatedly to cycle
through the various heat settings
and off. More lights indicate warmer
settings. See the Seats chapter in your
Owner’s Manual for details.
POWER-ADJUSTABLE PEDALS*
Use the control on the left
side of the steering column. Press to
move the pedals further away from you
or
to move the pedals closer to you.
Adjust the pedals only when the vehicle
is in park (P).
POWER TILT AND TELESCOPE
STEERING COLUMN*
Use the four-way rocker control to tilt
and telescope the steering wheel to
your desired position.
MEMORY FUNCTION*
Allows one-touch recall of memory
positions for the driver seat, power
mirrors, steering column* and power-
adjustable pedals. Use the memory
controls on the driver’s door to program
and then recall memory positions. To
program position 1, press and hold the
1 button until you hear a tone.
Use this same procedure to set
positions 2 and 3 using the respective
buttons. Once programmed, you can
use these controls to recall the set
memory positions. You can also program your memory
seats to your transmitter. That way,
when you unlock your door with the
transmitter, your memory features
automatically move into your saved
position. See the Seats
chapter in your
Owner’s Manual for details.
AMBIENT LIGHTING*
When activated, this feature lights
select areas of your vehicle with a
choice of colors.
To use:
1. Press the Settings icon, then select
Vehicle and Ambient Lighting.
2. Touch the desired color.
3. Use the scroll bar to increase or
decrease the intensity. Press the
power button to switch the feature
on and off.