lock FORD EXPLORER 2016 5.G Quick Reference Guide
[x] Cancel search | Manufacturer: FORD, Model Year: 2016, Model line: EXPLORER, Model: FORD EXPLORER 2016 5.GPages: 10, PDF Size: 5.65 MB
Page 4 of 10
SYNC®
67
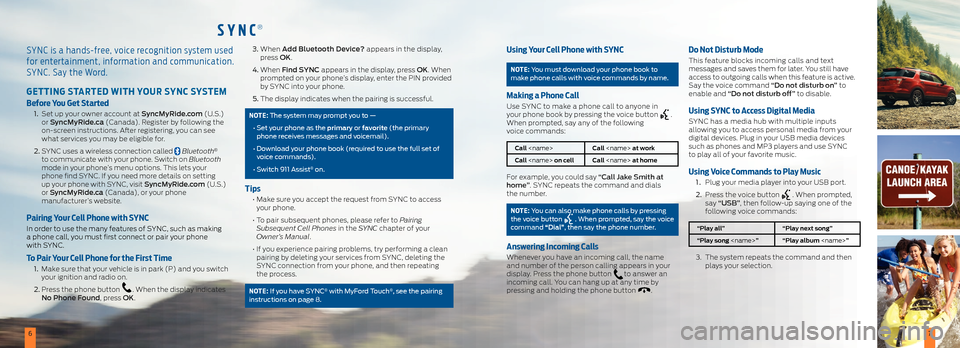
SYNC is a hands-free, voice recognition system used
for entertainment, information and communication.
SYNC. Say the Word.
GETTING STARTED WITH YOUR SYNC SYSTEM
Before You Get Started
1. Set up your owner account at SyncMyRide.com (U.S.)
or SyncMyRide.ca (Canada). Register by following the
on-screen instructions. After registering, you can see
what services you may be eligible for.
2. SYNC uses a wireless connection called
Bluetooth®
to communicate with your phone. Switch on Bluetooth
mode in your phone’s menu options. This lets your
phone find SYNC. If you need more details on setting
up your phone with SYNC, visit SyncMyRide.com (U.S.)
or SyncMyRide.ca (Canada), or your phone
manufacturer’s website.
Pairing Your Cell Phone with SYNC
In order to use the many features of SYNC, such as making
a phone call, you must first connect or pair your phone
with SYNC.
To Pair Your Cell Phone for the First Time
1. Make sure that your vehicle is in park (P) and you switch
your ignition and radio on.
2. Press the phone button
. When the display indicates
No Phone Found, press OK.
3. When Add Bluetooth Device? appears in the display,
press OK.
4. When Find SYNC appears in the display, press OK. When
prompted on your phone’s display, enter the PIN provided
by SYNC into your phone.
5. The display indicates when the pairing is successful.
NOTE: The system may prompt you to —
• Set your phone as the primary or favorite (the primary
phone receives messages and voicemail).
• Download your phone book (required to use the full set of
voice commands).
• Switch 911 Assist
® on.
Tips
• Make sure you accept the request from SYNC to access
your phone.
• To pair subsequent phones, please refer to Pairing
Subsequent Cell Phones in the SYNC chapter of your
Owner’s Manual.
• If you experience pairing problems, try performing a clean
pairing by deleting your services from SYNC, deleting the
SYNC connection from your phone, and then repeating
the process.
NOTE: If you have SYNC® with MyFord Touch®, see the pairing
instructions on page 8.
Using Your Cell Phone with SYNC
NOTE: You must download your phone book to
make phone calls with voice commands by name.
Making a Phone Call
Use SYNC to make a phone call to anyone in
your phone book by pressing the voice button .
When prompted, say any of the following
voice commands:
Call
Call
For example, you could say “Call Jake Smith at
home”. SYNC repeats the command and dials
the number.
NOTE: You can also make phone calls by pressing
the voice button . When prompted, say the voice
command “Dial”, then say the phone number.
Answering Incoming Calls
Whenever you have an incoming call, the name
and number of the person calling appears in your
display. Press the phone button
to answer an
incoming call. You can hang up at any time by
pressing and holding the phone button
.
Do Not Disturb Mode
This feature blocks incoming calls and text
messages and saves them for later. You still have
access to outgoing calls when this feature is active.
Say the voice command “Do not disturb on” to
enable and “Do not disturb off” to disable.
Using SYNC to A ccess Digital Media
SYNC has a media hub with multiple inputs
allowing you to access personal media from your
digital devices. Plug in your USB media devices
such as phones and MP3 players and use SYNC
to play all of your favorite music.
Using Voice Commands to Play Music
1 . Plug your media player into your USB port.
2. Press the voice button
. When prompted,
say “USB”, then follow-up saying one of the
following voice commands:
“Play all” “Play next song”
“Play song
3. The system repeats the command and then
plays your selection.
Page 6 of 10
1011*if equipped*if equipped
CLIMATE
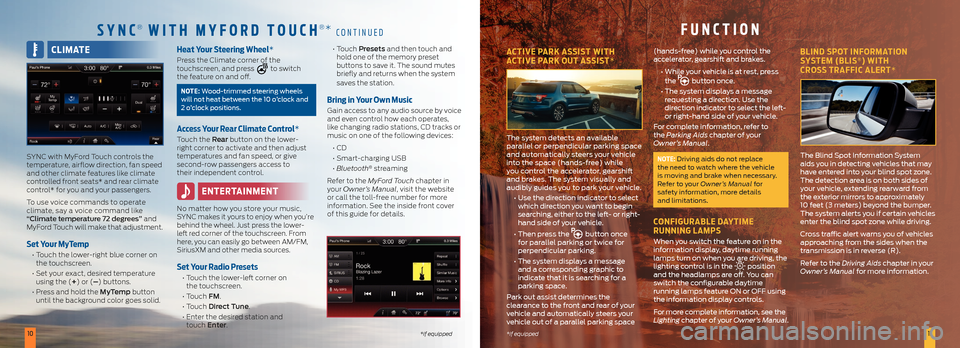
SYNC with MyFord Touch controls the
temperature, airflow direction, fan speed
and other climate features like climate
controlled front seats* and rear climate
control* for you and your passengers.
To use voice commands to operate
climate, say a voice command like
“Climate temperature 72 degrees” and
MyFord Touch will make that adjustment.
Set Your MyTemp
• Touch the lower-right blue corner on
the touchscreen.
• Set your exact, desired temperature
using the (+) or (–) buttons.
• Press and hold the MyTemp button
until the background color goes solid.
Heat Your Steering Wheel*
Press the Climate corner of the
touchscreen, and press to switch
the feature on and off.
NOTE: Wood-trimmed steering wheels
will not heat between the 10 o’clock and
2 o’clock positions.
Access Your Rear Climate Control*
Touch the Rear button on the lower-
right corner to activate and then adjust
temperatures and fan speed, or give
second-row passengers access to
their independent control.
ENTERTAINMENT
No matter how you store your music,
SYNC makes it yours to enjoy when you’re
behind the wheel. Just press the lower-
left red corner of the touchscreen. From
here, you can easily go between AM/FM,
SiriusXM and other media sources.
Set Your Radio Presets
• Touch the lower-left corner on
the touchscreen.
• Touch FM.
• Touch Direct Tune.
• Enter the desired station and
touch Enter.
• Touch Presets and then touch and
hold one of the memory preset
buttons to save it. The sound mutes
briefly and returns when the system
saves the station.
Bring in Your Own Music
Gain access to any audio source by voice
and even control how each operates,
like changing radio stations, CD tracks or
music on one of the following devices:
• CD
• Smart-charging USB
• Bluetooth
® streaming
Refer to the MyFord Touch chapter in
your Owner’s Manual, visit the website
or call the toll-free number for more
information. See the inside front cover
of this guide for details.
SYNC® WITH M YFORD TOUCH®* CONTINUEDFUNCTION
ACTIVE PARK ASSIST WITH
ACTIVE PARK OUT ASSIST*
The system detects an available
parallel or perpendicular parking space
and automatically steers your vehicle
into the space (hands-free) while
you control the accelerator, gearshift
and brakes. The system visually and
audibly guides you to park your vehicle.
• Use the direction indicator to select
which direction you want to begin
searching, either to the left- or right-
hand side of your vehicle.
• Then press the
button once
for parallel parking or twice for
perpendicular parking.
• The system displays a message
and a corresponding graphic to
indicate that it is searching for a
parking space.
Park out assist determines the
clearance to the front and rear of your
vehicle and automatically steers your
vehicle out of a parallel parking space (hands-free) while you control the
accelerator, gearshift and brakes.
• While your vehicle is at rest, press
the
button once.
• The system displays a message
requesting a direction. Use the
direction indicator to select the left-
or right-hand side of your vehicle.
For complete information, refer to
the Parking Aids chapter of your
Owner’s Manual.
NOTE: Driving aids do not replace
the need to watch where the vehicle
is moving and brake when necessary.
Refer to your Owner’s Manual for
safety information, more details
and limitations.
CONFIGURABLE DAYTIME
RUNNING LAMPS
When you switch the feature on in the
information display, daytime running
lamps turn on when you are driving, the
lighting control is in the
position
and the headlamps are off. You can
switch the configurable daytime
running lamps feature ON or OFF using
the information display controls.
For more complete information, see the
Lighting chapter of your Owner’s Manual.
BLIND SPOT INFORMATION
SYSTEM (BLIS®) WITH
CROSS TRAFFIC ALERT*
The Blind Spot Information System
aids you in detecting vehicles that may
have entered into your blind spot zone.
The detection area is on both sides of
your vehicle, extending rearward from
the exterior mirrors to approximately
10 feet (3 meters) beyond the bumper.
The system alerts you if certain vehicles
enter the blind spot zone while driving.
Cross traffic alert warns you of vehicles
approaching from the sides when the
transmission is in reverse (R).
Refer to the Driving Aids chapter in your
Owner’s Manual for more information.
Page 7 of 10
1213*if equipped
*if equipped
SECURICODE™ KEYLESS
ENTRY SYSTEM*
Invisible until touched, the
keypad allows you to lock or
unlock the doors. You will
need your five-digit factory
code located on your owner’s
wallet card in the glove box.
Refer to the Locks chapter
in your Owner’s Manual for
more information.
DRIVER ALERT*
The system automatically
monitors your driving behavior
using various inputs including
the front camera sensor. If the
system detects that your driving
alertness is reduced below a
certain threshold, the system
alerts you by using a tone and
showing a message in the
cluster display. Press OK on
the steering wheel to clear
the warning.
FRONT AND REAR PARKING
AIDS* AND SIDE
SENSING SYSTEM*
These systems warn you of
obstacles within a certain range
of your vehicle. As you move
closer to the detected obstacle,
the rate of the warning tone
increases in frequency.
The system turns on
automatically whenever you
switch the ignition on.
The side sensing system uses
the front and rear side sensors
to detect and map obstacles that are near to the sides of
your vehicle.
The front sensors are active
when the transmission is in any
position other than park (P).
The rear sensors are active
only when the vehicle is in
reverse (R).
The side sensors are active
when the transmission is in any
position other than park (P).
Use the parking aid control to
switch the front parking aid
system off.
You can switch the rear parking
aid system off through the
information display menu or
from the pop-up message that
appears once you shift the
transmission into reverse (R).
See the Parking Aids chapter
in your Owner’s Manual for
complete information on your
vehicle’s sensing systems.
SELECTSHIFT AUTOMATIC®
TRANSMISSION*
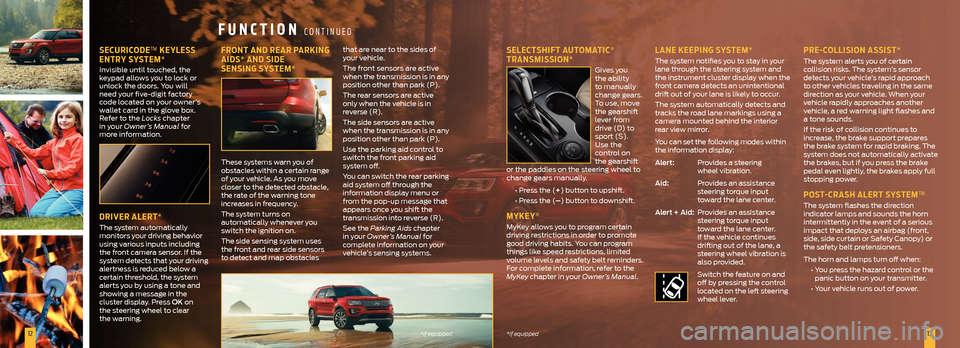
Gives you
the ability
to manually
change gears.
To use, move
the gearshift
lever from
drive (D) to
sport (S).
Use the
control on
the gearshift
or the paddles on the steering wheel to
change gears manually.
• Press the (+) button to upshift.
• Press the (–) button to downshift.
MYKEY®
MyKey allows you to program certain
driving restrictions in order to promote
good driving habits. You can program
things like speed restrictions, limited
volume levels and safety belt reminders.
For complete information, refer to the
MyKey chapter in your Owner’s Manual.
LANE KEEPING SYSTEM*
The system notifies you to stay in your
lane through the steering system and
the instrument cluster display when the
front camera detects an unintentional
drift out of your lane is likely to occur.
The system automatically detects and
tracks the road lane markings using a
camera mounted behind the interior
rear view mirror.
You can set the following modes within
the information display:
Alert: Provides a steering
wheel vibration.
Aid: Provides an assistance
steering torque input
toward the lane center.
Alert + Aid: Provides an assistance
steering torque input
toward the lane center.
If the vehicle continues
drifting out of the lane, a
steering wheel vibration is
also provided.
Switch the feature on and
off by pressing the control
located on the left steering
wheel lever.
PRE-COLLISION ASSIST*
The system alerts you of certain
collision risks. The system’s sensor
detects your vehicle’s rapid approach
to other vehicles traveling in the same
direction as your vehicle. When your
vehicle rapidly approaches another
vehicle, a red warning light flashes and
a tone sounds.
If the risk of collision continues to
increase, the brake support prepares
the brake system for rapid braking. The
system does not automatically activate
the brakes, but if you press the brake
pedal even lightly, the brakes apply full
stopping power.
POST-CRASH ALERT SYSTEM™
The system flashes the direction
indicator lamps and sounds the horn
intermittently in the event of a serious
impact that deploys an airbag (front,
side, side curtain or Safety Canopy) or
the safety belt pretensioners.
The horn and lamps turn off when:
• You press the hazard control or the
panic button on your transmitter.
• Your vehicle runs out of power.
FUNCTION CONTINUED
Page 8 of 10
1415*if equipped
*if equipped
FLAT-FOLDING THIRD-ROW SEAT*
NOTE: Make sure that the area under
the seat is free of objects before
stowing it.
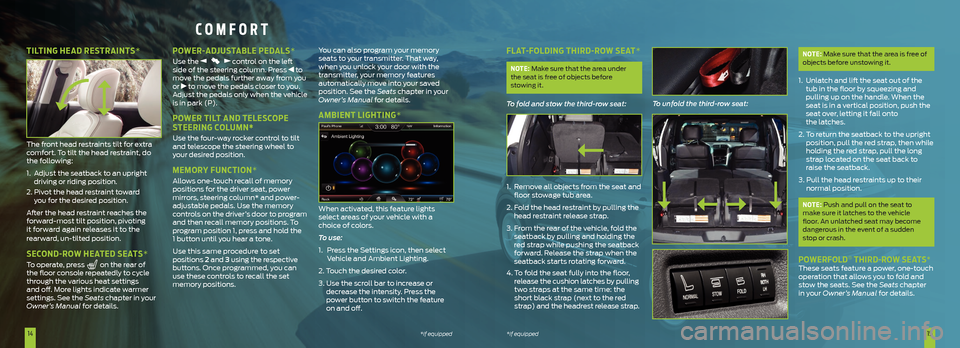
To fold and stow the third-row seat:
1. Remove all objects from the seat and
floor stowage tub area.
2. Fold the head restraint by pulling the
head restraint release strap.
3. From the rear of the vehicle, fold the
seatback by pulling and holding the
red strap while pushing the seatback
forward. Release the strap when the
seatback starts rotating forward.
4. To fold the seat fully into the floor,
release the cushion latches by pulling
two straps at the same time: the
short black strap (next to the red
strap) and the headrest release strap. To unfold the third-row seat:
NOTE: Make sure that the area is free of
objects before unstowing it.
1. Unlatch and lift the seat out of the
tub in the floor by squeezing and
pulling up on the handle. When the
seat is in a vertical position, push the
seat over, letting it fall onto
the latches.
2. To return the seatback to the upright
position, pull the red strap, then while
holding the red strap, pull the long
strap located on the seat back to
raise the seatback.
3. Pull the head restraints up to their
normal position.
NOTE: Push and pull on the seat to
make sure it latches to the vehicle
floor. An unlatched seat may become
dangerous in the event of a sudden
stop or crash.
POWERFOLD® THIRD-ROW SEATS* These seats feature a power, one-touch
operation that allows you to fold and
stow the seats. See the Seats chapter
in your Owner’s Manual for details.
COMFORT
TILTING HEAD RESTRAINTS*
The front head restraints tilt for extra
comfort. To tilt the head restraint, do
the following:
1. Adjust the seatback to an upright
driving or riding position.
2. Pivot the head restraint toward
you for the desired position.
After the head restraint reaches the
forward-most tilt position, pivoting
it forward again releases it to the
rearward, un-tilted position.
SECOND-ROW HEATED SEATS*
To operate, press on the rear of
the floor console repeatedly to cycle
through the various heat settings
and off. More lights indicate warmer
settings. See the Seats chapter in your
Owner’s Manual for details.
POWER-ADJUSTABLE PEDALS*
Use the control on the left
side of the steering column. Press to
move the pedals further away from you
or
to move the pedals closer to you.
Adjust the pedals only when the vehicle
is in park (P).
POWER TILT AND TELESCOPE
STEERING COLUMN*
Use the four-way rocker control to tilt
and telescope the steering wheel to
your desired position.
MEMORY FUNCTION*
Allows one-touch recall of memory
positions for the driver seat, power
mirrors, steering column* and power-
adjustable pedals. Use the memory
controls on the driver’s door to program
and then recall memory positions. To
program position 1, press and hold the
1 button until you hear a tone.
Use this same procedure to set
positions 2 and 3 using the respective
buttons. Once programmed, you can
use these controls to recall the set
memory positions. You can also program your memory
seats to your transmitter. That way,
when you unlock your door with the
transmitter, your memory features
automatically move into your saved
position. See the Seats
chapter in your
Owner’s Manual for details.
AMBIENT LIGHTING*
When activated, this feature lights
select areas of your vehicle with a
choice of colors.
To use:
1. Press the Settings icon, then select
Vehicle and Ambient Lighting.
2. Touch the desired color.
3. Use the scroll bar to increase or
decrease the intensity. Press the
power button to switch the feature
on and off.
Page 9 of 10
1617*if equipped*if equipped
CONVENIENCE
KEYLESS TRANSMITTER ICONS*
• Press once to lock all doors.
Press again within three seconds
to confirm all doors are locked.
• Press
once to unlock the driver’s
door. Press again within three
seconds to unlock all doors.
• Press
to start the panic alarm.
Press again or switch on the ignition
to stop the alarm.
• Press
twice within three
seconds to open the liftgate.
• Car finder: Press
twice within
three seconds to locate your
vehicle. The horn sounds and
the direction indicators flash.
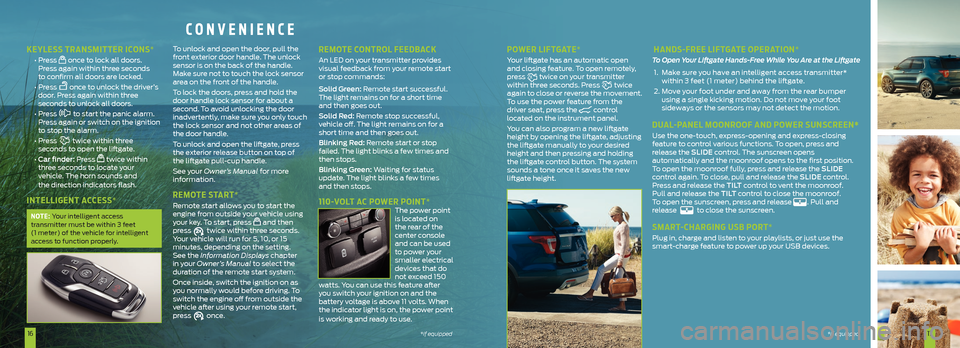
INTELLIGENT ACCESS*
NOTE: Your intelligent access
transmitter must be within 3 feet
(1 meter) of the vehicle for intelligent
access to function properly.
To unlock and open the door, pull the
front exterior door handle. The unlock
sensor is on the back of the handle.
Make sure not to touch the lock sensor
area on the front of the handle.
To lock the doors, press and hold the
door handle lock sensor for about a
second. To avoid unlocking the door
inadvertently, make sure you only touch
the lock sensor and not other areas of
the door handle.
To unlock and open the liftgate, press
the exterior release button on top of
the liftgate pull-cup handle.
See your Owner’s Manual for more
information.
REMOTE START*
Remote start allows you to start the
engine from outside your vehicle using
your key. To start, press
and then
press twice within three seconds.
Your vehicle will run for 5, 10, or 15
minutes, depending on the setting.
See the Information Displays chapter
in your Owner’s Manual to select the
duration of the remote start system.
Once inside, switch the ignition on as
you normally would before driving. To
switch the engine off from outside the
vehicle after using your remote start,
press
once.
REMOTE CONTROL FEEDBACK
An LED on your transmitter provides
visual feedback from your remote start
or stop commands:
Solid Green: Remote start successful.
The light remains on for a short time
and then goes out.
Solid Red: Remote stop successful,
vehicle off. The light remains on for a
short time and then goes out.
Blinking Red: Remote start or stop
failed. The light blinks a few times and
then stops.
Blinking Green: Waiting for status
update. The light blinks a few times
and then stops.
110-VOLT AC POWER POINT* The power point
is located on
the rear of the
center console
and can be used
to power your
smaller electrical
devices that do
not exceed 150
watts. You can use this feature after
you switch your ignition on and the
battery voltage is above 11 volts. When
the indicator light is on, the power point
is working and ready to use.
POWER LIFTGATE*
Your liftgate has an automatic open
and closing feature. To open remotely,
press
twice on your transmitter
within three seconds. Press twice
again to close or reverse the movement.
To use the power feature from the
driver seat, press the
control
located on the instrument panel.
You can also program a new liftgate
height by opening the liftgate, adjusting
the liftgate manually to your desired
height and then pressing and holding
the liftgate control button. The system
sounds a tone once it saves the new
liftgate height.
HANDS-FREE LIFTGATE OPERATION*
To Open Your Liftgate Hands-Free While You Are at the Liftgate
1. Make sure you have an intelligent access transmitter*
within 3 feet (1 meter) behind the liftgate.
2. Move your foot under and away from the rear bumper
using a single kicking motion. Do not move your foot
sideways or the sensors may not detect the motion.
DUAL-PANEL MOONROOF AND POWER SUNSCREEN*
Use the one-touch, express-opening and express-closing
feature to control various functions. To open, press and
release the SLIDE control. The sunscreen opens
automatically and the moonroof opens to the first position.
To open the moonroof fully, press and release the SLIDE
control again. To close, pull and release the SLIDE control.
Press and release the TILT control to vent the moonroof.
Pull and release the TILT control to close the moonroof.
To open the sunscreen, press and release
. Pull and
release to close the sunscreen.
SMART-CHARGING USB PORT*
Plug in, charge and listen to your playlists, or just use the
smart-charge feature to power up your USB devices.
*if equipped