power steering FORD EXPLORER 2016 5.G Quick Reference Guide
[x] Cancel search | Manufacturer: FORD, Model Year: 2016, Model line: EXPLORER, Model: FORD EXPLORER 2016 5.GPages: 10, PDF Size: 5.65 MB
Page 7 of 10

1213*if equipped
*if equipped
SECURICODE™ KEYLESS
ENTRY SYSTEM*
Invisible until touched, the
keypad allows you to lock or
unlock the doors. You will
need your five-digit factory
code located on your owner’s
wallet card in the glove box.
Refer to the Locks chapter
in your Owner’s Manual for
more information.
DRIVER ALERT*
The system automatically
monitors your driving behavior
using various inputs including
the front camera sensor. If the
system detects that your driving
alertness is reduced below a
certain threshold, the system
alerts you by using a tone and
showing a message in the
cluster display. Press OK on
the steering wheel to clear
the warning.
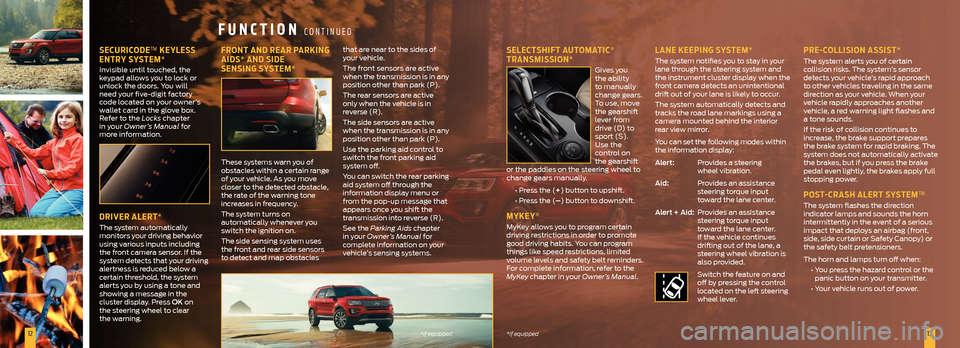
FRONT AND REAR PARKING
AIDS* AND SIDE
SENSING SYSTEM*
These systems warn you of
obstacles within a certain range
of your vehicle. As you move
closer to the detected obstacle,
the rate of the warning tone
increases in frequency.
The system turns on
automatically whenever you
switch the ignition on.
The side sensing system uses
the front and rear side sensors
to detect and map obstacles that are near to the sides of
your vehicle.
The front sensors are active
when the transmission is in any
position other than park (P).
The rear sensors are active
only when the vehicle is in
reverse (R).
The side sensors are active
when the transmission is in any
position other than park (P).
Use the parking aid control to
switch the front parking aid
system off.
You can switch the rear parking
aid system off through the
information display menu or
from the pop-up message that
appears once you shift the
transmission into reverse (R).
See the Parking Aids chapter
in your Owner’s Manual for
complete information on your
vehicle’s sensing systems.
SELECTSHIFT AUTOMATIC®
TRANSMISSION*
Gives you
the ability
to manually
change gears.
To use, move
the gearshift
lever from
drive (D) to
sport (S).
Use the
control on
the gearshift
or the paddles on the steering wheel to
change gears manually.
• Press the (+) button to upshift.
• Press the (–) button to downshift.
MYKEY®
MyKey allows you to program certain
driving restrictions in order to promote
good driving habits. You can program
things like speed restrictions, limited
volume levels and safety belt reminders.
For complete information, refer to the
MyKey chapter in your Owner’s Manual.
LANE KEEPING SYSTEM*
The system notifies you to stay in your
lane through the steering system and
the instrument cluster display when the
front camera detects an unintentional
drift out of your lane is likely to occur.
The system automatically detects and
tracks the road lane markings using a
camera mounted behind the interior
rear view mirror.
You can set the following modes within
the information display:
Alert: Provides a steering
wheel vibration.
Aid: Provides an assistance
steering torque input
toward the lane center.
Alert + Aid: Provides an assistance
steering torque input
toward the lane center.
If the vehicle continues
drifting out of the lane, a
steering wheel vibration is
also provided.
Switch the feature on and
off by pressing the control
located on the left steering
wheel lever.
PRE-COLLISION ASSIST*
The system alerts you of certain
collision risks. The system’s sensor
detects your vehicle’s rapid approach
to other vehicles traveling in the same
direction as your vehicle. When your
vehicle rapidly approaches another
vehicle, a red warning light flashes and
a tone sounds.
If the risk of collision continues to
increase, the brake support prepares
the brake system for rapid braking. The
system does not automatically activate
the brakes, but if you press the brake
pedal even lightly, the brakes apply full
stopping power.
POST-CRASH ALERT SYSTEM™
The system flashes the direction
indicator lamps and sounds the horn
intermittently in the event of a serious
impact that deploys an airbag (front,
side, side curtain or Safety Canopy) or
the safety belt pretensioners.
The horn and lamps turn off when:
• You press the hazard control or the
panic button on your transmitter.
• Your vehicle runs out of power.
FUNCTION CONTINUED
Page 8 of 10

1415*if equipped
*if equipped
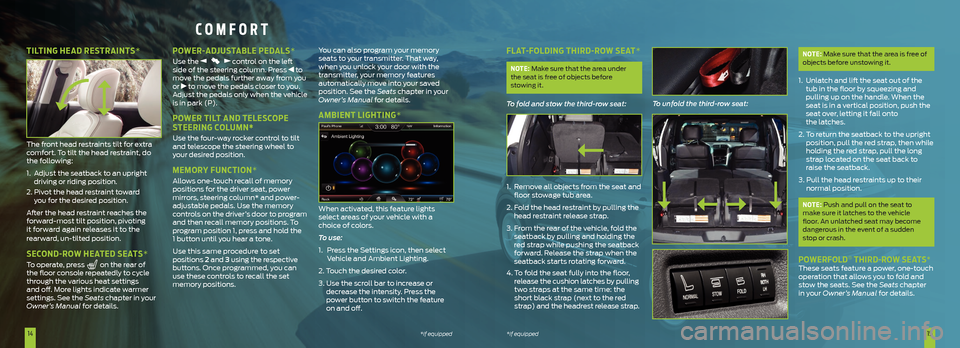
FLAT-FOLDING THIRD-ROW SEAT*
NOTE: Make sure that the area under
the seat is free of objects before
stowing it.
To fold and stow the third-row seat:
1. Remove all objects from the seat and
floor stowage tub area.
2. Fold the head restraint by pulling the
head restraint release strap.
3. From the rear of the vehicle, fold the
seatback by pulling and holding the
red strap while pushing the seatback
forward. Release the strap when the
seatback starts rotating forward.
4. To fold the seat fully into the floor,
release the cushion latches by pulling
two straps at the same time: the
short black strap (next to the red
strap) and the headrest release strap. To unfold the third-row seat:
NOTE: Make sure that the area is free of
objects before unstowing it.
1. Unlatch and lift the seat out of the
tub in the floor by squeezing and
pulling up on the handle. When the
seat is in a vertical position, push the
seat over, letting it fall onto
the latches.
2. To return the seatback to the upright
position, pull the red strap, then while
holding the red strap, pull the long
strap located on the seat back to
raise the seatback.
3. Pull the head restraints up to their
normal position.
NOTE: Push and pull on the seat to
make sure it latches to the vehicle
floor. An unlatched seat may become
dangerous in the event of a sudden
stop or crash.
POWERFOLD® THIRD-ROW SEATS* These seats feature a power, one-touch
operation that allows you to fold and
stow the seats. See the Seats chapter
in your Owner’s Manual for details.
COMFORT
TILTING HEAD RESTRAINTS*
The front head restraints tilt for extra
comfort. To tilt the head restraint, do
the following:
1. Adjust the seatback to an upright
driving or riding position.
2. Pivot the head restraint toward
you for the desired position.
After the head restraint reaches the
forward-most tilt position, pivoting
it forward again releases it to the
rearward, un-tilted position.
SECOND-ROW HEATED SEATS*
To operate, press on the rear of
the floor console repeatedly to cycle
through the various heat settings
and off. More lights indicate warmer
settings. See the Seats chapter in your
Owner’s Manual for details.
POWER-ADJUSTABLE PEDALS*
Use the control on the left
side of the steering column. Press to
move the pedals further away from you
or
to move the pedals closer to you.
Adjust the pedals only when the vehicle
is in park (P).
POWER TILT AND TELESCOPE
STEERING COLUMN*
Use the four-way rocker control to tilt
and telescope the steering wheel to
your desired position.
MEMORY FUNCTION*
Allows one-touch recall of memory
positions for the driver seat, power
mirrors, steering column* and power-
adjustable pedals. Use the memory
controls on the driver’s door to program
and then recall memory positions. To
program position 1, press and hold the
1 button until you hear a tone.
Use this same procedure to set
positions 2 and 3 using the respective
buttons. Once programmed, you can
use these controls to recall the set
memory positions. You can also program your memory
seats to your transmitter. That way,
when you unlock your door with the
transmitter, your memory features
automatically move into your saved
position. See the Seats
chapter in your
Owner’s Manual for details.
AMBIENT LIGHTING*
When activated, this feature lights
select areas of your vehicle with a
choice of colors.
To use:
1. Press the Settings icon, then select
Vehicle and Ambient Lighting.
2. Touch the desired color.
3. Use the scroll bar to increase or
decrease the intensity. Press the
power button to switch the feature
on and off.