engine overheat FORD EXPLORER 2018 Owners Manual
[x] Cancel search | Manufacturer: FORD, Model Year: 2018, Model line: EXPLORER, Model: FORD EXPLORER 2018Pages: 571, PDF Size: 7.3 MB
Page 82 of 571
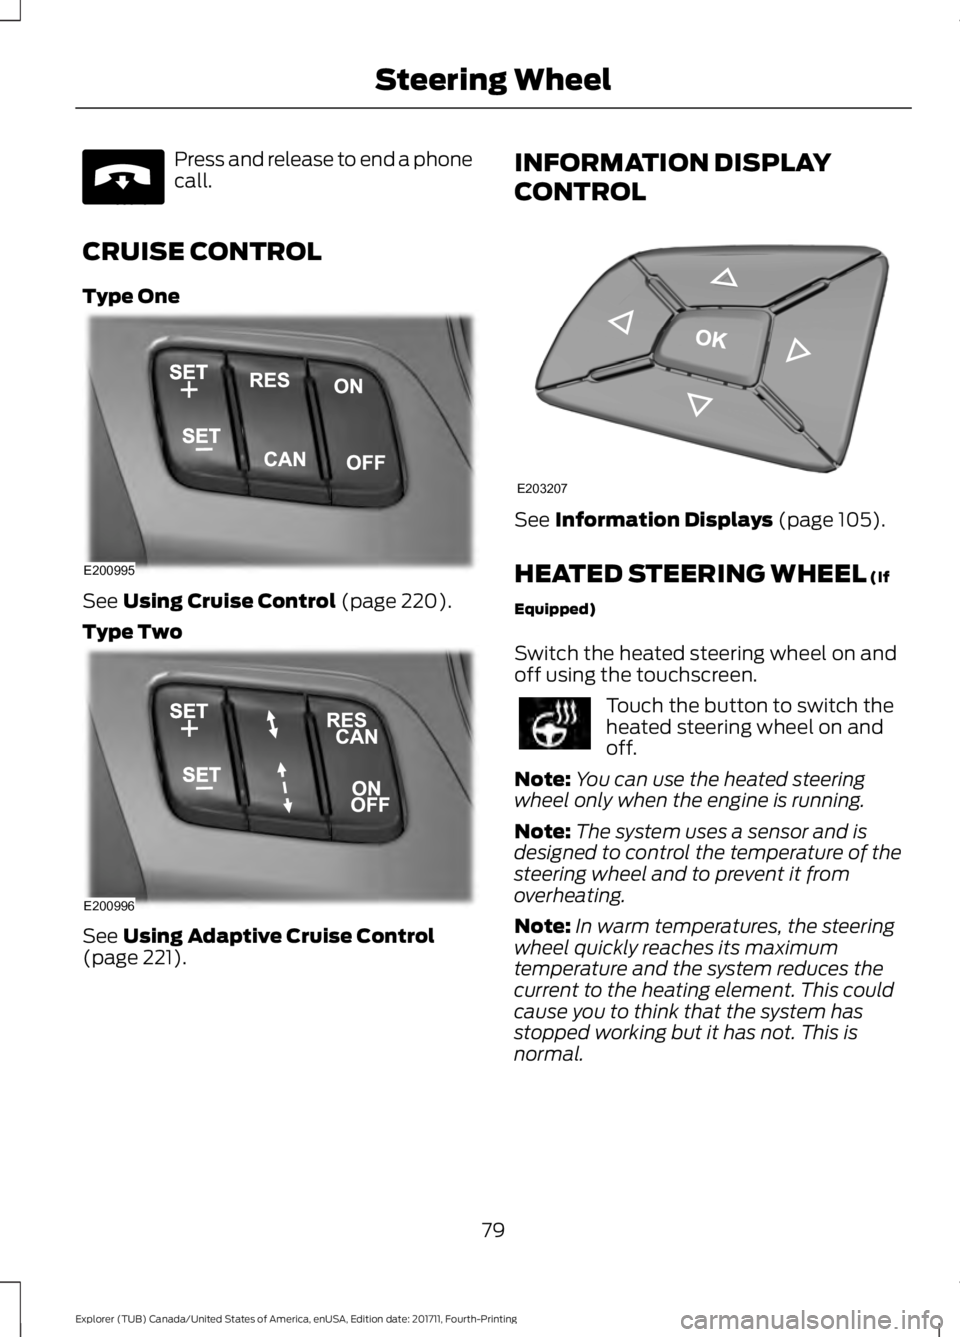
Press and release to end a phone
call.
CRUISE CONTROL
Type One See Using Cruise Control (page 220).
Type Two See
Using Adaptive Cruise Control
(page 221). INFORMATION DISPLAY
CONTROL
See
Information Displays (page 105).
HEATED STEERING WHEEL
(If
Equipped)
Switch the heated steering wheel on and
off using the touchscreen. Touch the button to switch the
heated steering wheel on and
off.
Note: You can use the heated steering
wheel only when the engine is running.
Note: The system uses a sensor and is
designed to control the temperature of the
steering wheel and to prevent it from
overheating.
Note: In warm temperatures, the steering
wheel quickly reaches its maximum
temperature and the system reduces the
current to the heating element. This could
cause you to think that the system has
stopped working but it has not. This is
normal.
79
Explorer (TUB) Canada/United States of America, enUSA, Edition date: 201711, Fourth-Printing Steering WheelE265040 E200995 E200996 E203207
Page 103 of 571
Engine Coolant Temperature
Gauge
Shows the temperature of the engine
coolant. At normal operating temperature,
the needle remains in the center section.
If the needle enters the red section, the
engine is overheating. Stop the engine,
switch the ignition off and determine the
cause once the engine has cooled down.
Note:
Do not restart the engine until the
cause of the overheating has been resolved. WARNING: Do not remove the
coolant reservoir cap when the cooling
system is hot. Wait 10 minutes for the
cooling system to cool down. Cover the
coolant reservoir cap with a thick cloth to
prevent the possibility of scalding and
slowly remove the cap. Failure to follow
this instruction could result in personal
injury.
Fuel Gauge
The fuel gauge indicates about how much
fuel is in the fuel tank.
The arrow adjacent to the fuel pump
symbol indicates on which side of your
vehicle the fuel filler door is located.
Note: The fuel gauge may vary slightly
when your vehicle is moving or on a slope.
Low Fuel Reminder
A low fuel level reminder displays and
sounds when the distance to empty
reaches
75 mi (120 km) to empty for
MyKey, and at 50 mi (80 km), 25 mi
(40 km), 10 mi (20 km) and 0 mi (0 km)
for all vehicle keys.
Note: The low fuel reminder can appear at
different fuel gauge positions depending on
fuel economy conditions. This variation is
normal. WARNING LAMPS AND
INDICATORS
The following warning lamps and
indicators alert you to a vehicle condition
that may become serious. Some lamps
illuminate when you start your vehicle to
make sure they work. If any lamps remain
on after starting your vehicle, refer to the
respective system warning lamp for further
information.
Note:
Some warning indicators appear in
the information display and function the
same as a warning lamp, but do not display
when you start your vehicle.
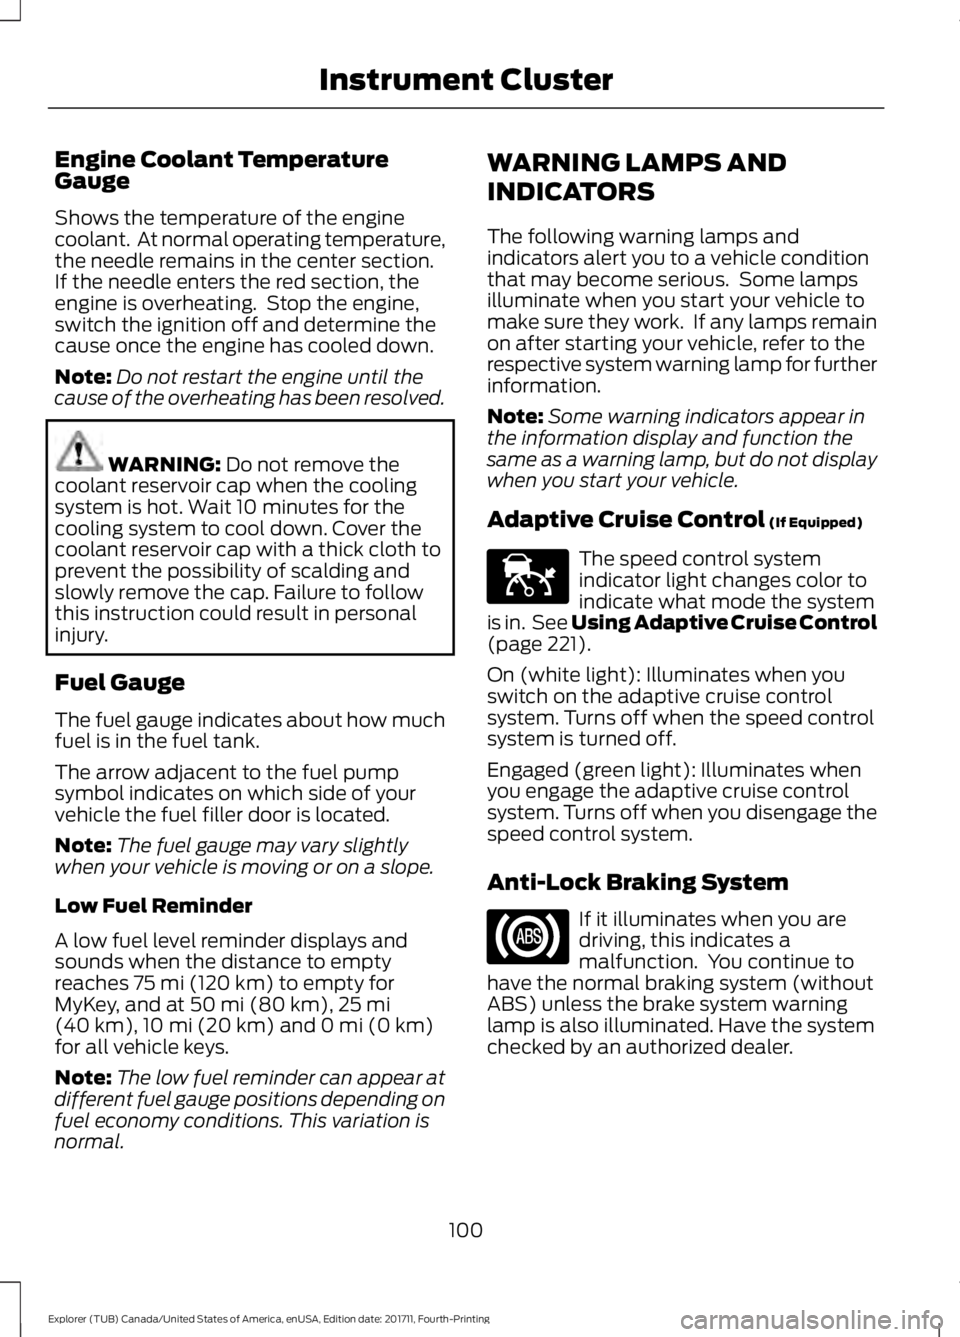
Adaptive Cruise Control
(If Equipped) The speed control system
indicator light changes color to
indicate what mode the system
is in. See Using Adaptive Cruise Control
(page
221).
On (white light): Illuminates when you
switch on the adaptive cruise control
system. Turns off when the speed control
system is turned off.
Engaged (green light): Illuminates when
you engage the adaptive cruise control
system. Turns off when you disengage the
speed control system.
Anti-Lock Braking System If it illuminates when you are
driving, this indicates a
malfunction. You continue to
have the normal braking system (without
ABS) unless the brake system warning
lamp is also illuminated. Have the system
checked by an authorized dealer.
100
Explorer (TUB) Canada/United States of America, enUSA, Edition date: 201711, Fourth-Printing Instrument ClusterE144524
Page 161 of 571
FOLD: Press to fold down the
seatback.
C
RH / BOTH / LH: Press to select
the normal, stow and fold modes
to activate the right-hand seat,
the left-hand seat or both.
D
Note: The third row seat includes obstacle
detection that allows the seat to stop and
reverse direction if it hits an obstacle so that
the obstacle can be removed.
Note: Pressing a different button while the
power seat feature is already being
performed may cause the first selected seat
movement to be cancelled. Allow the first
seat movement to be completed before
pressing a button for another function.
Note: Make sure that there are no objects
such as books, purses or briefcases on the
load floor before unstowing the seat. Failure
to remove all objects from the top of the
load floor prior to unstowing it may cause
damage to the seat.
Note: In order to allow the seat to complete
the stowed position, do not place objects
under the seat before stowing. Remove all
objects from the seat and stowage tub.
Note: In the unlikely event that the third
row power seat stops prematurely or travels
to an unexpected position, press the FOLD
button (C) to reset the seat and return it to
a normal position.
These seats feature a power one-touch
operation that allows you fold and stow
the seats.
• The power fold seats work only when
the transmission is in park (P) and the
liftgate is open.
• If the ignition is off and the feature is
still running, the battery saver turns it
off after 10 minutes. Press unlock on
the remote entry key transmitter to
reactivate the power seats or unlock it
with the keyless entry keypad. See
Remote Control (page 53). HEATED SEATS
(If Equipped)
Front Seats WARNING:
People who are unable
to feel pain to their skin because of
advanced age, chronic illness, diabetes,
spinal cord injury, medication, alcohol use,
exhaustion or other physical conditions,
must exercise care when using the heated
seat. The heated seat may cause burns
even at low temperatures, especially if
used for long periods of time. Do not place
anything on the seat that insulates against
heat, such as a blanket or cushion. This
may cause the heated seat to overheat.
Do not puncture the seat with pins, needles
or other pointed objects. This may damage
the heating element which may cause the
heated seat to overheat. An overheated
seat may cause serious personal injury.
Do not do the following:
• Place heavy objects on the seat.
• Operate the heated seat if water or any
other liquid spills on the seat. Allow the
seat to dry thoroughly.
Note: The engine must be running to use
this feature. Press the heated seat symbol to cycle
through the various heat settings and off.
More indicator lights indicate warmer
settings.
158
Explorer (TUB) Canada/United States of America, enUSA, Edition date: 201711, Fourth-Printing SeatsE146322
Page 162 of 571
Note:
The heated seats may remain on
after you remote start your vehicle, based
on your remote start settings. The heated
seats may also turn on when you start your
vehicle if they were on when you switched
your vehicle off.
Second Row Heated Seats (If Equipped) WARNING: People who are unable
to feel pain to their skin because of
advanced age, chronic illness, diabetes,
spinal cord injury, medication, alcohol use,
exhaustion or other physical conditions,
must exercise care when using the heated
seat. The heated seat may cause burns
even at low temperatures, especially if
used for long periods of time. Do not place
anything on the seat that insulates against
heat, such as a blanket or cushion. This
may cause the heated seat to overheat.
Do not puncture the seat with pins, needles
or other pointed objects. This may damage
the heating element which may cause the
heated seat to overheat. An overheated
seat may cause serious personal injury.
Do not do the following:
• Place heavy objects on the seat.
• Operate the seat heater if water or any
other liquid spills on the seat. Allow the
seat to dry thoroughly.
Note: The engine must be running to use
this feature. Press the heated seat symbol to cycle
through the various heat settings and off.
More indicator lights indicate warmer
settings.
Note:
The heated seats may remain on
after you remote start your vehicle, based
on your remote start settings. The heated
seats may also turn on when you start your
vehicle if they were on when you switched
your vehicle off.
CLIMATE CONTROLLED SEATS
(If Equipped)
Heated Seats WARNING:
People who are unable
to feel pain to their skin because of
advanced age, chronic illness, diabetes,
spinal cord injury, medication, alcohol use,
exhaustion or other physical conditions,
must use caution when using the heated
seat. The heated seat may cause burns
even at low temperatures, especially if
used for long periods of time. Do not place
anything on the seat that may block the
heat, such as a blanket or cushion. This can
cause the heated seat to overheat. Do not
puncture the seat with pins, needles or
other pointed objects. This damages the
heating element and can cause the heated
seat to overheat. An overheated seat may
cause serious personal injury.
Do not do the following:
• Place heavy objects on the seat.
• Operate the heated seat if water or any
other liquid spills on the seat. Allow the
seat to dry thoroughly.
Note: The engine must be running to use
this feature.
159
Explorer (TUB) Canada/United States of America, enUSA, Edition date: 201711, Fourth-Printing SeatsE146322
Page 193 of 571
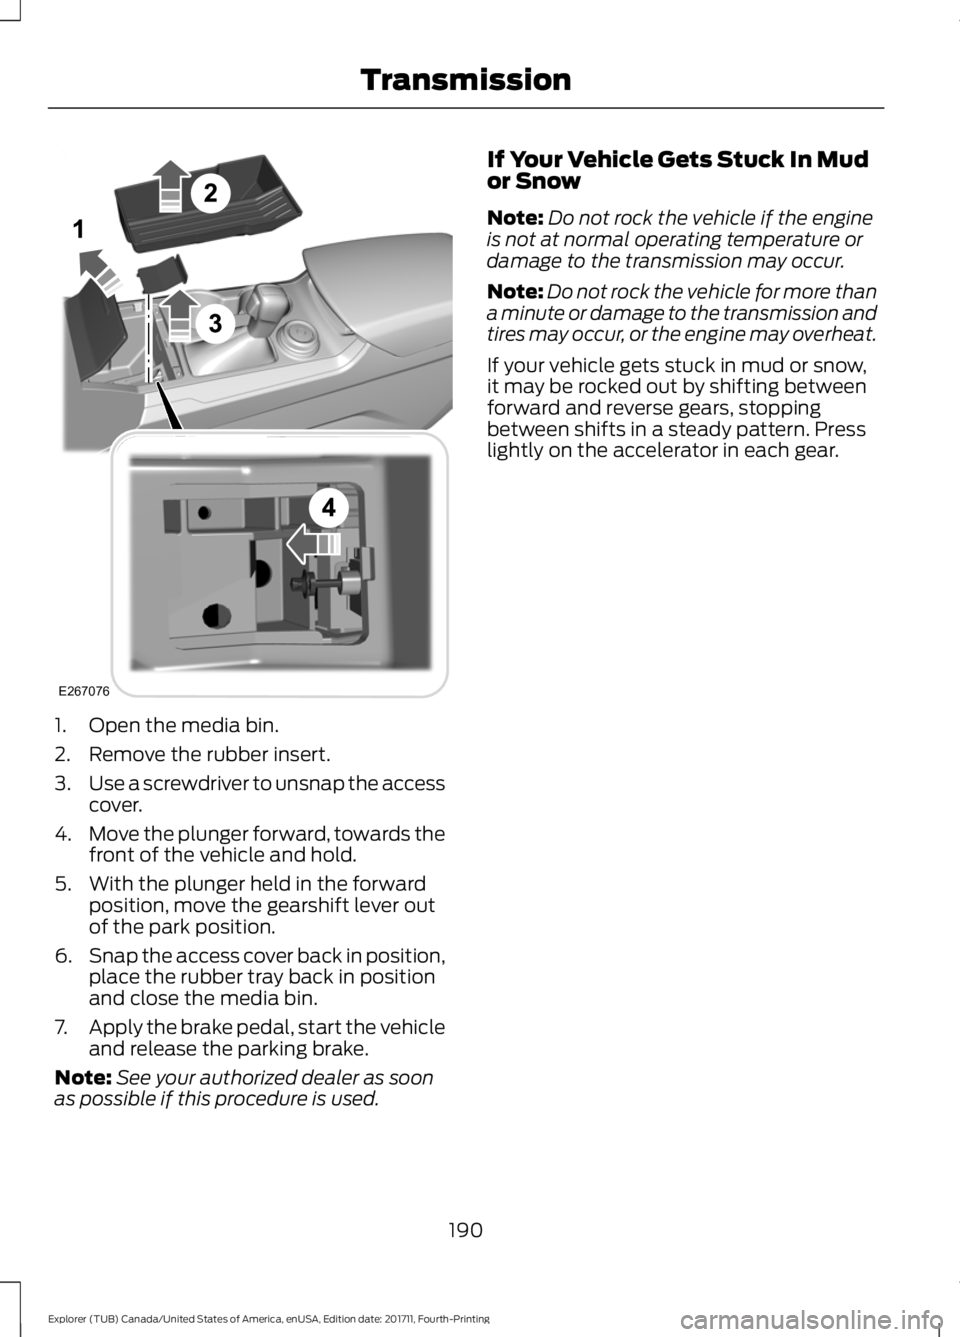
1. Open the media bin.
2. Remove the rubber insert.
3.
Use a screwdriver to unsnap the access
cover.
4. Move the plunger forward, towards the
front of the vehicle and hold.
5. With the plunger held in the forward position, move the gearshift lever out
of the park position.
6. Snap the access cover back in position,
place the rubber tray back in position
and close the media bin.
7. Apply the brake pedal, start the vehicle
and release the parking brake.
Note: See your authorized dealer as soon
as possible if this procedure is used. If Your Vehicle Gets Stuck In Mud
or Snow
Note:
Do not rock the vehicle if the engine
is not at normal operating temperature or
damage to the transmission may occur.
Note: Do not rock the vehicle for more than
a minute or damage to the transmission and
tires may occur, or the engine may overheat.
If your vehicle gets stuck in mud or snow,
it may be rocked out by shifting between
forward and reverse gears, stopping
between shifts in a steady pattern. Press
lightly on the accelerator in each gear.
190
Explorer (TUB) Canada/United States of America, enUSA, Edition date: 201711, Fourth-Printing TransmissionE267076
Page 194 of 571
PRINCIPLE OF OPERATION
This system is a proactive system. It has
the ability to anticipate wheel slip and
transfer torque to the rear wheels before
slip occurs. Even when wheel slip is not
present, the system is continuously making
adjustments to the torque distribution, in
an attempt to improve straight line and
cornering behavior, both on and off road.
The system automatically turns on every
time you switch the ignition on.
If any component requires maintenance,
a message appears in the information
display.
USING FOUR-WHEEL DRIVE
WARNING: Vehicles with a higher
center of gravity such as utility and
four-wheel drive vehicles handle differently
than vehicles with a lower center of gravity.
Utility and four-wheel drive vehicles are
not designed for cornering at speeds as
high as passenger cars any more than
low-slung sports cars are designed to
perform satisfactorily under off-road
conditions. Avoid sharp turns, excessive
speed and abrupt maneuvers in these
vehicles. Failure to drive cautiously could
result in an increased risk of loss of vehicle
control, vehicle rollover, personal injury and
death.
The intelligent 4WD system continuously
monitors vehicle conditions and
automatically adjusts the power
distribution between the front and rear
wheels. It combines transparent
all-surface operation with highly capable
four-wheel drive. The 4WD system is always active and
requires no driver input. It is capable of
handling all road conditions, including
street and highway driving as well as
off-road and winter driving. The driver can
optimize more 4WD control by moving the
terrain management switch for the correct
terrain. See Using Terrain Control (page
202
).
Note: A warning message will be displayed
in the information display when an 4WD
system fault is present
See Information
Messages (page 119). An 4WD system fault
will cause the 4WD system to default to
front-wheel drive only mode. When this
warning message is displayed, have your
vehicle serviced at an authorized dealer
Note: A warning message will be displayed
in the information display if the 4WD system
has overheated
See Information
Messages (page 119). This condition may
occur if the vehicle was operated in extreme
conditions with excessive wheel slip, such
as deep sand. To resume normal 4WD
function as soon as possible, stop the
vehicle in a safe location and stop the
engine for at least 10 minutes. After the
engine has been restarted and the 4WD
system has adequately cooled, the warning
message will turn off and normal 4WD
function will return.
Do not use a spare tire of a different size
other than the tire provided. If the
mini-spare tire is installed, the 4WD system
may disable automatically and enter
front-wheel drive only mode to protect
driveline components. This condition will
be indicated by a warning in the
information display
See Information
Messages (page 119). If there is a warning
message in the information display from
using the spare tire, this indicator should
turn off after reinstalling the repaired or
replaced normal road tire and cycling the
ignition off and on. It is recommended to
191
Explorer (TUB) Canada/United States of America, enUSA, Edition date: 201711, Fourth-Printing Four-Wheel Drive
(If Equipped)
Page 196 of 571
WARNING: If the parking brake is
fully released, but the brake warning lamp
remains illuminated, the brakes may not
be working properly. See your authorized
dealer. WARNING:
Do not spin the wheels
at over 35 mph (56 km/h). The tires may
fail and injure a passenger or bystander.
Note: Do not rock the vehicle if the engine
is not at normal operating temperature or
damage to the transmission may occur.
Note: Do not rock the vehicle for more than
a few minutes or damage to the
transmission and tires may occur or the
engine may overheat.
If your vehicle gets stuck in mud or snow it
may be rocked out by shifting between
forward and reverse gears, stopping
between shifts, in a steady pattern. Press
lightly on the accelerator in each gear.
If your vehicle is equipped with
AdvanceTrac® with Roll Stability
Control ™, it may be beneficial to
disengage the AdvanceTrac® with Roll
Stability Control ™ system while
attempting to rock the vehicle.
Emergency Maneuvers
• In an unavoidable emergency situation
where a sudden sharp turn must be
made, remember to avoid
"over-driving" your vehicle (i.e., turn the
steering wheel only as rapidly and as
far as required to avoid the
emergency). Excessive steering will
result in less vehicle control, not more.
Additionally, smooth variations of the
accelerator and/or brake pedal
pressure should be utilized if changes
in vehicle speed are called for. Avoid abrupt steering, acceleration or braking
which could result in an increased risk
of loss of vehicle control, vehicle
rollover and/or personal injury. Use all
available road surface to return the
vehicle to a safe direction of travel.
• In the event of an emergency stop,
avoid skidding the tires and do not
attempt any sharp steering wheel
movements.
• If the vehicle goes from one type of
surface to another (i.e., from concrete
to gravel) there will be a change in the
way the vehicle responds to a
maneuver (steering, acceleration or
braking). Again, avoid these abrupt
inputs.
Sand
When driving over sand, try to keep all four
wheels on the most solid area of the trail.
Avoid reducing the tire pressures but shift
to a lower gear and drive steadily through
the terrain. Apply the accelerator slowly
and avoid spinning the wheels.
Avoid excessive speed because vehicle
momentum can work against you and
cause the vehicle to become stuck to the
point that assistance may be required from
another vehicle. Remember, you may be
able to back out the way you came if you
proceed with caution.
Mud and Water
Note: Driving through deep water may
damage your vehicle.
If you must drive through high water, drive
slowly. Traction or brake capability may
be limited.
When driving through water, determine the
depth; avoid water higher than the bottom
of the hubs (if possible) and proceed
slowly. If the ignition system gets wet, the
vehicle may stall.
193
Explorer (TUB) Canada/United States of America, enUSA, Edition date: 201711, Fourth-Printing Four-Wheel Drive
(If Equipped)
Page 197 of 571
Once through water, always try the brakes.
Wet brakes do not stop the vehicle as
effectively as dry brakes. Drying can be
improved by moving your vehicle slowly
while applying light pressure on the brake
pedal.
Be cautious of sudden changes in vehicle
speed or direction when you are driving in
mud. Even 4WD vehicles can lose traction
in slick mud. As when you are driving over
sand, apply the accelerator slowly and
avoid spinning your wheels. If the vehicle
does slide, steer in the direction of the slide
until you regain control of the vehicle.
After driving through mud, clean off residue
stuck to rotating driveshafts and tires.
Excess mud stuck on tires and rotating
driveshafts causes an imbalance that
could damage drive components.
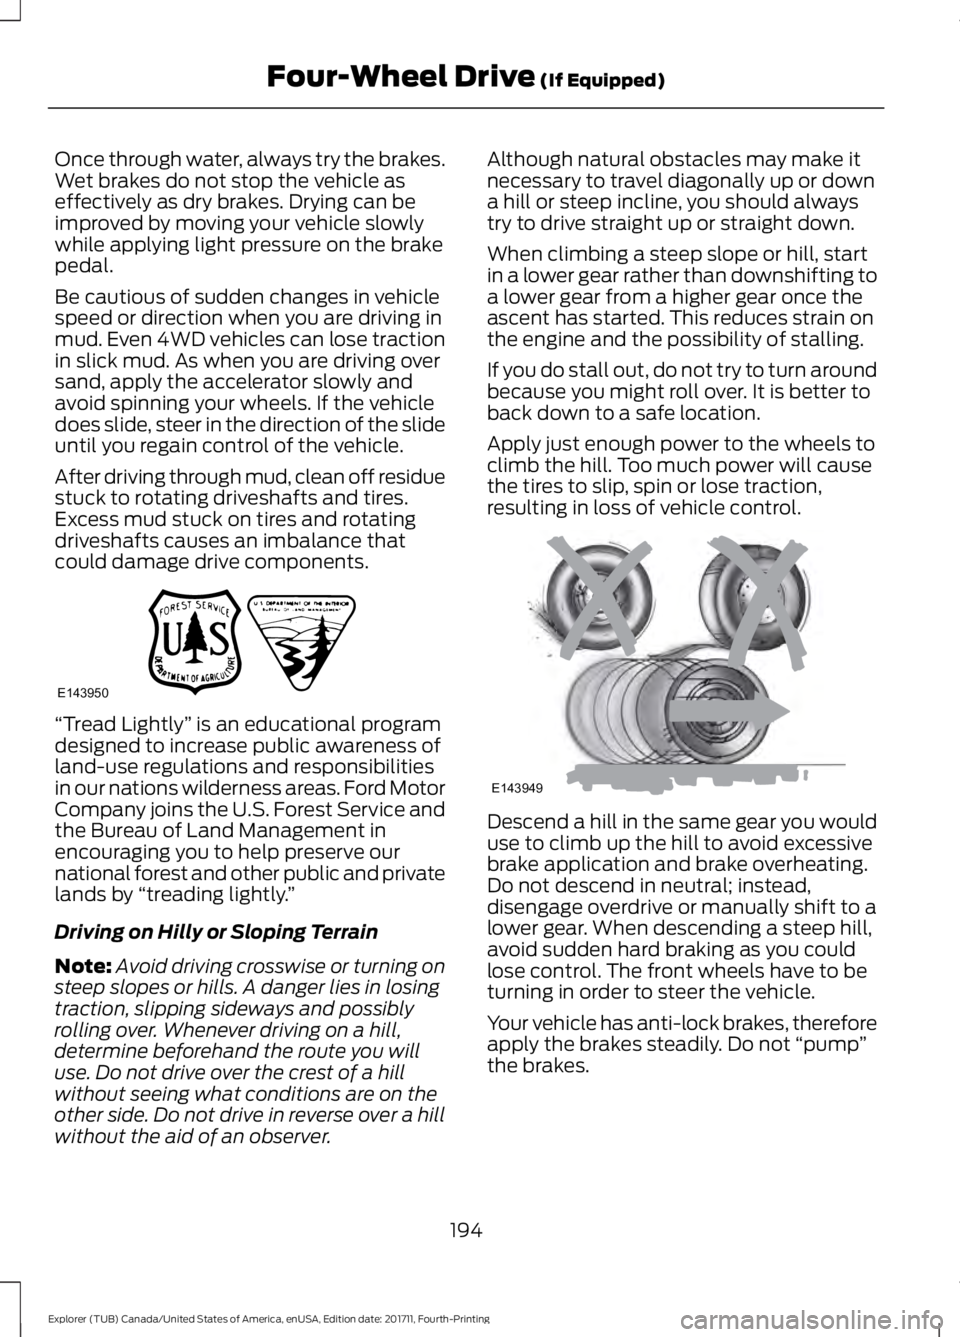
“Tread Lightly
” is an educational program
designed to increase public awareness of
land-use regulations and responsibilities
in our nations wilderness areas. Ford Motor
Company joins the U.S. Forest Service and
the Bureau of Land Management in
encouraging you to help preserve our
national forest and other public and private
lands by “treading lightly. ”
Driving on Hilly or Sloping Terrain
Note: Avoid driving crosswise or turning on
steep slopes or hills. A danger lies in losing
traction, slipping sideways and possibly
rolling over. Whenever driving on a hill,
determine beforehand the route you will
use. Do not drive over the crest of a hill
without seeing what conditions are on the
other side. Do not drive in reverse over a hill
without the aid of an observer. Although natural obstacles may make it
necessary to travel diagonally up or down
a hill or steep incline, you should always
try to drive straight up or straight down.
When climbing a steep slope or hill, start
in a lower gear rather than downshifting to
a lower gear from a higher gear once the
ascent has started. This reduces strain on
the engine and the possibility of stalling.
If you do stall out, do not try to turn around
because you might roll over. It is better to
back down to a safe location.
Apply just enough power to the wheels to
climb the hill. Too much power will cause
the tires to slip, spin or lose traction,
resulting in loss of vehicle control.
Descend a hill in the same gear you would
use to climb up the hill to avoid excessive
brake application and brake overheating.
Do not descend in neutral; instead,
disengage overdrive or manually shift to a
lower gear. When descending a steep hill,
avoid sudden hard braking as you could
lose control. The front wheels have to be
turning in order to steer the vehicle.
Your vehicle has anti-lock brakes, therefore
apply the brakes steadily. Do not
“pump”
the brakes.
194
Explorer (TUB) Canada/United States of America, enUSA, Edition date: 201711, Fourth-Printing Four-Wheel Drive (If Equipped)E143950 E143949
Page 227 of 571
The system resumes operation when you
release the accelerator pedal. The vehicle
speed decreases to the set speed, or a
lower speed if following a slower vehicle.
Changing the Set Speed
•
Press SET+ or SET- to change the set
speed in small increments.
• Press the accelerator or brake pedal
until you reach the desired speed. Press
SET+
or SET-.
• Press and hold
SET+ or SET- to
change the set speed in large
increments. Release the control when
you reach the desired speed.
The system may apply the brakes to slow
the vehicle to the new set speed. The set
speed displays continuously in the
information display when the system is
active.
Canceling the Set Speed
Press
CAN or tap the brake pedal. The set
speed does not erase.
Resuming the Set Speed
Note: Only use resume if you are aware of
the set speed and intend to return to it.
Press
RES. Your vehicle speed returns to
the previously set speed and gap setting.
The set speed displays continuously in the
information display when the system is
active.
Automatic Cancellation
Note: If the engine speed drops too low, an
audible warning sounds and a message
appears in the information display.
Automatic braking releases.
The system does not operate below
12 mph (20 km/h)
. Hilly Condition Usage
Note:
An audible alarm sounds and the
system shuts down if it applies brakes for
an extended period of time. This allows the
brakes to cool. The system functions
normally again when the brakes have
cooled.
Select a lower gear during prolonged
downhill driving on steep slopes, such as
mountainous areas, when the system is
active. In such situations, the system needs
additional engine braking to reduce the
load on the vehicle ’s regular brake system
to prevent the brakes from overheating.
Switching Adaptive Cruise Control
Off
Note: You erase the set speed and gap
setting when you switch the system off.
Press
OFF when the system is in standby
mode, or switch the ignition off.
Detection Issues WARNING:
On rare occasions,
detection issues can occur due to the road
infrastructures, for example bridges,
tunnels and safety barriers. In these cases,
the system may brake late or
unexpectedly. At all times, you are
responsible for controlling your vehicle,
supervising the system and intervening, if
required. WARNING:
If the system
malfunctions, have your vehicle checked
as soon as possible.
The radar sensor has a limited field of view.
It may not detect vehicles at all or detect
a vehicle later than expected in some
situations. The lead vehicle graphic does
not illuminate if the system does not
detect a vehicle in front of you.
224
Explorer (TUB) Canada/United States of America, enUSA, Edition date: 201711, Fourth-Printing Cruise Control
Page 256 of 571
Trailer Brakes
WARNING: Do not connect a trailer's
hydraulic brake system directly to your
vehicle's brake system. Your vehicle may
not have enough braking power and your
chances of having a collision greatly
increase.
Electric brakes and manual, automatic or
surge-type trailer brakes are safe if you
install them properly and adjust them to
the manufacturer's specifications. The
trailer brakes must meet local and federal
regulations.
The rating for the tow vehicle's braking
system operation is at the gross vehicle
weight rating, not the gross combined
weight rating.
Separate functioning brake systems are
required for safe control of towed vehicles
and trailers weighing more than 1,500 lb
(680 kg) when loaded.
Trailer Lamps WARNING: Never connect any trailer
lamp wiring to the vehicle's tail lamp
wiring; this may damage the electrical
system resulting in fire. Contact your
authorized dealer as soon as possible for
assistance in proper trailer tow wiring
installation. Additional electrical
equipment may be required.
Trailer lamps are required on most towed
vehicles. Make sure all running lights, brake
lights, turn signals and hazard lights are
working. Before Towing a Trailer
Practice turning, stopping and backing up
to get the feel of your vehicle-trailer
combination before starting on a trip.
When turning, make wider turns so the
trailer wheels clear curbs and other
obstacles.
When Towing a Trailer
•
Do not drive faster than
70 mph
(113 km/h) during the first 500 mi
(800 km).
• Do not make full-throttle starts.
• Check your hitch, electrical connections
and trailer wheel lug nuts thoroughly
after you have traveled 50 mi (80 km).
• When stopped in congested or heavy
traffic during hot weather, place the
gearshift in park (P) to aid engine and
transmission cooling and to help A/C
performance.
• Turn off the speed control with heavy
loads or in hilly terrain. The speed
control may turn off automatically
when you are towing on long, steep
grades.
• Shift to a lower gear when driving down
a long or steep hill. Do not apply the
brakes continuously, as they may
overheat and become less effective.
• If your transmission is equipped with a
Grade Assist or Tow/Haul feature, use
this feature when towing. This provides
engine braking and helps eliminate
excessive transmission shifting for
optimum fuel economy and
transmission cooling.
• Allow more distance for stopping with
a trailer attached. Anticipate stops and
brake gradually.
• Avoid parking on a grade. However, if
you must park on a grade:
1. Turn the steering wheel to point your vehicle tires away from traffic flow.
253
Explorer (TUB) Canada/United States of America, enUSA, Edition date: 201711, Fourth-Printing Towing