radio FORD EXPLORER 2019 Owners Manual
[x] Cancel search | Manufacturer: FORD, Model Year: 2019, Model line: EXPLORER, Model: FORD EXPLORER 2019Pages: 571, PDF Size: 6.8 MB
Page 4 of 571
Introduction
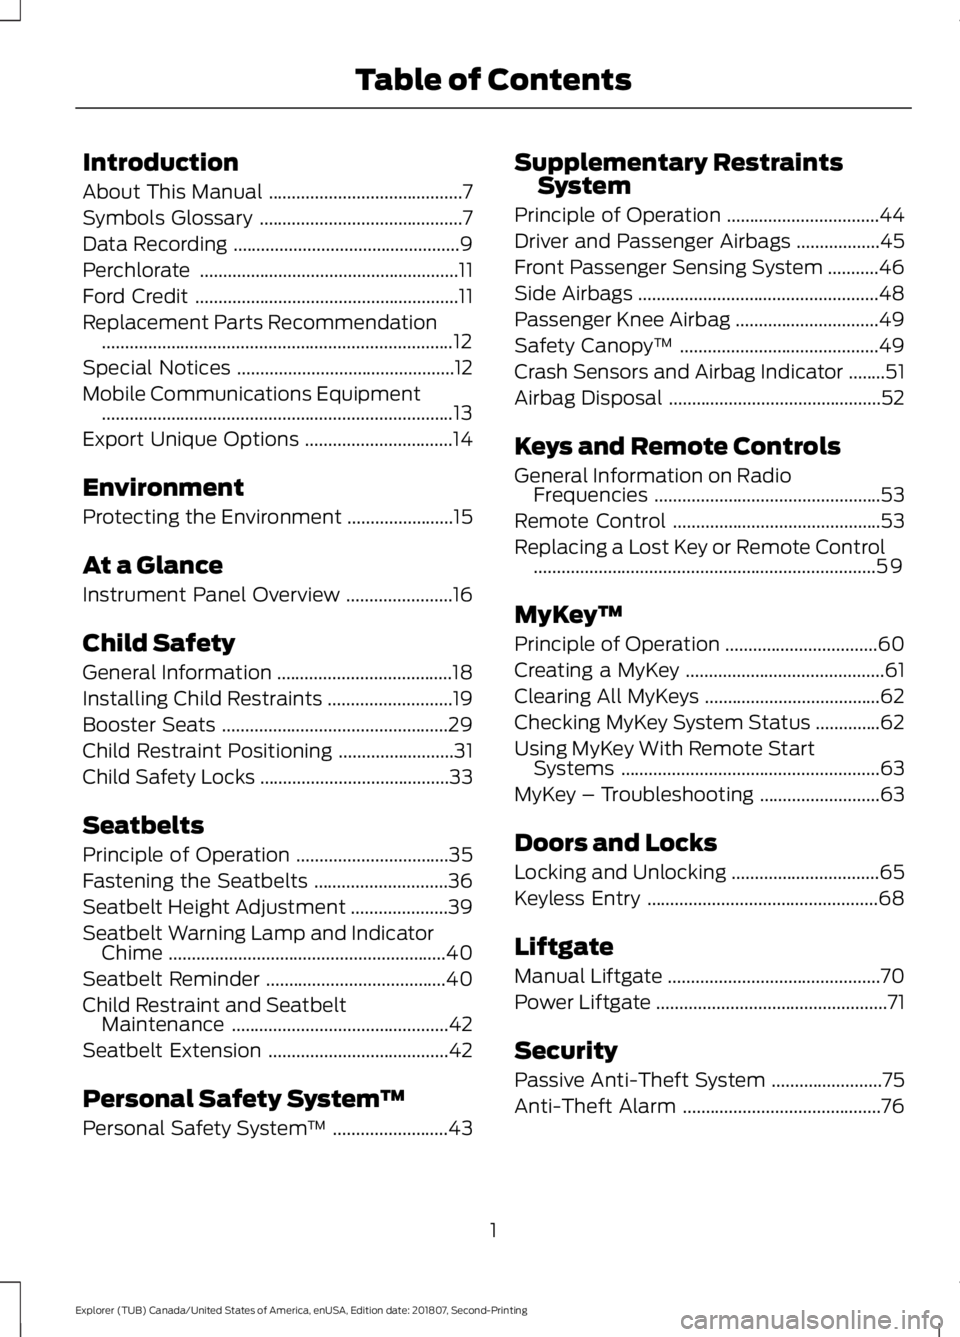
About This Manual
..........................................7
Symbols Glossary ............................................
7
Data Recording .................................................
9
Perchlorate ........................................................
11
Ford Credit .........................................................
11
Replacement Parts Recommendation ........................................................................\
....
12
Special Notices ...............................................
12
Mobile Communications Equipment ........................................................................\
....
13
Export Unique Options ................................
14
Environment
Protecting the Environment .......................
15
At a Glance
Instrument Panel Overview .......................
16
Child Safety
General Information ......................................
18
Installing Child Restraints ...........................
19
Booster Seats .................................................
29
Child Restraint Positioning .........................
31
Child Safety Locks .........................................
33
Seatbelts
Principle of Operation .................................
35
Fastening the Seatbelts .............................
36
Seatbelt Height Adjustment .....................
39
Seatbelt Warning Lamp and Indicator Chime ............................................................
40
Seatbelt Reminder .......................................
40
Child Restraint and Seatbelt Maintenance ...............................................
42
Seatbelt Extension .......................................
42
Personal Safety System ™
Personal Safety System ™.........................
43 Supplementary Restraints
System
Principle of Operation .................................
44
Driver and Passenger Airbags ..................
45
Front Passenger Sensing System ...........
46
Side Airbags ....................................................
48
Passenger Knee Airbag ...............................
49
Safety Canopy ™...........................................
49
Crash Sensors and Airbag Indicator ........
51
Airbag Disposal ..............................................
52
Keys and Remote Controls
General Information on Radio Frequencies .................................................
53
Remote Control .............................................
53
Replacing a Lost Key or Remote Control ........................................................................\
..
59
MyKey ™
Principle of Operation .................................
60
Creating a MyKey ...........................................
61
Clearing All MyKeys ......................................
62
Checking MyKey System Status ..............
62
Using MyKey With Remote Start Systems ........................................................
63
MyKey – Troubleshooting ..........................
63
Doors and Locks
Locking and Unlocking ................................
65
Keyless Entry ..................................................
68
Liftgate
Manual Liftgate ..............................................
70
Power Liftgate ..................................................
71
Security
Passive Anti-Theft System ........................
75
Anti-Theft Alarm ...........................................
76
1
Explorer (TUB) Canada/United States of America, enUSA, Edition date: 201807, Second-Printing Table of Contents
Page 8 of 571
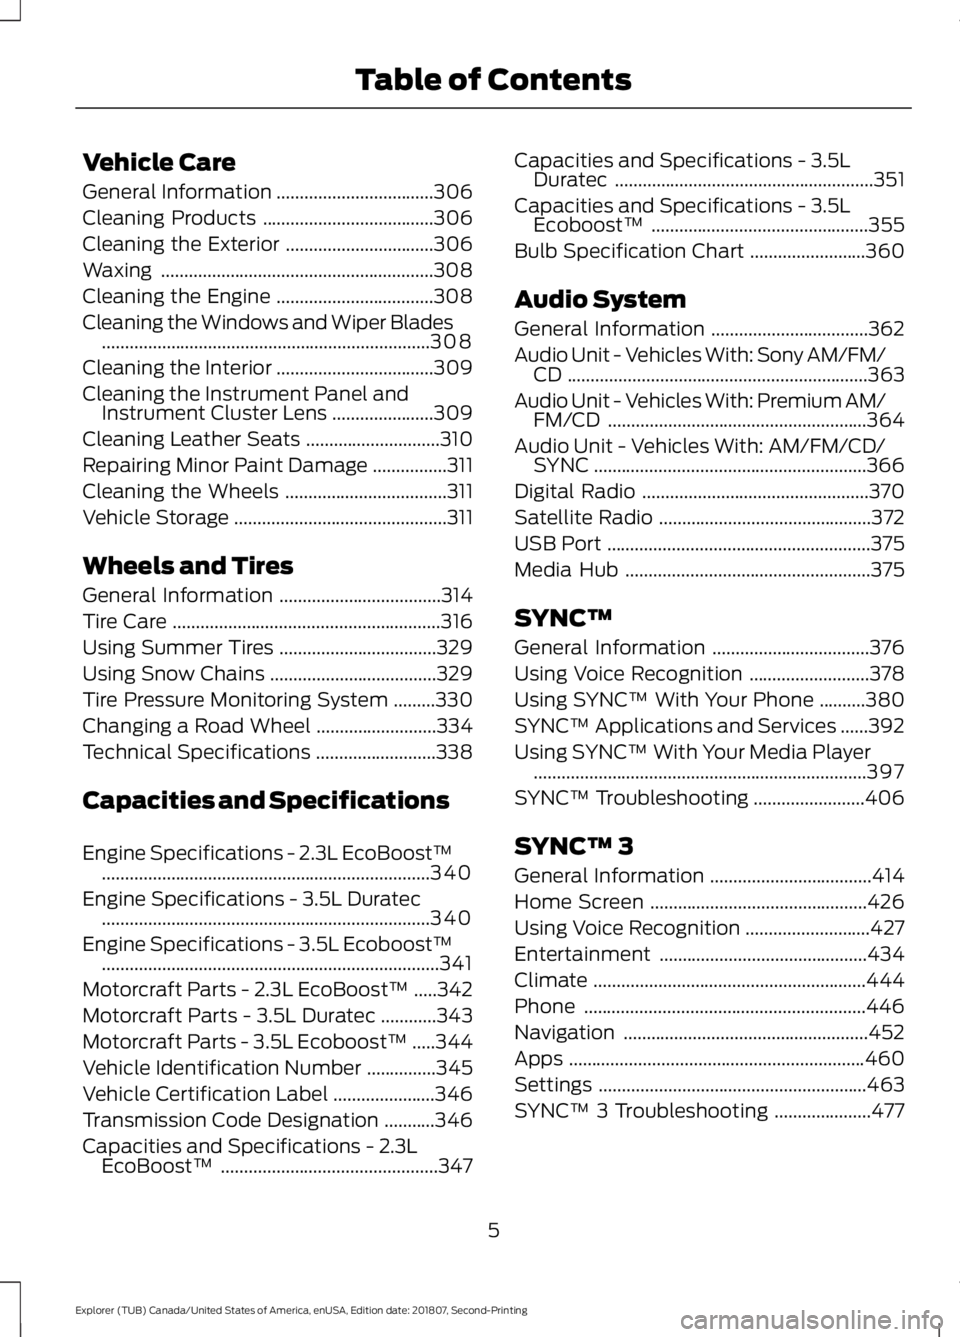
Vehicle Care
General Information
..................................306
Cleaning Products .....................................
306
Cleaning the Exterior ................................
306
Waxing ...........................................................
308
Cleaning the Engine ..................................
308
Cleaning the Windows and Wiper Blades .......................................................................
308
Cleaning the Interior ..................................
309
Cleaning the Instrument Panel and Instrument Cluster Lens ......................
309
Cleaning Leather Seats .............................
310
Repairing Minor Paint Damage ................
311
Cleaning the Wheels ...................................
311
Vehicle Storage ..............................................
311
Wheels and Tires
General Information ...................................
314
Tire Care ..........................................................
316
Using Summer Tires ..................................
329
Using Snow Chains ....................................
329
Tire Pressure Monitoring System .........
330
Changing a Road Wheel ..........................
334
Technical Specifications ..........................
338
Capacities and Specifications
Engine Specifications - 2.3L EcoBoost™ .......................................................................
340
Engine Specifications - 3.5L Duratec .......................................................................
340
Engine Specifications - 3.5L Ecoboost™ ........................................................................\
.
341
Motorcraft Parts - 2.3L EcoBoost™ .....
342
Motorcraft Parts - 3.5L Duratec ............
343
Motorcraft Parts - 3.5L Ecoboost™ .....
344
Vehicle Identification Number ...............
345
Vehicle Certification Label ......................
346
Transmission Code Designation ...........
346
Capacities and Specifications - 2.3L EcoBoost™ ...............................................
347Capacities and Specifications - 3.5L
Duratec ........................................................
351
Capacities and Specifications - 3.5L Ecoboost™ ...............................................
355
Bulb Specification Chart .........................
360
Audio System
General Information ..................................
362
Audio Unit - Vehicles With: Sony AM/FM/ CD .................................................................
363
Audio Unit - Vehicles With: Premium AM/ FM/CD ........................................................
364
Audio Unit - Vehicles With: AM/FM/CD/ SYNC ...........................................................
366
Digital Radio .................................................
370
Satellite Radio ..............................................
372
USB Port .........................................................
375
Media Hub .....................................................
375
SYNC™
General Information ..................................
376
Using Voice Recognition ..........................
378
Using SYNC™ With Your Phone ..........
380
SYNC™ Applications and Services ......
392
Using SYNC™ With Your Media Player ........................................................................\
397
SYNC™ Troubleshooting ........................
406
SYNC™ 3
General Information ...................................
414
Home Screen ...............................................
426
Using Voice Recognition ...........................
427
Entertainment .............................................
434
Climate ...........................................................
444
Phone .............................................................
446
Navigation .....................................................
452
Apps ................................................................
460
Settings ..........................................................
463
SYNC™ 3 Troubleshooting .....................
477
5
Explorer (TUB) Canada/United States of America, enUSA, Edition date: 201807, Second-Printing Table of Contents
Page 17 of 571
communications equipment to avoid
negating these benefits. Mobile
communication equipment includes, but
is not limited to, cellular phones, pagers,
portable email devices, text messaging
devices and portable two-way radios.
EXPORT UNIQUE OPTIONS
For your particular global region, your
vehicle may be equipped with features and
options that are different from the features
and options that are described in this
Owner
’s Manual. A market unique
supplement may be supplied that
complements this book. By referring to the
market unique supplement, if provided,
you can properly identify those features,
recommendations and specifications that
are unique to your vehicle. This Owner ’s
Manual is written primarily for the U.S. and
Canadian Markets. Features or equipment
listed as standard may be different on units
built for export. Refer to this Owner ’s
Manual for all other required
information and warnings.
14
Explorer (TUB) Canada/United States of America, enUSA, Edition date: 201807, Second-Printing Introduction
Page 56 of 571
GENERAL INFORMATION ON
RADIO FREQUENCIES
This device complies with Part 15 of the
FCC Rules and with Industry Canada
license-exempt RSS standard(s).
Operation is subject to the following two
conditions: (1) This device may not cause
harmful interference, and (2) This device
must accept any interference received,
including interference that may cause
undesired operation.
Note:
Changes or modifications not
expressively approved by the party
responsible for compliance could void the
user's authority to operate the equipment.
The term IC before the radio certification
number only signifies that Industry Canada
technical specifications were met.
The typical operating range for your
transmitter is approximately
33 ft (10 m).
Vehicles with the remote start feature will
have a greater range.
One of the following could cause a
decrease in operating range:
• Weather conditions.
• Nearby radio towers.
• Structures around the vehicle.
• Other vehicles parked next to your
vehicle.
The radio frequency used by your remote
control can also be used by other radio
transmitters, for example amateur radios,
medical equipment, wireless headphones,
wireless remote controls, cell phones,
battery chargers and alarm systems. If the
frequencies are jammed, you will not be
able to use your remote control. You can
lock and unlock the doors with the key.
Note: Make sure to lock your vehicle before
leaving it unattended. Note:
If you are in range, the remote control
will operate if you press any button
unintentionally.
Note: The remote control contains sensitive
electrical components. Exposure to moisture
or impact may cause permanent damage.
Intelligent Access
(If Equipped)
The system uses a radio frequency signal
to communicate with your vehicle and
authorize your vehicle to unlock when one
of the following conditions are met:
• You activate the front exterior door
handle switch.
• You press the luggage compartment
button.
• You press a button on the transmitter.
If excessive radio frequency interference
is present in the area or if the transmitter
battery is low, you may need to
mechanically unlock your door. You can
use the mechanical key blade in your
intelligent access key to open the driver
door in this situation. See
Remote
Control (page 53).
REMOTE CONTROL
Integrated Keyhead Transmitter (If
Equipped)
Use the key blade to start your vehicle and
unlock or lock the driver door from outside
your vehicle. The integrated keyhead
transmitter functions as a programmed
ignition key that operates all the locks and
starts your vehicle, as well as a remote
control.
53
Explorer (TUB) Canada/United States of America, enUSA, Edition date: 201807, Second-Printing Keys and Remote Controls
Page 62 of 571
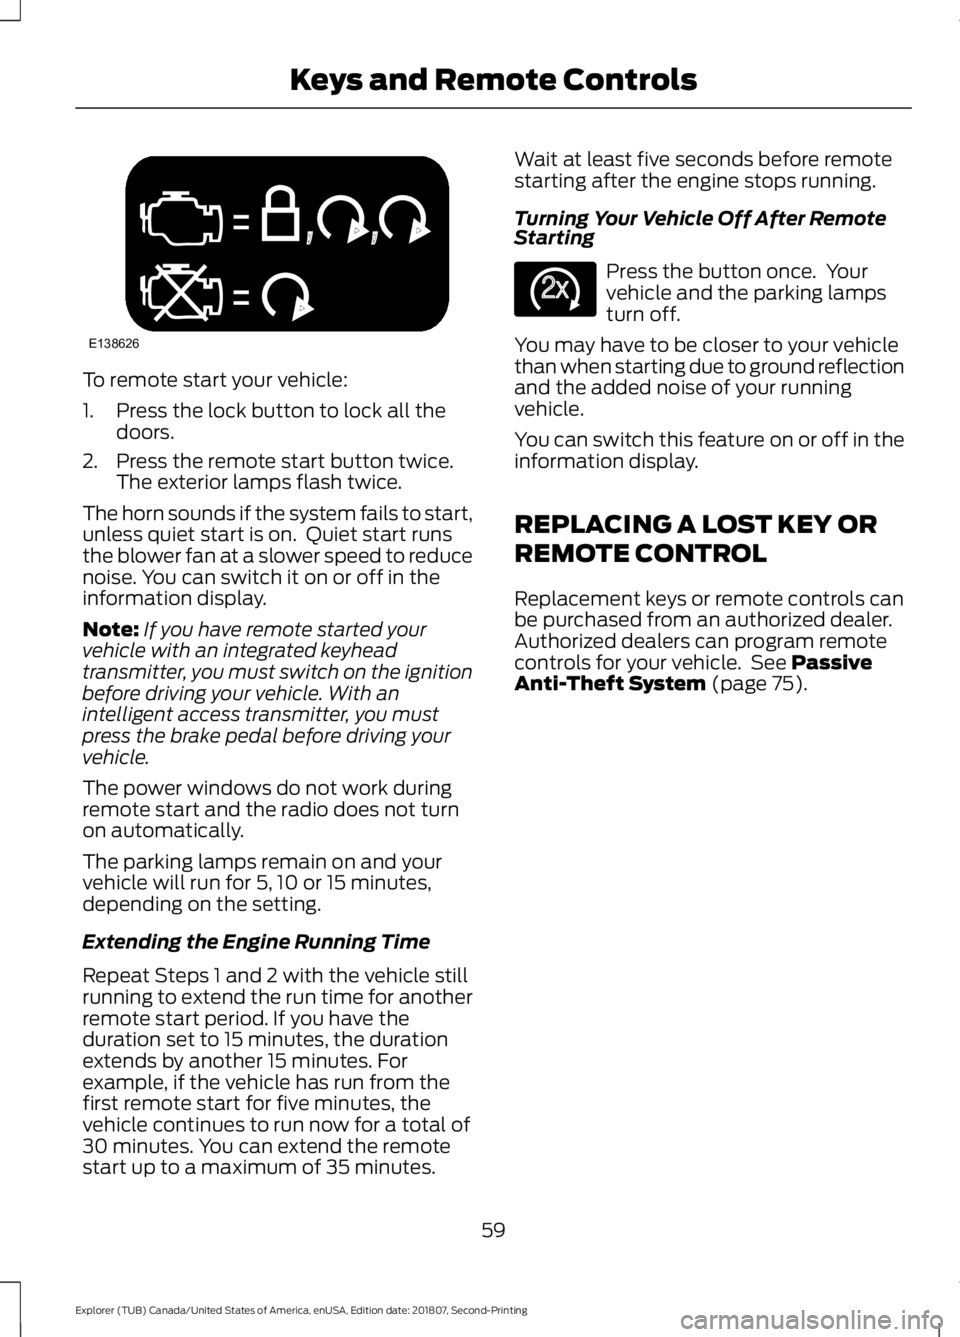
To remote start your vehicle:
1. Press the lock button to lock all the
doors.
2. Press the remote start button twice. The exterior lamps flash twice.
The horn sounds if the system fails to start,
unless quiet start is on. Quiet start runs
the blower fan at a slower speed to reduce
noise. You can switch it on or off in the
information display.
Note: If you have remote started your
vehicle with an integrated keyhead
transmitter, you must switch on the ignition
before driving your vehicle. With an
intelligent access transmitter, you must
press the brake pedal before driving your
vehicle.
The power windows do not work during
remote start and the radio does not turn
on automatically.
The parking lamps remain on and your
vehicle will run for 5, 10 or 15 minutes,
depending on the setting.
Extending the Engine Running Time
Repeat Steps 1 and 2 with the vehicle still
running to extend the run time for another
remote start period. If you have the
duration set to 15 minutes, the duration
extends by another 15 minutes. For
example, if the vehicle has run from the
first remote start for five minutes, the
vehicle continues to run now for a total of
30 minutes. You can extend the remote
start up to a maximum of 35 minutes. Wait at least five seconds before remote
starting after the engine stops running.
Turning Your Vehicle Off After Remote
Starting
Press the button once. Your
vehicle and the parking lamps
turn off.
You may have to be closer to your vehicle
than when starting due to ground reflection
and the added noise of your running
vehicle.
You can switch this feature on or off in the
information display.
REPLACING A LOST KEY OR
REMOTE CONTROL
Replacement keys or remote controls can
be purchased from an authorized dealer.
Authorized dealers can program remote
controls for your vehicle. See Passive
Anti-Theft System (page 75).
59
Explorer (TUB) Canada/United States of America, enUSA, Edition date: 201807, Second-Printing Keys and Remote ControlsE138626 E138625
Page 63 of 571
PRINCIPLE OF OPERATION
MyKey allows you to program keys with
restricted driving modes to promote good
driving habits. You can program the
restrictions to all keys except one. Any keys
that you did not program are administrator
keys or admin keys.
You can use admin keys to:
•
Create a MyKey with certain vehicle
restrictions.
• Program certain MyKey settings.
• Clear all MyKey restrictions.
After you program a MyKey, you can view
the following information through the
information display:
• The total number of admin keys and
MyKeys for your vehicle.
• The total distance a MyKey driver
traveled with your vehicle.
Note: Every MyKey receives the same
restrictions and settings. You cannot
program them individually.
Note: For vehicles equipped with a
push-button start switch: When both a
MyKey and an admin key are present when
you start your vehicle, the system recognizes
the admin key only. Standard Settings
Not every vehicle includes the features
listed below. If your vehicle has this
equipment, then you cannot change the
following settings when using a MyKey:
•
Seatbelt reminder or Belt-Minder™.
MyKey mutes the audio system until
drivers, and in some instances,
passengers, fasten their seatbelts.
Note: If your vehicle includes an
AM/FM radio or a very basic audio
system, then the radio may not mute.
• Earlier low-fuel warning. The low-fuel
warning activates earlier for MyKey
drivers, giving them more time to refuel.
• Certain driver alerts, stability systems
or parking aids turn on automatically
when you use the MyKey system. For
example, Blind Spot Information
System (BLIS), cross traffic alert, lane
departure warning or forward collision
warning. Note:
MyKey drivers may be
able to turn the lane departure warning
feature off, but this feature turns back
on automatically with every new key
cycle.
• Restricted touchscreen operation in
some markets. For example, MyKey
may prevent manual navigation
destination input while the vehicle is in
any gear other than park (P) or when
the vehicle reaches a certain rate of
speed.
• Satellite radio adult content
restrictions, if this feature is available
in your market.
Optional Settings
You can configure certain vehicle feature
settings when you first create a MyKey. You
can also change the settings afterward
with an admin key.
60
Explorer (TUB) Canada/United States of America, enUSA, Edition date: 201807, Second-Printing MyKey
™
Page 64 of 571
Note:
Not every feature applies to every
vehicle in every market. When they are
available for your vehicle, then they appear
in your information display, providing
choices to switch them on or off, or to select
a more specific setting.
• Various vehicle speed limits so the
MyKey driver cannot exceed certain
speeds. The information display shows
warnings followed by an audible tone
when the MyKey driver reaches the set
speed. You cannot override the set
speed by fully depressing the
accelerator pedal. WARNING: Do not set MyKey
maximum speed limit to a limit that will
prevent the driver from maintaining a
safe speed considering posted speed
limits and prevailing road conditions. The
driver is always responsible to drive in
accordance with local laws and
prevailing conditions. Failure to do so
could result in accident or injury. •
Various vehicle speed reminders so
MyKey drivers know when their vehicle
speed approaches the limits. Warnings
appear in your information display and
a tone sounds when the MyKey drivers
exceed the set vehicle speed.
• The audio system's maximum volume
limits to 45% so MyKey drivers can
concentrate on the road. A message
appears in the information display
when MyKey drivers attempt to exceed
the limited volume. MyKey also
disables the automatic volume control.
Note:
If your vehicle includes an
AM/FM radio or a very basic audio
system, then the radio may not limit.
• Always on setting. This setting forces
certain features to remain on and
active for MyKey drivers. For example,
E911 or emergency assistance and the
do not disturb features stay on even if
a MyKey driver uses the feature's
control to switch it off. When you
select, you will not be able to turn off
Advance Trac or traction control (if
your vehicle has this feature).
CREATING A MYKEY
Use the information display to create a
MyKey:
1. Insert the key you want to program into
the ignition. See Starting a Gasoline
Engine
(page 167). If your vehicle is
equipped with a push-button start,
place the remote control into the
backup slot. See Passive Anti-Theft
System
(page 75).
2. Switch the ignition on.
61
Explorer (TUB) Canada/United States of America, enUSA, Edition date: 201807, Second-Printing MyKey
™
Page 82 of 571
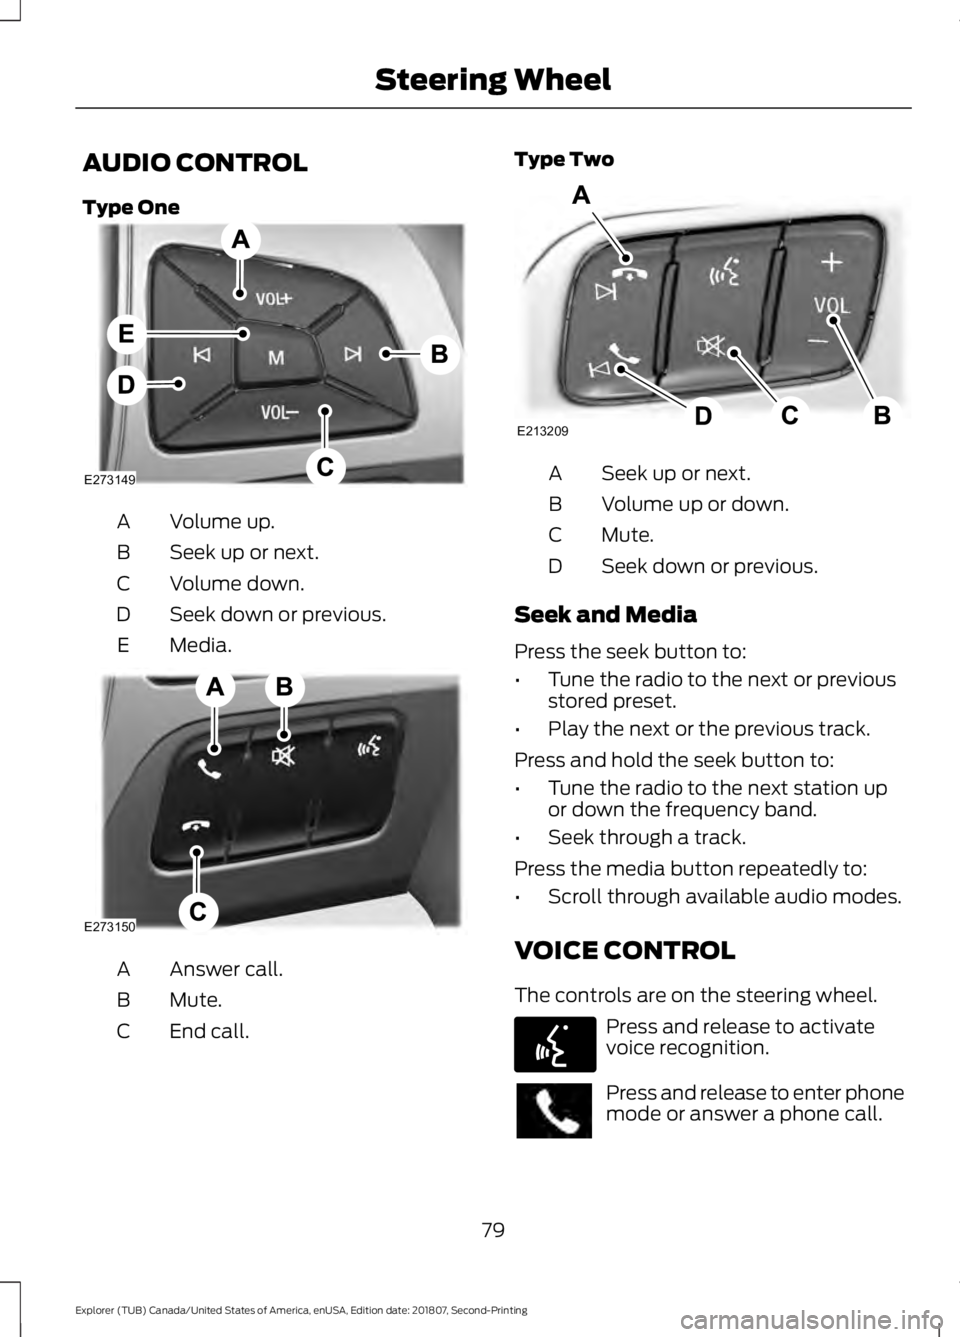
AUDIO CONTROL
Type One
Volume up.
A
Seek up or next.
B
Volume down.
C
Seek down or previous.
D
Media.
E Answer call.
A
Mute.
B
End call.
C Type Two
Seek up or next.
A
Volume up or down.
B
Mute.
C
Seek down or previous.
D
Seek and Media
Press the seek button to:
• Tune the radio to the next or previous
stored preset.
• Play the next or the previous track.
Press and hold the seek button to:
• Tune the radio to the next station up
or down the frequency band.
• Seek through a track.
Press the media button repeatedly to:
• Scroll through available audio modes.
VOICE CONTROL
The controls are on the steering wheel. Press and release to activate
voice recognition.
Press and release to enter phone
mode or answer a phone call.
79
Explorer (TUB) Canada/United States of America, enUSA, Edition date: 201807, Second-Printing Steering WheelE273149 E273150 E213209 E142599
Page 160 of 571
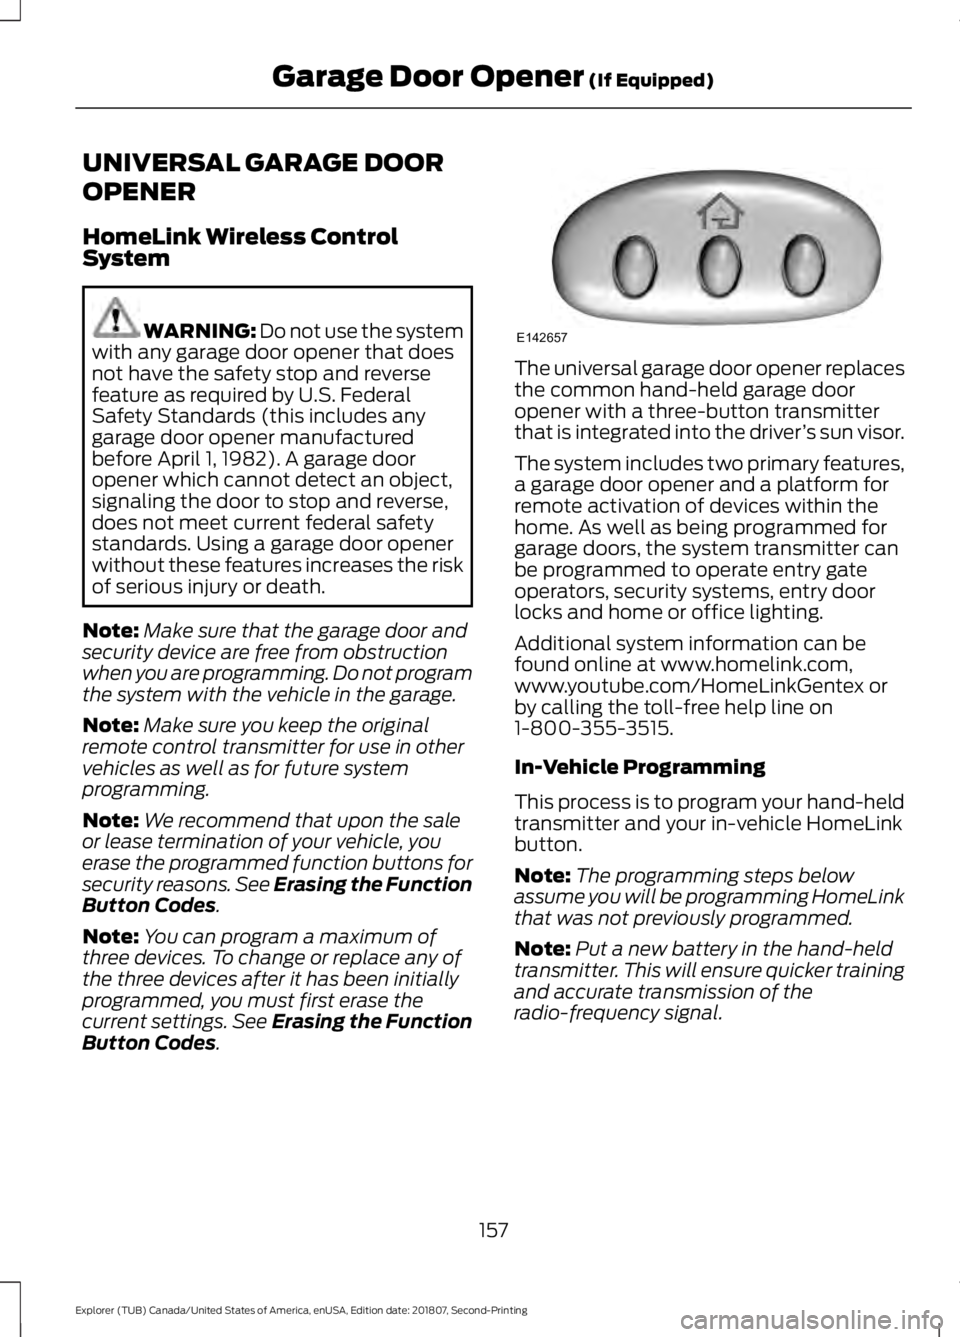
UNIVERSAL GARAGE DOOR
OPENER
HomeLink Wireless Control
System
WARNING: Do not use the system
with any garage door opener that does
not have the safety stop and reverse
feature as required by U.S. Federal
Safety Standards (this includes any
garage door opener manufactured
before April 1, 1982). A garage door
opener which cannot detect an object,
signaling the door to stop and reverse,
does not meet current federal safety
standards. Using a garage door opener
without these features increases the risk
of serious injury or death.
Note: Make sure that the garage door and
security device are free from obstruction
when you are programming. Do not program
the system with the vehicle in the garage.
Note: Make sure you keep the original
remote control transmitter for use in other
vehicles as well as for future system
programming.
Note: We recommend that upon the sale
or lease termination of your vehicle, you
erase the programmed function buttons for
security reasons. See Erasing the Function
Button Codes
.
Note: You can program a maximum of
three devices. To change or replace any of
the three devices after it has been initially
programmed, you must first erase the
current settings. See Erasing the Function
Button Codes
. The universal garage door opener replaces
the common hand-held garage door
opener with a three-button transmitter
that is integrated into the driver
’s sun visor.
The system includes two primary features,
a garage door opener and a platform for
remote activation of devices within the
home. As well as being programmed for
garage doors, the system transmitter can
be programmed to operate entry gate
operators, security systems, entry door
locks and home or office lighting.
Additional system information can be
found online at www.homelink.com,
www.youtube.com/HomeLinkGentex or
by calling the toll-free help line on
1-800-355-3515.
In-Vehicle Programming
This process is to program your hand-held
transmitter and your in-vehicle HomeLink
button.
Note: The programming steps below
assume you will be programming HomeLink
that was not previously programmed.
Note: Put a new battery in the hand-held
transmitter. This will ensure quicker training
and accurate transmission of the
radio-frequency signal.
157
Explorer (TUB) Canada/United States of America, enUSA, Edition date: 201807, Second-Printing Garage Door Opener
(If Equipped)E142657
Page 162 of 571
Gate Operator / Canadian
Programming
Canadian radio-frequency laws require
transmitter signals to
“time-out” (or quit)
after several seconds of transmission –
which may not be long enough for
HomeLink to pick up the signal during
programming. Similar to this Canadian law,
some U.S. gate operators are designed to
“time-out” in the same manner.
Note: If programming a garage door opener
or gate operator, it is advised to unplug the
device during the “cycling” process to
prevent possible overheating.
1. Press and hold the HomeLink button while you press and release, every two
seconds, your hand-held transmitter
until the HomeLink indicator light
changes from a slow to a rapidly
blinking light.
2. Release both the HomeLink and hand-held transmitter buttons.
3. Continue programing HomeLink. See In-Vehicle Programming
.
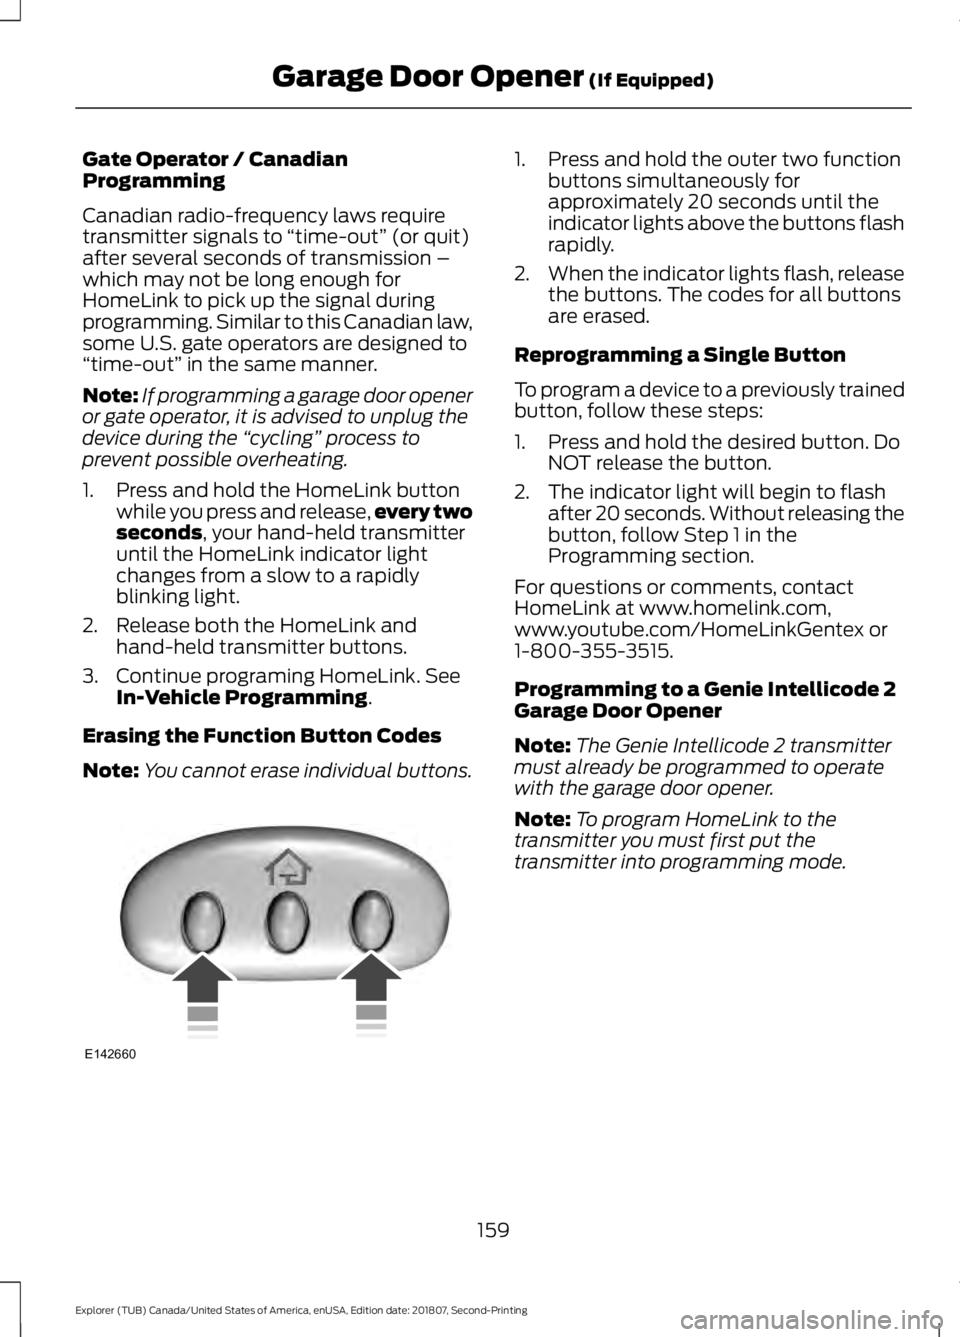
Erasing the Function Button Codes
Note: You cannot erase individual buttons. 1. Press and hold the outer two function
buttons simultaneously for
approximately 20 seconds until the
indicator lights above the buttons flash
rapidly.
2. When the indicator lights flash, release
the buttons. The codes for all buttons
are erased.
Reprogramming a Single Button
To program a device to a previously trained
button, follow these steps:
1. Press and hold the desired button. Do NOT release the button.
2. The indicator light will begin to flash after 20 seconds. Without releasing the
button, follow Step 1 in the
Programming section.
For questions or comments, contact
HomeLink at www.homelink.com,
www.youtube.com/HomeLinkGentex or
1-800-355-3515.
Programming to a Genie Intellicode 2
Garage Door Opener
Note: The Genie Intellicode 2 transmitter
must already be programmed to operate
with the garage door opener.
Note: To program HomeLink to the
transmitter you must first put the
transmitter into programming mode.
159
Explorer (TUB) Canada/United States of America, enUSA, Edition date: 201807, Second-Printing Garage Door Opener
(If Equipped)E142660