traction control FORD EXPLORER 2020 User Guide
[x] Cancel search | Manufacturer: FORD, Model Year: 2020, Model line: EXPLORER, Model: FORD EXPLORER 2020Pages: 555, PDF Size: 8.16 MB
Page 228 of 555
PRINCIPLE OF OPERATION
WARNING: Vehicle modifications
involving braking system, aftermarket
roof racks, suspension, steering system,
tire construction and wheel and tire size
may change the handling characteristics
of your vehicle and may adversely affect
the performance of the electronic
stability control system. In addition,
installing any stereo loudspeakers may
interfere with and adversely affect the
electronic stability control system. Install
any aftermarket stereo loudspeaker as
far as possible from the front center
console, the tunnel, and the front seats
in order to minimize the risk of interfering
with the electronic stability control
sensors. Reducing the effectiveness of
the electronic stability control system
could lead to an increased risk of loss of
vehicle control, vehicle rollover, personal
injury and death. WARNING:
Remember that even
advanced technology cannot defy the
laws of physics. It’ s always possible to
lose control of a vehicle due to
inappropriate driver input for the
conditions. Aggressive driving on any
road condition can cause you to lose
control of your vehicle increasing the risk
of personal injury or property damage.
Activation of the electronic stability
control system is an indication that at
least some of the tires have exceeded
their ability to grip the road; this could
reduce the operator ’s ability to control
the vehicle potentially resulting in a loss
of vehicle control, vehicle rollover,
personal injury and death. If your
electronic stability control system
activates, SLOW DOWN.
The system automatically turns on each
time you switch the ignition on. If a driving condition activates either the
stability control or the traction control
system you may experience the following
conditions:
•
The stability and traction control light
flashes.
• Your vehicle slows down.
• Reduced engine power.
• A vibration in the brake pedal.
• The brake pedal is stiffer than usual.
• If the driving condition is severe and
your foot is not on the brake, the brake
pedal may move as the systems
applies higher brake forces.
The stability control system has several
features built into it to help you maintain
control of your vehicle:
Electronic Stability Control
The system enhances your vehicle ’s ability
to prevent skids or lateral slides by
applying brakes to one or more of the
wheels individually and, if necessary,
reducing engine power.
Roll Stability Control
The system enhances your vehicle ’s ability
to prevent rollovers by detecting your
vehicle ’s roll motion and the rate at which
it changes by applying the brakes to one
or more wheels individually.
Curve Control
The system enhances your vehicle ’s ability
to follow the road when cornering severely
or avoiding objects in the roadway. Curve
Control operates by reducing engine power
and, if necessary, applying brakes to one
or more of the wheels individually.
225
Explorer (CTW) Canada/United States of America, enUSA, Edition date: 201902, Third-Printing- Stability Control
Page 229 of 555
Traction Control
The system enhances your vehicle
’s ability
to maintain traction of the wheels by
detecting and controlling wheel spin. See
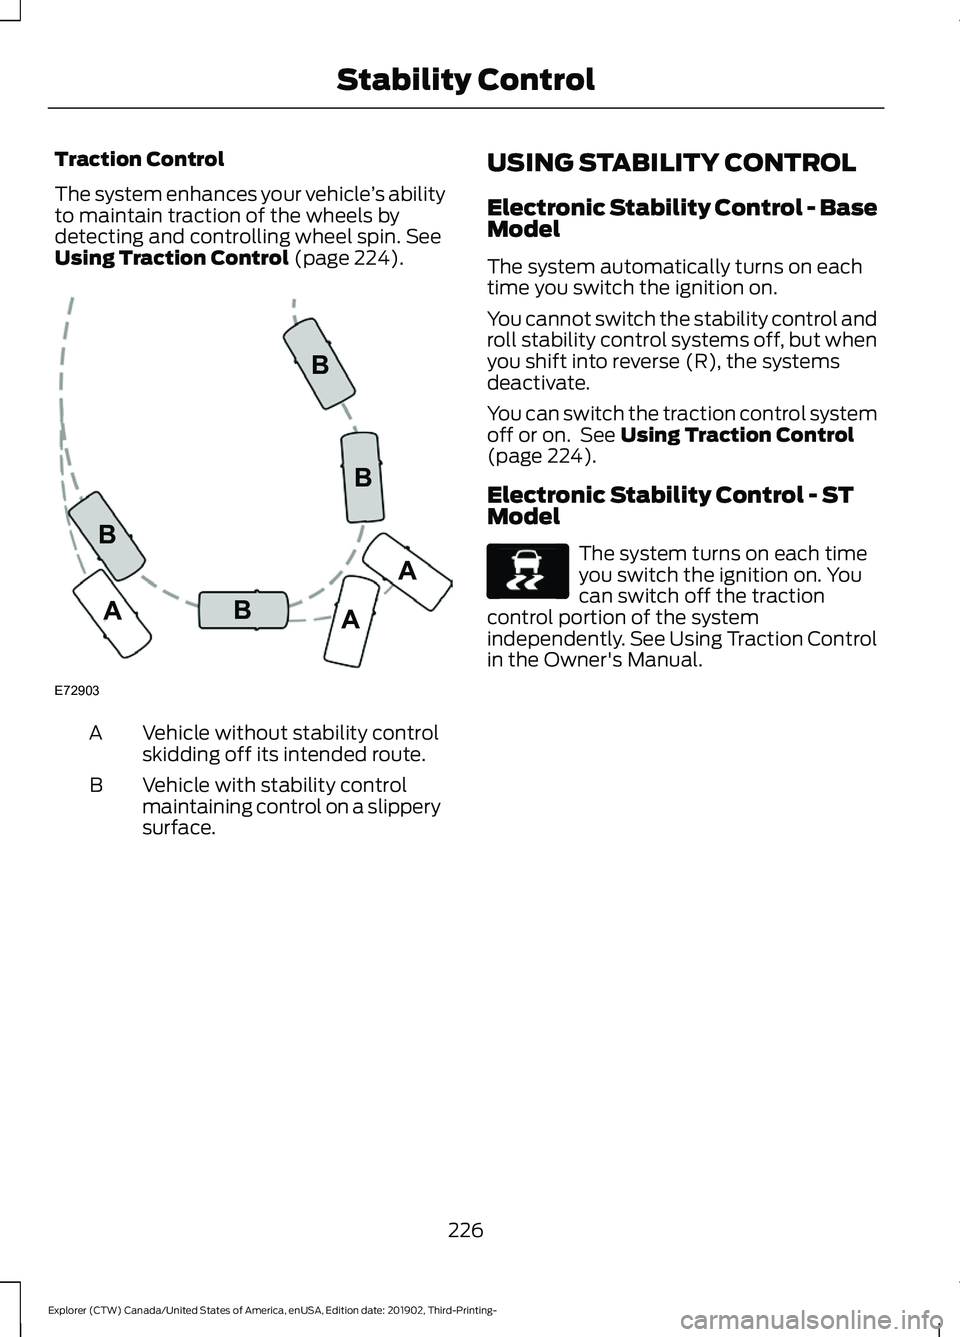
Using Traction Control (page 224). Vehicle without stability control
skidding off its intended route.
A
Vehicle with stability control
maintaining control on a slippery
surface.
B USING STABILITY CONTROL
Electronic Stability Control - Base
Model
The system automatically turns on each
time you switch the ignition on.
You cannot switch the stability control and
roll stability control systems off, but when
you shift into reverse (R), the systems
deactivate.
You can switch the traction control system
off or on. See
Using Traction Control
(page 224).
Electronic Stability Control - ST
Model The system turns on each time
you switch the ignition on. You
can switch off the traction
control portion of the system
independently. See Using Traction Control
in the Owner's Manual.
226
Explorer (CTW) Canada/United States of America, enUSA, Edition date: 201902, Third-Printing- Stability ControlE72903A
AA
B
BB
B E138639
Page 230 of 555
ESC Features
Traction ControlSystem
Electronic
Stability Control
Stability Control
Off Light
Mode
Button Func-
tions
Enabled
Enabled
On during bulb
check
Default - Trac-
tion Control On and Normal
AdvanceTrac
Default at start-
up
Disabled
Enabled
On
Traction Control
Off
Button
momentarily
pressed - single press
Disabled
Disabled
On
AdvanceTrac
Off
Button pressed
and held for five seconds
Enabled
Enabled
Off
Return to
Default
Button pressed
when in Trac-
tion Control Off or AdvanceTrac Off
Note: Do not use the AdvanceTrac Off
setting on public roadways.
227
Explorer (CTW) Canada/United States of America, enUSA, Edition date: 201902, Third-Printing- Stability Control
Page 231 of 555
WHAT IS HILL DESCENT
CONTROL
WARNING: Hill descent control
cannot control descent in all surface
conditions and circumstances, such as
ice or extremely steep grades. Hill
descent control is a driver assist system
and cannot substitute for good judgment
by the driver. Failure to do so may result
in loss of vehicle control, crash or serious
injury. WARNING:
The system does not
replace the parking brake. When you
leave your vehicle, always apply the
parking brake and shift the transmission
into park (P) for automatic transmission
or first gear for manual transmission.
Note: The system does not function below
3 mph (5 km/h)
.
Hill descent control allows the driver to set
and maintain vehicle speed while
descending steep slopes in various surface
conditions.
The system can maintain vehicle speeds
on downhill slopes between
3– 20 mph
(5– 32 km/h). Above 20 mph (32 km/h),
the system remains on but the descent
speed cannot be set or maintained.
The system requires a cool down interval
after a period of sustained use. The
amount of time that the system can
remain active before cooling varies with
conditions. The system provides a warning
in the message center and a tone sounds
when the system is about to disengage for
cooling. At this time, manually apply the
brakes as needed to maintain descent
speed. SWITCHING HILL DESCENT
CONTROL ON AND OFF Press the button on the center
console. A light illuminates in the
control and a tone sounds when
the system is active.
SETTING THE HILL DESCENT
SPEED WARNING:
The system does not
replace the parking brake. When you
leave your vehicle, always apply the
parking brake and shift the transmission
into park (P) for automatic transmission
or first gear for manual transmission. WARNING:
The system does not
control speed in low traction conditions
or extremely steep slopes. The system
is designed to be an aid and does not
relieve you of your responsibility to drive
with due care and attention. Failure to
follow this instruction could result in
personal injury.
To increase the descent speed, press the
accelerator pedal until you reach the speed
you prefer.
To decrease the descent speed, press the
brake pedal until you reach the speed you
prefer.
When you reach the speed you prefer,
either by accelerating or decelerating,
remove your feet from the pedals. The
system maintains the chosen vehicle
speed.
228
Explorer (CTW) Canada/United States of America, enUSA, Edition date: 201902, Third-Printing- Hill Descent Control
Page 237 of 555
When you shift into neutral (N), the system
only provides visual indication if your
vehicle is moving at a speed of
approximately 5 mph (8 km/h) or below,
for example, your vehicle is moving on a
slope, and the system detects an object
moving toward your vehicle. When you
stop your vehicle, visual indication stops
after four seconds.
SIDE SENSING SYSTEM
(IF
EQUIPPED) WARNING:
The system may not
detect objects with surfaces that absorb
reflection. Always drive with due care
and attention. Failure to take care may
result in a crash. WARNING:
The system may not
detect small or moving objects,
particularly those close to the ground. WARNING:
To help avoid personal
injury, always use caution when in
reverse (R) and when using the sensing
system. WARNING:
The parking aid system
can only assist you to detect objects
when your vehicle is moving at parking
speeds. To help avoid personal injury you
must take care when using the parking
aid system.
Note: Keep the sensors free from snow, ice
and large accumulations of dirt.
Note: Do not cover up the sensors.
Note: Do not clean the sensors with sharp
objects.
Note: If your vehicle sustains damage
leaving the sensors misaligned, this may
cause inaccurate measurements or false
alerts. Note:
If you switch traction control off, the
side sensing system also turns off.
Note: Some accessories, for example large
trailer hitches or bike or surfboard racks can
cause reduced performance or false alerts.
Note: The system does not detect an object
that is moving toward the side of your
vehicle, for example another vehicle moving
at low speed, if it does not pass a front or
rear sensor.
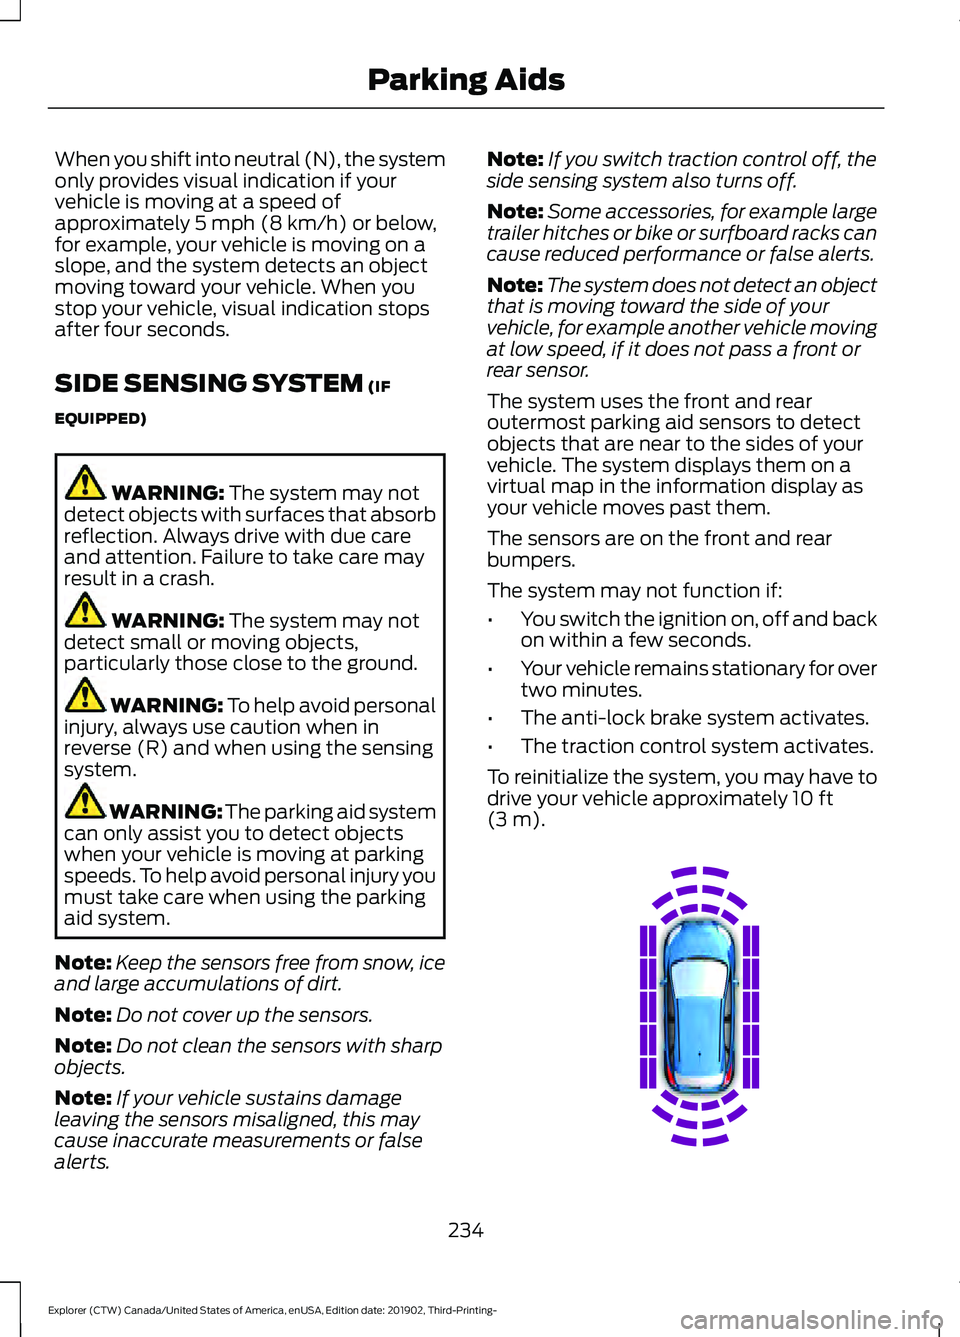
The system uses the front and rear
outermost parking aid sensors to detect
objects that are near to the sides of your
vehicle. The system displays them on a
virtual map in the information display as
your vehicle moves past them.
The sensors are on the front and rear
bumpers.
The system may not function if:
• You switch the ignition on, off and back
on within a few seconds.
• Your vehicle remains stationary for over
two minutes.
• The anti-lock brake system activates.
• The traction control system activates.
To reinitialize the system, you may have to
drive your vehicle approximately 10 ft
(3 m). 234
Explorer (CTW) Canada/United States of America, enUSA, Edition date: 201902, Third-Printing- Parking AidsE190458
Page 240 of 555
4. Release the steering wheel and shift
into neutral (N).
5. Release the parking brake.
6. Press and hold the active park assist button.
7. Release the brake pedal to allow the vehicle to move.
Note: You can slow down your vehicle at
any time by pressing the brake pedal.
Note: After the system drives your vehicle
to a position where you can exit the parking
space in a forward movement, a message
appears instructing you to take full control
of your vehicle. Canceling Active Park Assist
To cancel parking assistance at any time,
shift out of neutral (N).
Note:
If you turn the steering wheel or open
the driver door the parking assistance also
cancels.
Pausing Active Park Assist
To pause parking assistance at any time,
release the active park assist button.
The vehicle stops moving until you press
and hold the active park assist button
again.
Note: If you open the passenger or rear
doors the parking assistance also pauses.
Active Park Assist Troubleshooting Possible Cause
Symptom
The system is unable to detect a vehicle, curb or object
to park next to, or in-between.
The system does not correctly
operate.
You may have switched traction control off.
The system does not search for
a parking space.
The transmission is in reverse (R). Your vehicle must
be moving forward to be able to detect a parking space.
The sensors may be blocked. For example, snow, ice
or large accumulations of dirt. Blocked sensors can
affect how the system functions.
The system does not offer a
parking space.
The sensors in the front or rear bumper could be
damaged.
There is not enough room in the parking space for your
vehicle to safely park.
There is not enough space for the parking maneuver on
the opposite side of the parking space.
The parking space is more than 5 ft (1.5 m) or less than
2 ft (0.5 m) away.
The vehicle speed is greater than
22 mph (35 km/h)
for parallel parking or greater than 19 mph (30 km/h)
for perpendicular parking.
237
Explorer (CTW) Canada/United States of America, enUSA, Edition date: 201902, Third-Printing- Parking Aids
Page 250 of 555
WARNING: Pay close attention to
changing road conditions such as
entering or leaving a highway, on roads
with intersections or roundabouts, roads
without visible lanes of travel, roads that
are winding, slippery, unpaved, or steep
slopes. WARNING:
The system does not
control speed in low traction conditions
or extremely steep slopes. The system
is designed to be an aid and does not
relieve you of your responsibility to drive
with due care and attention. Failure to
follow this instruction could result in
personal injury. WARNING:
The system is not a
crash warning or avoidance system. WARNING:
Do not use the system
when towing a trailer that has
aftermarket electronic trailer brake
controls. Failure to follow this instruction
could result in the loss of control of your
vehicle, personal injury or death. WARNING:
Do not use tire sizes
other than those recommended because
this can affect the normal operation of
the system. Failure to do so may result
in a loss of vehicle control, which could
result in serious injury. WARNING:
Do not use the system
with a snow plow blade installed. WARNING:
Do not use the system
in poor visibility, for example fog, heavy
rain, spray or snow. When Following a Vehicle WARNING:
When following a
vehicle that is braking, your vehicle does
not always decelerate quickly enough to
avoid a crash without driver intervention.
Apply the brakes when necessary. Failure
to follow this instruction could result in
personal injury or death.
Hilly Condition Usage
You should select a lower gear when the
system is active in situations such as
prolonged downhill driving on steep
grades, for example in mountainous areas.
The system needs additional engine
braking in these situations to reduce the
load on the vehicle ’s regular brake system
to prevent it from overheating.
Note: An audible alarm sounds and the
system shuts down if it applies brakes for
an extended period of time. This allows the
brakes to cool. The system functions
normally again after the brakes cool.
ADAPTIVE CRUISE CONTROL
LIMITATIONS - VEHICLES
WITH: ADAPTIVE CRUISE
CONTROL WITH LANE
CENTERING
Adaptive cruise control limitations apply
to lane centering unless stated otherwise
or contradicted by a lane centering
limitation. See Adaptive Cruise Control
Limitations
(page 248).
The system may not correctly operate in
any of the following conditions:
• Your vehicle is not centered in the lane.
• The lane is too narrow or wide.
247
Explorer (CTW) Canada/United States of America, enUSA, Edition date: 201902, Third-Printing- Adaptive Cruise Control
(If Equipped)
Page 253 of 555
Optimal system performance requires a
clear view of the road by the
windshield-mounted camera.
Optimal performance may not occur if:
•
The camera is blocked.
• There is poor visibility or lighting
conditions.
• There are bad weather conditions.
SWITCHING ADAPTIVE
CRUISE CONTROL ON AND OFF
The cruise controls are on the steering
wheel. See Cruise Control (page 83).
Switching Adaptive Cruise Control
On Press to set the system in
standby mode.
The indicator, current gap setting and set
speed appear in the information display.
Switching Adaptive Cruise Control
Off Press when the system is in
standby mode, or switch the
ignition off.
Note: You erase the set speed and gap
setting when you switch the system off.
Automatic Cancellation or
Deactivation
The system may cancel if:
• The tires lose traction.
• You apply the parking brake. The system may cancel and set the parking
brake if:
•
You unbuckle the seatbelt and open
the driver door after you stop your
vehicle.
• Your vehicle is held at a stop
continuously for more than three
minutes.
The system may deactivate or prevent
activating when requested if:
• A sensor is blocked.
• The brake temperature is too high.
• There is a failure in the system or a
related system.
SETTING THE ADAPTIVE
CRUISE CONTROL SPEED
Drive to the speed you prefer. Press the toggle button upward
or downward to set the current
speed.
Take your foot off the accelerator pedal.
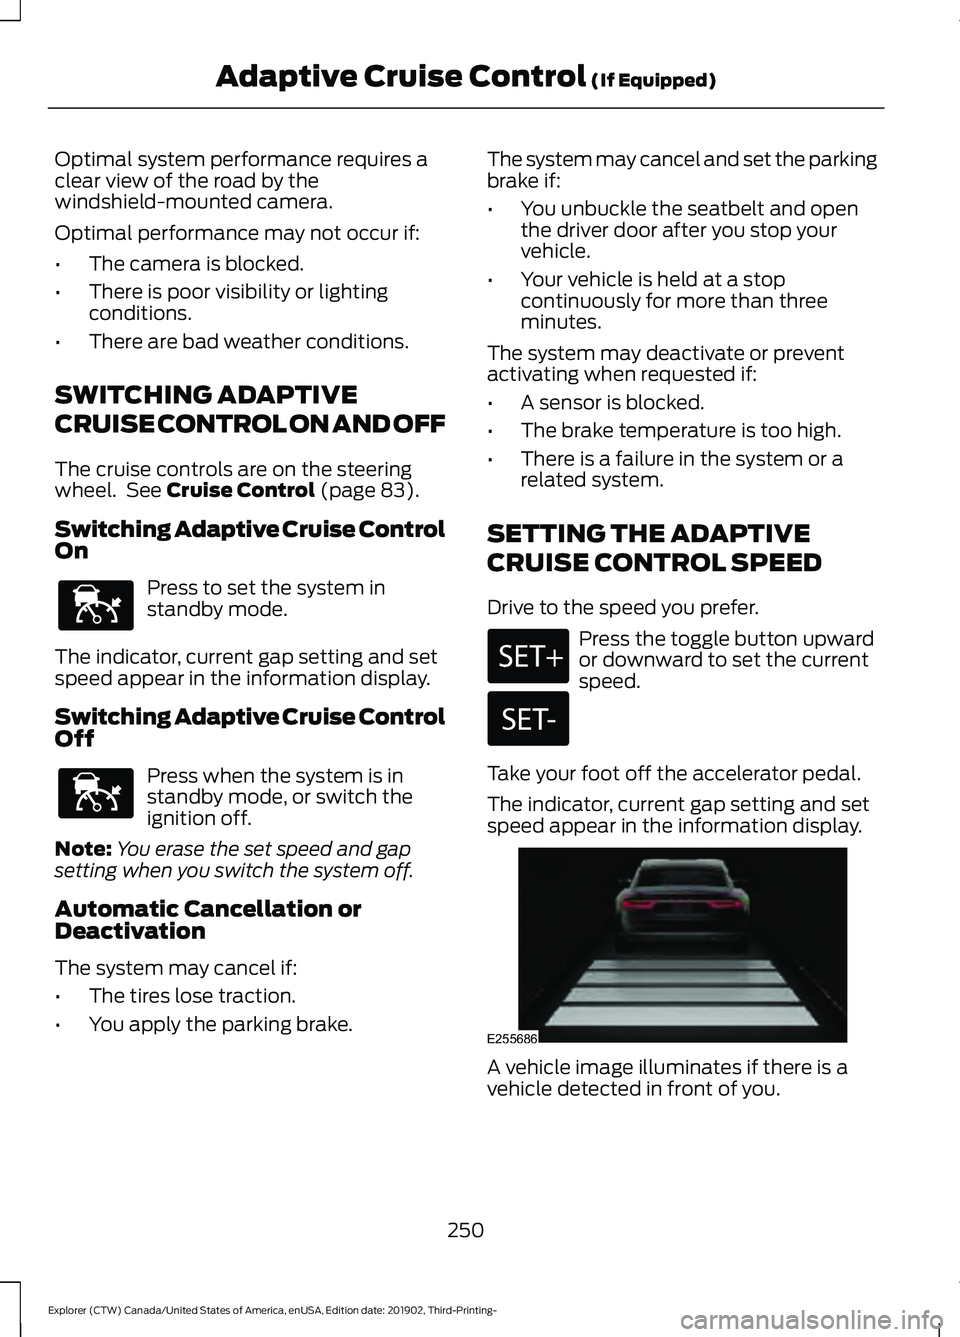
The indicator, current gap setting and set
speed appear in the information display. A vehicle image illuminates if there is a
vehicle detected in front of you.
250
Explorer (CTW) Canada/United States of America, enUSA, Edition date: 201902, Third-Printing- Adaptive Cruise Control
(If Equipped)E144529 E144529 E255686
Page 282 of 555
WHAT IS DRIVE MODE
CONTROL
The system delivers a driving experience
through a suite of sophisticated electronic
vehicle systems. These systems optimize
steering, handling and powertrain
response. This provides a single location
to control multiple systems performance
settings.
Changing the drive mode changes the
functionality of the following systems:
•
Electric power-assisted steering
system adjusts steering effort and feel
based on the mode you select. See
Steering (page 273).
• Electronic stability control and traction
control maintain your vehicle control
in adverse conditions or high
performance driving. See
Stability
Control (page 225).
• Electronic throttle control enhances
the powertrain response to your driving
inputs.
• Transmission controls become
optimized with shift schedules tuned
to each mode.
• Four-wheel drive settings are optimized
and tuned to each mode.
• Electric vehicle mode selections may
be limited. See
Hybrid Vehicle
Operation (page 182).
The system tailors your vehicle
configuration for each mode you select.
Note: Not all settings may be available.
Note: The system has diagnostic checks
that continuously monitor the system for
proper operation. If a mode is unavailable
due to a system fault or change in gear
shifter position, the mode defaults to
Normal. SELECTING A DRIVE MODE
Note:
Drive mode changes may not be
available when the ignition is off or when
the engine is not running.
Note: Button icons shown may vary from
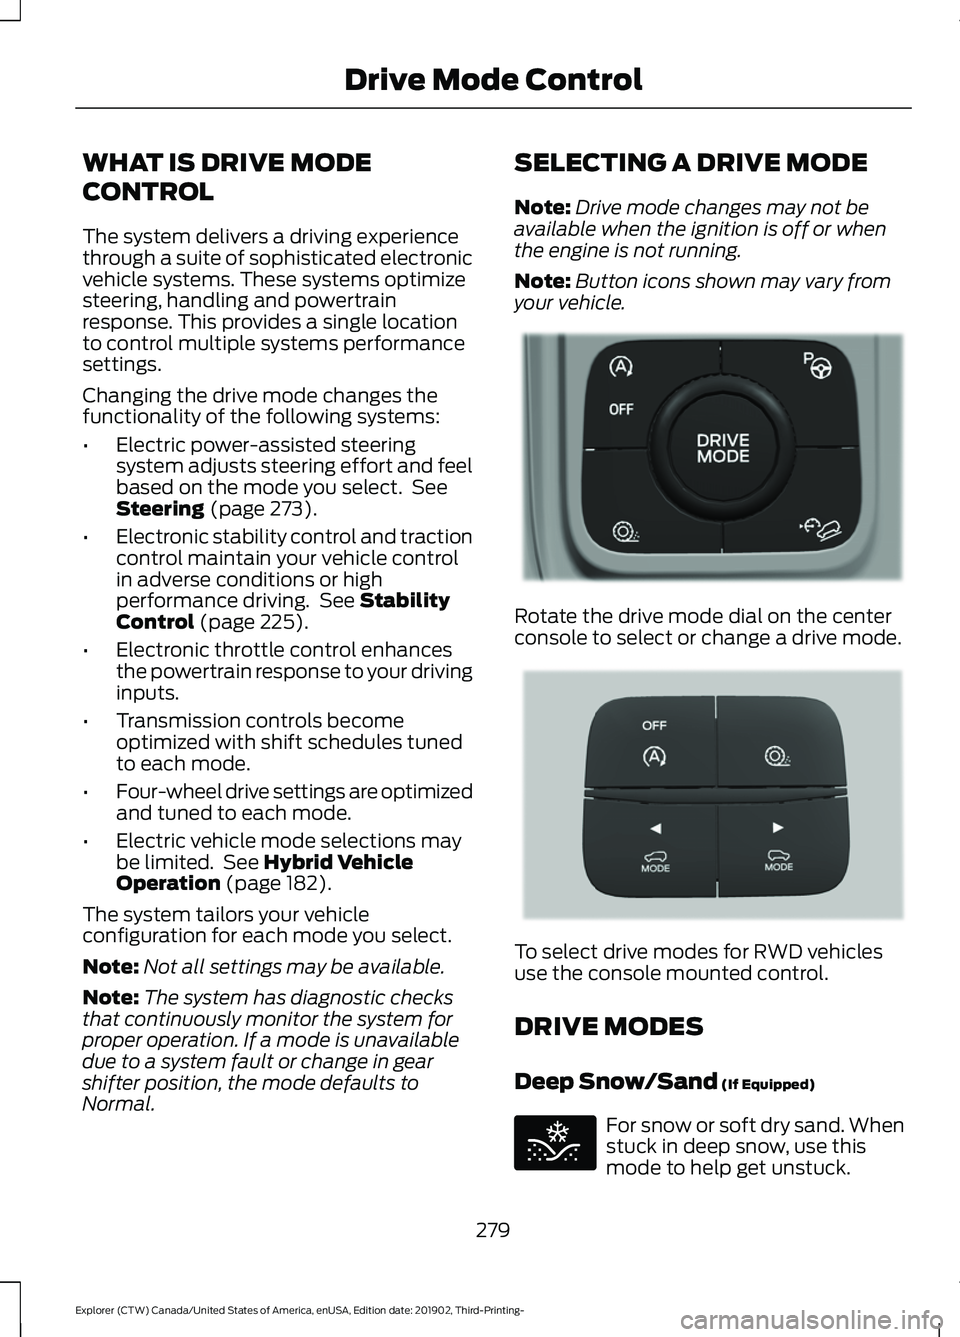
your vehicle. Rotate the drive mode dial on the center
console to select or change a drive mode.
To select drive modes for RWD vehicles
use the console mounted control.
DRIVE MODES
Deep Snow/Sand
(If Equipped)
For snow or soft dry sand. When
stuck in deep snow, use this
mode to help get unstuck.
279
Explorer (CTW) Canada/United States of America, enUSA, Edition date: 201902, Third-Printing- Drive Mode ControlE298238 E297643 E295420
Page 301 of 555
When driving through standing water, drive
very slowly and do not stop your vehicle.
Your brake performance and traction may
be limited. After driving through water and
as soon as it is safe to do so:
•
Lightly press the brake pedal to dry the
brakes and to check that they work.
• Check that the horn works.
• Check that the exterior lights work.
• Turn the steering wheel to check that
the steering power assist works.
FLOOR MATS WARNING: Use a floor mat
designed to fit the footwell of your
vehicle that does not obstruct the pedal
area. Failure to follow this instruction
could result in the loss of control of your
vehicle, personal injury or death. WARNING:
Pedals that cannot
move freely can cause loss of vehicle
control and increase the risk of serious
personal injury. WARNING:
Secure the floor mat
to both retention devices so that it
cannot slip out of position and interfere
with the pedals. Failure to follow this
instruction could result in the loss of
control of your vehicle, personal injury or
death. WARNING: Do not place additional
floor mats or any other covering on top
of the original floor mats. This could
result in the floor mat interfering with the
operation of the pedals. Failure to follow
this instruction could result in the loss of
control of your vehicle, personal injury or
death. WARNING:
Always make sure that
objects cannot fall into the driver foot
well while your vehicle is moving. Objects
that are loose can become trapped
under the pedals causing a loss of
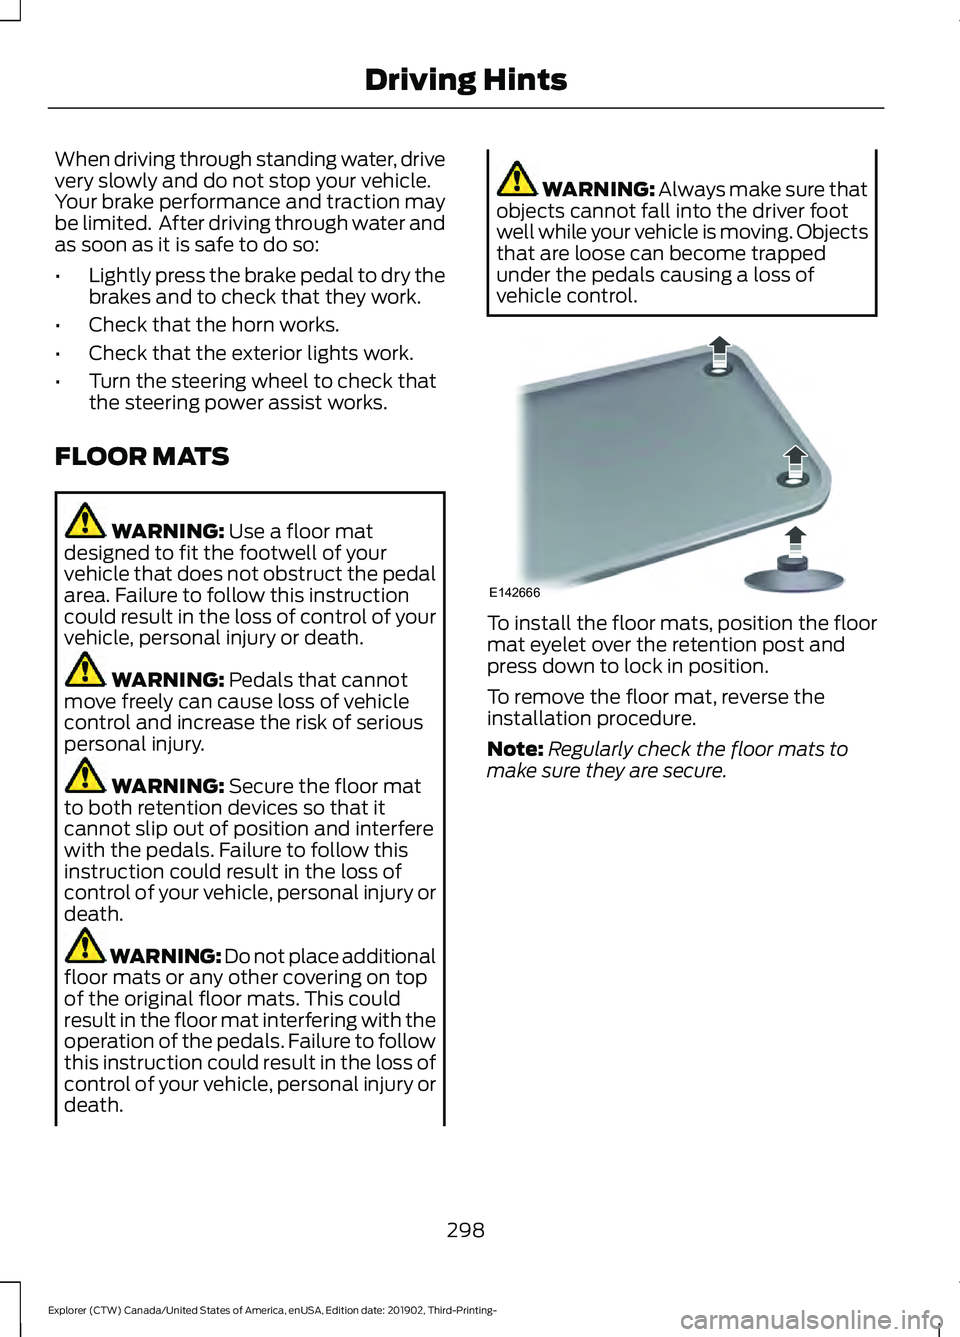
vehicle control. To install the floor mats, position the floor
mat eyelet over the retention post and
press down to lock in position.
To remove the floor mat, reverse the
installation procedure.
Note:
Regularly check the floor mats to
make sure they are secure.
298
Explorer (CTW) Canada/United States of America, enUSA, Edition date: 201902, Third-Printing- Driving HintsE142666