FORD EXPLORER 2020 Owners Manual
Manufacturer: FORD, Model Year: 2020, Model line: EXPLORER, Model: FORD EXPLORER 2020Pages: 555, PDF Size: 8.16 MB
Page 241 of 555
Possible Cause
Symptom
You recently disconnected or replaced the battery. After
you reconnect the battery you must drive your vehicle
on a straight road for a short period of time.
An irregular curb along the parking space prevents the
system from correctly aligning your vehicle.
The system does not correctly
position your vehicle in a
parking space.
Vehicles or objects bordering the space may not be
correctly parked.
Your vehicle stopped too far past the parking space.
The tires may not be correctly installed or maintained.
For example, not inflated correctly, improper size, or of
different sizes.
A repair or alteration changes the detection capabilities.
A parked vehicle has a high attachment. For example,
a salt sprayer, snowplow or moving truck bed.
The parking space length or position of parked objects
changes after your vehicle passes the space.
You are using a spare tire or a tire that is significantly
worn more than the other tires.
The temperature around your vehicle quickly changes.
For example, driving from a heated garage into cold
outside temperature, or after leaving a car wash.
REAR VIEW CAMERA WARNING: The rear view camera
system is a reverse aid supplement
device that still requires the driver to use
it in conjunction with the interior and
exterior mirrors for maximum coverage. WARNING:
Objects that are close
to either corner of the bumper or under
the bumper, might not be seen on the
screen due to the limited coverage of the
camera system. WARNING:
Reverse your vehicle
slowly. Failure to follow this instruction
could result in the loss of control of your
vehicle, personal injury or death. WARNING:
Use caution when the
rear cargo door is ajar. If the rear cargo
door is ajar, the camera will be out of
position and the video image may be
incorrect. All guidelines disappear when
the rear cargo door is ajar. Failure to
follow this instruction could result in
personal injury.
238
Explorer (CTW) Canada/United States of America, enUSA, Edition date: 201902, Third-Printing- Parking Aids
Page 242 of 555
WARNING: Use caution when
turning camera features on or off when
the transmission is not in park (P). Make
sure your vehicle is not moving.
Note: Some vehicles may not come
equipped with guidelines.
The rear view camera system provides a
video image of the area behind your
vehicle.
During operation, lines appear in the
display which represent your vehicle ’s path
and proximity to objects behind your
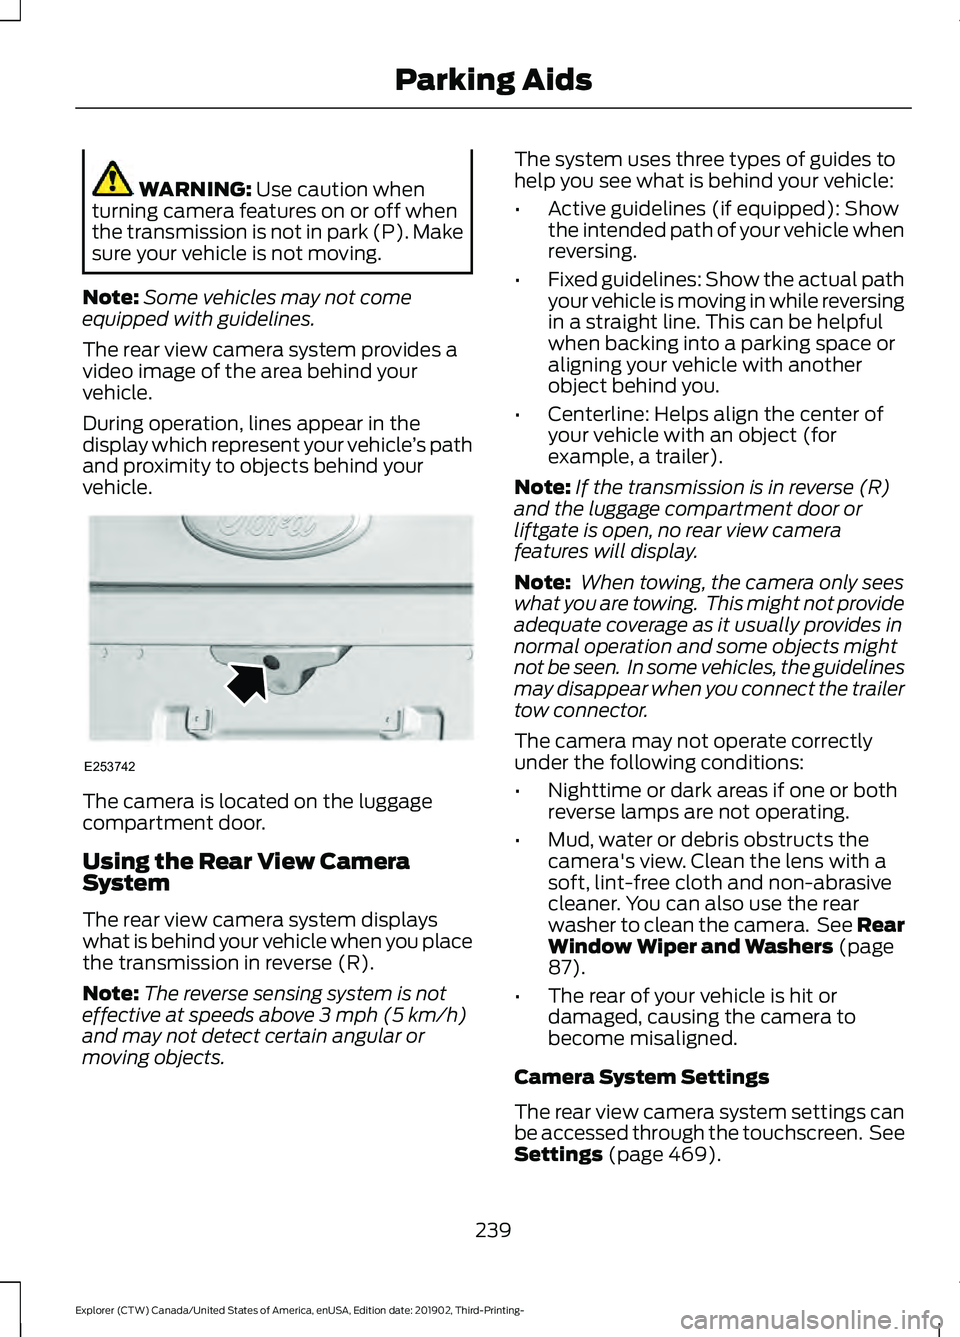
vehicle. The camera is located on the luggage
compartment door.
Using the Rear View Camera
System
The rear view camera system displays
what is behind your vehicle when you place
the transmission in reverse (R).
Note:
The reverse sensing system is not
effective at speeds above
3 mph (5 km/h)
and may not detect certain angular or
moving objects. The system uses three types of guides to
help you see what is behind your vehicle:
•
Active guidelines (if equipped): Show
the intended path of your vehicle when
reversing.
• Fixed guidelines: Show the actual path
your vehicle is moving in while reversing
in a straight line. This can be helpful
when backing into a parking space or
aligning your vehicle with another
object behind you.
• Centerline: Helps align the center of
your vehicle with an object (for
example, a trailer).
Note: If the transmission is in reverse (R)
and the luggage compartment door or
liftgate is open, no rear view camera
features will display.
Note: When towing, the camera only sees
what you are towing. This might not provide
adequate coverage as it usually provides in
normal operation and some objects might
not be seen. In some vehicles, the guidelines
may disappear when you connect the trailer
tow connector.
The camera may not operate correctly
under the following conditions:
• Nighttime or dark areas if one or both
reverse lamps are not operating.
• Mud, water or debris obstructs the
camera's view. Clean the lens with a
soft, lint-free cloth and non-abrasive
cleaner. You can also use the rear
washer to clean the camera. See Rear
Window Wiper and Washers
(page
87).
• The rear of your vehicle is hit or
damaged, causing the camera to
become misaligned.
Camera System Settings
The rear view camera system settings can
be accessed through the touchscreen. See
Settings
(page 469).
239
Explorer (CTW) Canada/United States of America, enUSA, Edition date: 201902, Third-Printing- Parking AidsE253742
Page 243 of 555
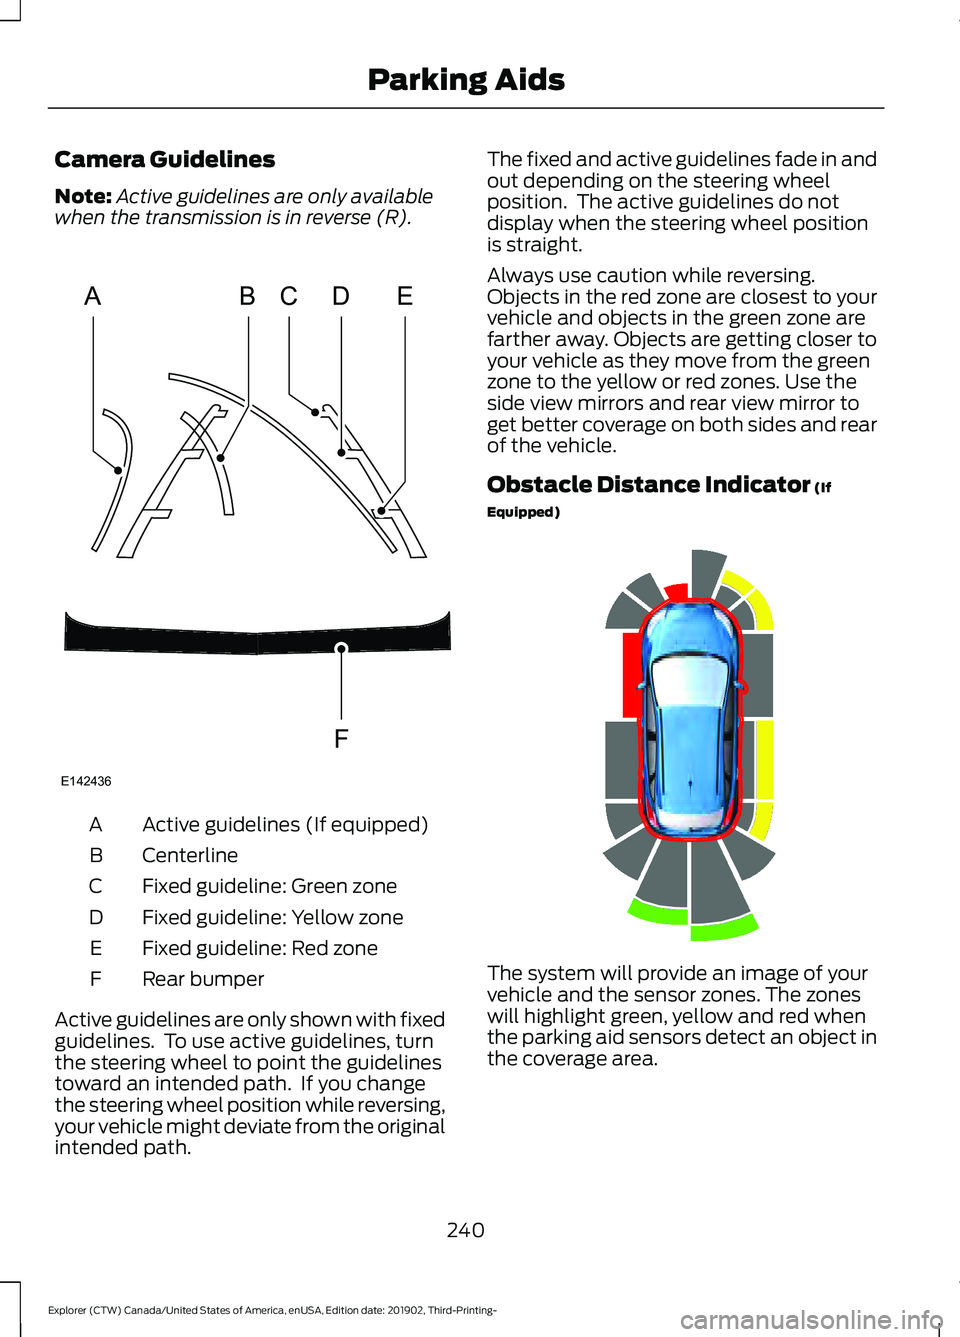
Camera Guidelines
Note:
Active guidelines are only available
when the transmission is in reverse (R). Active guidelines (If equipped)
A
Centerline
B
Fixed guideline: Green zone
C
Fixed guideline: Yellow zone
D
Fixed guideline: Red zone
E
Rear bumper
F
Active guidelines are only shown with fixed
guidelines. To use active guidelines, turn
the steering wheel to point the guidelines
toward an intended path. If you change
the steering wheel position while reversing,
your vehicle might deviate from the original
intended path. The fixed and active guidelines fade in and
out depending on the steering wheel
position. The active guidelines do not
display when the steering wheel position
is straight.
Always use caution while reversing.
Objects in the red zone are closest to your
vehicle and objects in the green zone are
farther away. Objects are getting closer to
your vehicle as they move from the green
zone to the yellow or red zones. Use the
side view mirrors and rear view mirror to
get better coverage on both sides and rear
of the vehicle.
Obstacle Distance Indicator (If
Equipped) The system will provide an image of your
vehicle and the sensor zones. The zones
will highlight green, yellow and red when
the parking aid sensors detect an object in
the coverage area.
240
Explorer (CTW) Canada/United States of America, enUSA, Edition date: 201902, Third-Printing- Parking AidsABCD
F
E
E142436 E190459
Page 244 of 555
Manual Zoom
WARNING: When manual zoom is
on, the full area behind your vehicle may
not show. Be aware of your surroundings
when using the manual zoom feature.
Note: Manual zoom is only available when
the transmission is in reverse (R).
Note: When you enable manual zoom, only
the centerline is shown.
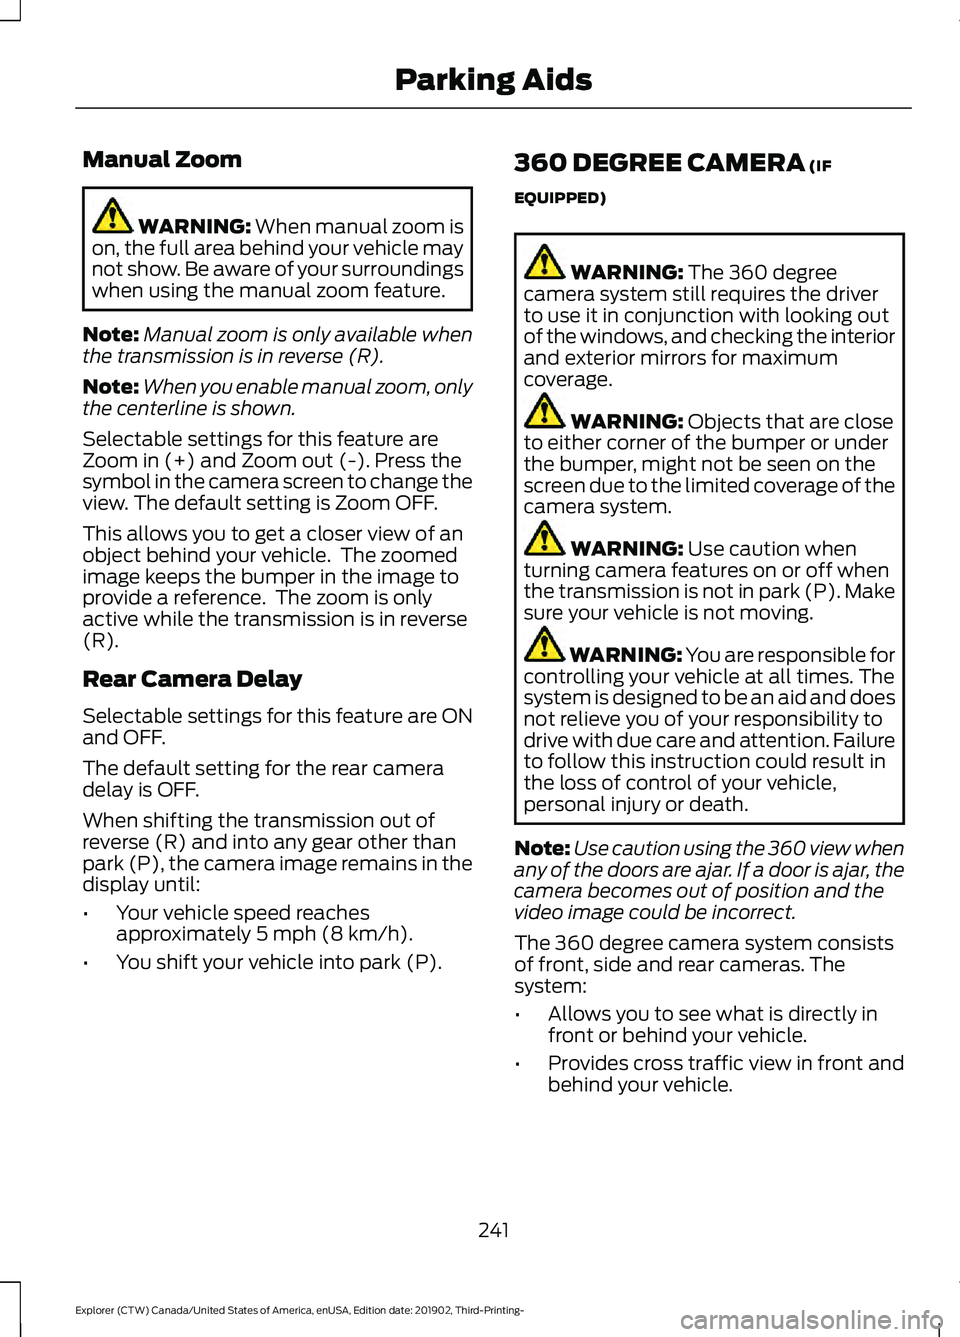
Selectable settings for this feature are
Zoom in (+) and Zoom out (-). Press the
symbol in the camera screen to change the
view. The default setting is Zoom OFF.
This allows you to get a closer view of an
object behind your vehicle. The zoomed
image keeps the bumper in the image to
provide a reference. The zoom is only
active while the transmission is in reverse
(R).
Rear Camera Delay
Selectable settings for this feature are ON
and OFF.
The default setting for the rear camera
delay is OFF.
When shifting the transmission out of
reverse (R) and into any gear other than
park (P), the camera image remains in the
display until:
• Your vehicle speed reaches
approximately
5 mph (8 km/h).
• You shift your vehicle into park (P). 360 DEGREE CAMERA
(IF
EQUIPPED) WARNING:
The 360 degree
camera system still requires the driver
to use it in conjunction with looking out
of the windows, and checking the interior
and exterior mirrors for maximum
coverage. WARNING:
Objects that are close
to either corner of the bumper or under
the bumper, might not be seen on the
screen due to the limited coverage of the
camera system. WARNING:
Use caution when
turning camera features on or off when
the transmission is not in park (P). Make
sure your vehicle is not moving. WARNING: You are responsible for
controlling your vehicle at all times. The
system is designed to be an aid and does
not relieve you of your responsibility to
drive with due care and attention. Failure
to follow this instruction could result in
the loss of control of your vehicle,
personal injury or death.
Note: Use caution using the 360 view when
any of the doors are ajar. If a door is ajar, the
camera becomes out of position and the
video image could be incorrect.
The 360 degree camera system consists
of front, side and rear cameras. The
system:
• Allows you to see what is directly in
front or behind your vehicle.
• Provides cross traffic view in front and
behind your vehicle.
241
Explorer (CTW) Canada/United States of America, enUSA, Edition date: 201902, Third-Printing- Parking Aids
Page 245 of 555
•
Allows you to see a top-down view of
the area outside your vehicle, including
the blind spots.
• Provides you with visibility around your
vehicle in parking maneuvers such as:
•Centering in a parking space.
• Obstacles near the vehicle.
• Parallel parking. The front camera enable button
is near the display screen and
turns on the front camera when
your vehicle is not in reverse (R).
Using the System
Note: The 360 degree camera system turns
off when your vehicle is in motion at low
speed, except when in reverse (R).
The front and rear cameras have multiple
screens which consist of normal view with
360, normal view, and split view. When in
park (P), neutral (N) or drive (D), only the
front images display when you press the
button. When in reverse (R), only the rear
images display. Press to access the different
camera views.
Normal + 360 view: Contains
the normal camera view next to
a 360 degree camera view. Normal view:
Provides an
image of what is directly in front
or behind your vehicle. Split view:
Provides an
extended view of what is in front
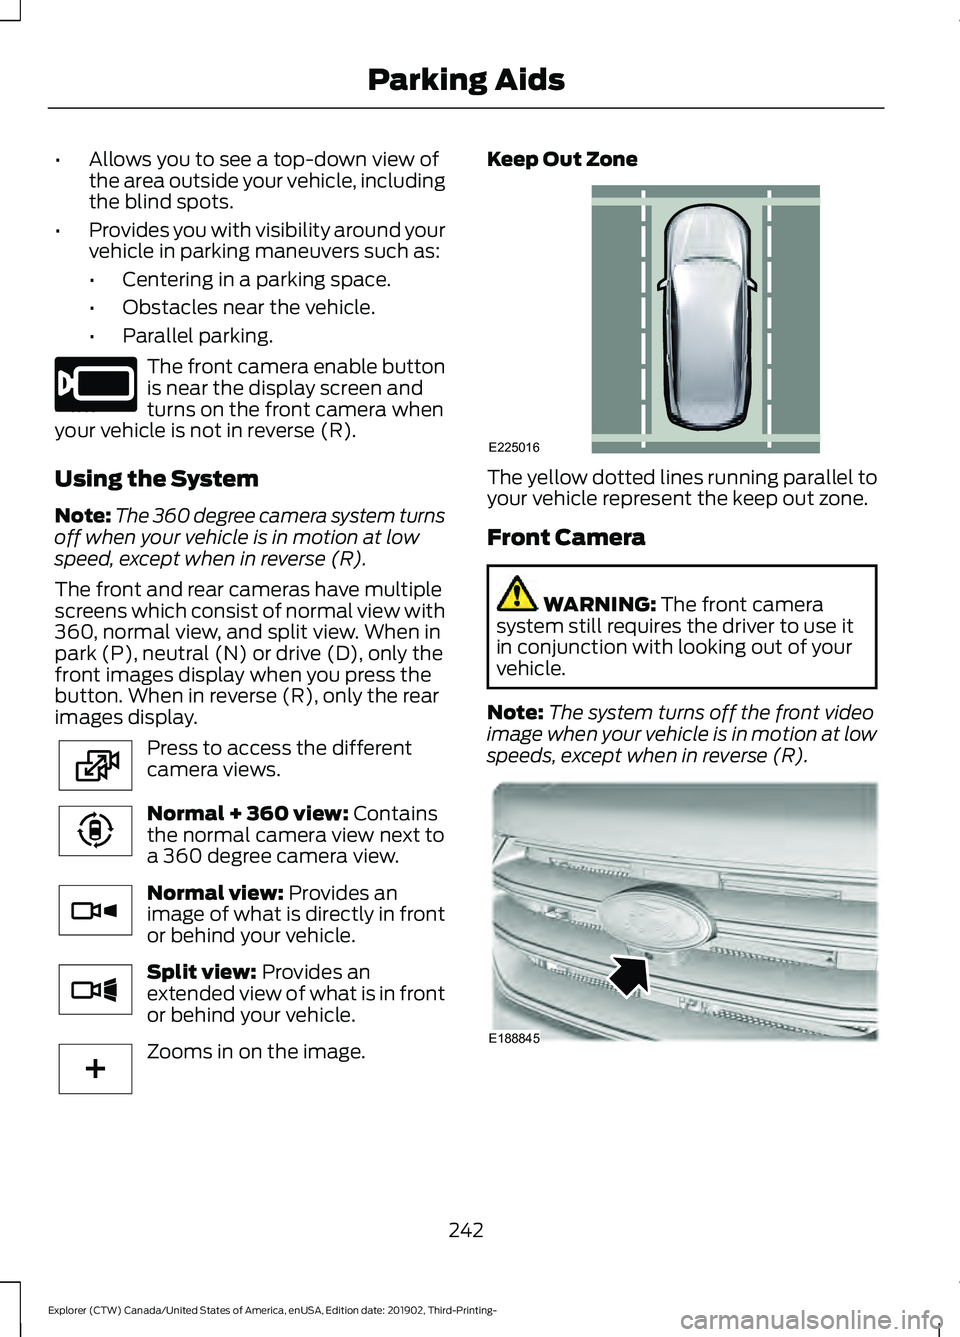
or behind your vehicle. Zooms in on the image. Keep Out Zone
The yellow dotted lines running parallel to
your vehicle represent the keep out zone.
Front Camera
WARNING:
The front camera
system still requires the driver to use it
in conjunction with looking out of your
vehicle.
Note: The system turns off the front video
image when your vehicle is in motion at low
speeds, except when in reverse (R). 242
Explorer (CTW) Canada/United States of America, enUSA, Edition date: 201902, Third-Printing- Parking AidsE205884 E224483 E224783 E224784 E224785 E224485 E225016 E188845
Page 246 of 555
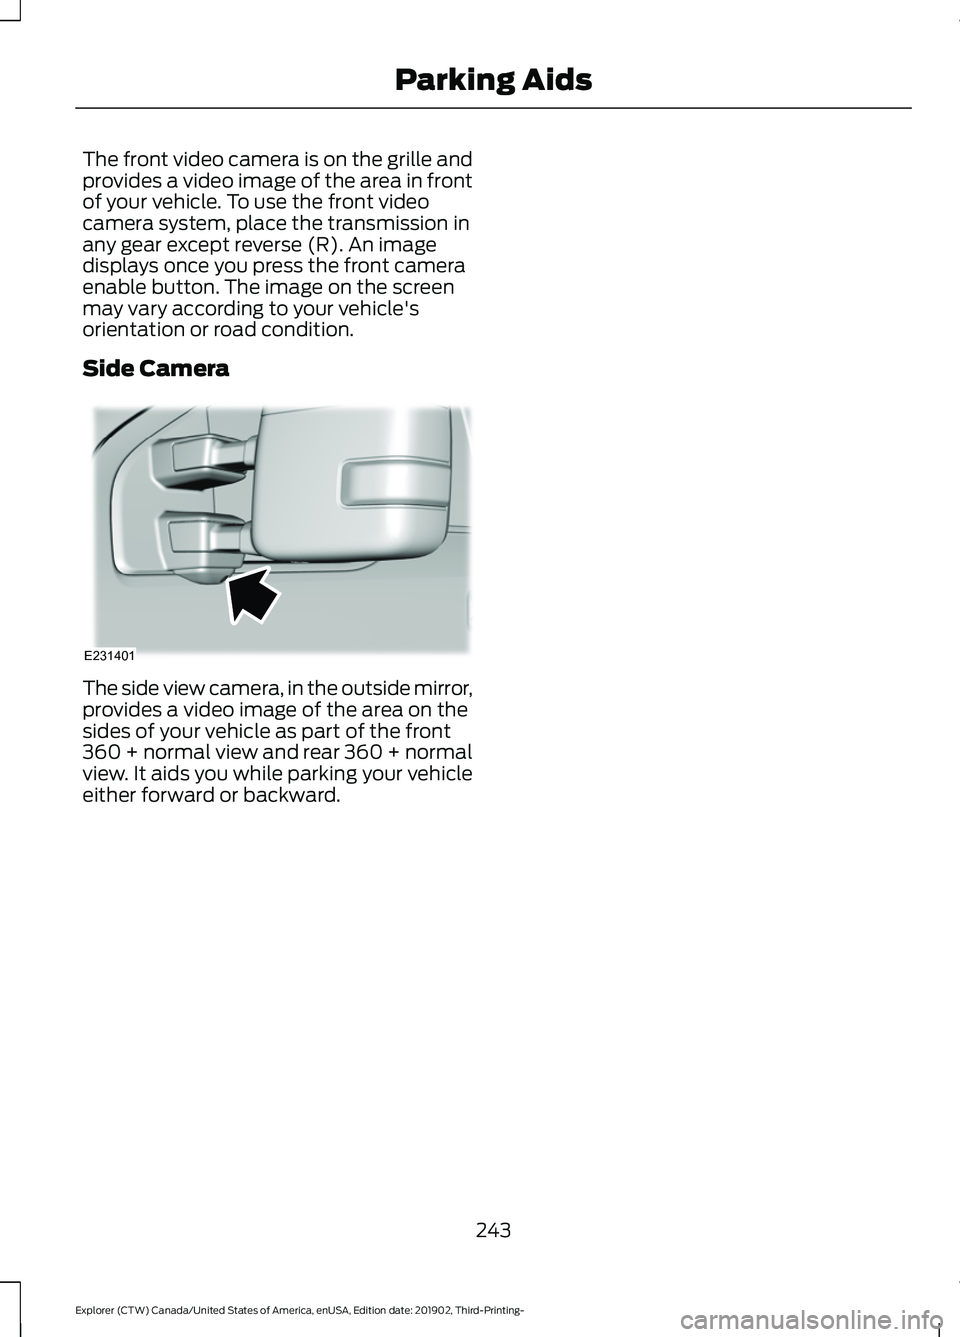
The front video camera is on the grille and
provides a video image of the area in front
of your vehicle. To use the front video
camera system, place the transmission in
any gear except reverse (R). An image
displays once you press the front camera
enable button. The image on the screen
may vary according to your vehicle's
orientation or road condition.
Side Camera
The side view camera, in the outside mirror,
provides a video image of the area on the
sides of your vehicle as part of the front
360 + normal view and rear 360 + normal
view. It aids you while parking your vehicle
either forward or backward.
243
Explorer (CTW) Canada/United States of America, enUSA, Edition date: 201902, Third-Printing- Parking AidsE231401
Page 247 of 555
WHAT IS CRUISE CONTROL
Cruise control lets you maintain a set
speed without keeping your foot on the
accelerator pedal. You can use cruise
control when your vehicle speed is greater
than 20 mph (30 km/h).
SWITCHING CRUISE CONTROL
ON AND OFF WARNING:
Do not use cruise
control on winding roads, in heavy traffic
or when the road surface is slippery. This
could result in loss of vehicle control,
serious injury or death.
The cruise controls are on the steering
wheel. See
Cruise Control (page 83).
Switching Cruise Control On Press to set the system in
standby mode.
Switching Cruise Control Off Press the button when the
system is in standby mode.
The system also turns off when you switch
the ignition off.
Note: The set speed erases when you
switch the system off. SETTING THE CRUISE
CONTROL SPEED WARNING:
When you are going
downhill, your vehicle speed could
increase above the set speed. The
system does not apply the brakes.
Drive to the speed you prefer. Press the toggle button upward
or downward to set the current
speed.
Take your foot off the accelerator pedal.
Note: The indicator changes color in the
information display.
Changing the Set Speed Press and release the toggle
button upward to increase the
set speed in small increments.
Press and hold the toggle button upward
to accelerate. Release the button when
you have reached your preferred speed. Press and release the toggle
button downward to decrease
the set speed in small
increments.
Press and hold the toggle button
downward to decelerate. Release the
button when you have reached your
preferred speed.
Note: If you accelerate by pressing the
accelerator pedal, the set speed does not
change. When you release the accelerator
pedal, your vehicle returns to the speed that
you previously set.
244
Explorer (CTW) Canada/United States of America, enUSA, Edition date: 201902, Third-Printing- Cruise ControlE71340 E71340
Page 248 of 555
CANCELING THE SET SPEED
Press the button, or tap the
brake pedal to cancel the set
speed.
Note: The system remembers the set
speed.
Note: The system cancels if the vehicle
speed drops below 10 mph (16 km/h) under
the set speed when driving uphill.
RESUMING THE SET SPEED Press the button.
CRUISE CONTROL
INDICATORS Illuminates when you switch the
system on.
245
Explorer (CTW) Canada/United States of America, enUSA, Edition date: 201902, Third-Printing- Cruise ControlE280804 E71340
Page 249 of 555
HOW DOES ADAPTIVE CRUISE
CONTROL WITH STOP AND GO
WORK
Adaptive cruise control with stop and go
uses radar and camera sensors to adjust
the speed of your vehicle to maintain a set
gap from the vehicle in front of you in the
same lane while following it to a complete
stop. You can also engage the system to
follow a vehicle in front of you and adjust
set speed while stopped.
WHAT IS ADAPTIVE CRUISE
CONTROL WITH LANE
CENTERING
Adaptive cruise control with lane centering
uses radar and camera sensors to help
keep your vehicle in the lane by applying
continuous assistance steering torque
input toward the lane center on highways.
Note:
The adaptive cruise control gap
setting operates normally.
WHAT IS INTELLIGENT
ADAPTIVE CRUISE CONTROL
Intelligent adaptive cruise control
combines speed sign recognition with
adaptive cruise control to adjust the cruise
set speed to the speed limit detected by
the speed sign recognition system. For
example, if the speed sign recognition
system detects a 50 mph (80 km/h)
speed limit, the cruise set speed is updated
to
50 mph (80 km/h).
Note: The adaptive cruise control gap
setting operates normally. ADAPTIVE CRUISE CONTROL
PRECAUTIONS - VEHICLES
WITH: ADAPTIVE CRUISE
CONTROL WITH LANE
CENTERING
Adaptive cruise control precautions apply
to lane centering unless stated otherwise
or contradicted by a lane centering
precaution. See Adaptive Cruise Control
Precautions
(page 246).
WARNING:
Do not use the system
when towing a trailer. Failure to follow
this instruction could result in the loss of
control of your vehicle, personal injury or
death. WARNING:
Do not use the system
if any changes or modifications to the
steering wheel have been made. Any
changes or modifications to the steering
wheel could affect the functionality or
performance of the system. Failure to
follow this instruction could result in the
loss of control of your vehicle, personal
injury or death.
ADAPTIVE CRUISE CONTROL
PRECAUTIONS - VEHICLES
WITH: ADAPTIVE CRUISE
CONTROL WITH STOP AND GO WARNING: You are responsible for
controlling your vehicle at all times. The
system is designed to be an aid and does
not relieve you of your responsibility to
drive with due care and attention. Failure
to follow this instruction could result in
the loss of control of your vehicle,
personal injury or death.
246
Explorer (CTW) Canada/United States of America, enUSA, Edition date: 201902, Third-Printing- Adaptive Cruise Control
(If Equipped)
Page 250 of 555
WARNING: Pay close attention to
changing road conditions such as
entering or leaving a highway, on roads
with intersections or roundabouts, roads
without visible lanes of travel, roads that
are winding, slippery, unpaved, or steep
slopes. WARNING:
The system does not
control speed in low traction conditions
or extremely steep slopes. The system
is designed to be an aid and does not
relieve you of your responsibility to drive
with due care and attention. Failure to
follow this instruction could result in
personal injury. WARNING:
The system is not a
crash warning or avoidance system. WARNING:
Do not use the system
when towing a trailer that has
aftermarket electronic trailer brake
controls. Failure to follow this instruction
could result in the loss of control of your
vehicle, personal injury or death. WARNING:
Do not use tire sizes
other than those recommended because
this can affect the normal operation of
the system. Failure to do so may result
in a loss of vehicle control, which could
result in serious injury. WARNING:
Do not use the system
with a snow plow blade installed. WARNING:
Do not use the system
in poor visibility, for example fog, heavy
rain, spray or snow. When Following a Vehicle WARNING:
When following a
vehicle that is braking, your vehicle does
not always decelerate quickly enough to
avoid a crash without driver intervention.
Apply the brakes when necessary. Failure
to follow this instruction could result in
personal injury or death.
Hilly Condition Usage
You should select a lower gear when the
system is active in situations such as
prolonged downhill driving on steep
grades, for example in mountainous areas.
The system needs additional engine
braking in these situations to reduce the
load on the vehicle ’s regular brake system
to prevent it from overheating.
Note: An audible alarm sounds and the
system shuts down if it applies brakes for
an extended period of time. This allows the
brakes to cool. The system functions
normally again after the brakes cool.
ADAPTIVE CRUISE CONTROL
LIMITATIONS - VEHICLES
WITH: ADAPTIVE CRUISE
CONTROL WITH LANE
CENTERING
Adaptive cruise control limitations apply
to lane centering unless stated otherwise
or contradicted by a lane centering
limitation. See Adaptive Cruise Control
Limitations
(page 248).
The system may not correctly operate in
any of the following conditions:
• Your vehicle is not centered in the lane.
• The lane is too narrow or wide.
247
Explorer (CTW) Canada/United States of America, enUSA, Edition date: 201902, Third-Printing- Adaptive Cruise Control
(If Equipped)