change time FORD EXPLORER 2021 Owner's Manual
[x] Cancel search | Manufacturer: FORD, Model Year: 2021, Model line: EXPLORER, Model: FORD EXPLORER 2021Pages: 577, PDF Size: 9.79 MB
Page 249 of 577
HOW DOES ADAPTIVE CRUISE
CONTROL WITH STOP AND GO
WORK
Adaptive cruise control with stop and go
uses radar and camera sensors to adjust
the speed of your vehicle to maintain a set
gap from the vehicle in front of you in the
same lane while following it to a complete
stop. You can also engage the system to
follow a vehicle in front of you and adjust
set speed while stopped.
WHAT IS ADAPTIVE CRUISE
CONTROL WITH LANE
CENTERING
Adaptive cruise control with lane centering
uses radar and camera sensors to help
keep your vehicle in the lane by applying
continuous assistance steering torque
input toward the lane center on highways.
Note:
The adaptive cruise control gap
setting operates normally.
WHAT IS INTELLIGENT
ADAPTIVE CRUISE CONTROL
Intelligent adaptive cruise control
combines speed sign recognition with
adaptive cruise control to adjust the cruise
set speed to the speed limit detected by
the speed sign recognition system. For
example, if the speed sign recognition
system detects a 50 mph (80 km/h)
speed limit, the cruise set speed is updated
to
50 mph (80 km/h).
Note: The adaptive cruise control gap
setting operates normally. ADAPTIVE CRUISE CONTROL
PRECAUTIONS - VEHICLES
WITH: ADAPTIVE CRUISE
CONTROL WITH LANE
CENTERING
Adaptive cruise control precautions apply
to lane centering unless stated otherwise
or contradicted by a lane centering
precaution. See Adaptive Cruise Control
Precautions
(page 246).
WARNING:
Do not use the system
when towing a trailer. Failure to follow
this instruction could result in the loss of
control of your vehicle, personal injury or
death. WARNING:
Do not use the system
if any changes or modifications to the
steering wheel have been made. Any
changes or modifications to the steering
wheel could affect the functionality or
performance of the system. Failure to
follow this instruction could result in the
loss of control of your vehicle, personal
injury or death.
ADAPTIVE CRUISE CONTROL
PRECAUTIONS - VEHICLES
WITH: ADAPTIVE CRUISE
CONTROL WITH STOP AND GO WARNING: You are responsible for
controlling your vehicle at all times. The
system is designed to be an aid and does
not relieve you of your responsibility to
drive with due care and attention. Failure
to follow this instruction could result in
the loss of control of your vehicle,
personal injury or death.
246
Explorer (CTW), enUSA, Edition date: 202007, Second-Printing Adaptive Cruise Control
(If Equipped)
Page 257 of 577
1. Select Settings.
2. Select
Driver Assist..
3. Select
Cruise Control.
4. Select
Normal. The cruise control indicator
replaces the adaptive cruise
control indicator if you select
normal cruise control. The gap setting does
not display, and the system does not
respond to lead vehicles. Automatic
braking remains active to maintain set
speed. The system remembers the last
setting when you start your vehicle.
SWITCHING LANE CENTERING
ON AND OFF
The cruise controls are on the steering
wheel. See
Cruise Control (page 83). Press the button.
The indicator appears in the information
display. When the system is on, the color
of the indicator changes to indicate the
system status. See
Adaptive Cruise
Control Indicators (page 253).
Note: Adaptive cruise control must be on
before you can switch lane centering on.
Activating Lane Centering
The system only activates when all of the
following occur:
• You have adaptive cruise control with
stop-and-go on.
• Your hands are on the steering wheel.
• The system detects both lane
markings.
Note: If it does not detect valid lane
markings, the system stays inactive until
valid markings are available. You can override the system at any time
by steering your vehicle.
System Alerts and Automatic
Cancellation
You must keep your hands on the steering
wheel at all times.
When the system is active and detects no
steering activity for a certain period of time,
the system alerts you to put your hands on
the steering wheel. If you do not react to
the warnings the system cancels and slows
your vehicle down to idle speeds while
maintaining steering control.
The system also alerts you if your vehicle
crosses lane markings without detected
steering activity.
Note:
The system may detect a light grip
or touch on the steering wheel as hands-off
driving.
When an external condition cancels the
system, for example, no lane markings
available, a tone sounds and a message
appears in the information display. If your vehicle starts to slow
down, you must provide steering
input to the wheel and press and
release the button to regain full system
performance.
Automatic cancellation can also occur if:
• The lane becomes too wide or too
narrow.
• The system cannot detect valid lane
markings.
• Lane markings are crossed.
Note: The system disables until the next
key cycle if your vehicle slows down due to
driver inactivity twice within a key cycle.
254
Explorer (CTW), enUSA, Edition date: 202007, Second-Printing Adaptive Cruise Control
(If Equipped)E71340 E262175
Page 264 of 577
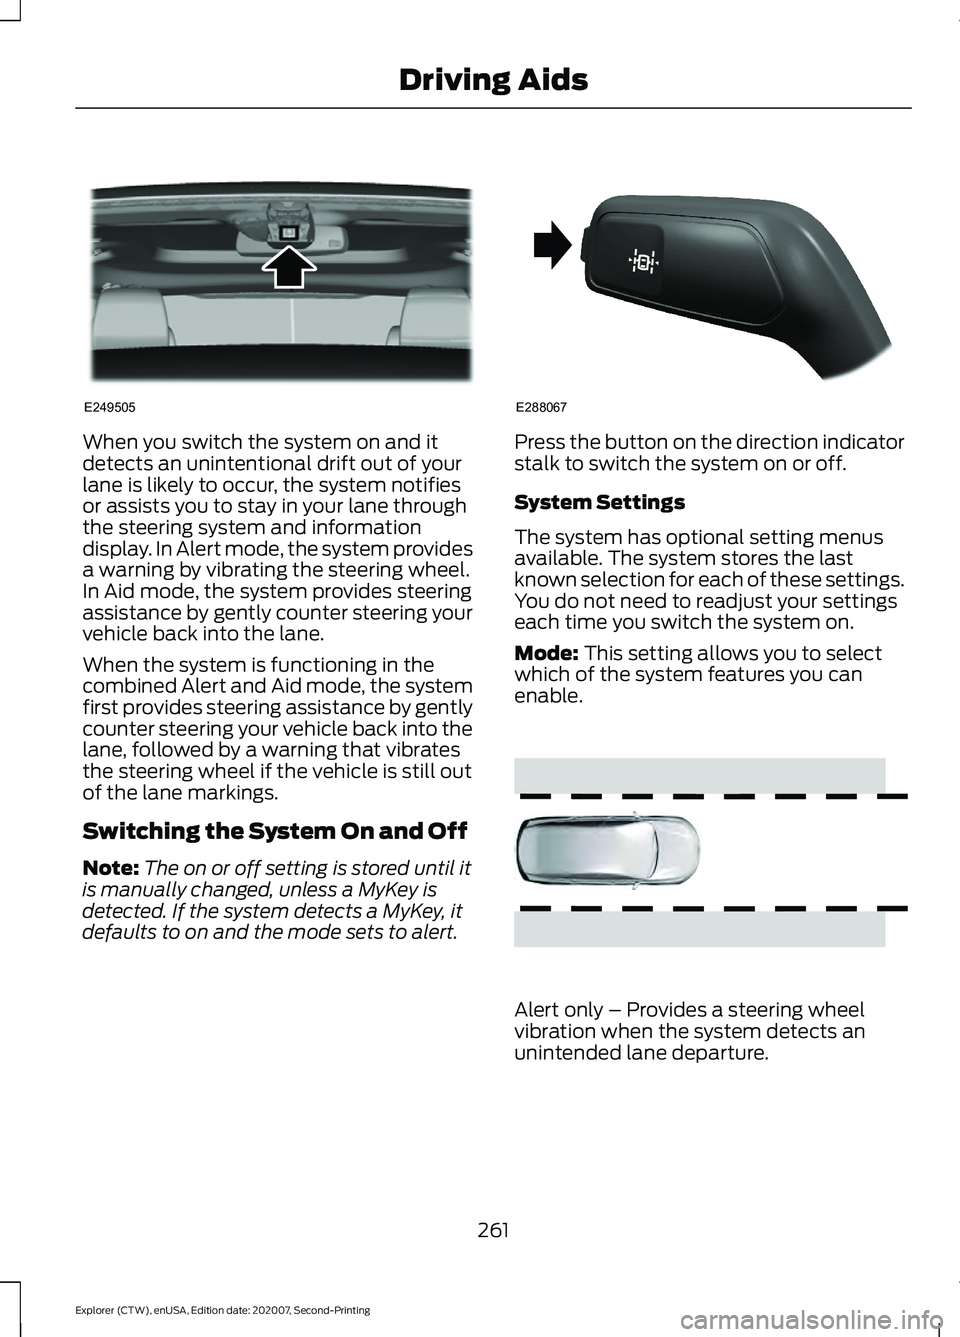
When you switch the system on and it
detects an unintentional drift out of your
lane is likely to occur, the system notifies
or assists you to stay in your lane through
the steering system and information
display. In Alert mode, the system provides
a warning by vibrating the steering wheel.
In Aid mode, the system provides steering
assistance by gently counter steering your
vehicle back into the lane.
When the system is functioning in the
combined Alert and Aid mode, the system
first provides steering assistance by gently
counter steering your vehicle back into the
lane, followed by a warning that vibrates
the steering wheel if the vehicle is still out
of the lane markings.
Switching the System On and Off
Note:
The on or off setting is stored until it
is manually changed, unless a MyKey is
detected. If the system detects a MyKey, it
defaults to on and the mode sets to alert. Press the button on the direction indicator
stalk to switch the system on or off.
System Settings
The system has optional setting menus
available. The system stores the last
known selection for each of these settings.
You do not need to readjust your settings
each time you switch the system on.
Mode: This setting allows you to select
which of the system features you can
enable. Alert only – Provides a steering wheel
vibration when the system detects an
unintended lane departure.
261
Explorer (CTW), enUSA, Edition date: 202007, Second-Printing Driving AidsE249505 E288067 E165515
Page 266 of 577
•
Your vehicle is under the activation
speed.
• The direction indicator is active.
• Your vehicle is in a dynamic maneuver.
• The road has no or poor lane markings
in the camera field-of-view.
• The camera is obscured or unable to
detect the lane markings due to
environmental, traffic or vehicle
conditions. For example, significant sun
angles, shadows, snow, heavy rain or
fog, following a large vehicle that is
blocking or shadowing the lane or poor
headlamp illumination.
See Troubleshooting for additional
information.
White: Indicates that the system is
available or ready to provide a warning or
intervention on the indicated side. Note:
If your vehicle has lane centering
assist and the system is active, the walls
appear green instead of white.
Yellow: Indicates that the system is
providing or has just provided a lane
keeping aid intervention.
Red: Indicates that the system is providing
or has just provided a lane keeping alert
warning.
The system can be temporarily suppressed
at any time by the following:
• Quick braking.
• Fast acceleration.
• Using the direction indicator.
• Evasive steering maneuver.
• Driving too close to the lane markings.
Troubleshooting Why is the feature not available (line markings are gray) when I can see the lane markings
on the road?
Your vehicle speed is outside the operational range of the feature.
The sun is shining directly into the camera lens.
A quick intentional lane change has occurred.
Your vehicle stays too close to the lane markings.
Driving at high speeds in curves.
The last alert warning or aid intervention occurred a short time ago.
Ambiguous lane markings, for example in construction zones.
Rapid transition from light to dark, or from dark to light.
Sudden offset in lane markings.
ABS or AdvanceTrac ™ is active.
There is a camera blockage due to dirt, grime, fog, frost or water on the windshield.
You are driving too close to the vehicle in front of you.
263
Explorer (CTW), enUSA, Edition date: 202007, Second-Printing Driving Aids
Page 279 of 577
Evasive Steering Assist (If Equipped)
If your vehicle is rapidly approaching a
stationary vehicle or a vehicle traveling in
the same direction as your vehicle, the
system is designed to help you steer
around the vehicle.
The system only activates when all of the
following occur:
• The Pre-Collision Assist system detects
a vehicle ahead and starts to apply
Active Braking.
• You turn the steering wheel in an
attempt to steer around the vehicle.
After you turn the steering wheel, the
system applies additional steering torque
to help you steer around the vehicle. After
you pass the vehicle, the system applies
steering torque in the opposite direction to
encourage you to steer back into the lane.
The system deactivates after you fully pass
the vehicle.
Note: The system does not automatically
steer around a vehicle. If you do not turn the
steering wheel, the system does not
activate.
Note: The system does not activate if the
distance to the vehicle ahead is too small
and the system cannot avoid a crash.
Adjusting the Pre-Collision Assist
Settings
You can adjust the following settings by
using the touchscreen. See Settings (page
464
).
• You can change Alert and Distance
Alert sensitivity to one of three possible
settings.
• You can switch Distance Indication and
Alert on or off. •
If required, you can switch Active
Braking on or off.
• If required, you can switch Evasive
Steering Assist on or off.
Note: Active Braking and Evasive Steering
Assist automatically turn on every time you
switch the ignition on.
Note: If you switch Active Braking off,
Evasive Steering Assist turns off.
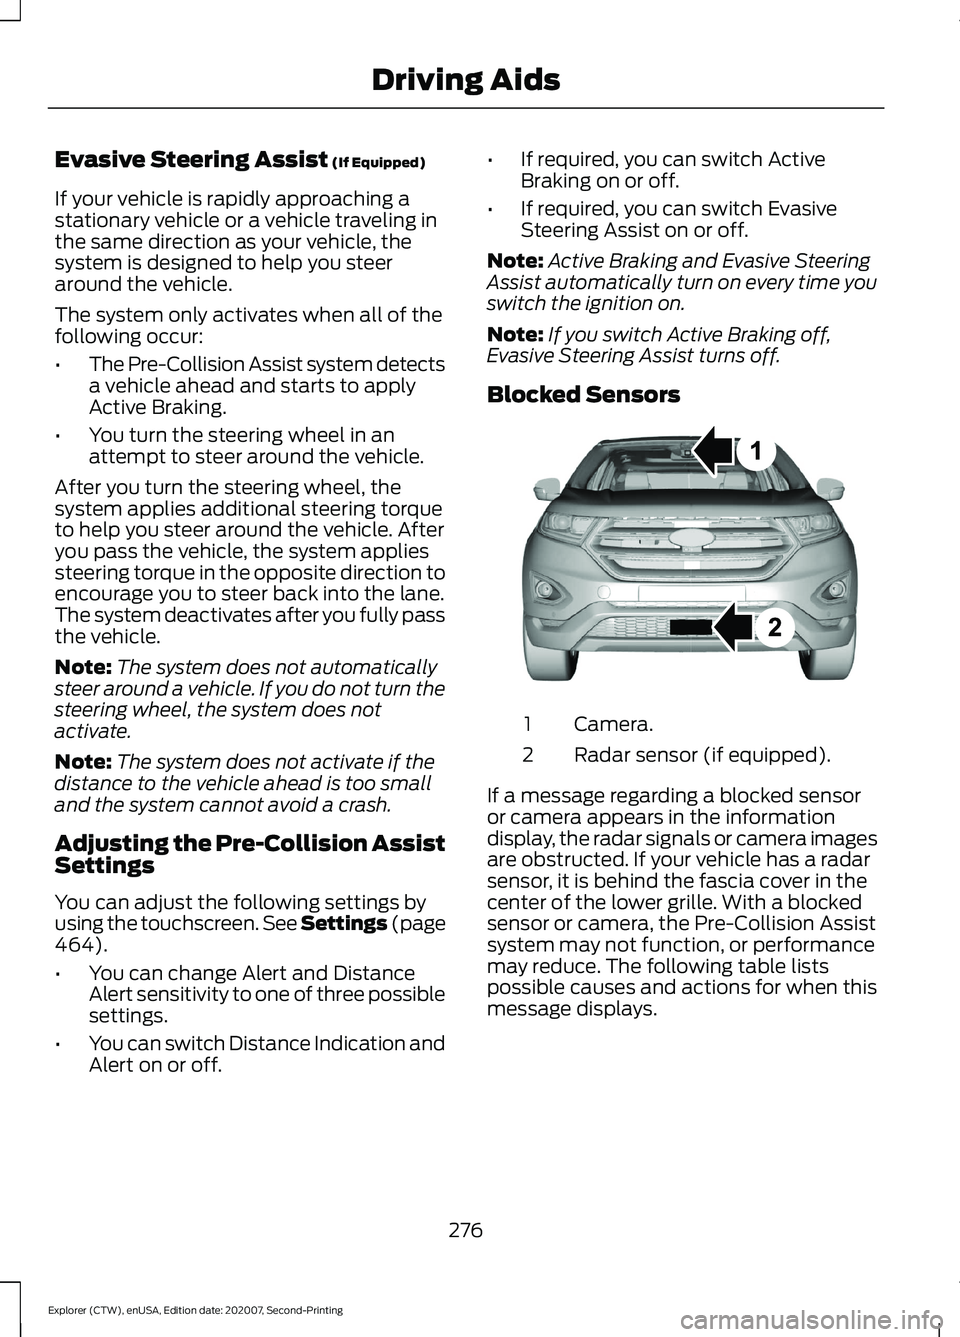
Blocked Sensors Camera.
1
Radar sensor (if equipped).
2
If a message regarding a blocked sensor
or camera appears in the information
display, the radar signals or camera images
are obstructed. If your vehicle has a radar
sensor, it is behind the fascia cover in the
center of the lower grille. With a blocked
sensor or camera, the Pre-Collision Assist
system may not function, or performance
may reduce. The following table lists
possible causes and actions for when this
message displays.
276
Explorer (CTW), enUSA, Edition date: 202007, Second-Printing Driving AidsE273245
Page 280 of 577
Camera Troubleshooting
Action
Cause
Clean the outside of the windshield in frontof the camera.
The windshield in front of the camera is
dirty or obstructed in some way.
Wait a short time. It may take several
minutes for the camera to detect that there is no obstruction.
The windshield in front of the camera is
clean but the message remains in the display screen.
Radar Troubleshooting (If Equipped) Action
Cause
Clean the grille surface in front of the radaror remove the object causing the obstruc- tion.
The surface of the radar in the grille is dirty
or obstructed in some way.
Wait a short time. It may take several
minutes for the radar to detect that there is no obstruction.
The surface of the radar in the grille is clean
but the message remains in the display screen.
The Pre-Collision Assist system is tempor-
arily disabled. Pre-Collision Assist automat-ically reactivates a short time after the weather conditions improve.
Heavy rain, spray, snow or fog is interfering
with the radar signals.
The Pre-Collision Assist system is tempor-
arily disabled. Pre-Collision Assist automat-ically reactivates a short time after the weather conditions improve.
Swirling water or snow or ice on the surface
of the road may interfere with the radar signals.
Contact an authorized dealer to have theradar checked for proper coverage and operation.
Radar is out of alignment due to a front end
impact.
Note: Proper system operation requires a
clear view of the road by the camera. Have
any windshield damage in the area of the
camera's field of view repaired.
Note: If something hits the front end of your
vehicle or damage occurs and your vehicle
has a radar sensor, the radar sensing zone
may change. This could cause missed or
false detections. Contact an authorized
dealer to have the radar checked for proper
coverage and operation.
277
Explorer (CTW), enUSA, Edition date: 202007, Second-Printing Driving Aids
Page 296 of 577
Before Towing a Trailer
Practice turning, stopping and backing up
to get the feel of your vehicle-trailer
combination before starting on a trip.
When turning, make wider turns so the
trailer wheels clear curbs and other
obstacles.
When Towing a Trailer
•
Do not drive faster than 70 mph
(113 km/h) during the first 500 mi
(800 km).
• Do not make full-throttle starts.
• Check your hitch, electrical connections
and trailer wheel lug nuts thoroughly
after you have traveled 50 mi (80 km).
• When stopped in congested or heavy
traffic during hot weather, place the
gearshift in park (P) to aid engine and
transmission cooling and to help A/C
performance.
• Turn off the speed control with heavy
loads or in hilly terrain. The speed
control may turn off automatically
when you are towing on long, steep
grades.
• Shift to a lower gear when driving down
a long or steep hill. Do not apply the
brakes continuously, as they may
overheat and become less effective.
• If your transmission is equipped with a
Grade Assist or Tow/Haul feature, use
this feature when towing. This provides
engine braking and helps eliminate
excessive transmission shifting for
optimum fuel economy and
transmission cooling.
• Allow more distance for stopping with
a trailer attached. Anticipate stops and
brake gradually.
• Avoid parking on a grade. However, if
you must park on a grade:
1. Turn the steering wheel to point your vehicle tires away from traffic flow. 2. Set your vehicle parking brake.
3. Place the automatic transmission in
park (P).
4. Place wheel chocks in front and back of the trailer wheels. (Chocks not
included with vehicle.)
Launching or Retrieving a Boat or
Personal Watercraft (PWC)
Note: Disconnect the wiring to the trailer
before backing the trailer into the water.
Note: Reconnect the wiring to the trailer
after
removing the trailer from the water.
When backing down a ramp during boat
launching or retrieval:
• Do not allow the static water level to
rise above the bottom edge of the rear
bumper.
• Do not allow waves to break higher
than
6 in (15 cm) above the bottom
edge of the rear bumper.
Exceeding these limits may allow water to
enter vehicle components:
• Causing internal damage to the
components.
• Affecting driveability, emissions, and
reliability.
Replace the rear axle lubricant anytime
the rear axle has been submerged in water.
Water may have contaminated the rear
axle lubricant, which is not normally
checked or changed unless a leak is
suspected or other axle repair is required.
293
Explorer (CTW), enUSA, Edition date: 202007, Second-Printing Towing
Page 310 of 577
You are required to submit your warranty
dispute to BBB AUTO LINE before asserting
in court any rights or remedies conferred
by California Civil Code Section 1793.22(b).
You are also required to use BBB AUTO
LINE before exercising rights or seeking
remedies created by the Federal
Magnuson-Moss Warranty Act, 15 U.S.C.
sec. 2301 et seq. If you choose to seek
redress by pursuing rights and remedies
not created by California Civil Code Section
1793.22(b) or the Magnuson-Moss
Warranty Act, resort to BBB AUTO LINE is
not required by those statutes.
THE BETTER BUSINESS
BUREAU (BBB) AUTO LINE
PROGRAM (U.S. ONLY)
Your satisfaction is important to Ford
Motor Company and to your dealer. If a
warranty concern has not been resolved
using the three-step procedure outlined
earlier in this chapter in the Getting the
Services you need section, you may be
eligible to participate in the BBB AUTO
LINE program.
The BBB AUTO LINE program consists of
two parts – mediation and arbitration.
During mediation, a representative of the
BBB will contact both you and Ford Motor
Company to explore options for settlement
of the claim. If an agreement is not reached
during mediation or you do not want to
participate in mediation, and if your claim
is eligible, you may participate in the
arbitration process. An arbitration hearing
will be scheduled so that you can present
your case in an informal setting before an
impartial person. The arbitrator will
consider the testimony provided and make
a decision after the hearing.
Disputes submitted to the BBB AUTO LINE
program are usually decided within forty
days after you file your claim with the BBB.
You are not bound by the decision, and
may reject the decision and proceed to
court where all findings of the BBB Auto
Line dispute, and decision, are admissible
in the court action. Should you choose to
accept the BBB AUTO LINE decision, Ford
is then bound by the decision, and must
comply with the decision within 30 days
of receipt of your acceptance letter.
BBB AUTO LINE Application: Using the
information provided below, please call or
write to request a program application.
You will be asked for your name and
address, general information about your
new vehicle, information about your
warranty concerns, and any steps you have
already taken to try to resolve them. A
Customer Claim Form will be mailed that
will need to be completed, signed and
returned to the BBB along with proof of
ownership. Upon receipt, the BBB will
review the claim for eligibility under the
Program Summary Guidelines.
You can get more information by
calling BBB AUTO LINE at
1-800-955-5100, or writing to:
BBB AUTO LINE
3033 Wilson Boulevard, Suite 600
Arlington, Virginia 22201
BBB AUTO LINE applications can also be
requested by calling the Ford Motor
Company Customer Relationship Center
at 1-800-392-3673.
For additional information refer to the
Better Business Bureau website.
Note:
Ford Motor Company reserves the
right to change eligibility limitations, modify
procedures, or to discontinue this process
at any time without notice and without
obligation.
307
Explorer (CTW), enUSA, Edition date: 202007, Second-Printing Customer Assistance
Page 339 of 577
1. Park your vehicle on a level surface.
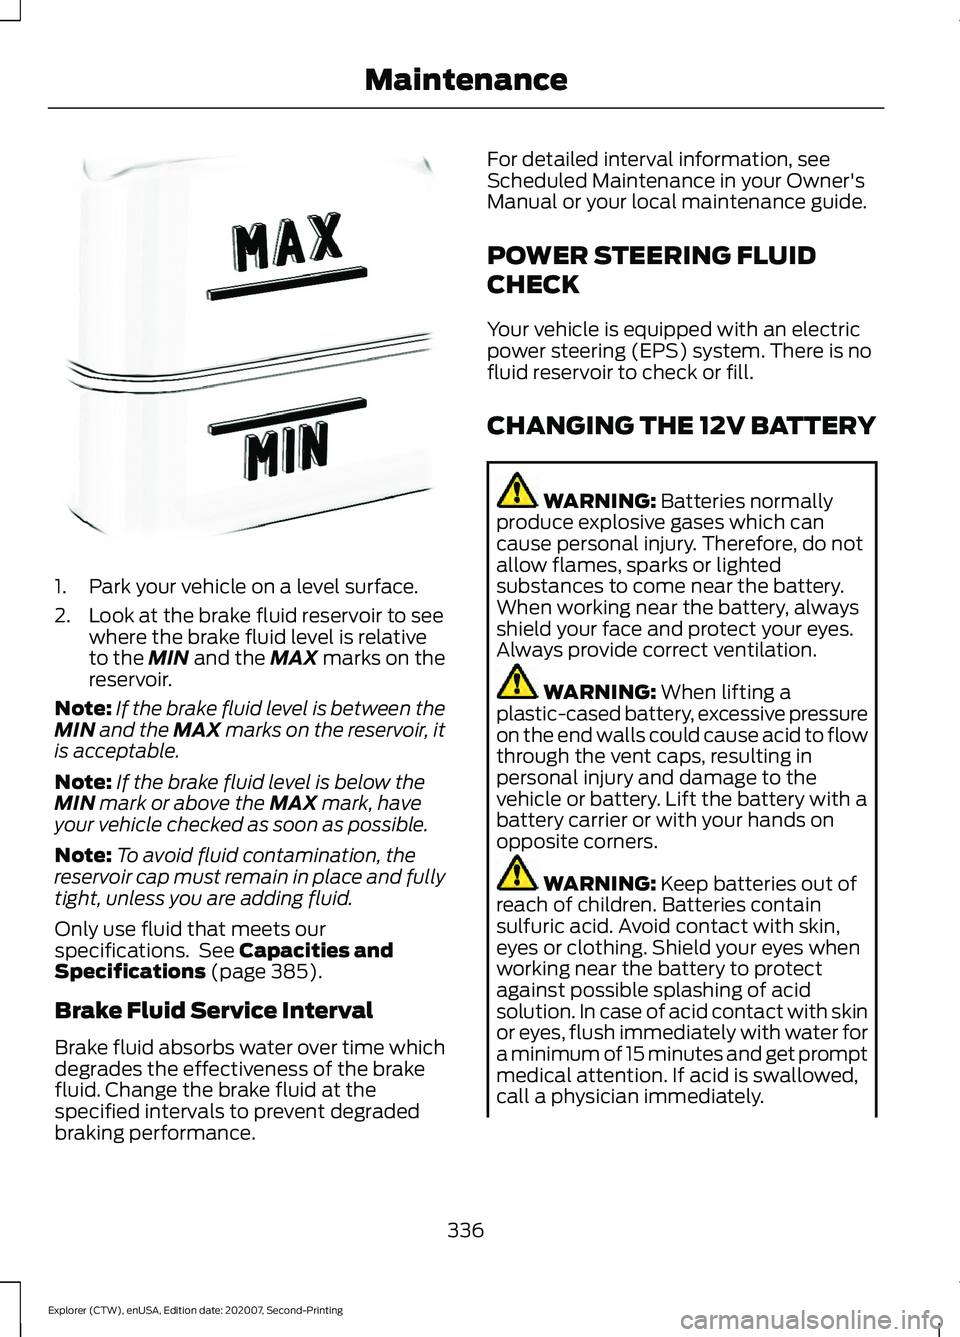
2. Look at the brake fluid reservoir to see
where the brake fluid level is relative
to the MIN and the MAX marks on the
reservoir.
Note: If the brake fluid level is between the
MIN
and the MAX marks on the reservoir, it
is acceptable.
Note: If the brake fluid level is below the
MIN
mark or above the MAX mark, have
your vehicle checked as soon as possible.
Note: To avoid fluid contamination, the
reservoir cap must remain in place and fully
tight, unless you are adding fluid.
Only use fluid that meets our
specifications. See
Capacities and
Specifications (page 385).
Brake Fluid Service Interval
Brake fluid absorbs water over time which
degrades the effectiveness of the brake
fluid. Change the brake fluid at the
specified intervals to prevent degraded
braking performance. For detailed interval information, see
Scheduled Maintenance in your Owner's
Manual or your local maintenance guide.
POWER STEERING FLUID
CHECK
Your vehicle is equipped with an electric
power steering (EPS) system. There is no
fluid reservoir to check or fill.
CHANGING THE 12V BATTERY
WARNING:
Batteries normally
produce explosive gases which can
cause personal injury. Therefore, do not
allow flames, sparks or lighted
substances to come near the battery.
When working near the battery, always
shield your face and protect your eyes.
Always provide correct ventilation. WARNING:
When lifting a
plastic-cased battery, excessive pressure
on the end walls could cause acid to flow
through the vent caps, resulting in
personal injury and damage to the
vehicle or battery. Lift the battery with a
battery carrier or with your hands on
opposite corners. WARNING:
Keep batteries out of
reach of children. Batteries contain
sulfuric acid. Avoid contact with skin,
eyes or clothing. Shield your eyes when
working near the battery to protect
against possible splashing of acid
solution. In case of acid contact with skin
or eyes, flush immediately with water for
a minimum of 15 minutes and get prompt
medical attention. If acid is swallowed,
call a physician immediately.
336
Explorer (CTW), enUSA, Edition date: 202007, Second-Printing MaintenanceE170684
Page 354 of 577
GENERAL INFORMATION
The recommended tire inflation pressures
are found on the Tire Label which is
located on the B-pillar or the edge of the
driver door. This information can also be
found on the Safety Compliance
Certification Label, affixed to either the
door hinge pillar, door-latch post, or the
door edge that meets the door-latch post,
next to the driver
’s seating position.
We strongly recommend maintaining these
tire pressures at all times. Failure to follow
the tire pressure recommendations can
cause uneven treadwear patterns, reduced
fuel economy, and adversely affect the
way your vehicle handles.
Note: Check and set the tire pressure at the
ambient temperature in which you are
intending to drive your vehicle and when the
tires are cold.
Note: Check your tire pressures at least
once per month.
If your vehicle has a spare tire, set the
pressure to the highest value given for your
vehicle and tire size combination.
Use only approved wheels and tire sizes;
using other sizes could damage your
vehicle.
If you change the diameter of the factory
installed tires, the speedometer could
display the incorrect speed. This could
effect the functionality of the 4WD system
(if equipped). Take your vehicle to an
authorized dealer and have the engine
management system reprogrammed.
If you intend to change the size of the
factory installed tires, check the suitability
with an authorized dealer.
Additional information related to the
functionality and maintenance of your tires
can be found in the Wheels and Tire
section. See Tire Care (page 353). Self-Sealing Tires
(If Equipped)
Self-Sealing tires are a special type of tire
that have a material on the inside of the
tire that can seal punctures up to
0.2 in
(6 mm) in diameter in the tread area. This
material does not protect from damage or
punctures in the sidewall of the tire.
Self-sealing tires can be identified by the
tire manufacturer with a special mark.
If your TPMS warning light comes on,
inspect your tires for damage and re-inflate
your tires to the pressure indicated on the
tire placard. See
Tire Pressure
Monitoring System (page 368). If your
tires are damaged or continue to lose air,
take your vehicle to the nearest authorized
dealer to have your tires inspected and
repaired/replaced as necessary.
Note: Replace self-sealing tires with
self-sealing tires to maintain the
functionality provided.
Note: Do not drive on a deflated
self-sealing tire. This damages the tire
beyond repair.
Notice to utility vehicle and truck
owners WARNING:
Vehicles with a higher
center of gravity (utility and four-wheel
drive vehicles) handle differently than
vehicles with a lower center of gravity
(passenger cars). Avoid sharp turns,
excessive speed and abrupt steering in
these vehicles. Failure to drive cautiously
increases the risk of losing control of your
vehicle, vehicle rollover, personal injury
and death. WARNING:
In a rollover crash, an
unbelted person is significantly more
likely to die than a person wearing a
seatbelt.
351
Explorer (CTW), enUSA, Edition date: 202007, Second-Printing Wheels and Tires