bulb FORD EXPLORER 2021 Owners Manual
[x] Cancel search | Manufacturer: FORD, Model Year: 2021, Model line: EXPLORER, Model: FORD EXPLORER 2021Pages: 577, PDF Size: 9.79 MB
Page 9 of 577
Essential Towing Checks
.........................292
Towing the Vehicle on Four Wheels .....
294
Driving Hints
Reduced Engine Performance ...............
295
Economical Driving ....................................
295
Cold Weather Precautions ......................
296
Breaking-In ...................................................
296
Driving Through Water .............................
296
Floor Mats ......................................................
297
Roadside Emergencies
Roadside Assistance .................................
298
Hazard Flashers ..........................................
299
Fuel Shutoff .................................................
299
Jump Starting the Vehicle ......................
300
Collision, Damage or Fire Event ............
302
Post-Crash Alert System .........................
303
Transporting the Vehicle .........................
303
Customer Assistance
Getting the Services You Need .............
305
In California (U.S. Only) ...........................
306
The Better Business Bureau (BBB) Auto Line Program (U.S. Only) .....................
307
Utilizing the Mediation/Arbitration Program (Canada Only) .....................
308
Getting Assistance Outside the U.S. and Canada ......................................................
308
Ordering Additional Owner's Literature ........................................................................\
.
310
Reporting Safety Defects (U.S. Only) ........................................................................\
.
310
Reporting Safety Defects (Canada Only) ........................................................................\
.
310
Fuses
Fuse Specification Chart ...........................
312
Changing a Fuse .........................................
320Maintenance
General Information
...................................
322
Opening and Closing the Hood .............
322
Under Hood Overview - 2.3L EcoBoost™ ........................................................................\
323
Under Hood Overview - 3.0L ..................
324
Under Hood Overview - 3.3L ..................
325
Engine Oil Dipstick - 2.3L EcoBoost™ ........................................................................\
326
Engine Oil Dipstick - 3.0L ........................
326
Engine Oil Dipstick - 3.3L .........................
326
Engine Oil Check .........................................
326
Oil Change Indicator Reset ......................
327
Changing the Engine Air Filter - 2.3L EcoBoost™ ...............................................
328
Changing the Engine Air Filter - 3.0L ........................................................................\
329
Changing the Engine Air Filter - 3.3L ....
330
Engine Coolant Check ................................
331
Automatic Transmission Fluid Check ........................................................................\
335
Brake Fluid Check .......................................
335
Power Steering Fluid Check ....................
336
Changing the 12V Battery ........................
336
Adjusting the Headlamps .......................
338
Washer Fluid Check ...................................
340
Fuel Filter .......................................................
340
Checking the Wiper Blades ....................
340
Changing the Front Wiper Blades ........
340
Changing the Rear Wiper Blades ...........
341
Changing a Bulb ...........................................
341
Vehicle Care
General Information ..................................
343
Cleaning Products ......................................
343
Cleaning the Exterior .................................
344
Waxing ............................................................
345
Cleaning the Engine ...................................
345
Cleaning the Windows and Wiper Blades ........................................................................\
346
6
Explorer (CTW), enUSA, Edition date: 202007, Second-Printing Table of Contents
Page 10 of 577
Cleaning the Interior
..................................346
Cleaning the Instrument Panel and Instrument Cluster Lens .......................
347
Cleaning Leather Seats .............................
347
Repairing Minor Paint Damage .............
348
Cleaning the Wheels .................................
348
Vehicle Storage ...........................................
348
Body Styling Kits ........................................
350
Wheels and Tires
General Information ...................................
351
Tire Care .........................................................
353
Using Summer Tires ..................................
366
Using Snow Chains ....................................
366
Tire Pressure Monitoring System .........
368
Changing a Road Wheel ...........................
374
Technical Specifications .........................
380
Capacities and Specifications
Engine Specifications - 2.3L EcoBoost™ ........................................................................\
382
Engine Specifications - 3.0L ..................
383
Engine Specifications - 3.0L, ST ...........
383
Engine Specifications - 3.3L, Gasoline ........................................................................\
385
Engine Specifications - 3.3L, Hybrid Electric Vehicle (HEV) ..........................
386
Transmission Specifications - ST ........
386
Motorcraft Parts - 2.3L EcoBoost™ .....
388
Motorcraft Parts - 3.0L ............................
389
Motorcraft Parts - 3.3L .............................
390
Vehicle Identification Number ................
391
Capacities and Specifications - 2.3L EcoBoost™ ................................................
391
Capacities and Specifications - 3.0L .......................................................................
398
Capacities and Specifications - 3.3L, Gasoline .....................................................
405
Capacities and Specifications - 3.3L, Hybrid Electric Vehicle (HEV) .............
412Bulb Specification Chart
..........................
419
Connected Vehicle
What Is a Connected Vehicle ..................
421
Connected Vehicle Requirements .........
421
Connected Vehicle Limitations ..............
421
Connecting the Vehicle to a Mobile Network .......................................................
421
Connecting the Vehicle to a Wi-Fi Network - Vehicles With: SYNC 3 ......
421
Connected Vehicle – Troubleshooting - Vehicles With: Modem ..........................
422
Connected Vehicle – Troubleshooting - Vehicles With: SYNC 3 ..........................
423
Vehicle Wi-Fi Hotspot
Creating a Vehicle Wi-Fi Hotspot .........
425
Changing the Vehicle Wi-Fi Hotspot Name or Password ................................
425
Audio System
General Information ..................................
426
Audio Unit .....................................................
426
Digital Radio ..................................................
427
Satellite Radio .............................................
429
USB Port ........................................................
432
SYNC™ 3
General Information ..................................
433
Using Voice Recognition ..........................
435
Entertainment ..............................................
441
Climate ............................................................
451
Phone ..............................................................
453
Navigation .....................................................
455
Electric Vehicle Information ...................
460
Apps .................................................................
461
Settings ..........................................................
464
SYNC™ 3 Troubleshooting ....................
466
7
Explorer (CTW), enUSA, Edition date: 202007, Second-Printing Table of Contents
Page 94 of 577
Direction Indicator
Flashes when you switch the
direction indicators on.
Note: An increase in the rate of flashing
warns of a failed indicator bulb.
INTERIOR LAMPS
The lamps turn on under the following
conditions:
• You open any door.
• You press a button on the remote
control.
• You press the all lamps on button on
the overhead console.
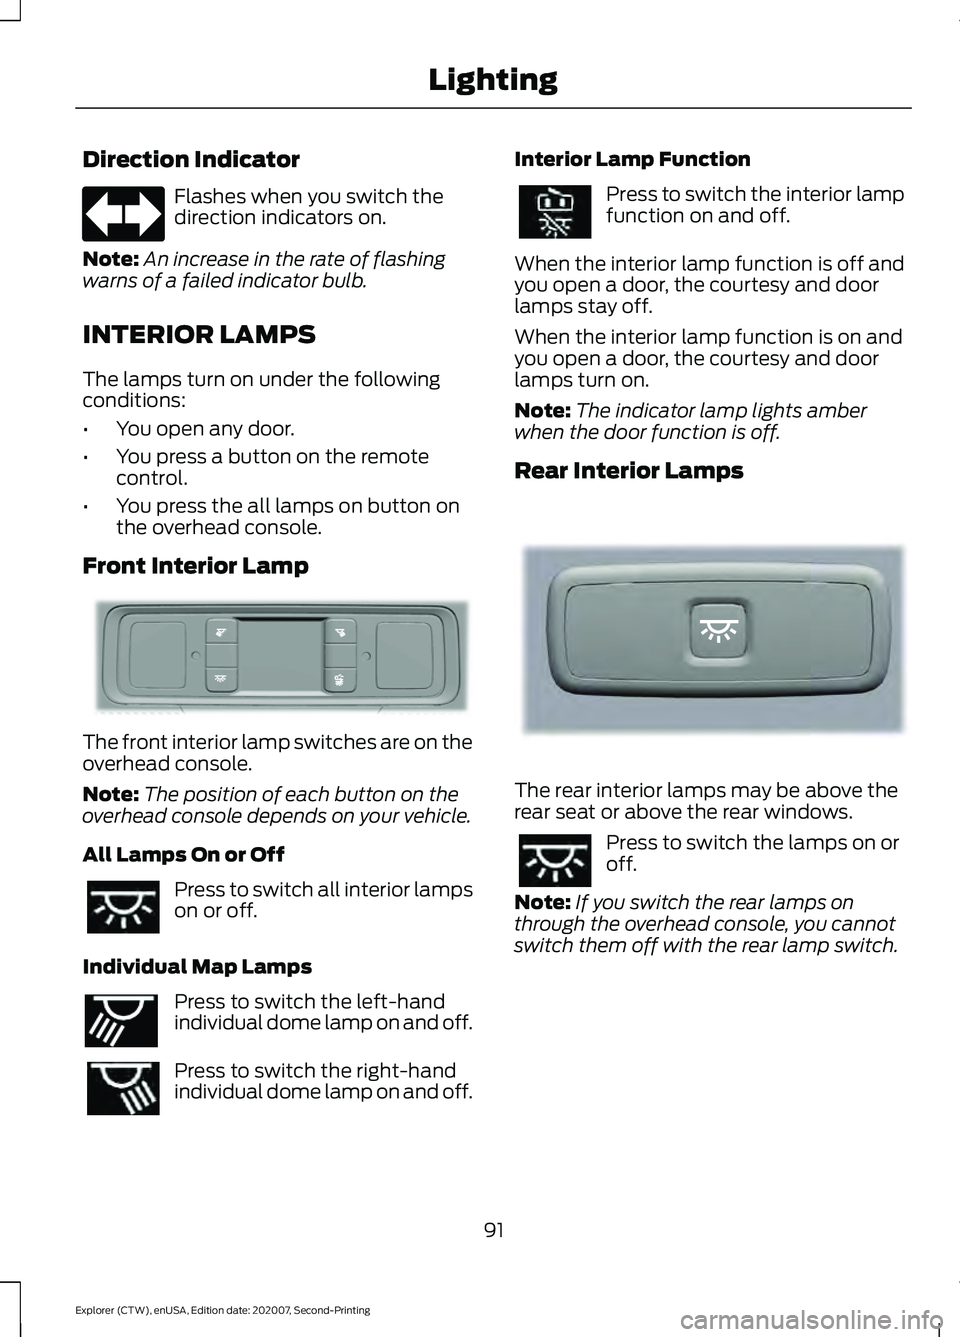
Front Interior Lamp The front interior lamp switches are on the
overhead console.
Note:
The position of each button on the
overhead console depends on your vehicle.
All Lamps On or Off Press to switch all interior lamps
on or off.
Individual Map Lamps Press to switch the left-hand
individual dome lamp on and off.
Press to switch the right-hand
individual dome lamp on and off. Interior Lamp Function Press to switch the interior lamp
function on and off.
When the interior lamp function is off and
you open a door, the courtesy and door
lamps stay off.
When the interior lamp function is on and
you open a door, the courtesy and door
lamps turn on.
Note: The indicator lamp lights amber
when the door function is off.
Rear Interior Lamps The rear interior lamps may be above the
rear seat or above the rear windows.
Press to switch the lamps on or
off.
Note: If you switch the rear lamps on
through the overhead console, you cannot
switch them off with the rear lamp switch.
91
Explorer (CTW), enUSA, Edition date: 202007, Second-Printing Lighting E281230 E262193 E281231
Page 112 of 577
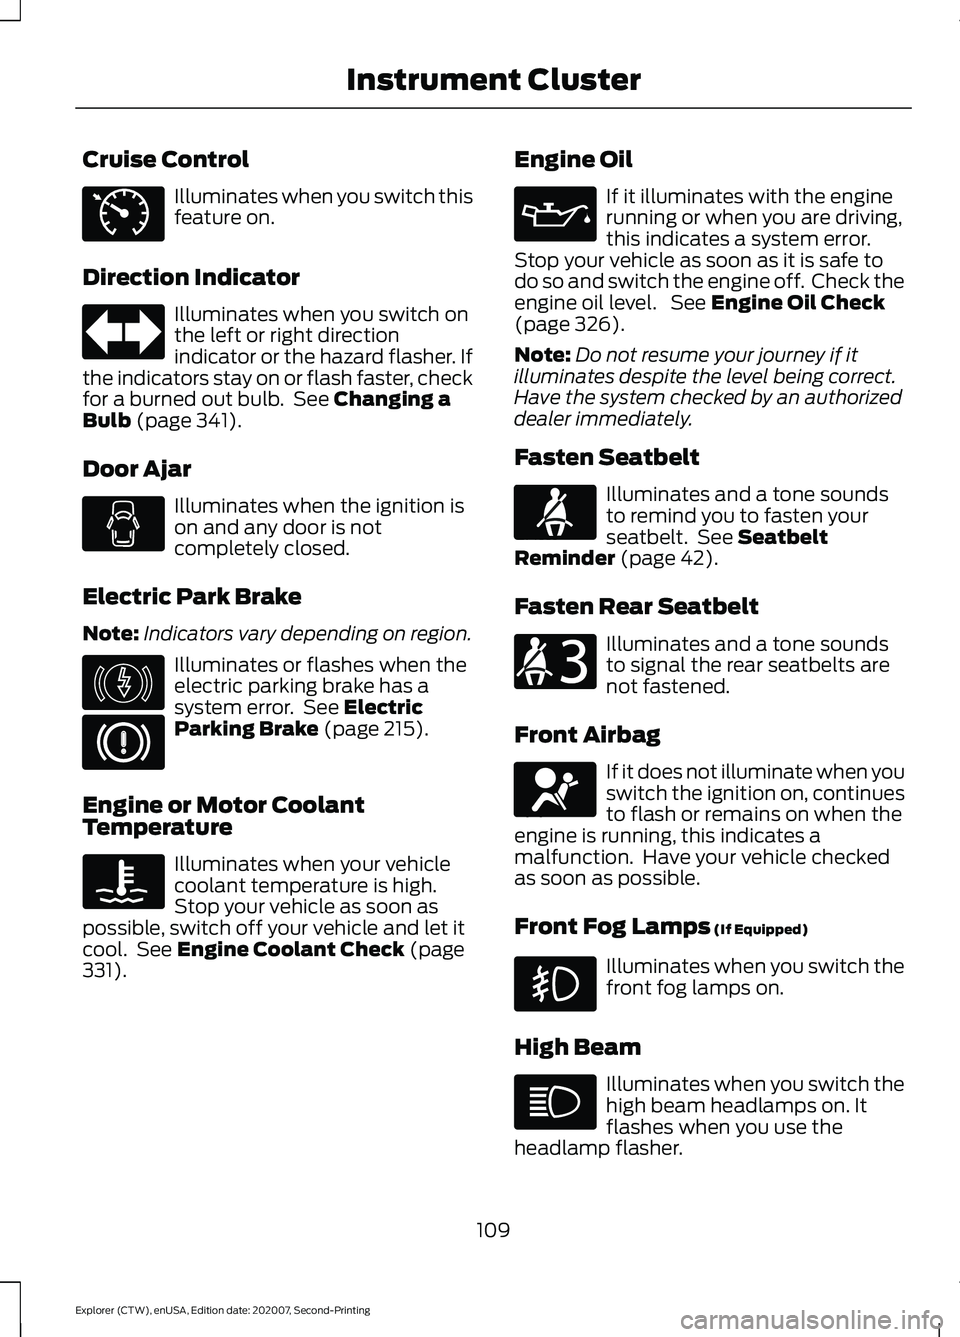
Cruise Control
Illuminates when you switch this
feature on.
Direction Indicator Illuminates when you switch on
the left or right direction
indicator or the hazard flasher. If
the indicators stay on or flash faster, check
for a burned out bulb. See Changing a
Bulb (page 341).
Door Ajar Illuminates when the ignition is
on and any door is not
completely closed.
Electric Park Brake
Note: Indicators vary depending on region. Illuminates or flashes when the
electric parking brake has a
system error. See
Electric
Parking Brake (page 215).
Engine or Motor Coolant
Temperature Illuminates when your vehicle
coolant temperature is high.
Stop your vehicle as soon as
possible, switch off your vehicle and let it
cool. See
Engine Coolant Check (page
331). Engine Oil If it illuminates with the engine
running or when you are driving,
this indicates a system error.
Stop your vehicle as soon as it is safe to
do so and switch the engine off. Check the
engine oil level. See
Engine Oil Check
(page 326).
Note: Do not resume your journey if it
illuminates despite the level being correct.
Have the system checked by an authorized
dealer immediately.
Fasten Seatbelt Illuminates and a tone sounds
to remind you to fasten your
seatbelt. See
Seatbelt
Reminder (page 42).
Fasten Rear Seatbelt Illuminates and a tone sounds
to signal the rear seatbelts are
not fastened.
Front Airbag If it does not illuminate when you
switch the ignition on, continues
to flash or remains on when the
engine is running, this indicates a
malfunction. Have your vehicle checked
as soon as possible.
Front Fog Lamps
(If Equipped) Illuminates when you switch the
front fog lamps on.
High Beam Illuminates when you switch the
high beam headlamps on. It
flashes when you use the
headlamp flasher.
109
Explorer (CTW), enUSA, Edition date: 202007, Second-Printing Instrument ClusterE71340 E146190 E71880 E206718 E67017
Page 113 of 577
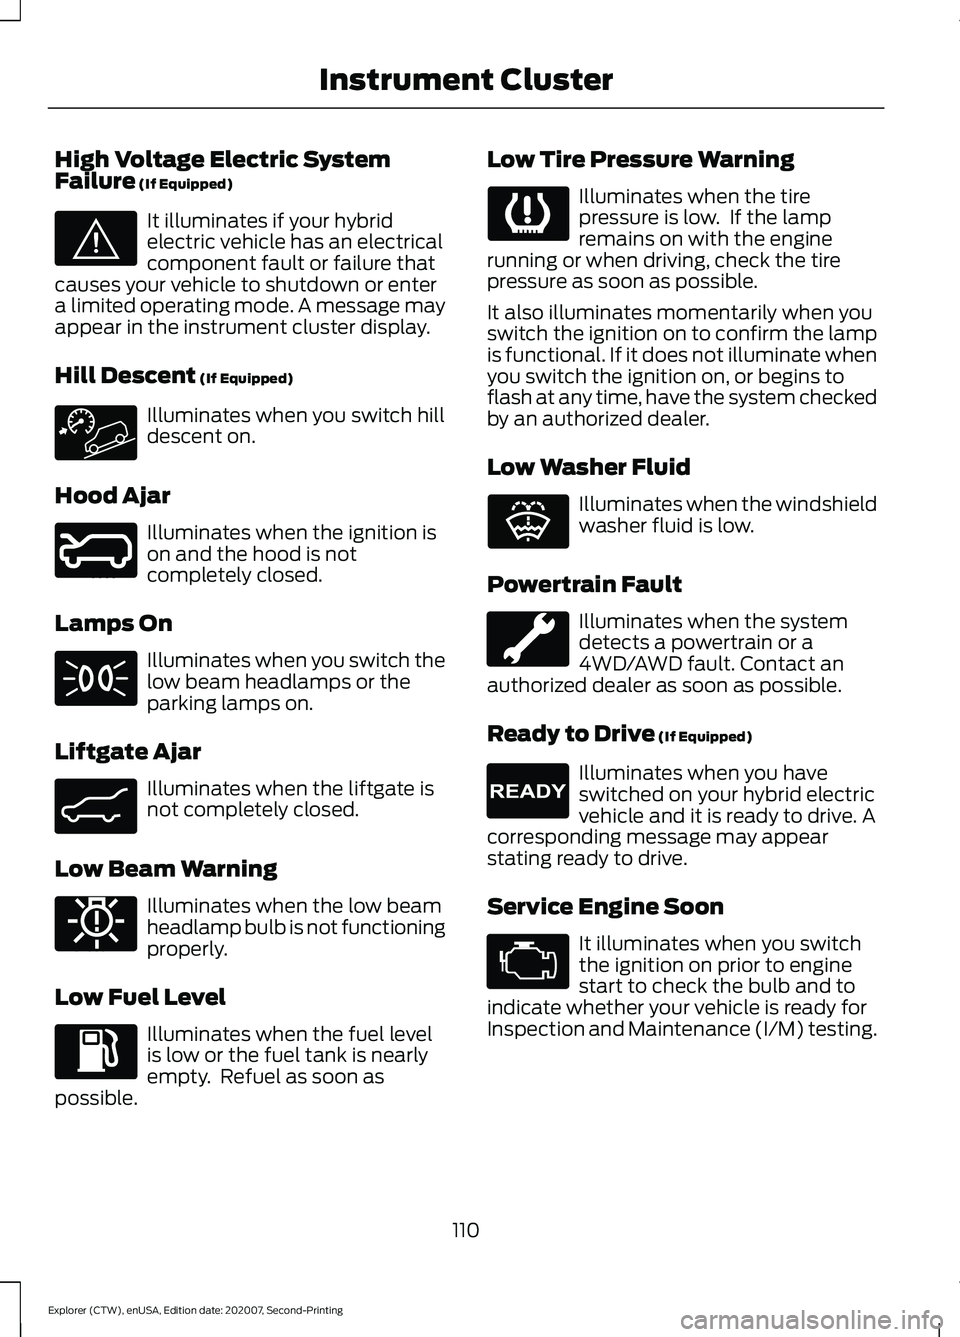
High Voltage Electric System
Failure (If Equipped)
It illuminates if your hybrid
electric vehicle has an electrical
component fault or failure that
causes your vehicle to shutdown or enter
a limited operating mode. A message may
appear in the instrument cluster display.
Hill Descent
(If Equipped) Illuminates when you switch hill
descent on.
Hood Ajar Illuminates when the ignition is
on and the hood is not
completely closed.
Lamps On Illuminates when you switch the
low beam headlamps or the
parking lamps on.
Liftgate Ajar Illuminates when the liftgate is
not completely closed.
Low Beam Warning Illuminates when the low beam
headlamp bulb is not functioning
properly.
Low Fuel Level Illuminates when the fuel level
is low or the fuel tank is nearly
empty. Refuel as soon as
possible. Low Tire Pressure Warning Illuminates when the tire
pressure is low. If the lamp
remains on with the engine
running or when driving, check the tire
pressure as soon as possible.
It also illuminates momentarily when you
switch the ignition on to confirm the lamp
is functional. If it does not illuminate when
you switch the ignition on, or begins to
flash at any time, have the system checked
by an authorized dealer.
Low Washer Fluid Illuminates when the windshield
washer fluid is low.
Powertrain Fault Illuminates when the system
detects a powertrain or a
4WD/AWD fault. Contact an
authorized dealer as soon as possible.
Ready to Drive
(If Equipped) Illuminates when you have
switched on your hybrid electric
vehicle and it is ready to drive. A
corresponding message may appear
stating ready to drive.
Service Engine Soon It illuminates when you switch
the ignition on prior to engine
start to check the bulb and to
indicate whether your vehicle is ready for
Inspection and Maintenance (I/M) testing.
110
Explorer (CTW), enUSA, Edition date: 202007, Second-Printing Instrument ClusterE144693 E246598 E162453 E181350 E132353 E224090
Page 201 of 577
Illumination of the service engine soon
indicator, charging system warning light or
the temperature warning light, fluid leaks,
strange odors, smoke or loss of engine
power could indicate that the emission
control system is not working properly.
An improperly operating or damaged
exhaust system may allow exhaust to
enter the vehicle. Have a damaged or
improperly operating exhaust system
inspected and repaired immediately.
Do not make any unauthorized changes to
your vehicle or engine. By law, vehicle
owners and anyone who manufactures,
repairs, services, sells, leases, trades
vehicles, or supervises a fleet of vehicles
are not permitted to intentionally remove
an emission control device or prevent it
from working. Information about your
vehicle
’s emission system is on the Vehicle
Emission Control Information Decal
located on or near the engine. This decal
also lists engine displacement.
Please consult your warranty information
for complete details.
On-Board Diagnostics (OBD-II)
Your vehicle has a computer known as the
on-board diagnostics system (OBD-II) that
monitors the engine ’s emission control
system. The system protects the
environment by making sure that your
vehicle continues to meet government
emission standards. The OBD-II system
also assists a service technician in properly
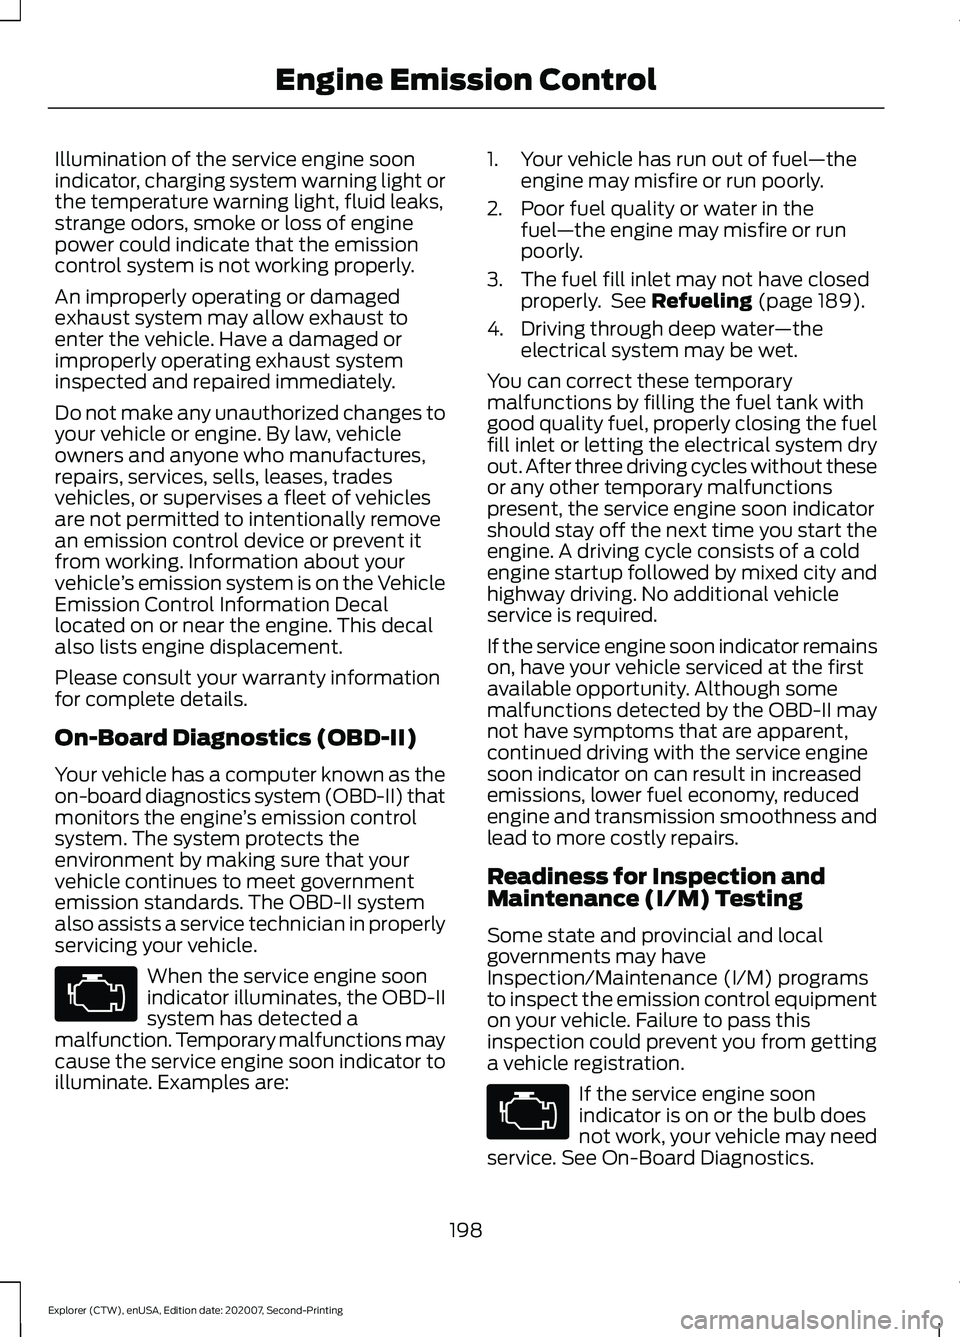
servicing your vehicle. When the service engine soon
indicator illuminates, the OBD-II
system has detected a
malfunction. Temporary malfunctions may
cause the service engine soon indicator to
illuminate. Examples are: 1. Your vehicle has run out of fuel
—the
engine may misfire or run poorly.
2. Poor fuel quality or water in the fuel —the engine may misfire or run
poorly.
3. The fuel fill inlet may not have closed properly. See Refueling (page 189).
4. Driving through deep water —the
electrical system may be wet.
You can correct these temporary
malfunctions by filling the fuel tank with
good quality fuel, properly closing the fuel
fill inlet or letting the electrical system dry
out. After three driving cycles without these
or any other temporary malfunctions
present, the service engine soon indicator
should stay off the next time you start the
engine. A driving cycle consists of a cold
engine startup followed by mixed city and
highway driving. No additional vehicle
service is required.
If the service engine soon indicator remains
on, have your vehicle serviced at the first
available opportunity. Although some
malfunctions detected by the OBD-II may
not have symptoms that are apparent,
continued driving with the service engine
soon indicator on can result in increased
emissions, lower fuel economy, reduced
engine and transmission smoothness and
lead to more costly repairs.
Readiness for Inspection and
Maintenance (I/M) Testing
Some state and provincial and local
governments may have
Inspection/Maintenance (I/M) programs
to inspect the emission control equipment
on your vehicle. Failure to pass this
inspection could prevent you from getting
a vehicle registration. If the service engine soon
indicator is on or the bulb does
not work, your vehicle may need
service. See On-Board Diagnostics.
198
Explorer (CTW), enUSA, Edition date: 202007, Second-Printing Engine Emission Control
Page 202 of 577
Your vehicle may not pass the I/M test if
the service engine soon indicator is on or
not working properly (bulb is burned out),
or if the OBD-II system has determined
that some of the emission control systems
have not been properly checked. In this
case, the vehicle is not ready for I/M
testing.
If the vehicle
’s engine or transmission has
just been serviced, or the battery has
recently run down or been replaced, the
OBD-II system may indicate that the
vehicle is not ready for I/M testing. To
determine if the vehicle is ready for I/M
testing, turn the ignition key to the on
position for 15 seconds without cranking
the engine. If the service engine soon
indicator blinks eight times, it means that
the vehicle is not ready for I/M testing; if
the service engine soon indicator stays on
solid, it means that your vehicle is ready
for I/M testing.
The OBD-II system checks the emission
control system during normal driving. A
complete check may take several days.
If the vehicle is not ready for I/M testing,
you can perform the following driving cycle
consisting of mixed city and highway
driving:
1. 15 minutes of steady driving on an expressway or highway followed by 20
minutes of stop-and-go driving with at
least four 30-second idle periods.
2. Allow your vehicle to sit for at least eight hours with the ignition off. Then,
start the vehicle and complete the
above driving cycle. The vehicle must
warm up to its normal operating
temperature. Once started, do not turn
off the vehicle until the above driving
cycle is complete.
If the vehicle is still not ready for I/M
testing, you need to repeat the above
driving cycle.
199
Explorer (CTW), enUSA, Edition date: 202007, Second-Printing Engine Emission Control
Page 230 of 577
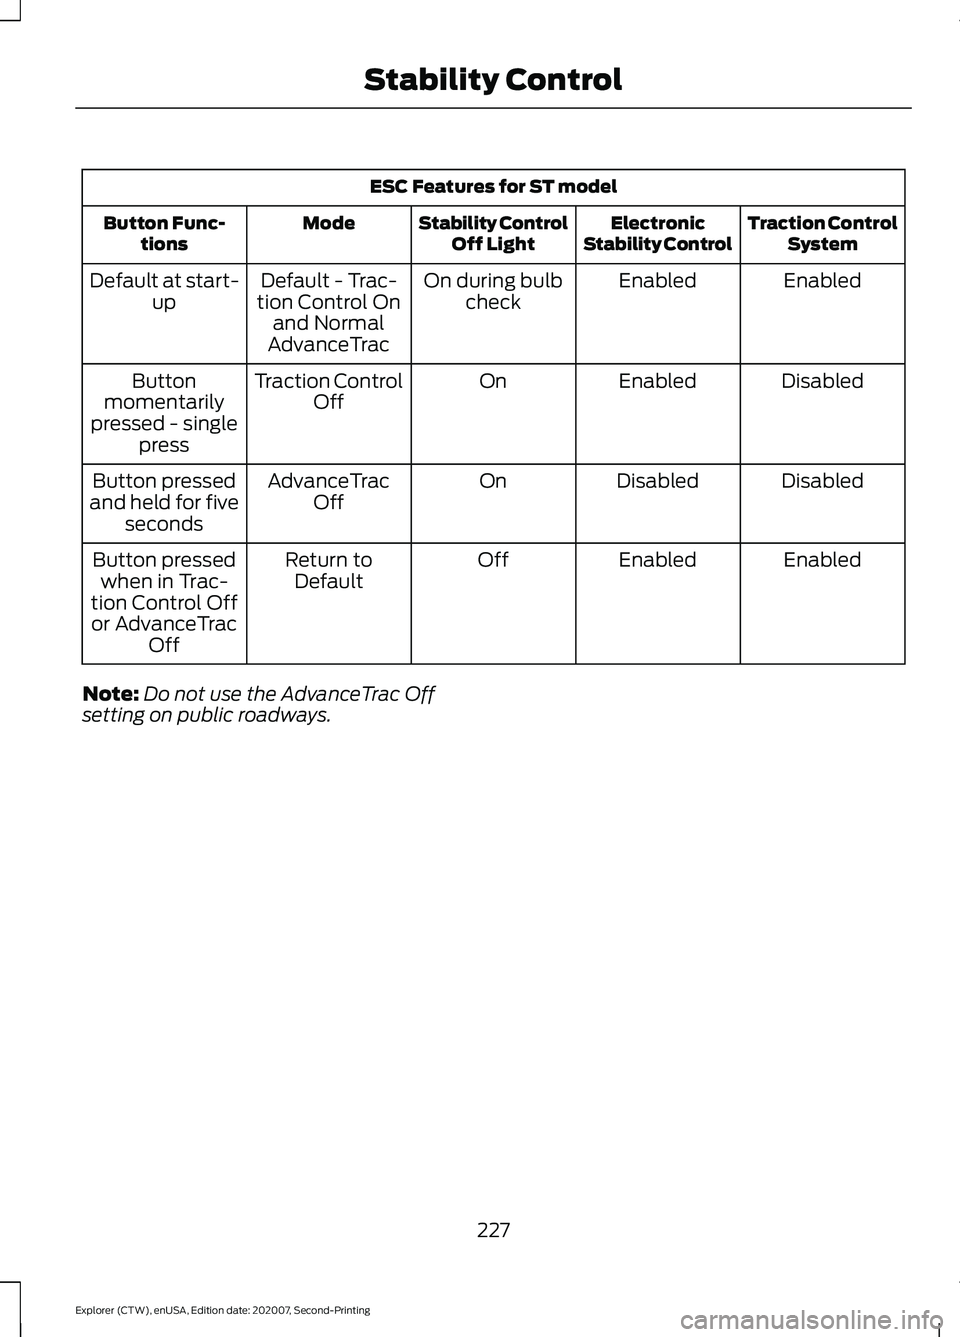
ESC Features for ST model
Traction ControlSystem
Electronic
Stability Control
Stability Control
Off Light
Mode
Button Func-
tions
Enabled
Enabled
On during bulb
check
Default - Trac-
tion Control On and Normal
AdvanceTrac
Default at start-
up
Disabled
Enabled
On
Traction Control
Off
Button
momentarily
pressed - single press
Disabled
Disabled
On
AdvanceTrac
Off
Button pressed
and held for five seconds
Enabled
Enabled
Off
Return to
Default
Button pressed
when in Trac-
tion Control Off or AdvanceTrac Off
Note: Do not use the AdvanceTrac Off
setting on public roadways.
227
Explorer (CTW), enUSA, Edition date: 202007, Second-Printing Stability Control
Page 275 of 577
Note:
If your vehicle has a suspension kit
not approved by us, the system may not
correctly function.
Note: Always replace headlamp bulbs with
those specifically designed for your vehicle.
Other bulbs could reduce system
performance.
The system turns on when you switch the
ignition on and you cannot switch the
system off.
Using Speed Sign Recognition
Setting the System Speed Warning
You can set the system speed warning to
alert you when the vehicle speed exceeds
the speed limit recognized by the system
by a certain speed tolerance.
Note: The system remembers the last
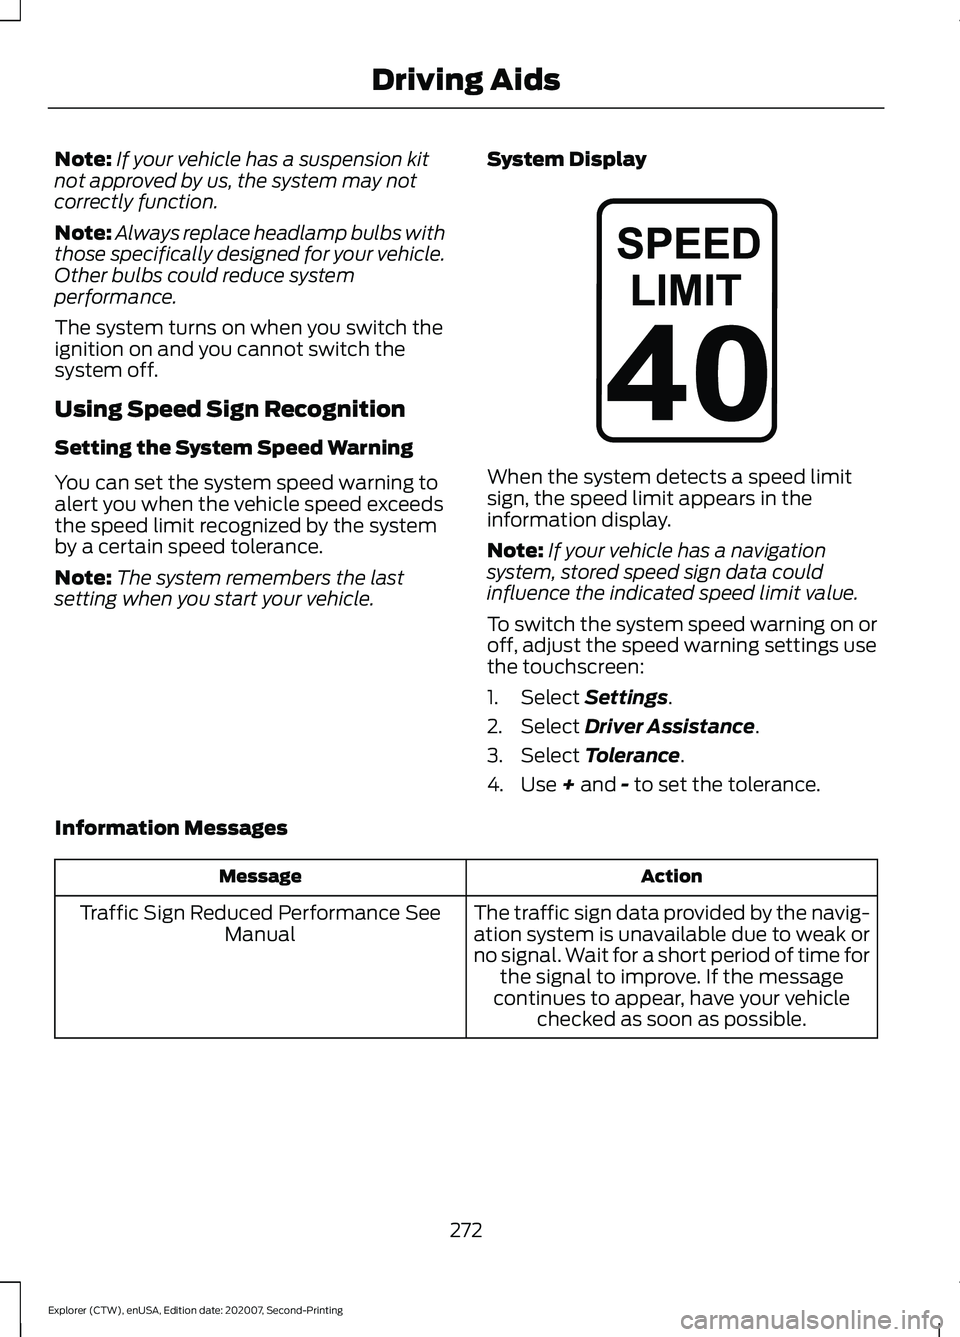
setting when you start your vehicle. System Display When the system detects a speed limit
sign, the speed limit appears in the
information display.
Note:
If your vehicle has a navigation
system, stored speed sign data could
influence the indicated speed limit value.
To switch the system speed warning on or
off, adjust the speed warning settings use
the touchscreen:
1. Select Settings.
2. Select
Driver Assistance.
3. Select
Tolerance.
4. Use
+ and - to set the tolerance.
Information Messages Action
Message
The traffic sign data provided by the navig-ation system is unavailable due to weak or
no signal. Wait for a short period of time for the signal to improve. If the message
continues to appear, have your vehicle checked as soon as possible.
Traffic Sign Reduced Performance See
Manual
272
Explorer (CTW), enUSA, Edition date: 202007, Second-Printing Driving AidsE317824
Page 342 of 577
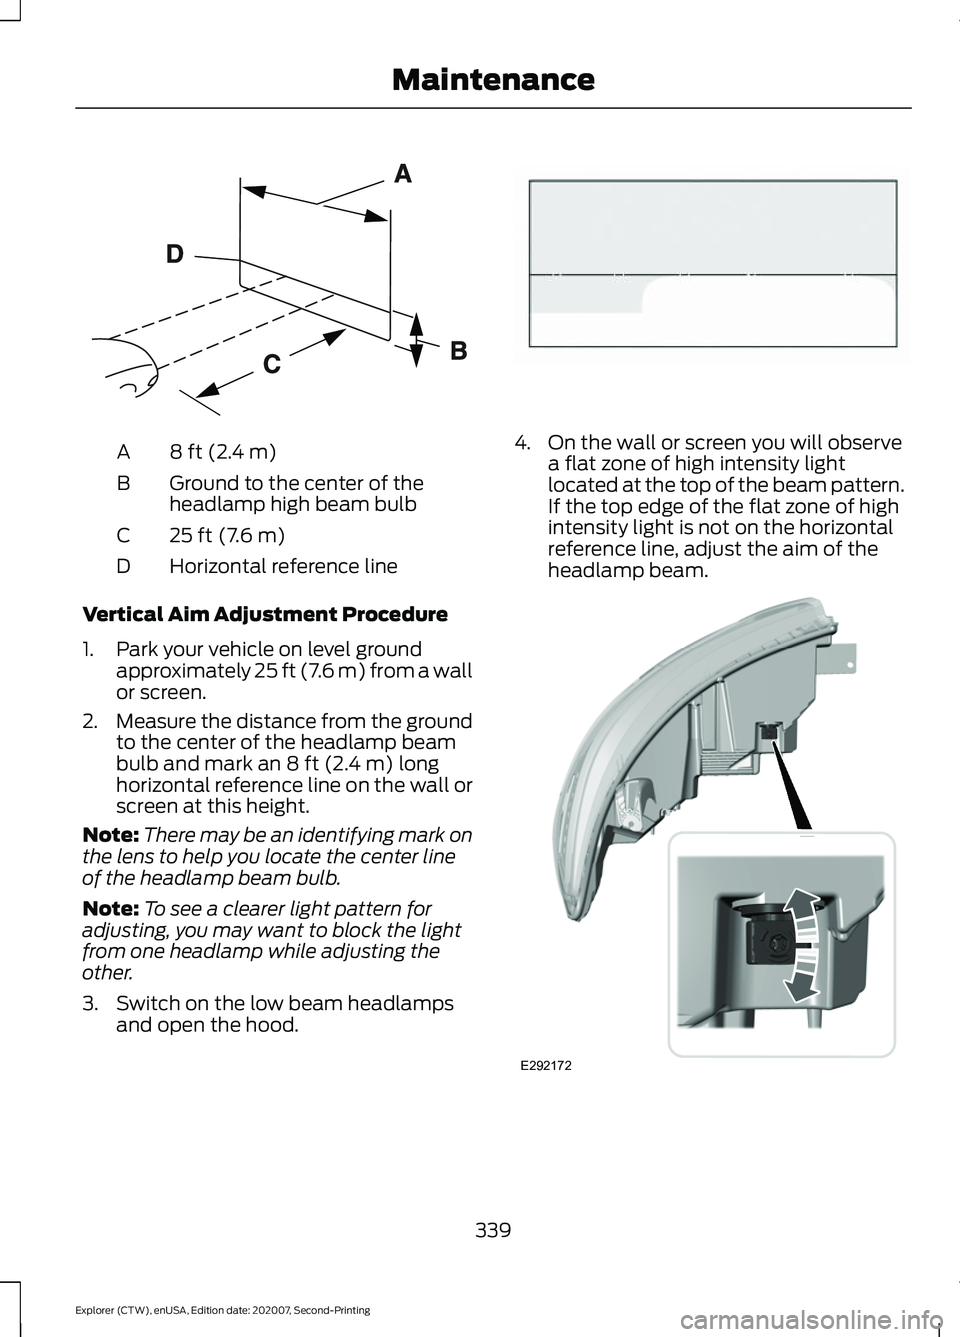
8 ft (2.4 m)
A
Ground to the center of the
headlamp high beam bulb
B
25 ft (7.6 m)
C
Horizontal reference line
D
Vertical Aim Adjustment Procedure
1. Park your vehicle on level ground approximately 25 ft (7.6 m) from a wall
or screen.
2. Measure the distance from the ground
to the center of the headlamp beam
bulb and mark an
8 ft (2.4 m) long
horizontal reference line on the wall or
screen at this height.
Note: There may be an identifying mark on
the lens to help you locate the center line
of the headlamp beam bulb.
Note: To see a clearer light pattern for
adjusting, you may want to block the light
from one headlamp while adjusting the
other.
3. Switch on the low beam headlamps and open the hood. 4. On the wall or screen you will observe
a flat zone of high intensity light
located at the top of the beam pattern.
If the top edge of the flat zone of high
intensity light is not on the horizontal
reference line, adjust the aim of the
headlamp beam. 339
Explorer (CTW), enUSA, Edition date: 202007, Second-Printing MaintenanceE142592 E142465 E292172