low beam FORD EXPLORER 2021 Owners Manual
[x] Cancel search | Manufacturer: FORD, Model Year: 2021, Model line: EXPLORER, Model: FORD EXPLORER 2021Pages: 577, PDF Size: 9.79 MB
Page 91 of 577
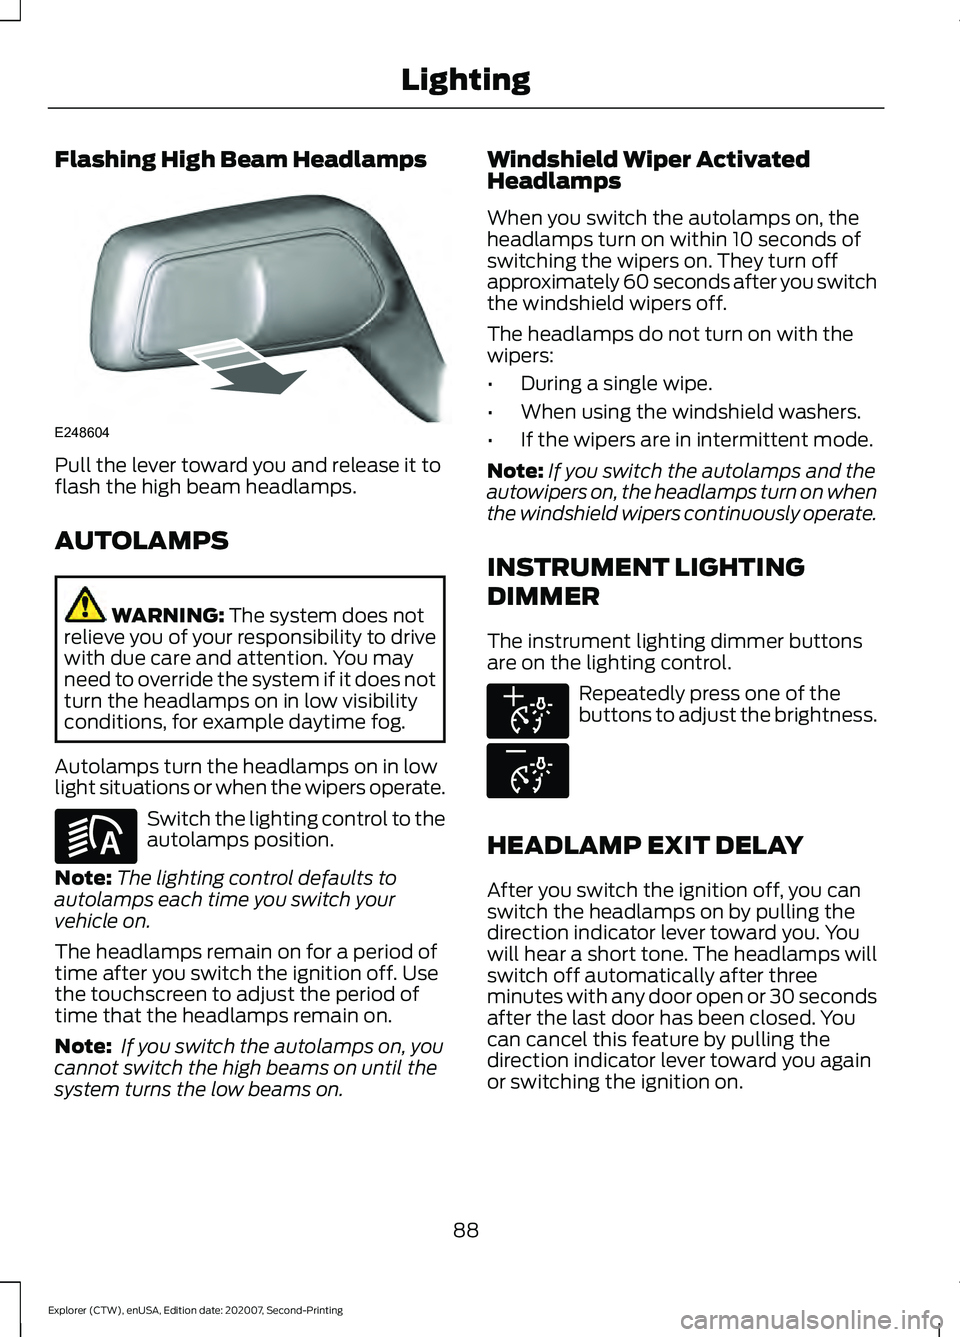
Flashing High Beam Headlamps
Pull the lever toward you and release it to
flash the high beam headlamps.
AUTOLAMPS
WARNING: The system does not
relieve you of your responsibility to drive
with due care and attention. You may
need to override the system if it does not
turn the headlamps on in low visibility
conditions, for example daytime fog.
Autolamps turn the headlamps on in low
light situations or when the wipers operate. Switch the lighting control to the
autolamps position.
Note: The lighting control defaults to
autolamps each time you switch your
vehicle on.
The headlamps remain on for a period of
time after you switch the ignition off. Use
the touchscreen to adjust the period of
time that the headlamps remain on.
Note: If you switch the autolamps on, you
cannot switch the high beams on until the
system turns the low beams on. Windshield Wiper Activated
Headlamps
When you switch the autolamps on, the
headlamps turn on within 10 seconds of
switching the wipers on. They turn off
approximately 60 seconds after you switch
the windshield wipers off.
The headlamps do not turn on with the
wipers:
•
During a single wipe.
• When using the windshield washers.
• If the wipers are in intermittent mode.
Note: If you switch the autolamps and the
autowipers on, the headlamps turn on when
the windshield wipers continuously operate.
INSTRUMENT LIGHTING
DIMMER
The instrument lighting dimmer buttons
are on the lighting control. Repeatedly press one of the
buttons to adjust the brightness.
HEADLAMP EXIT DELAY
After you switch the ignition off, you can
switch the headlamps on by pulling the
direction indicator lever toward you. You
will hear a short tone. The headlamps will
switch off automatically after three
minutes with any door open or 30 seconds
after the last door has been closed. You
can cancel this feature by pulling the
direction indicator lever toward you again
or switching the ignition on.
88
Explorer (CTW), enUSA, Edition date: 202007, Second-Printing LightingE248604 E281240 E291299 E296433
Page 97 of 577
WHAT IS AUTOMATIC HIGH
BEAM CONTROL
The system turns on high beams if it is dark
enough and no other traffic is present. If it
detects an approaching vehicle
’s
headlamps or tail lamps, or street lighting
ahead, the system turns the high beams
off. Low beams remain on.
A camera sensor, centrally mounted
behind the windshield of your vehicle,
continuously monitors conditions to turn
the high beams on and off.
SWITCHING AUTOMATIC HIGH
BEAM CONTROL ON AND OFF WARNING: Do not use the system
in poor visibility, for example fog, heavy
rain, spray or snow.
1. Press
Settings on the touchscreen.
2. Press
Vehicle.
3. Press
Lighting.
Activating the Automatic High
Beam Control Switch the lighting control to the
autolamps position. See
Autolamps
(page 88).
Note: The lighting control defaults to
autolamps each time you switch your
vehicle on.
When active, the high beams turn on if:
• The ambient light level is low enough.
• There is no traffic in front of your
vehicle.
• The vehicle speed is greater than
approximately
32 mph (51 km/h). When active, the high beams turn off if:
•
The ambient light level is high enough
that high beams are not required.
• The system detects an approaching
vehicle's headlamps or tail lamps.
• The system detects severe rain, snow
or fog.
• The camera is blocked.
• The vehicle speed falls below
approximately
27 mph (44 km/h).
Note: The deactivation speed is lower on
curves.
Note: High beam reactivation may be
delayed in certain curvy road situations.
Note: The system may not operate properly
if the sensor is blocked. Keep the windshield
free from obstruction or damage.
Note: The system may not operate properly
in cold or inclement conditions. You can
switch on the high beams by overriding the
system.
Note: If the system detects a blockage, for
example bird droppings, bug splatter, snow
or ice, the system goes into low beam mode
until you clear the blockage. A message may
appear in the information display if the
camera is blocked.
Note: Using much larger tires or equipping
vehicle accessories such as snowplows can
modify your vehicle's ride height and
degrade automatic high beam control
performance.
AUTOMATIC HIGH BEAM
CONTROL INDICATORS The indicator illuminates to
confirm when the system is
ready to assist.
94
Explorer (CTW), enUSA, Edition date: 202007, Second-Printing Automatic High Beam ControlE281240
Page 98 of 577
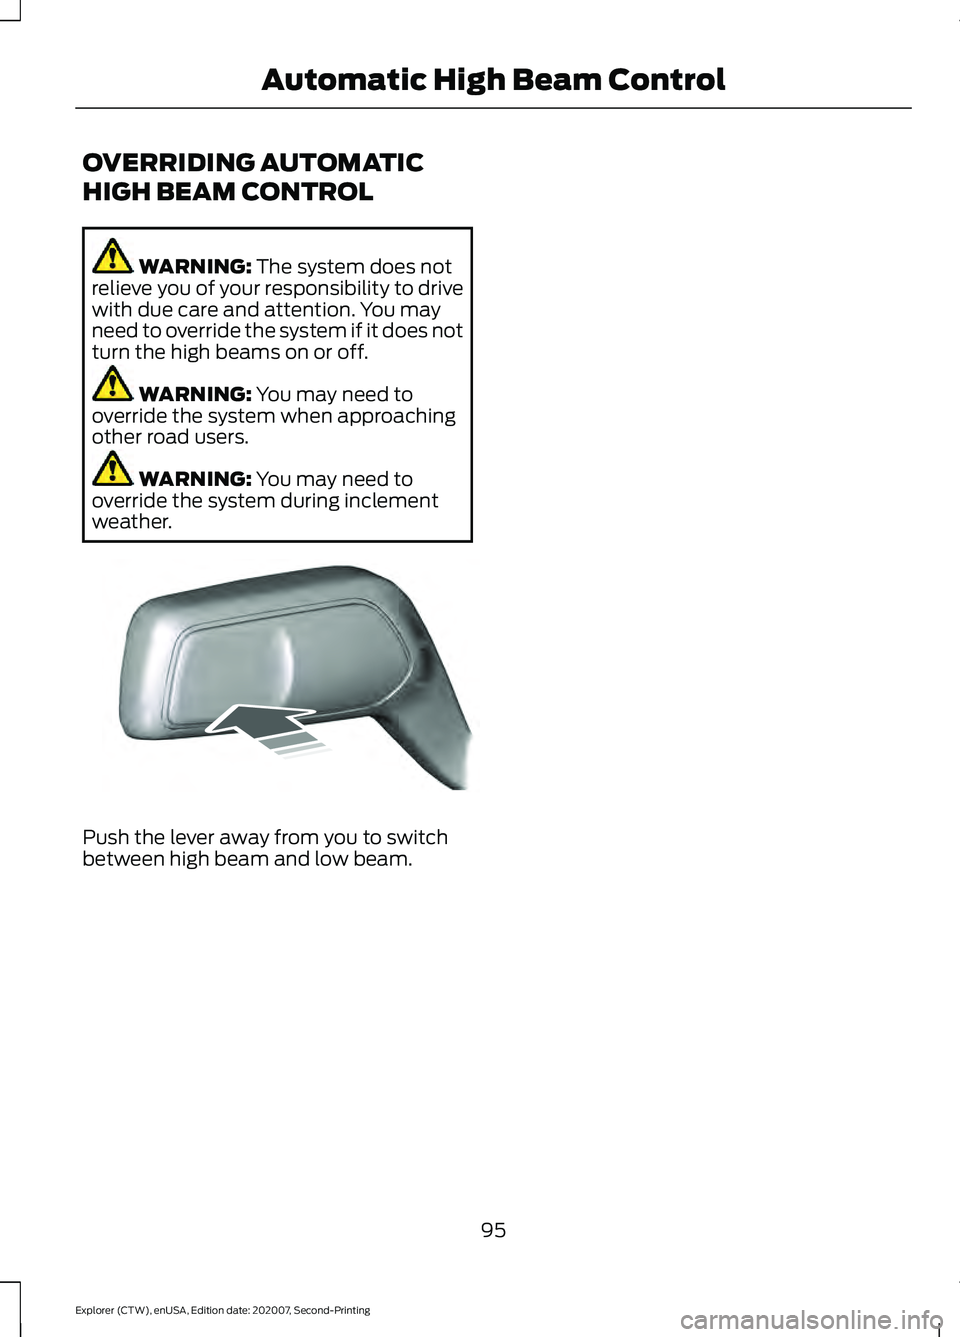
OVERRIDING AUTOMATIC
HIGH BEAM CONTROL
WARNING: The system does not
relieve you of your responsibility to drive
with due care and attention. You may
need to override the system if it does not
turn the high beams on or off. WARNING:
You may need to
override the system when approaching
other road users. WARNING:
You may need to
override the system during inclement
weather. Push the lever away from you to switch
between high beam and low beam.
95
Explorer (CTW), enUSA, Edition date: 202007, Second-Printing Automatic High Beam ControlE248603
Page 111 of 577
On (white light): Illuminates when you
switch on the adaptive cruise control
system. Turns off when you switch the
cruise control system off.
Engaged (green light): Illuminates when
you engage the adaptive cruise control
system. Turns off when you disengage the
cruise control system.
Anti-Lock Braking System
If it illuminates when you are
driving, this indicates a system
error. You continue to have the
normal braking (without ABS) unless the
brake system warning lamp also
illuminates. Have the system checked by
an authorized dealer.
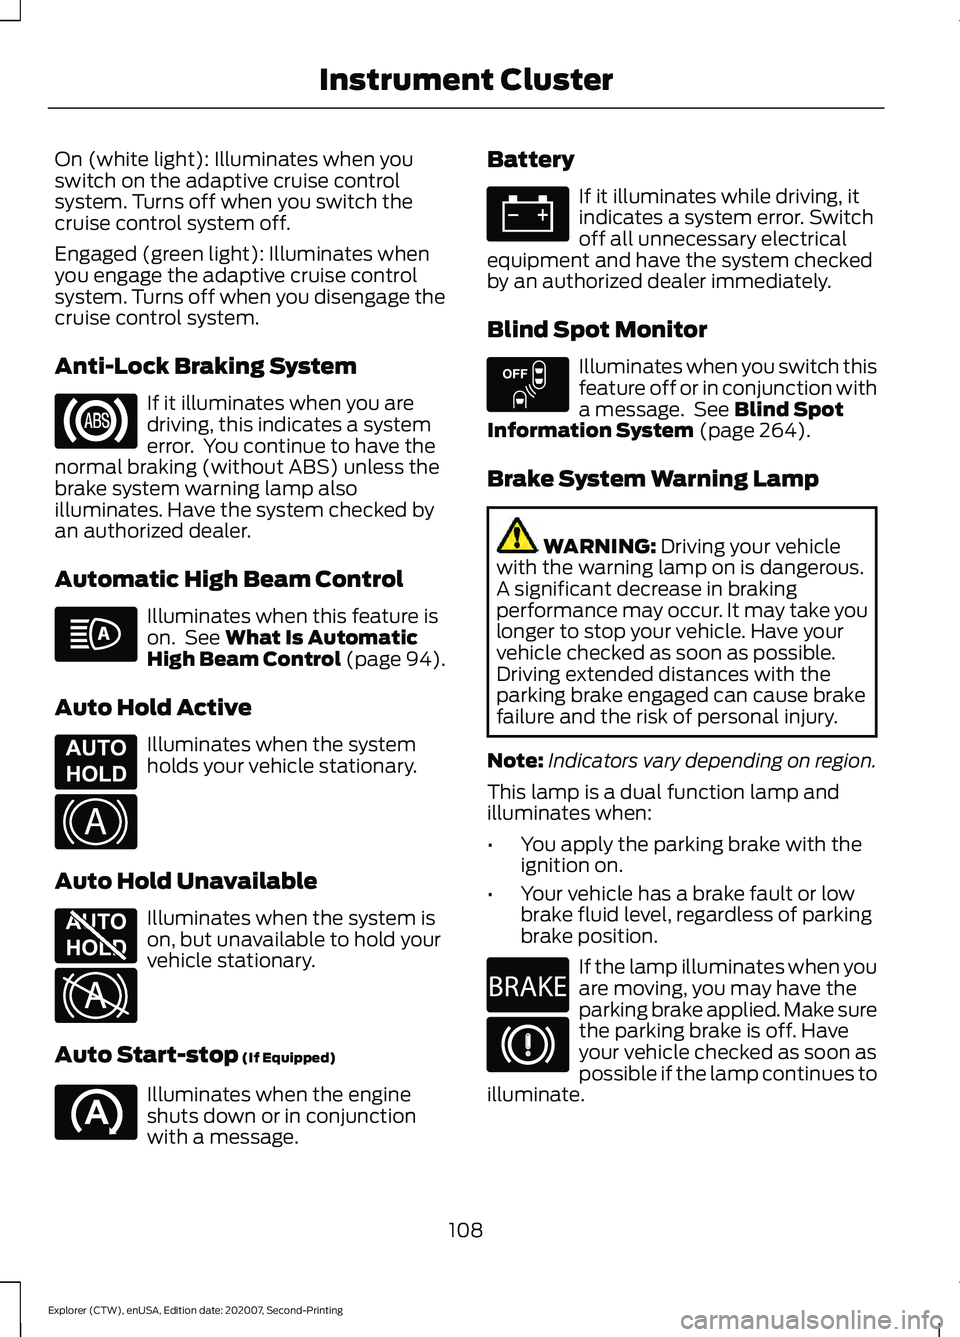
Automatic High Beam Control Illuminates when this feature is
on. See What Is Automatic
High Beam Control (page 94).
Auto Hold Active Illuminates when the system
holds your vehicle stationary.
Auto Hold Unavailable Illuminates when the system is
on, but unavailable to hold your
vehicle stationary.
Auto Start-stop
(If Equipped) Illuminates when the engine
shuts down or in conjunction
with a message. Battery If it illuminates while driving, it
indicates a system error. Switch
off all unnecessary electrical
equipment and have the system checked
by an authorized dealer immediately.
Blind Spot Monitor Illuminates when you switch this
feature off or in conjunction with
a message. See
Blind Spot
Information System (page 264).
Brake System Warning Lamp WARNING:
Driving your vehicle
with the warning lamp on is dangerous.
A significant decrease in braking
performance may occur. It may take you
longer to stop your vehicle. Have your
vehicle checked as soon as possible.
Driving extended distances with the
parking brake engaged can cause brake
failure and the risk of personal injury.
Note: Indicators vary depending on region.
This lamp is a dual function lamp and
illuminates when:
• You apply the parking brake with the
ignition on.
• Your vehicle has a brake fault or low
brake fluid level, regardless of parking
brake position. If the lamp illuminates when you
are moving, you may have the
parking brake applied. Make sure
the parking brake is off. Have
your vehicle checked as soon as
possible if the lamp continues to
illuminate.
108
Explorer (CTW), enUSA, Edition date: 202007, Second-Printing Instrument Cluster E197933 E322410 E197934 E322411 E151262 E270480
Page 113 of 577
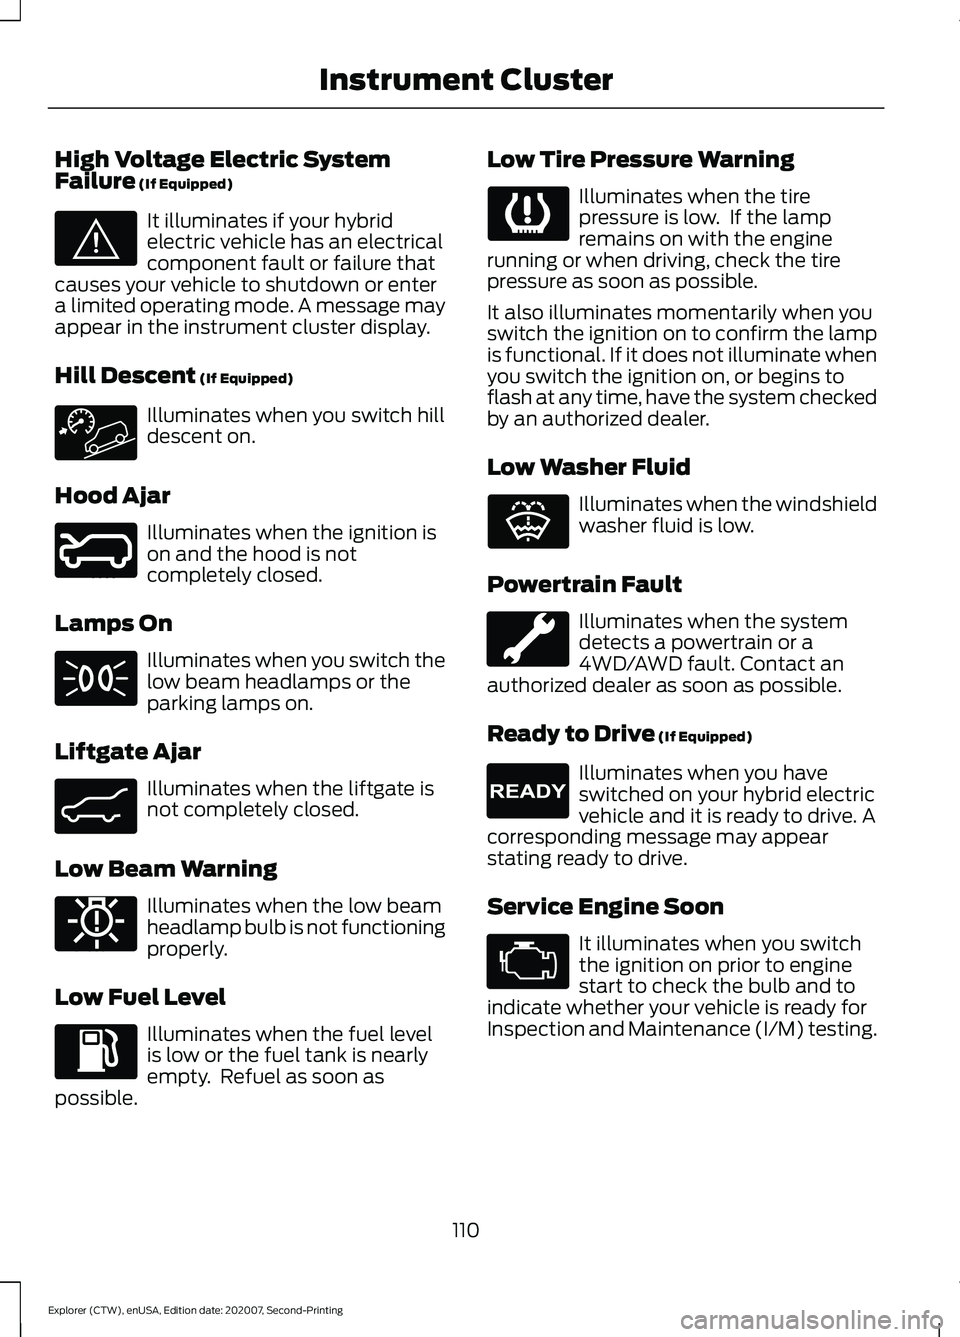
High Voltage Electric System
Failure (If Equipped)
It illuminates if your hybrid
electric vehicle has an electrical
component fault or failure that
causes your vehicle to shutdown or enter
a limited operating mode. A message may
appear in the instrument cluster display.
Hill Descent
(If Equipped) Illuminates when you switch hill
descent on.
Hood Ajar Illuminates when the ignition is
on and the hood is not
completely closed.
Lamps On Illuminates when you switch the
low beam headlamps or the
parking lamps on.
Liftgate Ajar Illuminates when the liftgate is
not completely closed.
Low Beam Warning Illuminates when the low beam
headlamp bulb is not functioning
properly.
Low Fuel Level Illuminates when the fuel level
is low or the fuel tank is nearly
empty. Refuel as soon as
possible. Low Tire Pressure Warning Illuminates when the tire
pressure is low. If the lamp
remains on with the engine
running or when driving, check the tire
pressure as soon as possible.
It also illuminates momentarily when you
switch the ignition on to confirm the lamp
is functional. If it does not illuminate when
you switch the ignition on, or begins to
flash at any time, have the system checked
by an authorized dealer.
Low Washer Fluid Illuminates when the windshield
washer fluid is low.
Powertrain Fault Illuminates when the system
detects a powertrain or a
4WD/AWD fault. Contact an
authorized dealer as soon as possible.
Ready to Drive
(If Equipped) Illuminates when you have
switched on your hybrid electric
vehicle and it is ready to drive. A
corresponding message may appear
stating ready to drive.
Service Engine Soon It illuminates when you switch
the ignition on prior to engine
start to check the bulb and to
indicate whether your vehicle is ready for
Inspection and Maintenance (I/M) testing.
110
Explorer (CTW), enUSA, Edition date: 202007, Second-Printing Instrument ClusterE144693 E246598 E162453 E181350 E132353 E224090
Page 341 of 577
After battery replacement, or in some
cases after charging the battery with an
external charger, the battery management
system requires eight hours of vehicle sleep
time to relearn the battery state of charge.
During this time your vehicle must remain
fully locked with the ignition switched off.
Note:
Prior to relearning the battery state
of charge, the battery management system
may temporarily disable some electrical
systems.
Electrical Accessory Installation
To make sure the battery management
system works correctly, do not connect an
electrical device ground connection
directly to the battery negative post. This
can cause inaccurate measurements of
the battery condition and potential
incorrect system operation.
Note: If you add electrical accessories or
components to the vehicle, it may adversely
affect battery performance and durability.
This may also affect the performance of
other electrical systems in the vehicle.
Remove and Reinstall the Battery
To disconnect or remove the battery, do
the following:
1. Apply the parking brake and switch the
ignition off.
2. Switch all electrical equipment off, for
example lights and radio.
3. Wait a minimum of two minutes before
disconnecting the battery.
Note: The engine management system has
a power hold function and remains powered
for a period of time after you switch the
ignition off. This is to allow diagnostic and
adaptive tables to be stored. Disconnecting
the battery without waiting can cause
damage not covered by the vehicle
Warranty. 4. Disconnect the negative battery cable
terminal.
5. Disconnect the positive battery cable terminal.
6. Remove the battery securing clamp.
7. Remove the battery.
8. To install, reverse the removal procedure.
Note: Before reconnecting the battery,
make sure the ignition remains switched off.
Note: Make sure the battery cable terminals
are fully tightened.
If you disconnect or replace the vehicle
battery, you must reset the following
features:
• Window bounce-back. See Power
Windows (page 96).
• Clock Settings.
• Pre-set radio stations.
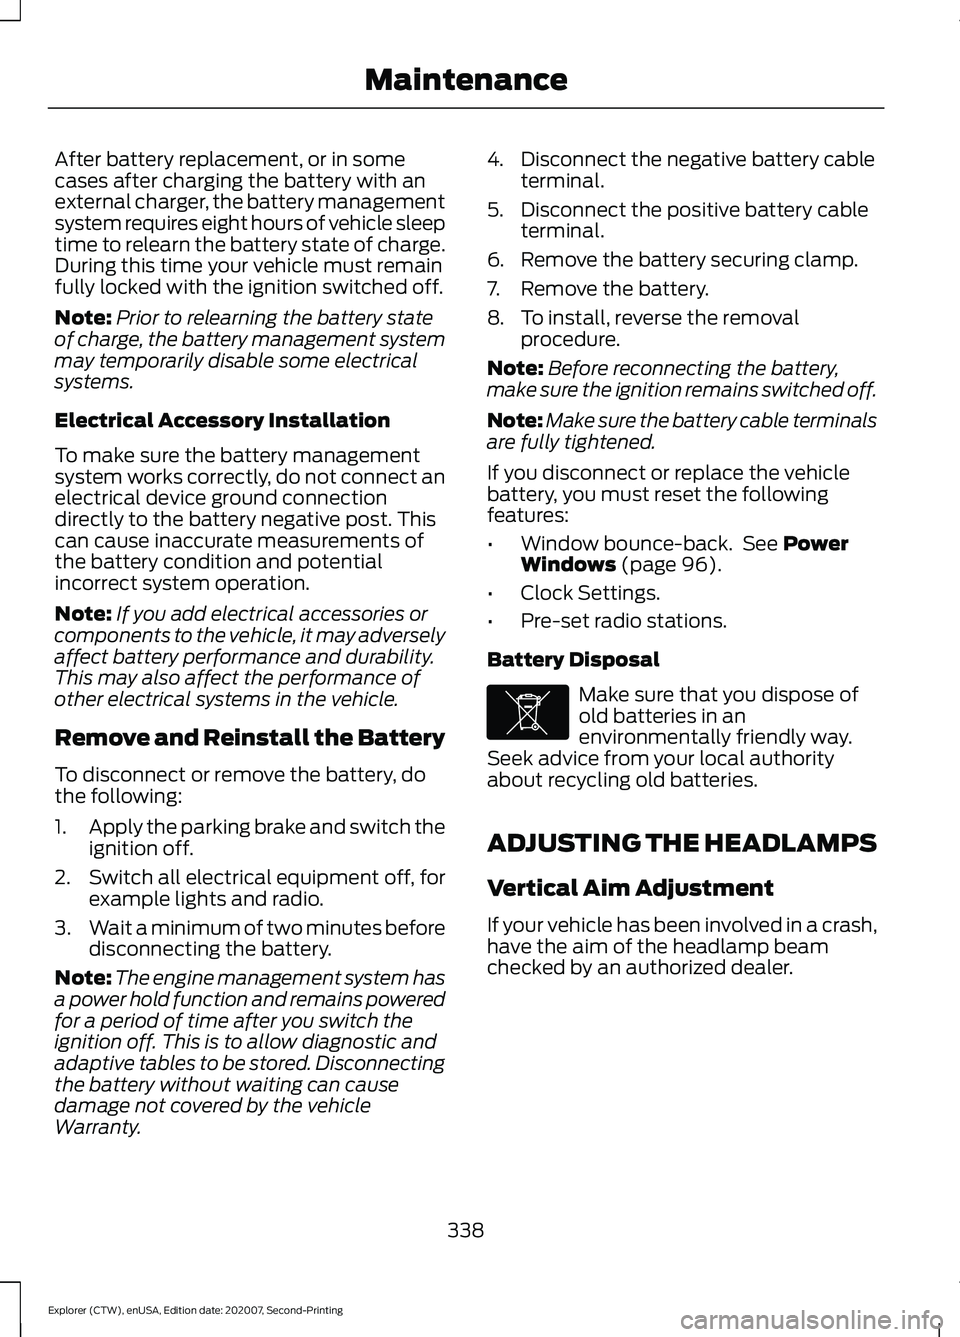
Battery Disposal Make sure that you dispose of
old batteries in an
environmentally friendly way.
Seek advice from your local authority
about recycling old batteries.
ADJUSTING THE HEADLAMPS
Vertical Aim Adjustment
If your vehicle has been involved in a crash,
have the aim of the headlamp beam
checked by an authorized dealer.
338
Explorer (CTW), enUSA, Edition date: 202007, Second-Printing MaintenanceE107998
Page 342 of 577
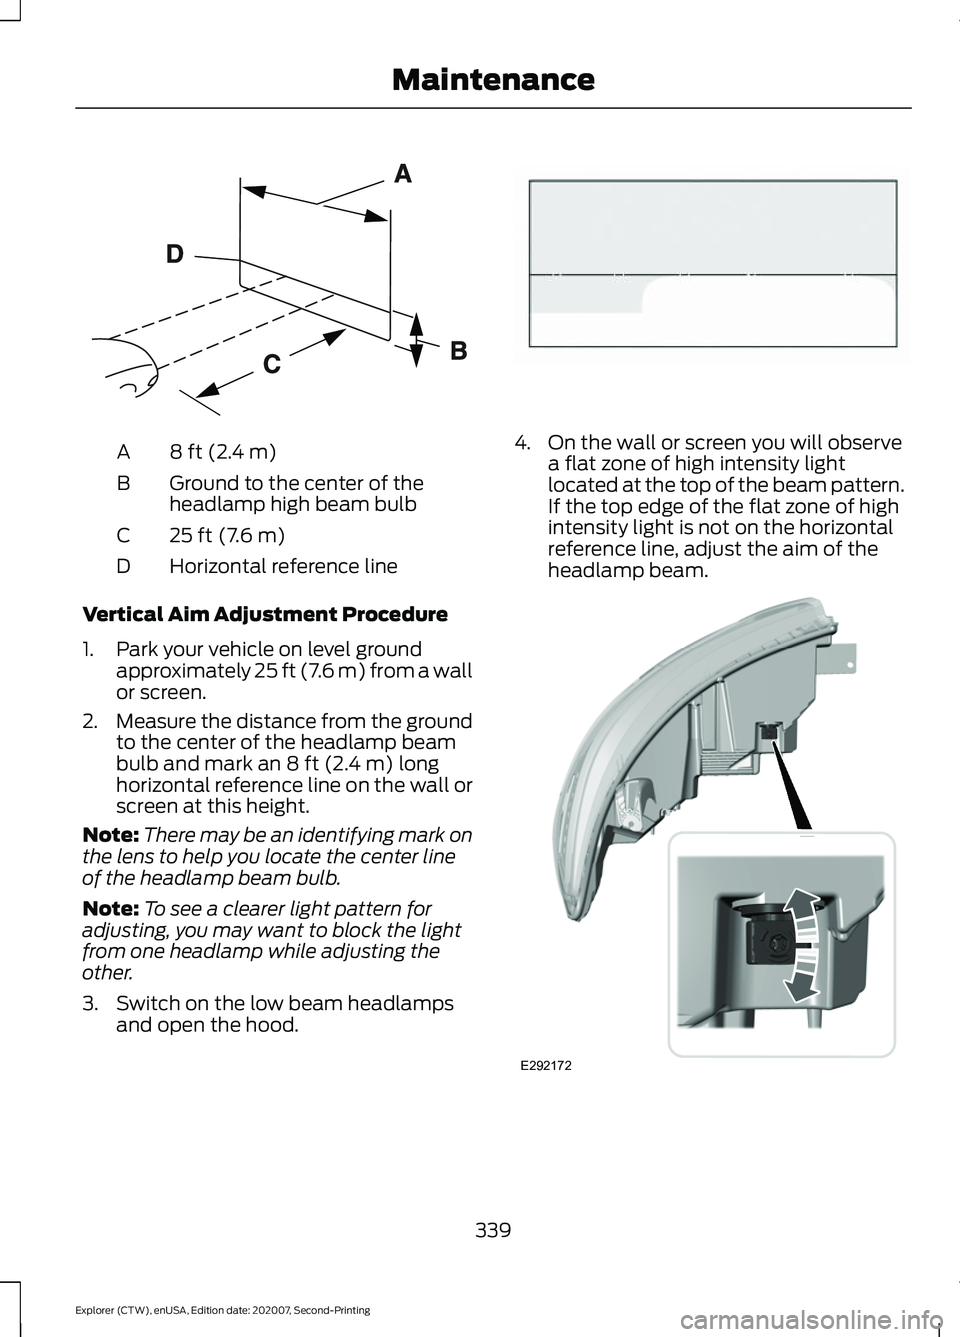
8 ft (2.4 m)
A
Ground to the center of the
headlamp high beam bulb
B
25 ft (7.6 m)
C
Horizontal reference line
D
Vertical Aim Adjustment Procedure
1. Park your vehicle on level ground approximately 25 ft (7.6 m) from a wall
or screen.
2. Measure the distance from the ground
to the center of the headlamp beam
bulb and mark an
8 ft (2.4 m) long
horizontal reference line on the wall or
screen at this height.
Note: There may be an identifying mark on
the lens to help you locate the center line
of the headlamp beam bulb.
Note: To see a clearer light pattern for
adjusting, you may want to block the light
from one headlamp while adjusting the
other.
3. Switch on the low beam headlamps and open the hood. 4. On the wall or screen you will observe
a flat zone of high intensity light
located at the top of the beam pattern.
If the top edge of the flat zone of high
intensity light is not on the horizontal
reference line, adjust the aim of the
headlamp beam. 339
Explorer (CTW), enUSA, Edition date: 202007, Second-Printing MaintenanceE142592 E142465 E292172
Page 345 of 577
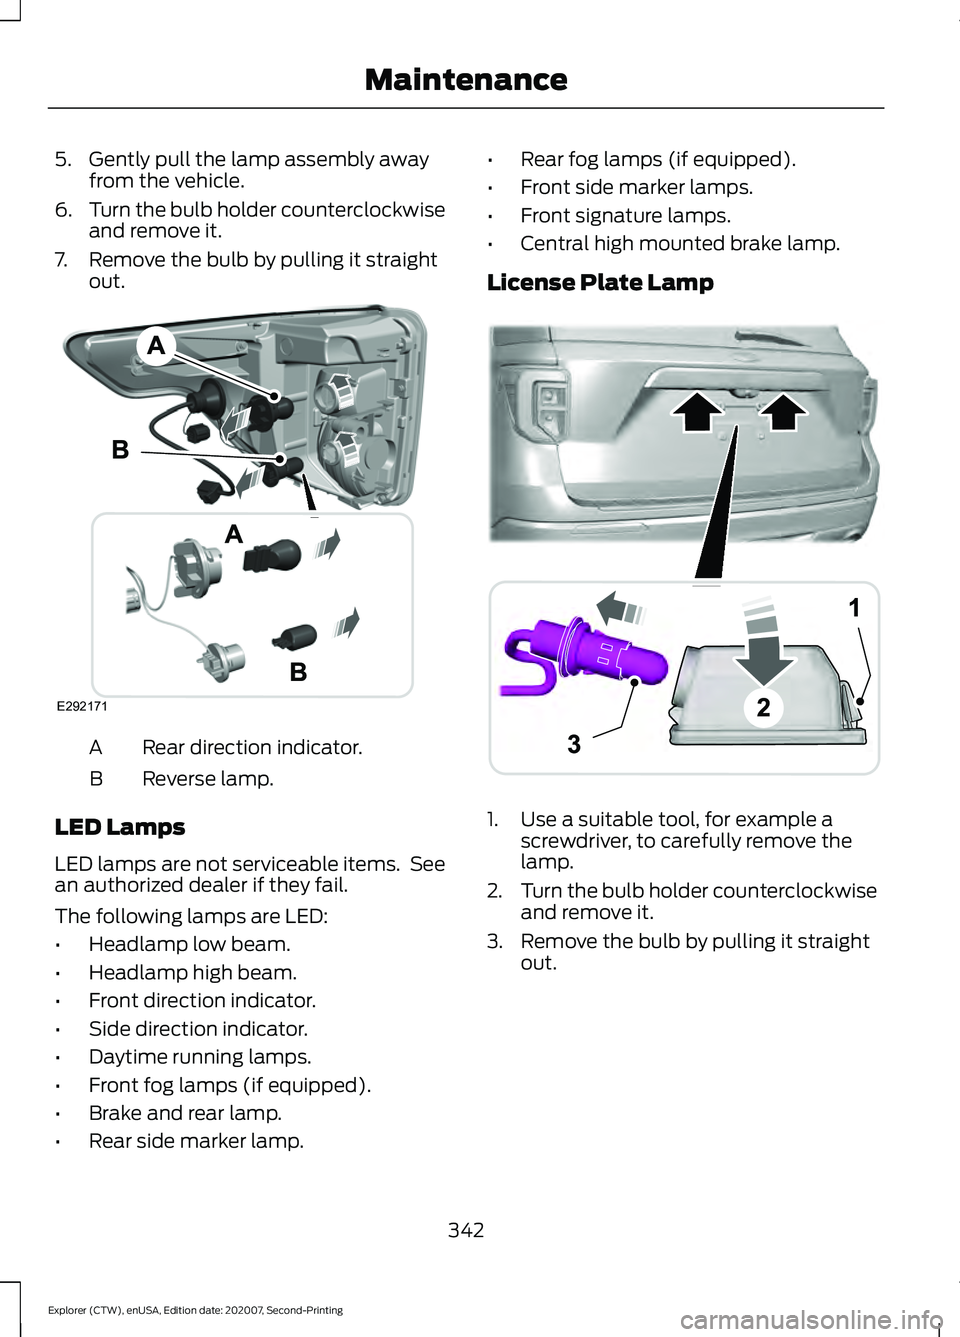
5. Gently pull the lamp assembly away
from the vehicle.
6. Turn the bulb holder counterclockwise
and remove it.
7. Remove the bulb by pulling it straight out. Rear direction indicator.
A
Reverse lamp.
B
LED Lamps
LED lamps are not serviceable items. See
an authorized dealer if they fail.
The following lamps are LED:
• Headlamp low beam.
• Headlamp high beam.
• Front direction indicator.
• Side direction indicator.
• Daytime running lamps.
• Front fog lamps (if equipped).
• Brake and rear lamp.
• Rear side marker lamp. •
Rear fog lamps (if equipped).
• Front side marker lamps.
• Front signature lamps.
• Central high mounted brake lamp.
License Plate Lamp 1. Use a suitable tool, for example a
screwdriver, to carefully remove the
lamp.
2. Turn the bulb holder counterclockwise
and remove it.
3. Remove the bulb by pulling it straight out.
342
Explorer (CTW), enUSA, Edition date: 202007, Second-Printing MaintenanceE292171 A
B
A
12
203A
AE292276
Page 422 of 577
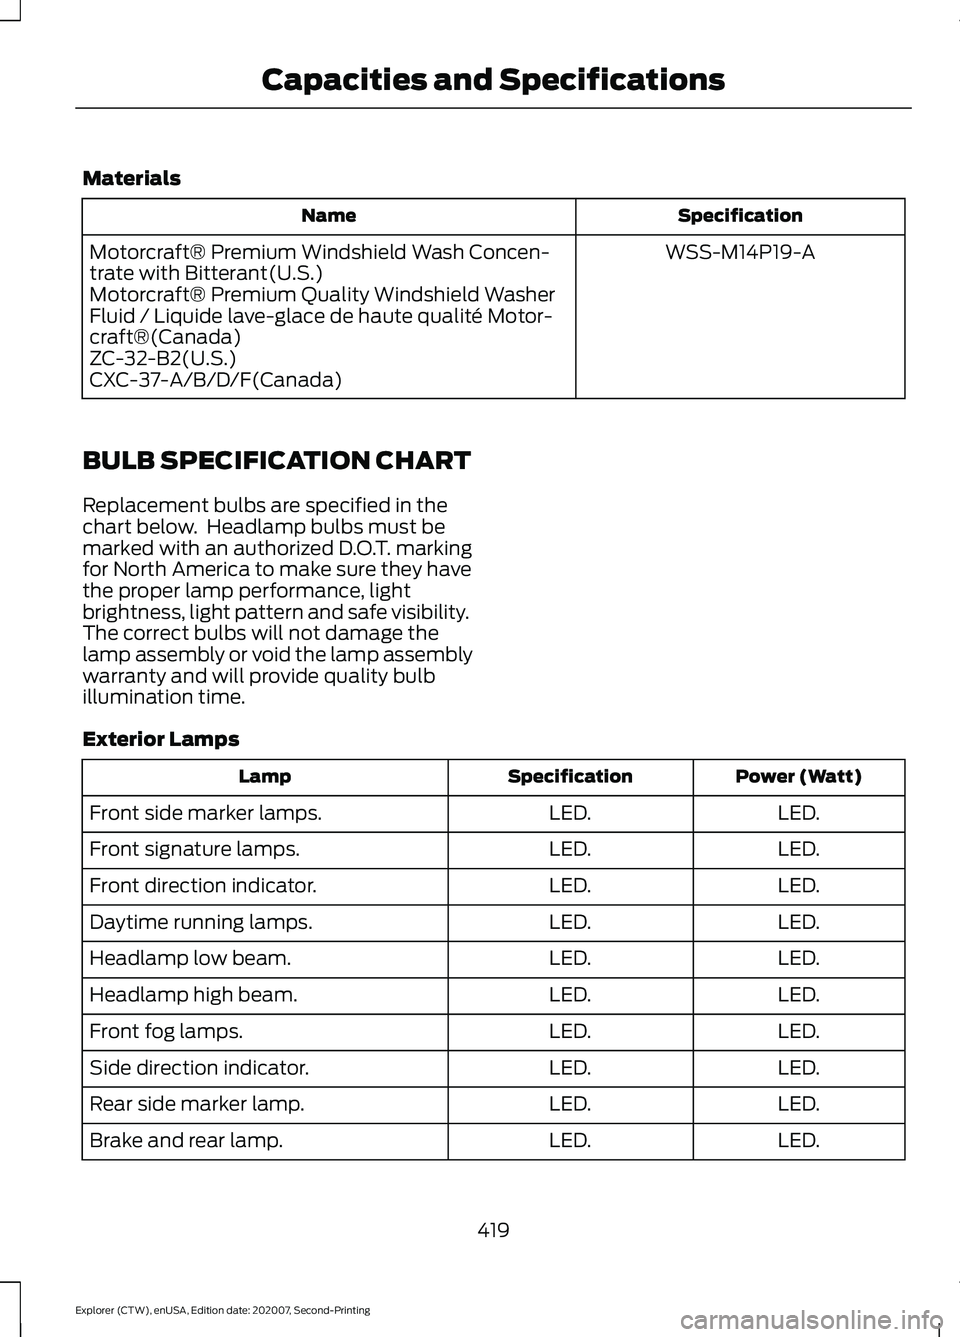
Materials
Specification
Name
WSS-M14P19-A
Motorcraft® Premium Windshield Wash Concen-
trate with Bitterant(U.S.)
Motorcraft® Premium Quality Windshield Washer
Fluid / Liquide lave-glace de haute qualité Motor-
craft®(Canada)
ZC-32-B2(U.S.)
CXC-37-A/B/D/F(Canada)
BULB SPECIFICATION CHART
Replacement bulbs are specified in the
chart below. Headlamp bulbs must be
marked with an authorized D.O.T. marking
for North America to make sure they have
the proper lamp performance, light
brightness, light pattern and safe visibility.
The correct bulbs will not damage the
lamp assembly or void the lamp assembly
warranty and will provide quality bulb
illumination time.
Exterior Lamps Power (Watt)
Specification
Lamp
LED.
LED.
Front side marker lamps.
LED.
LED.
Front signature lamps.
LED.
LED.
Front direction indicator.
LED.
LED.
Daytime running lamps.
LED.
LED.
Headlamp low beam.
LED.
LED.
Headlamp high beam.
LED.
LED.
Front fog lamps.
LED.
LED.
Side direction indicator.
LED.
LED.
Rear side marker lamp.
LED.
LED.
Brake and rear lamp.
419
Explorer (CTW), enUSA, Edition date: 202007, Second-Printing Capacities and Specifications
Page 563 of 577
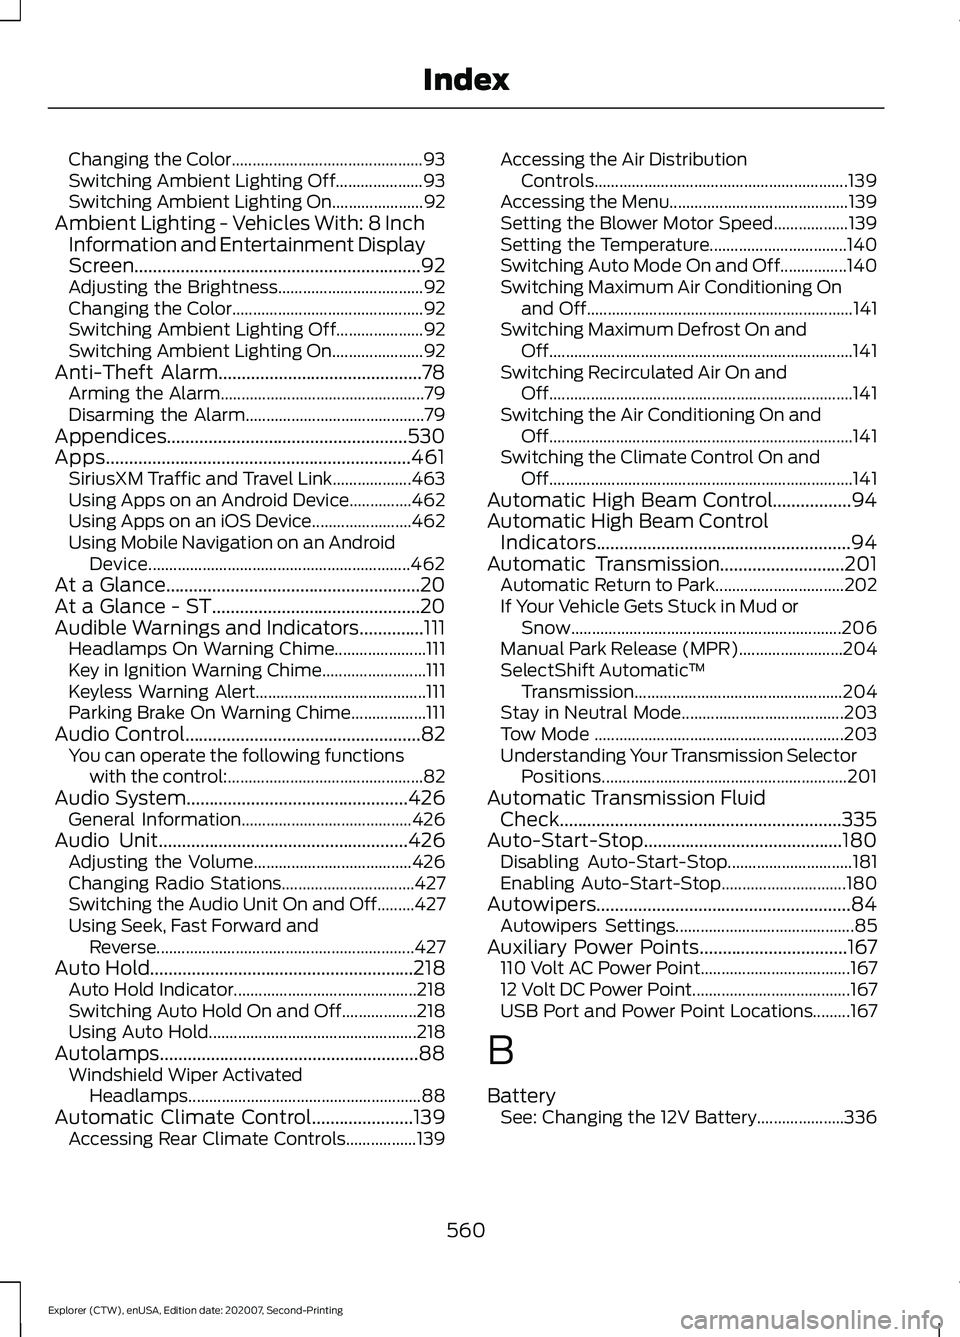
Changing the Color..............................................
93
Switching Ambient Lighting Off..................... 93
Switching Ambient Lighting On...................... 92
Ambient Lighting - Vehicles With: 8 Inch Information and Entertainment Display
Screen..............................................................92
Adjusting the Brightness................................... 92
Changing the Color.............................................. 92
Switching Ambient Lighting Off..................... 92
Switching Ambient Lighting On...................... 92
Anti-Theft Alarm............................................78 Arming the Alarm................................................. 79
Disarming the Alarm........................................... 79
Appendices....................................................530
Apps..................................................................461 SiriusXM Traffic and Travel Link................... 463
Using Apps on an Android Device...............462
Using Apps on an iOS Device........................ 462
Using Mobile Navigation on an Android Device............................................................... 462
At a Glance.......................................................20
At a Glance - ST.............................................20
Audible Warnings and Indicators..............111
Headlamps On Warning Chime...................... 111
Key in Ignition Warning Chime......................... 111
Keyless Warning Alert......................................... 111
Parking Brake On Warning Chime.................. 111
Audio Control...................................................82 You can operate the following functions
with the control:............................................... 82
Audio System................................................426 General Information......................................... 426
Audio Unit
......................................................426
Adjusting the Volume...................................... 426
Changing Radio Stations................................ 427
Switching the Audio Unit On and Off.........427
Using Seek, Fast Forward and Reverse.............................................................. 427
Auto Hold
.........................................................218
Auto Hold Indicator............................................ 218
Switching Auto Hold On and Off.................. 218
Using Auto Hold.................................................. 218
Autolamps........................................................88 Windshield Wiper Activated
Headlamps........................................................ 88
Automatic Climate Control......................139 Accessing Rear Climate Controls.................139 Accessing the Air Distribution
Controls............................................................. 139
Accessing the Menu........................................... 139
Setting the Blower Motor Speed.................. 139
Setting the Temperature................................. 140
Switching Auto Mode On and Off................140
Switching Maximum Air Conditioning On and Off................................................................ 141
Switching Maximum Defrost On and Off........................................................................\
. 141
Switching Recirculated Air On and Off........................................................................\
. 141
Switching the Air Conditioning On and Off........................................................................\
. 141
Switching the Climate Control On and Off........................................................................\
. 141
Automatic High Beam Control.................94
Automatic High Beam Control Indicators.......................................................94
Automatic Transmission
...........................201
Automatic Return to Park............................... 202
If Your Vehicle Gets Stuck in Mud or Snow................................................................. 206
Manual Park Release (MPR)......................... 204
SelectShift Automatic ™
Transmission.................................................. 204
Stay in Neutral Mode....................................... 203
Tow Mode ............................................................ 203
Understanding Your Transmission Selector Positions........................................................... 201
Automatic Transmission Fluid Check.............................................................335
Auto-Start-Stop...........................................180 Disabling Auto-Start-Stop.............................. 181
Enabling Auto-Start-Stop.............................. 180
Autowipers
.......................................................84
Autowipers Settings........................................... 85
Auxiliary Power Points
................................167
110 Volt AC Power Point.................................... 167
12 Volt DC Power Point...................................... 167
USB Port and Power Point Locations.........167
B
Battery See: Changing the 12V Battery..................... 336
560
Explorer (CTW), enUSA, Edition date: 202007, Second-Printing Index