FORD EXPLORER SPORT TRAC 2001 Owner's Manual
Manufacturer: FORD, Model Year: 2001, Model line: EXPLORER SPORT TRAC, Model: FORD EXPLORER SPORT TRAC 2001Pages: 264, PDF Size: 2.19 MB
Page 21 of 264
²A/C-Uses outside air to cool the vehicle. It is quieter than MAX A/C
but not as economical. Airflow will be from the instrument panel
registers.
²
(Panel)-Distributes outside air through the instrument panel
registers. However, the air will not be cooled below the outside
temperature because the air conditioning does not operate in this
mode.
²OFF-Outside air is shut out and the fan will not operate. For short
periods of time only, use this mode to prevent undesirable odors from
entering the vehicle.
²
(Panel and floor)-Distributes outside air through the instrument
panel registers and the floor ducts. Heating and air conditioning
capabilities are provided in this mode. For added customer comfort,
when the temperature control knob is anywhere in between the full
hot and full cold positions, the air distributed through the floor ducts
will be slightly warmer than the air sent to the instrument panel
registers.
²
(Floor)-Allows for maximum heating by distributing outside air
through the floor ducts. However, the air will not be cooled below the
outside temperature because the air conditioning does not operate in
this mode.
²
(Floor and defrost)-Distributes outside air through the windshield
defroster ducts and the floor ducts. Heating and air conditioning
capabilities are provided in this mode. For added customer comfort,
when the temperature control knob is anywhere in between the full
hot and full cold positions, the air distributed through the floor ducts
will be slightly warmer than the air sent to the windshield defrost
ducts. If the temperature is about 6ÉC (43ÉF) or higher, the air
conditioner will automatically dehumidify the air to reduce fogging.
²
(Defrost)-Distributes outside air through the windshield defroster
ducts. It can be used to clear ice or fog from the windshield. If the
temperature is about 6ÉC (43ÉF) or higher, the air conditioner will
automatically dehumidify the air to reduce fogging.
Operating tips
²In humid weather conditions, place the climate control system in DEF
before driving. This will reduce fogging on your windshield. Once the
windshield has been cleared, operate the climate control system as
desired.
Controls and features
21
Page 22 of 264
²To reduce humidity buildup inside the vehicle in cold weather
conditions, don't drive with the climate control system in the OFF or
MAX A/C position.
²To reduce humidity buildup inside the vehicle in warm weather
conditions, don't drive with the climate control system in the OFF
position.
²Under normal weather conditions, your vehicle's climate control
system should be left in any position other than MAX A/C or OFF
when the vehicle is parked. This allows the vehicle to ªbreatheº
through the outside air inlet duct.
²Under snowy or dirty weather conditions, your vehicle's climate
control system should be left in the OFF position when the vehicle is
parked. This allows the climate control system to be free from
contamination of outside pollutants.
²If your vehicle has been parked with the windows closed during warm
weather conditions, the air conditioner will perform more efficiently in
cooling the vehicle if driven for two or three minutes with the
windows open. This will force most of the hot, stale air out of the
vehicle. Once the vehicle has been ªaired outº, operate the climate
control system as desired.
²Do not put objects under the front seat that will interfere with the
airflow to the back seats.
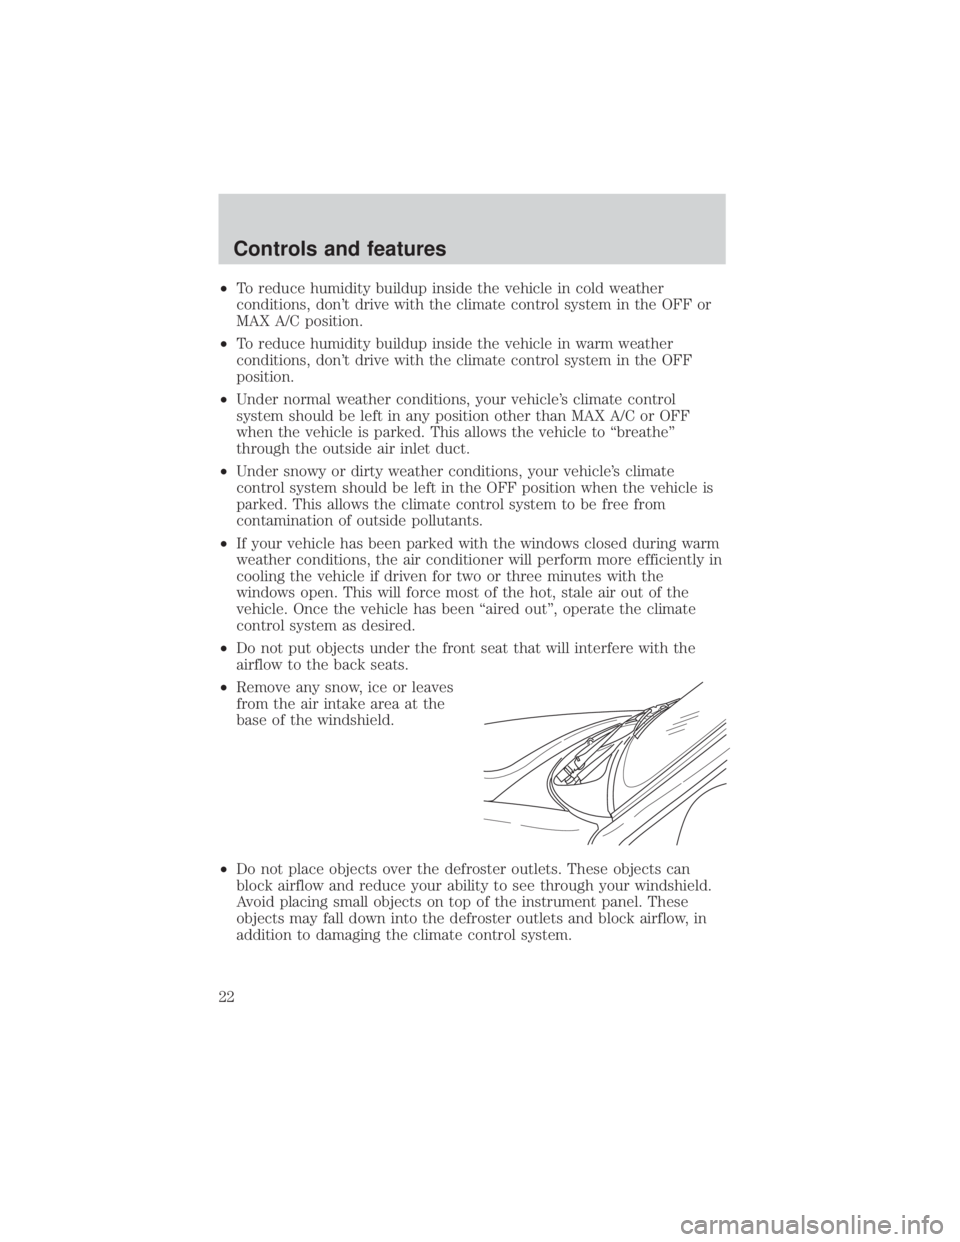
²Remove any snow, ice or leaves
from the air intake area at the
base of the windshield.
²Do not place objects over the defroster outlets. These objects can
block airflow and reduce your ability to see through your windshield.
Avoid placing small objects on top of the instrument panel. These
objects may fall down into the defroster outlets and block airflow, in
addition to damaging the climate control system.
Controls and features
22
Page 23 of 264
To aid in side defogging/demisting in cold weather.
1. Select
2. Set the temperature control to full heat
3. Set the fan speed to HI
4. Direct the outer panel vents towards to side windows
To increase airflow to the outer panel vents, close the central panel
vents.
Do not place objects on top of the instrument panel, as these
objects may become projectiles in a collision or sudden stop.
Rear console climate controls (if equipped)
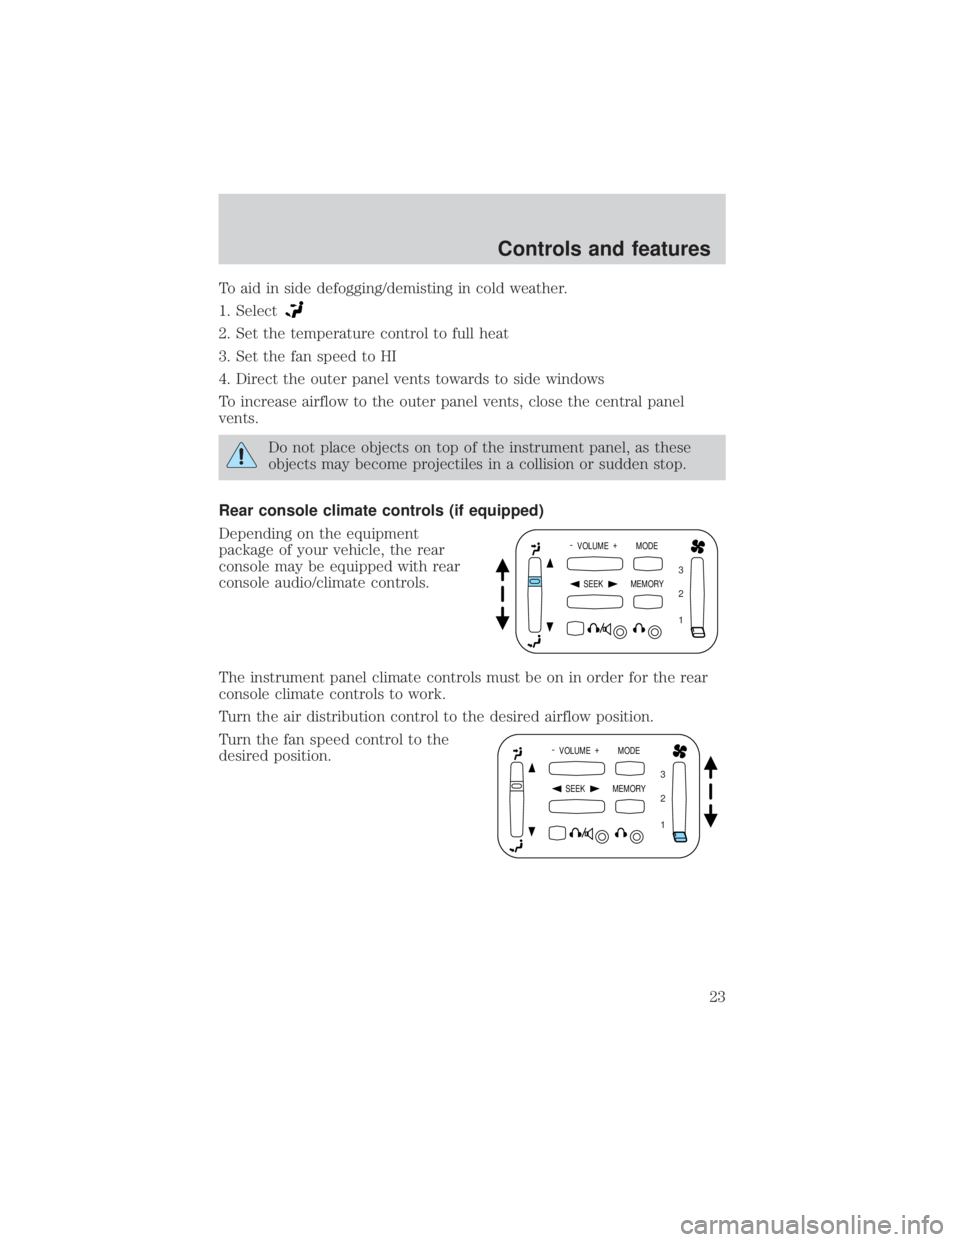
Depending on the equipment
package of your vehicle, the rear
console may be equipped with rear
console audio/climate controls.
The instrument panel climate controls must be on in order for the rear
console climate controls to work.
Turn the air distribution control to the desired airflow position.
Turn the fan speed control to the
desired position.
- VOLUME +
MODE
SEEK MEMORY
1 2 3
- VOLUME +
MODE
SEEK MEMORY
1 2 3
Controls and features
23
Page 24 of 264
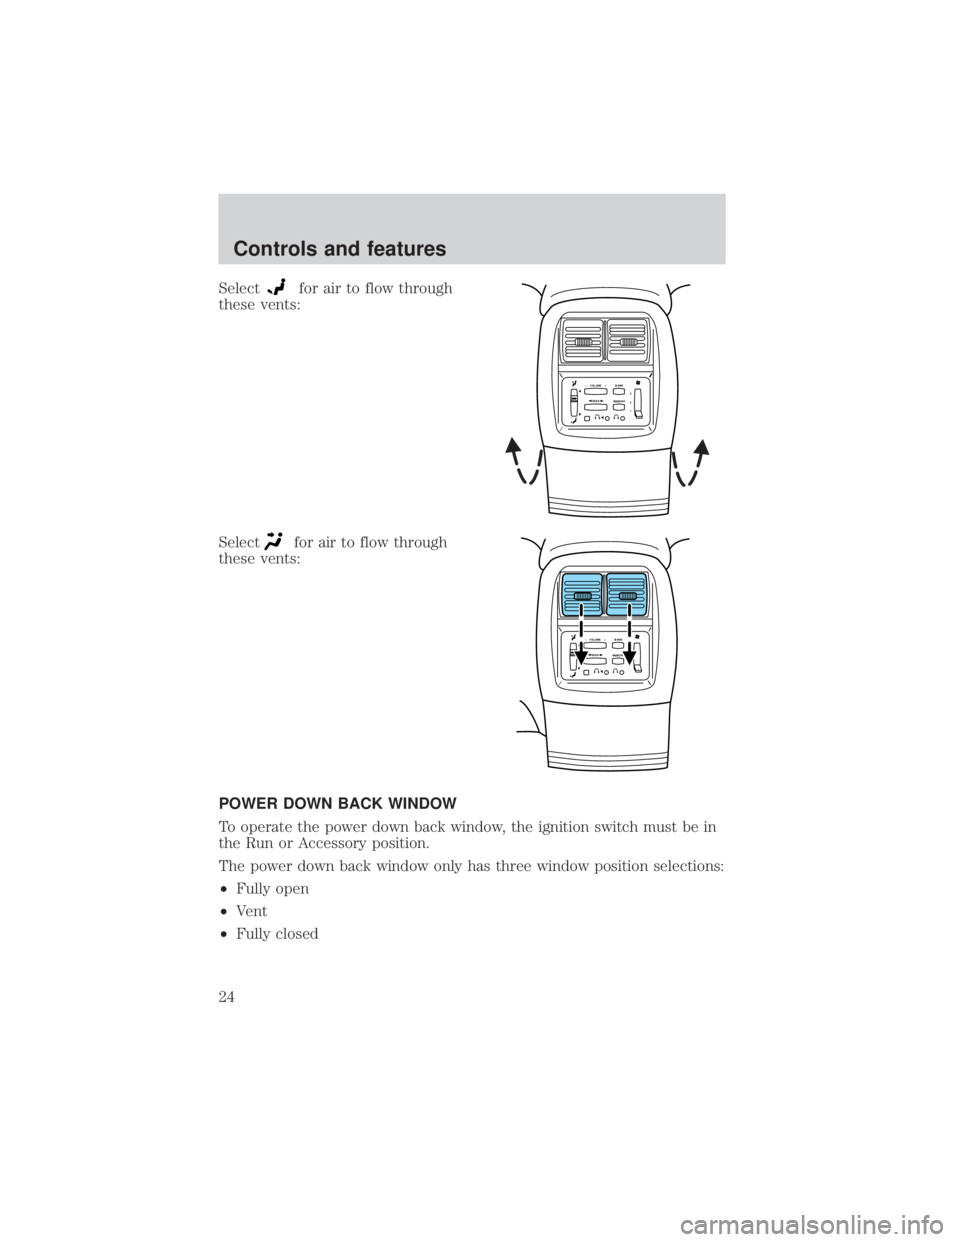
Selectfor air to flow through
these vents:
Select
for air to flow through
these vents:
POWER DOWN BACK WINDOW
To operate the power down back window, the ignition switch must be in
the Run or Accessory position.
The power down back window only has three window position selections:
²Fully open
²Vent
²Fully closed
SEEK– VOLUME + BAND
MEMORY3
2
1
SEEK– VOLUME + BAND
3
2
1 MEMORY
Controls and features
24
Page 25 of 264
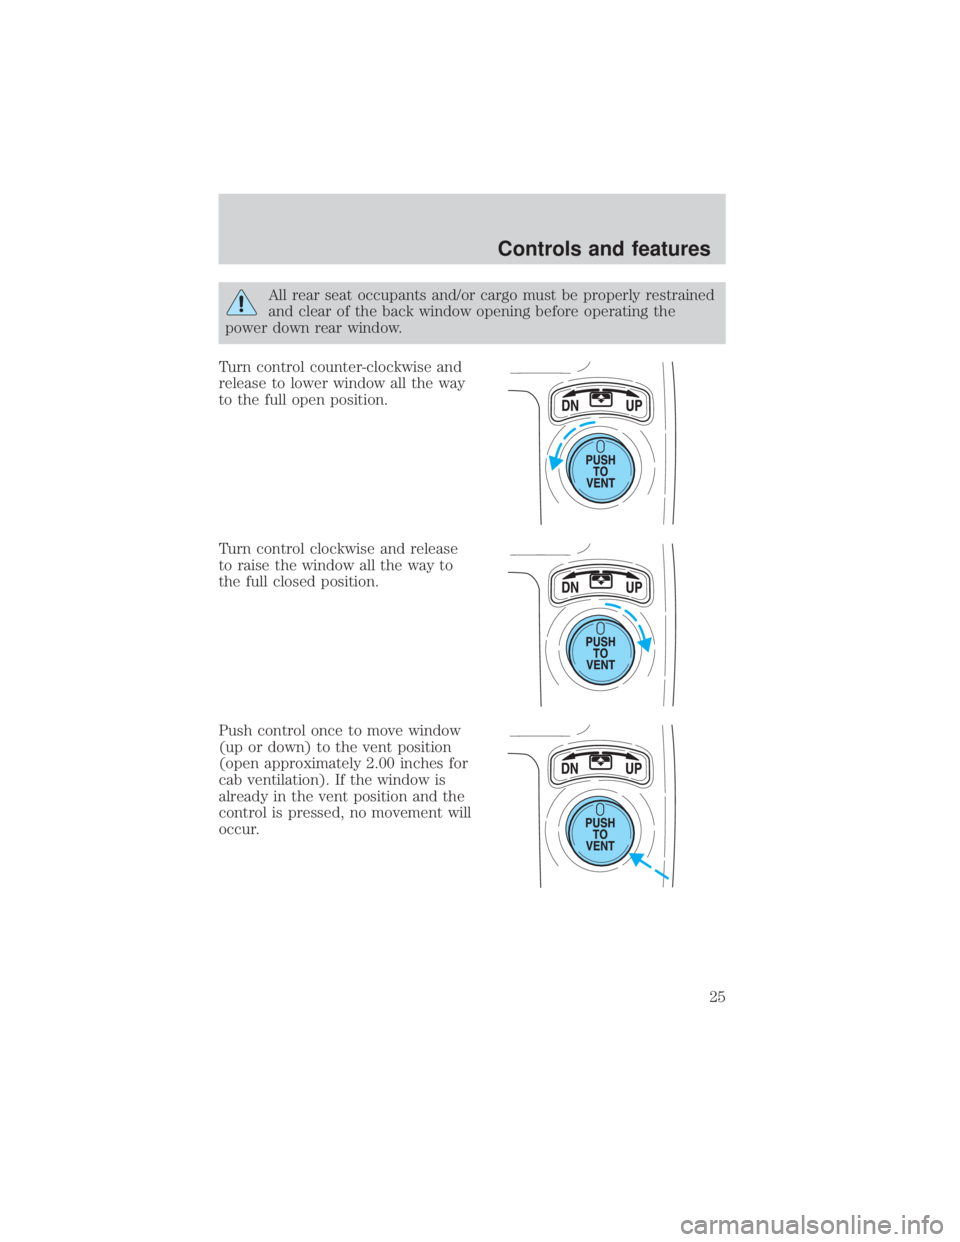
All rear seat occupants and/or cargo must be properly restrained
and clear of the back window opening before operating the
power down rear window.
Turn control counter-clockwise and
release to lower window all the way
to the full open position.
Turn control clockwise and release
to raise the window all the way to
the full closed position.
Push control once to move window
(up or down) to the vent position
(open approximately 2.00 inches for
cab ventilation). If the window is
already in the vent position and the
control is pressed, no movement will
occur.
Controls and features
25
Page 26 of 264
Normal Operation
If an ªupº command is selected and the ignition is switched to OFF or
START during window travel, the window will:
1. stop if it is between the vent position and fully closed or
2. continue to move up to the vent position if it is between vent and fully
open.
If a ªdownº or ªventº command is selected and the ignition is switched to
OFF or START during window travel, the window will move to the fully
open or vent position, respectively, and then stop.
The ªdownº command is the only one allowed after the ignition has been
switched to OFF or START while the window is moving.
Bounce-Back
When the back window is moving upward and an obstacle interferes with
the window's movement, the back window will reverse direction and
move toward the fully open position. This is known as ªbounce-backº.
Security Override
If, during a bounce-back condition, the control is held in the clockwise
(ªupº) direction for at least two seconds,the back window will travel
up with no bounce-back protection. If the control is released before
the window reaches fully closed or the ignition is switched to OFF or
START, the back window will reverse direction with bounce-back
re-enabled.
The following are possible reasons for using the security override:
²Ice on the window causing a restriction.
²Window unexpectedly reverses.
Position recovery mode
If the window fails to operate in ªnormalº operation mode, the control
can be turned and held in the active position (up or down window
direction) which will move the window in increments of approximately
15mm (0.6 inches) in the selected direction. (The ªventº feature is
inoperable in this mode.) This feature allows the window to be closed.
Once the window has reached the full closed, the window should again
operate in ªnormalº operation mode. If the window still does not operate
correctly, see your dealer for service.
Controls and features
26
Page 27 of 264
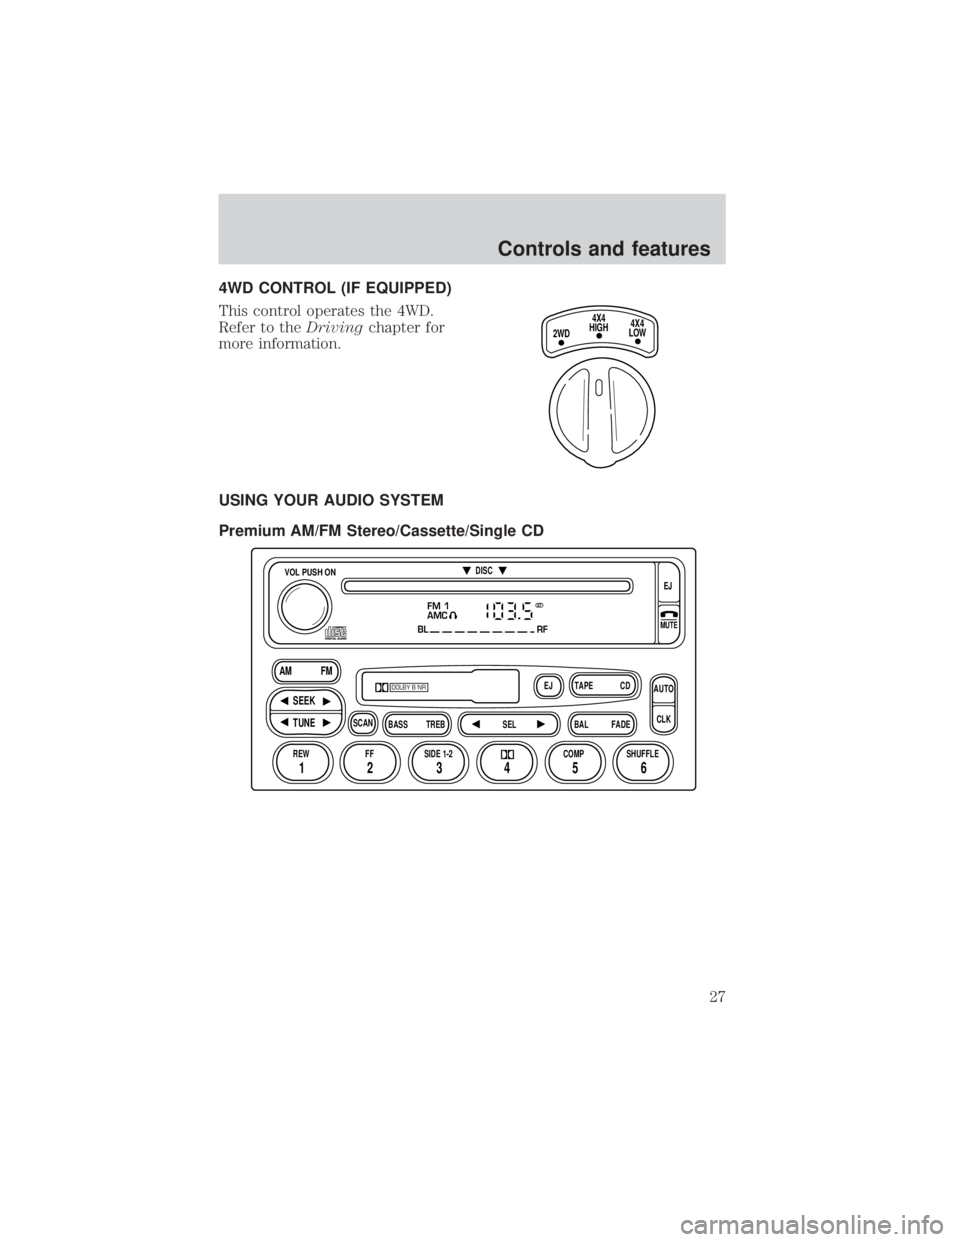
4WD CONTROL (IF EQUIPPED)
This control operates the 4WD.
Refer to theDrivingchapter for
more information.
USING YOUR AUDIO SYSTEM
Premium AM/FM Stereo/Cassette/Single CD
4X4
HIGH
2WD4X4
LOW
FM 1
AMC
BL RF
REW FFSCAN
BASS TREB SEL BALTAPE DISC
EJ CD
FADEAUTO
CLK
SIDE 1-2 COMP SHUFFLEEJ
MUTE
VOL PUSH ON
SEEK
TUNE AM FM
12 3456
DOLBY B NR
ST
Controls and features
27
Page 28 of 264
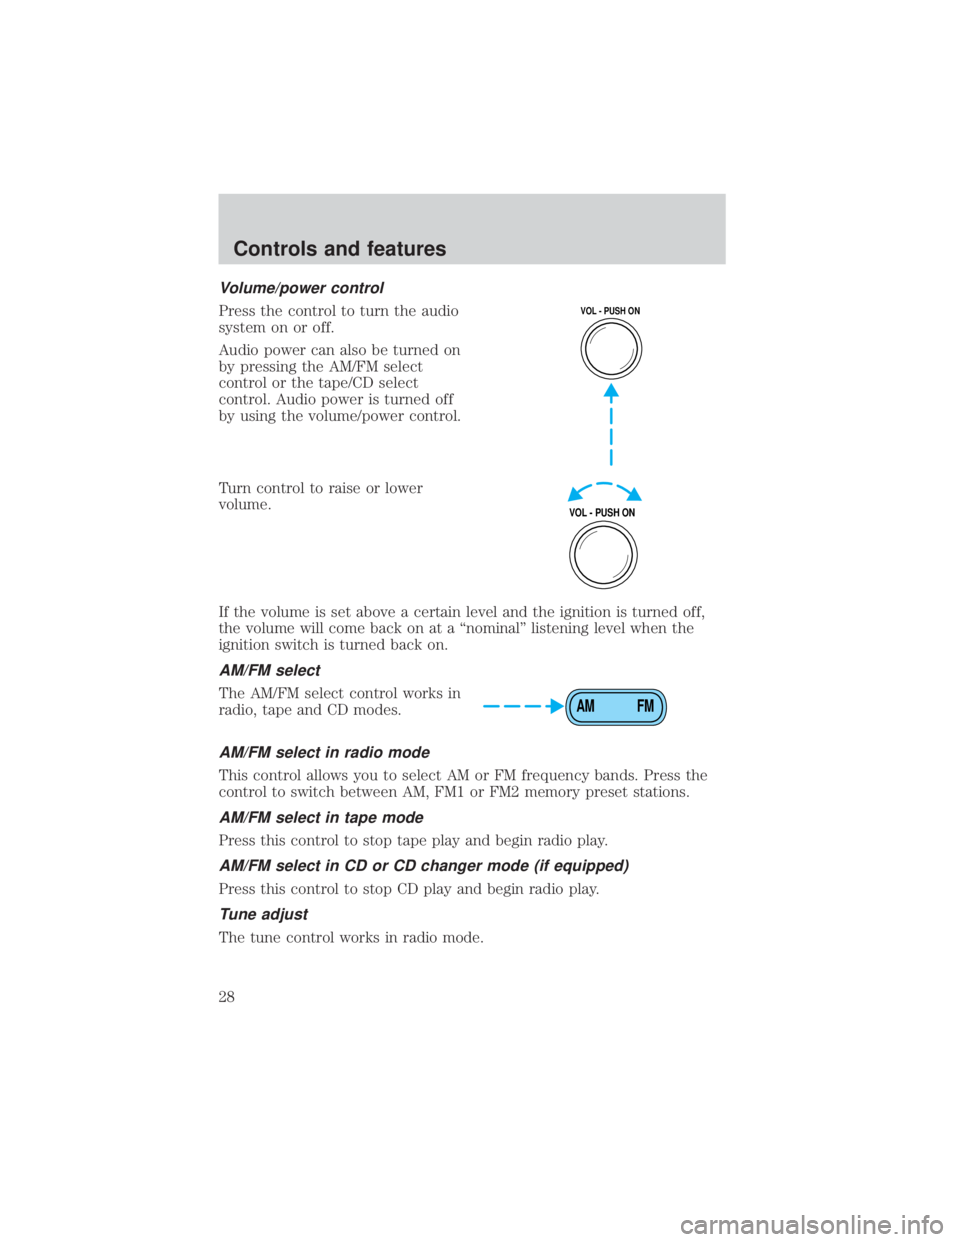
Volume/power control
Press the control to turn the audio
system on or off.
Audio power can also be turned on
by pressing the AM/FM select
control or the tape/CD select
control. Audio power is turned off
by using the volume/power control.
Turn control to raise or lower
volume.
If the volume is set above a certain level and the ignition is turned off,
the volume will come back on at a ªnominalº listening level when the
ignition switch is turned back on.
AM/FM select
The AM/FM select control works in
radio, tape and CD modes.
AM/FM select in radio mode
This control allows you to select AM or FM frequency bands. Press the
control to switch between AM, FM1 or FM2 memory preset stations.
AM/FM select in tape mode
Press this control to stop tape play and begin radio play.
AM/FM select in CD or CD changer mode (if equipped)
Press this control to stop CD play and begin radio play.
Tune adjust
The tune control works in radio mode.
VOL - PUSH ON
VOL - PUSH ON
AM FM
Controls and features
28
Page 29 of 264
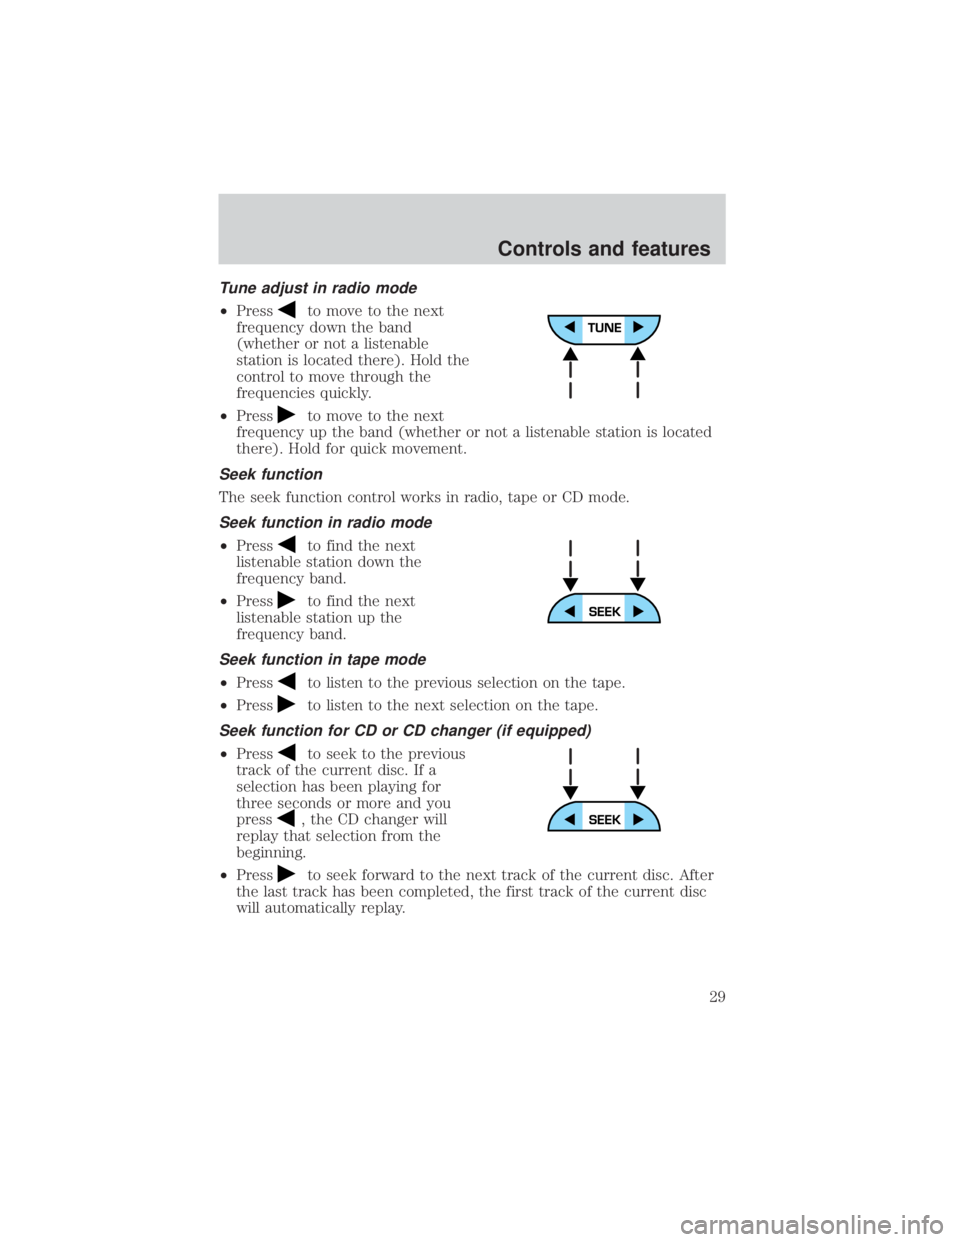
Tune adjust in radio mode
²Pressto move to the next
frequency down the band
(whether or not a listenable
station is located there). Hold the
control to move through the
frequencies quickly.
²Press
to move to the next
frequency up the band (whether or not a listenable station is located
there). Hold for quick movement.
Seek function
The seek function control works in radio, tape or CD mode.
Seek function in radio mode
²Pressto find the next
listenable station down the
frequency band.
²Press
to find the next
listenable station up the
frequency band.
Seek function in tape mode
²Pressto listen to the previous selection on the tape.
²Press
to listen to the next selection on the tape.
Seek function for CD or CD changer (if equipped)
²Pressto seek to the previous
track of the current disc. If a
selection has been playing for
three seconds or more and you
press
, the CD changer will
replay that selection from the
beginning.
²Press
to seek forward to the next track of the current disc. After
the last track has been completed, the first track of the current disc
will automatically replay.
Controls and features
29
Page 30 of 264
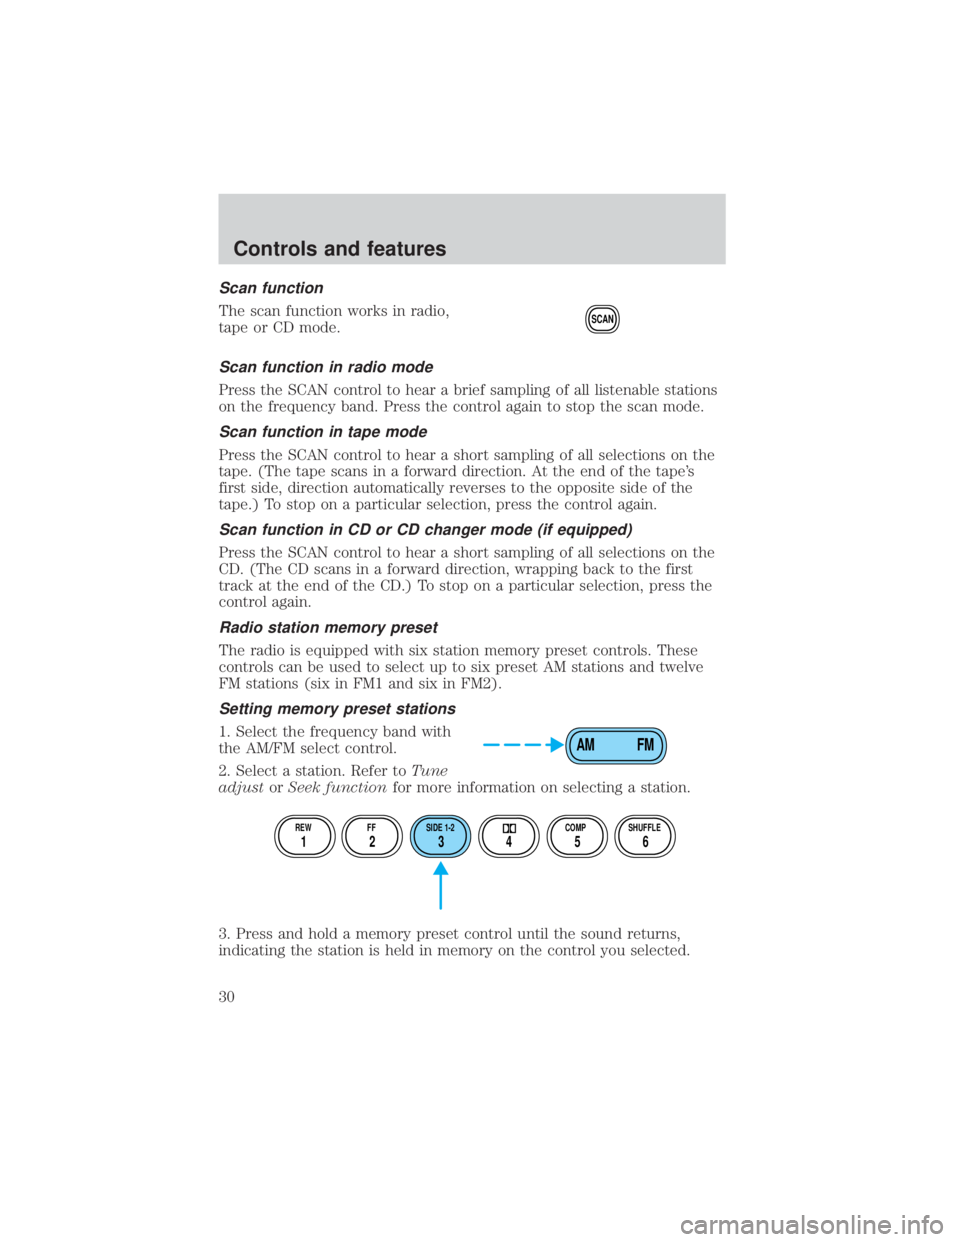
Scan function
The scan function works in radio,
tape or CD mode.
Scan function in radio mode
Press the SCAN control to hear a brief sampling of all listenable stations
on the frequency band. Press the control again to stop the scan mode.
Scan function in tape mode
Press the SCAN control to hear a short sampling of all selections on the
tape. (The tape scans in a forward direction. At the end of the tape's
first side, direction automatically reverses to the opposite side of the
tape.) To stop on a particular selection, press the control again.
Scan function in CD or CD changer mode (if equipped)
Press the SCAN control to hear a short sampling of all selections on the
CD. (The CD scans in a forward direction, wrapping back to the first
track at the end of the CD.) To stop on a particular selection, press the
control again.
Radio station memory preset
The radio is equipped with six station memory preset controls. These
controls can be used to select up to six preset AM stations and twelve
FM stations (six in FM1 and six in FM2).
Setting memory preset stations
1. Select the frequency band with
the AM/FM select control.
2. Select a station. Refer toTune
adjustorSeek functionfor more information on selecting a station.
3. Press and hold a memory preset control until the sound returns,
indicating the station is held in memory on the control you selected.
SCAN
AM FM
REW FF SIDE 1-2 COMP SHUFFLE
12 3456
Controls and features
30