headlamp FORD F-150 2018 Owners Manual
[x] Cancel search | Manufacturer: FORD, Model Year: 2018, Model line: F-150, Model: FORD F-150 2018Pages: 641, PDF Size: 8.37 MB
Page 8 of 641
Engine Oil Dipstick - Gasoline
...............350
Engine Oil Dipstick - Diesel ......................
351
Engine Oil Check - Gasoline ....................
351
Engine Oil Check - Diesel .........................
352
Oil Change Indicator Reset .....................
353
Engine Coolant Check ..............................
354
Automatic Transmission Fluid Check ........................................................................\
358
Transfer Case Fluid Check ......................
358
Brake Fluid Check .......................................
359
Power Steering Fluid Check ...................
359
Washer Fluid Check ...................................
359
Draining the Fuel Filter Water Trap ......
360
Fuel Filter - Diesel ......................................
360
Fuel Filter - Gasoline .................................
360
Changing the 12V Battery .......................
360
Checking the Wiper Blades .....................
362
Changing the Wiper Blades ....................
363
Adjusting the Headlamps .......................
363
Changing a Bulb .........................................
364
Bulb Specification Chart .........................
368
Changing the Engine Air Filter - Gasoline ........................................................................\
370
Changing the Engine Air Filter - Diesel ........................................................................\
370
Vehicle Care
General Information ...................................
373
Cleaning Products ......................................
373
Cleaning the Exterior ..................................
373
Waxing ............................................................
375
Cleaning the Engine ...................................
375
Cleaning the Exhaust ................................
375
Cleaning the Windows and Wiper Blades ........................................................................\
376
Cleaning the Interior ..................................
376
Cleaning the Instrument Panel and Instrument Cluster Lens .......................
377
Cleaning Leather Seats ............................
378
Repairing Minor Paint Damage ..............
379Cleaning the Wheels
.................................
379
Vehicle Storage ............................................
379
Body Styling Kits ..........................................
381
Wheels and Tires
General Information ..................................
382
Tire Care .........................................................
384
Using Snow Chains ...................................
398
Tire Pressure Monitoring System .........
399
Changing a Road Wheel ..........................
405
Technical Specifications ...........................
413
Capacities and Specifications
Engine Specifications - 2.7L EcoBoost™ ........................................................................\
.
415
Engine Specifications - 3.0L V6, Diesel ........................................................................\
.
415
Engine Specifications - 3.3L Duratec - V6 ..................................................................
416
Engine Specifications - 3.5L Ecoboost™ ........................................................................\
.
416
Engine Specifications - 5.0L Modular - V8 ..................................................................
417
Motorcraft Parts - 2.7L EcoBoost™ ......
418
Motorcraft Parts - 3.0L V6, Diesel ........
418
Motorcraft Parts - 3.3L Duratec - V6 ........................................................................\
.
419
Motorcraft Parts - 3.5L Ecoboost™ .....
420
Motorcraft Parts - 5.0L Modular - V8 ........................................................................\
420
Vehicle Identification Number ................
421
Vehicle Certification Label ......................
422
Transmission Code Designation ...........
423
Capacities and Specifications - 2.7L EcoBoost™ ...............................................
424
Capacities and Specifications - 3.0L V6, Diesel ..........................................................
428
Capacities and Specifications - 3.3L Duratec - V6 .............................................
432
Capacities and Specifications - 3.5L Ecoboost™ ...............................................
437
5
F-150 (TFC) Canada/United States of America, enUSA, Edition date: 201709, Fifth-Printing Table of Contents
Page 94 of 641
GENERAL INFORMATION
Condensation in the Exterior Front
Lamps and Rear Lamps
Exterior front lamps and rear lamps have
vents to accommodate normal changes
in air pressure.
Condensation can be a natural by-product
of this design. When moist air enters the
lamp assembly through the vents, there is
a possibility that condensation can occur
when the temperature is cold. When
normal condensation occurs, a fine mist
can form on the interior of the lens. The
fine mist eventually clears and exits
through the vents during normal operation.
Clearing time may take as long as 48 hours
under dry weather conditions.
Examples of acceptable condensation are:
•
The presence of a fine mist (no streaks,
drip marks or large droplets).
• A fine mist covers less than 50% of the
lens.
Examples of unacceptable condensation
are:
• A water puddle inside the lamp.
• Streaks, drip marks or large droplets
present on the interior of the lens.
If you see any unacceptable condensation,
have your vehicle checked by an authorized
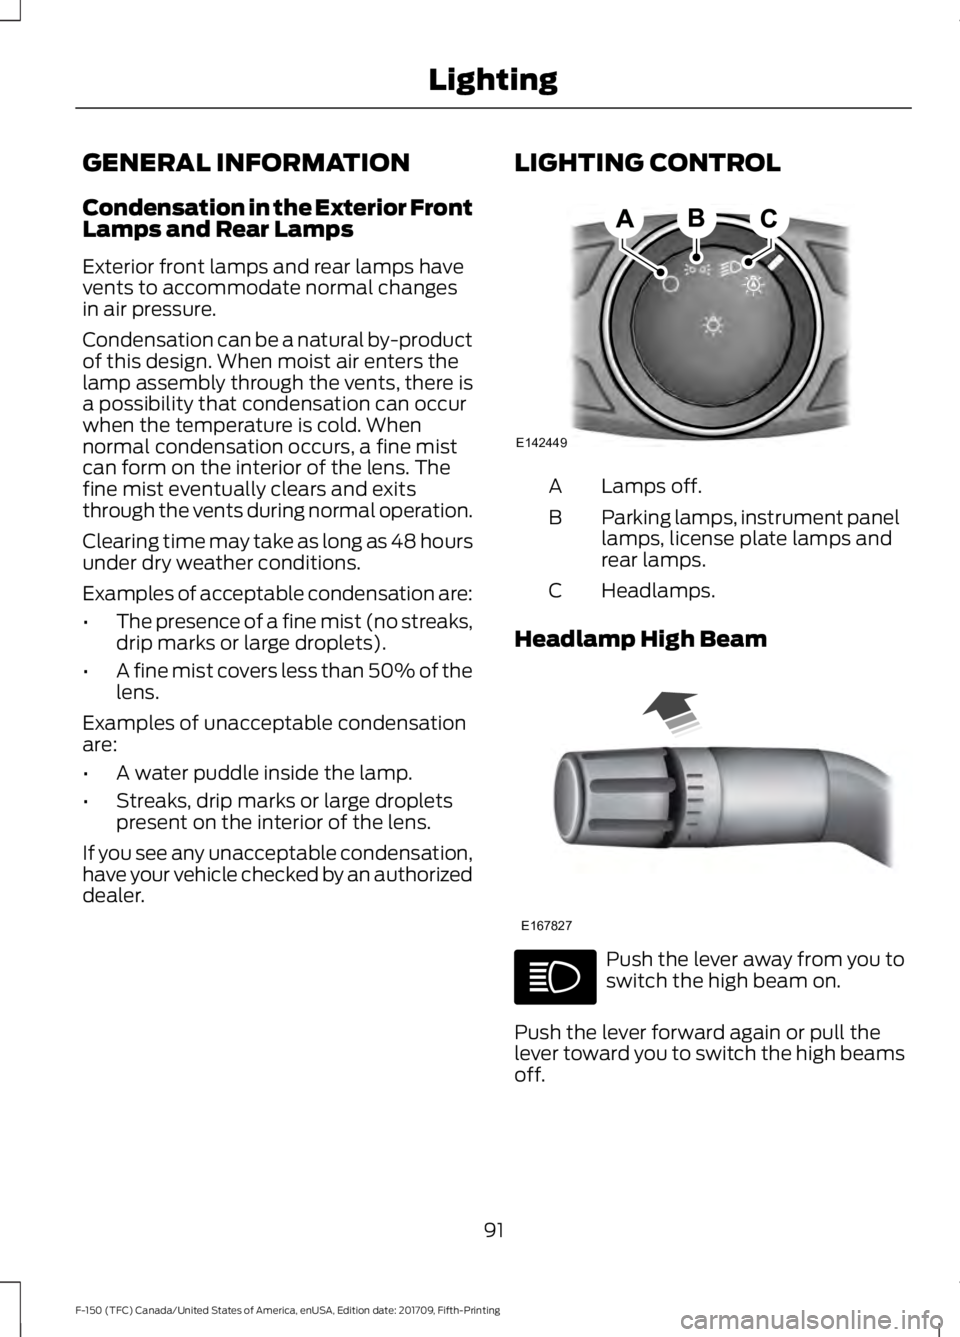
dealer. LIGHTING CONTROL Lamps off.
A
Parking lamps, instrument panel
lamps, license plate lamps and
rear lamps.
B
Headlamps.
C
Headlamp High Beam Push the lever away from you to
switch the high beam on.
Push the lever forward again or pull the
lever toward you to switch the high beams
off.
91
F-150 (TFC) Canada/United States of America, enUSA, Edition date: 201709, Fifth-Printing LightingE142449 E167827
Page 95 of 641
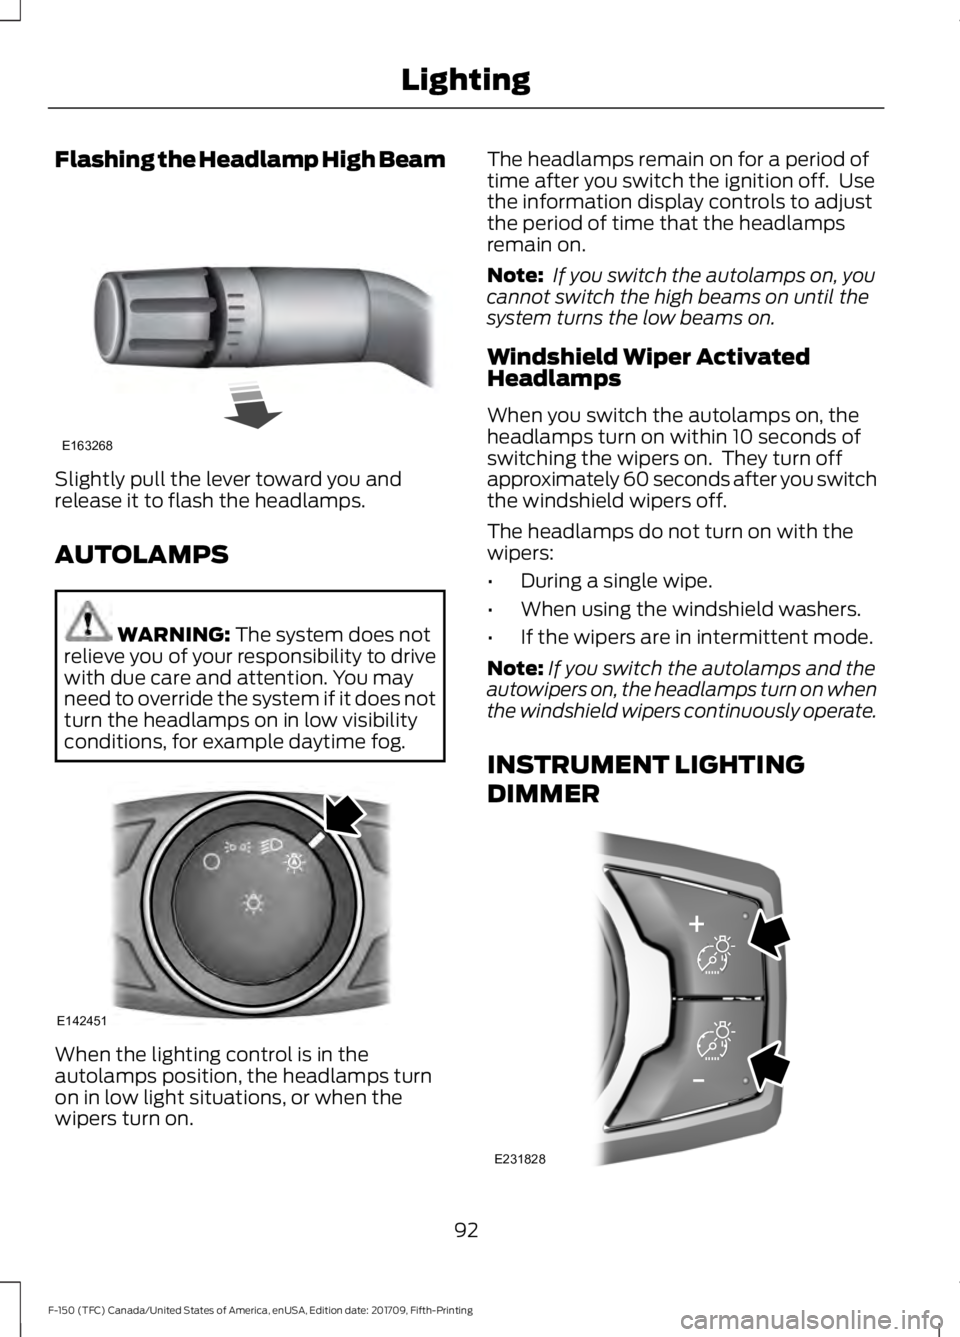
Flashing the Headlamp High Beam
Slightly pull the lever toward you and
release it to flash the headlamps.
AUTOLAMPS
WARNING: The system does not
relieve you of your responsibility to drive
with due care and attention. You may
need to override the system if it does not
turn the headlamps on in low visibility
conditions, for example daytime fog. When the lighting control is in the
autolamps position, the headlamps turn
on in low light situations, or when the
wipers turn on. The headlamps remain on for a period of
time after you switch the ignition off. Use
the information display controls to adjust
the period of time that the headlamps
remain on.
Note:
If you switch the autolamps on, you
cannot switch the high beams on until the
system turns the low beams on.
Windshield Wiper Activated
Headlamps
When you switch the autolamps on, the
headlamps turn on within 10 seconds of
switching the wipers on. They turn off
approximately 60 seconds after you switch
the windshield wipers off.
The headlamps do not turn on with the
wipers:
• During a single wipe.
• When using the windshield washers.
• If the wipers are in intermittent mode.
Note: If you switch the autolamps and the
autowipers on, the headlamps turn on when
the windshield wipers continuously operate.
INSTRUMENT LIGHTING
DIMMER 92
F-150 (TFC) Canada/United States of America, enUSA, Edition date: 201709, Fifth-Printing LightingE163268 E142451 E231828
Page 96 of 641
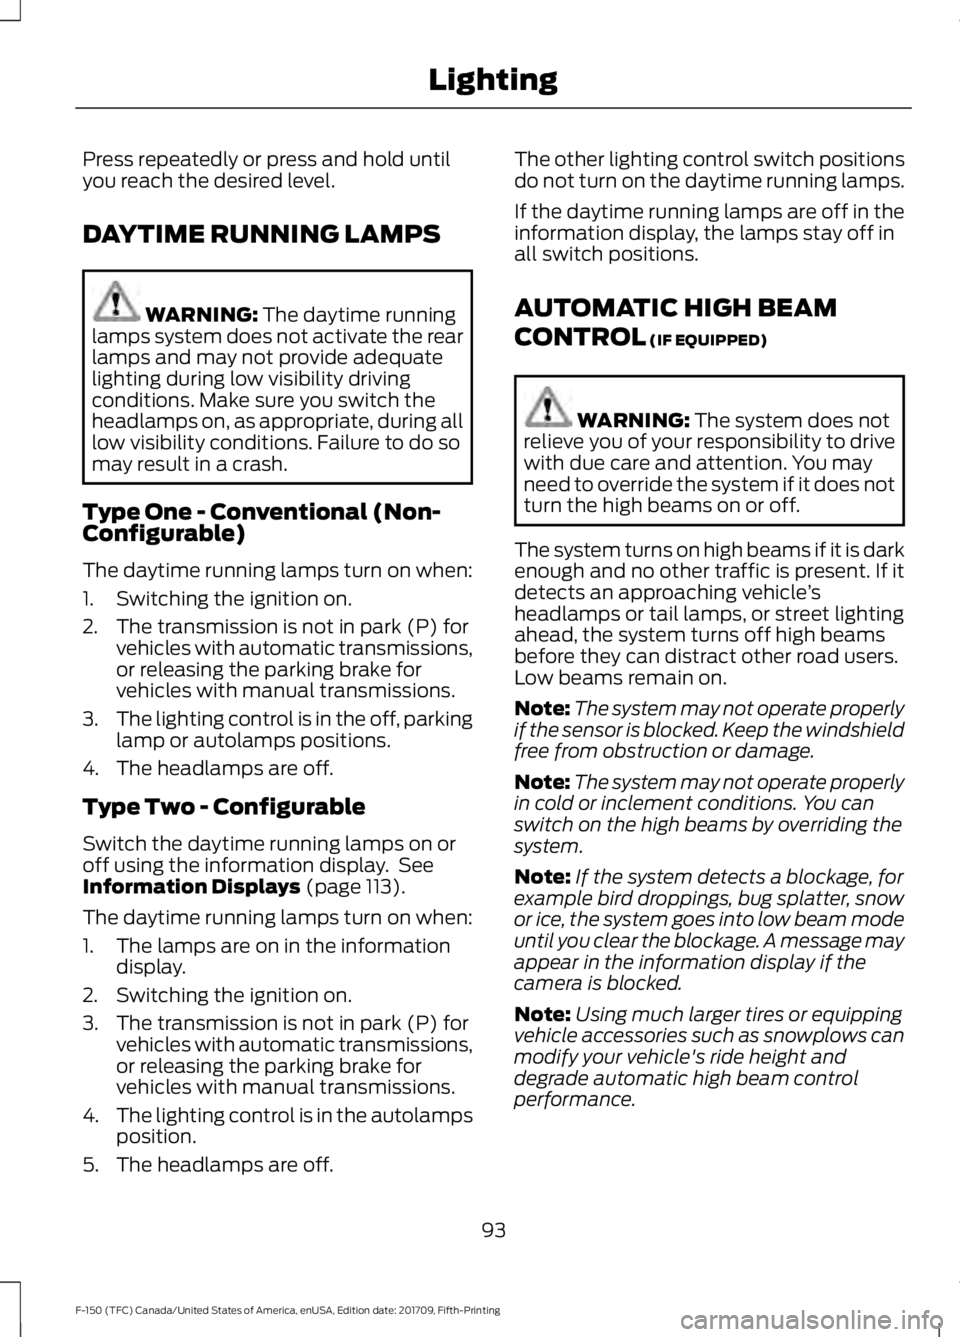
Press repeatedly or press and hold until
you reach the desired level.
DAYTIME RUNNING LAMPS
WARNING: The daytime running
lamps system does not activate the rear
lamps and may not provide adequate
lighting during low visibility driving
conditions. Make sure you switch the
headlamps on, as appropriate, during all
low visibility conditions. Failure to do so
may result in a crash.
Type One - Conventional (Non-
Configurable)
The daytime running lamps turn on when:
1. Switching the ignition on.
2. The transmission is not in park (P) for vehicles with automatic transmissions,
or releasing the parking brake for
vehicles with manual transmissions.
3. The lighting control is in the off, parking
lamp or autolamps positions.
4. The headlamps are off.
Type Two - Configurable
Switch the daytime running lamps on or
off using the information display. See
Information Displays
(page 113).
The daytime running lamps turn on when:
1. The lamps are on in the information display.
2. Switching the ignition on.
3. The transmission is not in park (P) for vehicles with automatic transmissions,
or releasing the parking brake for
vehicles with manual transmissions.
4. The lighting control is in the autolamps
position.
5. The headlamps are off. The other lighting control switch positions
do not turn on the daytime running lamps.
If the daytime running lamps are off in the
information display, the lamps stay off in
all switch positions.
AUTOMATIC HIGH BEAM
CONTROL
(IF EQUIPPED)
WARNING:
The system does not
relieve you of your responsibility to drive
with due care and attention. You may
need to override the system if it does not
turn the high beams on or off.
The system turns on high beams if it is dark
enough and no other traffic is present. If it
detects an approaching vehicle ’s
headlamps or tail lamps, or street lighting
ahead, the system turns off high beams
before they can distract other road users.
Low beams remain on.
Note: The system may not operate properly
if the sensor is blocked. Keep the windshield
free from obstruction or damage.
Note: The system may not operate properly
in cold or inclement conditions. You can
switch on the high beams by overriding the
system.
Note: If the system detects a blockage, for
example bird droppings, bug splatter, snow
or ice, the system goes into low beam mode
until you clear the blockage. A message may
appear in the information display if the
camera is blocked.
Note: Using much larger tires or equipping
vehicle accessories such as snowplows can
modify your vehicle's ride height and
degrade automatic high beam control
performance.
93
F-150 (TFC) Canada/United States of America, enUSA, Edition date: 201709, Fifth-Printing Lighting
Page 97 of 641
A camera sensor, centrally mounted
behind the windshield of your vehicle,
continuously monitors conditions to turn
the high beams on and off.
Once the system is active, the high beams
turn on if:
•
The ambient light level is low enough.
• There is no traffic in front of your
vehicle.
• The vehicle speed is greater than
approximately 32 mph (51 km/h).
The high beams turn off if:
• The ambient light level is high enough
that high beams are not required.
• The system detects an approaching
vehicle's headlamps or tail lamps.
• The vehicle speed falls below
approximately
27 mph (44 km/h).
• The system detects severe rain, snow
or fog.
• The camera is blocked.
Switching the System On and Off
Switch the system on using the information
display. See Information Displays (page
113
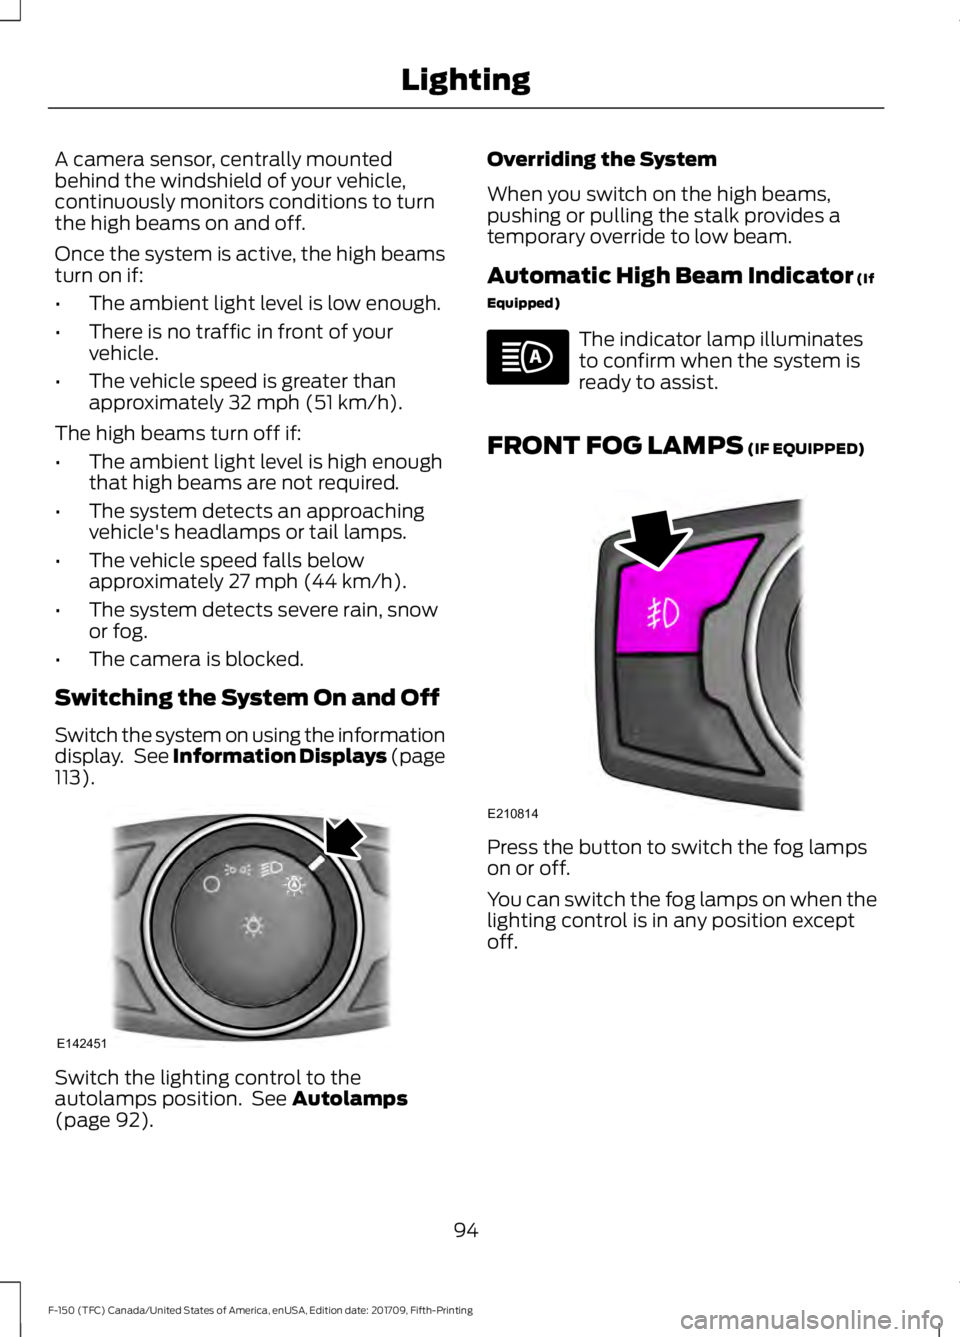
). Switch the lighting control to the
autolamps position. See
Autolamps
(page 92). Overriding the System
When you switch on the high beams,
pushing or pulling the stalk provides a
temporary override to low beam.
Automatic High Beam Indicator
(If
Equipped) The indicator lamp illuminates
to confirm when the system is
ready to assist.
FRONT FOG LAMPS
(IF EQUIPPED) Press the button to switch the fog lamps
on or off.
You can switch the fog lamps on when the
lighting control is in any position except
off.
94
F-150 (TFC) Canada/United States of America, enUSA, Edition date: 201709, Fifth-Printing LightingE142451 E210814
Page 104 of 641
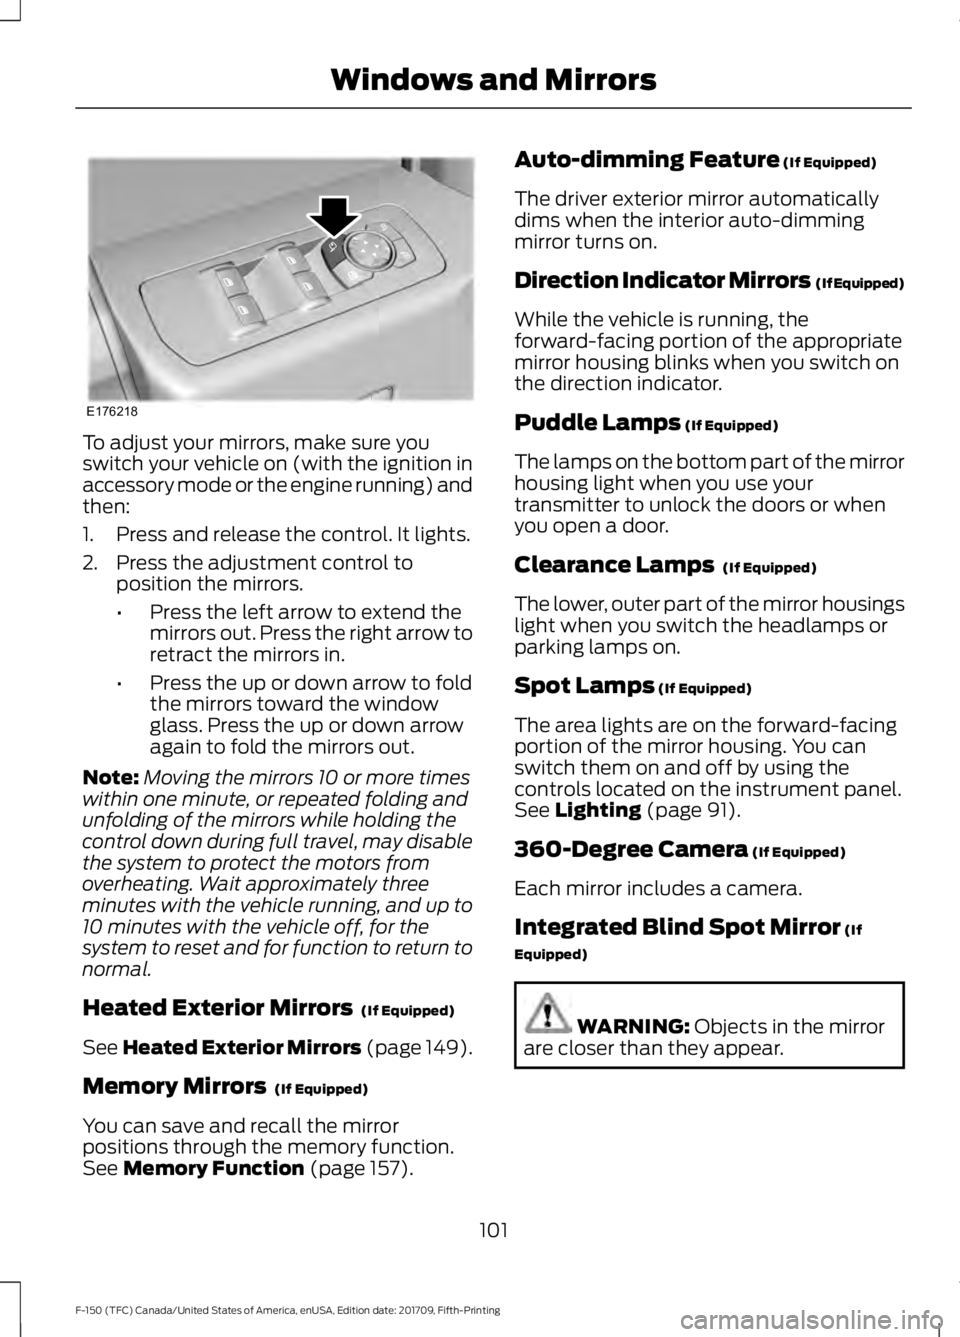
To adjust your mirrors, make sure you
switch your vehicle on (with the ignition in
accessory mode or the engine running) and
then:
1. Press and release the control. It lights.
2. Press the adjustment control to
position the mirrors.
•Press the left arrow to extend the
mirrors out. Press the right arrow to
retract the mirrors in.
• Press the up or down arrow to fold
the mirrors toward the window
glass. Press the up or down arrow
again to fold the mirrors out.
Note: Moving the mirrors 10 or more times
within one minute, or repeated folding and
unfolding of the mirrors while holding the
control down during full travel, may disable
the system to protect the motors from
overheating. Wait approximately three
minutes with the vehicle running, and up to
10 minutes with the vehicle off, for the
system to reset and for function to return to
normal.
Heated Exterior Mirrors (If Equipped)
See
Heated Exterior Mirrors (page 149).
Memory Mirrors
(If Equipped)
You can save and recall the mirror
positions through the memory function.
See
Memory Function (page 157). Auto-dimming Feature
(If Equipped)
The driver exterior mirror automatically
dims when the interior auto-dimming
mirror turns on.
Direction Indicator Mirrors (If Equipped)
While the vehicle is running, the
forward-facing portion of the appropriate
mirror housing blinks when you switch on
the direction indicator.
Puddle Lamps
(If Equipped)
The lamps on the bottom part of the mirror
housing light when you use your
transmitter to unlock the doors or when
you open a door.
Clearance Lamps
(If Equipped)
The lower, outer part of the mirror housings
light when you switch the headlamps or
parking lamps on.
Spot Lamps
(If Equipped)
The area lights are on the forward-facing
portion of the mirror housing. You can
switch them on and off by using the
controls located on the instrument panel.
See
Lighting (page 91).
360-Degree Camera
(If Equipped)
Each mirror includes a camera.
Integrated Blind Spot Mirror
(If
Equipped) WARNING:
Objects in the mirror
are closer than they appear.
101
F-150 (TFC) Canada/United States of America, enUSA, Edition date: 201709, Fifth-Printing Windows and MirrorsE176218
Page 111 of 641
Trip Computer
See General Information (page 113).
Vehicle Settings and Personalization
See
General Information (page 113).
WARNING LAMPS AND
INDICATORS
The following warning lamps and
indicators alert you to a vehicle condition
that may become serious. Some lamps
illuminate when you start your vehicle to
make sure they work. If any lamps remain
on after starting your vehicle, refer to the
respective system warning lamp for further
information.
Note: Some warning indicators appear in
the information display and operate the
same as a warning lamp but do not
illuminate when you start your vehicle.
Adaptive Cruise Control Indicator
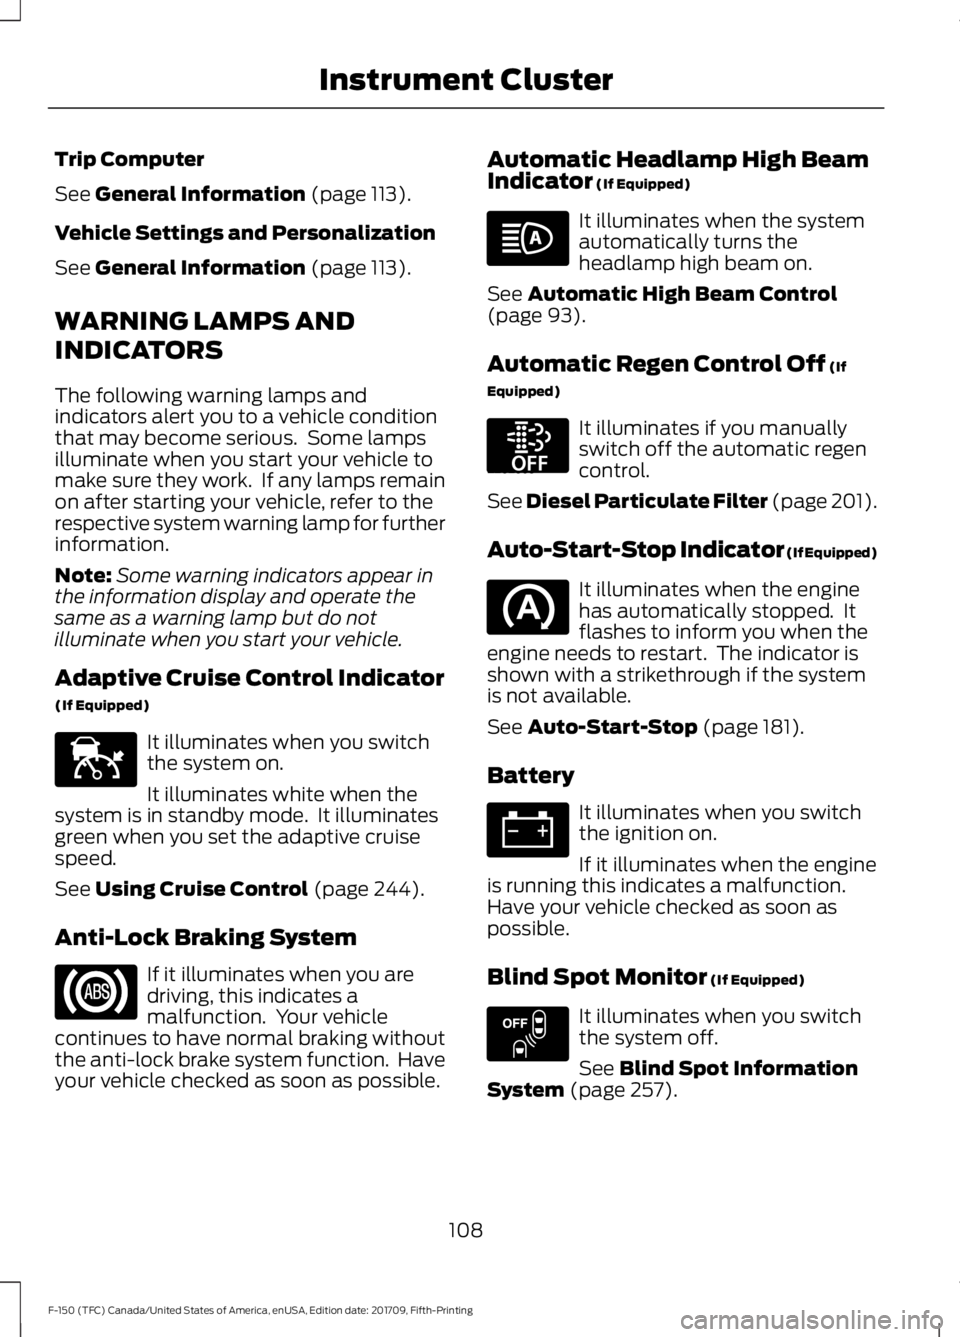
(If Equipped) It illuminates when you switch
the system on.
It illuminates white when the
system is in standby mode. It illuminates
green when you set the adaptive cruise
speed.
See
Using Cruise Control (page 244).
Anti-Lock Braking System If it illuminates when you are
driving, this indicates a
malfunction. Your vehicle
continues to have normal braking without
the anti-lock brake system function. Have
your vehicle checked as soon as possible. Automatic Headlamp High Beam
Indicator
(If Equipped) It illuminates when the system
automatically turns the
headlamp high beam on.
See
Automatic High Beam Control
(page 93).
Automatic Regen Control Off
(If
Equipped) It illuminates if you manually
switch off the automatic regen
control.
See Diesel Particulate Filter (page 201).
Auto-Start-Stop Indicator (If Equipped) It illuminates when the engine
has automatically stopped. It
flashes to inform you when the
engine needs to restart. The indicator is
shown with a strikethrough if the system
is not available.
See
Auto-Start-Stop (page 181).
Battery It illuminates when you switch
the ignition on.
If it illuminates when the engine
is running this indicates a malfunction.
Have your vehicle checked as soon as
possible.
Blind Spot Monitor
(If Equipped) It illuminates when you switch
the system off.
See
Blind Spot Information
System (page 257).
108
F-150 (TFC) Canada/United States of America, enUSA, Edition date: 201709, Fifth-Printing Instrument ClusterE144524 E252868 E151262
Page 113 of 641
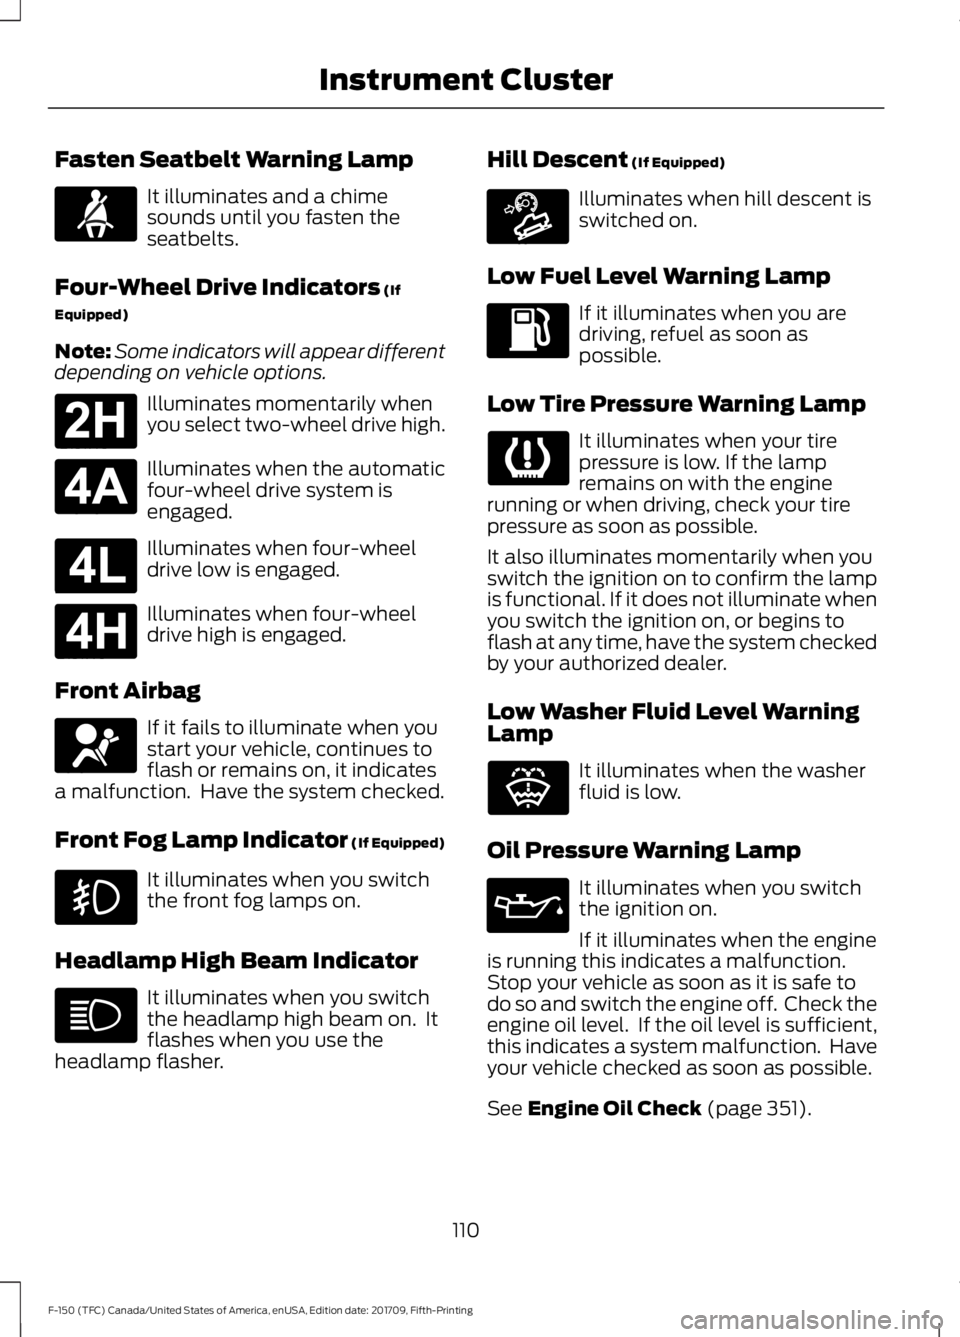
Fasten Seatbelt Warning Lamp
It illuminates and a chime
sounds until you fasten the
seatbelts.
Four-Wheel Drive Indicators (If
Equipped)
Note: Some indicators will appear different
depending on vehicle options. Illuminates momentarily when
you select two-wheel drive high.
Illuminates when the automatic
four-wheel drive system is
engaged.
Illuminates when four-wheel
drive low is engaged.
Illuminates when four-wheel
drive high is engaged.
Front Airbag If it fails to illuminate when you
start your vehicle, continues to
flash or remains on, it indicates
a malfunction. Have the system checked.
Front Fog Lamp Indicator (If Equipped) It illuminates when you switch
the front fog lamps on.
Headlamp High Beam Indicator It illuminates when you switch
the headlamp high beam on. It
flashes when you use the
headlamp flasher. Hill Descent
(If Equipped) Illuminates when hill descent is
switched on.
Low Fuel Level Warning Lamp If it illuminates when you are
driving, refuel as soon as
possible.
Low Tire Pressure Warning Lamp It illuminates when your tire
pressure is low. If the lamp
remains on with the engine
running or when driving, check your tire
pressure as soon as possible.
It also illuminates momentarily when you
switch the ignition on to confirm the lamp
is functional. If it does not illuminate when
you switch the ignition on, or begins to
flash at any time, have the system checked
by your authorized dealer.
Low Washer Fluid Level Warning
Lamp It illuminates when the washer
fluid is low.
Oil Pressure Warning Lamp It illuminates when you switch
the ignition on.
If it illuminates when the engine
is running this indicates a malfunction.
Stop your vehicle as soon as it is safe to
do so and switch the engine off. Check the
engine oil level. If the oil level is sufficient,
this indicates a system malfunction. Have
your vehicle checked as soon as possible.
See
Engine Oil Check (page 351).
110
F-150 (TFC) Canada/United States of America, enUSA, Edition date: 201709, Fifth-Printing Instrument ClusterE71880 E181778 E181781 E181780 E181779 E67017 E163171 E132353
Page 115 of 641
During refueling, it is possible for
you to pump
water-contaminated diesel fuel
into your fuel tank. Your vehicle ’s fuel
system is equipped with a fuel filter and
water separator to remove water from the
fuel. The water in fuel indicator lights when
the fuel and water separator has a
significant quantity of water in it and
requires immediate draining.
If the water in fuel indicator illuminates
when the engine is running, stop your
vehicle as soon as safely possible, shut off
the engine, then drain the fuel and water
separator. See Fuel Quality (page 184).
Allowing water to stay in the fuel system,
after the water in fuel indicator illuminates,
could result in extensive damage or failure
of the fuel injection system.
Note: Do not drain the fuel and water
separator while the engine is running. Air will
enter into the fuel system causing the engine
not to operate properly.
AUDIBLE WARNINGS AND
INDICATORS
Airbag Secondary Warning
Sounds if there is a malfunction with the
safety belt warning lamp and there is a
fault in the supplemental restraints
system.
Beltminder Warning
Sounds when a seatbelt is unfastened in
an occupied seat and your vehicle is
moving.
Door Ajar Warning
Sounds when any door is not completely
closed and your vehicle speed exceeds
3 mph (5 km/h)
. Headlamps On Warning
Sounds when you remove the key from the
ignition and open the driver's door and you
have left the headlamps or parking lamps
on.
Key in Ignition Warning
Sounds when you open the driver's door
and you have left the key in the ignition.
Keyless Warning Alert
(If Equipped)
Sounds the horn twice when you exit your
vehicle with the intelligent access key, after
the last door is closed and your keyless
vehicle is in RUN, indicating your vehicle is
still on.
Rear Park Aid Warning
(If Equipped)
A detection warning sounds when
obstacles are within a certain range of the
bumper area. The system turns on
automatically whenever you switch the
ignition on.
Parking Brake On Warning
Sounds when you have left the parking
brake on and drive your vehicle. If the
warning chime remains on after you have
released the parking brake, have the
system checked by your authorized dealer
immediately.
Service AdvanceTrac Warning
Sounds when there is a malfunction with
the Electronic Stability Control (ESC) or
Rollover Stability Control (RSC) system.
112
F-150 (TFC) Canada/United States of America, enUSA, Edition date: 201709, Fifth-Printing Instrument Cluster
Page 175 of 641
Unlocking the Steering Wheel
The steering wheel unlocks when the
system detects a valid passive key inside
your vehicle. If the steering wheel relocks,
switch the ignition on to unlock it.
Note:
You may have to slightly rotate the
steering wheel to assist unlocking it.
STARTING A GASOLINE
ENGINE
When you start the engine, the idle speed
increases. This helps to warm up the
engine. If the engine idle speed does not
slow down automatically, have your
vehicle checked by an authorized dealer.
Note: You can crank the engine for a total
of 60 seconds (without the engine starting)
before the starting system temporarily
disables. The 60 seconds does not have to
be all at once. For example, if you crank the
engine three times for 20 seconds each
time, without the engine starting, you
reached the 60-second time limit. A
message appears in the information display
alerting you that you exceeded the cranking
time. You cannot attempt to start the
engine for at least 15 minutes. After 15
minutes, you are limited to a 15-second
engine cranking time. You need to wait 60
minutes before you can crank the engine for
60 seconds again.
Before starting the engine, check the
following:
• Make sure all occupants have fastened
their seatbelts.
• Make sure the headlamps and
electrical accessories are off.
• Make sure the parking brake is on. •
Move the transmission selector lever
to position P.
• Turn the ignition key to on. If your
vehicle is equipped with a keyless
ignition, see the following instructions.
Vehicles with an Ignition Key
Note: Do not touch the accelerator pedal.
1. Fully depress the brake pedal.
2. Turn the key to start the engine. Release the key when the engine starts.
Note: The engine may continue cranking
for up to 15 seconds or until it starts.
Note: If you cannot start the engine on the
first try, wait for a short period and try again.
Vehicles with Keyless Start
Note: Do not touch the accelerator pedal.
Note: You must have your intelligent access
key in the vehicle in order to shift the
transmission out of position
P.
1. Fully depress the brake pedal.
2. Press the button.
The system does not function if:
• The key frequencies are jammed.
• The key battery has no charge.
If you are unable to start the engine, locate
the backup slot (A) in one of two positions:
172
F-150 (TFC) Canada/United States of America, enUSA, Edition date: 201709, Fifth-Printing Starting and Stopping the Engine