tire type FORD F-150 2018 Owners Manual
[x] Cancel search | Manufacturer: FORD, Model Year: 2018, Model line: F-150, Model: FORD F-150 2018Pages: 641, PDF Size: 8.37 MB
Page 42 of 641
Seatbelt Locking Modes
WARNING: If your vehicle is
involved in a crash, have the seatbelts
and associated components inspected
as soon as possible. Failure to follow this
instruction could result in personal injury
or death.
All safety restraints in the vehicle are
combination lap and shoulder belts. The
driver seatbelt has the first type of locking
mode, and the front outboard passenger
and rear seat seatbelts have both types of
locking modes described as follows:
Vehicle Sensitive Mode
This is the normal retractor mode, which
allows free shoulder belt length
adjustment to your movements and
locking in response to vehicle movement.
For example, if the driver brakes suddenly,
turns a corner sharply, or the vehicle
receives an impact of about
5 mph
(8 km/h) or more, the combination
seatbelts lock to help reduce forward
movement of the driver and passengers.
In addition, the retractor is designed to lock
if you pull the webbing out too quickly. If
the seatbelt retractor locks, slowly lower
the height adjuster to allow the seatbelt
to retract. If the retractor does not unlock,
pull the seatbelt out slowly then feed a
small length of webbing back toward the
stowed position. For rear seatbelts, recline
the rear seat backrest or push the seat
backrest cushion away from the seatbelt.
Feed a small length of webbing back
toward the stowed position. Automatic Locking Mode
In this mode, the shoulder belt
automatically pre-locks. The belt still
retracts to remove any slack in the
shoulder belt. The automatic locking mode
is not available on the driver seatbelt.
When to Use the Automatic Locking
Mode
Use this mode any time you install a child
safety seat in a front outboard passenger
seating position in a Regular Cab,
SuperCab, SuperCrew or any rear seating
position of a SuperCab or SuperCrew. The
optional front seat center seatbelt has a
cinch mechanism. Properly restrain
children 12 years old and under in a rear
seat whenever possible. See
Child Safety
(page 18).
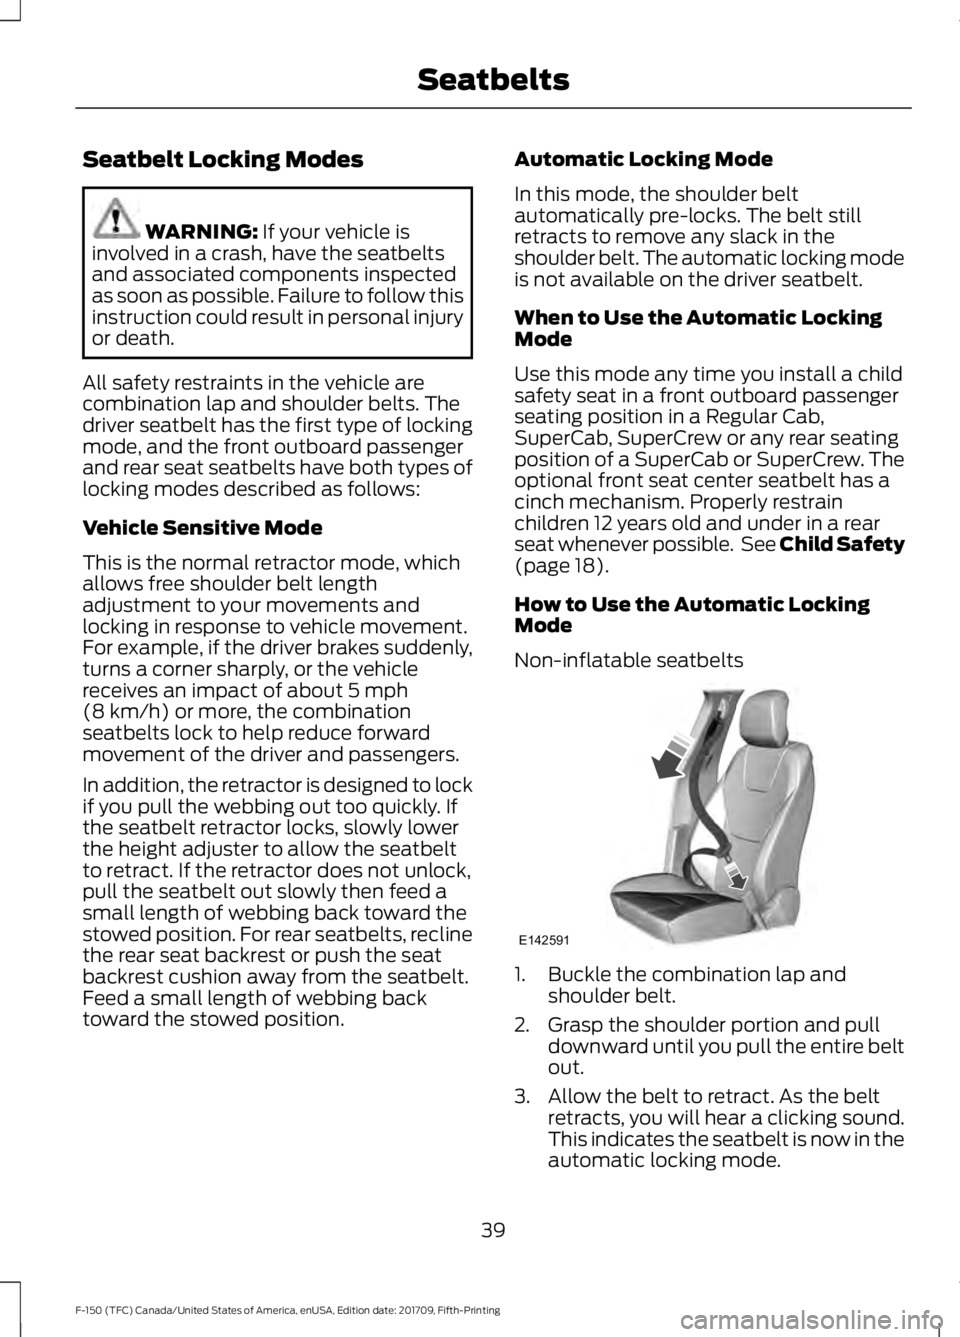
How to Use the Automatic Locking
Mode
Non-inflatable seatbelts 1. Buckle the combination lap and
shoulder belt.
2. Grasp the shoulder portion and pull downward until you pull the entire belt
out.
3. Allow the belt to retract. As the belt retracts, you will hear a clicking sound.
This indicates the seatbelt is now in the
automatic locking mode.
39
F-150 (TFC) Canada/United States of America, enUSA, Edition date: 201709, Fifth-Printing SeatbeltsE142591
Page 96 of 641
Press repeatedly or press and hold until
you reach the desired level.
DAYTIME RUNNING LAMPS
WARNING: The daytime running
lamps system does not activate the rear
lamps and may not provide adequate
lighting during low visibility driving
conditions. Make sure you switch the
headlamps on, as appropriate, during all
low visibility conditions. Failure to do so
may result in a crash.
Type One - Conventional (Non-
Configurable)
The daytime running lamps turn on when:
1. Switching the ignition on.
2. The transmission is not in park (P) for vehicles with automatic transmissions,
or releasing the parking brake for
vehicles with manual transmissions.
3. The lighting control is in the off, parking
lamp or autolamps positions.
4. The headlamps are off.
Type Two - Configurable
Switch the daytime running lamps on or
off using the information display. See
Information Displays
(page 113).
The daytime running lamps turn on when:
1. The lamps are on in the information display.
2. Switching the ignition on.
3. The transmission is not in park (P) for vehicles with automatic transmissions,
or releasing the parking brake for
vehicles with manual transmissions.
4. The lighting control is in the autolamps
position.
5. The headlamps are off. The other lighting control switch positions
do not turn on the daytime running lamps.
If the daytime running lamps are off in the
information display, the lamps stay off in
all switch positions.
AUTOMATIC HIGH BEAM
CONTROL
(IF EQUIPPED)
WARNING:
The system does not
relieve you of your responsibility to drive
with due care and attention. You may
need to override the system if it does not
turn the high beams on or off.
The system turns on high beams if it is dark
enough and no other traffic is present. If it
detects an approaching vehicle ’s
headlamps or tail lamps, or street lighting
ahead, the system turns off high beams
before they can distract other road users.
Low beams remain on.
Note: The system may not operate properly
if the sensor is blocked. Keep the windshield
free from obstruction or damage.
Note: The system may not operate properly
in cold or inclement conditions. You can
switch on the high beams by overriding the
system.
Note: If the system detects a blockage, for
example bird droppings, bug splatter, snow
or ice, the system goes into low beam mode
until you clear the blockage. A message may
appear in the information display if the
camera is blocked.
Note: Using much larger tires or equipping
vehicle accessories such as snowplows can
modify your vehicle's ride height and
degrade automatic high beam control
performance.
93
F-150 (TFC) Canada/United States of America, enUSA, Edition date: 201709, Fifth-Printing Lighting
Page 118 of 641
Fuel Economy
Average Speed
Auto StartStop
• Distance to E - Shows the approximate distance your vehicle can travel before running
out of fuel.
• Instant Fuel Economy - Shows your instantaneous fuel usage.
• Average Fuel Economy - Shows the average fuel usage based on time. Press and hold
OK to reset this value.
• Average Speed - Shows the average speed your vehicle travels.
• Auto StartStop - Shows the current status of the Auto StartStop system.
Note: You can reset your average fuel economy by pressing and holding the
OK button on
the left hand steering wheel controls.
Driver Assist
Note: Use the arrow buttons to configure different driver setting choices. Driver Assist
Prog Range Sel
Driver Assist
DEF Gauge
Exhaust Filter
Engine Hours
Tire Pressure
Trans. Temp.
Rear Park Aid
Brake Type
Brake Effort
Trailer Sway
115
F-150 (TFC) Canada/United States of America, enUSA, Edition date: 201709, Fifth-Printing Information Displays
Page 119 of 641
Settings
Settings
Enter the submenu and select your
setting
Auto Regen
Vehicle
DTE Calculate
Lighting
Locks
Neutral Tow
Oil Life Reset
Remote Start
Wiper Controls Enter the submenu and select your
setting
MyKey Status
MyKey
Create MyKey
911 Assist
Do Not Disturb
AdvanceTrac
Max Speed
Speed Minder
Vol. Limiter Enter the submenu and select your
setting
Clear MyKeys
Enter the submenu and select your
setting
Units
Display Setup
Temperature
Tire Pressure
Language
Main menu (Type 2)
• Display Mode
• Trip/Fuel •
Towing
• Off Road
• Settings
116
F-150 (TFC) Canada/United States of America, enUSA, Edition date: 201709, Fifth-Printing Information Displays
Page 123 of 641
Settings
Enter the submenu and select
your setting
MyKey
Units
Display Setup
Temperature
Tire Pressure
Language
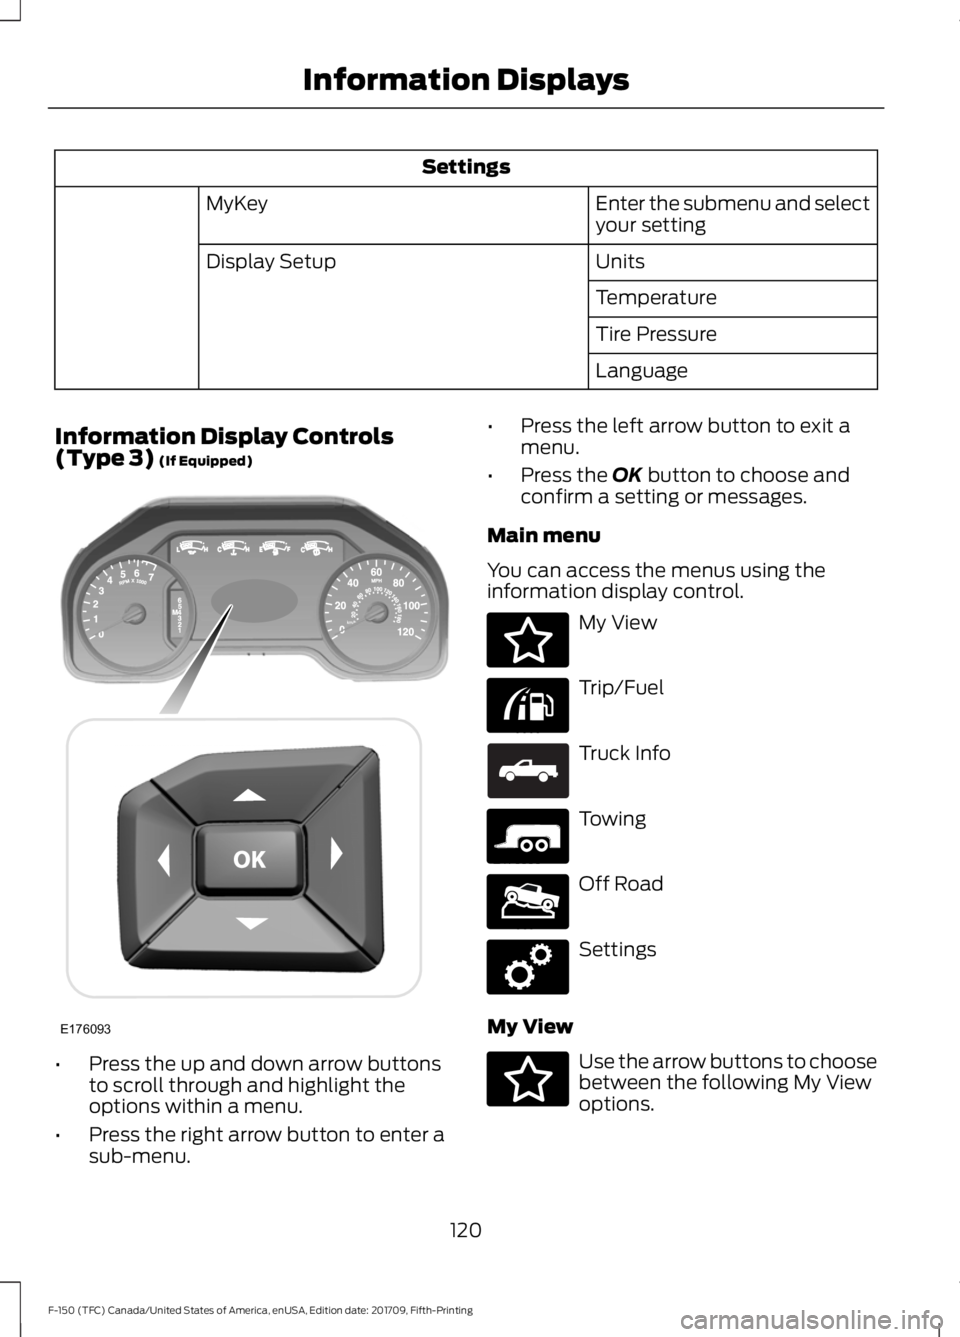
Information Display Controls
(Type 3) (If Equipped) •
Press the up and down arrow buttons
to scroll through and highlight the
options within a menu.
• Press the right arrow button to enter a
sub-menu. •
Press the left arrow button to exit a
menu.
• Press the OK button to choose and
confirm a setting or messages.
Main menu
You can access the menus using the
information display control. My View
Trip/Fuel
Truck Info
Towing
Off Road
Settings
My View Use the arrow buttons to choose
between the following My View
options.
120
F-150 (TFC) Canada/United States of America, enUSA, Edition date: 201709, Fifth-Printing Information DisplaysE176093 E176094 E176095 E163181 E176096 E176097 E176098 E176094
Page 128 of 641
Settings
Enter the submenu and select your setting
Gauge Selec-
tion
Enter the submenu for items such as system modes and alert intensity
Lane
Keeping
System
Auto Engine Off
Vehicle
Advanced
Settings
Easy Entry/Exit
Lighting
Locks
Alarm
Power Running Boards
Remote Start
Wiper Controls
Enter the submenu and select
your setting
MyKey
Units
Display Setup
Temperature
Tire Pressure
Language
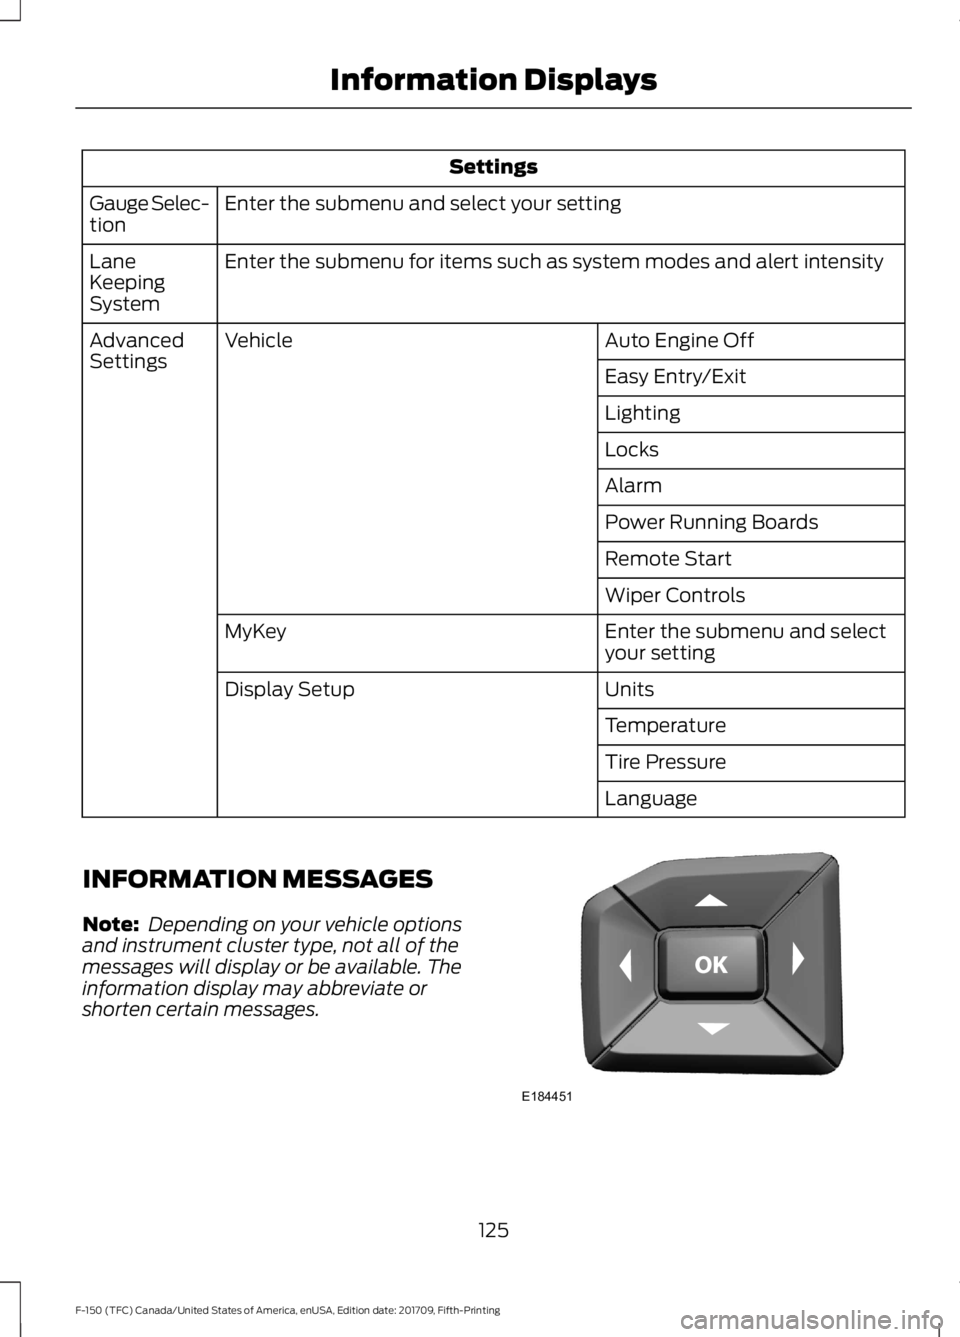
INFORMATION MESSAGES
Note: Depending on your vehicle options
and instrument cluster type, not all of the
messages will display or be available. The
information display may abbreviate or
shorten certain messages. 125
F-150 (TFC) Canada/United States of America, enUSA, Edition date: 201709, Fifth-Printing Information DisplaysE184451
Page 216 of 641
USING FOUR-WHEEL DRIVE (IF
EQUIPPED)
Note: For important information regarding
safe operation of this type of vehicle, see
General Information in the Wheels and Tires
chapter.
Note: Do not use 4H or 4L mode on dry,
hard surfaced roads. Doing so can produce
excessive noise, increase tire wear and may
damage drive components. 4H or 4L mode
is only intended for consistently slippery or
loose surfaces. Use of 4L mode on these
surfaces may produce some noise (such as
occasional clunks), but should not damage
drive components.
Note: If 4L is selected while your vehicle is
moving above
3 mph (5 km/h), the 4WD
system should not perform a shift. This is
normal and should be no reason for concern.
Refer to Shifting to or from 4L (4X4 Low)
for proper operation.
Note: You can switch on and switch off the
electronic locking differential by pulling the
4WD control (4WD vehicles) or turning the
electronic locking differential control (2WD
vehicles). See
Electronic Locking
Differential (page 221).
4WD Indicator Lights
Note: When a 4X4 system fault is present,
the system can typically remain in whichever
4X4 mode was selected prior to the fault
condition occurring. It should not default to
4X2 in all circumstances. When this warning
is displayed, have your vehicle serviced by
an authorized dealer.
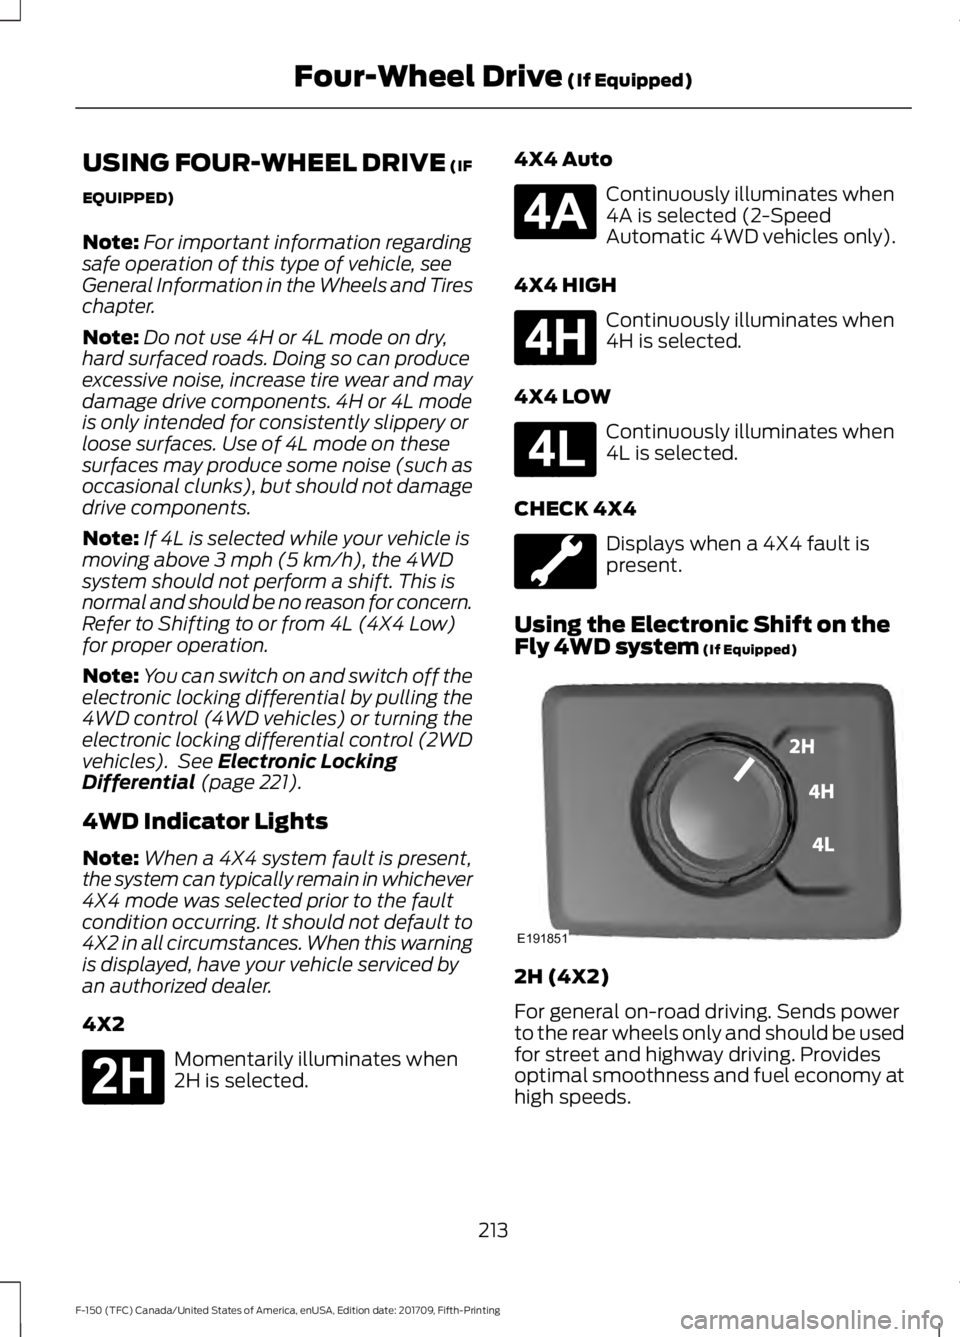
4X2 Momentarily illuminates when
2H is selected. 4X4 Auto Continuously illuminates when
4A is selected (2-Speed
Automatic 4WD vehicles only).
4X4 HIGH Continuously illuminates when
4H is selected.
4X4 LOW Continuously illuminates when
4L is selected.
CHECK 4X4 Displays when a 4X4 fault is
present.
Using the Electronic Shift on the
Fly 4WD system
(If Equipped) 2H (4X2)
For general on-road driving. Sends power
to the rear wheels only and should be used
for street and highway driving. Provides
optimal smoothness and fuel economy at
high speeds.
213
F-150 (TFC) Canada/United States of America, enUSA, Edition date: 201709, Fifth-Printing Four-Wheel Drive
(If Equipped)E181778 E181781 E181779 E181780 E191851
Page 221 of 641
It may be less risky to strike small objects,
such as freeway reflectors, with minor
damage to your vehicle rather than
attempt a sudden return to the road which
could cause your vehicle to slide sideways
out of control or roll over. Remember, your
safety and the safety of others should be
your primary concern.
Emergency Maneuvers
In an unavoidable emergency situation
where a sudden sharp turn must be made,
remember to avoid over-driving your
vehicle (i.e. turn the steering wheel only as
rapidly and as far as required to avoid the
emergency). Excessive steering can result
in loss of vehicle control. Apply smooth
pressure to the accelerator pedal or brake
pedal when changes in vehicle speed are
required. Avoid abrupt steering,
acceleration and braking. This could result
in an increased risk of vehicle roll over, loss
of vehicle control and personal injury. Use
all available road surface to bring your
vehicle to a safe direction of travel.
In the event of an emergency stop, avoid
skidding the tires and do not attempt any
sharp steering wheel movements.
If your vehicle goes from one type of
surface to another (i.e. from concrete to
gravel) there can be a change in the way
your vehicle responds to a maneuver (i.e.
steering, acceleration or braking).
Sand
When driving over sand, try to keep all four
wheels on the most solid area of the trail.
Avoid reducing the tire pressures but shift
to a lower gear and drive steadily through
the terrain. Apply the accelerator slowly
and avoid excessive wheel slip.
When driving at slow speeds in deep sand
under high outside temperatures, use a low
gear when possible. Low gear operation
can maximize the engine and transmission
cooling capability.
Avoid driving at excessive speeds, this
causes vehicle momentum to work against
you and your vehicle could become stuck
to the point that assistance may be
required from another vehicle. Remember,
you may be able to back out the way you
came if you proceed with caution.
Mud and Water
Mud
Be cautious of sudden changes in vehicle
speed or direction when you are driving in
mud. Even four-wheel drive vehicles can
lose traction in slick mud. If your vehicle
does slide, steer in the direction of the slide
until you regain control of your vehicle.
After driving through mud, clean off residue
stuck to rotating driveshafts and tires.
Excess mud stuck on tires and rotating
driveshafts can cause an imbalance that
could damage drive components.
Water
If you must drive through high water, drive
slowly. Traction or brake capability may
be limited.
When driving through water, determine the
depth and avoid water higher than the
bottom of the hubs. If the ignition system
gets wet, your vehicle may stall.
Once through water, try the brakes. Wet
brakes do not stop your vehicle as
effectively as dry brakes. Drying improves
by applying light pressure to the brake
pedal while moving slowly.
Note:
Driving through deep water may
damage the transmission. If the front or rear
axle is submerged in water, the axle
lubricant and power transfer unit lubricant
should be checked and changed if
necessary.
218
F-150 (TFC) Canada/United States of America, enUSA, Edition date: 201709, Fifth-Printing Four-Wheel Drive (If Equipped)
Page 287 of 641
Note:
The default option is low. This is
recommended for most trailers. If the
trailer's brakes require more initial voltage,
or if you prefer more aggressive braking then
select the other options as required.
6. Select the trailer type.
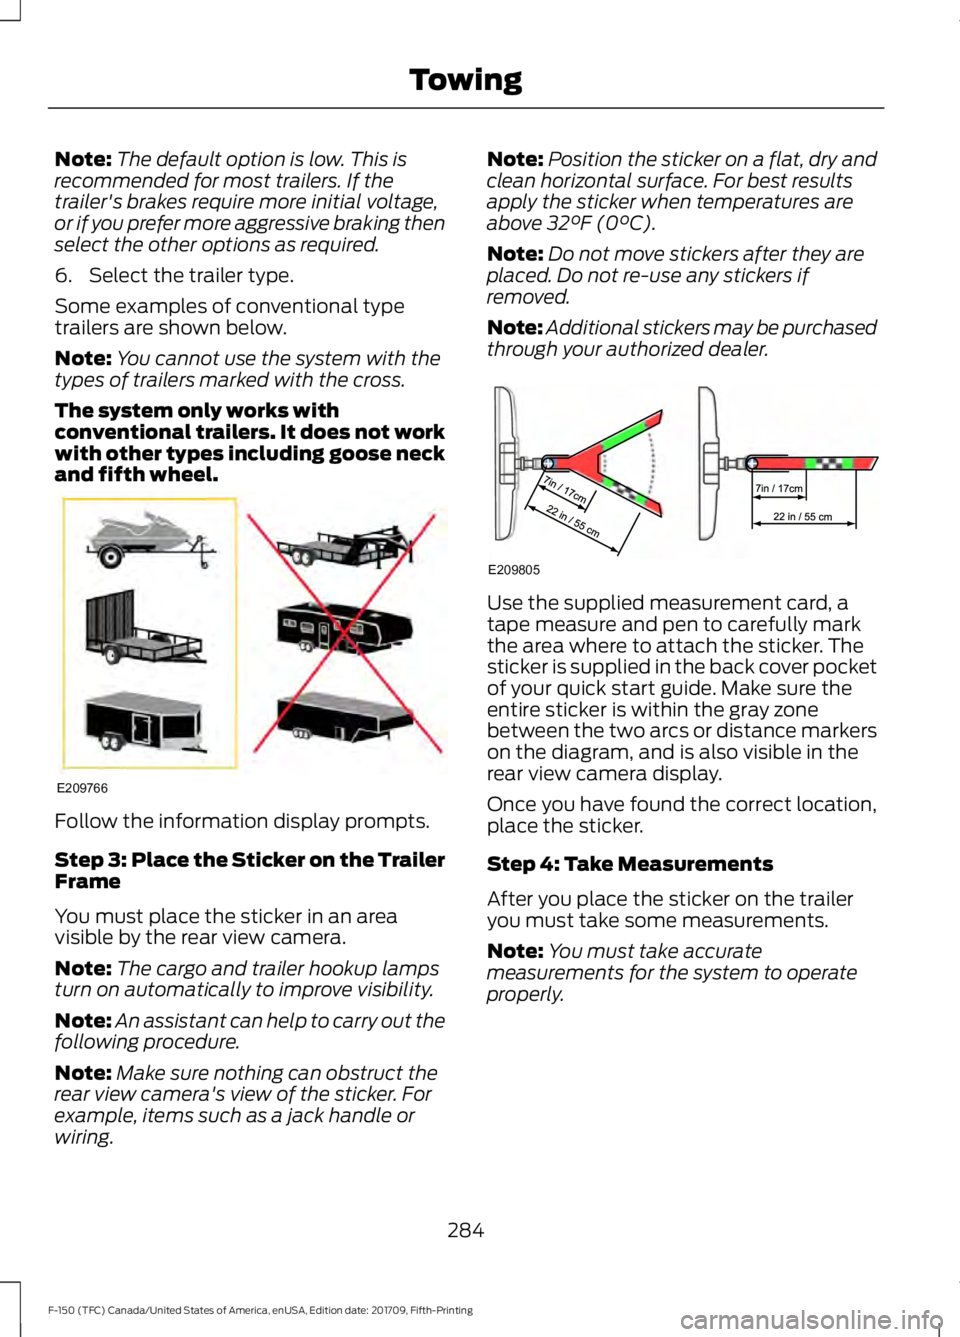
Some examples of conventional type
trailers are shown below.
Note: You cannot use the system with the
types of trailers marked with the cross.
The system only works with
conventional trailers. It does not work
with other types including goose neck
and fifth wheel. Follow the information display prompts.
Step 3: Place the Sticker on the Trailer
Frame
You must place the sticker in an area
visible by the rear view camera.
Note:
The cargo and trailer hookup lamps
turn on automatically to improve visibility.
Note: An assistant can help to carry out the
following procedure.
Note: Make sure nothing can obstruct the
rear view camera's view of the sticker. For
example, items such as a jack handle or
wiring. Note:
Position the sticker on a flat, dry and
clean horizontal surface. For best results
apply the sticker when temperatures are
above 32°F (0°C).
Note: Do not move stickers after they are
placed. Do not re-use any stickers if
removed.
Note: Additional stickers may be purchased
through your authorized dealer. Use the supplied measurement card, a
tape measure and pen to carefully mark
the area where to attach the sticker. The
sticker is supplied in the back cover pocket
of your quick start guide. Make sure the
entire sticker is within the gray zone
between the two arcs or distance markers
on the diagram, and is also visible in the
rear view camera display.
Once you have found the correct location,
place the sticker.
Step 4: Take Measurements
After you place the sticker on the trailer
you must take some measurements.
Note:
You must take accurate
measurements for the system to operate
properly.
284
F-150 (TFC) Canada/United States of America, enUSA, Edition date: 201709, Fifth-Printing TowingE209766 E209805
Page 313 of 641
Before Towing a Trailer
Practice turning, stopping and backing up
to get the feel of your vehicle-trailer
combination before starting on a trip.
When turning, make wider turns so the
trailer wheels clear curbs and other
obstacles.
When Towing a Trailer
•
Do not drive faster than 70 mph
(113 km/h) during the first 500 mi
(800 km).
• Do not make full-throttle starts.
• Check your hitch, electrical connections
and trailer wheel lug nuts thoroughly
after you have traveled 50 mi (80 km).
• When stopped in congested or heavy
traffic during hot weather, place the
transmission in park (P) to aid engine
and transmission cooling and to help
A/C performance.
• Turn off the speed control with heavy
loads or in hilly terrain. The speed
control may turn off automatically
when you are towing on long, steep
grades.
• Shift to a lower gear when driving down
a long or steep hill. Do not apply the
brakes continuously, as they may
overheat and become less effective.
• If your transmission is equipped with a
Grade Assist or Tow/Haul feature, use
this feature when towing. This provides
engine braking and helps eliminate
excessive transmission shifting for
optimum fuel economy and
transmission cooling.
• If your vehicle is equipped with
AdvanceTrac with RSC, this system
may turn on during typical cornering
maneuvers with a heavily loaded trailer.
This is normal. Turning the corner at a
slower speed while towing may reduce
this tendency. •
If you are towing a trailer frequently in
hot weather, hilly conditions, at the
gross combined weight rating (or any
combination of these factors), consider
refilling your rear axle with synthetic
gear lubricant (if the axle is not already
filled with it). See
Capacities and
Specifications (page 415).
• Allow more distance for stopping with
a trailer attached. Anticipate stops and
brake gradually.
• Avoid parking on a grade. However, if
you must park on a grade:
1. Turn the steering wheel to point your vehicle tires away from traffic flow.
2. Set your vehicle parking brake.
3. Place the automatic transmission in park (P).
4. Place wheel chocks in front and back of the trailer wheels. Chocks are not
included with your vehicle.
Your vehicle may be equipped with a
temporary or conventional spare tire. A
temporary spare tire is different in diameter
or width, tread-type, or is from a different
manufacturer than the road tires on your
vehicle. Consult information on the tire
label or Safety Compliance label for
limitations when using.
Launching or Retrieving a Boat or
Personal Watercraft (PWC)
Note: Disconnect the wiring to the trailer
before
backing the trailer into the water.
Note: Reconnect the wiring to the trailer
after
removing the trailer from the water.
310
F-150 (TFC) Canada/United States of America, enUSA, Edition date: 201709, Fifth-Printing Towing