brake light FORD F-150 2020 Owners Manual
[x] Cancel search | Manufacturer: FORD, Model Year: 2020, Model line: F-150, Model: FORD F-150 2020Pages: 625, PDF Size: 7.98 MB
Page 13 of 625
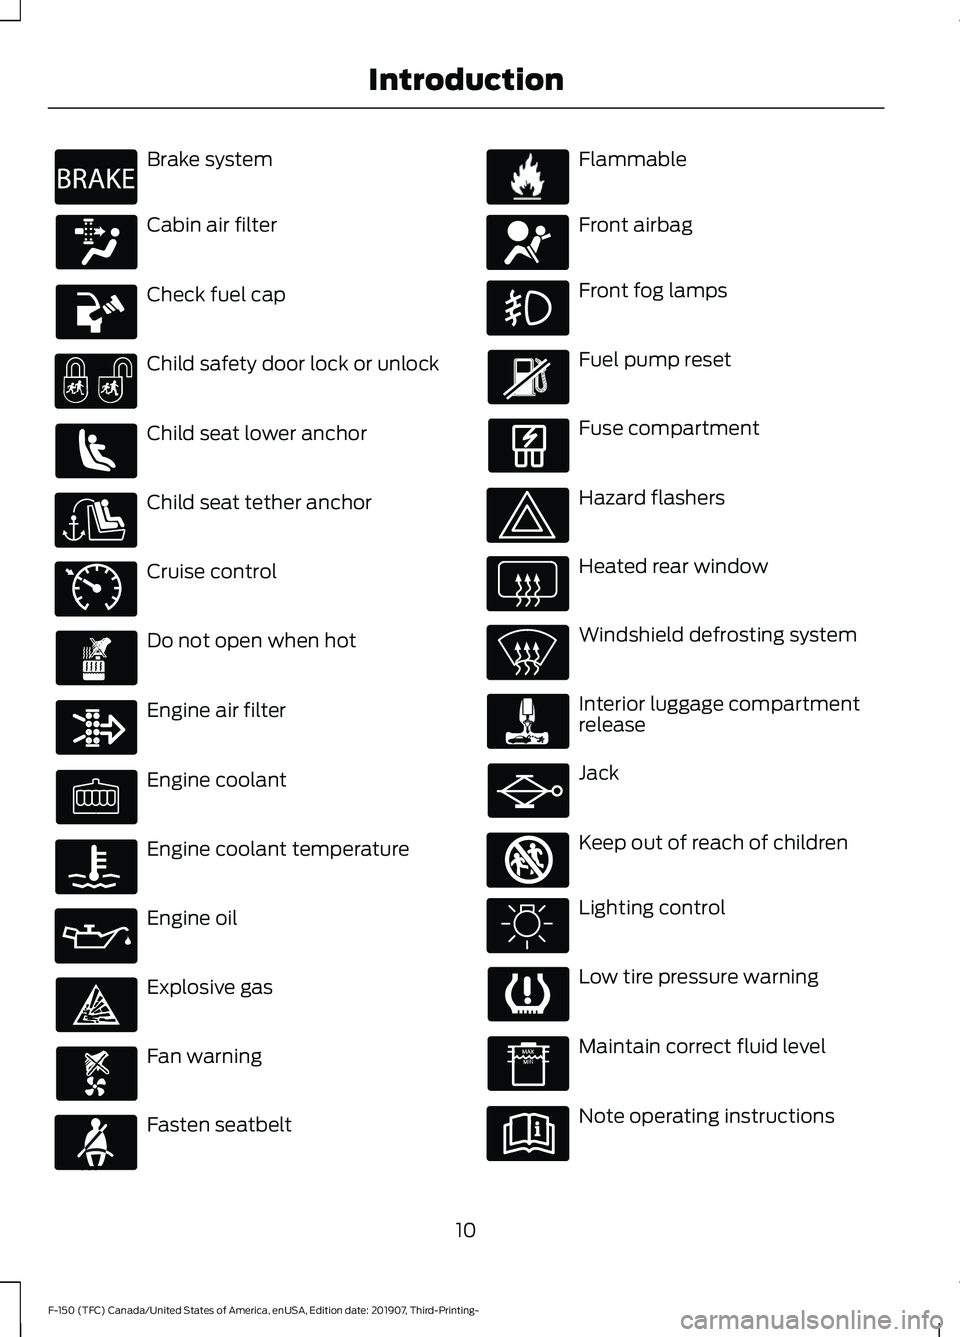
Brake system
Cabin air filter
Check fuel cap
Child safety door lock or unlock
Child seat lower anchor
Child seat tether anchor
Cruise control
Do not open when hot
Engine air filter
Engine coolant
Engine coolant temperature
Engine oil
Explosive gas
Fan warning
Fasten seatbelt Flammable
Front airbag
Front fog lamps
Fuel pump reset
Fuse compartment
Hazard flashers
Heated rear window
Windshield defrosting system
Interior luggage compartment
release
Jack
Keep out of reach of children
Lighting control
Low tire pressure warning
Maintain correct fluid level
Note operating instructions
10
F-150 (TFC) Canada/United States of America, enUSA, Edition date: 201907, Third-Printing- IntroductionE270480 E71340 E71880 E231160 E67017 E161353
Page 24 of 625
Start button. See Keyless Starting (page 179).
M
Voice control.
See Voice Control (page 90).
N
Cruise control switches. See
Cruise Control (page 90). Adaptive cruise control
switches. See Using Adaptive Cruise Control (page 254).
O
Electric parking brake switch. See
Electric Parking Brake (page 234).
P
Lighting control.
See Lighting Control (page 95).
Q
21
F-150 (TFC) Canada/United States of America, enUSA, Edition date: 201907, Third-Printing- At a Glance
Page 50 of 625
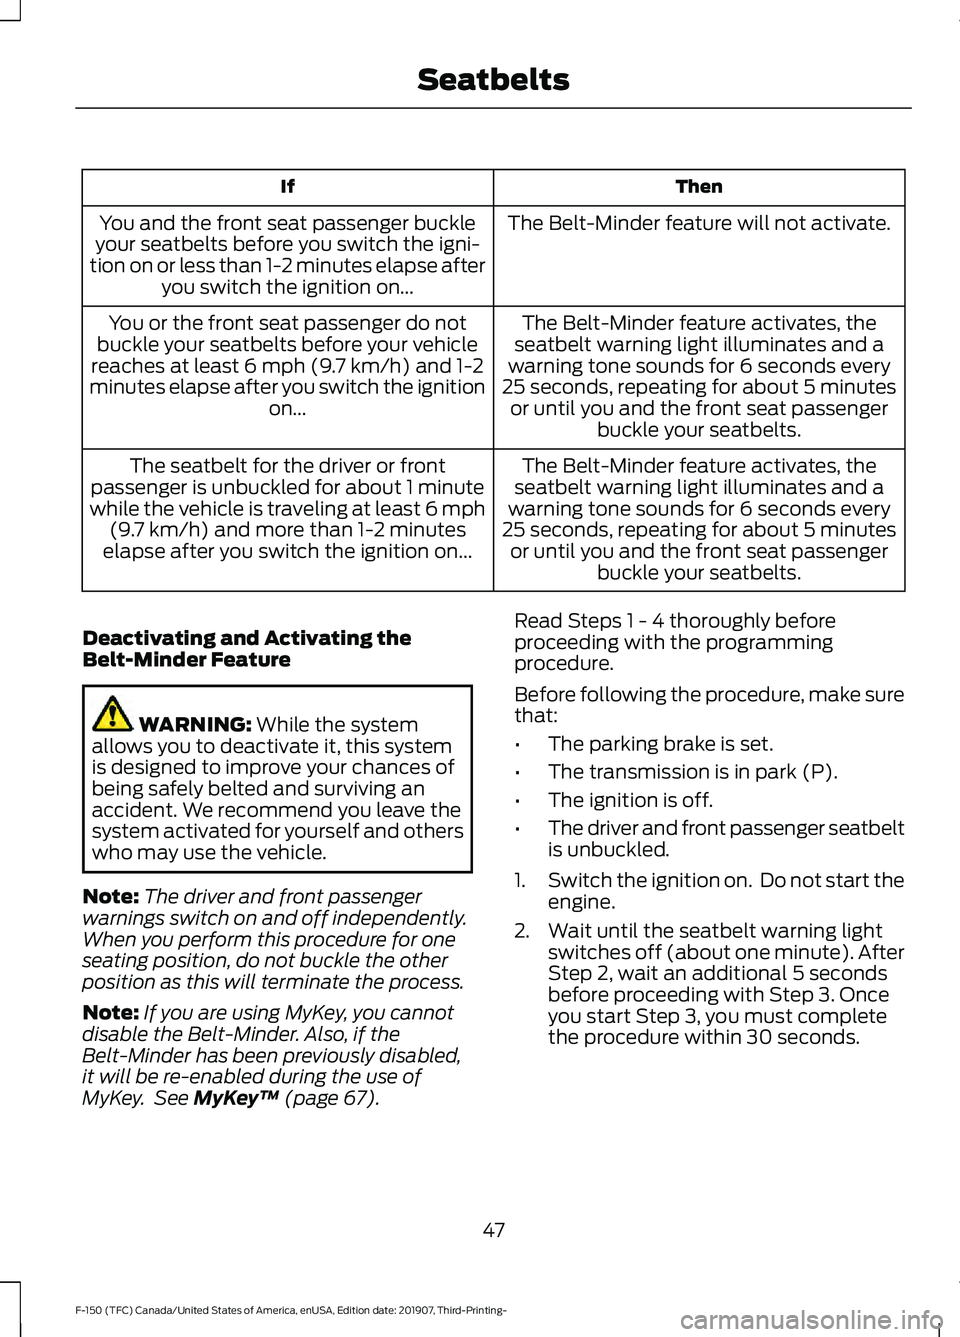
Then
If
The Belt-Minder feature will not activate.
You and the front seat passenger buckle
your seatbelts before you switch the igni-
tion on or less than 1-2 minutes elapse after you switch the ignition on...
The Belt-Minder feature activates, the
seatbelt warning light illuminates and a
warning tone sounds for 6 seconds every
25 seconds, repeating for about 5 minutes or until you and the front seat passenger buckle your seatbelts.
You or the front seat passenger do not
buckle your seatbelts before your vehicle
reaches at least 6 mph (9.7 km/h) and 1-2
minutes elapse after you switch the ignition on...
The Belt-Minder feature activates, the
seatbelt warning light illuminates and a
warning tone sounds for 6 seconds every
25 seconds, repeating for about 5 minutes or until you and the front seat passenger buckle your seatbelts.
The seatbelt for the driver or front
passenger is unbuckled for about 1 minute
while the vehicle is traveling at least 6 mph (9.7 km/h)
and more than 1-2 minutes
elapse after you switch the ignition on...
Deactivating and Activating the
Belt-Minder Feature WARNING:
While the system
allows you to deactivate it, this system
is designed to improve your chances of
being safely belted and surviving an
accident. We recommend you leave the
system activated for yourself and others
who may use the vehicle.
Note: The driver and front passenger
warnings switch on and off independently.
When you perform this procedure for one
seating position, do not buckle the other
position as this will terminate the process.
Note: If you are using MyKey, you cannot
disable the Belt-Minder. Also, if the
Belt-Minder has been previously disabled,
it will be re-enabled during the use of
MyKey. See
MyKey ™ (page 67). Read Steps 1 - 4 thoroughly before
proceeding with the programming
procedure.
Before following the procedure, make sure
that:
•
The parking brake is set.
• The transmission is in park (P).
• The ignition is off.
• The driver and front passenger seatbelt
is unbuckled.
1. Switch the ignition on. Do not start the
engine.
2. Wait until the seatbelt warning light switches off (about one minute). After
Step 2, wait an additional 5 seconds
before proceeding with Step 3. Once
you start Step 3, you must complete
the procedure within 30 seconds.
47
F-150 (TFC) Canada/United States of America, enUSA, Edition date: 201907, Third-Printing- Seatbelts
Page 68 of 625
Remote Start (If Equipped)
WARNING:
To avoid exhaust
fumes, do not use remote start if your
vehicle is parked indoors or in areas that
are not well ventilated.
Note: Do not use remote start if your fuel
level is low. The remote start button is on the
transmitter.
This feature allows you to start your
vehicle from the outside. The transmitter
has an extended operating range.
If your vehicle has automatic climate
control, you can configure it to operate
when you remote start your vehicle. See
Climate Control
(page 151). A manual
climate control system will run at the
setting it was set to when you switched
your vehicle off.
Many states and provinces have
restrictions for the use of remote start.
Check your local and state or provincial
laws for specific requirements regarding
remote start systems.
The remote start system does not work if:
• The ignition is on.
• The alarm system triggers.
• You disable the feature.
• The hood is open.
• The transmission is not in park (P).
• The vehicle battery voltage is too low.
• The service engine soon light is on.
Remote Control Feedback (If
Equipped)
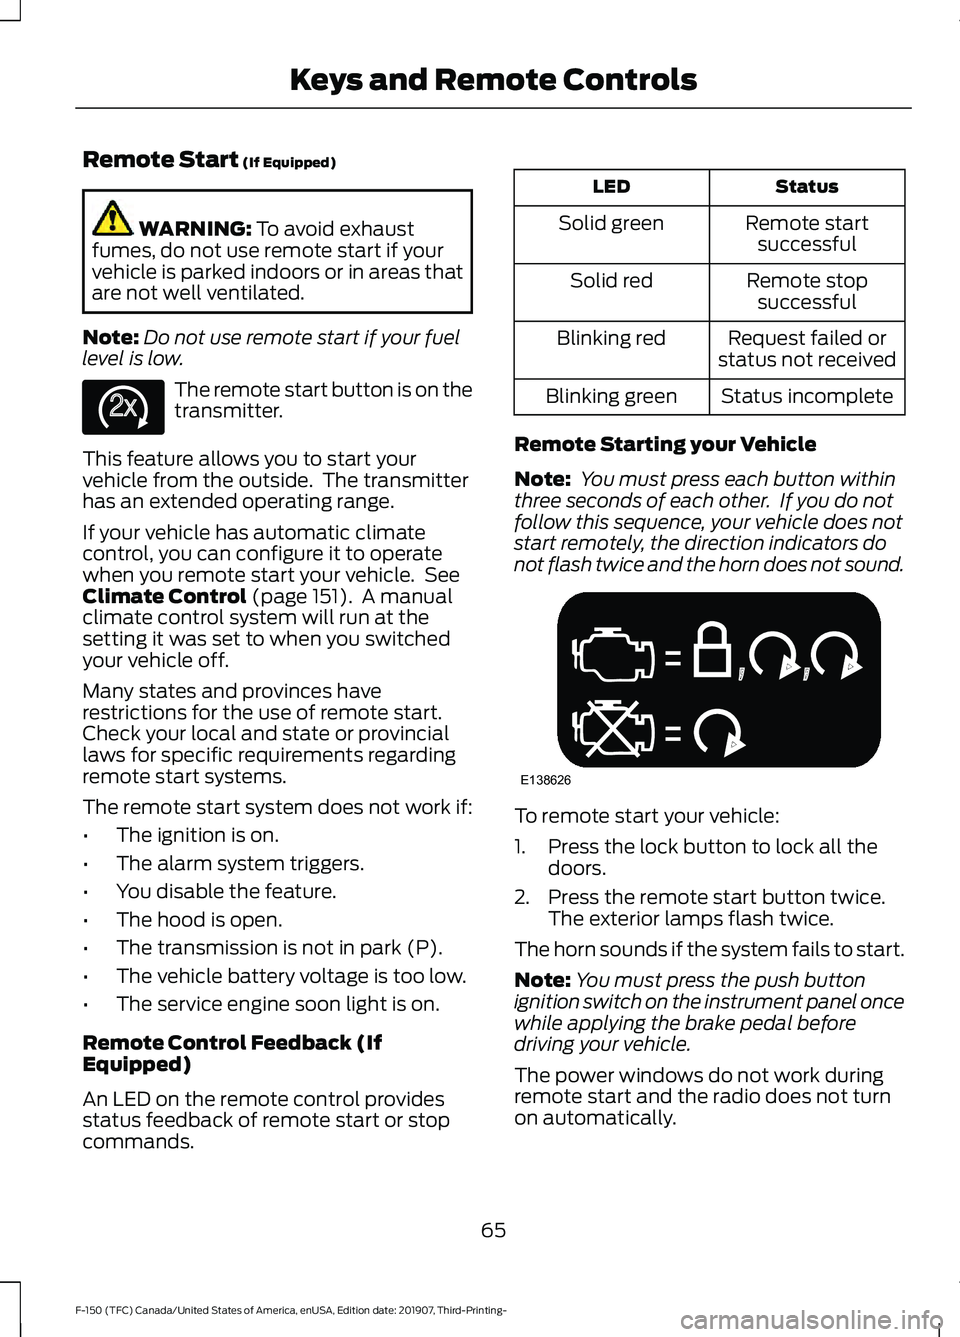
An LED on the remote control provides
status feedback of remote start or stop
commands. Status
LED
Remote startsuccessful
Solid green
Remote stopsuccessful
Solid red
Request failed or
status not received
Blinking red
Status incomplete
Blinking green
Remote Starting your Vehicle
Note: You must press each button within
three seconds of each other. If you do not
follow this sequence, your vehicle does not
start remotely, the direction indicators do
not flash twice and the horn does not sound. To remote start your vehicle:
1. Press the lock button to lock all the
doors.
2. Press the remote start button twice. The exterior lamps flash twice.
The horn sounds if the system fails to start.
Note: You must press the push button
ignition switch on the instrument panel once
while applying the brake pedal before
driving your vehicle.
The power windows do not work during
remote start and the radio does not turn
on automatically.
65
F-150 (TFC) Canada/United States of America, enUSA, Edition date: 201907, Third-Printing- Keys and Remote ControlsE138625 E138626
Page 100 of 625
The system turns the lamps on in daylight
conditions.
To switch the system on, switch the
lighting control to any position except
headlamps.
DAYTIME RUNNING LAMPS -
VEHICLES WITH:
CONFIGURABLE DAYTIME
RUNNING LAMPS
WARNING: The daytime running
lamps system does not activate the rear
lamps and may not provide adequate
lighting during low visibility driving
conditions. Make sure you switch the
headlamps on, as appropriate, during all
low visibility conditions. Failure to do so
may result in a crash.
Switch the daytime running lamps on or
off using the information display. See
General Information
(page 120).
The daytime running lamps turn on when:
1. The lamps are on in the information display.
2. You switch the ignition on.
3. The transmission is not in park (P) for vehicles with automatic transmissions
or you release the parking brake for
vehicles with manual transmissions.
4. The lighting control is in the autolamps
position.
5. The headlamps are off.
The other lighting control switch positions
do not turn on the daytime running lamps.
If the daytime running lamps are off in the
information display, the lamps stay off in
all switch positions. FRONT FOG LAMPS
(IF EQUIPPED)
Switching the Front Fog Lamps On
or Off
Only switch the front fog lamps on during
reduced visibility.
You can switch the front fog lamps on if
any of the following occur:
• You set the lighting control to the
parking lamps position.
• You set the lighting control to the
headlamps position.
• You set the lighting control to the
autolamps position and the headlamps
are on.
The front fog lamp button is on the lighting
control. Press the button to switch the
front fog lamps on or off.
Note: The brightness of the daytime running
lamps may decrease when the front fog
lamps are switched on.
Front Fog Lamp Indicator It illuminates when you switch
the front fog lamps on.
97
F-150 (TFC) Canada/United States of America, enUSA, Edition date: 201907, Third-Printing- Lighting
Page 133 of 625
Truck Info
Engine Information
Transmission Temperature
• Gauge View - Shows the turbo boost or transmission temp value.
• Tire Pressure - Shows the tire pressure. See Tire Pressure Monitoring System
(page 408).
• Digital Speedometer - Shows a digital display of your vehicle speed.
• Diesel Exhaust Fluid Status - Shows diesel exhaust fluid status on demand screen
and DEF distance to empty.
• Diesel Exhaust Filter Status - Shows exhaust filter on demand screen.
• Engine Information - Shows engine information.
• Transmission Temperature - Shows the transmission temperature of your vehicle.
Towing Use the arrow buttons to choose
between the following towing
options.
Note: Once you select a trailer, it remains active until you set it as no longer active. An active
trailer still accumulates miles even after you physically disconnect it from your vehicle. Towing
Enter the submenu for items such as % Grade, steering angle, gain and
output display
Towing
Status
Enter the submenu for items such as Trailer Name, Accumulated Miles, Pro
Trailer Backup Assist Status and Trailer BLIS Status - Press
OK for Trailer
Options
Towing
Informa-
tion
Enter the submenu for items such as Running, Brake and Turn Signal Light
Status or No Trailer Detected
Trailer
Light
Check
Trailer Sway Control
Trailer
Setup
Enter the submenu and select your
setting
Select trailer
Enter the submenu and select your
setting
Change Trailer Settings
Enter the submenu and select your
setting
Add Trailer
130
F-150 (TFC) Canada/United States of America, enUSA, Edition date: 201907, Third-Printing- Information DisplaysE176096
Page 152 of 625
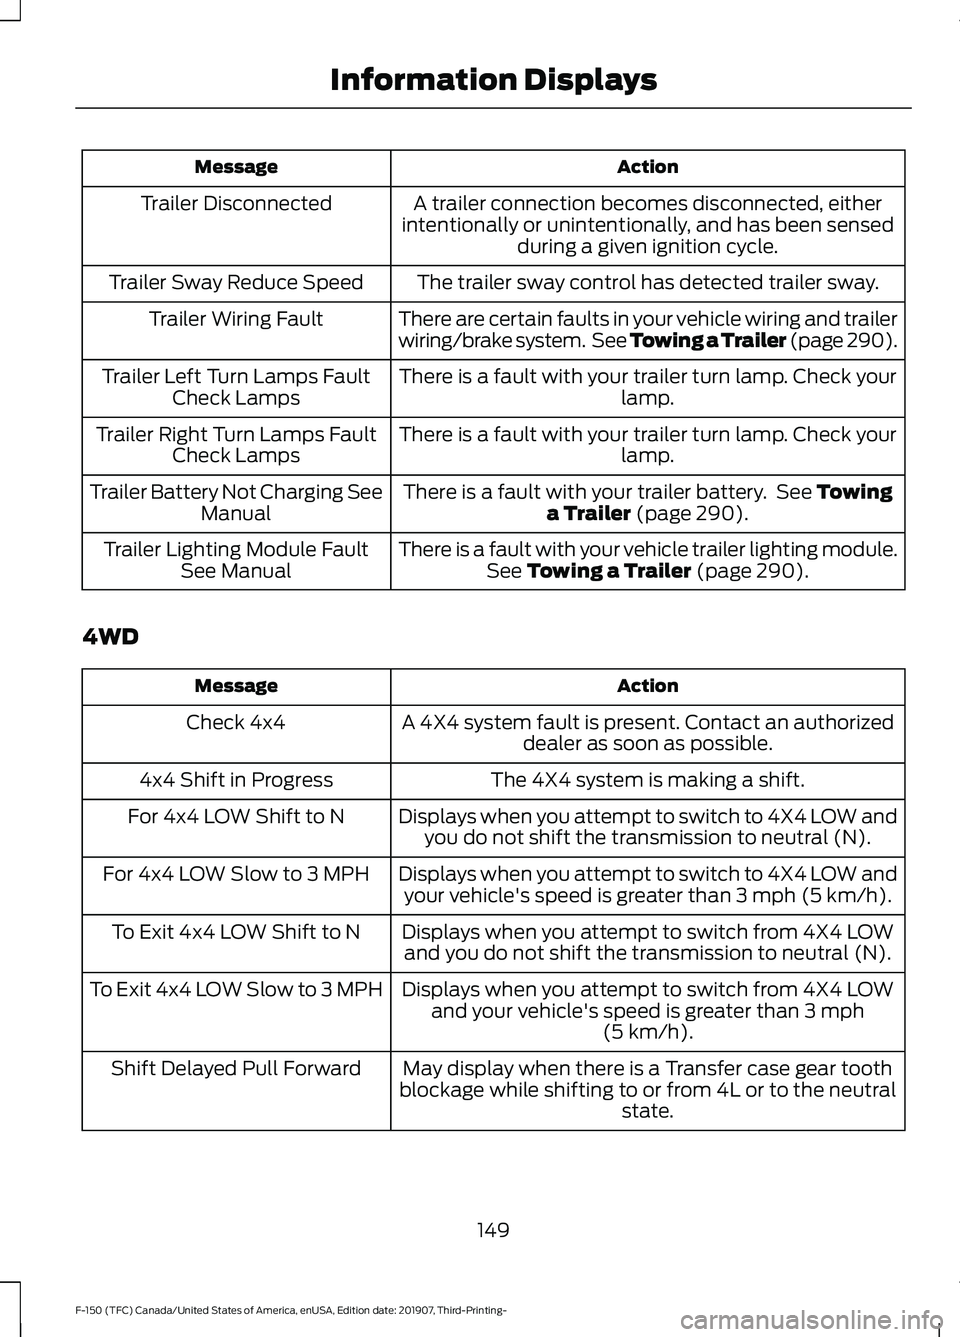
Action
Message
A trailer connection becomes disconnected, either
intentionally or unintentionally, and has been sensed during a given ignition cycle.
Trailer Disconnected
The trailer sway control has detected trailer sway.
Trailer Sway Reduce Speed
There are certain faults in your vehicle wiring and trailer
wiring/brake system. See Towing a Trailer (page 290).
Trailer Wiring Fault
There is a fault with your trailer turn lamp. Check yourlamp.
Trailer Left Turn Lamps Fault
Check Lamps
There is a fault with your trailer turn lamp. Check yourlamp.
Trailer Right Turn Lamps Fault
Check Lamps
There is a fault with your trailer battery. See
Towing
a Trailer (page 290).
Trailer Battery Not Charging See
Manual
There is a fault with your vehicle trailer lighting module.See
Towing a Trailer (page 290).
Trailer Lighting Module Fault
See Manual
4WD Action
Message
A 4X4 system fault is present. Contact an authorizeddealer as soon as possible.
Check 4x4
The 4X4 system is making a shift.
4x4 Shift in Progress
Displays when you attempt to switch to 4X4 LOW andyou do not shift the transmission to neutral (N).
For 4x4 LOW Shift to N
Displays when you attempt to switch to 4X4 LOW andyour vehicle's speed is greater than
3 mph (5 km/h).
For 4x4 LOW Slow to 3 MPH
Displays when you attempt to switch from 4X4 LOWand you do not shift the transmission to neutral (N).
To Exit 4x4 LOW Shift to N
Displays when you attempt to switch from 4X4 LOWand your vehicle's speed is greater than
3 mph
(5 km/h).
To Exit 4x4 LOW Slow to 3 MPH
May display when there is a Transfer case gear tooth
blockage while shifting to or from 4L or to the neutral state.
Shift Delayed Pull Forward
149
F-150 (TFC) Canada/United States of America, enUSA, Edition date: 201907, Third-Printing- Information Displays
Page 183 of 625
Note:
A valid key must be located inside
your vehicle to switch the ignition on and
start the engine.
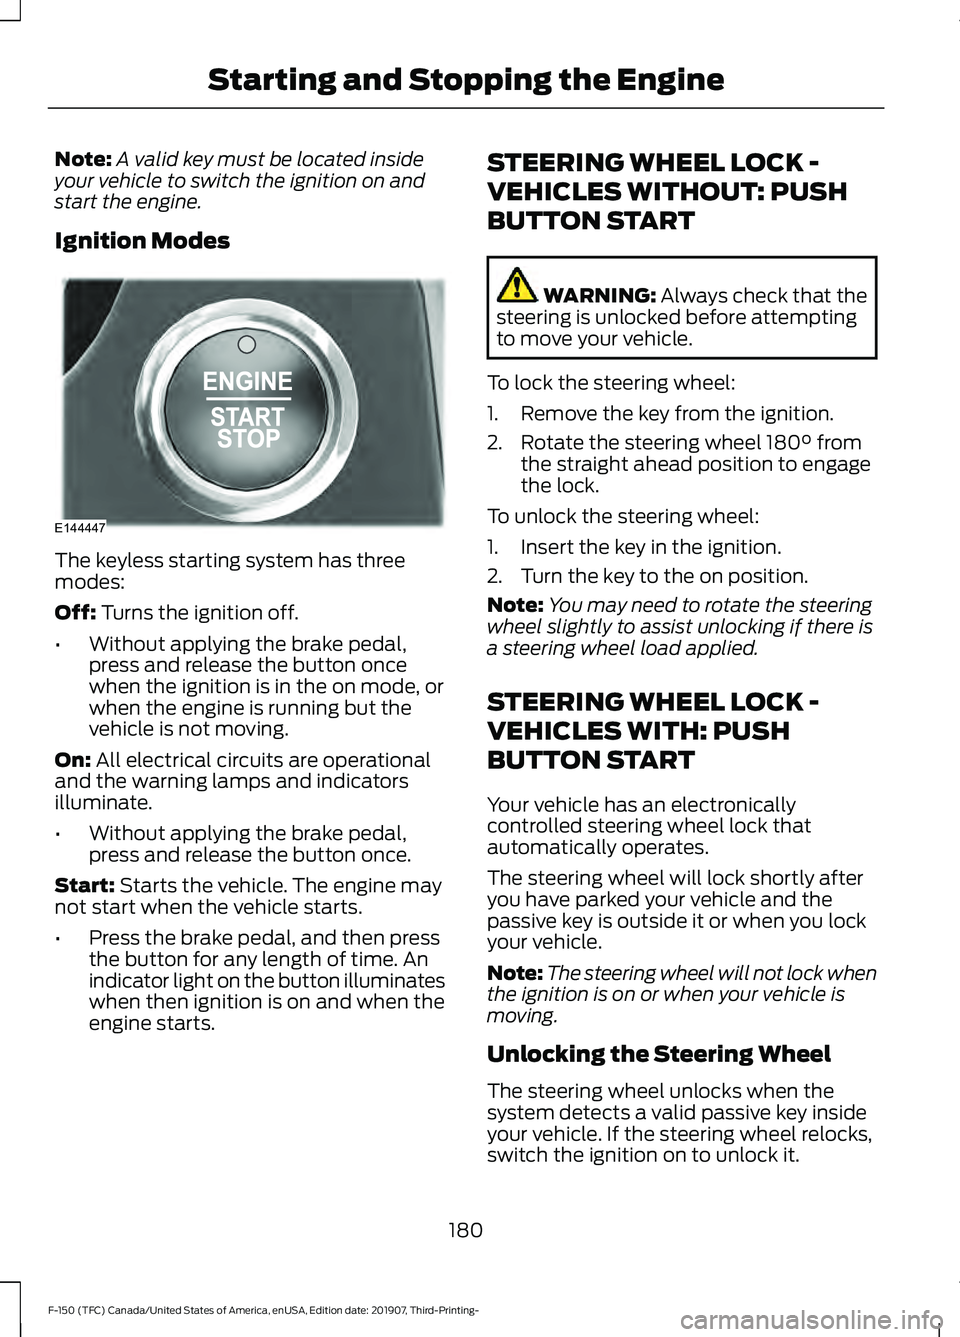
Ignition Modes The keyless starting system has three
modes:
Off: Turns the ignition off.
• Without applying the brake pedal,
press and release the button once
when the ignition is in the on mode, or
when the engine is running but the
vehicle is not moving.
On:
All electrical circuits are operational
and the warning lamps and indicators
illuminate.
• Without applying the brake pedal,
press and release the button once.
Start:
Starts the vehicle. The engine may
not start when the vehicle starts.
• Press the brake pedal, and then press
the button for any length of time. An
indicator light on the button illuminates
when then ignition is on and when the
engine starts. STEERING WHEEL LOCK -
VEHICLES WITHOUT: PUSH
BUTTON START WARNING:
Always check that the
steering is unlocked before attempting
to move your vehicle.
To lock the steering wheel:
1. Remove the key from the ignition.
2. Rotate the steering wheel 180° from the straight ahead position to engage
the lock.
To unlock the steering wheel:
1. Insert the key in the ignition.
2. Turn the key to the on position.
Note: You may need to rotate the steering
wheel slightly to assist unlocking if there is
a steering wheel load applied.
STEERING WHEEL LOCK -
VEHICLES WITH: PUSH
BUTTON START
Your vehicle has an electronically
controlled steering wheel lock that
automatically operates.
The steering wheel will lock shortly after
you have parked your vehicle and the
passive key is outside it or when you lock
your vehicle.
Note: The steering wheel will not lock when
the ignition is on or when your vehicle is
moving.
Unlocking the Steering Wheel
The steering wheel unlocks when the
system detects a valid passive key inside
your vehicle. If the steering wheel relocks,
switch the ignition on to unlock it.
180
F-150 (TFC) Canada/United States of America, enUSA, Edition date: 201907, Third-Printing- Starting and Stopping the EngineE144447
Page 184 of 625
Note:
You may have to slightly rotate the
steering wheel to assist unlocking it.
STARTING A GASOLINE
ENGINE (IF EQUIPPED)
When you start the engine, the idle speed
increases. This helps to warm up the
engine. If the engine idle speed does not
slow down automatically, have your
vehicle checked by an authorized dealer.
Note: You can crank the engine for a total
of 60 seconds (without the engine starting)
before the starting system temporarily
disables. The 60 seconds does not have to
be all at once. For example, if you crank the
engine three times for 20 seconds each
time, without the engine starting, you
reached the 60-second time limit. A
message appears in the information display
alerting you that you exceeded the cranking
time. You cannot attempt to start the
engine for at least 15 minutes. After 15
minutes, you are limited to a 15-second
engine cranking time. You need to wait 60
minutes before you can crank the engine for
60 seconds again.
Before starting the engine, check the
following:
• Make sure all occupants have fastened
their seatbelts.
• Make sure the headlamps and
electrical accessories are off.
• Make sure the parking brake is on.
• Move the transmission selector lever
to position
P.
• Turn the ignition key to on. If your
vehicle is equipped with a keyless
ignition, see the following instructions.
Vehicles with an Ignition Key
Note: Do not touch the accelerator pedal.
1. Fully depress the brake pedal. 2. Turn the key to start the engine.
Release the key when the engine starts.
Note: The engine may continue cranking
for up to 15 seconds or until it starts.
Note: If you cannot start the engine on the
first try, wait for a short period and try again.
Vehicles with Keyless Start
Note: Do not touch the accelerator pedal.
Note: You must have your intelligent access
key in the vehicle in order to shift the
transmission out of position
P.
1. Fully depress the brake pedal.
2. Press the button.
The system does not function if:
• The key frequencies are jammed.
• The key battery has no charge.
If you are unable to start the engine, locate
the backup slot (A) in one of two positions:
181
F-150 (TFC) Canada/United States of America, enUSA, Edition date: 201907, Third-Printing- Starting and Stopping the Engine
Page 189 of 625
When the glow plug pre-heat indicator
turns off, turn the key to start and release
the key as soon as the engine starts. After
starting the engine, the glow plugs may
remain on for a period. If you do not start
the engine before the glow plug activation
time ends, you will need to reset the glow
plugs by switching the ignition off. After
the engine starts, allow it to idle for about
15 seconds. This is to protect the engine.
Do not increase engine speed until the oil
pressure gauge indicates normal pressure.
For vehicles with keyless start:
1. Fully depress brake pedal and hold to
allow time for glow-plugs to heat.
2. Press and release the start button.
Note: A message "Engine Start Pending,
Please Wait", along with the glow plug
indicator displays on the instrument cluster.
3. When the engine starts, release the brake pedal.
Cold Weather Operation
Note: Idling in cold weather does not heat
the engine to its normal operating
temperature. Long periods of idling,
especially in cold weather, can cause a
buildup of deposits which can cause engine
damage.
Changing to a lighter grade engine oil also
makes starting easier under these
conditions. Refer to Engine oil
specifications. See Capacities and
Specifications (page 433).
Diesel fuel is adjusted seasonally for cold
temperatures. Diesel fuel which has not
been properly formulated for the ambient
conditions may gel which can clog the fuel
filters. One indication that the fuel filter(s)
may be clogged is if the engine starts, stalls
after a short time, and then does not
restart. If you have been using biodiesel,
you may need to use a fuel with lower
biodiesel content, try another brand, or discontinue using biodiesel. Do not use
alcohol based additives to correct fuel
gelling. This may result in damage to the
fuel injectors and system. Use the proper
anti-gel and performance improvement
product. See
Capacities and
Specifications (page 433).
Your vehicle is equipped with a fuel and
water separator that recirculates fuel from
the engine to help prevent fuel filter
clogging. To avoid engine fuel starvation
during cold weather operation of 32°F
(0°C) or below, we recommended that
the fuel level in your tank should not drop
below 1⁄4 full. This helps prevent air from
entering the fuel system and stalling the
engine.
In cold weather below 32°F (0°C), the
engine may slowly increase to a higher idle
speed if left idling in park (P). As the engine
warms-up, the engine sound level
decreases due to the activation of
PCM-controlled sound reduction features.
If you operate your vehicle in a heavy
snowstorm or blowing snow conditions,
snow and ice can clog the engine air
induction. If this occurs, the engine may
experience a significant reduction in power
output. At the earliest opportunity, clear
all the snow and/or ice away from inside
the air filter assembly. Remove the air
cleaner cover and the pleated paper filter,
leaving the foam filter in and remove any
snow or ice. Make sure you install the foam
filter correctly in place. Remove any debris,
snow or ice on the foam filter by brushing
the surface with soft brush. Once you have
cleared all of the debris, reinstall the air
filter and assembly.
Do not use water, solvents, or a hard brush
for cleaning the foam filter.
186
F-150 (TFC) Canada/United States of America, enUSA, Edition date: 201907, Third-Printing- Starting and Stopping the Engine