tire type FORD F-250 2019 Owner's Manual
[x] Cancel search | Manufacturer: FORD, Model Year: 2019, Model line: F-250, Model: FORD F-250 2019Pages: 666, PDF Size: 13.6 MB
Page 392 of 666
Note:
Do not reduce tire pressure
to change the ride characteristics
of the vehicle. If you do not
maintain the inflation pressure at
the levels specified by Ford, your
vehicle may experience a condition
known as shimmy. Shimmy is a
severe vibration and oscillation in
the steering wheel after the vehicle
travels over a bump or dip in the
road that does not dampen out by
itself. Shimmy may result from
significant under-inflation of the
tires, improper tires (load range,
size, or type), or vehicle
modifications such as lift-kits. In
the event that your vehicle
experiences shimmy, you should
slowly reduce speed by either lifting
off the accelerator pedal or lightly
applying the brakes. The shimmy
will cease as the vehicle speed
decreases.
Maximum Inflation Pressure is
the tire manufacturer's maximum
permissible pressure and the
pressure at which the maximum
load can be carried by the tire. This
pressure is normally higher than
the manufacturer ’s recommended
cold inflation pressure which can
be found on the Safety
Compliance Certification Label
(affixed to either the door hinge
pillar, door-latch post, or the door
edge that meets the door-latch
post, next to the driver's seating
position), or Tire Label located on the B-pillar or the edge of the
driver's door. The cold inflation
pressure should never be set lower
than the recommended pressure
on the Safety Compliance
Certification Label or Tire Label.
When weather temperature
changes occur, tire inflation
pressures also change. A 10°F
(6°C) temperature drop can
cause a corresponding drop of 1
psi (7 kPa) in inflation pressure.
Check your tire pressures
frequently and adjust them to the
proper pressure which can be
found on the Safety Compliance
Certification Label or Tire Label.
To check the pressure in your
tire(s):
1. Make sure the tires are cool,
meaning they are not hot from
driving even a mile.
Note:
If you are checking tire
pressure when the tire is hot, (for
example, driven more than 1 mile
[1.6 kilometers]), never bleed or
reduce air pressure. The tires are
hot from driving and it is normal for
pressures to increase above
recommended cold pressures. A
hot tire at or below recommended
cold inflation pressure could be
significantly under-inflated.
389
Super Duty (TFE) Canada/United States of America, enUSA, Edition date: 201804, Fourth-Printing Wheels and Tires
Page 393 of 666
Note:
If you have to drive a
distance to get air for your tire(s),
check and record the tire pressure
first and add the appropriate air
pressure when you get to the
pump. It is normal for tires to heat
up and the air pressure inside to go
up as you drive.
2. Remove the cap from the valve
on one tire, then firmly press the
tire gauge onto the valve and
measure the pressure.
3. Add enough air to reach the
recommended air pressure.
Note: If you overfill the tire, release
air by pressing on the metal stem
in the center of the valve. Then
recheck the pressure with your tire
gauge.
4. Replace the valve cap.
5. Repeat this procedure for each
tire, including the spare.
Note: Some spare tires operate at
a higher inflation pressure than the
other tires. For T type mini-spare
tires, (see the Dissimilar spare
wheel and tire assembly
information for a description. Store
and maintain at 60 psi (4.15 bar).
For full-size and dissimilar spare
tires, see the Dissimilar spare wheel
and tire assembly information for
a description. Store and maintain
at the higher of the front and rear
inflation pressure as shown on the
Safety Compliance Certification
Label or Tire Label. 6. Visually inspect the tires to
make sure there are no nails or
other objects embedded that
could poke a hole in the tire and
cause an air leak.
7. Check the sidewalls to make
sure there are no gouges, cuts or
bulges.
Tire Inflation Information
WARNING: An inflated tire
and rim can be very dangerous
if improperly used, serviced or
maintained. To reduce the risk
of serious injury, never attempt
to re-inflate a tire which has
been run flat or seriously
under-inflated without first
removing the tire from the wheel
assembly for inspection. Do not
attempt to add air to tires or
replace tires or wheels without
first taking precautions to
protect persons and property.
All tires with Steel Carcass Plies
(if equipped):
This type of tire utilizes steel cords
in the sidewalls. As such, they
cannot be treated like normal light
truck tires. Tire service, including
adjusting tire pressure, must be
performed by personnel trained,
supervised and equipped
according to Federal Occupational
Safety and Health Administration
regulations. For example, during
390
Super Duty (TFE) Canada/United States of America, enUSA, Edition date: 201804, Fourth-Printing Wheels and Tires
Page 396 of 666
WARNING: You should
replace your spare tire when you
replace the road tires or after six
years due to aging even if it has
not been used.
U.S. DOT Tire Identification
Number
Both United States and Canada
Federal regulations require tire
manufacturers to place
standardized information on the
sidewall of all tires. This
information identifies and
describes the fundamental
characteristics of the tire and also
provides a U.S. DOT Tire
Identification Number for safety
standard certification and in case
of a recall.
This begins with the letters DOT
and indicates that the tire meets
all federal standards. The next
two numbers or letters are the
plant code designating where it
was manufactured, the next two
are the tire size code and the last
four numbers represent the week
and year the tire was built. For
example, the numbers 317 mean
the 31st week of 1997. After 2000
the numbers go to four digits. For
example, 2501 means the 25th
week of 2001. The numbers in
between are identification codes
used for traceability. This
information is used to contact
customers if a tire defect requires
a recall. Tire Replacement
Requirements
Your vehicle is equipped with tires
designed to provide a safe ride
and handling capability.
WARNING:
Only use
replacement tires and wheels
that are the same size, load
index, speed rating and type
(such as P-metric versus
LT-metric or all-season versus
all-terrain) as those originally
provided by Ford. The
recommended tire and wheel
size may be found on either the
Safety Compliance Certification
Label (affixed to either the door
hinge pillar, door-latch post, or
the door edge that meets the
door-latch post, next to the
driver ’s seating position), or the
Tire Label which is located on
the B-Pillar or edge of the
driver ’s door. If this information
is not found on these labels, then
you should contact your
authorized dealer as soon as
possible. Use of any tire or wheel
not recommended by Ford can
affect the safety and
performance of your vehicle,
which could result in an
increased risk of loss of vehicle
control, vehicle rollover, personal
injury and death.
393
Super Duty (TFE) Canada/United States of America, enUSA, Edition date: 201804, Fourth-Printing Wheels and Tires
Page 409 of 666
The trailer tire pressure monitoring system
can be reset through the menu in the
information display. See General
Information (page 112). Performing the
trailer setup process also resets the trailer
tire pressure monitoring system.
CHANGING A ROAD WHEEL WARNING:
If the tire pressure
monitor sensor becomes damaged it
may not function.
Note: If your vehicle is equipped with the
tire pressure monitoring system, the
indicator light illuminates when the spare
tire is in use. To restore the full function of
the monitoring system, all road wheels
equipped with tire pressure monitoring
sensors must be mounted on the vehicle.
Note: You should only use tire sealants in
roadside emergencies as they may cause
damage to the tire pressure monitoring
system sensor.
If you get a flat tire when driving, do not
apply the brake heavily. Instead, gradually
decrease your speed. Hold the steering
wheel firmly and slowly move to a safe
place on the side of the road.
If your vehicle is equipped with the tire
pressure monitoring system, have a flat
serviced by an authorized dealer in order
to prevent damage to the system sensors.
See
Tire Pressure Monitoring System
(page 398). Replace the spare tire with a
road tire as soon as possible. During
repairing or replacing of the flat tire, have
the authorized dealer inspect the system
sensor for damage. Dissimilar Spare Wheel and Tire
Assembly Information WARNING:
Failure to follow these
guidelines could result in an increased
risk of loss of vehicle control, injury or
death.
If you have a dissimilar spare wheel and
tire, then it is intended for temporary use
only. This means that if you need to use it,
you should replace it as soon as possible
with a road wheel and tire assembly that
is the same size and type as the road tires
and wheels that were originally provided
by Ford. If the dissimilar spare tire or wheel
is damaged, it should be replaced rather
than repaired.
A dissimilar spare wheel and tire assembly
is defined as a spare wheel and tire
assembly that is different in brand, size or
appearance from the road tires and
wheels.
Full-size dissimilar spare
When driving with the full-size dissimilar
spare wheel and tire assembly, do not:
• Exceed
70 mph (113 km/h).
• Use more than one dissimilar spare
wheel and tire assembly at a time.
• Use snow chains on the end of the
vehicle with the dissimilar spare wheel
and tire assembly.
When driving with the full-size dissimilar
spare wheel and tire assembly, it is
recommended that you do not:
• Exceed
50 mph (80 km/h) in 4WD.
• Engage 4WD unless the vehicle is
stationary.
• Use 4WD on dry pavement.
406
Super Duty (TFE) Canada/United States of America, enUSA, Edition date: 201804, Fourth-Printing Wheels and Tires
Page 537 of 666
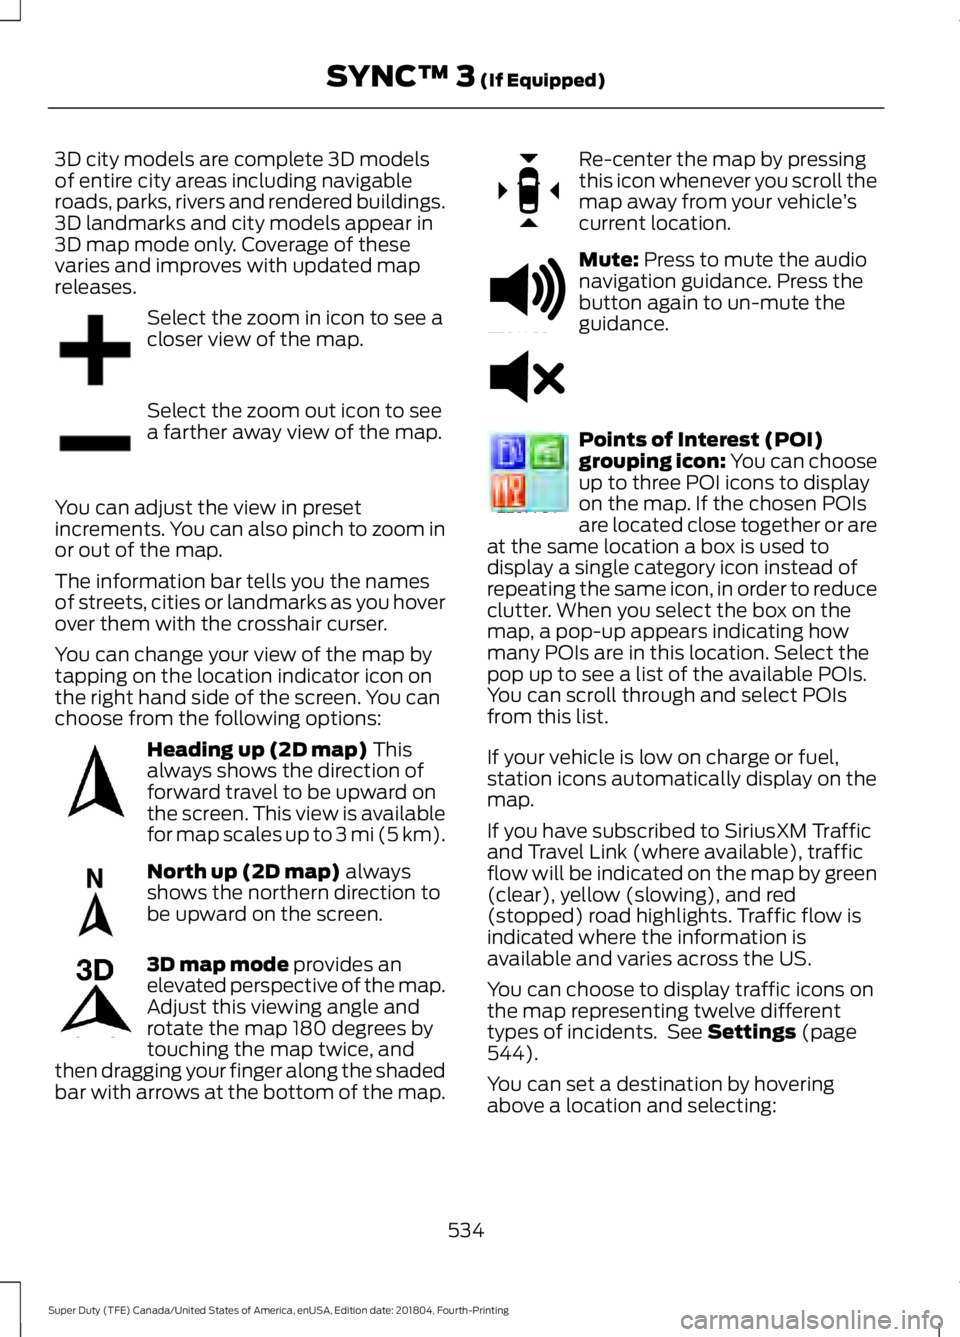
3D city models are complete 3D models
of entire city areas including navigable
roads, parks, rivers and rendered buildings.
3D landmarks and city models appear in
3D map mode only. Coverage of these
varies and improves with updated map
releases.
Select the zoom in icon to see a
closer view of the map.
Select the zoom out icon to see
a farther away view of the map.
You can adjust the view in preset
increments. You can also pinch to zoom in
or out of the map.
The information bar tells you the names
of streets, cities or landmarks as you hover
over them with the crosshair curser.
You can change your view of the map by
tapping on the location indicator icon on
the right hand side of the screen. You can
choose from the following options: Heading up (2D map) This
always shows the direction of
forward travel to be upward on
the screen. This view is available
for map scales up to
3 mi (5 km). North up (2D map)
always
shows the northern direction to
be upward on the screen. 3D map mode
provides an
elevated perspective of the map.
Adjust this viewing angle and
rotate the map 180 degrees by
touching the map twice, and
then dragging your finger along the shaded
bar with arrows at the bottom of the map. Re-center the map by pressing
this icon whenever you scroll the
map away from your vehicle
’s
current location. Mute:
Press to mute the audio
navigation guidance. Press the
button again to un-mute the
guidance. Points of Interest (POI)
grouping icon: You can choose
up to three POI icons to display
on the map. If the chosen POIs
are located close together or are
at the same location a box is used to
display a single category icon instead of
repeating the same icon, in order to reduce
clutter. When you select the box on the
map, a pop-up appears indicating how
many POIs are in this location. Select the
pop up to see a list of the available POIs.
You can scroll through and select POIs
from this list.
If your vehicle is low on charge or fuel,
station icons automatically display on the
map.
If you have subscribed to SiriusXM Traffic
and Travel Link (where available), traffic
flow will be indicated on the map by green
(clear), yellow (slowing), and red
(stopped) road highlights. Traffic flow is
indicated where the information is
available and varies across the US.
You can choose to display traffic icons on
the map representing twelve different
types of incidents. See
Settings (page
544).
You can set a destination by hovering
above a location and selecting:
534
Super Duty (TFE) Canada/United States of America, enUSA, Edition date: 201804, Fourth-Printing SYNC™ 3
(If Equipped)E207752 E207753 E207750 E207749 E207748 E207751 E251780 E251779 E207754
Page 635 of 666
FOR ANY LOSS OF PROFIT, REVENUE,
CONTRACTS OR SAVINGS, OR ANY
OTHER DIRECT, INDIRECT, INCIDENTAL,
SPECIAL OR CONSEQUENTIAL DAMAGES
ARISING OUT OF YOUR USE OF OR
INABILITY TO USE THIS INFORMATION,
ANY DEFECT IN THE INFROMATION, OR
THE BREACH OF THESE TERMS OR
CONDITIONS, WHETHER IN AN ACTION
IN CONTRACT OR TORT OR BASED ON A
WARRANTY, EVEN IF NAV2 OR ITS
LICENSORS HAVE BEEN ADVISED OF THE
POSSIBILITY OF SUCH DAMAGES. UNDER
NO CIRCUMSTANCES SHALL NAV2’
s OR
ITS SUPPLIERS ’ LIABILITY HEREUNDER
EXCEED THE PRICE PAID. Certain liability
exclusions may not be permitted under
applicable law, so to that extent the above
exclusion may not apply to you.
Export Control
You agree not to export to anywhere any
part of the Data provided to you or any
direct product thereof except in
compliance with, and with all licenses and
approvals required under, applicable
export laws, rules and regulations.
IP Protection
The Data are owned by NAV2 or its
suppliers and are protected by applicable
copyright and other intellectual property
law and treaties. The Data are provided
solely on the basis of a license to use, not
sale.
Entire Agreement
These terms and conditions constitute the
entire agreement between NAV2(and its
licensors, including their licensors and
suppliers) and you pertaining to the subject
matter hereof, and supersedes in their
entirety any and all written or oral
agreements previously existing between
us with respect to such subject matter. Governing Law.
The above terms and conditions shall be
governed by the laws of the People
’s
Republic of China, without giving effect to
(i) its conflict of laws provisions, or (ii) the
United Nations Convention for Contracts
for the International Sale of Goods, which
is explicitly excluded. Any dispute arising
from or in connection with the Data
provided to you hereunder shall be
submitted to the Shanghai International
Economic and Trade Arbitration
Commission for arbitration.
Gracenote® Copyright
CD and music-related data from
Gracenote, Inc., copyright©
2000-2007 Gracenote. Gracenote
Software, copyright © 2000-2007
Gracenote. This product and service may
practice one or more of the following U.S.
Patents 5,987,525; 6,061,680; 6,154,773;
6,161,132; 6,230,192; 6,230,207; 6.240,459;
6,330,593 and other patents issued or
pending. Some services supplied under
license from Open Globe, Inc. for U.S.
Patent 6,304,523.
Gracenote and CDDB are registered
trademarks of Gracenote. The Gracenote
logo and logotype, and the "Powered by
Gracenote ™" logo are trademarks of
Gracenote.
Gracenote® End User License Agreement
(EULA)
This device contains software from
Gracenote, Inc. of 2000 Powell Street
Emeryville, California 94608
("Gracenote").
The software from Gracenote (the
"Gracenote Software") enables this device
to do disc and music file identification and
obtain music-related information, including
name, artist, track, and title information
("Gracenote Data") from online servers
632
Super Duty (TFE) Canada/United States of America, enUSA, Edition date: 201804, Fourth-Printing Appendices
Page 639 of 666
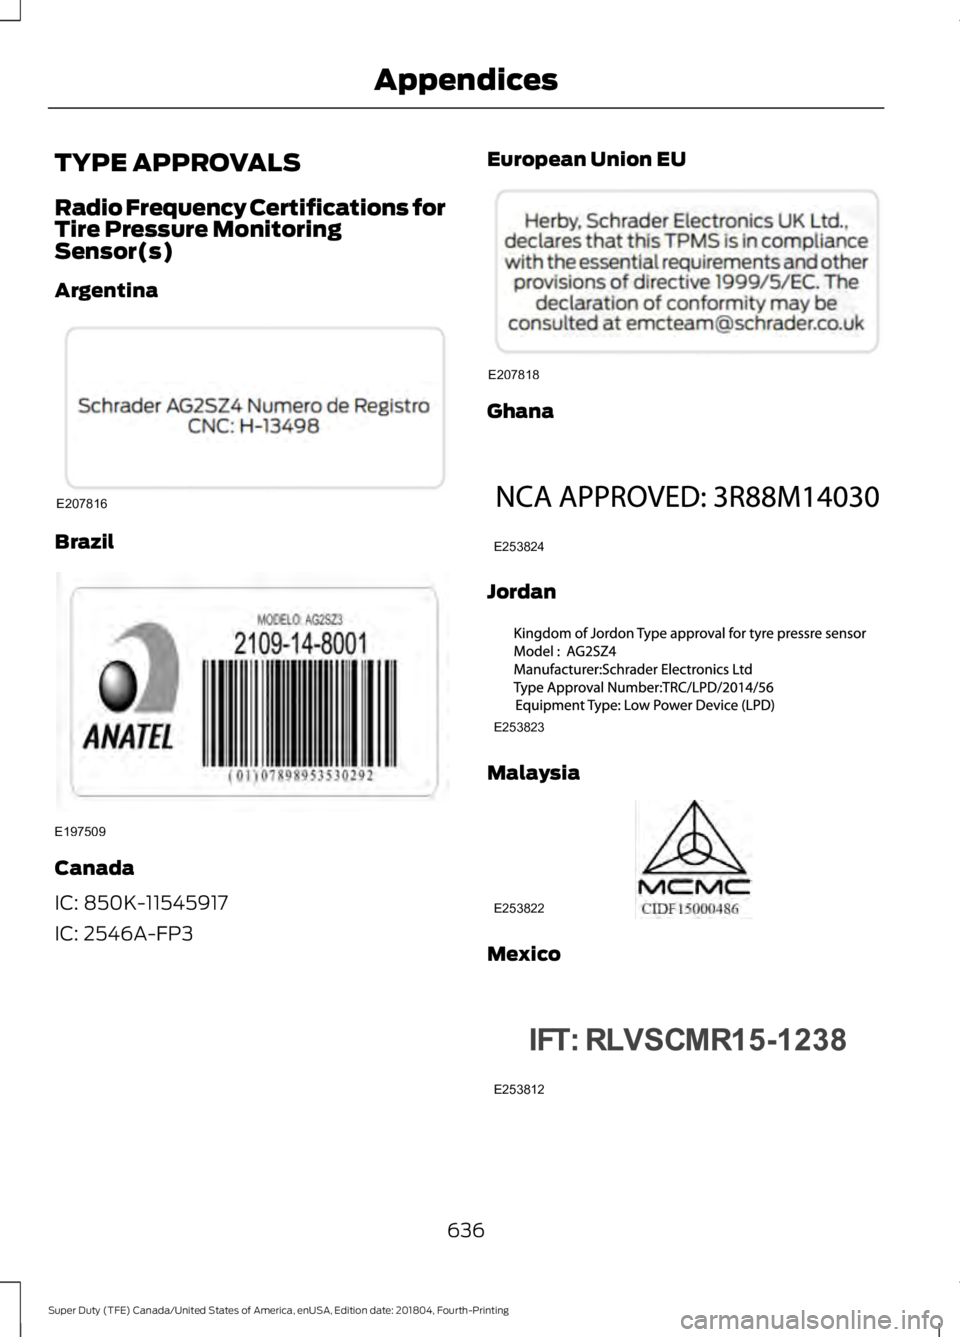
TYPE APPROVALS
Radio Frequency Certifications for
Tire Pressure Monitoring
Sensor(s)
Argentina
Brazil
Canada
IC: 850K-11545917
IC: 2546A-FP3 European Union EU Ghana
Jordan
Malaysia
Mexico
636
Super Duty (TFE) Canada/United States of America, enUSA, Edition date: 201804, Fourth-Printing AppendicesE207816 E197509 E207818 E253824 E253823 E253822 E253812
Page 659 of 666
Remote Start........................................................
142
Seats........................................................................\
142
Starting System .................................................. 142
Tire Pressure Monitoring System.................. 142
Trailer....................................................................... 143
Installing Child Restraints...........................22 Child Seats.............................................................. 22
Combining Seatbelt and LATCH Lower Anchors for Attaching Child Safety
Seats.................................................................... 30
Front Seat Tether Strap Attachment (Regular Cab).................................................... 31
Rear Seat Tether Strap Attachment (Crew Cab and Super Cab)....................................... 32
Use of Inboard Lower Anchors from the Outboard Seating Positions (Center
Seating Use) .................................................... 30
Using Inflatable Seatbelts (Rear Seat Outboard Positions)...................................... 26
Using Lap and Shoulder Belts (Except Front Center Position of Super Cab and Crew
Cab)...................................................................... 22
Using Lap and Shoulder Belts (Front Center Position of Super Cab and Crew
Cab)...................................................................... 24
Using Lower Anchors and Tethers for CHildren (LATCH)........................................... 28
Using Tether Straps............................................ 30
Instrument Cluster.......................................104
Instrument Lighting Dimmer.....................92
Instrument Panel............................................18
Interior Lamps.................................................95 Front Interior Lamp............................................. 95
Rear Interior Lamps............................................ 96
Interior Mirror
.................................................100
Auto-Dimming Mirror......................................... 101
Manual Dimming Mirror.................................... 101
Introduction.........................................................7
J
Jump Starting the Vehicle........................306 Connecting the Jumper Cables................... 306
Jump Starting...................................................... 307
Preparing Your Vehicle.................................... 306
Removing the Jumper Cables....................... 307K
Keyless Entry
....................................................72
SECURICODE™ KEYLESS ENTRY
KEYPAD............................................................... 72
Keyless Starting
.............................................174
Ignition Modes...................................................... 174
Keys and Remote Controls.........................58
L
Lane Keeping System
................................250
Switching the System On and Off................251
System Display................................................... 252
System Settings.................................................. 251
Troubleshooting................................................. 252
Lighting Control...............................................91 Flashing the Headlamp High Beam..............92
Headlamp High Beam......................................... 91
Lighting...............................................................91 General Information............................................. 91
Limited Slip Differential..............................221
Load Carrying
................................................266
Load Limit......................................................266
Special Loading Instructions for Owners of
Pick-up Trucks and Utility-type
Vehicles............................................................. 270
Vehicle Loading - with and without a Trailer................................................................ 266
Locking and Unlocking................................69 Activating Intelligent Access........................... 69
Autolock.................................................................... 71
Battery Saver........................................................... 71
Illuminated Entry.................................................... 71
Power Door Locks................................................ 69
Remote Control.................................................... 69
Smart Unlock......................................................... 70
Smart Unlocks for Intelligent Access Keys...................................................................... 70
Lug Nuts See: Changing a Road Wheel....................... 406
M
Maintenance.................................................329 General Information......................................... 329
Manual Climate Control
.............................145
Directing the Airflow.......................................... 145
656
Super Duty (TFE) Canada/United States of America, enUSA, Edition date: 201804, Fourth-Printing Index
Page 663 of 666

Starting and Stopping the Engine..........173
General Information........................................... 173
Steering...........................................................260 Adaptive Learning............................................. 262
Adaptive Steering.............................................. 262
Electronic Variable Overlay Power Steering............................................................. 261
Hydraulic Power Steering............................... 260
Steering Wheel
...............................................84
Storage Compartments.............................170
Sunroof See: Moonroof..................................................... 102
Sun Visors
........................................................101
Illuminated Vanity Mirror................................. 102
Supplementary Restraints System..........47 Principle of Operation......................................... 47
Switching Off the Engine - 6.7L Diesel...............................................................181
Symbols Glossary.............................................8
SYNC™ 3........................................................495 General Information......................................... 495
SYNC™ 3 Troubleshooting......................558
SYNC™ Applications and Services
.......473
911 Assist............................................................... 473
SYNC Mobile Apps............................................ 475
SYNC™............................................................457 General Information.......................................... 457
SYNC™ Troubleshooting
.........................487
T
Tailgate Lock
....................................................74
Tailgate Step....................................................75
Closing the Step.................................................... 76
Opening the Step................................................. 75
Tailgate...............................................................74
Technical Specifications See: Capacities and Specifications.............419
Terrain Control
...............................................231
Principle of Operation....................................... 231
The Better Business Bureau (BBB) Auto Line Program (U.S. Only)........................313
Tire Care
...........................................................381
Glossary of Tire Terminology......................... 382
Information About Uniform Tire Quality Grading.............................................................. 381
Information Contained on the Tire Sidewall........................................................... 383Temperature A B C............................................
382
Traction AA A B C............................................... 381
Treadwear............................................................. 381
Tire Pressure Monitoring System..........398 Trailer Tire Pressure Monitoring
System............................................................. 405
Vehicle Tire Pressure Monitoring System............................................................. 398
Tires See: Wheels and Tires..................................... 379
Towing a Trailer.............................................273 Load Placement................................................. 274
Towing Points
...............................................309
Towing the Vehicle on Four Wheels.........................................................296
Emergency Towing........................................... 296
Recreational Towing........................................ 296
Towing..............................................................273
Traction Control
............................................227
Principle of Operation....................................... 227
Trailer Reversing Aids
..................................275
Principle of Operation...................................... 275
Setting Up Trailer Reverse Guidance..........275
Trailer Reverse Guidance................................. 275
Troubleshooting................................................. 279
Using Trailer Reverse Guidance.................... 278
Trailer Sway Control...................................282
Transfer Case Fluid Check
.......................349
Transmission Code Designation............425
Transmission.................................................206
Transporting the Vehicle
..........................308
Type Approvals............................................636
China...................................................................... 646
Radio Frequency Certification for Keys and Remote Controls.......................................... 646
Radio Frequency Certifications for Blind Spot Information System.......................... 644
Radio Frequency Certifications for Body Control Module............................................. 646
Radio Frequency Certifications for Cruise Control Module............................................. 646
Radio Frequency Certifications for Mid Range Radar................................................... 638
Radio Frequency Certifications for Passive Anti-Theft System....................................... 639
Radio Frequency Certifications for Radio Transceiver Module...................................... 642
660
Super Duty (TFE) Canada/United States of America, enUSA, Edition date: 201804, Fourth-Printing Index