transmission oil FORD F-350 2020 Owners Manual
[x] Cancel search | Manufacturer: FORD, Model Year: 2020, Model line: F-350, Model: FORD F-350 2020Pages: 631, PDF Size: 9.62 MB
Page 8 of 631
Utilizing the Mediation/Arbitration
Program (Canada Only) ......................325
Getting Assistance Outside the U.S. and Canada .......................................................
325
Ordering Additional Owner's Literature ........................................................................\
.
327
Reporting Safety Defects (U.S. Only) ........................................................................\
.
327
Reporting Safety Defects (Canada Only) ........................................................................\
.
327
Fuses
Fuse Specification Chart .........................
329
Changing a Fuse ..........................................
335
Maintenance
General Information ...................................
337
Opening and Closing the Hood .............
337
Under Hood Overview - 6.2L ..................
338
Under Hood Overview - 6.7L Diesel ......
339
Under Hood Overview - 7.3L ..................
340
Engine Oil Dipstick - 6.2L ..........................
341
Engine Oil Dipstick - 6.7L Diesel .............
341
Engine Oil Dipstick - 7.3L ...........................
341
Engine Oil Check - 6.2L .............................
341
Engine Oil Check - 6.7L Diesel ...............
343
Engine Oil Check - 7.3L .............................
344
Changing the Engine Oil and Oil Filter ........................................................................\
345
Oil Change Indicator Reset .....................
345
Changing the Engine Air Filter - 6.2L ........................................................................\
346
Changing the Engine Air Filter - 6.7L Diesel ...........................................................
347
Changing the Engine Air Filter - 7.3L ....
349
Draining the Fuel Filter Water Trap - 6.7L Diesel ..........................................................
350
Engine Coolant Check - 6.2L ..................
353
Engine Coolant Check - 6.7L Diesel ......
357
Engine Coolant Check - 7.3L ..................
360
Automatic Transmission Fluid Check ........................................................................\
365 Transfer Case Fluid Check
......................
366
Brake Fluid Check .......................................
366
Power Steering Fluid Check ....................
367
Changing the 12V Battery ........................
368
Adjusting the Headlamps ........................
370
Washer Fluid Check .....................................
371
Fuel Filter - 6.2L/7.3L ..................................
371
Checking the Wiper Blades ......................
371
Changing the Wiper Blades .....................
371
Changing a Bulb ..........................................
372
Changing the Engine-Mounted and Diesel Fuel Conditioner Module Fuel
Filters - 6.7L Diesel .................................
375
Spring U-Bolt Check - F-600 .................
378
Vehicle Care
General Information ..................................
380
Cleaning Products .....................................
380
Cleaning the Exterior ..................................
381
Waxing ............................................................
382
Cleaning the Engine ...................................
382
Cleaning the Exhaust - 6.7L Diesel ......
382
Cleaning the Windows and Wiper Blades ........................................................................\
383
Cleaning the Interior ..................................
383
Cleaning the Instrument Panel and Instrument Cluster Lens ......................
385
Cleaning Leather Seats ............................
385
Repairing Minor Paint Damage ..............
387
Cleaning the Wheels .................................
387
Vehicle Storage ............................................
387
Wheels and Tires
General Information ..................................
390
Tire Care .........................................................
392
Using Snow Chains ...................................
408
Tire Pressure Monitoring System .........
409
Changing a Road Wheel ............................
417
Technical Specifications ..........................
428
5
Super Duty (TFE), enUSA, Edition date: 201909, Third-Printing- Table of Contents
Page 104 of 631
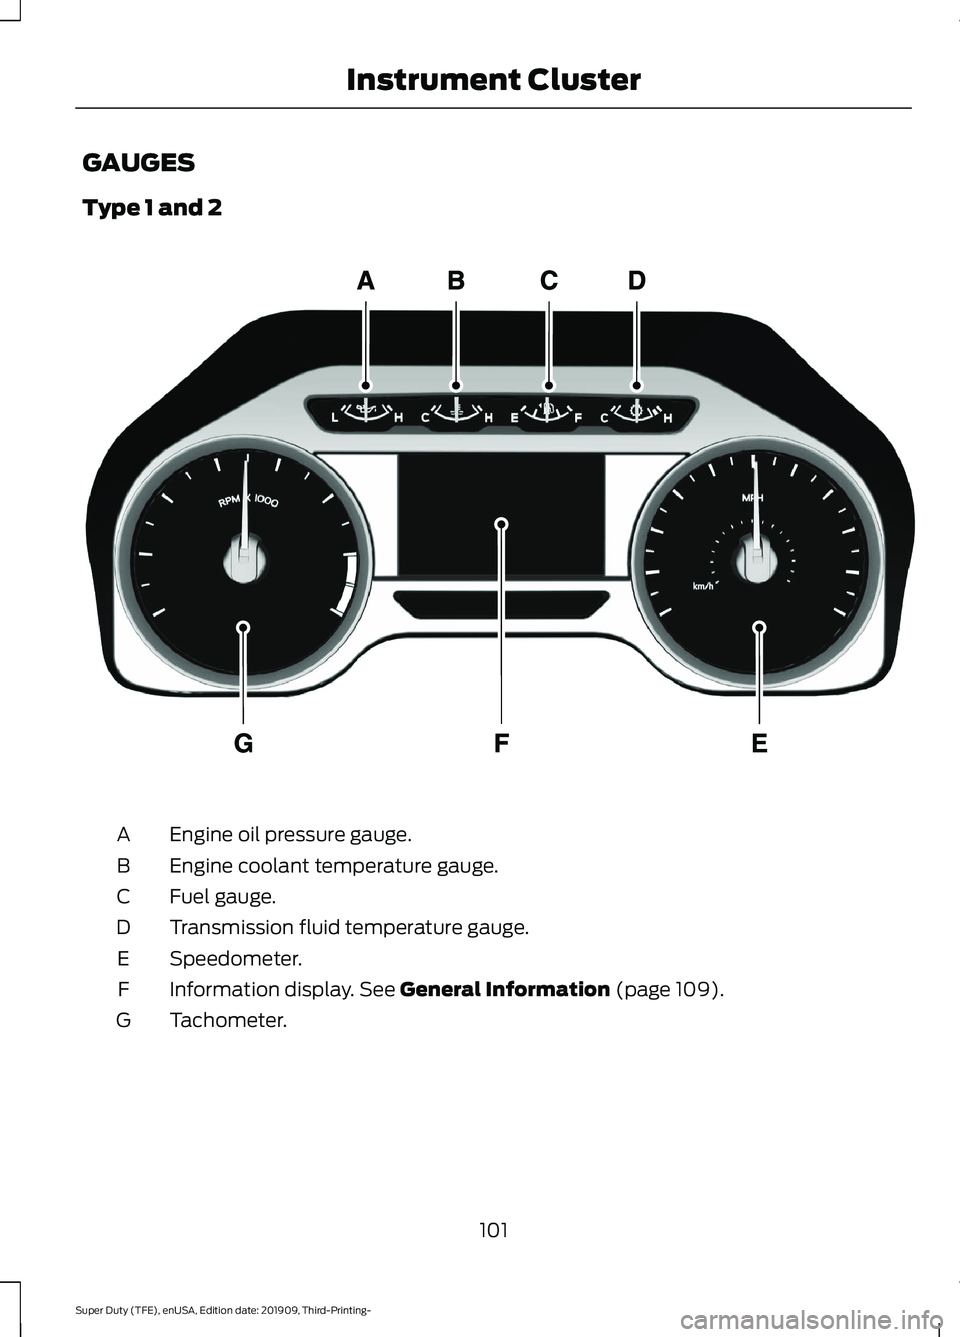
GAUGES
Type 1 and 2
Engine oil pressure gauge.
A
Engine coolant temperature gauge.
B
Fuel gauge.
C
Transmission fluid temperature gauge.
D
Speedometer.
E
Information display. See General Information (page 109).
F
Tachometer.
G
101
Super Duty (TFE), enUSA, Edition date: 201909, Third-Printing- Instrument ClusterE219638
Page 105 of 631
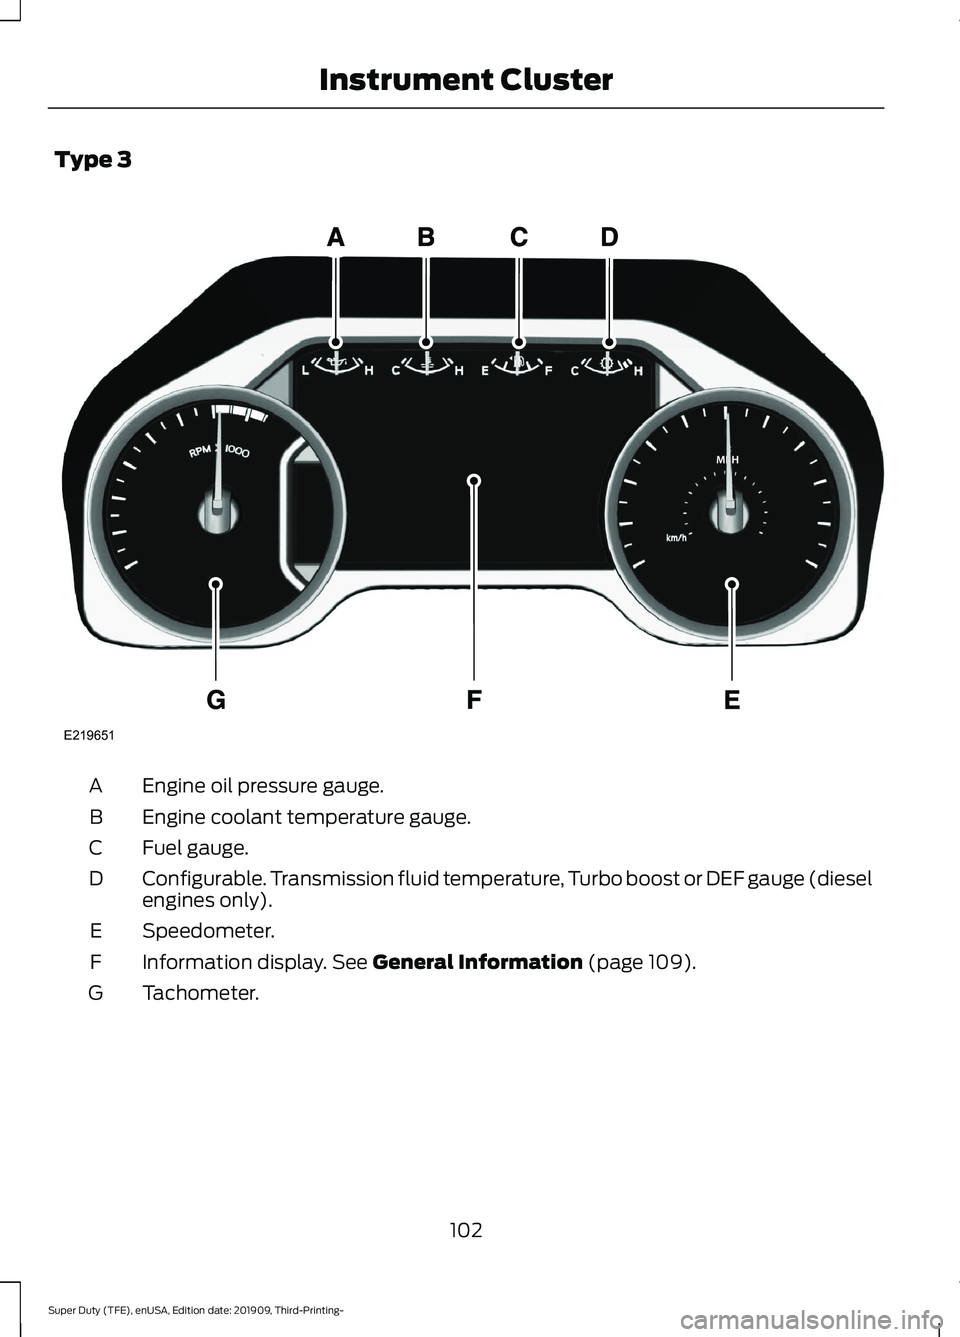
Type 3
Engine oil pressure gauge.
A
Engine coolant temperature gauge.
B
Fuel gauge.
C
Configurable. Transmission fluid temperature, Turbo boost or DEF gauge (diesel
engines only).
D
Speedometer.
E
Information display. See General Information (page 109).
F
Tachometer.
G
102
Super Duty (TFE), enUSA, Edition date: 201909, Third-Printing- Instrument ClusterE219651
Page 106 of 631
Engine Oil Pressure Gauge
Indicates engine oil pressure. The needle
should stay in the normal operating range
(between L and H). If the needle falls
below the normal range, stop your vehicle,
turn off the engine and check the engine
oil level. Add oil if needed. If the oil level is
correct, have your vehicle checked by an
authorized dealer.
Engine Coolant Temperature
Gauge
WARNING: Do not remove the
coolant reservoir cap when the engine is
on or the cooling system is hot. Wait 10
minutes for the cooling system to cool
down. Cover the coolant reservoir cap
with a thick cloth to prevent the
possibility of scalding and slowly remove
the cap. Failure to follow this instruction
could result in personal injury.
Indicates engine coolant temperature. At
normal operating temperature, the level
indicator will be in the normal range. If the
engine coolant temperature exceeds the
normal range, stop your vehicle as soon as
safely possible, switch off the engine and
let the engine cool.
Fuel Gauge
Note: The fuel gauge may vary slightly
when your vehicle is moving or on a slope.
The fuel gauge indicates about how much
fuel is in the fuel tank.
The arrow adjacent to the fuel pump
symbol indicates on which side of your
vehicle the fuel filler door is located. Low Fuel Reminder
A low fuel level reminder displays and
sounds when the distance to empty
reaches
75 mi (120 km) to empty for
MyKey, and at 50 mi (80 km), 25 mi
(40 km), 10 mi (20 km) and 0 mi (0 km)
for all vehicle keys.
Note: The low fuel reminder can appear at
different fuel gauge positions depending on
fuel economy conditions. This variation is
normal.
Transmission Fluid Temperature
Gauge
Indicates transmission fluid temperature.
At normal operating temperature, the level
indicator will be in the normal range. If the
transmission fluid temperature exceeds
the normal range, stop the vehicle as soon
as safely possible and verify the airflow is
not restricted such as snow or debris
blocking airflow through the grill. Also,
higher than normal operating temperature
can be caused by special operation
conditions (i.e. snowplowing, towing or
off-road use). Operating the transmission
for extended periods with the gauge in the
higher than normal area may cause
internal transmission damage. You need
to alter the severity of your driving
conditions to lower the transmission
temperature into the normal range. If the
gauge continues to show high
temperatures, see an authorized dealer.
Turbo Boost Gauge
(If Equipped)
Indicates the amount of manifold air
pressure in the engine.
DEF Gauge
(If Equipped)
Indicates the current DEF level.
103
Super Duty (TFE), enUSA, Edition date: 201909, Third-Printing- Instrument Cluster
Page 310 of 631
ECONOMICAL DRIVING
Your fuel economy is affected by several
things, such as how you drive, the
conditions you drive under, and how you
maintain your vehicle.
You may improve your fuel economy by
keeping these things in mind:
•
Accelerate and slow down in a smooth,
moderate fashion.
• Drive at steady speeds without
stopping.
• Anticipate stops; slowing down may
eliminate the need to stop.
• Combine errands and minimize
stop-and-go driving.
• Close the windows for high-speed
driving.
• Drive at reasonable speeds (traveling
at 55 mph [88 km/h] uses 15% less
fuel than traveling at 65 mph [105
km/h]).
• Keep the tires properly inflated and use
only the recommended size.
• Use the recommended engine oil.
• Perform all regularly scheduled
maintenance.
Avoid these actions; they reduce your fuel
economy:
• Sudden accelerations or hard
accelerations.
• Revving the engine before turning it off.
• Idle for periods longer than one minute.
• Warm up your vehicle on cold
mornings.
• Use the air conditioner or front
defroster.
• Use the speed control in hilly terrain.
• Rest your foot on the brake pedal while
driving. •
Drive a heavily loaded vehicle or tow a
trailer.
• Carry unnecessary weight
(approximately 1 mpg [0.4 km/L] is
lost for every 400 lb [180 kilogram] of
weight carried).
• Driving with the wheels out of
alignment.
Conditions
• Heavily loading a vehicle or towing a
trailer may reduce fuel economy at any
speed.
• Adding certain accessories to your
vehicle (for example bug deflectors,
rollbars, light bars, running boards, ski
racks or luggage racks) may reduce
fuel economy.
• To maximize the fuel economy, drive
with the tonneau cover installed (if
equipped).
• Using fuel blended with alcohol may
lower fuel economy.
• Fuel economy may decrease with lower
temperatures during the first 5–10 mi
(12 –16 km) of driving.
• Driving on flat terrain offers improved
fuel economy as compared to driving
on hilly terrain.
• Transmissions give their best fuel
economy when operated in the top
cruise gear and with steady pressure
on the gas pedal.
• Four-wheel-drive operation (if
equipped) is less fuel efficient than
two-wheel-drive operation.
OFF-ROAD DRIVING
(IF EQUIPPED)
Note: The following off-road driving
information applies to Tremor package
equipped vehicles only.
307
Super Duty (TFE), enUSA, Edition date: 201909, Third-Printing- Driving Hints
Page 315 of 631
•
The tire air pressures recommended
for general driving are on the vehicle ’s
Safety Certification Label. The
maximum cold inflation pressure for
the tire and associated load rating is
on the tire sidewall. Tire air pressure
may require re-adjustment within these
pressure limits to accommodate the
additional weight of the snowplow
installation.
• Federal and some local regulations
require additional exterior lamps for
snowplow-equipped vehicles. Consult
your authorized dealer for additional
information.
Operating the Vehicle with the
Snowplow Attached
Note: Do not use your vehicle for snow
removal until you have driven at least
500 mi (800 km).
Ford recommends vehicle speed does not
exceed
45 mph (72 km/h) when
snowplowing.
If transporting a snowplow in summertime,
cooling system airflow may be blocked by
the snowplow. Change the snowplow
height or position to improve airflow to the
radiator or limit your vehicle speed to a
maximum of
45 mph (72 km/h).
The attached snowplow blade restricts
airflow to the radiator, and may cause the
engine to run at a higher temperature:
Attention to engine temperature is
especially important when outside
temperatures are above freezing. Angle
the blade to maximize airflow to the
radiator and monitor engine temperature
to determine whether a left or right angle
provides the best performance.
Follow the severe duty schedule in your
Scheduled Maintenance information for
engine oil and transmission fluid change
intervals. Snowplowing with your Airbag
Equipped Vehicle WARNING:
Do not attempt to
service, repair, or modify the
supplementary restraint system or
associated components. Failure to
follow this instruction could result in
personal injury or death. WARNING:
All occupants of your
vehicle, including the driver, should
always properly wear their seatbelts,
even when an airbag supplemental
restraint system is provided. Failure to
properly wear your seatbelt could
seriously increase the risk of injury or
death. WARNING:
Modifying or adding
equipment to the front end of your
vehicle (including hood, bumper system,
frame, front end body structure, tow
hooks and hood pins) may affect the
performance of the airbag system,
increasing the risk of injury. Do not
modify or add equipment to the front
end of your vehicle.
Note: Please refer to the Body Builders
Layout Book for instructions about the
appropriate installation of additional
equipment.
Your vehicle is equipped with a driver and
passenger airbag supplemental restraint
system. The supplemental restraint system
will activate in certain frontal and offset
frontal collisions when the vehicle sustains
sufficient frontal deceleration.
Careless or high speed driving while
plowing snow that results in sufficient
vehicle decelerations can deploy the
airbags. Such driving also increases the risk
of accidents.
312
Super Duty (TFE), enUSA, Edition date: 201909, Third-Printing- Driving Hints
Page 344 of 631
Power steering fluid reservoir. See Power Steering Fluid Check (page 367).
E.
Engine oil dipstick.
See Engine Oil Dipstick (page 341).
F.
Engine oil filler cap.
See Engine Oil Check (page 344).
G.
Air cleaner assembly. See
Changing the Engine Air Filter (page 349).
H.
ENGINE OIL DIPSTICK - 6.2L MINA
MAX
B
ENGINE OIL DIPSTICK - 6.7L
DIESEL Minimum.
A
Maximum.
B ENGINE OIL DIPSTICK - 7.3L
Minimum.
A
Nominal.
B
Maximum.
C
ENGINE OIL CHECK - 6.2L
To check the engine oil level consistently
and accurately, do the following:
1. Make sure that your vehicle is on level ground.
2. Run engine until it reaches normal operating temperature.
3. Make sure the parking brake is on. Make
sure the transmission is in park (P) or
neutral (N).
4. Switch the engine off and wait 15 minutes for the oil to drain into the oil
pan. Checking the engine oil level too
soon after you switch the engine off
may result in an inaccurate reading.
341
Super Duty (TFE), enUSA, Edition date: 201909, Third-Printing- MaintenanceE161560 E71362
AB E250320
Page 346 of 631
ENGINE OIL CHECK - 6.7L
DIESEL
To check the engine oil level consistently
and accurately, do the following:
1.
Make sure the parking brake is on. Make
sure the transmission is in park (P) or
neutral (N).
2. Run engine until it reaches normal operating temperature.
3. Make sure that your vehicle is on level ground.
4. Switch the engine off and wait 15 minutes for the oil to drain into the oil
pan. Checking the engine oil level too
soon after you switch the engine off
may result in an inaccurate reading.
5. Open the hood. See Opening and
Closing the Hood (page 337).
6. Remove the dipstick and wipe it with a clean, lint-free cloth. See
Under
Hood Overview (page 339).
7. Replace the dipstick and remove it again to check the oil level. See
Engine Oil Dipstick
(page 341).
8. Make sure that the oil level is between
the maximum and minimum marks. If
the oil level is at the minimum mark,
add oil immediately. See
Capacities
and Specifications (page 446).
9. If the oil level is correct, replace the dipstick and make sure it is fully seated.
Note: Do not remove the dipstick when the
engine is running.
Note: If the oil level is between the
maximum and minimum marks, the oil level
is acceptable. Do not add oil.
Note: The oil consumption of new engines
reaches its normal level after approximately
3,000 mi (5,000 km)
. Adding Engine Oil WARNING: Do not remove the filler
cap when the engine is running.
Do not use supplemental engine oil
additives because they are unnecessary
and could lead to engine damage that may
not be covered by the vehicle Warranty.
To top up the engine oil level do the
following:
1. Clean the area surrounding the engine oil filler cap before you remove it.
2. Remove the engine oil filler cap. See Under Hood Overview
(page 339).
Turn it counterclockwise and remove
it.
3. Add engine oil of the proper viscosity and grade that meets Ford
specifications. See
Capacities and
Specifications (page 446). You may
have to use a funnel to pour the engine
oil into the opening.
4. Recheck the oil level.
5. If the oil level is correct, replace the dipstick and make sure it is fully seated.
6. Replace the engine oil filler cap. Turn it clockwise until you feel a strong
resistance.
Note: Do not add oil further than the
maximum mark. Oil levels above the
maximum mark may cause engine damage.
Note: Make sure you install the oil filler cap
correctly.
Note: Soak up any spillage with an
absorbent cloth immediately.
343
Super Duty (TFE), enUSA, Edition date: 201909, Third-Printing- Maintenance
Page 347 of 631
Engine lubrication for severe
service operation
The following conditions define severe
operation for which engine operation with
SAE 5W-40 oil which meets Ford
specification, WSS-M2C171-F1, is
recommended. Oil and oil filter change
intervals will be determined by the
Intelligent Oil Life Monitor™ as noted
previously.
ENGINE OIL CHECK - 7.3L
To check the engine oil level consistently
and accurately, do the following:
1.
Make sure the parking brake is on. Make
sure the transmission is in park (P) or
neutral (N).
2. Run the engine until it reaches normal operating temperature.
3. Make sure that your vehicle is on level ground.
4. Switch the engine off and wait 15 minutes for the oil to drain into the oil
pan. Checking the engine oil level too
soon after you switch the engine off
may result in an inaccurate reading.
5. Open the hood. See Maintenance
(page 337).
6. Remove the dipstick and wipe it with a clean, lint-free cloth. See
Maintenance
(page 337).
7. Replace the dipstick and remove it again to check the oil level. See
Maintenance
(page 337).
8. Make sure that the oil level is between
the maximum and minimum marks. If
the oil level is at the minimum mark,
add oil immediately. See
Capacities
and Specifications (page 429).
9. If the oil level is correct, replace the dipstick and make sure it is fully seated. Note:
Do not remove the dipstick when the
engine is running.
Note: If the oil level is between the
maximum and minimum marks, the oil level
is acceptable. Do not add oil.
Note: The oil consumption of new engines
reaches its normal level after approximately
3,000 mi (5,000 km)
.
Adding Engine Oil WARNING: Do not remove the filler
cap when the engine is running.
Do not use supplemental engine oil
additives because they are unnecessary
and could lead to engine damage that may
not be covered by the vehicle Warranty. Only use oils certified for gasoline engines
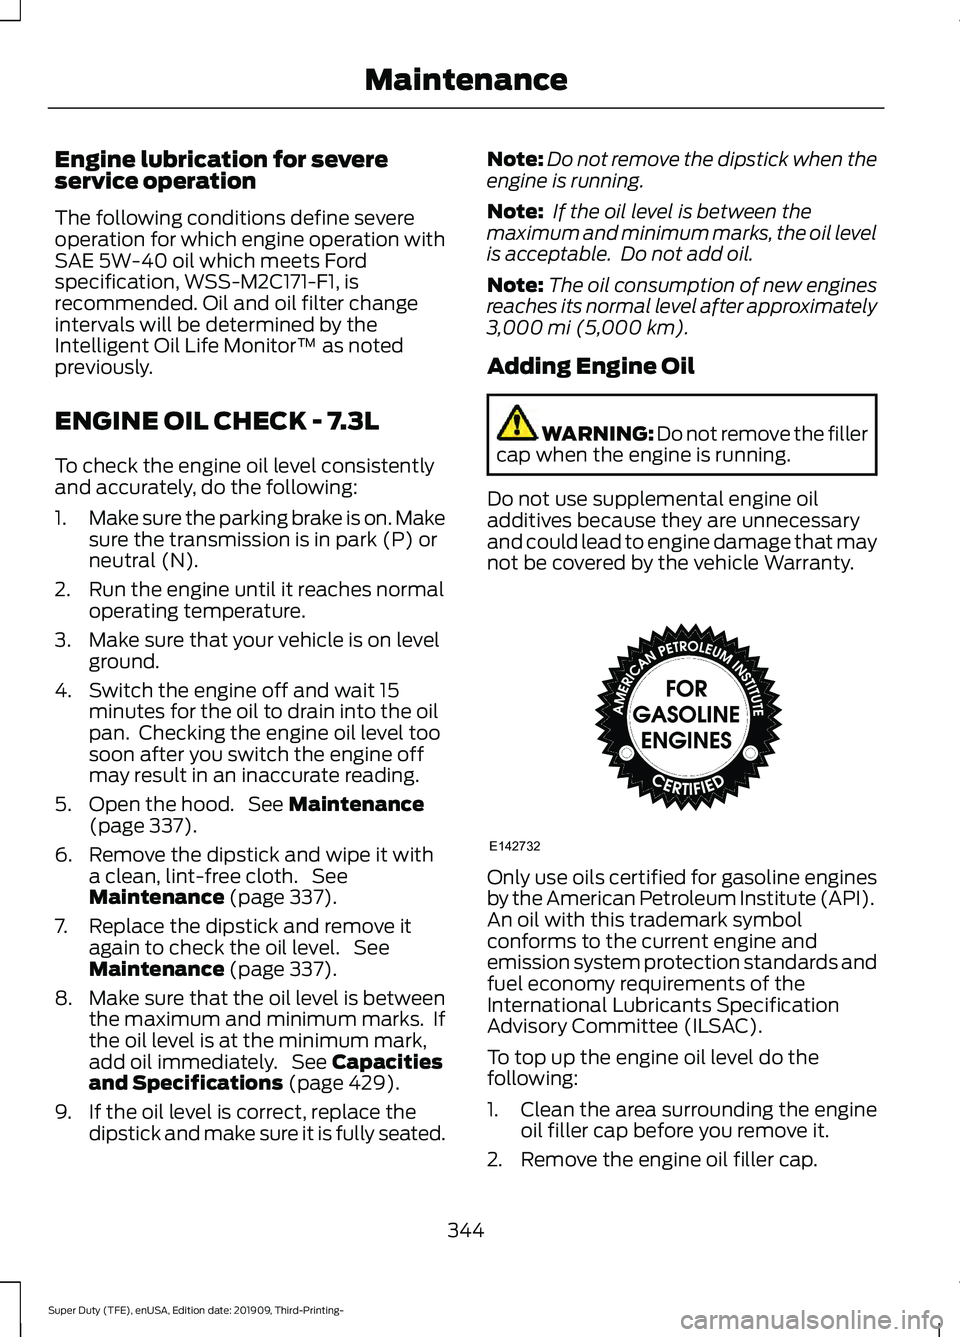
by the American Petroleum Institute (API).
An oil with this trademark symbol
conforms to the current engine and
emission system protection standards and
fuel economy requirements of the
International Lubricants Specification
Advisory Committee (ILSAC).
To top up the engine oil level do the
following:
1. Clean the area surrounding the engine
oil filler cap before you remove it.
2. Remove the engine oil filler cap.
344
Super Duty (TFE), enUSA, Edition date: 201909, Third-Printing- MaintenanceE142732
Page 434 of 631
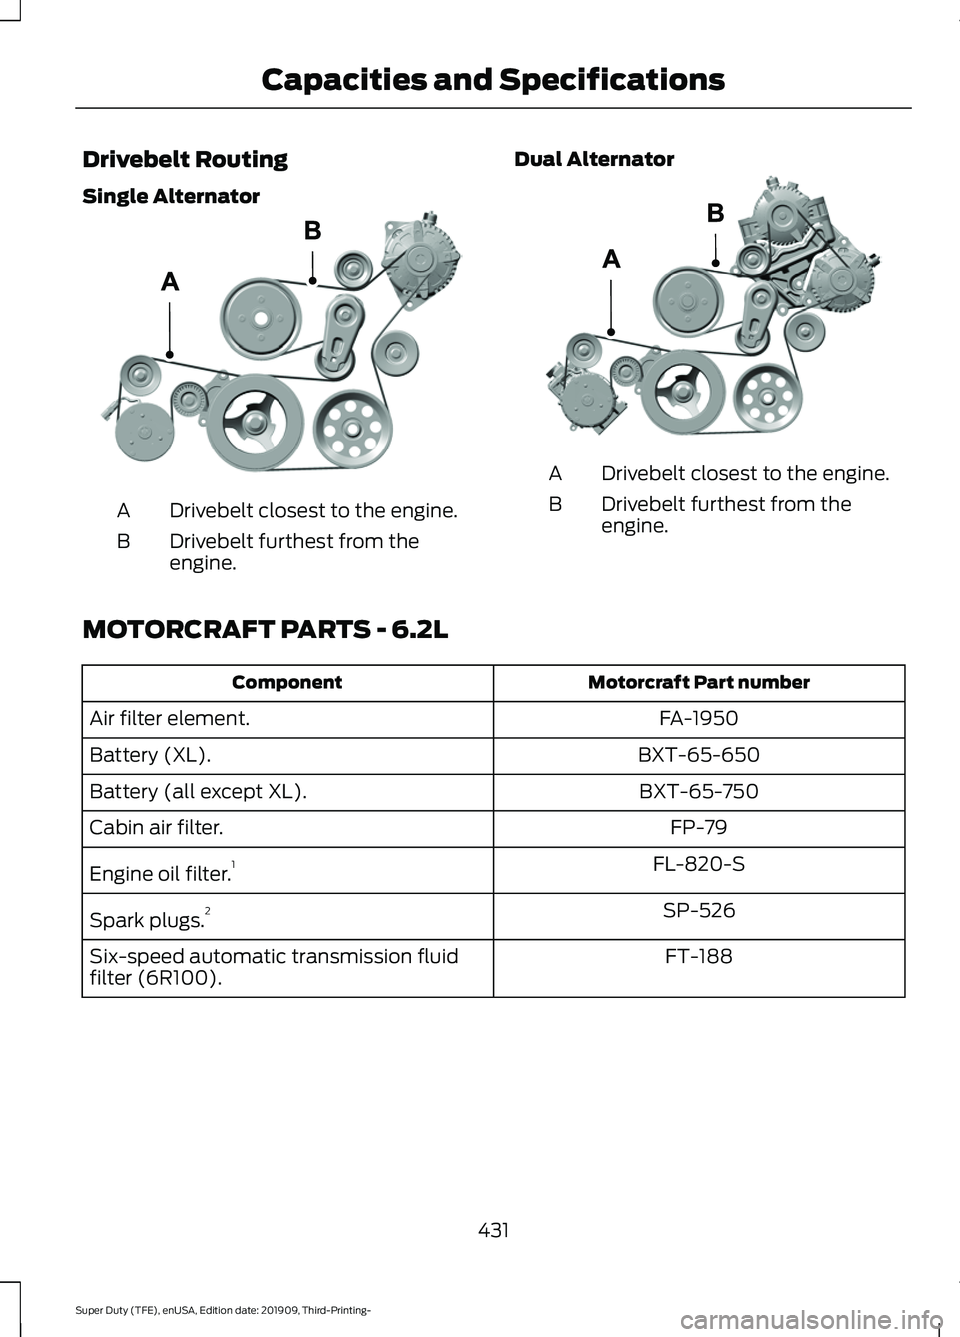
Drivebelt Routing
Single Alternator
Drivebelt closest to the engine.
A
Drivebelt furthest from the
engine.
B Dual Alternator Drivebelt closest to the engine.
A
Drivebelt furthest from the
engine.
B
MOTORCRAFT PARTS - 6.2L Motorcraft Part number
Component
FA-1950
Air filter element.
BXT-65-650
Battery (XL).
BXT-65-750
Battery (all except XL).
FP-79
Cabin air filter.
FL-820-S
Engine oil filter. 1
SP-526
Spark plugs. 2
FT-188
Six-speed automatic transmission fluid
filter (6R100).
431
Super Duty (TFE), enUSA, Edition date: 201909, Third-Printing- Capacities and SpecificationsE305075 E298579