seats FORD F-350 2021 Owner's Guide
[x] Cancel search | Manufacturer: FORD, Model Year: 2021, Model line: F-350, Model: FORD F-350 2021Pages: 666, PDF Size: 11.3 MB
Page 160 of 666
MEMORY FUNCTION (IF EQUIPPED)
WARNING:
Before activating the
memory seat, make sure that the area
immediately surrounding the seat is clear
of obstructions and that all occupants
are clear of moving parts. WARNING:
Do not use the memory
function when your vehicle is moving.
This feature recalls the position of the
following:
• Driver seat.
• Power mirrors.
• Optional power steering column.
• Optional power adjustable pedals.
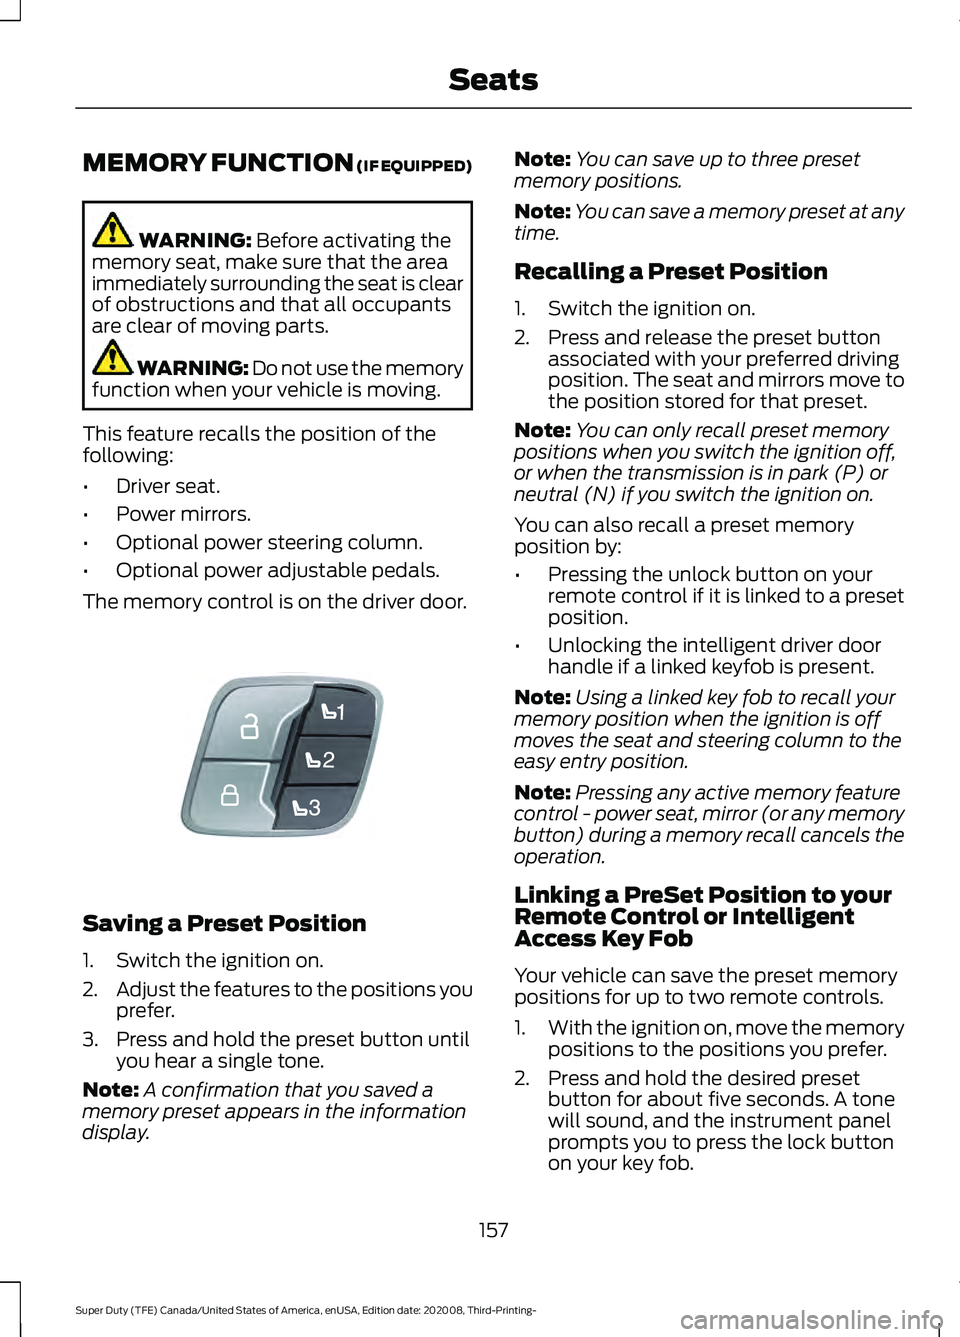
The memory control is on the driver door. Saving a Preset Position
1. Switch the ignition on.
2.
Adjust the features to the positions you
prefer.
3. Press and hold the preset button until you hear a single tone.
Note: A confirmation that you saved a
memory preset appears in the information
display. Note:
You can save up to three preset
memory positions.
Note: You can save a memory preset at any
time.
Recalling a Preset Position
1. Switch the ignition on.
2. Press and release the preset button associated with your preferred driving
position. The seat and mirrors move to
the position stored for that preset.
Note: You can only recall preset memory
positions when you switch the ignition off,
or when the transmission is in park (P) or
neutral (N) if you switch the ignition on.
You can also recall a preset memory
position by:
• Pressing the unlock button on your
remote control if it is linked to a preset
position.
• Unlocking the intelligent driver door
handle if a linked keyfob is present.
Note: Using a linked key fob to recall your
memory position when the ignition is off
moves the seat and steering column to the
easy entry position.
Note: Pressing any active memory feature
control - power seat, mirror (or any memory
button) during a memory recall cancels the
operation.
Linking a PreSet Position to your
Remote Control or Intelligent
Access Key Fob
Your vehicle can save the preset memory
positions for up to two remote controls.
1. With the ignition on, move the memory
positions to the positions you prefer.
2. Press and hold the desired preset button for about five seconds. A tone
will sound, and the instrument panel
prompts you to press the lock button
on your key fob.
157
Super Duty (TFE) Canada/United States of America, enUSA, Edition date: 202008, Third-Printing- SeatsE307868
Page 161 of 666
3. Within ten seconds, press the lock
button on the remote control you are
linking. The instrument panel indicates
a successful link.
To unlink a remote control, follow the
same procedure – except in step 3, press
the unlock button on the remote control.
Note: If more than one linked remote
control or intelligent access key is in range,
the memory function moves to the settings
of the first key to initiate a memory recall.
Easy Entry and Exit Feature (If
Equipped)
If you enable the easy entry and exit
feature, it moves the driver seat rearward
up to
2 in (5 cm) when you put the
transmission in park (P) and remove the
key from the ignition.
The driver seat returns to the previous
position when you put the key in the
ignition.
You can enable or disable this feature
through the information display. See
Information Displays
(page 110).
REAR SEATS
(IF EQUIPPED)
Folding Up the Rear Seat Cushion
If your vehicle has a 60/40 rear seat, you
can flip each cushion up into a vertical
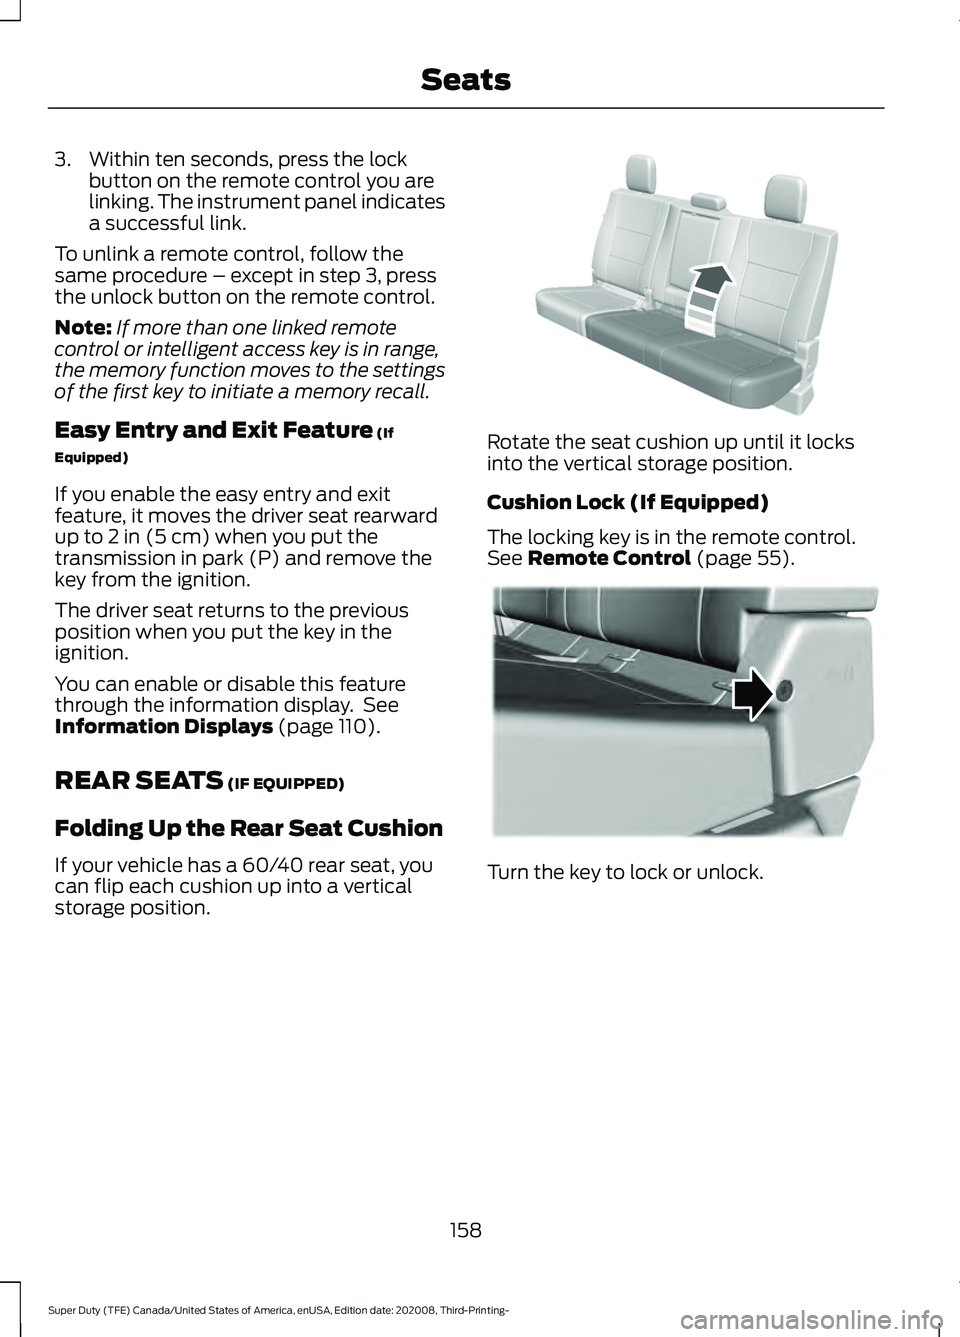
storage position. Rotate the seat cushion up until it locks
into the vertical storage position.
Cushion Lock (If Equipped)
The locking key is in the remote control.
See
Remote Control (page 55).
Turn the key to lock or unlock.
158
Super Duty (TFE) Canada/United States of America, enUSA, Edition date: 202008, Third-Printing- SeatsE310192 E310192 E224956
Page 162 of 666
Returning the Seat to the Seating
Position
WARNING: Check under the seat
cushion to make sure no cargo or objects
are under the seat cushion before
returning the seat cushion to its original
position, and that the seat cushion locks
into place. Failure to do so may prevent
the seat from operating properly in the
event of a crash, which could increase
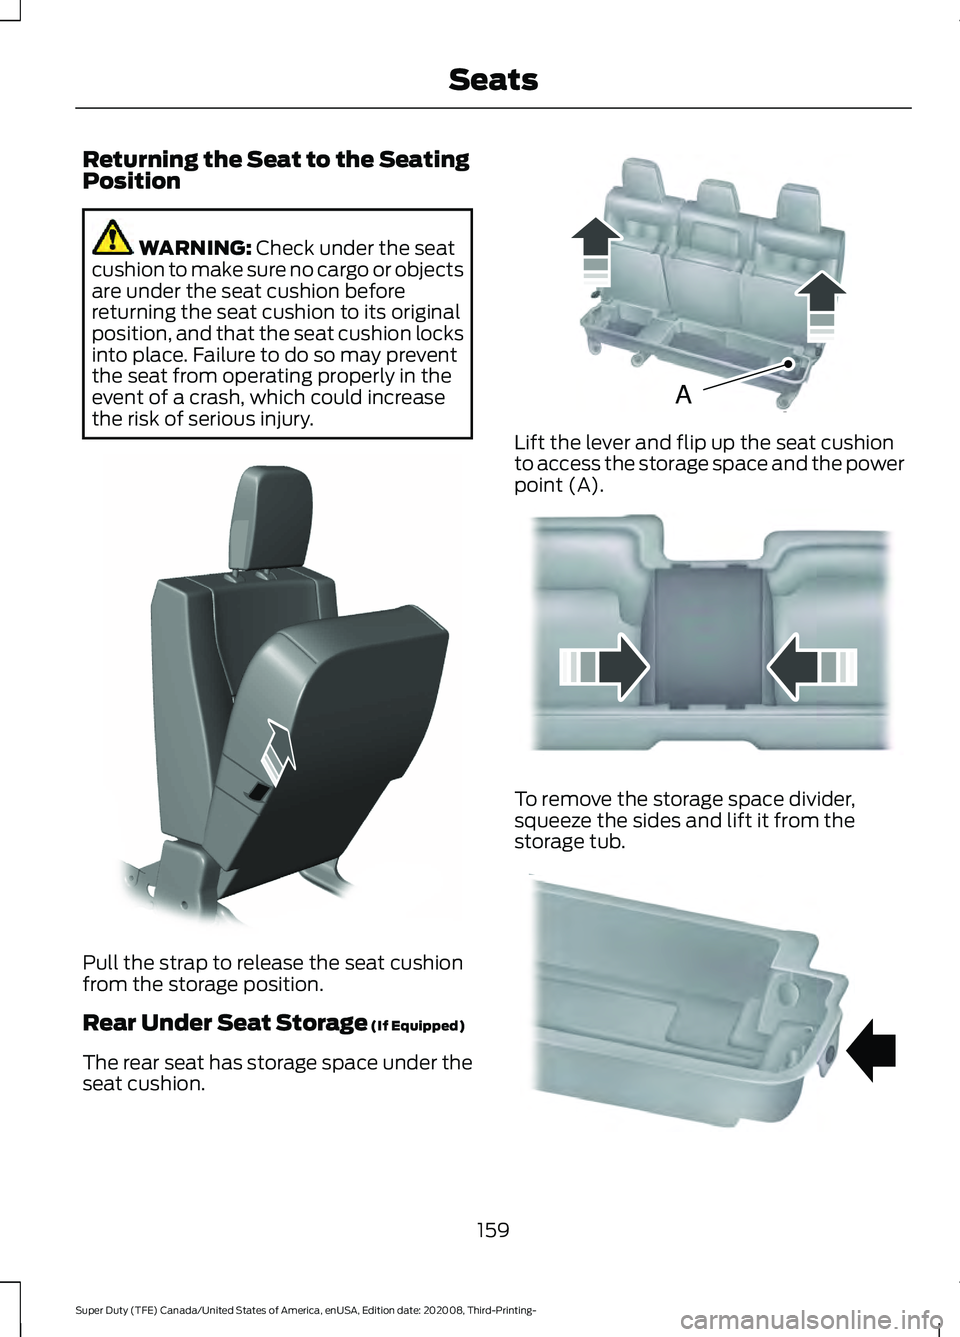
the risk of serious injury. Pull the strap to release the seat cushion
from the storage position.
Rear Under Seat Storage
(If Equipped)
The rear seat has storage space under the
seat cushion. Lift the lever and flip up the seat cushion
to access the storage space and the power
point (A).
To remove the storage space divider,
squeeze the sides and lift it from the
storage tub.
159
Super Duty (TFE) Canada/United States of America, enUSA, Edition date: 202008, Third-Printing- SeatsE308139 AE162739 E162740 E162741
Page 163 of 666
Use your vehicle key to lock the storage
space. See Keys and Remote Controls
(page 55).
HEATED SEATS
(IF EQUIPPED) WARNING: People who are unable
to feel pain to their skin because of
advanced age, chronic illness, diabetes,
spinal cord injury, medication, alcohol
use, exhaustion or other physical
conditions, must exercise care when
using the heated seat. The heated seat
may cause burns even at low
temperatures, especially if used for long
periods of time. Do not place anything
on the seat that insulates against heat,
such as a blanket or cushion. This may
cause the heated seat to overheat. Do
not puncture the seat with pins, needles
or other pointed objects. This may
damage the heating element which may
cause the heated seat to overheat. An
overheated seat may cause serious
personal injury.
Do not do the following:
• Place heavy objects on the seat.
• Operate the heated seat if water or any
other liquid spills on the seat. Allow the
seat to dry thoroughly.
Note: The engine must be running to use
this feature. Press the heated seat symbol to cycle
through the various heat settings and off.
More indicator lights indicate warmer
settings.
Note:
The heated seats may remain on
after you remote start your vehicle, based
on your remote start settings. The heated
seats may also turn on when you start your
vehicle if they were on when you switched
your vehicle off.
Rear Heated Seats
(If Equipped) WARNING: People who are unable
to feel pain to their skin because of
advanced age, chronic illness, diabetes,
spinal cord injury, medication, alcohol
use, exhaustion or other physical
conditions, must exercise care when
using the heated seat. The heated seat
may cause burns even at low
temperatures, especially if used for long
periods of time. Do not place anything
on the seat that insulates against heat,
such as a blanket or cushion. This may
cause the heated seat to overheat. Do
not puncture the seat with pins, needles
or other pointed objects. This may
damage the heating element which may
cause the heated seat to overheat. An
overheated seat may cause serious
personal injury.
Do not do the following:
• Place heavy objects on the seat.
• Operate the heated seat if water or any
other liquid spills on the seat. Allow the
seat to dry thoroughly.
Note: The engine must be running to use
this feature.
The rear seat heat controls are on the rear
of the center console.
160
Super Duty (TFE) Canada/United States of America, enUSA, Edition date: 202008, Third-Printing- SeatsE146322
Page 164 of 666
Press the heated seat symbol to cycle
through the various heat settings and off.
More indicator lights indicate warmer
settings.
The heated seat module resets at every
ignition run cycle. While the ignition is in
the on position, press the heated seat
switch to enable heating mode. When
activated, they turn off automatically when
you switch off the engine.
VENTILATED SEATS (IF EQUIPPED)
Note: The ventilated seats may remain on
after you remote start your vehicle, based
on your remote start settings. The ventilated
seats may also turn on when you start your
vehicle if they were on when you switched
your vehicle off.
Do not do the following:
• Spill liquid on the front seats. This may
cause the air vent holes to become
blocked and not work properly.
• Place cargo or objects under the seats.
They may block the air intake causing
the air vents to not work properly.
The engine must be running to use this
feature. Press this symbol to cycle through the
various ventilation settings and off. More
indicator lights indicate higher fan speeds.
If the engine falls below 350 RPM while
the ventilated seats are on, the feature
turns itself off. You need to reactivate it.
Note:
To improve comfort, use the
ventilated seats along with the vehicle ’s air
conditioning system.
161
Super Duty (TFE) Canada/United States of America, enUSA, Edition date: 202008, Third-Printing- SeatsE146322 E224689
Page 166 of 666
SWITCHING REAR OCCUPANT
ALERT SYSTEM ON AND OFF
1. Press Settings on the touchscreen.
2. Press
Vehicle.
3. Switch
Rear Occupant Alert on or off.
Note: The default setting is on.
Note: Performing a master reset causes the
system to switch on again.
Semiannual Reminder
(If Equipped)
When you switch the system off, a
message appears every six months as a
reminder that the system is off. You can
switch the system back on or leave it off.
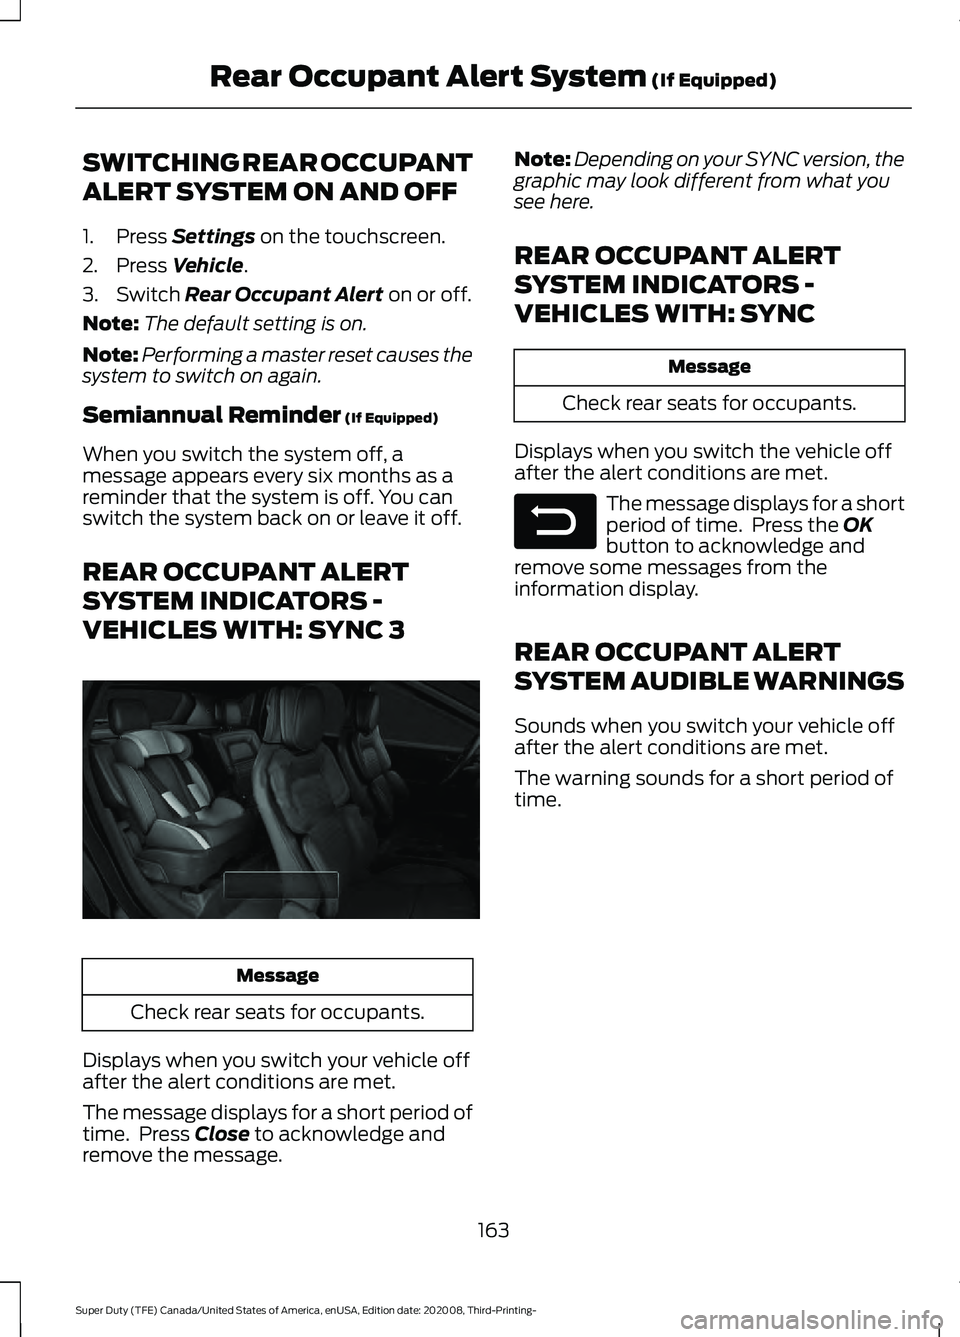
REAR OCCUPANT ALERT
SYSTEM INDICATORS -
VEHICLES WITH: SYNC 3 Message
Check rear seats for occupants.
Displays when you switch your vehicle off
after the alert conditions are met.
The message displays for a short period of
time. Press
Close to acknowledge and
remove the message. Note:
Depending on your SYNC version, the
graphic may look different from what you
see here.
REAR OCCUPANT ALERT
SYSTEM INDICATORS -
VEHICLES WITH: SYNC Message
Check rear seats for occupants.
Displays when you switch the vehicle off
after the alert conditions are met. The message displays for a short
period of time. Press the
OK
button to acknowledge and
remove some messages from the
information display.
REAR OCCUPANT ALERT
SYSTEM AUDIBLE WARNINGS
Sounds when you switch your vehicle off
after the alert conditions are met.
The warning sounds for a short period of
time.
163
Super Duty (TFE) Canada/United States of America, enUSA, Edition date: 202008, Third-Printing- Rear Occupant Alert System
(If Equipped)E350472 E281480
Page 174 of 666
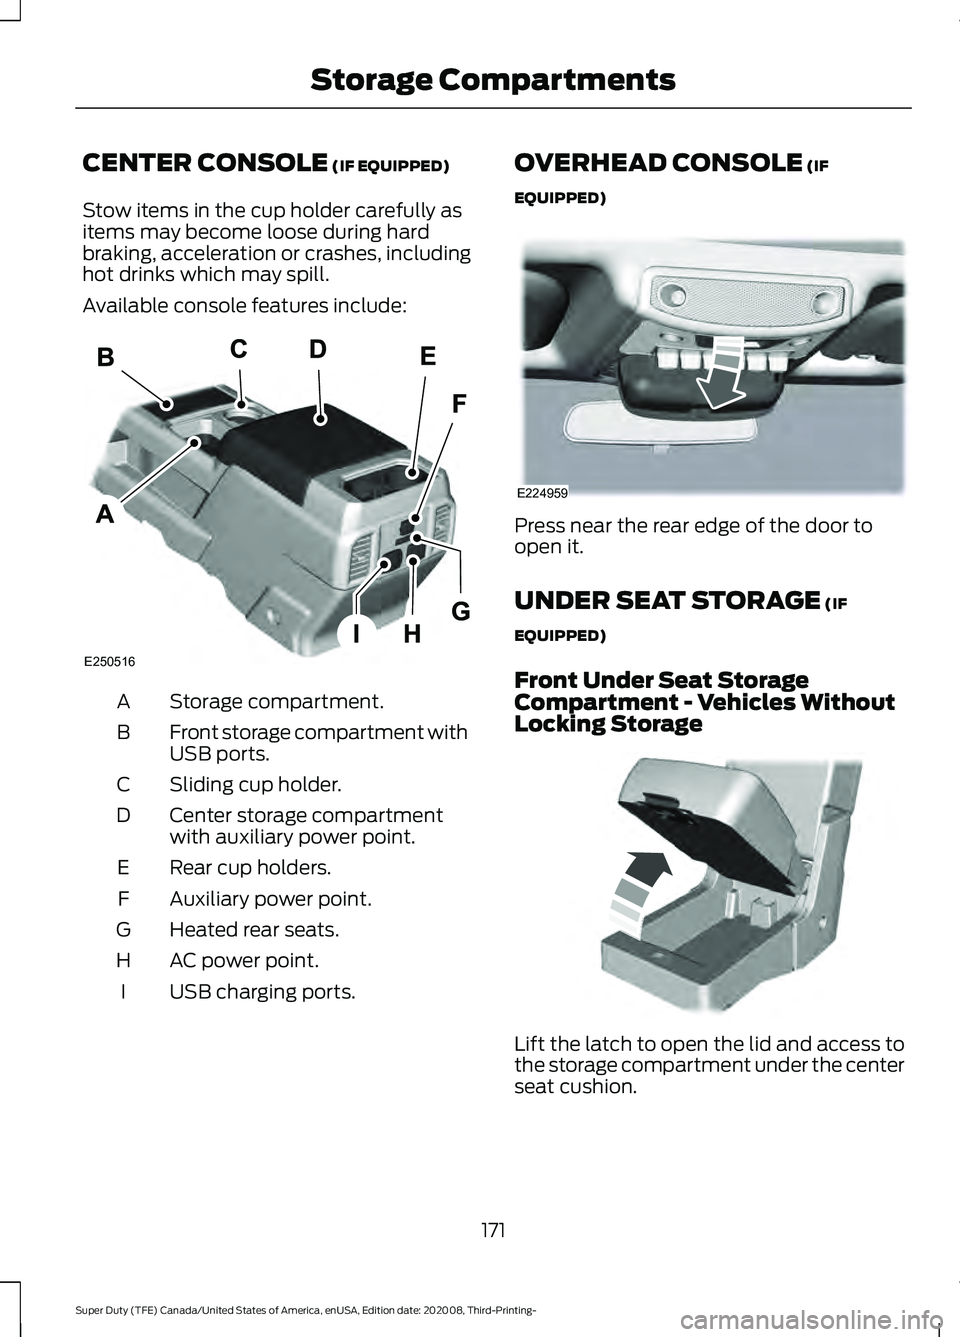
CENTER CONSOLE (IF EQUIPPED)
Stow items in the cup holder carefully as
items may become loose during hard
braking, acceleration or crashes, including
hot drinks which may spill.
Available console features include: Storage compartment.
A
Front storage compartment with
USB ports.
B
Sliding cup holder.
C
Center storage compartment
with auxiliary power point.
D
Rear cup holders.
E
Auxiliary power point.
F
Heated rear seats.
G
AC power point.
H
USB charging ports.
I OVERHEAD CONSOLE (IF
EQUIPPED) Press near the rear edge of the door to
open it.
UNDER SEAT STORAGE
(IF
EQUIPPED)
Front Under Seat Storage
Compartment - Vehicles Without
Locking Storage Lift the latch to open the lid and access to
the storage compartment under the center
seat cushion.
171
Super Duty (TFE) Canada/United States of America, enUSA, Edition date: 202008, Third-Printing- Storage CompartmentsE250516 E224959 E306120
Page 202 of 666
Only use diesel exhaust fluid that is
certified by the American Petroleum
Institute (API). Non-certified diesel exhaust
fluid use can cause damage not covered
by the vehicle Warranty.
Note:
Do not put diesel exhaust fluid in the
fuel tank. This can cause damage not
covered by the vehicle Warranty.
You can purchase diesel exhaust fluid at
an authorized dealer, most highway truck
stops or you can contact roadside
assistance for help in finding a retailer that
sells diesel exhaust fluid. In addition, there
is a government website to help you find
the nearest location to purchase diesel
exhaust fluid:
http://www.discoverdef.com.
Filling the Diesel Exhaust Fluid Tank
Using a Fuel Station Pump
Filling the diesel exhaust fluid tank using
a nozzle is similar to fuel fill. The nozzle
shuts off automatically when the tank is
full. Do not continue to fill the tank as this
could cause spilling or overflow, potentially
damaging the tank.
Filling the Diesel Exhaust Fluid Tank
Using a Container
The following procedure applies to
Motorcraft diesel exhaust fluid or similar
fluid containers. Always follow the
manufacturer's instructions.
1. Remove the diesel exhaust fluid container cap. Place the spout on to
the container and tighten it until you
feel a strong resistance.
2. Remove the diesel exhaust fluid tank filler cap.
3. Insert the spout in to the filler neck until
the seal on the spout seats on to the
filler neck. Pour the fluid in to the tank.
When the tank is full the fluid stops
flowing automatically. 4. Return the container to the vertical
position slightly below the diesel
exhaust fluid filler neck. Allow any fluid
remaining in the spout to drain back in
to the container.
5. Remove the spout from the diesel exhaust fluid filler neck. Replace the
diesel exhaust fluid tank cap.
6. Remove the spout from the diesel exhaust fluid container and replace the
cap.
Note: If there is diesel exhaust fluid left in
the container retain it for later use. The
spout is re-useable. Wash the spout with
clean water prior to storage. Do not use the
diesel exhaust fluid spout with any other
fluid.
Filling the Diesel Exhaust Fluid Tank in
Cold Climates
Diesel exhaust fluid may freeze if the
ambient temperature is below 12°F (-11°C).
Your vehicle has a preheating system
which allows diesel exhaust fluid to
operate below 12°F (-11°C). If you do not
use your vehicle for an extended period
when the ambient temperature is below
12°F (-11°C)
, the fluid in the tank may
freeze. If the tank is overfilled and the fluid
freezes it may damage the tank. This is not
covered by the vehicle warranty.
Diesel Exhaust Fluid Warning
Messages and Vehicle Operations WARNING:
Diesel exhaust fluid
must be refilled when low or replaced
when contaminated or your vehicle
speed becomes limited to
50 mph
(80 km/h). In these conditions, drive with
caution and refill diesel exhaust fluid
immediately. If the diesel exhaust fluid
becomes empty or contaminated and
fluid is not replaced, your vehicle
199
Super Duty (TFE) Canada/United States of America, enUSA, Edition date: 202008, Third-Printing- Engine Emission Control
Page 231 of 666
PRINCIPLE OF OPERATION
WARNING: Vehicle modifications
involving braking system, aftermarket
roof racks, suspension, steering system,
tire construction and wheel and tire size
may change the handling characteristics
of your vehicle and may adversely affect
the performance of the electronic
stability control system. In addition,
installing any stereo loudspeakers may
interfere with and adversely affect the
electronic stability control system. Install
any aftermarket stereo loudspeaker as
far as possible from the front center
console, the tunnel, and the front seats
in order to minimize the risk of interfering
with the electronic stability control
sensors. Reducing the effectiveness of
the electronic stability control system
could lead to an increased risk of loss of
vehicle control, vehicle rollover, personal
injury and death. WARNING:
Remember that even
advanced technology cannot defy the
laws of physics. It’ s always possible to
lose control of a vehicle due to
inappropriate driver input for the
conditions. Aggressive driving on any
road condition can cause you to lose
control of your vehicle increasing the risk
of personal injury or property damage.
Activation of the electronic stability
control system is an indication that at
least some of the tires have exceeded
their ability to grip the road; this could
reduce the operator ’s ability to control
the vehicle potentially resulting in a loss
of vehicle control, vehicle rollover,
personal injury and death. If your
electronic stability control system
activates, SLOW DOWN.
The system automatically turns on each
time you switch the ignition on. If a fault occurs in either the stability
control or the traction control system, you
may experience the following conditions:
•
The stability and traction control light
illuminates steadily.
• The stability control and traction
control systems do not enhance your
vehicle's ability to maintain traction of
the wheels.
• The Adaptive Steering system (if
equipped) automatically changes the
steering function to a fixed steering
ratio. See
Adjusting the Steering
Wheel (page 81).
If a driving condition activates either the
stability control or the traction control
system you may experience the following
conditions:
• The stability and traction control light
flashes.
• Your vehicle slows down.
• Reduced engine power.
• A vibration in the brake pedal.
• The brake pedal is stiffer than usual.
• If the driving condition is severe and
your foot is not on the brake, the brake
pedal may move as the system applies
higher brake force.
The stability control system has several
features built into it to help you maintain
control of your vehicle:
Electronic Stability Control
The system enhances your vehicle ’s ability
to prevent skids or lateral slides by
applying brakes to one or more of the
wheels individually and, if necessary,
reducing engine power.
228
Super Duty (TFE) Canada/United States of America, enUSA, Edition date: 202008, Third-Printing- Stability Control
Page 280 of 666
PICKUP BED ANCHOR POINTS
Pickup Bed Anchor Point
Precautions
WARNING: Always properly secure
cargo to prevent shifting cargo or cargo
falling from the vehicle. Failure to do so
could result in compromised vehicle
stability and serious personal injury to
vehicle occupants or others. WARNING: The appropriate
loading capacity of your vehicle can be
limited either by volume capacity (how
much space is available) or by payload
capacity (how much weight the vehicle
should carry). Once you have reached
the maximum payload of your vehicle,
do not add more cargo, even if there is
space available. Overloading or
improperly loading your vehicle can
contribute to loss of vehicle control and
vehicle rollover. WARNING:
It is extremely
dangerous to ride in a cargo area, inside
or outside of a vehicle. In a crash, people
riding in these areas are more likely to be
seriously injured or killed. Do not allow
people to ride in any area of your vehicle
that is not equipped with seats and
seatbelts. Make sure everyone in your
vehicle is in a seat and properly using a
seatbelt. Failure to follow this warning
could result in serious personal injury or
death.
Locating the Pickup Bed Anchor
Points
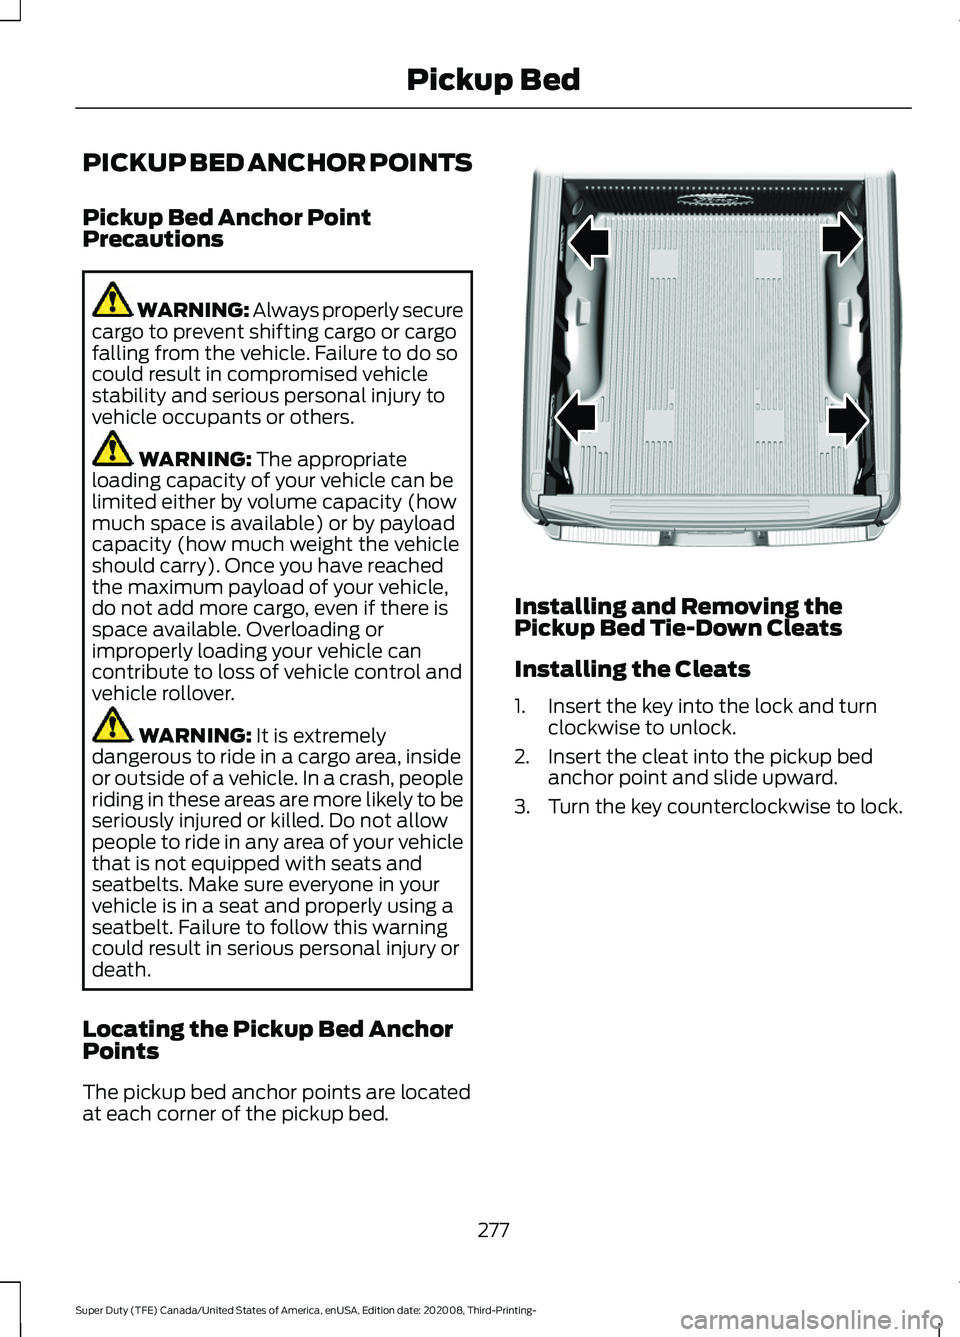
The pickup bed anchor points are located
at each corner of the pickup bed. Installing and Removing the
Pickup Bed Tie-Down Cleats
Installing the Cleats
1. Insert the key into the lock and turn
clockwise to unlock.
2. Insert the cleat into the pickup bed anchor point and slide upward.
3. Turn the key counterclockwise to lock.
277
Super Duty (TFE) Canada/United States of America, enUSA, Edition date: 202008, Third-Printing- Pickup BedE327579