headlamp FORD F-350 2022 User Guide
[x] Cancel search | Manufacturer: FORD, Model Year: 2022, Model line: F-350, Model: FORD F-350 2022Pages: 740, PDF Size: 12.6 MB
Page 196 of 740
STARTING A GASOLINE ENGINE -
VEHICLES WITH: PUSH BUTTON
START
Before starting your vehicle, check the
following:
•
Make sure that the headlamps and
electrical accessories are off.
• Make sure that the parking brake is on.
• Make sure that the transmission is in
park (P).
1. Fully press the brake pedal.
Note: Do not touch the accelerator pedal.2. Press the push button ignition switch.
Note:
The engine may continue cranking
for up to 15 seconds or until it starts.
Note: The engine takes longer to start at
lower temperatures. It may crank for several
seconds when very cold.
STARTING A DIESEL ENGINE -
VEHICLES WITHOUT: PUSH
BUTTON START
Before starting your vehicle, check the
following:
• Make sure that the headlamps and
electrical accessories are off.
• Make sure that the parking brake is on.
• Make sure that the transmission is in
park (P). 1. Turn the key to position II.
Note: Wait until the glow plug indicator
turns off.
2. Fully press the brake pedal.
Note: Do not touch the accelerator pedal. 3. Turn the key to position
III.
Note: The engine may continue cranking
for up to 15 seconds or until it starts.
Note: The engine takes longer to start at
lower temperatures. It may crank for several
seconds when very cold.
Glow Plug Indicator If it illuminates, wait until the
glow plug indicator turns off
before starting the engine.
STARTING A DIESEL ENGINE -
VEHICLES WITH: PUSH BUTTON
START
Before starting your vehicle, check the
following:
• Make sure that the headlamps and
electrical accessories are off.
• Make sure that the parking brake is on.
• Make sure that the transmission is in
park (P).
1. Fully press the brake pedal.
Note: Do not touch the accelerator pedal.
193
2022 Super Duty (TFE) Canada/United States of America, enUSA, Edition date: 202103, First-Printing Starting and Stopping the EngineE321258 E322357 E322354
Page 380 of 740
•
Braking and steering.
• Front wheel toe. See the Ford
Workshop Manual.
• Headlight aim. See
Adjusting the
Headlamps (page 411).
• Tire air pressure. See Information on
the Tire Sidewall
(page 430).
Note: Do not exceed the front gross axle
weight rating or gross vehicle weight rating.
Note: Your vehicle may require rear ballast
weight for proper braking and steering.
Your vehicle has a driver and passenger
airbag supplemental restraint system. The
supplemental restraint system activates
in certain frontal and offset frontal
collisions when the vehicle sustains
sufficient longitudinal deceleration.
When operating your vehicle with a
snowplow:
• Do not exceed
45 mph (72 km/h).
• Your engine could run at a higher
temperature than normal.
•If you are driving more than
15 mi
(24 km) at temperatures above
freezing, angle the plow blade
either full left or full right to provide
maximum airflow to the radiator.
• If you are driving less than
15 mi
(24 km) at speeds up to 45 mph
(72 km/h) in cold weather, you do
not need to worry about blade
position to provide maximum
airflow.
• Shift to 4L when plowing in small areas
at speeds below
5 mph (8 km/h).
• Shift to
4H when plowing larger areas
or light snow at higher speeds above
5 mph (8 km/h)
. Do not exceed
15 mph (24 km/h).
• Do not shift the transmission from a
forward gear to reverse (R) until the
engine is at idle and the wheels have
stopped. Note:
Careless or high-speed driving when
snowplowing, which results in significant
vehicle decelerations, can deploy the airbag.
Such driving also increases the risk of
accidents.
Note: Drive your vehicle at least
500 mi
(800 km) before using your vehicle for
snowplowing.
Note: Follow the severe duty schedule for
engine oil and transmission fluid change
intervals. See
Special Operating
Conditions Scheduled Maintenance (page
631
).
377
2022 Super Duty (TFE) Canada/United States of America, enUSA, Edition date: 202103, First-Printing Snow Plowing
Page 384 of 740
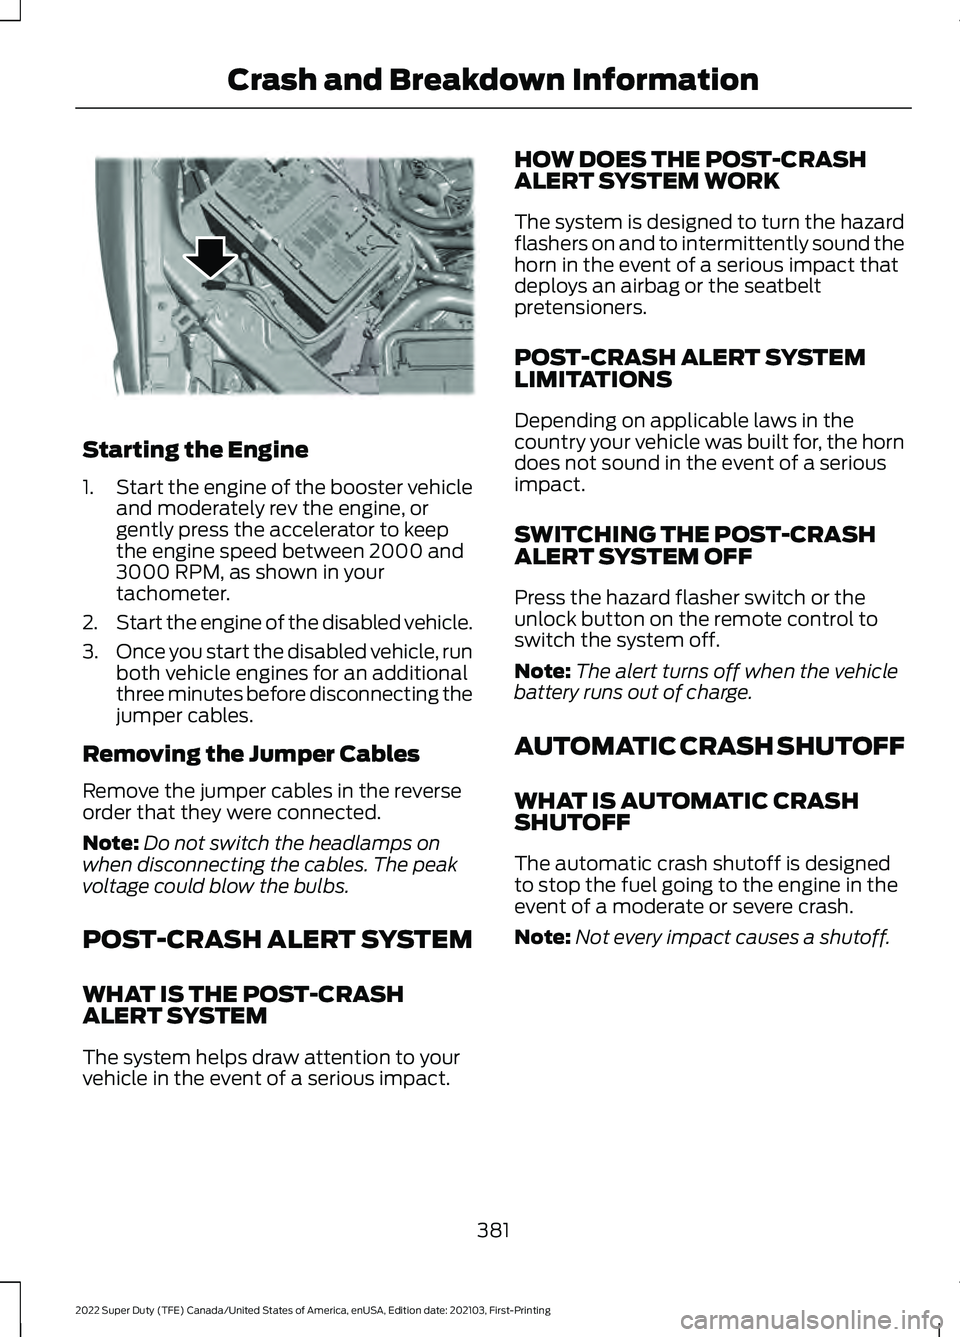
Starting the Engine
1.
Start the engine of the booster vehicle
and moderately rev the engine, or
gently press the accelerator to keep
the engine speed between 2000 and
3000 RPM, as shown in your
tachometer.
2. Start the engine of the disabled vehicle.
3. Once you start the disabled vehicle, run
both vehicle engines for an additional
three minutes before disconnecting the
jumper cables.
Removing the Jumper Cables
Remove the jumper cables in the reverse
order that they were connected.
Note: Do not switch the headlamps on
when disconnecting the cables. The peak
voltage could blow the bulbs.
POST-CRASH ALERT SYSTEM
WHAT IS THE POST-CRASH
ALERT SYSTEM
The system helps draw attention to your
vehicle in the event of a serious impact. HOW DOES THE POST-CRASH
ALERT SYSTEM WORK
The system is designed to turn the hazard
flashers on and to intermittently sound the
horn in the event of a serious impact that
deploys an airbag or the seatbelt
pretensioners.
POST-CRASH ALERT SYSTEM
LIMITATIONS
Depending on applicable laws in the
country your vehicle was built for, the horn
does not sound in the event of a serious
impact.
SWITCHING THE POST-CRASH
ALERT SYSTEM OFF
Press the hazard flasher switch or the
unlock button on the remote control to
switch the system off.
Note:
The alert turns off when the vehicle
battery runs out of charge.
AUTOMATIC CRASH SHUTOFF
WHAT IS AUTOMATIC CRASH
SHUTOFF
The automatic crash shutoff is designed
to stop the fuel going to the engine in the
event of a moderate or severe crash.
Note: Not every impact causes a shutoff.
381
2022 Super Duty (TFE) Canada/United States of America, enUSA, Edition date: 202103, First-Printing Crash and Breakdown InformationE309115
Page 414 of 740
•
Audio unit.
• Navigation system.
A message may appear in the information
display to alert you that battery protection
actions are active.
After battery replacement, or in some
cases after charging the battery with an
external charger, the battery management
system requires eight hours of vehicle sleep
time to relearn the battery state of charge.
During this time your vehicle must remain
fully locked with the ignition off.
Note: If you add electrical accessories or
components to the vehicle, it may adversely
affect battery performance and durability.
This may also affect the performance of
other electrical systems in the vehicle.
Battery Disposal Make sure that you dispose of
old batteries in an
environmentally friendly way.
Seek advice from your local authority
about recycling old batteries.
ADJUSTING THE HEADLAMPS
Vertical Aim Adjustment
The headlamps on your vehicle are
properly aimed at the assembly plant. If
your vehicle has been in an accident, have
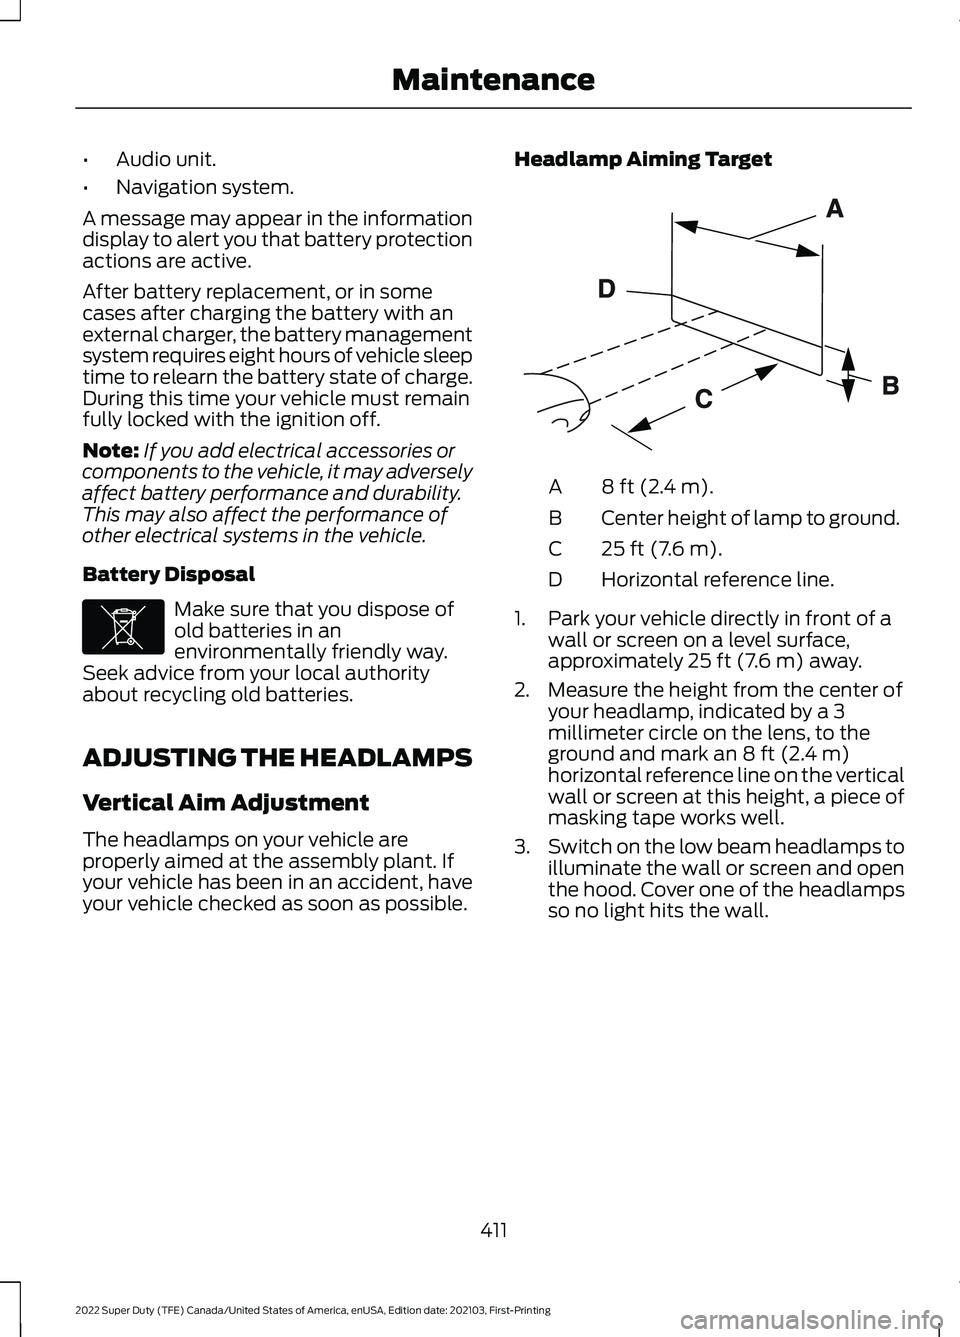
your vehicle checked as soon as possible. Headlamp Aiming Target 8 ft (2.4 m).
A
Center height of lamp to ground.
B
25 ft (7.6 m).
C
Horizontal reference line.
D
1. Park your vehicle directly in front of a wall or screen on a level surface,
approximately 25 ft (7.6 m) away.
2. Measure the height from the center of your headlamp, indicated by a 3
millimeter circle on the lens, to the
ground and mark an
8 ft (2.4 m)
horizontal reference line on the vertical
wall or screen at this height, a piece of
masking tape works well.
3. Switch on the low beam headlamps to
illuminate the wall or screen and open
the hood. Cover one of the headlamps
so no light hits the wall.
411
2022 Super Duty (TFE) Canada/United States of America, enUSA, Edition date: 202103, First-Printing MaintenanceE107998 E142592
Page 415 of 740
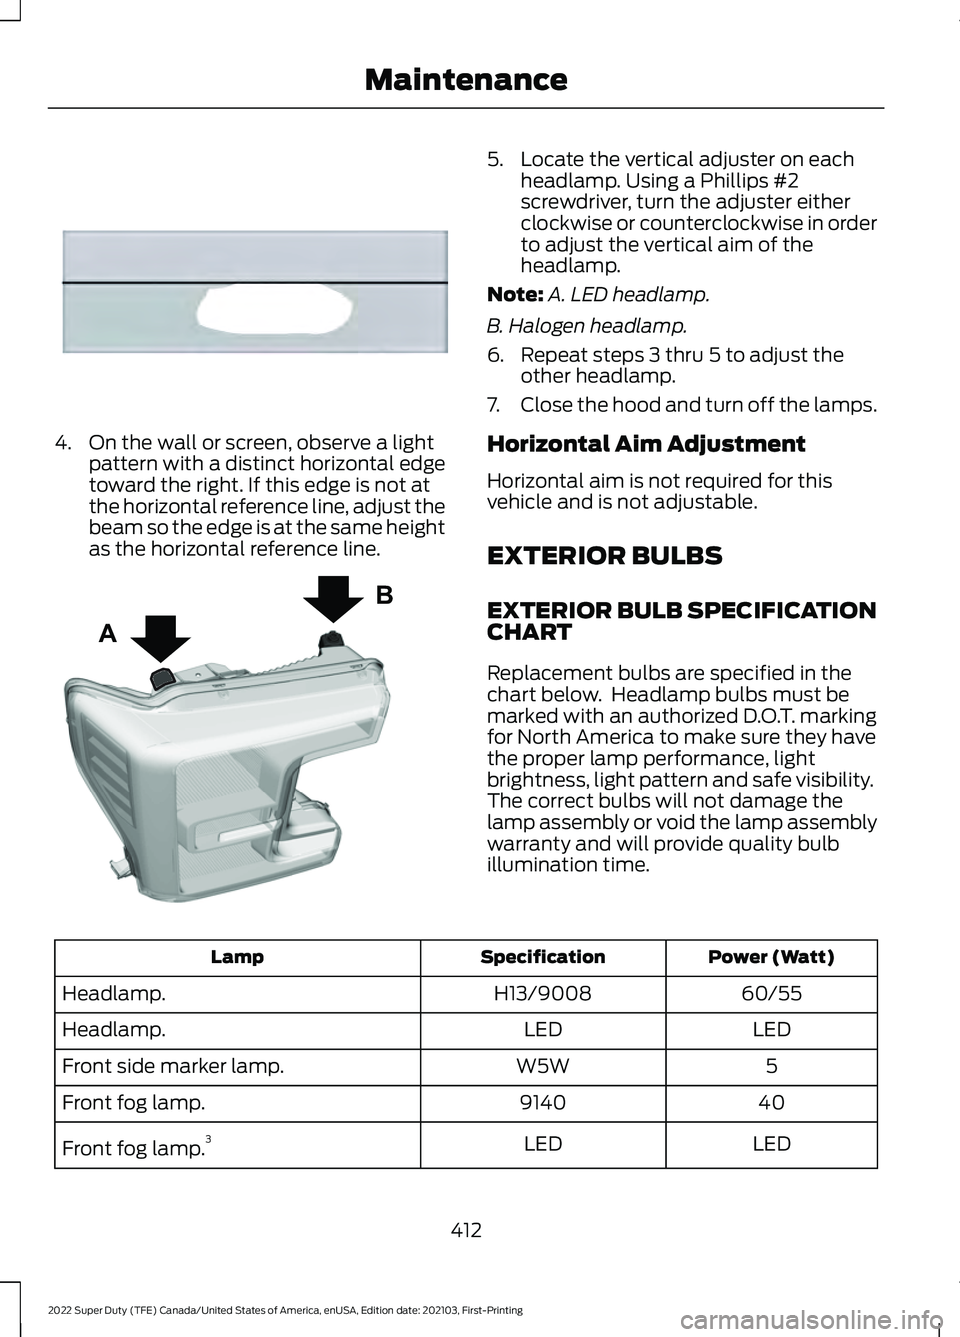
4. On the wall or screen, observe a light
pattern with a distinct horizontal edge
toward the right. If this edge is not at
the horizontal reference line, adjust the
beam so the edge is at the same height
as the horizontal reference line. 5. Locate the vertical adjuster on each
headlamp. Using a Phillips #2
screwdriver, turn the adjuster either
clockwise or counterclockwise in order
to adjust the vertical aim of the
headlamp.
Note: A. LED headlamp.
B. Halogen headlamp.
6. Repeat steps 3 thru 5 to adjust the other headlamp.
7. Close the hood and turn off the lamps.
Horizontal Aim Adjustment
Horizontal aim is not required for this
vehicle and is not adjustable.
EXTERIOR BULBS
EXTERIOR BULB SPECIFICATION
CHART
Replacement bulbs are specified in the
chart below. Headlamp bulbs must be
marked with an authorized D.O.T. marking
for North America to make sure they have
the proper lamp performance, light
brightness, light pattern and safe visibility.
The correct bulbs will not damage the
lamp assembly or void the lamp assembly
warranty and will provide quality bulb
illumination time. Power (Watt)
Specification
Lamp
60/55
H13/9008
Headlamp.
LED
LED
Headlamp.
5
W5W
Front side marker lamp.
40
9140
Front fog lamp.
LED
LED
Front fog lamp. 3
412
2022 Super Duty (TFE) Canada/United States of America, enUSA, Edition date: 202103, First-Printing MaintenanceE167358 A
BE223774
Page 417 of 740
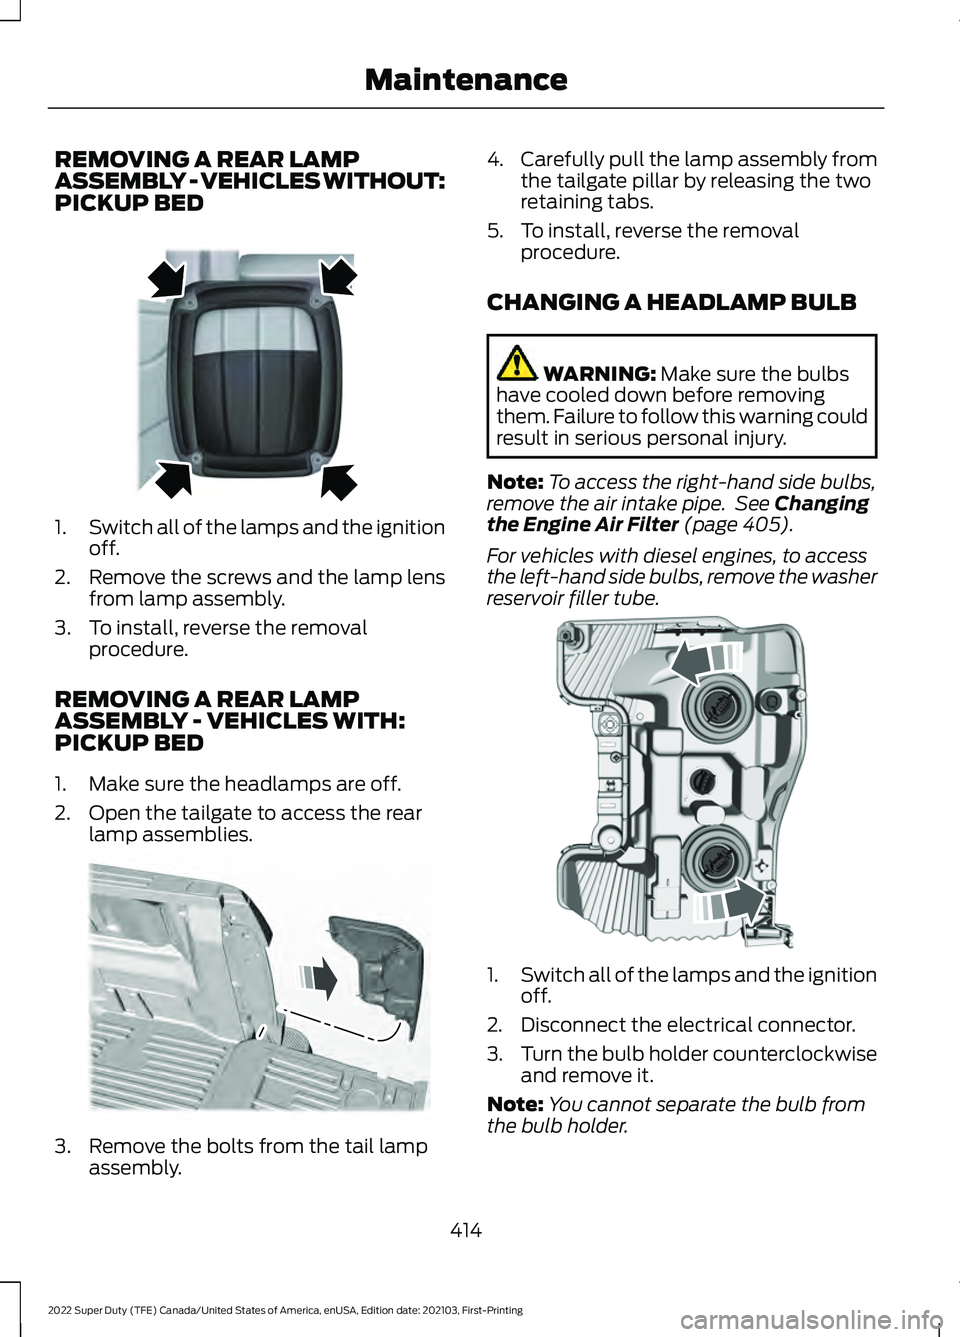
REMOVING A REAR LAMP
ASSEMBLY - VEHICLES WITHOUT:
PICKUP BED
1.
Switch all of the lamps and the ignition
off.
2. Remove the screws and the lamp lens from lamp assembly.
3. To install, reverse the removal procedure.
REMOVING A REAR LAMP
ASSEMBLY - VEHICLES WITH:
PICKUP BED
1. Make sure the headlamps are off.
2. Open the tailgate to access the rear lamp assemblies. 3. Remove the bolts from the tail lamp
assembly. 4.
Carefully pull the lamp assembly from
the tailgate pillar by releasing the two
retaining tabs.
5. To install, reverse the removal procedure.
CHANGING A HEADLAMP BULB WARNING: Make sure the bulbs
have cooled down before removing
them. Failure to follow this warning could
result in serious personal injury.
Note: To access the right-hand side bulbs,
remove the air intake pipe. See
Changing
the Engine Air Filter (page 405).
For vehicles with diesel engines, to access
the left-hand side bulbs, remove the washer
reservoir filler tube. 1.
Switch all of the lamps and the ignition
off.
2. Disconnect the electrical connector.
3. Turn the bulb holder counterclockwise
and remove it.
Note: You cannot separate the bulb from
the bulb holder.
414
2022 Super Duty (TFE) Canada/United States of America, enUSA, Edition date: 202103, First-Printing MaintenanceE163828 E187288 E224991
Page 418 of 740
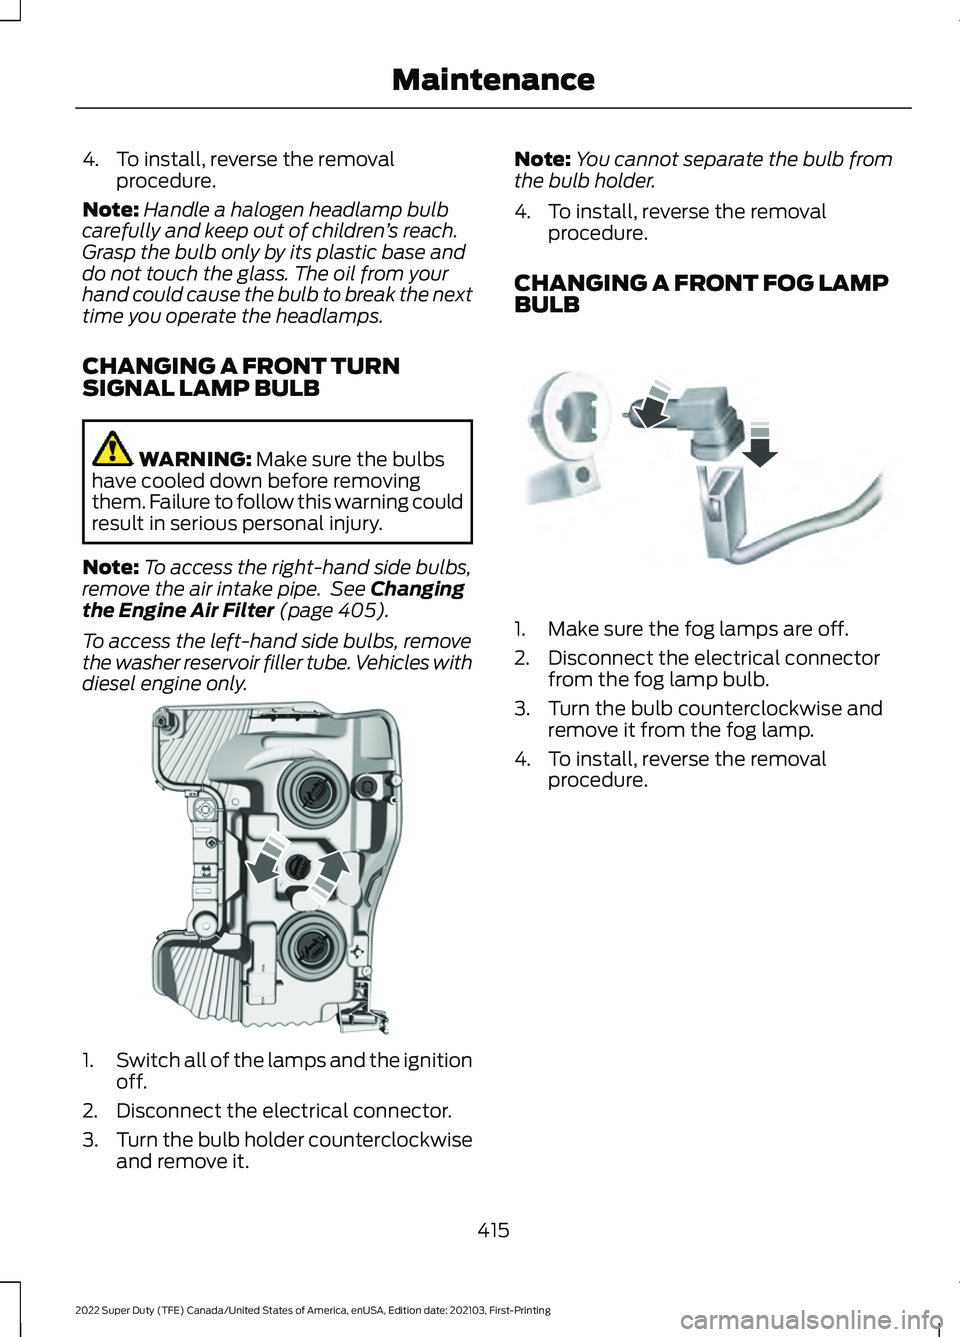
4. To install, reverse the removal
procedure.
Note: Handle a halogen headlamp bulb
carefully and keep out of children ’s reach.
Grasp the bulb only by its plastic base and
do not touch the glass. The oil from your
hand could cause the bulb to break the next
time you operate the headlamps.
CHANGING A FRONT TURN
SIGNAL LAMP BULB WARNING: Make sure the bulbs
have cooled down before removing
them. Failure to follow this warning could
result in serious personal injury.
Note: To access the right-hand side bulbs,
remove the air intake pipe. See
Changing
the Engine Air Filter (page 405).
To access the left-hand side bulbs, remove
the washer reservoir filler tube. Vehicles with
diesel engine only. 1.
Switch all of the lamps and the ignition
off.
2. Disconnect the electrical connector.
3. Turn the bulb holder counterclockwise
and remove it. Note:
You cannot separate the bulb from
the bulb holder.
4. To install, reverse the removal procedure.
CHANGING A FRONT FOG LAMP
BULB 1. Make sure the fog lamps are off.
2. Disconnect the electrical connector
from the fog lamp bulb.
3. Turn the bulb counterclockwise and remove it from the fog lamp.
4. To install, reverse the removal procedure.
415
2022 Super Duty (TFE) Canada/United States of America, enUSA, Edition date: 202103, First-Printing MaintenanceE224990 E163826
Page 424 of 740
CLEANING PRODUCTS
Materials
For best results, use the following products
or products of equivalent quality:
For additional information and assistance,
we recommend that you contact an
authorized dealer. Specification
Name
Motorcraft® Bug and Tar Remover, ZC-42 (U.S. & Canada) ESR-M5B194-B
Motorcraft® Custom Bright Metal Cleaner, ZC-15 (U.S. & Canada)
ESR-M14P4-A
Motorcraft® Detail Wash, ZC-3-A (U.S. & Canada)
ESR-M14P3-A
Motorcraft® Engine Shampoo and Degreaser, ZC-20 (U.S.)
Motorcraft® Engine Shampoo, CXC-66-A (Canada)
Motorcraft® Premium Leather and Vinyl Cleaner, ZC-56 (U.S. &
Canada)
Motorcraft® Multi-Purpose Cleaner, CXC-101 (Canada)
WSS-M14P19-A
Motorcraft® Premium Windshield Wash Concentrate with
Bitterant, ZC-32-B2 (U.S.)
WSS-M14P19-A
Motorcraft® Premium Quality Windshield Washer Fluid, CXC-37-
F/M (Canada)
Motorcraft® Professional Strength Carpet & Upholstery Cleaner,
ZC-54 (U.S. & Canada)
ESR-M14P5-A
Motorcraft® Premium Glass Cleaner, CXC-100 (Canada)
Motorcraft® Spot and Stain Remover, ZC-14 (U.S.)
ESR-M14P5-A
Motorcraft® Ultra-Clear Spray Glass Cleaner, ZC-23 (U.S.)
Motorcraft® Wheel and Tire Cleaner, ZC-37-A (U.S. & Canada)
CLEANING THE EXTERIOR
CLEANING THE EXTERIOR
PRECAUTIONS
Immediately remove fuel spillages, AdBlue
residuals, bird droppings, insect deposits
and road tar. These may cause damage to
your vehicle ’s paintwork or trim over time. Remove any exterior accessories, for
example antennas, before entering a car
wash.
CLEANING HEADLAMPS AND
REAR LAMPS
We recommend that you only use cold or
lukewarm water containing car shampoo
to clean the headlamps and the rear
lamps.
421
2022 Super Duty (TFE) Canada/United States of America, enUSA, Edition date: 202103, First-Printing Vehicle Care
Page 720 of 740
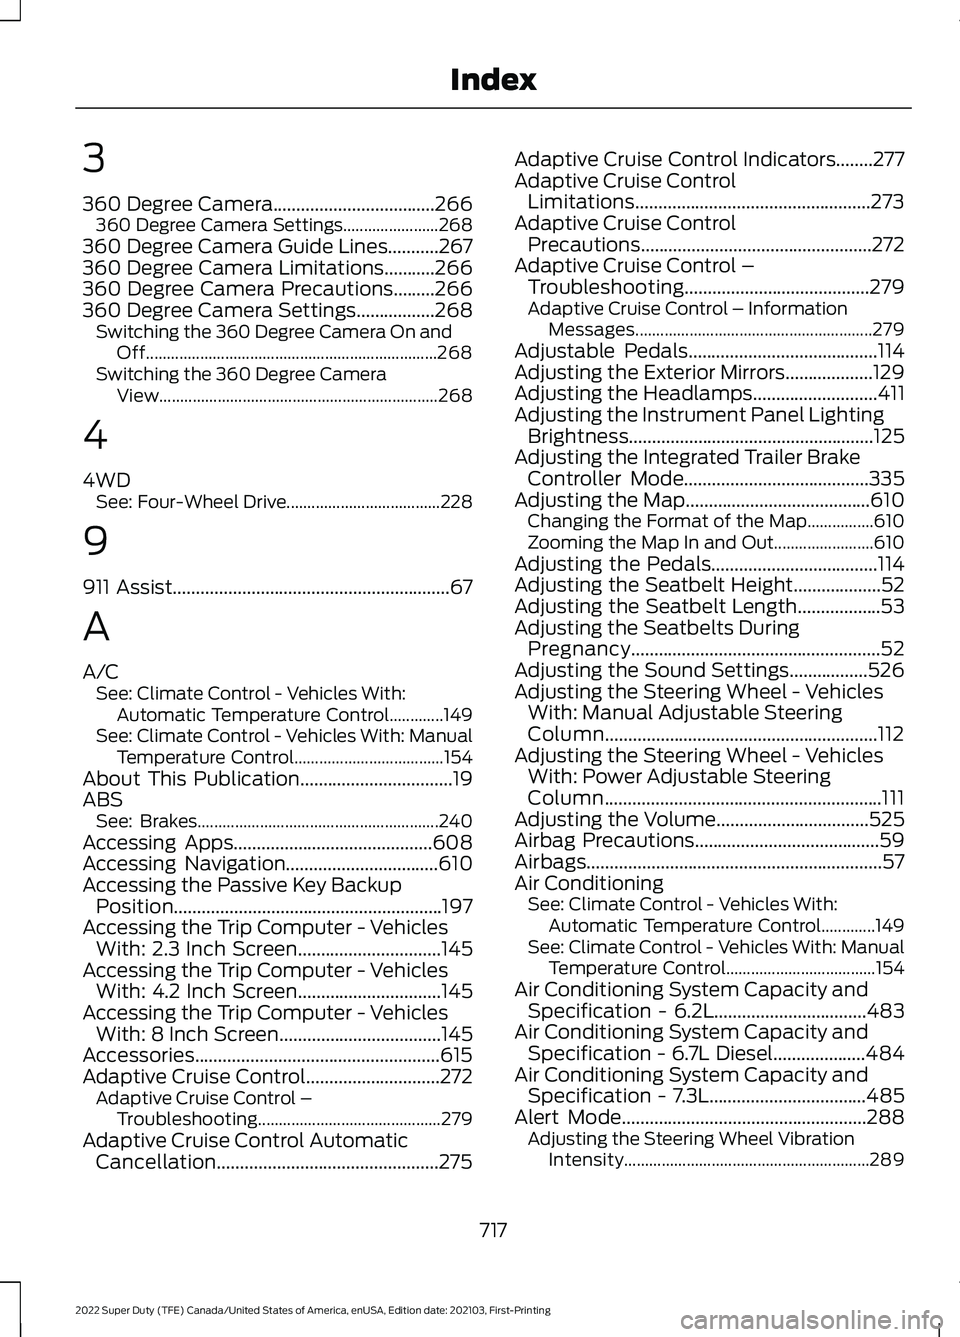
3
360 Degree Camera...................................266
360 Degree Camera Settings....................... 268
360 Degree Camera Guide Lines...........267
360 Degree Camera Limitations...........266
360 Degree Camera Precautions.........266
360 Degree Camera Settings.................268 Switching the 360 Degree Camera On and
Off...................................................................... 268
Switching the 360 Degree Camera View................................................................... 268
4
4WD See: Four-Wheel Drive..................................... 228
9
911 Assist............................................................67
A
A/C See: Climate Control - Vehicles With:
Automatic Temperature Control.............149
See: Climate Control - Vehicles With: Manual Temperature Control.................................... 154
About This Publication.................................19
ABS See: Brakes.......................................................... 240
Accessing Apps...........................................608
Accessing Navigation
.................................610
Accessing the Passive Key Backup Position..........................................................197
Accessing the Trip Computer - Vehicles With: 2.3 Inch Screen...............................145
Accessing the Trip Computer - Vehicles With: 4.2 Inch Screen
...............................145
Accessing the Trip Computer - Vehicles With: 8 Inch Screen
...................................145
Accessories.....................................................615
Adaptive Cruise Control.............................272 Adaptive Cruise Control –
Troubleshooting............................................ 279
Adaptive Cruise Control Automatic Cancellation................................................275 Adaptive Cruise Control Indicators........277
Adaptive Cruise Control
Limitations...................................................273
Adaptive Cruise Control Precautions..................................................272
Adaptive Cruise Control – Troubleshooting........................................
279
Adaptive Cruise Control – Information
Messages......................................................... 279
Adjustable Pedals
.........................................114
Adjusting the Exterior Mirrors...................129
Adjusting the Headlamps...........................411
Adjusting the Instrument Panel Lighting Brightness.....................................................125
Adjusting the Integrated Trailer Brake Controller Mode
........................................335
Adjusting the Map........................................610
Changing the Format of the Map................610
Zooming the Map In and Out........................ 610
Adjusting the Pedals....................................114
Adjusting the Seatbelt Height
...................52
Adjusting the Seatbelt Length..................53
Adjusting the Seatbelts During Pregnancy......................................................52
Adjusting the Sound Settings.................526
Adjusting the Steering Wheel - Vehicles With: Manual Adjustable Steering
Column...........................................................112
Adjusting the Steering Wheel - Vehicles With: Power Adjustable Steering
Column............................................................111
Adjusting the Volume
.................................525
Airbag Precautions........................................59
Airbags................................................................57
Air Conditioning See: Climate Control - Vehicles With:
Automatic Temperature Control.............149
See: Climate Control - Vehicles With: Manual Temperature Control.................................... 154
Air Conditioning System Capacity and Specification - 6.2L.................................483
Air Conditioning System Capacity and Specification - 6.7L Diesel....................484
Air Conditioning System Capacity and Specification - 7.3L
..................................485
Alert Mode.....................................................288 Adjusting the Steering Wheel Vibration
Intensity........................................................... 289
717
2022 Super Duty (TFE) Canada/United States of America, enUSA, Edition date: 202103, First-Printing Index
Page 723 of 740
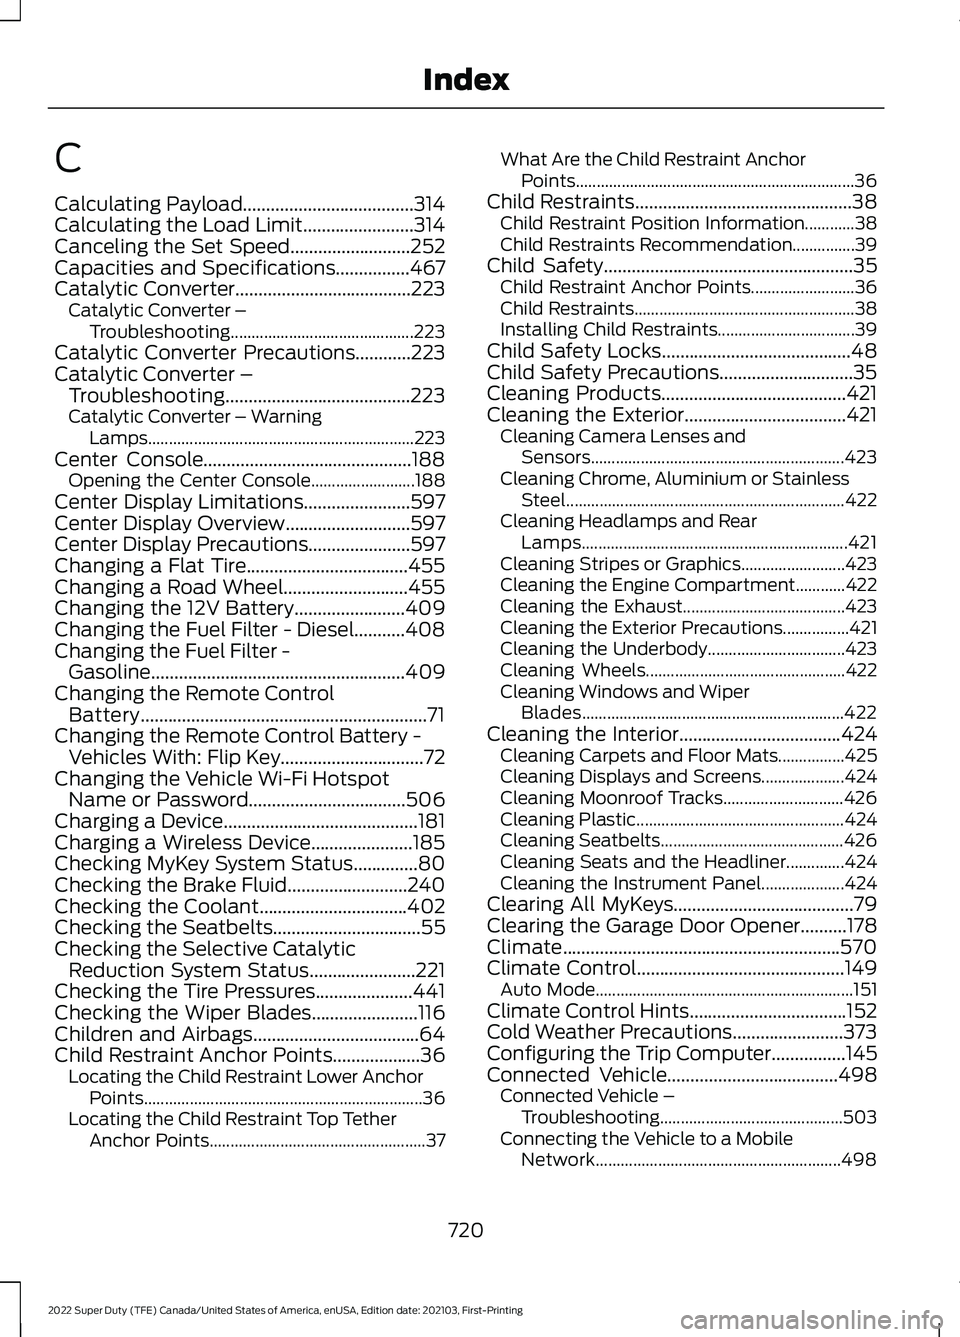
C
Calculating Payload.....................................314
Calculating the Load Limit........................314
Canceling the Set Speed..........................252
Capacities and Specifications................467
Catalytic Converter
......................................223
Catalytic Converter –
Troubleshooting............................................ 223
Catalytic Converter Precautions............223
Catalytic Converter – Troubleshooting........................................223
Catalytic Converter – Warning Lamps................................................................ 223
Center Console.............................................188 Opening the Center Console......................... 188
Center Display Limitations.......................597
Center Display Overview...........................597
Center Display Precautions......................597
Changing a Flat Tire...................................455
Changing a Road Wheel...........................455
Changing the 12V Battery........................409
Changing the Fuel Filter - Diesel...........408
Changing the Fuel Filter - Gasoline
.......................................................409
Changing the Remote Control Battery..............................................................71
Changing the Remote Control Battery - Vehicles With: Flip Key...............................72
Changing the Vehicle Wi-Fi Hotspot Name or Password
..................................506
Charging a Device..........................................181
Charging a Wireless Device......................185
Checking MyKey System Status..............80
Checking the Brake Fluid..........................240
Checking the Coolant................................402
Checking the Seatbelts
................................55
Checking the Selective Catalytic Reduction System Status.......................221
Checking the Tire Pressures
.....................441
Checking the Wiper Blades.......................116
Children and Airbags....................................64
Child Restraint Anchor Points
...................36
Locating the Child Restraint Lower Anchor
Points................................................................... 36
Locating the Child Restraint Top Tether Anchor Points.................................................... 37What Are the Child Restraint Anchor
Points................................................................... 36
Child Restraints
...............................................38
Child Restraint Position Information............38
Child Restraints Recommendation...............39
Child Safety
......................................................35
Child Restraint Anchor Points......................... 36
Child Restraints..................................................... 38
Installing Child Restraints................................. 39
Child Safety Locks.........................................48
Child Safety Precautions.............................35
Cleaning Products
........................................421
Cleaning the Exterior...................................421 Cleaning Camera Lenses and
Sensors............................................................. 423
Cleaning Chrome, Aluminium or Stainless Steel................................................................... 422
Cleaning Headlamps and Rear Lamps................................................................ 421
Cleaning Stripes or Graphics......................... 423
Cleaning the Engine Compartment............422
Cleaning the Exhaust....................................... 423
Cleaning the Exterior Precautions................421
Cleaning the Underbody................................. 423
Cleaning Wheels................................................ 422
Cleaning Windows and Wiper Blades............................................................... 422
Cleaning the Interior
...................................424
Cleaning Carpets and Floor Mats................425
Cleaning Displays and Screens.................... 424
Cleaning Moonroof Tracks............................. 426
Cleaning Plastic.................................................. 424
Cleaning Seatbelts............................................ 426
Cleaning Seats and the Headliner..............424
Cleaning the Instrument Panel.................... 424
Clearing All MyKeys
.......................................79
Clearing the Garage Door Opener..........178
Climate............................................................570
Climate Control
.............................................149
Auto Mode.............................................................. 151
Climate Control Hints..................................152
Cold Weather Precautions
........................373
Configuring the Trip Computer................145
Connected Vehicle
.....................................498
Connected Vehicle –
Troubleshooting............................................ 503
Connecting the Vehicle to a Mobile Network........................................................... 498
720
2022 Super Duty (TFE) Canada/United States of America, enUSA, Edition date: 202103, First-Printing Index