battery FORD F-450 2018 Owners Manual
[x] Cancel search | Manufacturer: FORD, Model Year: 2018, Model line: F-450, Model: FORD F-450 2018Pages: 660, PDF Size: 11.64 MB
Page 8 of 660
Power Steering Fluid Check
...................350
Washer Fluid Check ...................................
350
Draining the Fuel Filter Water Trap - 6.7L Diesel ............................................................
351
Fuel Filter - 6.2L/6.8L ................................
352
Changing the 12V Battery ........................
353
Checking the Wiper Blades .....................
355
Changing the Wiper Blades ....................
355
Adjusting the Headlamps ........................
355
Changing a Bulb ..........................................
357
Bulb Specification Chart .........................
360
Changing the Engine Air Filter - 6.2L/6.8L ........................................................................\
362
Changing the Engine Air Filter - 6.7L Diesel ..........................................................
363
Changing the Engine-Mounted and Diesel Fuel Conditioner Module Fuel
Filters - 6.7L Diesel .................................
365
Vehicle Care
General Information ..................................
370
Cleaning Products ......................................
370
Cleaning the Exterior .................................
370
Waxing ..............................................................
371
Cleaning the Engine ...................................
372
Cleaning the Exhaust - 6.7L Diesel .......
372
Cleaning the Windows and Wiper Blades ........................................................................\
373
Cleaning the Interior ...................................
373
Cleaning the Instrument Panel and Instrument Cluster Lens .......................
375
Cleaning Leather Seats .............................
375
Repairing Minor Paint Damage ..............
377
Cleaning the Wheels ..................................
377
Vehicle Storage ............................................
377
Wheels and Tires
General Information ..................................
380
Tire Care .........................................................
382
Using Snow Chains ...................................
400
Tire Pressure Monitoring System .........
400Changing a Road Wheel
.........................
408
Technical Specifications ..........................
418
Capacities and Specifications
Engine Specifications - 6.2L ..................
420
Engine Specifications - 6.7L Diesel ......
420
Engine Specifications - 6.8L ....................
421
Motorcraft Parts - 6.2L .............................
422
Motorcraft Parts - 6.7L Diesel ................
423
Motorcraft Parts - 6.8L .............................
424
Vehicle Identification Number ...............
425
Vehicle Certification Label ......................
426
Transmission Code Designation ...........
426
Capacities and Specifications - 6.2L ........................................................................\
427
Capacities and Specifications - 6.7L Diesel ...........................................................
432
Capacities and Specifications - 6.8L ........................................................................\
439
Audio System
General Information ..................................
445
Audio Unit - Vehicles With: AM/FM .....
446
Audio Unit - Vehicles With: AM/FM/CD/ SYNC ..........................................................
448
Audio Unit - Vehicles With: AM/FM/CD/ Touchscreen Display .............................
453
Digital Radio .................................................
454
Satellite Radio .............................................
456
USB Port ........................................................
459
SYNC™
General Information .................................
460
Using Voice Recognition ..........................
462
Using SYNC™ With Your Phone ..........
464
SYNC™ Applications and Services ......
476
Using SYNC™ With Your Media Player ........................................................................\
.
481
SYNC™ Troubleshooting ........................
490
5
Super Duty (TFE) Canada/United States of America, enUSA, Edition date: 201709, Second Printing Table of Contents
Page 11 of 660
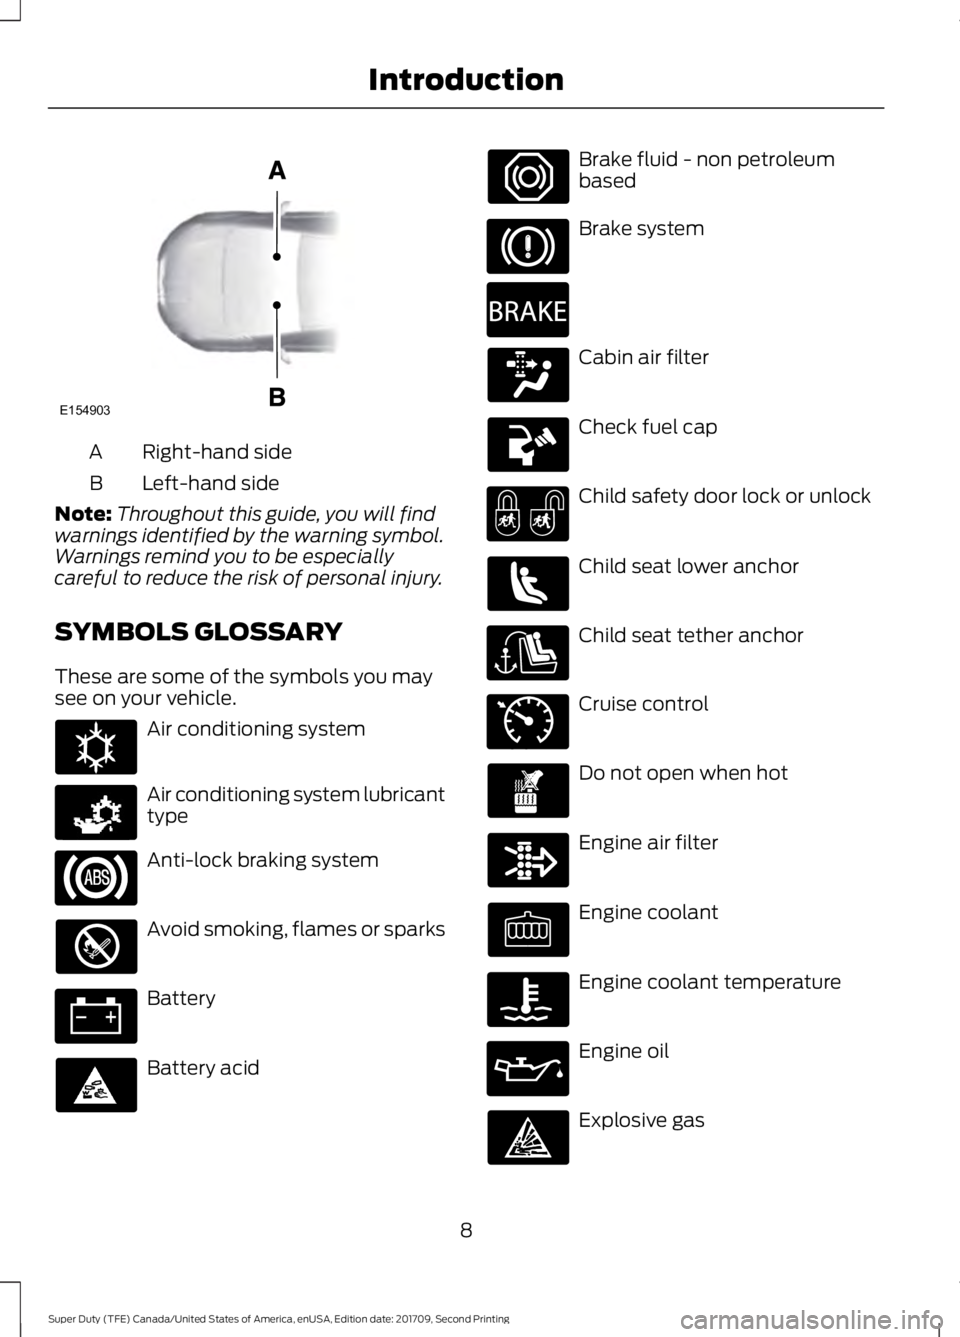
Right-hand side
A
Left-hand side
B
Note: Throughout this guide, you will find
warnings identified by the warning symbol.
Warnings remind you to be especially
careful to reduce the risk of personal injury.
SYMBOLS GLOSSARY
These are some of the symbols you may
see on your vehicle. Air conditioning system
Air conditioning system lubricant
type
Anti-lock braking system
Avoid smoking, flames or sparks
Battery
Battery acid Brake fluid - non petroleum
based
Brake system
Cabin air filter
Check fuel cap
Child safety door lock or unlock
Child seat lower anchor
Child seat tether anchor
Cruise control
Do not open when hot
Engine air filter
Engine coolant
Engine coolant temperature
Engine oil
Explosive gas
8
Super Duty (TFE) Canada/United States of America, enUSA, Edition date: 201709, Second Printing IntroductionE154903 E162384 E231157 E270480 E71340
Page 15 of 660
Ford or its vendors to receive this
information, do not activate the
service. For more information, see
Traffic, Directions and Information,
Terms and Conditions.
See SYNC™
(page 460).
CALIFORNIA PROPOSITION 65 WARNINGS
Some constituents of engine
exhaust, certain vehicle components,
certain fluids contained in vehicles
and certain products of component wear
contain or emit chemicals known to the
State of California to cause cancer and
birth defects or other reproductive harm. Battery posts, terminals and related
accessories contain lead and lead
compounds, chemicals known to the
State of California to cause cancer and
reproductive harm. Batteries also contain
other chemicals known to the State of
California to cause cancer. Wash your
hands after handling. PERCHLORATE
Certain components in your vehicle such
as airbag modules, seatbelt pretensioners
and remote control batteries may contain
perchlorate material. Special handling
may apply for service or vehicle end of life
disposal. For more information visit: Web Address
www.dtsc.ca.gov/hazard- ouswaste/perchlorate
FORD CREDIT
US Only
Ford Credit offers a full range of financing
and lease plans to help you acquire your
vehicle. If you have financed or leased your
vehicle through Ford Credit, thank you for
your business.
We offer a number of convenient ways for
you to contact us, and to manage your
account.
Call 1-800-727-7000.
For more information about Ford Credit
and access to Account Manager, go to
www.ford.com/finance.
REPLACEMENT PARTS
RECOMMENDATION
We have built your vehicle to the highest
standards using quality parts. We
recommend that you demand the use of
genuine Ford and Motorcraft parts
whenever your vehicle requires scheduled
maintenance or repair. You can clearly
identify genuine Ford and Motorcraft parts
by looking for the Ford, FoMoCo or
Motorcraft branding on the parts or their
packaging.
12
Super Duty (TFE) Canada/United States of America, enUSA, Edition date: 201709, Second Printing Introduction
Page 59 of 660
GENERAL INFORMATION ON
RADIO FREQUENCIES
This device complies with Part 15 of the
FCC Rules and with Industry Canada
license-exempt RSS standard(s).
Operation is subject to the following two
conditions: (1) This device may not cause
harmful interference, and (2) This device
must accept any interference received,
including interference that may cause
undesired operation.
Note:
Changes or modifications not
expressively approved by the party
responsible for compliance could void the
user's authority to operate the equipment.
The term "IC:" before the radio certification
number only signifies that Industry Canada
technical specifications were met.
The typical operating range for your
transmitter is approximately 33 ft (10 m).
Vehicles with the remote start feature will
have a greater range. One of the following
could cause a decrease in operating range:
• Weather conditions.
• Nearby radio towers.
• Structures around the vehicle.
• Other vehicles parked next to your
vehicle.
Other short-distance radio transmitters,
such as amateur radios, medical
equipment, wireless headphones, remote
controls and alarm systems may operate
on the same frequency as your remote
control. If other transmitters are operating
on those frequencies, you may not be able
to use your remote control. Using your
remote control near some types of
electronic equipment, such as USB devices,
computers or cell phones can interfere with
remote operation. Operating your remote
control near metal or metallic-finished
purses, bags or clothing can interfere with
remote operation. You can lock and unlock
the doors with the key. Note:
Make sure to lock your vehicle before
leaving it unattended.
Note: If you are in range, the remote control
still operates if you press any button
unintentionally.
Intelligent Access
(If Equipped)
The system uses a radio frequency signal
to communicate with your vehicle and
authorize your vehicle to unlock when one
of the following conditions are met:
• You touch the inside of the front
exterior door handle within
3 ft (1 m)
proximity of an intelligent access key.
• You press the tailgate release button.
• You press a button on the remote
control.
If excessive radio frequency interference
is present in the area or if the remote
control battery is low, you may need to
mechanically unlock your door. You can
use the mechanical key blade in your
intelligent access key to open the driver
door in this situation. See Remote Control
(page
56).
REMOTE CONTROL
Integrated Keyhead Transmitter (If
Equipped)
Use the key blade to start your vehicle and
unlock or lock the driver door from outside
your vehicle. The integrated keyhead
transmitter functions as a programmed
ignition key that operates all the locks and
starts your vehicle, as well as a remote
control.
56
Super Duty (TFE) Canada/United States of America, enUSA, Edition date: 201709, Second Printing Keys and Remote Controls
Page 61 of 660
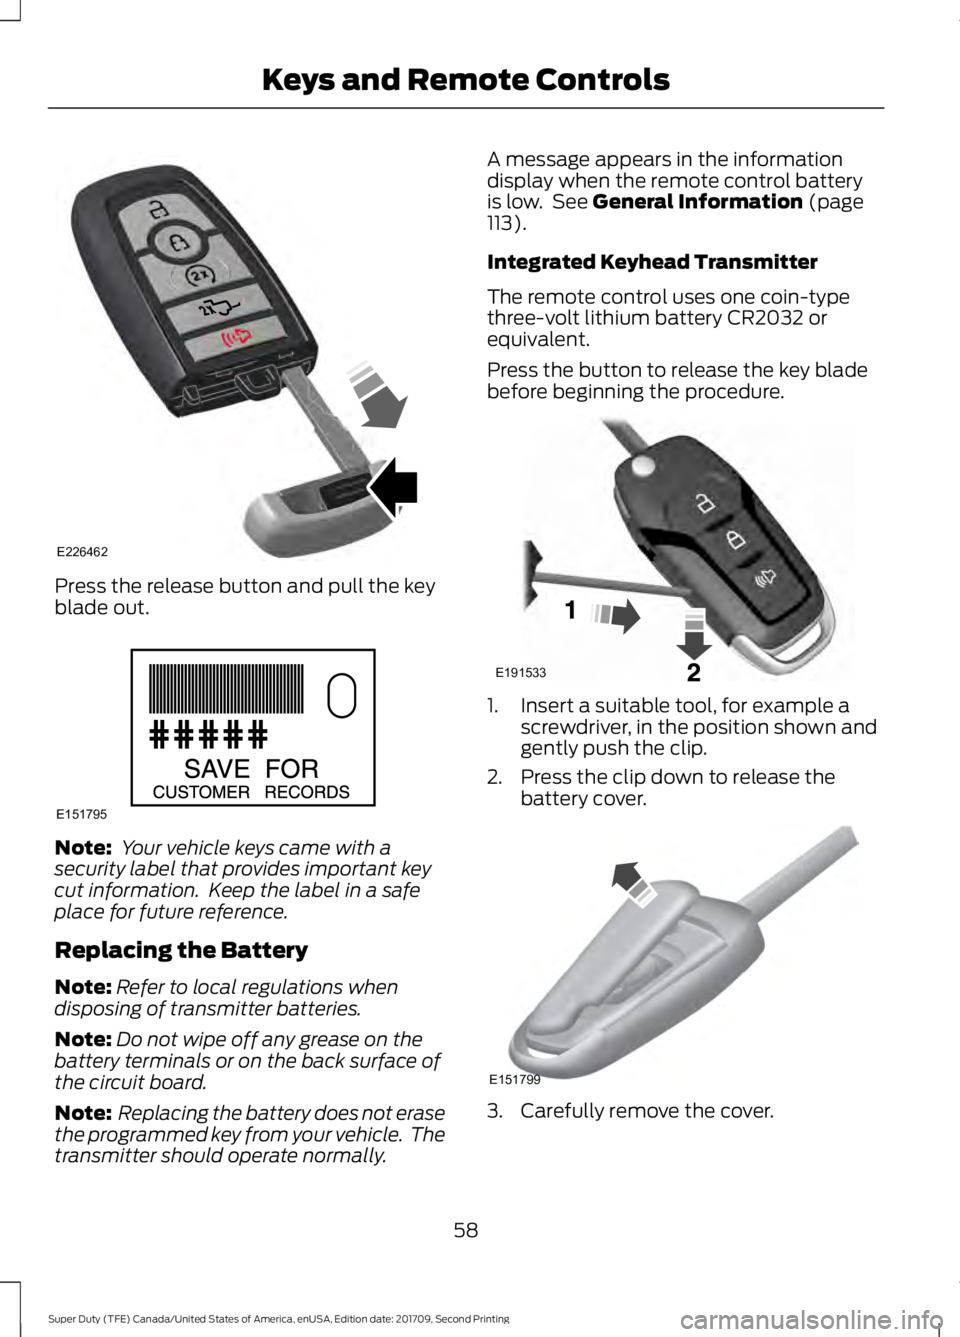
Press the release button and pull the key
blade out.
Note:
Your vehicle keys came with a
security label that provides important key
cut information. Keep the label in a safe
place for future reference.
Replacing the Battery
Note: Refer to local regulations when
disposing of transmitter batteries.
Note: Do not wipe off any grease on the
battery terminals or on the back surface of
the circuit board.
Note: Replacing the battery does not erase
the programmed key from your vehicle. The
transmitter should operate normally. A message appears in the information
display when the remote control battery
is low. See General Information (page
113).
Integrated Keyhead Transmitter
The remote control uses one coin-type
three-volt lithium battery CR2032 or
equivalent.
Press the button to release the key blade
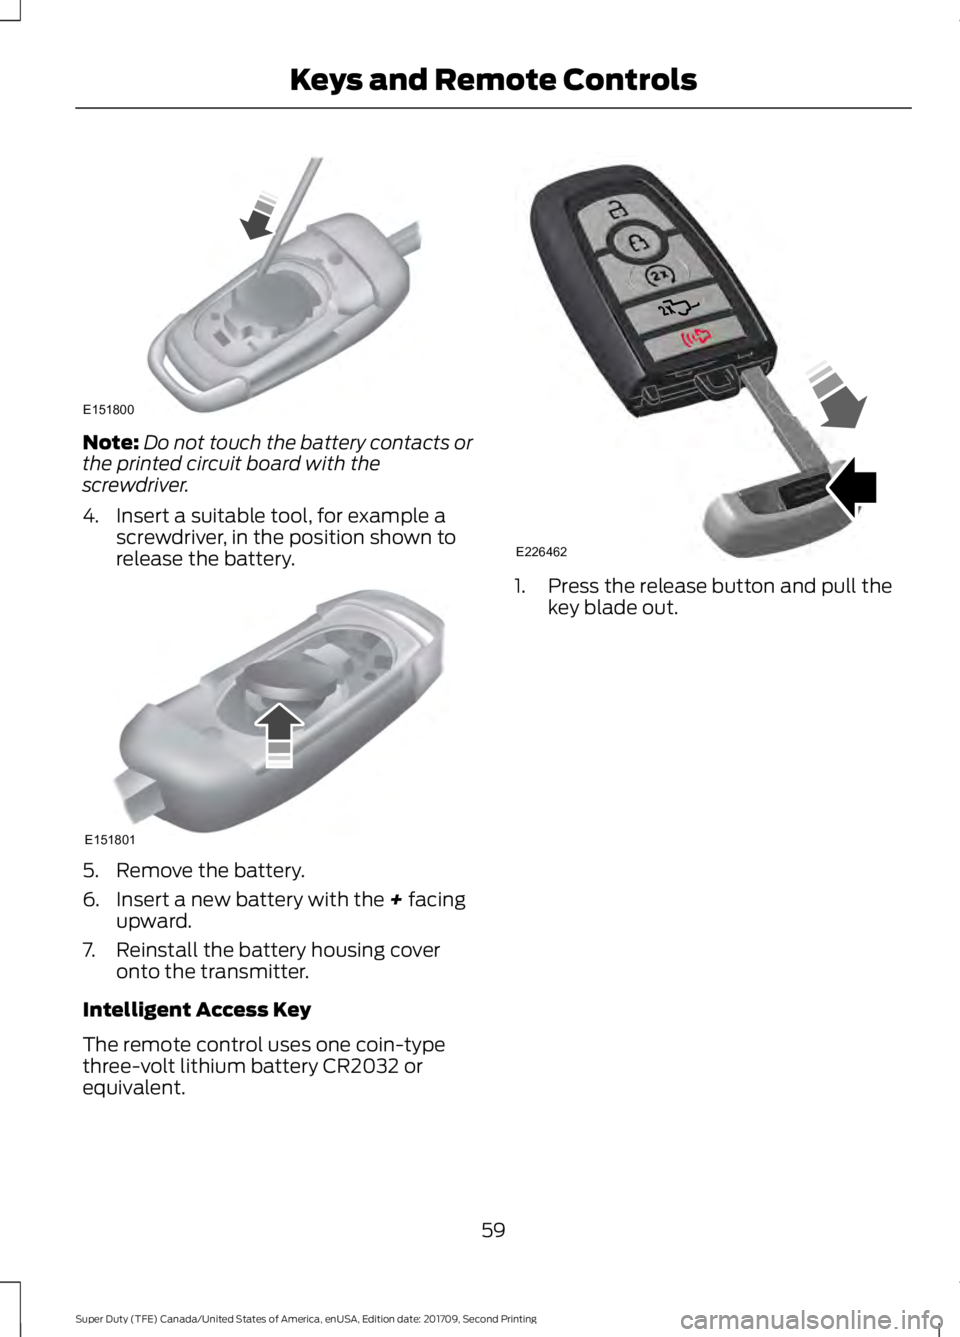
before beginning the procedure. 1. Insert a suitable tool, for example a
screwdriver, in the position shown and
gently push the clip.
2. Press the clip down to release the battery cover. 3. Carefully remove the cover.
58
Super Duty (TFE) Canada/United States of America, enUSA, Edition date: 201709, Second Printing Keys and Remote ControlsE226462 E151795 E191533 E151799
Page 62 of 660
Note:
Do not touch the battery contacts or
the printed circuit board with the
screwdriver.
4. Insert a suitable tool, for example a screwdriver, in the position shown to
release the battery. 5. Remove the battery.
6. Insert a new battery with the + facing
upward.
7. Reinstall the battery housing cover onto the transmitter.
Intelligent Access Key
The remote control uses one coin-type
three-volt lithium battery CR2032 or
equivalent. 1. Press the release button and pull the
key blade out.
59
Super Duty (TFE) Canada/United States of America, enUSA, Edition date: 201709, Second Printing Keys and Remote ControlsE151800 E151801 E226462
Page 63 of 660
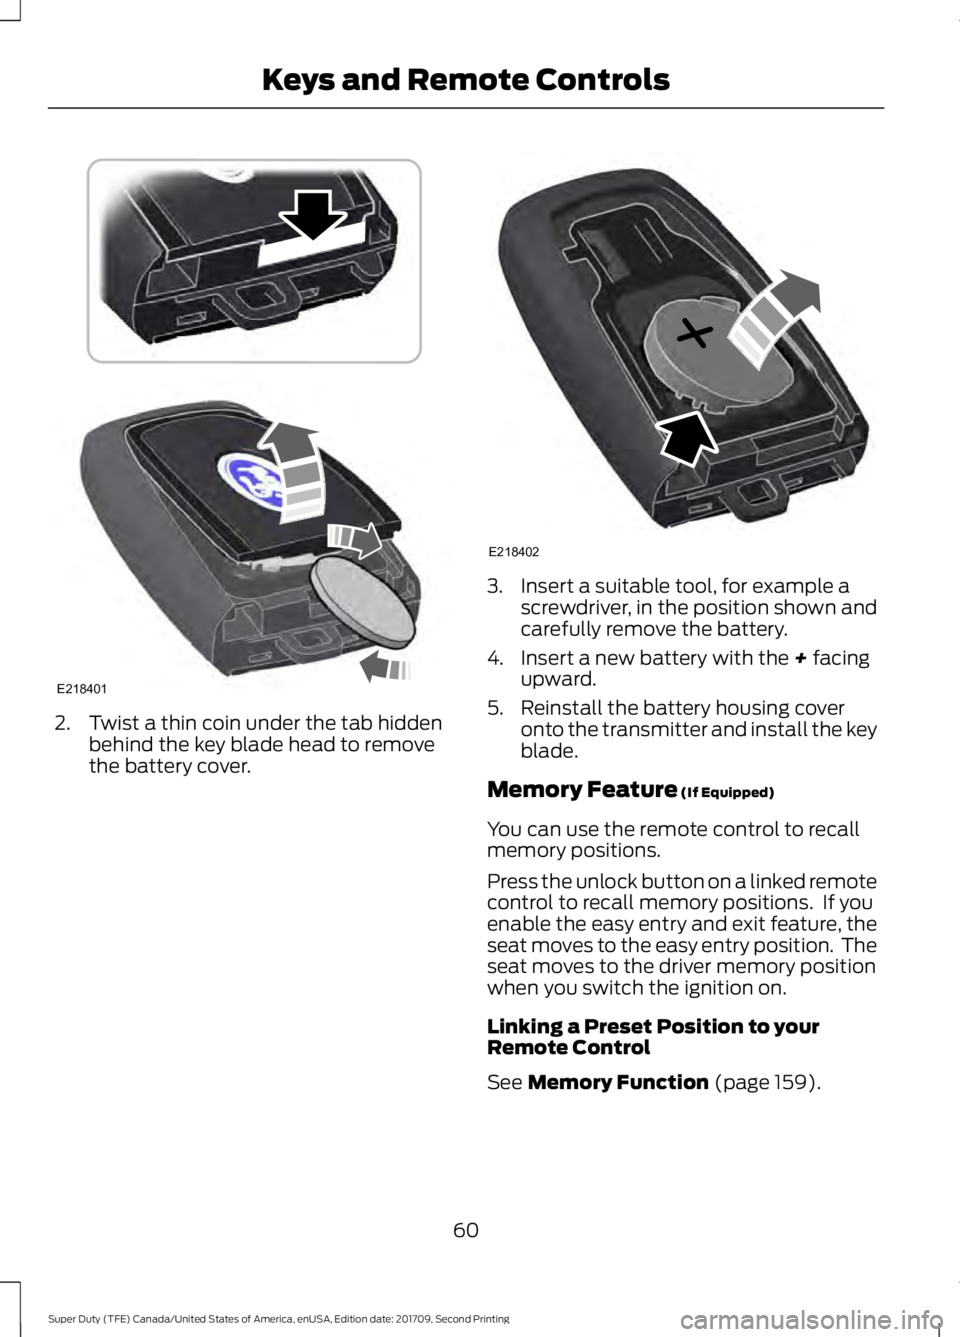
2. Twist a thin coin under the tab hidden
behind the key blade head to remove
the battery cover. 3. Insert a suitable tool, for example a
screwdriver, in the position shown and
carefully remove the battery.
4. Insert a new battery with the + facing
upward.
5. Reinstall the battery housing cover onto the transmitter and install the key
blade.
Memory Feature
(If Equipped)
You can use the remote control to recall
memory positions.
Press the unlock button on a linked remote
control to recall memory positions. If you
enable the easy entry and exit feature, the
seat moves to the easy entry position. The
seat moves to the driver memory position
when you switch the ignition on.
Linking a Preset Position to your
Remote Control
See
Memory Function (page 159).
60
Super Duty (TFE) Canada/United States of America, enUSA, Edition date: 201709, Second Printing Keys and Remote ControlsE218401 E218402
Page 64 of 660
Car Finder
Press the button twice within
three seconds. A tone sounds
and the direction indicators
flash. We recommend you use this method
to locate your vehicle, rather than using
the panic alarm.
Sounding the Panic Alarm Press the button to sound the
panic alarm. Press the button
again or switch the ignition on to
turn it off.
Note: The panic alarm only operates when
the ignition is off.
Remote Start (If Equipped) WARNING
To avoid exhaust fumes, do not use
remote start if your vehicle is parked
indoors or in areas that are not well
ventilated. Note:
Do not use remote start if your fuel
level is low. The remote start button is on the
transmitter.
This feature allows you to start your
vehicle from the outside. The transmitter
has an extended operating range.
You can configure vehicles with automatic
climate control to turn on the automatic
climate control when you remote start your
vehicle. See Automatic Climate Control
(page
147). A manual climate control
system runs at the setting you set it to
when you switched your vehicle off.
Many states and provinces restrict the use
of remote start. Check your local and state
or provincial laws for specific requirements
regarding remote start systems. The remote start system does not work if
any of the following occur:
•
The ignition is on.
• The anti-theft alarm triggers.
• You switch off the feature.
• The hood is open.
• The transmission is not in park (P).
• The battery voltage is below the
minimum operating voltage.
• The service engine soon light is on.
Remote Control Feedback
An LED on the remote control provides
status feedback of remote start or stop
commands. Status
LED
Remote start orextension
successful
Solid green
Remote stop
successful; vehicle off
Solid red
Remote start orstop failed
Blinking red
Waiting for statusupdate
Blinking green
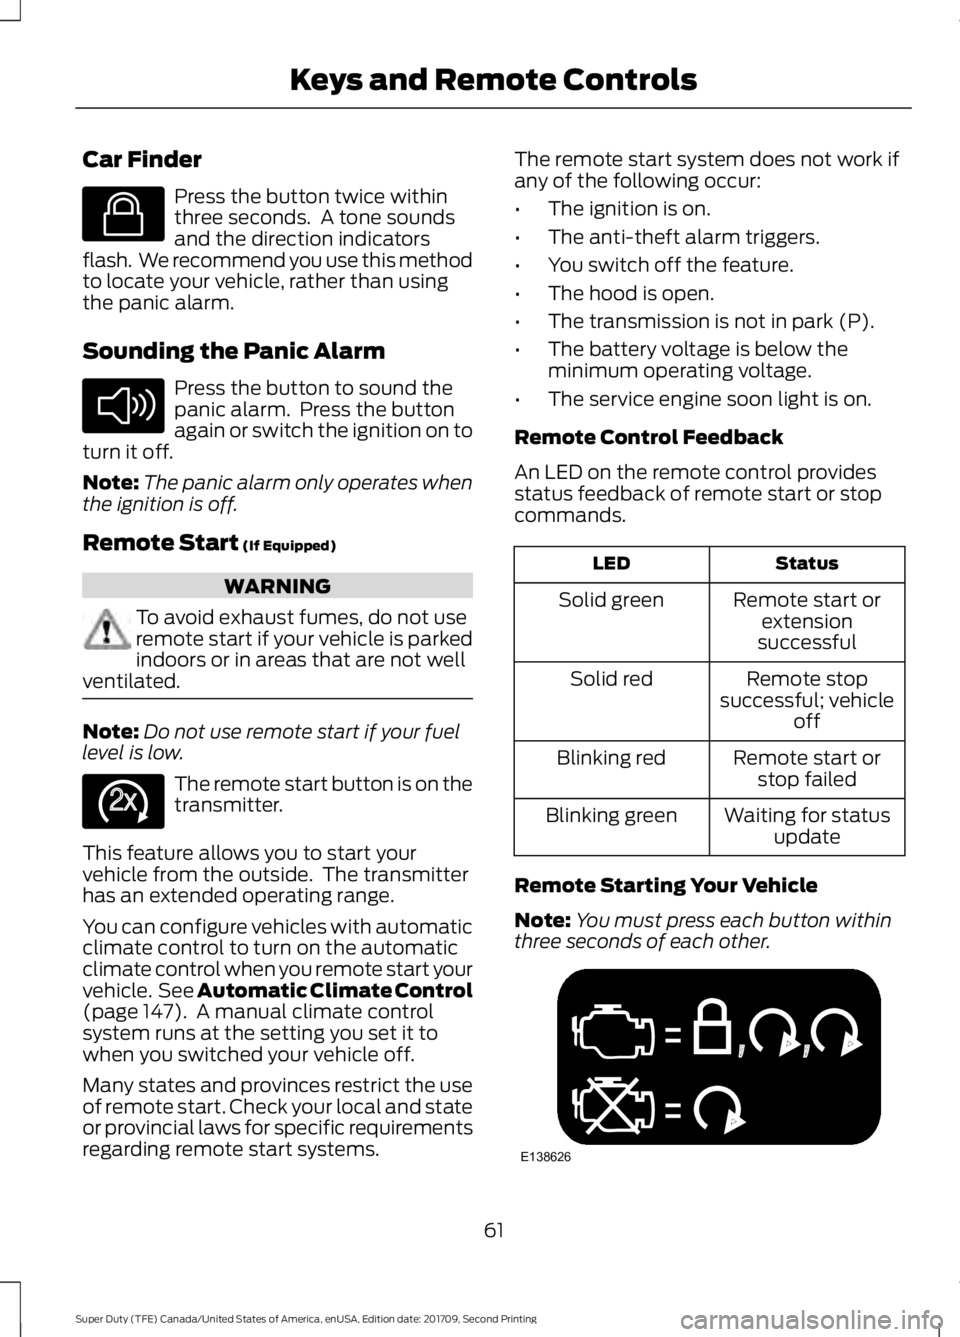
Remote Starting Your Vehicle
Note: You must press each button within
three seconds of each other. 61
Super Duty (TFE) Canada/United States of America, enUSA, Edition date: 201709, Second Printing Keys and Remote ControlsE138623 E138624 E138625 E138626
Page 70 of 660
LOCKING AND UNLOCKING
You can use the power door lock control
or the remote control to lock and unlock
your doors and tailgate. See Tailgate
(page 72).
Power Door Locks
(If Equipped)
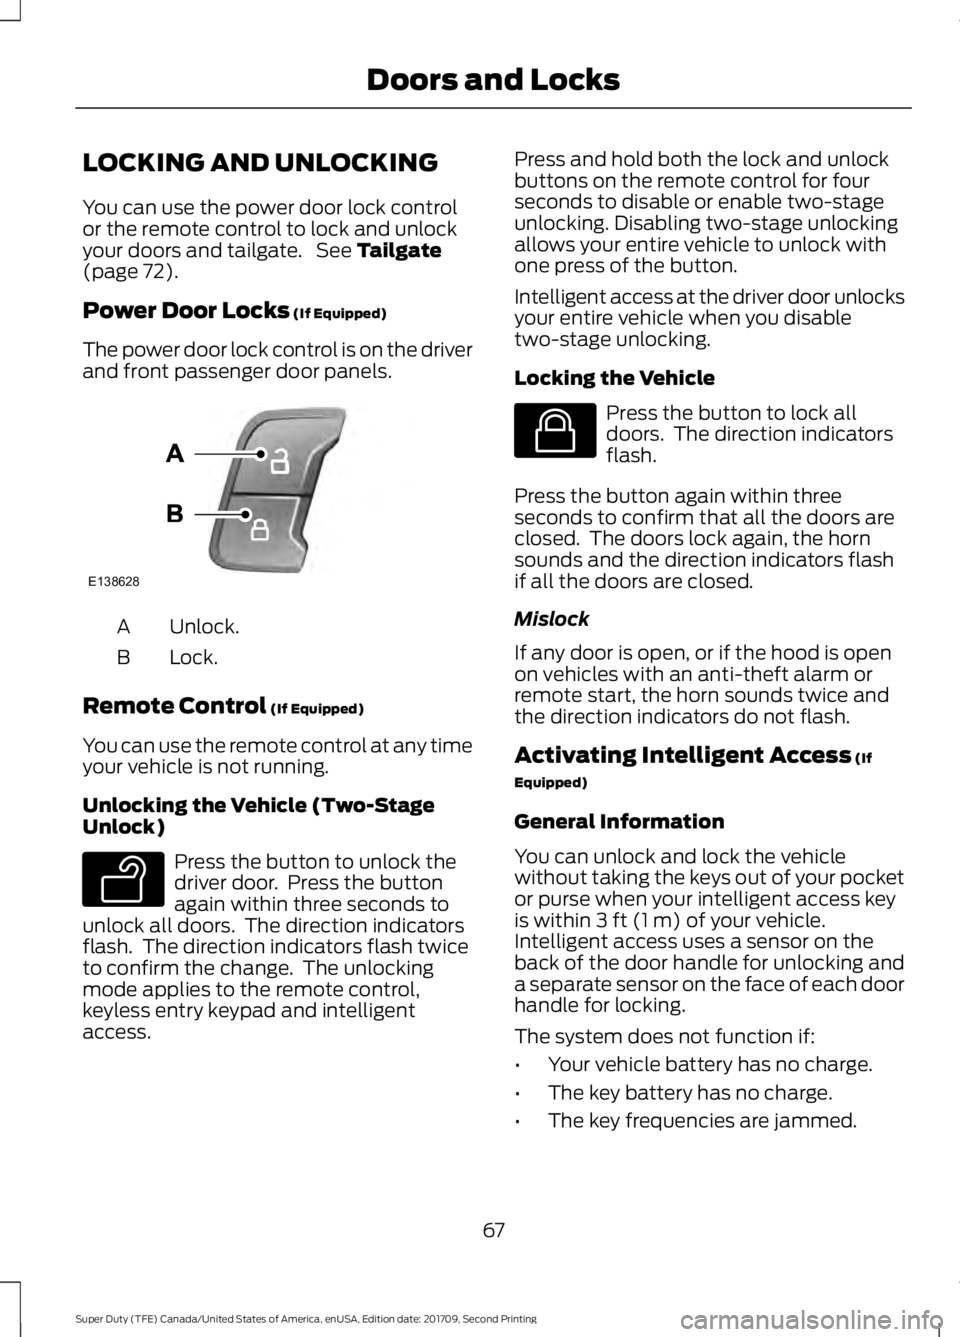
The power door lock control is on the driver
and front passenger door panels. Unlock.
A
Lock.
B
Remote Control
(If Equipped)
You can use the remote control at any time
your vehicle is not running.
Unlocking the Vehicle (Two-Stage
Unlock) Press the button to unlock the
driver door. Press the button
again within three seconds to
unlock all doors. The direction indicators
flash. The direction indicators flash twice
to confirm the change. The unlocking
mode applies to the remote control,
keyless entry keypad and intelligent
access. Press and hold both the lock and unlock
buttons on the remote control for four
seconds to disable or enable two-stage
unlocking. Disabling two-stage unlocking
allows your entire vehicle to unlock with
one press of the button.
Intelligent access at the driver door unlocks
your entire vehicle when you disable
two-stage unlocking.
Locking the Vehicle
Press the button to lock all
doors. The direction indicators
flash.
Press the button again within three
seconds to confirm that all the doors are
closed. The doors lock again, the horn
sounds and the direction indicators flash
if all the doors are closed.
Mislock
If any door is open, or if the hood is open
on vehicles with an anti-theft alarm or
remote start, the horn sounds twice and
the direction indicators do not flash.
Activating Intelligent Access
(If
Equipped)
General Information
You can unlock and lock the vehicle
without taking the keys out of your pocket
or purse when your intelligent access key
is within
3 ft (1 m) of your vehicle.
Intelligent access uses a sensor on the
back of the door handle for unlocking and
a separate sensor on the face of each door
handle for locking.
The system does not function if:
• Your vehicle battery has no charge.
• The key battery has no charge.
• The key frequencies are jammed.
67
Super Duty (TFE) Canada/United States of America, enUSA, Edition date: 201709, Second Printing Doors and LocksE138628 E138629 E138623
Page 73 of 660
Battery Saver
The battery saver turns off the interior
lamps 30 minutes after you switch off the
ignition if a door is open and the dome
lamp switch is on. It turns off the interior
lamps after 10 minutes if the dome lamp
switch is off.
Accessory Mode Battery Saver for
Intelligent Access Keys (If Equipped)
If you leave the ignition on after leaving
your vehicle, it turns off 15 minutes after
you close all of the doors.
KEYLESS ENTRY (If Equipped)
SECURICODE™ KEYLESS ENTRY
KEYPAD
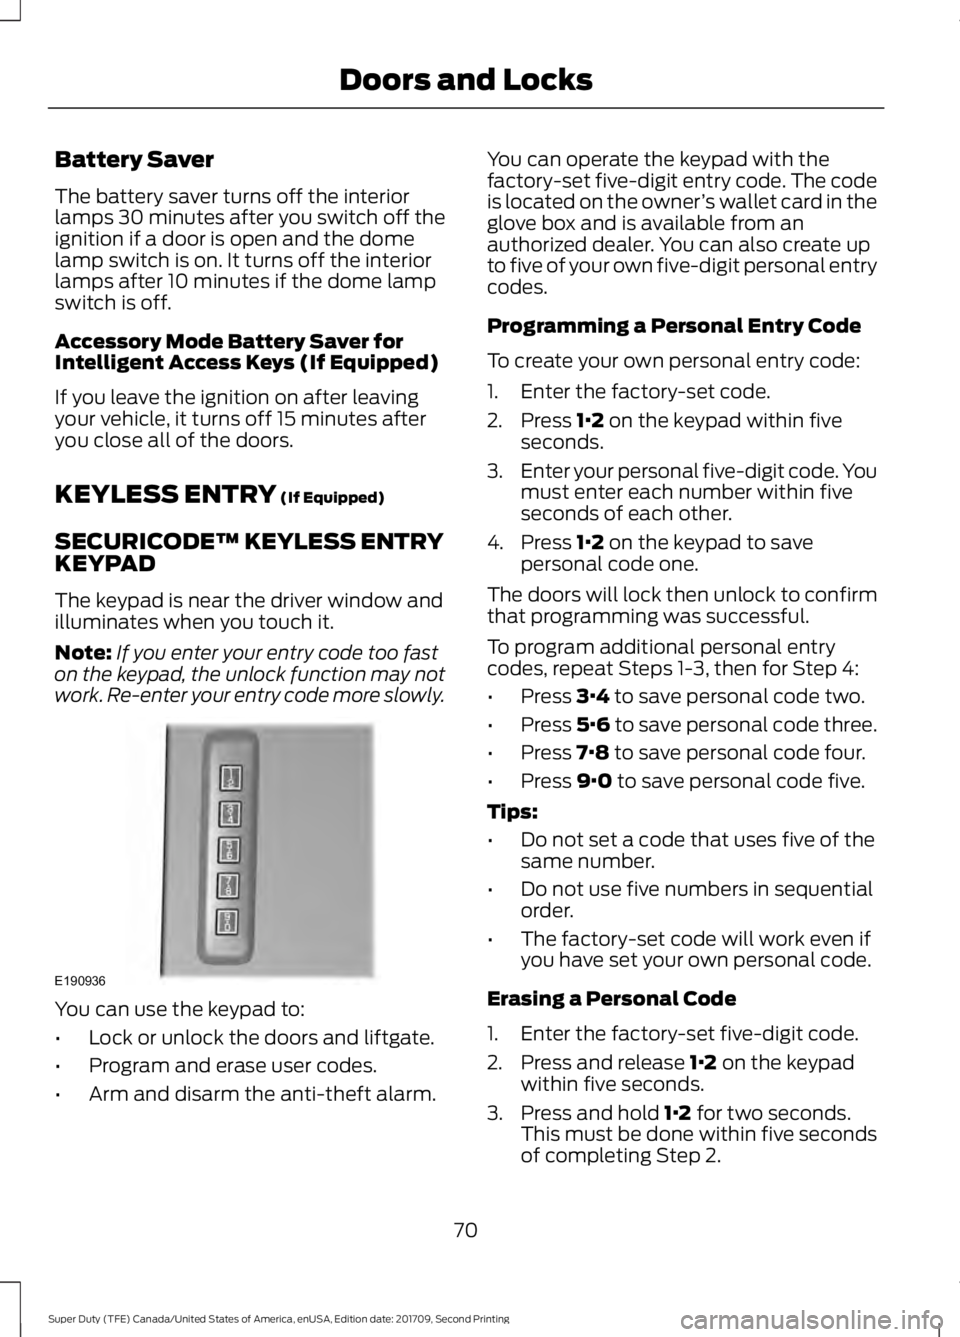
The keypad is near the driver window and
illuminates when you touch it.
Note: If you enter your entry code too fast
on the keypad, the unlock function may not
work. Re-enter your entry code more slowly. You can use the keypad to:
•
Lock or unlock the doors and liftgate.
• Program and erase user codes.
• Arm and disarm the anti-theft alarm. You can operate the keypad with the
factory-set five-digit entry code. The code
is located on the owner
’s wallet card in the
glove box and is available from an
authorized dealer. You can also create up
to five of your own five-digit personal entry
codes.
Programming a Personal Entry Code
To create your own personal entry code:
1. Enter the factory-set code.
2. Press
1·2 on the keypad within five
seconds.
3. Enter your personal five-digit code. You
must enter each number within five
seconds of each other.
4. Press
1·2 on the keypad to save
personal code one.
The doors will lock then unlock to confirm
that programming was successful.
To program additional personal entry
codes, repeat Steps 1-3, then for Step 4:
• Press
3·4 to save personal code two.
• Press
5·6 to save personal code three.
• Press
7·8 to save personal code four.
• Press
9·0 to save personal code five.
Tips:
• Do not set a code that uses five of the
same number.
• Do not use five numbers in sequential
order.
• The factory-set code will work even if
you have set your own personal code.
Erasing a Personal Code
1. Enter the factory-set five-digit code.
2. Press and release
1·2 on the keypad
within five seconds.
3. Press and hold
1·2 for two seconds.
This must be done within five seconds
of completing Step 2.
70
Super Duty (TFE) Canada/United States of America, enUSA, Edition date: 201709, Second Printing Doors and LocksE190936