AUX FORD F-450 2021 Owners Manual
[x] Cancel search | Manufacturer: FORD, Model Year: 2021, Model line: F-450, Model: FORD F-450 2021Pages: 666, PDF Size: 11.3 MB
Page 7 of 666
Rear Occupant Alert System Audible
Warnings .....................................................163
Garage Door Opener
Universal Garage Door Opener ..............
164
Auxiliary Power Points
Auxiliary Power Points ...............................
168
Wireless Accessory Charger ....................
169
Storage Compartments
Center Console ...............................................
171
Overhead Console ........................................
171
Under Seat Storage ......................................
171
Starting and Stopping the Engine
General Information ...................................
174
Ignition Switch ..............................................
174
Keyless Starting ............................................
175
Starting a Gasoline Engine - 6.2L/7.3L ........................................................................\
.
175
Starting a Diesel Engine - 6.7L Diesel ........................................................................\
..
177
Switching Off the Engine - 6.7L Diesel ........................................................................\
.
182
Engine Idle Shutdown ................................
182
Engine Block Heater ...................................
182
Fuel and Refueling
Safety Precautions .....................................
184
Fuel Quality - E85 .......................................
185
Fuel Quality - Gasoline .............................
186
Fuel Quality - Diesel ...................................
187
Running Out of Fuel ...................................
189
Refueling - Gasoline ...................................
189
Refueling - Diesel ........................................
190
Fuel Consumption .......................................
193Engine Emission Control
Emission Law
................................................
194
Catalytic Converter .....................................
195
Selective Catalytic Reductant System - Diesel ............................................................
197
Diesel Particulate Filter ............................
202
Transmission
Automatic Transmission ..........................
207
Power Take-Off ............................................
212
Four-Wheel Drive
Using Four-Wheel Drive ............................
213
Rear Axle
Limited Slip Differential .............................
221
Electronic Locking Differential ................
221
Brakes
General Information ...................................
223
Hints on Driving With Anti-Lock Brakes ........................................................................\
225
Parking Brake ................................................
225
Hill Start Assist ............................................
225
Traction Control
Principle of Operation ................................
227
Using Traction Control ...............................
227
Stability Control
Principle of Operation ...............................
228
Using Stability Control ..............................
229
Trail Control
What Is Trail Control ...................................
231
Switching Trail Control On and Off .......
231
Setting the Trail Control Speed ..............
231
Canceling the Set Speed ..........................
231
Trail Control Indicators ...............................
231
4
Super Duty (TFE) Canada/United States of America, enUSA, Edition date: 202008, Third-Printing- Table of Contents
Page 11 of 666
SYNC™
General Information
..................................496
Using Voice Recognition ..........................
497
Using SYNC™ With Your Phone ..........
499
SYNC™ Applications and Services .....
500
Using SYNC™ With Your Media Player ........................................................................\
503
SYNC™ Troubleshooting ........................
504
SYNC™ 3
General Information ...................................
513
Using Voice Recognition ...........................
515
Entertainment ...............................................
521
Climate ............................................................
531
Phone ..............................................................
533
Navigation .....................................................
535
Apps ................................................................
540
Settings ..........................................................
543
SYNC™ 3 Troubleshooting .....................
545
Accessories
Accessories ...................................................
558
Auxiliary Switches ......................................
559
Ford Protect
Ford Protect ..................................................
563
Scheduled Maintenance
General Maintenance Information ......
565
Normal Scheduled Maintenance .........
568
Special Operating Conditions Scheduled Maintenance .............................................
574
Customer Information
Radio Frequency Certification Labels .......................................................................
584
Appendices
Electromagnetic Compatibility ..............
618
End User License Agreement ..................
621Declaration of Conformity
......................
646
8
Super Duty (TFE) Canada/United States of America, enUSA, Edition date: 202008, Third-Printing- Table of Contents
Page 171 of 666
12 V DC Power Point
WARNING: Do not plug optional
electrical accessories into the cigar
lighter socket. Incorrect use of the cigar
lighter can cause damage not covered
by the vehicle warranty, and can result
in fire or serious injury.
Note: When you switch the ignition on, you
can use the socket to power
12 V appliances
with a maximum current rating of 20 A20
amps.
Note: Do not plug in any device that
supplies power to the vehicle through the
power points, this may result in damage to
vehicle systems.
Note: Do not hang any accessory from the
accessory plug.
Note: Do not use the power point over the
vehicle capacity of 12 V DC 240 W or a fuse
may blow.
Note: Always keep the power point caps
closed when not in use.
Do not insert objects other than an
accessory plug into the power point. This
damages the power point and may blow
the fuse.
Run the vehicle for full capacity use of the
power point.
To prevent the battery from running out of
charge:
• Do not use the power point longer than
necessary when the engine is off.
• Do not leave devices plugged in
overnight or when you park your vehicle
for extended periods. 110 V 400 Watt AC Power Point
(If
Equipped) WARNING:
Do not keep electrical
devices plugged in the power point
whenever the device is not in use. Do not
use any extension cord with the 110 volt
AC power point, since it will defeat the
safety protection design. Doing so may
cause the power point to overload due
to powering multiple devices that can
reach beyond the 400 watt load limit
and could result in fire or serious injury.
Note: This feature works only when you
have the ignition switched on.
Note: This feature has a maximum output
of 400 watts when the vehicle is in park (P).
Note: While in drive (D), the maximum
outlet output is 300 watts.
Note: When powering electric devices that
require more than 10 watts in vehicles
equipped with keyless start, the engine must
remain running. If the engine is turned off or
you switch the ignition to accessory mode,
plugged in devices will not be charged.
You can use the power point for electric
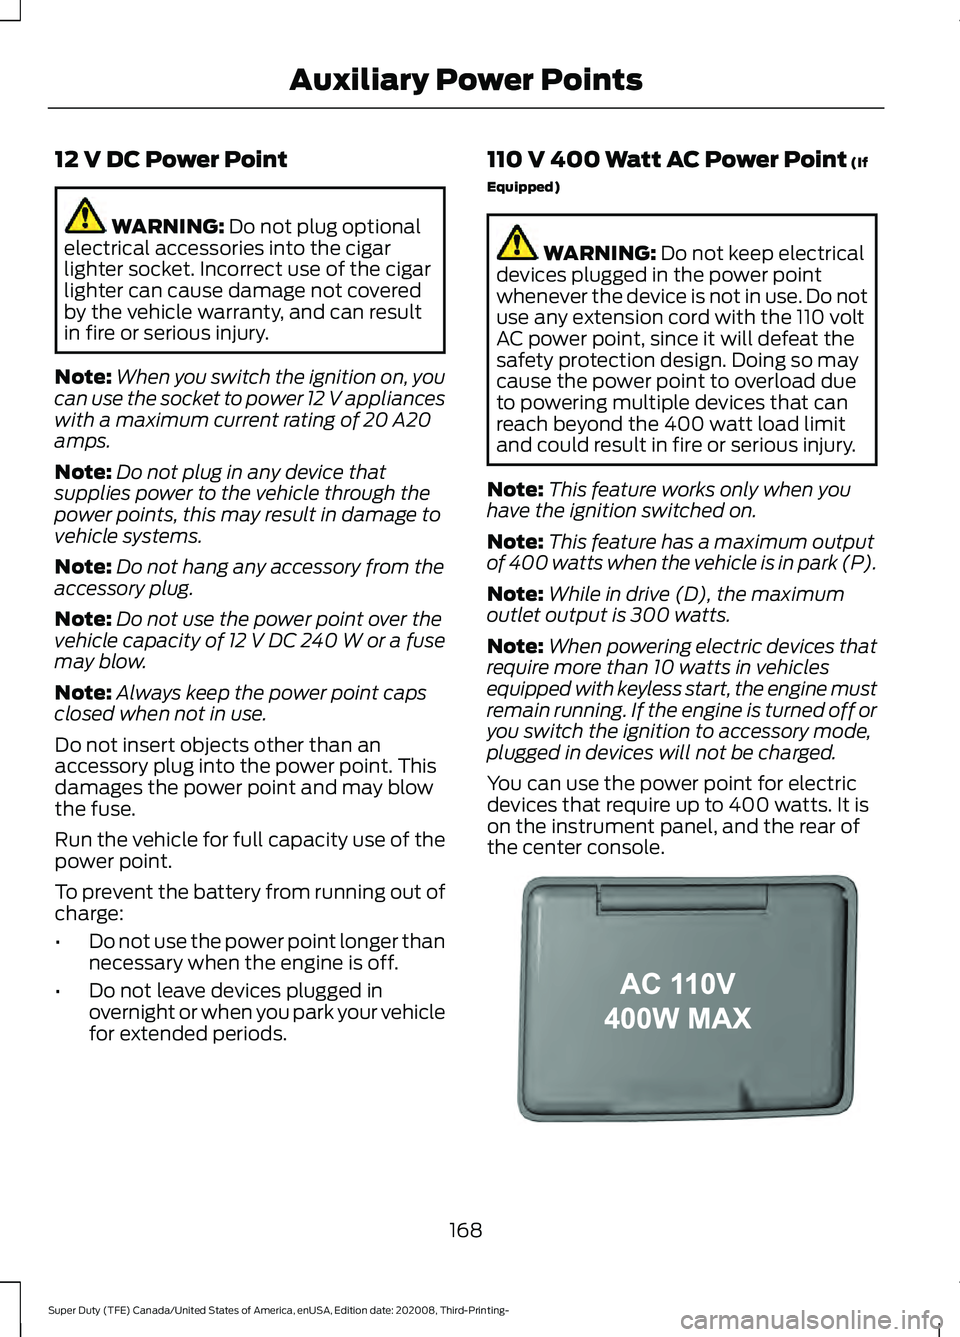
devices that require up to 400 watts. It is
on the instrument panel, and the rear of
the center console. 168
Super Duty (TFE) Canada/United States of America, enUSA, Edition date: 202008, Third-Printing- Auxiliary Power PointsE191617
Page 172 of 666
When the indicator light on the power point
is:
•
On: The power point is working, the
ignition is on and a device is plugged
in.
• Off: The power point is off, the ignition
is off or no device is plugged in.
• Flashing: The power point is in fault
mode.
The power outlet temporarily turns off
power when in fault mode if the device
exceeds the 400 watt limit. Unplug your
device and switch the ignition off. Switch
the ignition back on, but do not plug your
device back in. Let the system cool off and
switch the ignition off to reset the fault
mode. Switch the ignition back on and
make sure the indicator light remains on.
You can use the 400 watt power outlet for
these types of electric devices:
• Electric hand drills.
• Rechargeable power tools.
• Video games.
• Laptops.
• Televisions.
Note: Max 400W - when the vehicle is
parked and 300W - when the vehicle is
driving.
Do not use the power point for certain
electric devices, including:
• Cathode-ray, tube-type televisions.
• Motor loads, such as vacuum cleaners,
electric saws and other electric power
tools or compressor-driven
refrigerators.
• Measuring devices, which process
precise data, such as medical
equipment or measuring equipment.
• Other appliances requiring an
extremely stable power supply such as
microcomputer-controlled electric
blankets or touch-sensor lamps. Locations
Note:
Timed power points remain on for 30
minutes if the vehicle is in accessory mode.
If you switch the vehicle off, the timed
power points remain on for 75 minutes.
Power points may be in the following
locations:
• On the instrument panel.
• Inside the center console.
• On the rear of the center console.
• In the seat bin.
WIRELESS ACCESSORY
CHARGER (IF EQUIPPED) WARNING:
Wireless charging
devices can affect the operation of
implanted medical devices, including
cardiac pacemakers. If you have any
implanted medical devices, we
recommend that you consult with your
physician.
Tests on this equipment show that it
complies with part 18 of the FCC Rules.
• This equipment generates, uses and
can radiate radio frequency energy and
may cause harmful interference to
radio communications. There is no
guarantee that the interference will not
occur in a particular installation. If this
equipment does cause harmful
interference to radio or television
reception, please consult the dealer.
• This product is not end-user
serviceable.
169
Super Duty (TFE) Canada/United States of America, enUSA, Edition date: 202008, Third-Printing- Auxiliary Power Points
Page 173 of 666
WARNING: Changes or
modifications not expressively approved
by the party responsible for compliance
could void the user's authority to operate
the equipment. The term "IC:" before the
radio certification number only signifies
that Industry Canada technical
specifications were met.
This device complies with Industry Canada
licence-exempt RSS standard(s).
Operation is subject to:
• This device may not cause interference.
• This device must accept any
interference, including interference that
may cause undesired operation of the
device.
Note: The charging performance may be
affected if your device is in a case. It may be
necessary to remove the case to wirelessly
charge your device.
The system supports one Qi wireless
charging compatible device on the
charging area.
Keep the charging area clean and remove
foreign objects prior to charging a device.
Do not place items with a magnetic strip,
for example passports, parking tickets or
credit cards, near the charging area when
charging a device. Damage may occur to
the magnetic strip. Do not place metal objects, for example
remote controls, coins and candy
wrappers, on or near the charging area
when charging a device. Metal objects may
heat up and degrade the charging
performance.
Note:
The rate of charge, or charging power,
is controlled by the device. During charging,
the device and the charger may heat up, this
is normal. If the battery gets hotter than
usual, the charger may stop charging. The charging area is on the
center console or lower
instrument panel.
See Center
Console (page 171).
You can charge a device if the vehicle is
on, when in accessory mode, or anytime
SYNC is on.
To begin charging, place the device on the
center of the charging surface with the
charging side down. The charging stops
after your device reaches a full charge.
Note: If the system detects a foreign object
or if the device is misaligned on the charging
area, a message appears in the display.
Note: Software and firmware updates may
affect device compatibility, including the
use of unofficial software or firmware. You
should verify charging functionality with your
specific devices when in your vehicle. Description
Behavior
Message
This message appears whenwireless charging begins.
Message on screen display
or pop-up window.
Wireless Charger Active
The system stops chargingyour device if the system detects the phone is
misaligned, or a foreign
metal object is on the char- ging surface.
Pop-up window.
Phone misaligned or object
between phone and charger
detected. Correct the condi- tion to resume charging.
170
Super Duty (TFE) Canada/United States of America, enUSA, Edition date: 202008, Third-Printing- Auxiliary Power PointsE297549
Page 174 of 666
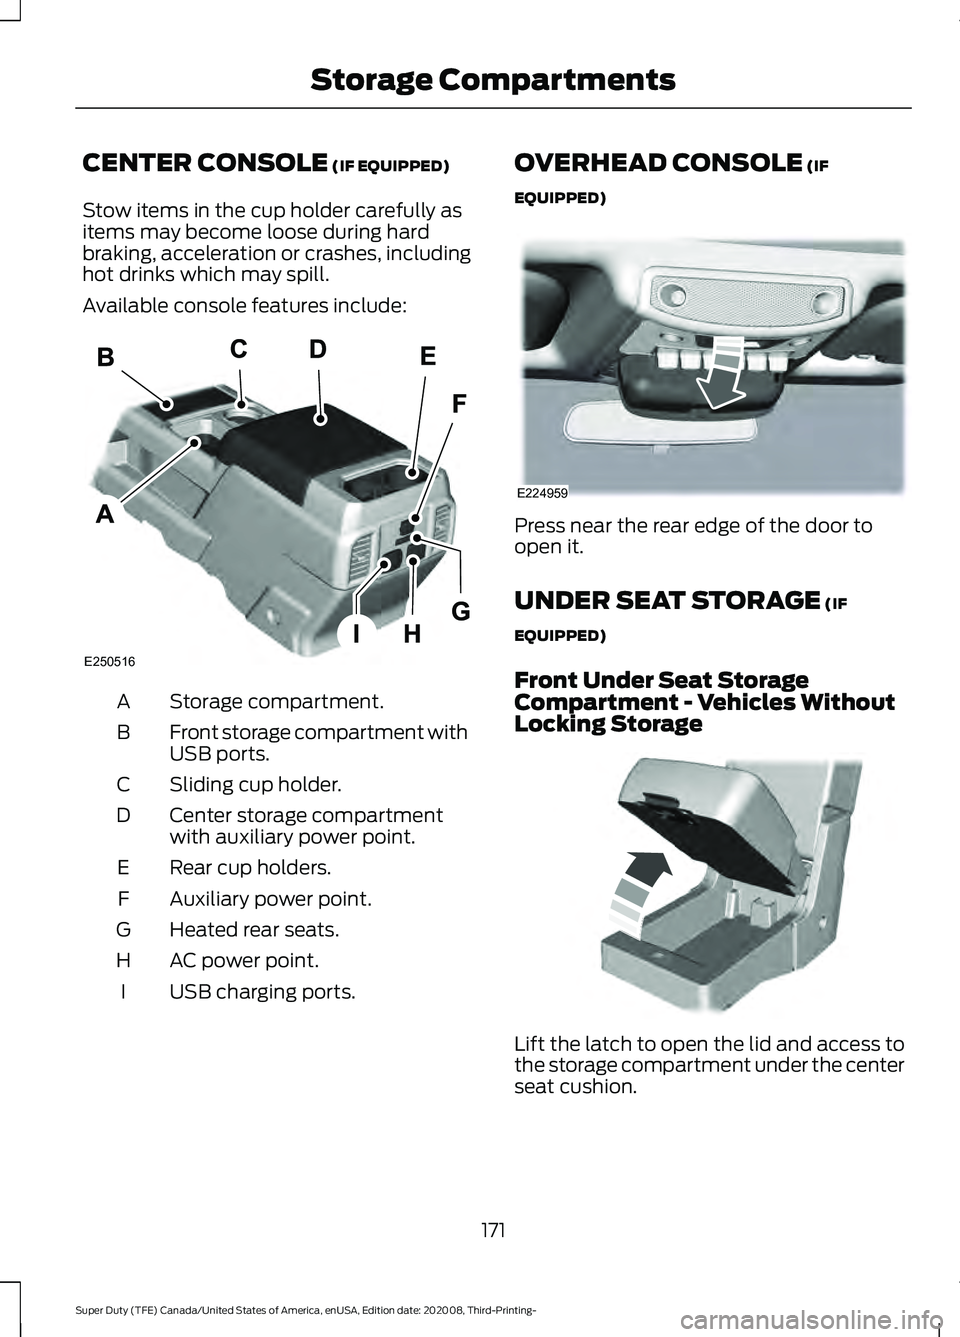
CENTER CONSOLE (IF EQUIPPED)
Stow items in the cup holder carefully as
items may become loose during hard
braking, acceleration or crashes, including
hot drinks which may spill.
Available console features include: Storage compartment.
A
Front storage compartment with
USB ports.
B
Sliding cup holder.
C
Center storage compartment
with auxiliary power point.
D
Rear cup holders.
E
Auxiliary power point.
F
Heated rear seats.
G
AC power point.
H
USB charging ports.
I OVERHEAD CONSOLE (IF
EQUIPPED) Press near the rear edge of the door to
open it.
UNDER SEAT STORAGE
(IF
EQUIPPED)
Front Under Seat Storage
Compartment - Vehicles Without
Locking Storage Lift the latch to open the lid and access to
the storage compartment under the center
seat cushion.
171
Super Duty (TFE) Canada/United States of America, enUSA, Edition date: 202008, Third-Printing- Storage CompartmentsE250516 E224959 E306120
Page 215 of 666
POWER TAKE-OFF (IF EQUIPPED)
Note: Use of auxiliary equipment that
exceeds the maximum Power Take-Off
(PTO) load specified in our Truck Body
Builders Layout Book can adversely affect
the performance of the powertrain system.
Refer to the Body Builders Layout Book for
instructions about the appropriate
installation of additional equipment.
Auxiliary equipment called power take-off,
or PTO, is often added to the engine or
transmission to operate utility equipment.
Examples include a wheel-lift for tow
trucks, cranes, tools for construction or tire
service, and pumping fluids. PTO
applications draw auxiliary horsepower
from the powertrain, often while the
vehicle is stationary. In this condition, there
is limited cooling air flow through the
radiator and around the vehicle that
normally occurs when a vehicle is moving.
The aftermarket PTO system installer,
having the most knowledge of the final
application, is responsible for determining
whether additional chassis heat protection
or powertrain cooling is required, and
alerting the user to the safe and proper
operation.
Split Shaft Capability
(If Equipped)
Our Super Duty vehicles are approved for
use as a stationary, including split shaft
capability with 6.7L diesel only, or mobile
power source, within limits and operating
guidelines detailed in our Truck Body
Builders Layout Book. For additional
information, visit
www .f or dbb a s. c om .
212
Super Duty (TFE) Canada/United States of America, enUSA, Edition date: 202008, Third-Printing- Transmission
Page 241 of 666
When shifting the transmission out of
reverse (R) and into any gear other than
park (P), the camera image remains in the
display until:
•
Your vehicle speed sufficiently
increases.
• You shift your vehicle into park (P).
• You apply the parking brake on vehicles
with a manual transmission.
360 DEGREE CAMERA (IF
EQUIPPED) WARNING:
The 360 degree
camera system still requires the driver
to use it in conjunction with looking out
of the windows, and checking the interior
and exterior mirrors for maximum
coverage. WARNING:
Objects that are close
to either corner of the bumper or under
the bumper, might not be seen on the
screen due to the limited coverage of the
camera system. WARNING:
Use caution when
turning camera features on or off when
the transmission is not in park (P). Make
sure your vehicle is not moving.
Note: The 360 degree camera system turns
off when your vehicle is in motion at low
speed, except when in reverse (R).
The 360 degree camera system consists
of front, side and rear cameras. The
system:
• Allows you to see what is directly in
front or behind your vehicle.
• Provides cross traffic view in front and
behind your vehicle. •
Allows you to see a top-down view of
the area outside your vehicle, including
the blind spots.
• Provides visibility around your vehicle
to you in parking maneuvers such as:
•Centering in a parking space.
• Obstacles near vehicle.
• Parallel parking.
Camera Views The camera button is located on
the instrument panel. Pressing
the camera button activates the
system.
When in park (P), neutral (N) or drive (D),
only images from the front cameras are
displayed. Press the camera button to
display the front camera image on the
display screen.
When in drive (D) at speeds greater than
6 mph (10 km/h)
, properly equipped
vehicles can access two camera views. By
pressing the camera button on the
instrument panel, the rear high view
camera and auxiliary camera can be
viewed.
When in reverse (R), only images from the
rear cameras are displayed. When you shift
into reverse (R), the rear view camera
image automatically shows on the display
screen.
Advanced Camera Views
(If Equipped) Additional camera views may be
available for vehicles with
specific features. Press the small
camera icon shown on the top left corner
of the display screen to open the camera
view menu.
238
Super Duty (TFE) Canada/United States of America, enUSA, Edition date: 202008, Third-Printing- Parking AidsE205884 E233726
Page 242 of 666
The following camera views can be
accessed in park (P), neutral (N) or drive
(D) when you press the camera button:
•
Front 360 + Normal: Contains the
normal front camera view next to a
360 degree camera view.
• Front Normal View:
Provides an
image of what is directly in front of your
vehicle.
• Front Split View:
Provides an
extended view of what is in front of
your vehicle.
• Rear High View:
Provides an image
of your truck bed and can be used to
assist you when backing up to align and
hitch a fifth wheel or gooseneck trailer.
• Auxiliary View:
Provides a rear view
image from the back of your trailer
while reversing.
The following camera views can be
accessed when you shift into reverse (R):
• Rear 360 + Normal:
Contains the
normal rear camera view next to a 360
degree camera view. Press the zoom
(+) button to quickly access Rear
Normal View from this screen.
• Rear Normal View: Provides an image
of what is directly behind your vehicle.
• Rear Split View:
Provides an
extended view of what is behind your
vehicle.
• Rear High View:
Provides an image
of your truck bed and can be used to
assist you when backing up to align and
hitch a fifth wheel or gooseneck trailer. •
Auxiliary View:
Provides a rear view
image from the back of your trailer
while reversing.
• Trailer Reverse Guidance View:
Provides an image of the rear of your
vehicle using the side cameras, useful
when reversing with a trailer. Use the
arrows at the bottom of the screen to
adjust the side camera position. See
Trailer Reversing Aids
(page 283).
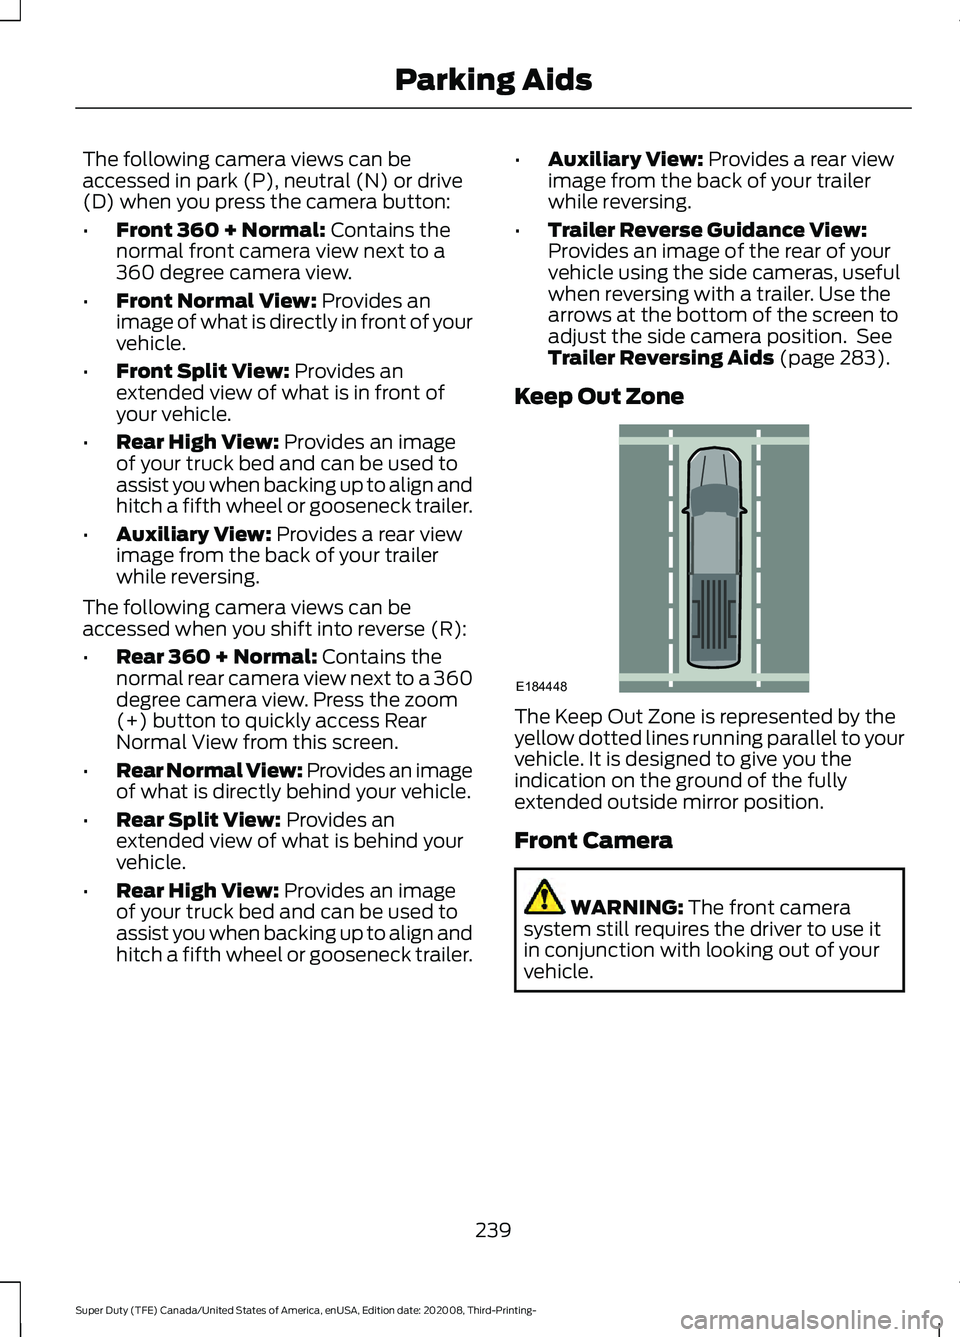
Keep Out Zone The Keep Out Zone is represented by the
yellow dotted lines running parallel to your
vehicle. It is designed to give you the
indication on the ground of the fully
extended outside mirror position.
Front Camera
WARNING:
The front camera
system still requires the driver to use it
in conjunction with looking out of your
vehicle.
239
Super Duty (TFE) Canada/United States of America, enUSA, Edition date: 202008, Third-Printing- Parking AidsE184448
Page 244 of 666
Auxiliary Camera (If Equipped)
Note: The auxiliary camera works with
trailers up to
50 ft (15 m) in length. Access the auxiliary camera view
by pressing the button on the
display screen when in reverse
(R).
Access the auxiliary camera while in drive
(D) by pressing the camera button twice.
The auxiliary camera system is a variant
of the rear view camera. It is designed to
display a rear view image from the back of
a trailer while reversing. The auxiliary
camera is not meant as an alternative to
the rear view camera.
241
Super Duty (TFE) Canada/United States of America, enUSA, Edition date: 202008, Third-Printing- Parking AidsE233727