instrument panel FORD F-450 2022 Owner's Manual
[x] Cancel search | Manufacturer: FORD, Model Year: 2022, Model line: F-450, Model: FORD F-450 2022Pages: 740, PDF Size: 12.6 MB
Page 231 of 740
HOW DOES FOUR-WHEEL
DRIVE WORK
Using the Electronic Shift On the
Fly System (If Equipped)
This four-wheel drive system utilizes a
2-speed Electronic Shift On the Fly (ESOF)
transfer case which is also known as a
part-time system. This system offers the
driver two-wheel drive high, four-wheel
drive high, and four-wheel drive low as
available modes of operation. When you
select either four-wheel drive high or
four-wheel drive low, the system provides
mechanically locked four-wheel drive
power to both the front and rear wheels
for use in off-road or slippery conditions
such as deep snow, sand or mud. When
you select four-wheel drive low, the system
provides additional gearing for increased
torque multiplication for conditions like
deep sand, steep slopes, or pulling heavy
objects. Additionally, the system is capable
of recreational flat towing by putting the
transfer case into a neutral position. See
Recreationally Towing Your Vehicle
(page
384). For proper operation, make sure that each
hub is fully engaged and that both hub
locks are set to the same position (both
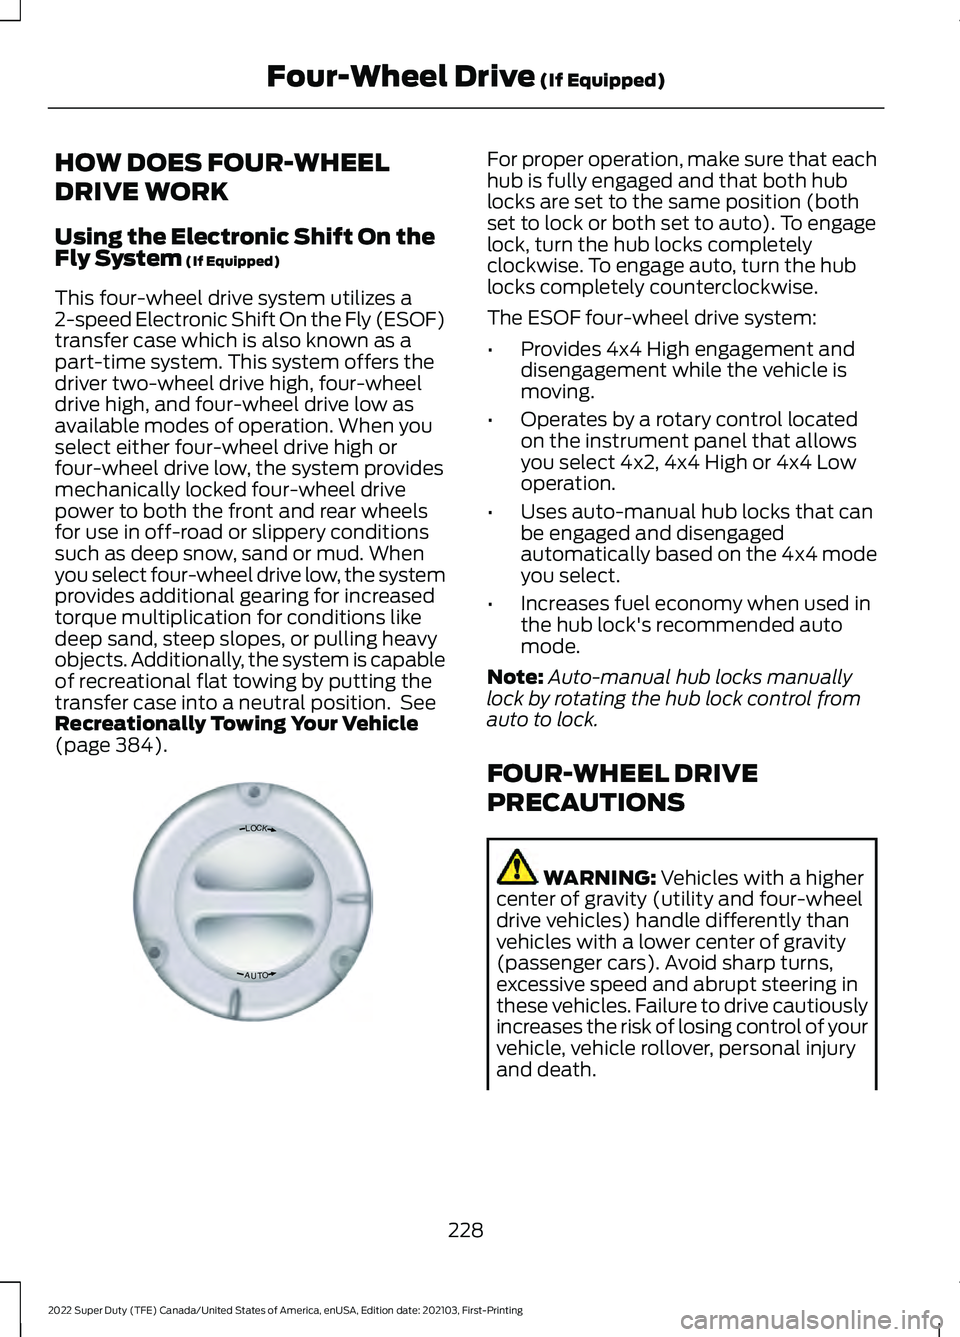
set to lock or both set to auto). To engage
lock, turn the hub locks completely
clockwise. To engage auto, turn the hub
locks completely counterclockwise.
The ESOF four-wheel drive system:
•
Provides 4x4 High engagement and
disengagement while the vehicle is
moving.
• Operates by a rotary control located
on the instrument panel that allows
you select 4x2, 4x4 High or 4x4 Low
operation.
• Uses auto-manual hub locks that can
be engaged and disengaged
automatically based on the 4x4 mode
you select.
• Increases fuel economy when used in
the hub lock's recommended auto
mode.
Note: Auto-manual hub locks manually
lock by rotating the hub lock control from
auto to lock.
FOUR-WHEEL DRIVE
PRECAUTIONS WARNING:
Vehicles with a higher
center of gravity (utility and four-wheel
drive vehicles) handle differently than
vehicles with a lower center of gravity
(passenger cars). Avoid sharp turns,
excessive speed and abrupt steering in
these vehicles. Failure to drive cautiously
increases the risk of losing control of your
vehicle, vehicle rollover, personal injury
and death.
228
2022 Super Duty (TFE) Canada/United States of America, enUSA, Edition date: 202103, First-Printing Four-Wheel Drive
(If Equipped)LOC K
OTUAE339076
Page 233 of 740
FOUR-WHEEL DRIVE
LIMITATIONS
Do not use four-wheel drive high or
four-wheel drive low mode on dry, hard
surfaced roads. Doing so can produce
excessive noise, increase tire wear and can
damage drive components. four-wheel
drive high or four-wheel drive low modes
intended for consistently slippery or loose
surfaces. Use of four low mode on these
surfaces could produce some noise, such
as occasional clunks, but should not
damage drive components. When
transitioning from consistently loose or
slippery surfaces, be sure the four-wheel
drive systems not mechanically blocked
once on dry, hard surfaced roads in
two-wheel drive high.
Operating Four-Wheel Drive with
a Spare or Mismatched tires
On four-wheel drive vehicles, the size of
the spare tire can affect the four-wheel
drive system. If there is a significant
difference between the size of the spare
tire and the remaining tires, you could have
limited four-wheel drive functionality.
When driving with the full-size dissimilar
spare wheel and tire assembly, do not:
•
Exceed 50 mph (80 km/h) with a
four-wheel drive mode turned on.
• Turn on a four-wheel drive mode
unless the vehicle is stationary.
• Use a four-wheel drive mode on dry
pavement.
When driving with the full-size dissimilar
spare wheel and tire assembly, four-wheel
drive functionality is limited, especially
when driving in a mechanically locked
four-wheel drive mode. You can experience
the following: •
Additional noise from the transfer case
or other drive components.
• Difficulty shifting out of a mechanically
locked four-wheel drive mode.
Use of a dissimilar spare wheel and tire
assembly can lead to impairment of the
following:
• Comfort and noise.
• Winter weather driving capability.
• Wet driving capability.
• Four-wheel drive capability.
SELECTING A FOUR-WHEEL
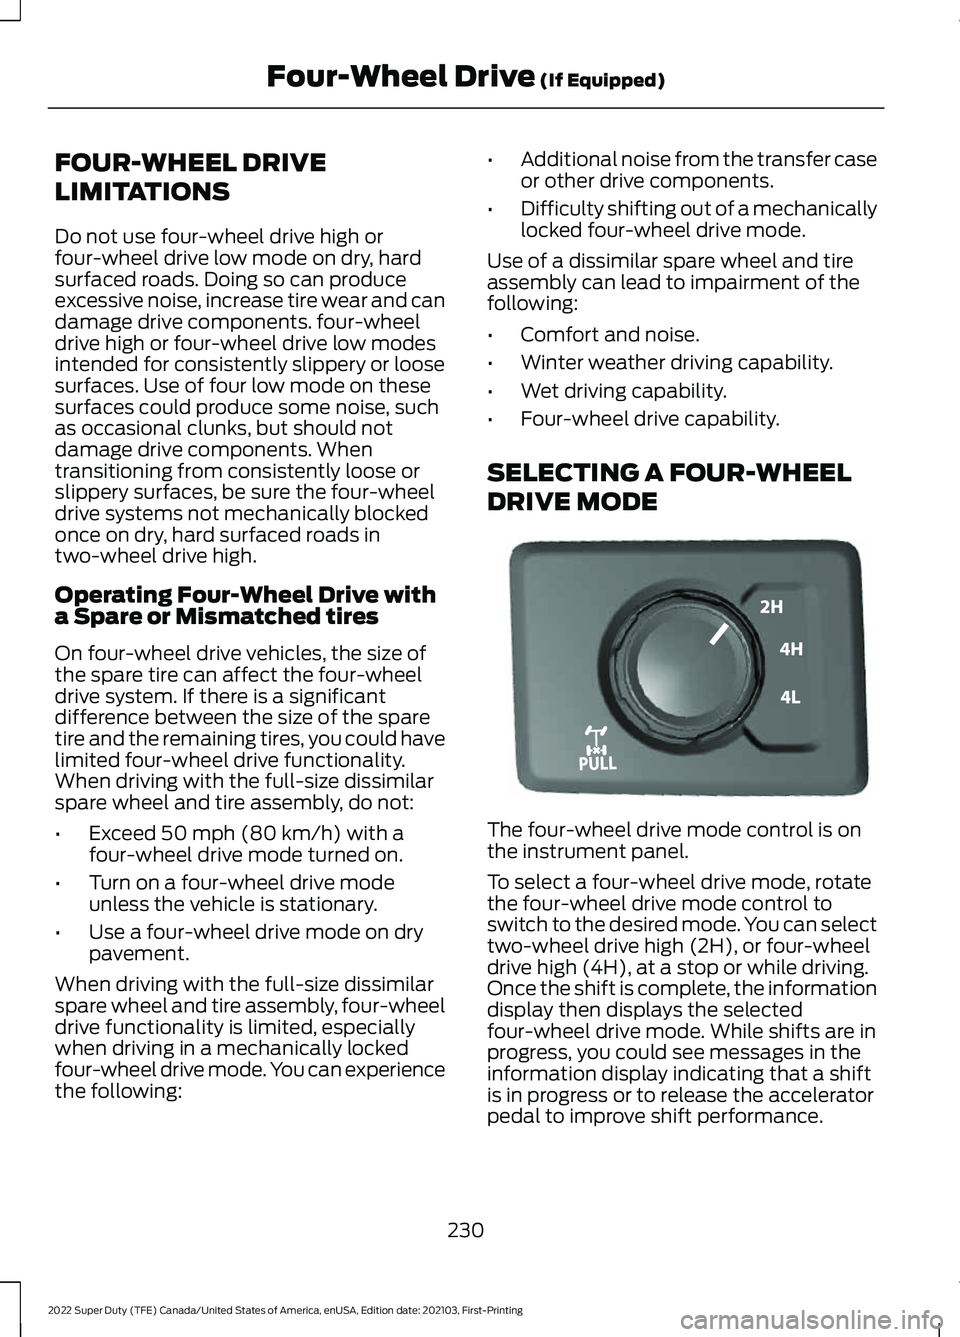
DRIVE MODE The four-wheel drive mode control is on
the instrument panel.
To select a four-wheel drive mode, rotate
the four-wheel drive mode control to
switch to the desired mode. You can select
two-wheel drive high (2H), or four-wheel
drive high (4H), at a stop or while driving.
Once the shift is complete, the information
display then displays the selected
four-wheel drive mode. While shifts are in
progress, you could see messages in the
information display indicating that a shift
is in progress or to release the accelerator
pedal to improve shift performance.
230
2022 Super Duty (TFE) Canada/United States of America, enUSA, Edition date: 202103, First-Printing Four-Wheel Drive
(If Equipped)E227398
Page 246 of 740
APPLYING THE PARKING
BRAKE
WARNING: Apply the parking
brake, shift into park (P), switch the
ignition off and remove the key before
you leave your vehicle. Failure to follow
this instruction could result in personal
injury or death.
Apply the parking brake whenever you park
your vehicle. Press the pedal downward to
set the parking brake. The brake warning
lamp in the instrument cluster will
illuminate and remains illuminated until
you release the parking brake. If you are parking your vehicle on a grade
or with a trailer, press and hold the brake
pedal down, then set the parking brake.
There may be a little vehicle movement as
the parking brake sets to hold the vehicle's
weight. This is normal and should be no
reason for concern. If needed, press and
hold the service brake pedal down, then
try reapplying the parking brake. Chock the
wheels if required. If the parking brake
cannot hold the weight of the vehicle, the
parking brake may need service or the
vehicle may be overloaded.
RELEASING THE PARKING
BRAKE
To release, pull the brake release lever
located at the lower left side of the
instrument panel.
PARKING BRAKE – TROUBLESHOOTING
PARKING BRAKE – INFORMATION MESSAGES Action
Message
The system has detected a fault, contact an authorized dealer as soon as possible.
Check Brake System
The brake fluid level is low, inspect the brake system immedi- ately.
Brake Fluid Level Low
You have set the parking brake and you have driven the vehicle
more than 3.1 mph (5 km/h). If the warning stays on after you
have released the parking brake, contact an authorized dealer.
Park Brake Engaged
243
2022 Super Duty (TFE) Canada/United States of America, enUSA, Edition date: 202103, First-Printing Parking Brake
Page 250 of 740
WHAT IS TRACTION CONTROL
The traction control system helps to avoid
drive wheel spin and loss of traction.
HOW DOES TRACTION
CONTROL WORK
If your vehicle begins to slide, the system
applies the brakes to individual wheels
and, when needed, reduces engine power
at the same time. If the wheels spin when
accelerating on slippery or loose surfaces,
the system reduces engine power in order
to increase traction.
SWITCHING TRACTION
CONTROL ON AND OFF
WARNING: Operating your vehicle
with the traction control disabled could
lead to an increased risk of loss of vehicle
control, vehicle rollover, personal injury
and death. The traction control system turns on each
time you switch the ignition on.
The button for the stability and traction
control system is on the instrument panel. Press and release the button to switch
traction control off. The stability control
system remains fully active, to switch it off,
press and hold the button for a few
seconds, then release.
When you switch traction control off, a
message and an illuminated icon appear
on the instrument cluster.
Press the switch again to turn the traction
control system back on to normal
operation.
If your vehicle is stuck in mud or snow,
switching traction control off may be
beneficial as this allows the wheels to spin.
Your vehicle may have MyKey restrictions
regarding this feature. See
What Is
MyKey (page 77).
TRACTION CONTROL
INDICATOR
Stability and Traction Control
Indicator If the indicator does not
illuminate when you switch the
ignition on, or remains on when
the engine is running, this indicates a
malfunction. Have your vehicle checked
by an authorized dealer as soon as
possible. The traction control off indicator
illuminates when you switch the
traction control system off, or
when an alternative stability control mode
is selected that requires the traction
control off depending on the drive mode
selected.
247
2022 Super Duty (TFE) Canada/United States of America, enUSA, Edition date: 202103, First-Printing Traction ControlE327252 E138639 E130458
Page 257 of 740
WHAT IS HILL DESCENT
CONTROL
Hill descent control allows the driver to set
and maintain vehicle speed while
descending steep slopes in various surface
conditions.
HOW DOES HILL DESCENT
CONTROL WORK
Hill descent control can maintain vehicle
speeds on downhill slopes between
2
– 20 mph (3– 32 km/h). Above 20 mph
(32 km/h), the system remains on but the
descent speed cannot be set or
maintained.
Note: The system does not function below
2 mph (3 km/h)
.
The system requires a cool down interval
after a period of sustained use. Hill descent
control provides a warning in the message
center and a tone sounds when the system
is about to disengage for cooling. At this
time, manually apply the brakes as needed
to maintain descent speed.
Note: The amount of time that the system
can remain active before cooling varies with
conditions.
HILL DESCENT CONTROL
PRECAUTIONS WARNING:
The system does not
control speed in low traction conditions
or extremely steep slopes. The system
is designed to be an aid and does not
relieve you of your responsibility to drive
with due care and attention. Failure to
follow this instruction could result in
personal injury. WARNING:
Hill descent control
cannot control descent in all surface
conditions and circumstances, such as
ice or extremely steep grades. Hill
descent control is a driver assist system
and cannot substitute for good judgment
by the driver. Failure to do so may result
in loss of vehicle control, crash or serious
injury. WARNING:
The system does not
replace the parking brake. When you
leave your vehicle, always apply the
parking brake and shift the transmission
into park (P) for automatic transmission
or first gear for manual transmission.
SWITCHING HILL DESCENT
CONTROL ON AND OFF Press the button on the
instrument panel. A light
illuminates and a tone sounds
when the system is active.
SETTING THE HILL DESCENT
SPEED
To increase or decrease the descent speed,
press the accelerator or brake pedal, or use
the SET
+ and SET - buttons on the
steering wheel. Once you reach the
preferred speed remove your feet from the
pedals.
HILL DESCENT CONTROL
INDICATOR Illuminates when you switch hill
descent control on.
254
2022 Super Duty (TFE) Canada/United States of America, enUSA, Edition date: 202103, First-Printing Hill Descent Control
(If Equipped)E163171 E163171
Page 266 of 740
WHAT IS THE REAR VIEW
CAMERA
The rear view camera provides a video
image of the area behind your vehicle when
the transmission is in reverse (R).
The rear view camera button is
on the instrument panel.
REAR VIEW CAMERA
PRECAUTIONS WARNING: The rear view camera
system is a reverse aid supplement
device that still requires the driver to use
it in conjunction with the interior and
exterior mirrors for maximum coverage. WARNING:
Objects that are close
to either corner of the bumper or under
the bumper, might not be seen on the
screen due to the limited coverage of the
camera system. WARNING:
Reverse your vehicle
slowly. Failure to follow this instruction
could result in the loss of control of your
vehicle, personal injury or death. WARNING:
Use caution when the
tailgate is ajar. If the tailgate is ajar, the
camera is out of position and the video
image could be incorrect. All guide lines
disappear when the tailgate is ajar.
Failure to follow this instruction could
result in personal injury. WARNING:
Use caution when
turning camera features on or off when
the transmission is not in park (P). Make
sure your vehicle is not moving. Note:
When towing, the camera only sees
what you are towing. This might not provide
adequate coverage and you might not see
some objects. In some vehicles, the guide
lines may disappear when you connect the
trailer tow connector.
LOCATING THE REAR VIEW
CAMERA
The rear view camera is on the tailgate. It
provides a video image of the area behind
your vehicle.
263
2022 Super Duty (TFE) Canada/United States of America, enUSA, Edition date: 202103, First-Printing Rear View CameraE332186
Page 271 of 740
The fixed and active guide lines fade in and
out depending on the steering wheel
position. The active guide lines do not
display when the steering wheel position
is straight.
Objects in the red zone are closest to your
vehicle and objects in the green zone are
farther away. Objects get closer to your
vehicle as they move from the green zone
to the yellow or red zones. Use the side
view mirrors and rear view mirror to get
better coverage on both sides and rear of
your vehicle.
Keep Out Zone
The Keep Out Zone is represented by the
yellow dotted lines running parallel to your
vehicle.
360 DEGREE CAMERA
SETTINGS
SWITCHING THE 360 DEGREE
CAMERA ON AND OFF
The 360 degree camera system
button is on the instrument
panel. The front and rear
cameras have multiple screens which
consist of: •
Normal view.
• Normal view with 360.
• Split view.
• Bed camera.
• Auxiliary camera.
• Hitch view.
Note: The rear view camera activates when
you switch into reverse (R). Additional views
are then accessible on the touchscreen.
When in park (P), neutral (N) or drive (D),
the front images display when the button
is pressed. When in reverse (R), only the
rear images display when the button is
pressed.
Note: Not all cameras are available.
Note: The 360 degree camera system turns
off when your vehicle is in motion at low
speed, except when in reverse (R).
SWITCHING THE 360 DEGREE
CAMERA VIEW Press to access the different
camera views.
Front normal view provides an
image of what is directly in front
of your vehicle.
Front split view provides an
extended view of what is in front
of your vehicle.
Normal + 360 degree view
contains the normal camera
view next to a 360 degree
camera view. Rear normal view provides an
image of what is directly behind
your vehicle.
Rear split view provides an
extended view of what is behind
your vehicle.
268
2022 Super Duty (TFE) Canada/United States of America, enUSA, Edition date: 202103, First-Printing 360 Degree Camera (If Equipped)E310341 E332186 E337002 E336516 E336517 E310996 E310967 E310974
Page 342 of 740
WHAT IS TRAILER BACKUP
ASSISTANCE
Trailer backup assistance utilizes the
control knob on the instrument panel to
help you steer a trailer. Turn the control
knob in the direction you want the trailer
to go and the system steers the vehicle.
HOW DOES TRAILER BACKUP
ASSISTANCE WORK
Trailer backup assistance uses a sticker or
sensor attached to the trailer to detect the
trailer angle relative to the towing vehicle
and provides instructions, graphics and
camera views on the touchscreen.
TRAILER BACKUP
ASSISTANCE PRECAUTIONS
WARNING: Driving while distracted
can result in loss of vehicle control, crash
and injury. We strongly recommend that
you use extreme caution when using any
device that may take your focus off the
road. Your primary responsibility is the
safe operation of your vehicle. We
recommend against the use of any
hand-held device while driving and
encourage the use of voice-operated
systems when possible. Make sure you
are aware of all applicable local laws
that may affect the use of electronic
devices while driving. WARNING: This system is an extra
driving aid. It does not replace your
attention and judgment, or the need to
apply the brakes. This system does NOT
automatically brake your vehicle. If you
fail to press the brake pedal when
necessary, you may collide with another
vehicle.
Note: The system is not a substitute for
safe driving practices. Always be aware of
your vehicle and trailer combination, and
the surrounding environment.
Note: The system does not detect or
prevent your vehicle or trailer from making
contact with obstacles in the surrounding
environment.
Note: The front end of your vehicle swings
out when changing the direction of the
trailer.
Note: In certain conditions, the trailer could
turn faster or the trailer angle could increase
more than anticipated. Always monitor the
clearance between the trailer and vehicle
and the surroundings.
SETTING UP THE TRAILER
BACKUP ASSISTANCE FOR A
CONVENTIONAL TRAILER
CONFIGURING THE TRAILER
You must configure a trailer in the system
to use trailer backup assistance. This is a
one-time setup process and the trailer
information is saved in the system for the
next time you use that trailer.
The following illustration shows examples
of conventional trailers on the left-hand
side.
339
2022 Super Duty (TFE) Canada/United States of America, enUSA, Edition date: 202103, First-Printing Trailer Backup Assistance
(If Equipped)
Page 382 of 740
Vehicles Sold in Canada: Getting
Roadside Assistance
To fully assist you should you have a
vehicle concern, Ford Motor Company of
Canada, Limited offers a complimentary
roadside assistance program. This
program is eligible within Canada or the
continental United States.
The service is available 24 hours a day,
seven days a week.
This program is separate from the New
Vehicle Limited Warranty, but the coverage
is concurrent with the powertrain coverage
period of your vehicle. Canadian roadside
coverage and benefits may differ from the
U.S. coverage.
If you require more information, please call
us in Canada at 1-800-665-2006, or visit
our website at www
.f or d . c a .
SWITCHING THE HAZARD
FLASHERS ON AND OFF The hazard flasher button is on
the instrument panel. Press the
button to switch the hazard
flashers on if your vehicle is creating a
safety hazard for other road users.
When you switch the hazard flashers on,
all front and rear direction indicators flash.
Note: The hazard flashers operate when
the ignition is in any position, or if the key is
not in the ignition. The battery loses charge
and could have insufficient power to restart
your vehicle.
Press the button again to switch them off. JUMP STARTING THE VEHICLE
JUMP STARTING PRECAUTIONS WARNING:
Batteries normally
produce explosive gases which can
cause personal injury. Therefore, do not
allow flames, sparks or lighted
substances to come near the battery.
When working near the battery, always
shield your face and protect your eyes.
Always provide correct ventilation. WARNING:
Keep batteries out of
reach of children. Batteries contain
sulfuric acid. Avoid contact with skin,
eyes or clothing. Shield your eyes when
working near the battery to protect
against possible splashing of acid
solution. In case of acid contact with skin
or eyes, flush immediately with water for
a minimum of 15 minutes and get prompt
medical attention. If acid is swallowed,
call a physician immediately. WARNING:
Use only adequately
sized cables with insulated clamps. WARNING:
Make sure that the
cables are clear of any moving parts and
fuel delivery system parts. WARNING: Connect batteries with
only the same nominal voltage. WARNING: If the engine is running
while the hood is open, stay clear of
moving engine components. Failure to
follow this warning could result in serious
personal injury or death.
Do not attempt to push-start an automatic
transmission vehicle. This could cause
transmission damage.
379
2022 Super Duty (TFE) Canada/United States of America, enUSA, Edition date: 202103, First-Printing Crash and Breakdown Information
Page 399 of 740
MAINTENANCE PRECAUTIONS
Service your vehicle regularly to help
maintain its roadworthiness and resale
value. There is a large network of
authorized dealers that are there to help
you with their professional servicing
expertise. We believe that their specially
trained technicians are best qualified to
service your vehicle properly and expertly.
They are supported by a wide range of
highly specialized tools developed
specifically for servicing your vehicle.
If your vehicle requires professional service,
an authorized dealer can provide the
necessary parts and service. Check your
warranty information to find out which
parts and services are covered.
Use only recommended fuels, lubricants,
fluids and service parts conforming to
specifications. See Capacities and
Specifications (page 467).
• Do not work on a hot engine.
• Make sure that nothing gets caught in
moving parts.
• Do not work on a vehicle with the
engine running in an enclosed space,
unless you are sure you have enough
ventilation.
• Keep all open flames and other burning
material, such as cigarettes, away from
the battery and all fuel related parts.
• Set the parking brake, shift the
transmission to park (P) and block the
wheels. OPENING AND CLOSING THE
HOOD
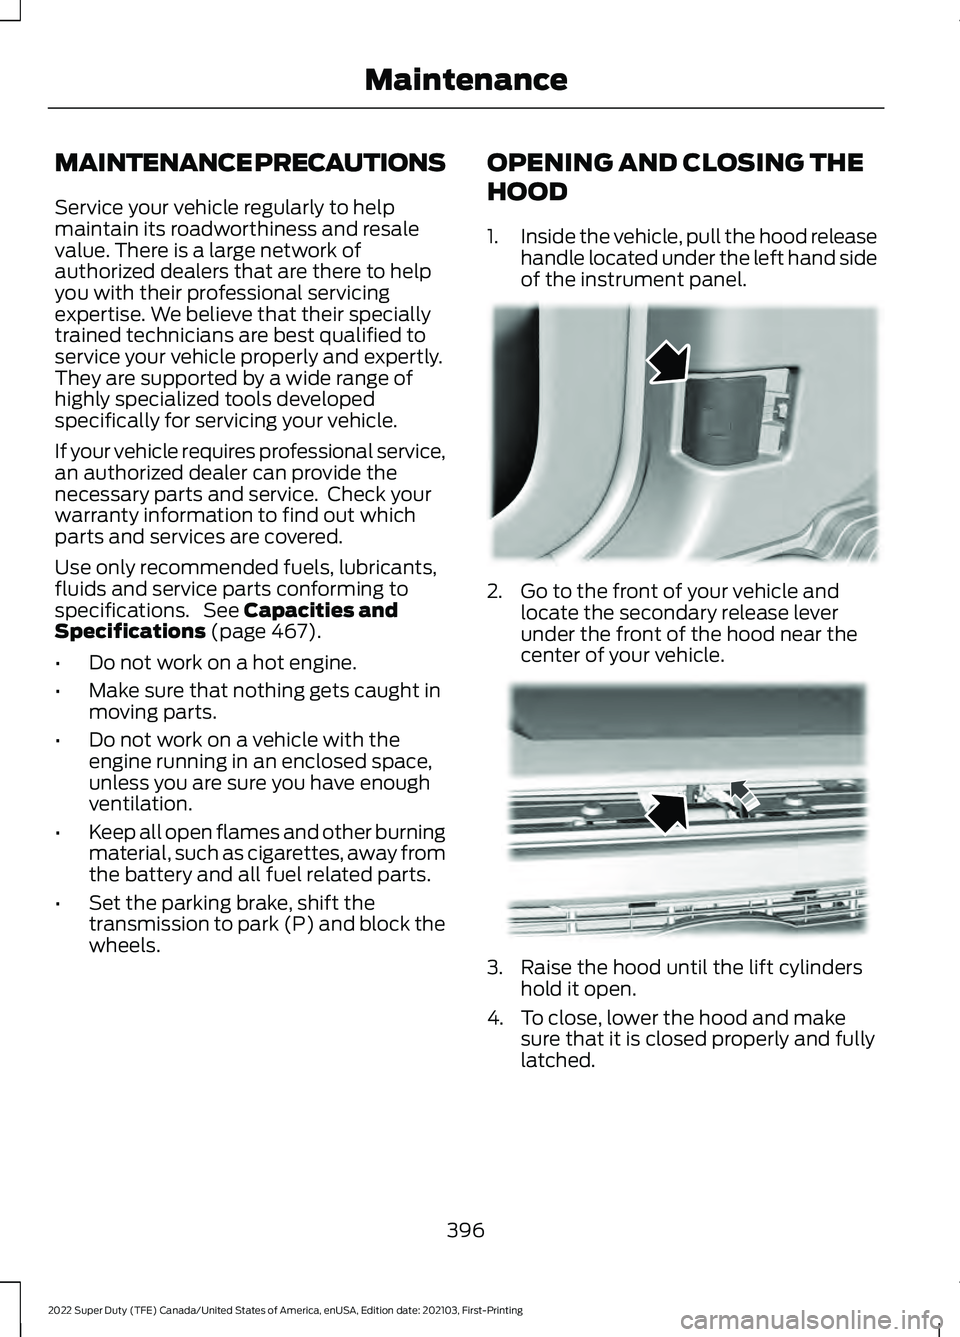
1.
Inside the vehicle, pull the hood release
handle located under the left hand side
of the instrument panel. 2. Go to the front of your vehicle and
locate the secondary release lever
under the front of the hood near the
center of your vehicle. 3. Raise the hood until the lift cylinders
hold it open.
4. To close, lower the hood and make sure that it is closed properly and fully
latched.
396
2022 Super Duty (TFE) Canada/United States of America, enUSA, Edition date: 202103, First-Printing Maintenance E166491 E190266