check engine FORD F-53 2020 Owners Manual
[x] Cancel search | Manufacturer: FORD, Model Year: 2020, Model line: F-53, Model: FORD F-53 2020Pages: 197, PDF Size: 3.04 MB
Page 5 of 197
Cruise Control
What Is Cruise Control
.................................57
Switching Cruise Control On and Off ........................................................................\
...
57
Setting the Cruise Control Speed ............
57
Canceling the Set Speed ............................
57
Resuming the Set Speed ...........................
58
Cruise Control Indicators ............................
58
Using Adaptive Cruise Control .................
58
Driving Aids
Driver Alert .......................................................
65
Lane Keeping System .................................
66
Steering ............................................................
69
Pre-Collision Assist ......................................
70
Load Carrying
Load Limit .........................................................
75
Towing
Towing a Trailer .............................................
80
Recommended Towing Weights ..............
81
Essential Towing Checks ...........................
84
Towing the Vehicle on Four Wheels ......
86
Driving Hints
Reduced Engine Performance ..................
87
Economical Driving .......................................
87
Breaking-In ......................................................
88
Driving Through Water ................................
88
Roadside Emergencies
Roadside Assistance ...................................
90
Hazard Flashers ..............................................
91
Jump Starting the Vehicle ...........................
91
Transporting the Vehicle ............................
93
Customer Assistance
Getting the Services You Need ................
95In California (U.S. Only)
..............................
96
The Better Business Bureau (BBB) Auto Line Program (U.S. Only) .......................
97
Getting Assistance Outside the U.S. and Canada .........................................................
98
Ordering Additional Owner's Literature ........................................................................\
..
99
Reporting Safety Defects (U.S. Only) ........................................................................\
..
99
Reporting Safety Defects (Canada Only) ........................................................................\
100
Fuses
Fuse Specification Chart ...........................
101
Changing a Fuse ..........................................
108
Maintenance
General Information ....................................
110
Under Hood Overview - Commercial Chassis ...........................................................
111
Under Hood Overview - Motorhome Chassis ..........................................................
112
Engine Oil Dipstick ........................................
113
Engine Oil Check ...........................................
113
Oil Change Indicator Reset .......................
114
Changing the Engine Air Filter .................
114
Engine Coolant Check .................................
115
Automatic Transmission Fluid Check ........................................................................\
..
119
Brake Fluid Check .........................................
121
Power Steering Fluid Check .....................
123
Changing the 12V Battery .........................
124
Fuel Filter ........................................................
126
Vehicle Care
General Information ....................................
127
Cleaning the Exterior ...................................
127
Cleaning the Engine ....................................
128
Cleaning the Wheels ..................................
128
Vehicle Storage ............................................
129
2
Motorhome (TY3) Canada/United States of America, enUSA, Edition date: 201910, Second-Printing Table of Contents
Page 9 of 197
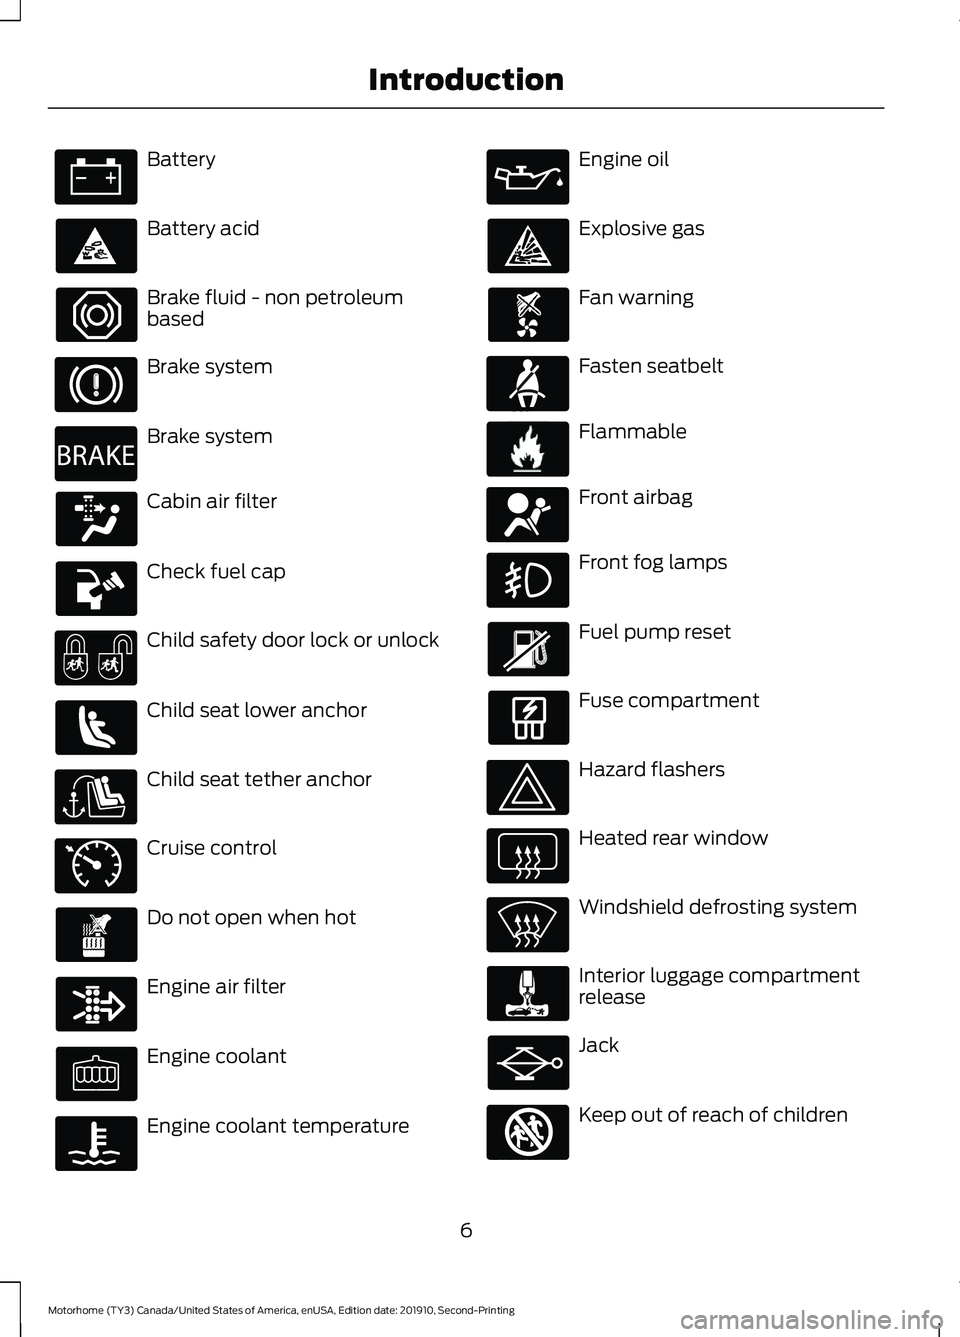
Battery
Battery acid
Brake fluid - non petroleum
based
Brake system
Brake system
Cabin air filter
Check fuel cap
Child safety door lock or unlock
Child seat lower anchor
Child seat tether anchor
Cruise control
Do not open when hot
Engine air filter
Engine coolant
Engine coolant temperature Engine oil
Explosive gas
Fan warning
Fasten seatbelt
Flammable
Front airbag
Front fog lamps
Fuel pump reset
Fuse compartment
Hazard flashers
Heated rear window
Windshield defrosting system
Interior luggage compartment
release
Jack
Keep out of reach of children
6
Motorhome (TY3) Canada/United States of America, enUSA, Edition date: 201910, Second-Printing Introduction E270480 E71340 E71880 E231160 E67017 E161353
Page 26 of 197
Engine Oil Pressure Gauge
Indicates engine oil pressure. The needle
should stay in the normal operating range,
between the L and H marks. If the needle
falls below the normal range, stop your
vehicle, turn off the engine and check the
engine oil level. Add oil if needed. If the oil
level is correct and the gauge displays
incorrectly, have your vehicle checked by
an authorized dealer.
Engine Coolant Temperature
Gauge WARNING:
Do not remove the
coolant reservoir cap when the engine is
on or the cooling system is hot. Wait 10
minutes for the cooling system to cool
down. Cover the coolant reservoir cap
with a thick cloth to prevent the
possibility of scalding and slowly remove
the cap. Failure to follow this instruction
could result in personal injury.
Indicates engine coolant temperature. At
normal operating temperature, the level
indicator is in the normal range. If the
engine coolant temperature exceeds the
normal range, stop your vehicle as soon as
possible, switch off the engine and let the
engine cool.
Fuel Gauge
The fuel gauge indicates about how much
fuel is in the fuel tank.
The arrow adjacent to the fuel pump
symbol indicates on which side of your
vehicle the fuel filler door is located.
Note: The fuel gauge may vary slightly
when your vehicle is moving or on a slope. Low Fuel Reminder
A low fuel level reminder displays and
sounds when the distance to empty
reaches
50 mi (80 km), 25 mi (40 km),
10 mi (20 km) and 0 mi (0 km).
Note: The low fuel reminder can appear at
different fuel gauge positions depending on
fuel economy conditions. This variation is
normal.
Distance to Empty
Indicates the approximate distance your
vehicle can travel on the fuel remaining in
the tank. Changes in driving pattern can
cause the value to not only decrease but
also increase or stay constant for periods
of time.
Configurable Gauge
Transmission Fluid Temperature Gauge
Indicates transmission fluid temperature.
At normal operating temperature, the level
indicator is in the normal range. If the
transmission fluid temperature exceeds
the normal range, stop your vehicle as soon
as possible and verify the airflow is not
restricted by snow or debris blocking
airflow through the grille.
To lower the transmission temperature
into the normal range, alter the severity of
your driving conditions. Operating the
transmission for extended periods with the
gauge in the higher than normal area may
cause internal transmission damage. If the
gauge continues to show high
temperatures, see an authorized dealer.
Voltmeter
Displays electrical system voltage.
23
Motorhome (TY3) Canada/United States of America, enUSA, Edition date: 201910, Second-Printing Instrument Cluster
Page 28 of 197
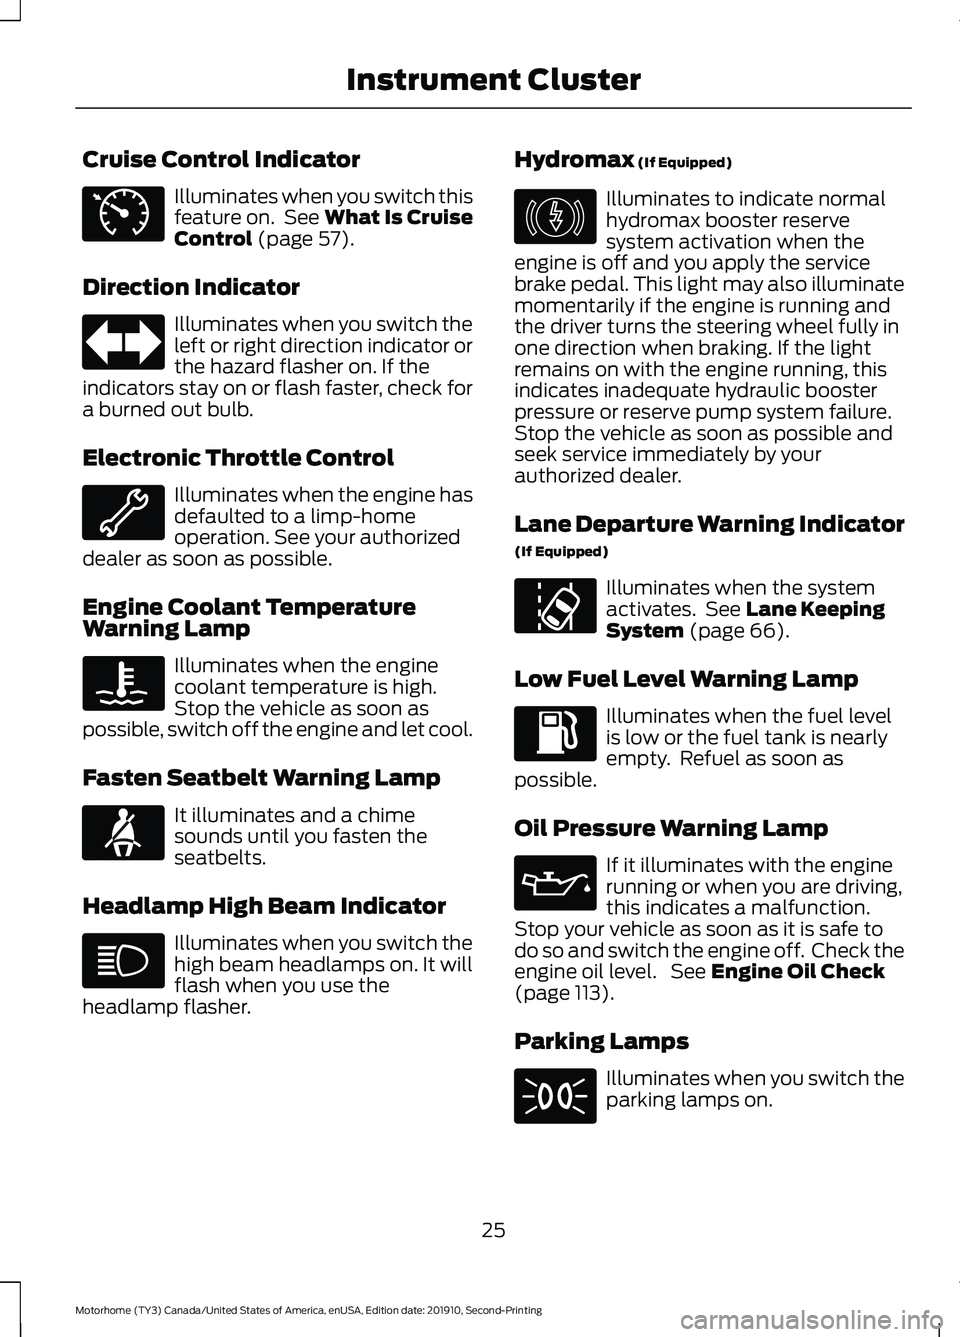
Cruise Control Indicator
Illuminates when you switch this
feature on. See What Is Cruise
Control (page 57).
Direction Indicator Illuminates when you switch the
left or right direction indicator or
the hazard flasher on. If the
indicators stay on or flash faster, check for
a burned out bulb.
Electronic Throttle Control Illuminates when the engine has
defaulted to a limp-home
operation. See your authorized
dealer as soon as possible.
Engine Coolant Temperature
Warning Lamp Illuminates when the engine
coolant temperature is high.
Stop the vehicle as soon as
possible, switch off the engine and let cool.
Fasten Seatbelt Warning Lamp It illuminates and a chime
sounds until you fasten the
seatbelts.
Headlamp High Beam Indicator Illuminates when you switch the
high beam headlamps on. It will
flash when you use the
headlamp flasher. Hydromax
(If Equipped) Illuminates to indicate normal
hydromax booster reserve
system activation when the
engine is off and you apply the service
brake pedal. This light may also illuminate
momentarily if the engine is running and
the driver turns the steering wheel fully in
one direction when braking. If the light
remains on with the engine running, this
indicates inadequate hydraulic booster
pressure or reserve pump system failure.
Stop the vehicle as soon as possible and
seek service immediately by your
authorized dealer.
Lane Departure Warning Indicator
(If Equipped) Illuminates when the system
activates. See
Lane Keeping
System (page 66).
Low Fuel Level Warning Lamp Illuminates when the fuel level
is low or the fuel tank is nearly
empty. Refuel as soon as
possible.
Oil Pressure Warning Lamp If it illuminates with the engine
running or when you are driving,
this indicates a malfunction.
Stop your vehicle as soon as it is safe to
do so and switch the engine off. Check the
engine oil level. See
Engine Oil Check
(page 113).
Parking Lamps Illuminates when you switch the
parking lamps on.
25
Motorhome (TY3) Canada/United States of America, enUSA, Edition date: 201910, Second-Printing Instrument ClusterE71340 E71880 E146190 E173233
Page 29 of 197
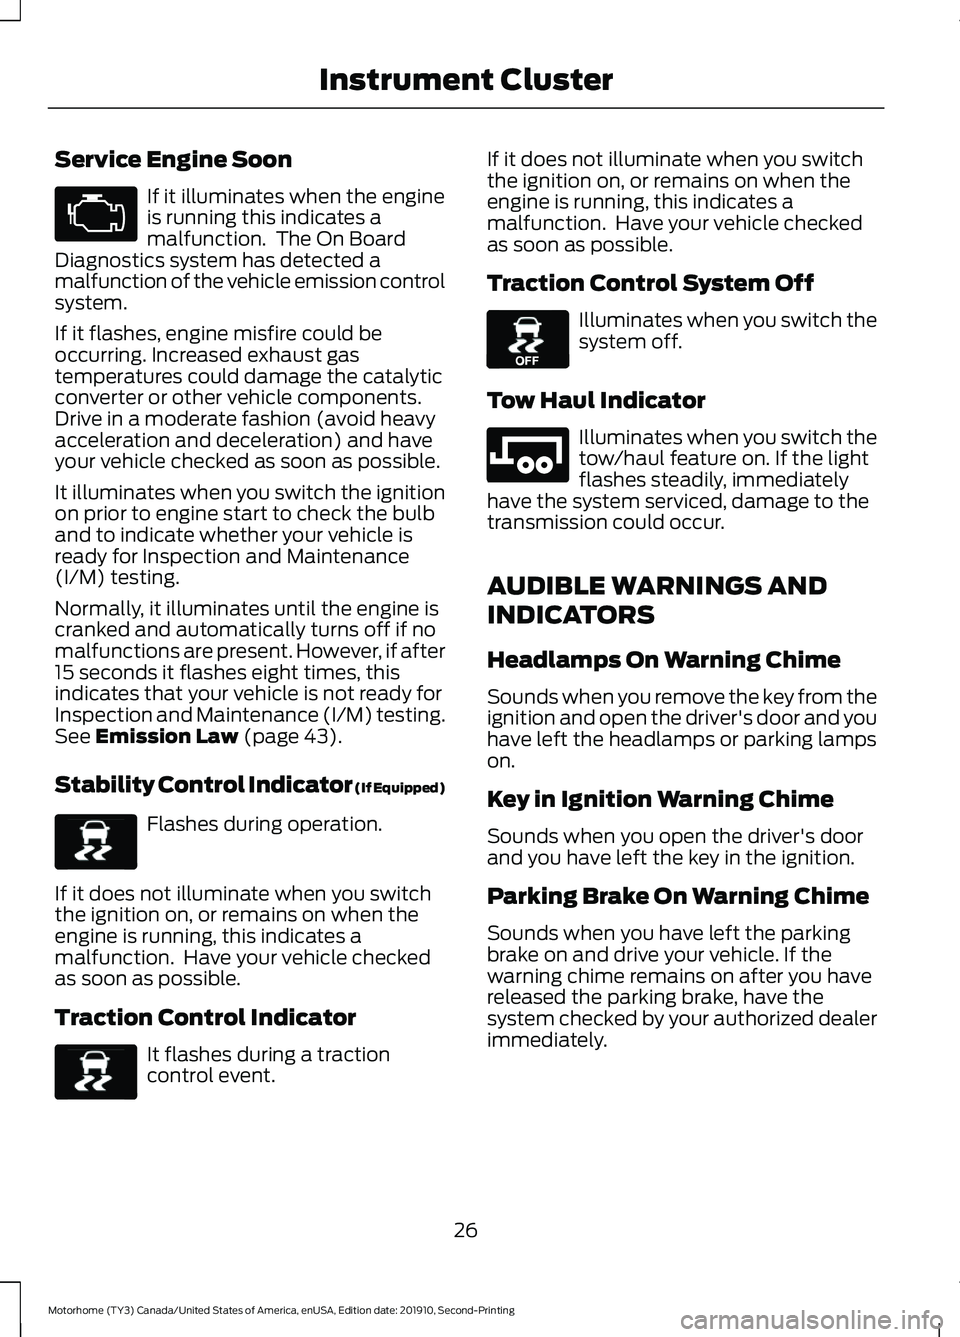
Service Engine Soon
If it illuminates when the engine
is running this indicates a
malfunction. The On Board
Diagnostics system has detected a
malfunction of the vehicle emission control
system.
If it flashes, engine misfire could be
occurring. Increased exhaust gas
temperatures could damage the catalytic
converter or other vehicle components.
Drive in a moderate fashion (avoid heavy
acceleration and deceleration) and have
your vehicle checked as soon as possible.
It illuminates when you switch the ignition
on prior to engine start to check the bulb
and to indicate whether your vehicle is
ready for Inspection and Maintenance
(I/M) testing.
Normally, it illuminates until the engine is
cranked and automatically turns off if no
malfunctions are present. However, if after
15 seconds it flashes eight times, this
indicates that your vehicle is not ready for
Inspection and Maintenance (I/M) testing.
See Emission Law (page 43).
Stability Control Indicator (If Equipped) Flashes during operation.
If it does not illuminate when you switch
the ignition on, or remains on when the
engine is running, this indicates a
malfunction. Have your vehicle checked
as soon as possible.
Traction Control Indicator It flashes during a traction
control event. If it does not illuminate when you switch
the ignition on, or remains on when the
engine is running, this indicates a
malfunction. Have your vehicle checked
as soon as possible.
Traction Control System Off Illuminates when you switch the
system off.
Tow Haul Indicator Illuminates when you switch the
tow/haul feature on. If the light
flashes steadily, immediately
have the system serviced, damage to the
transmission could occur.
AUDIBLE WARNINGS AND
INDICATORS
Headlamps On Warning Chime
Sounds when you remove the key from the
ignition and open the driver's door and you
have left the headlamps or parking lamps
on.
Key in Ignition Warning Chime
Sounds when you open the driver's door
and you have left the key in the ignition.
Parking Brake On Warning Chime
Sounds when you have left the parking
brake on and drive your vehicle. If the
warning chime remains on after you have
released the parking brake, have the
system checked by your authorized dealer
immediately.
26
Motorhome (TY3) Canada/United States of America, enUSA, Edition date: 201910, Second-Printing Instrument Cluster E138639 E138639 E130458 E246592
Page 34 of 197
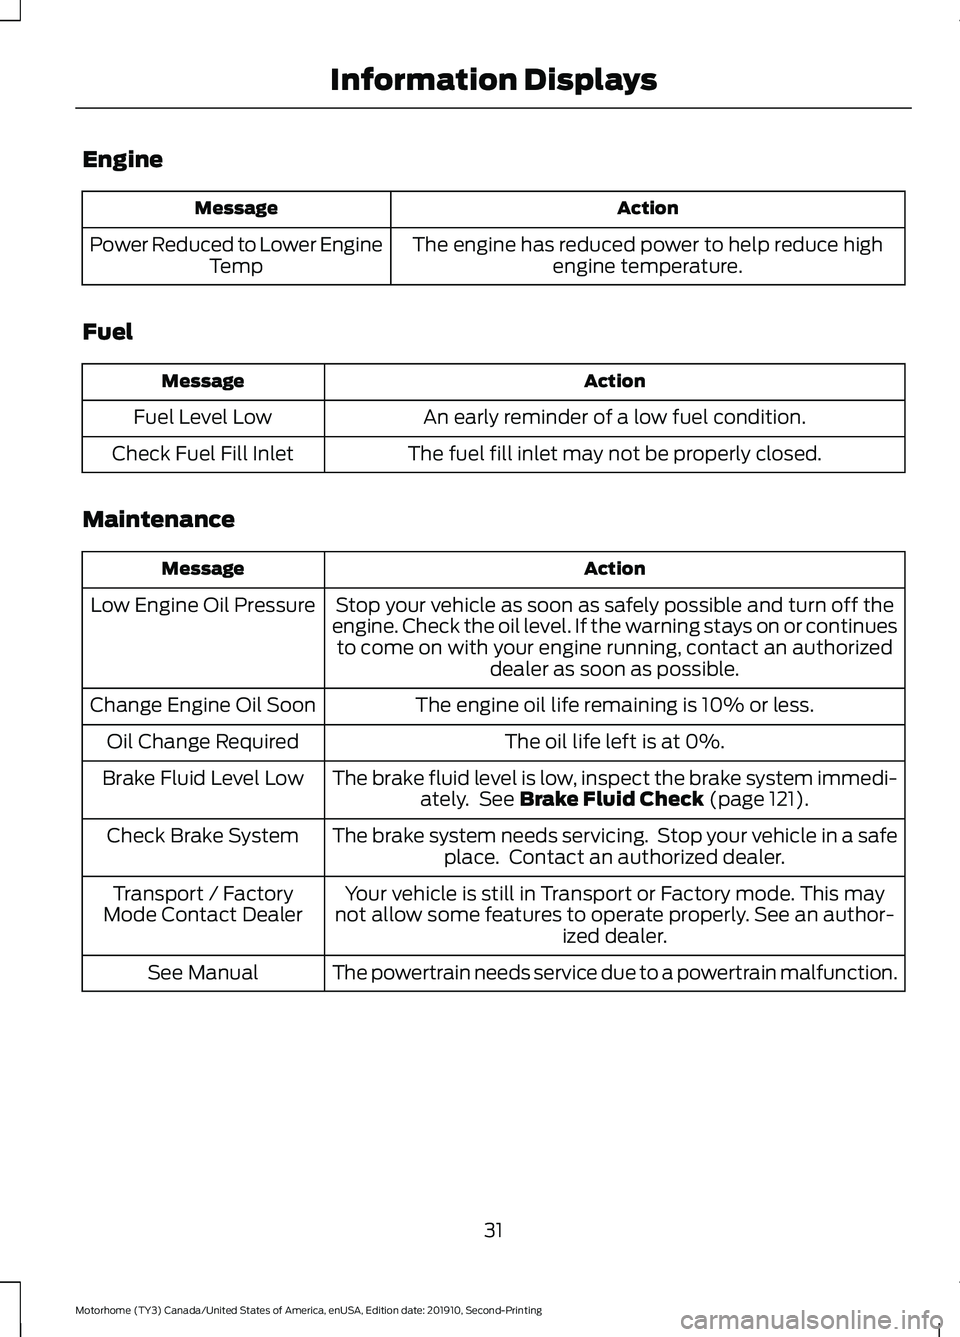
Engine
Action
Message
The engine has reduced power to help reduce highengine temperature.
Power Reduced to Lower Engine
Temp
Fuel Action
Message
An early reminder of a low fuel condition.
Fuel Level Low
The fuel fill inlet may not be properly closed.
Check Fuel Fill Inlet
Maintenance Action
Message
Stop your vehicle as soon as safely possible and turn off the
engine. Check the oil level. If the warning stays on or continues to come on with your engine running, contact an authorized dealer as soon as possible.
Low Engine Oil Pressure
The engine oil life remaining is 10% or less.
Change Engine Oil Soon
The oil life left is at 0%.
Oil Change Required
The brake fluid level is low, inspect the brake system immedi-ately. See Brake Fluid Check (page 121).
Brake Fluid Level Low
The brake system needs servicing. Stop your vehicle in a safeplace. Contact an authorized dealer.
Check Brake System
Your vehicle is still in Transport or Factory mode. This may
not allow some features to operate properly. See an author- ized dealer.
Transport / Factory
Mode Contact Dealer
The powertrain needs service due to a powertrain malfunction.
See Manual
31
Motorhome (TY3) Canada/United States of America, enUSA, Edition date: 201910, Second-Printing Information Displays
Page 37 of 197
GENERAL INFORMATION
WARNING: Extended idling at high
engine speeds can produce very high
temperatures in the engine and exhaust
system, creating the risk of fire or other
damage. WARNING:
Do not park, idle or
drive your vehicle on dry grass or other
dry ground cover. The emission system
heats up the engine compartment and
exhaust system, creating the risk of fire. WARNING: Do not start the engine
in a closed garage or in other enclosed
areas. Exhaust fumes can be toxic.
Always open the garage door before you
start the engine. WARNING:
Exhaust leaks may
result in entry of harmful and potentially
lethal fumes into the passenger
compartment. If you smell exhaust
fumes inside your vehicle, have your
vehicle inspected immediately. Do not
drive if you smell exhaust fumes.
If you disconnect the battery, your vehicle
may exhibit some unusual driving
characteristics for approximately
5 mi
(8 km) after you reconnect it. This is
because the engine management system
must realign itself with the engine. You
can disregard any unusual driving
characteristics during this period.
The powertrain control system meets all
Canadian interference-causing equipment
standard requirements regulating the
impulse electrical field or radio noise.
When you start the engine, avoid pressing
the accelerator pedal before and during
operation. Only use the accelerator pedal
when you have difficulty starting the
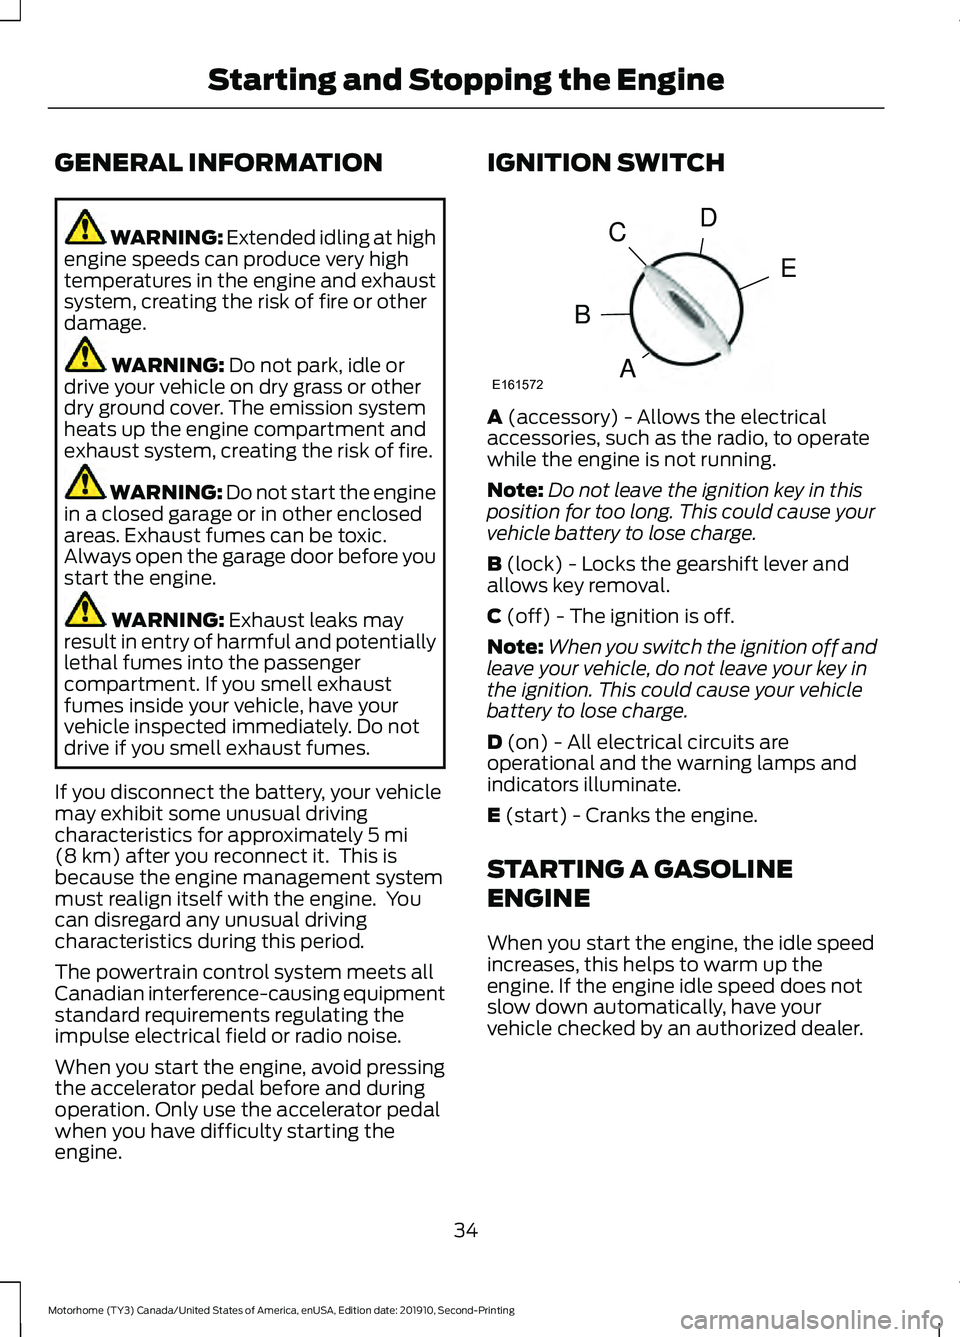
engine. IGNITION SWITCH
A
(accessory) - Allows the electrical
accessories, such as the radio, to operate
while the engine is not running.
Note: Do not leave the ignition key in this
position for too long. This could cause your
vehicle battery to lose charge.
B
(lock) - Locks the gearshift lever and
allows key removal.
C
(off) - The ignition is off.
Note: When you switch the ignition off and
leave your vehicle, do not leave your key in
the ignition. This could cause your vehicle
battery to lose charge.
D
(on) - All electrical circuits are
operational and the warning lamps and
indicators illuminate.
E
(start) - Cranks the engine.
STARTING A GASOLINE
ENGINE
When you start the engine, the idle speed
increases, this helps to warm up the
engine. If the engine idle speed does not
slow down automatically, have your
vehicle checked by an authorized dealer.
34
Motorhome (TY3) Canada/United States of America, enUSA, Edition date: 201910, Second-Printing Starting and Stopping the EngineE161572
D
E
C
B
A
Page 38 of 197
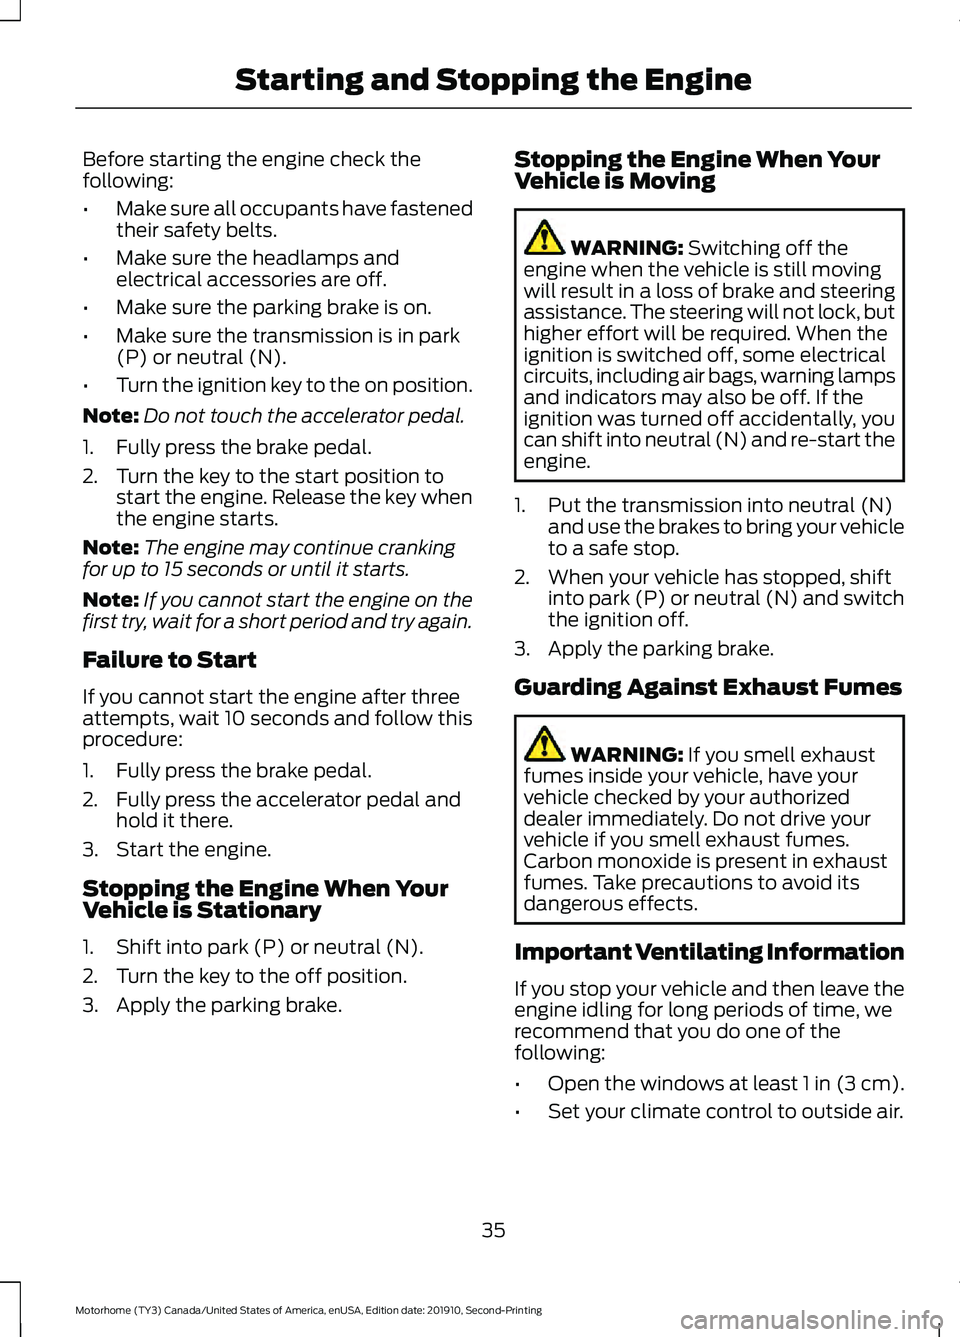
Before starting the engine check the
following:
•
Make sure all occupants have fastened
their safety belts.
• Make sure the headlamps and
electrical accessories are off.
• Make sure the parking brake is on.
• Make sure the transmission is in park
(P) or neutral (N).
• Turn the ignition key to the on position.
Note: Do not touch the accelerator pedal.
1. Fully press the brake pedal.
2. Turn the key to the start position to start the engine. Release the key when
the engine starts.
Note: The engine may continue cranking
for up to 15 seconds or until it starts.
Note: If you cannot start the engine on the
first try, wait for a short period and try again.
Failure to Start
If you cannot start the engine after three
attempts, wait 10 seconds and follow this
procedure:
1. Fully press the brake pedal.
2. Fully press the accelerator pedal and hold it there.
3. Start the engine.
Stopping the Engine When Your
Vehicle is Stationary
1. Shift into park (P) or neutral (N).
2. Turn the key to the off position.
3. Apply the parking brake. Stopping the Engine When Your
Vehicle is Moving WARNING: Switching off the
engine when the vehicle is still moving
will result in a loss of brake and steering
assistance. The steering will not lock, but
higher effort will be required. When the
ignition is switched off, some electrical
circuits, including air bags, warning lamps
and indicators may also be off. If the
ignition was turned off accidentally, you
can shift into neutral (N) and re-start the
engine.
1. Put the transmission into neutral (N) and use the brakes to bring your vehicle
to a safe stop.
2. When your vehicle has stopped, shift into park (P) or neutral (N) and switch
the ignition off.
3. Apply the parking brake.
Guarding Against Exhaust Fumes WARNING:
If you smell exhaust
fumes inside your vehicle, have your
vehicle checked by your authorized
dealer immediately. Do not drive your
vehicle if you smell exhaust fumes.
Carbon monoxide is present in exhaust
fumes. Take precautions to avoid its
dangerous effects.
Important Ventilating Information
If you stop your vehicle and then leave the
engine idling for long periods of time, we
recommend that you do one of the
following:
• Open the windows at least 1 in (3 cm).
• Set your climate control to outside air.
35
Motorhome (TY3) Canada/United States of America, enUSA, Edition date: 201910, Second-Printing Starting and Stopping the Engine
Page 39 of 197
ENGINE BLOCK HEATER (IF
EQUIPPED) WARNING:
Failure to follow engine
block heater instructions could result in
property damage or serious personal
injury. WARNING: Do not use your heater
with ungrounded electrical systems or
two-pronged adapters. There is a risk of
electrical shock. WARNING:
Do not fully close the
hood, or allow it to drop under its own
weight when using the engine block
heater. This could damage the power
cable and may cause an electrical short
resulting in fire, injury and property
damage.
Note: The heater is most effective when
outdoor temperatures are below
0°F
(-18°C).
The heater acts as a starting aid by
warming the engine coolant. This allows
the climate control system to respond
quickly. The equipment includes a heater
element, installed in the engine block and
a wire harness. You can connect the
system to a grounded 120-volt AC
electrical source.
We recommend that you do the following
for a safe and correct operation:
• Use a 16-gauge outdoor extension cord
that is product certified by
Underwriter ’s Laboratory (UL) or
Canadian Standards Association
(CSA). This extension cord must be
suitable for use outdoors, in cold temperatures, and be clearly marked
Suitable for Use with Outdoor
Appliances. Do not use an indoor
extension cord outdoors. This could
result in an electric shock or become a
fire hazard.
• Use as short an extension cord as
possible.
• Do not use multiple extension cords.
• Make sure that when in operation, the
extension cord plug and heater cord
plug connections are free and clear of
water. This could cause an electric
shock or fire.
• If the block heater cord is under the
hood, Do Not remove the wiring from
its original location. Do Not close the
hood on the extension wiring.
• Make sure your vehicle is parked in a
clean area, clear of combustibles.
• Make sure the heater, heater cord and
extension cord are firmly connected.
• Check for heat anywhere in the
electrical hookup once the system has
been operating for approximately 30
minutes.
• Make sure the system is unplugged and
properly stowed before starting and
driving your vehicle. Make sure the
protective cover seals the prongs of the
block heater cord plug when not in use.
• Make sure the heater system is
checked for proper operation before
winter.
Using the Engine Block Heater
Make sure the receptacle terminals are
clean and dry prior to use. Clean them with
a dry cloth if necessary.
36
Motorhome (TY3) Canada/United States of America, enUSA, Edition date: 201910, Second-Printing Starting and Stopping the Engine
Page 44 of 197
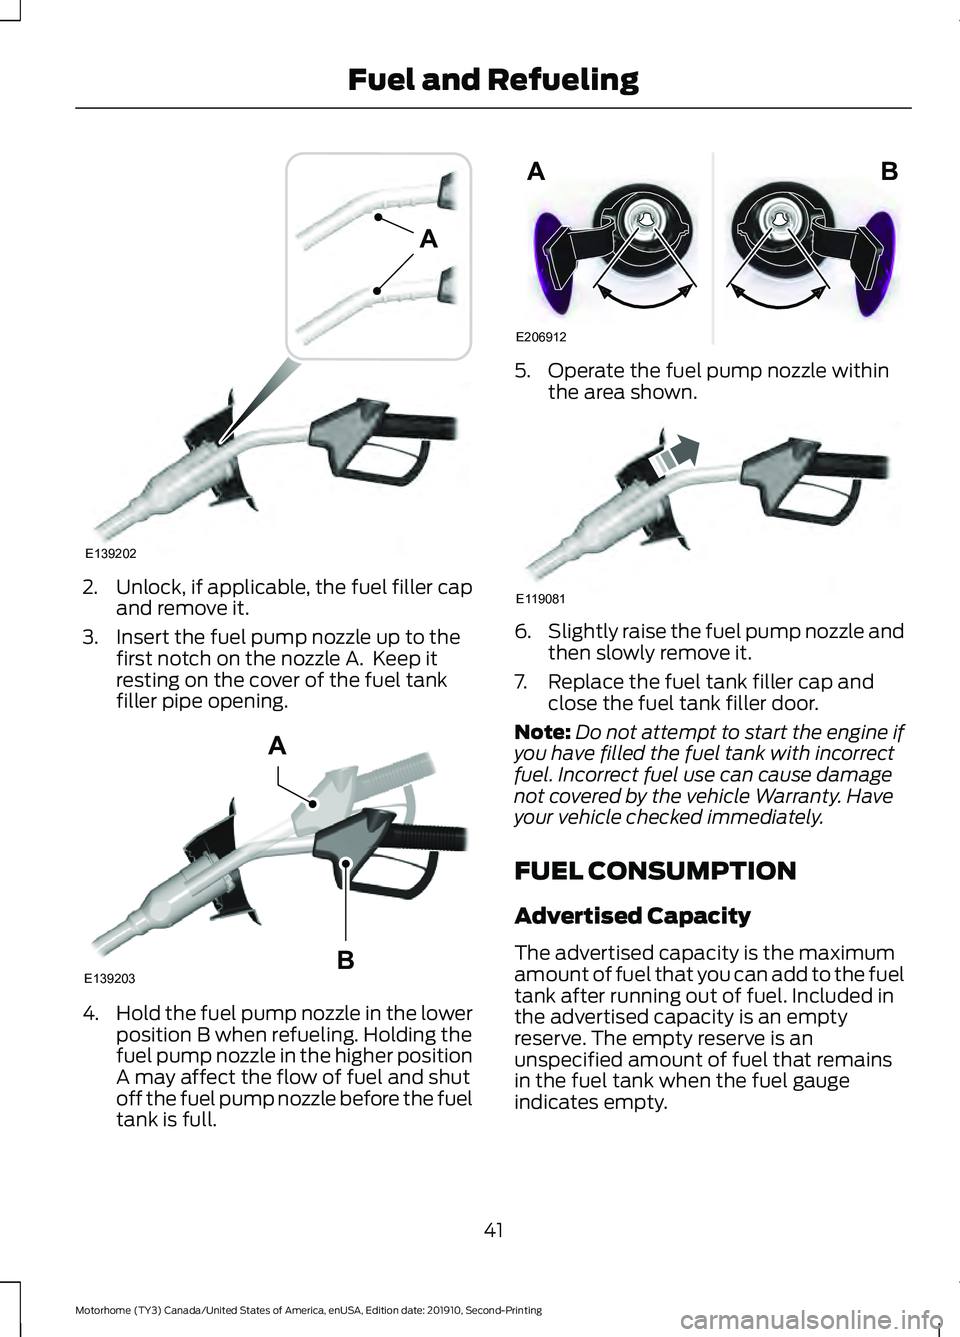
2. Unlock, if applicable, the fuel filler cap
and remove it.
3. Insert the fuel pump nozzle up to the first notch on the nozzle A. Keep it
resting on the cover of the fuel tank
filler pipe opening. 4.
Hold the fuel pump nozzle in the lower
position B when refueling. Holding the
fuel pump nozzle in the higher position
A may affect the flow of fuel and shut
off the fuel pump nozzle before the fuel
tank is full. 5. Operate the fuel pump nozzle within
the area shown. 6.
Slightly raise the fuel pump nozzle and
then slowly remove it.
7. Replace the fuel tank filler cap and close the fuel tank filler door.
Note: Do not attempt to start the engine if
you have filled the fuel tank with incorrect
fuel. Incorrect fuel use can cause damage
not covered by the vehicle Warranty. Have
your vehicle checked immediately.
FUEL CONSUMPTION
Advertised Capacity
The advertised capacity is the maximum
amount of fuel that you can add to the fuel
tank after running out of fuel. Included in
the advertised capacity is an empty
reserve. The empty reserve is an
unspecified amount of fuel that remains
in the fuel tank when the fuel gauge
indicates empty.
41
Motorhome (TY3) Canada/United States of America, enUSA, Edition date: 201910, Second-Printing Fuel and RefuelingE139202
A E139203
A
B E206912
AB E119081