key FORD F-53 2020 Owners Manual
[x] Cancel search | Manufacturer: FORD, Model Year: 2020, Model line: F-53, Model: FORD F-53 2020Pages: 197, PDF Size: 3.04 MB
Page 29 of 197
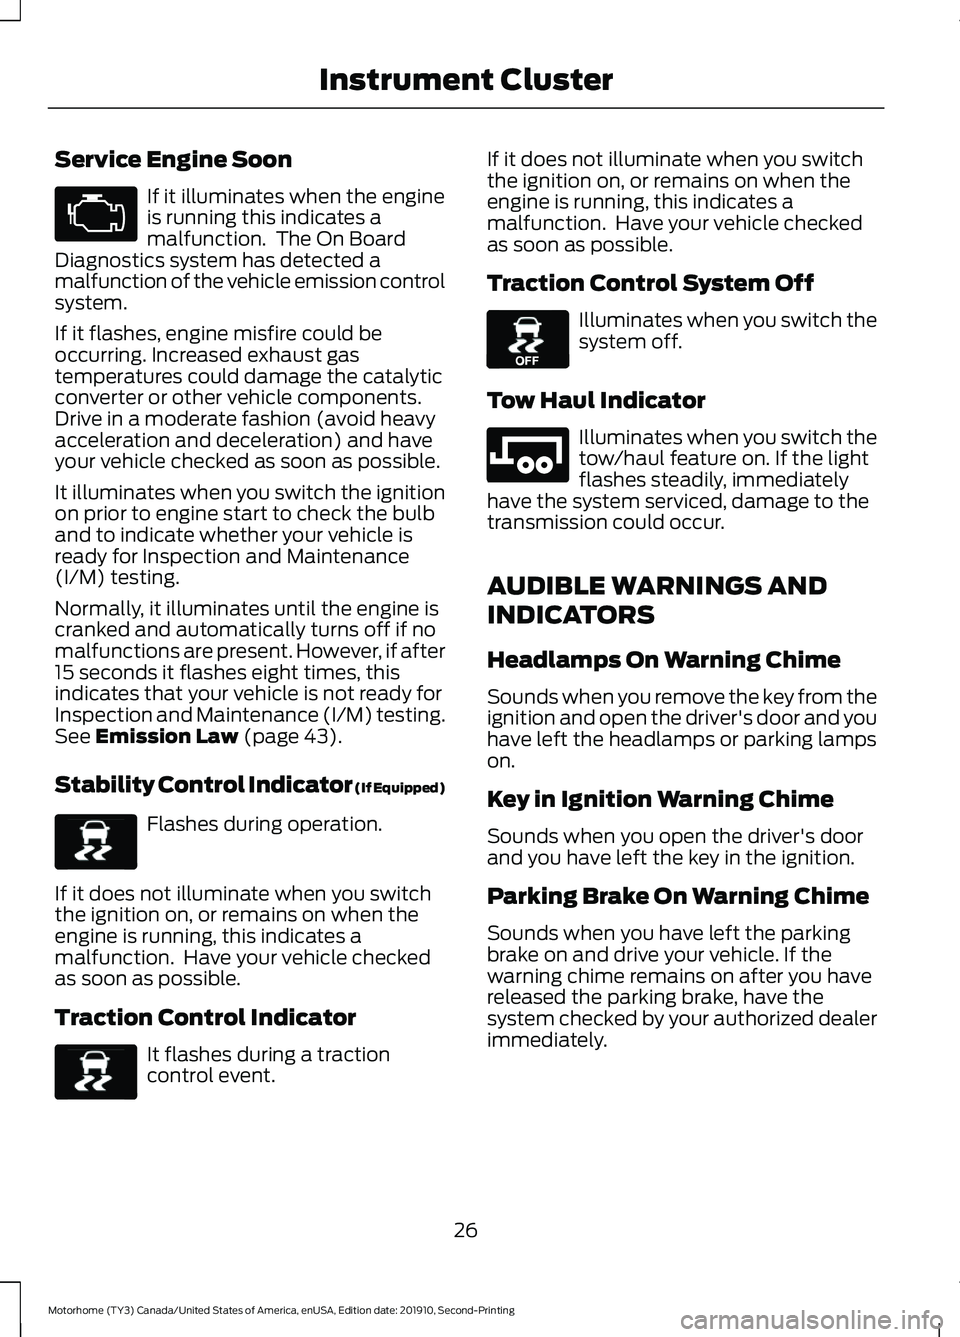
Service Engine Soon
If it illuminates when the engine
is running this indicates a
malfunction. The On Board
Diagnostics system has detected a
malfunction of the vehicle emission control
system.
If it flashes, engine misfire could be
occurring. Increased exhaust gas
temperatures could damage the catalytic
converter or other vehicle components.
Drive in a moderate fashion (avoid heavy
acceleration and deceleration) and have
your vehicle checked as soon as possible.
It illuminates when you switch the ignition
on prior to engine start to check the bulb
and to indicate whether your vehicle is
ready for Inspection and Maintenance
(I/M) testing.
Normally, it illuminates until the engine is
cranked and automatically turns off if no
malfunctions are present. However, if after
15 seconds it flashes eight times, this
indicates that your vehicle is not ready for
Inspection and Maintenance (I/M) testing.
See Emission Law (page 43).
Stability Control Indicator (If Equipped) Flashes during operation.
If it does not illuminate when you switch
the ignition on, or remains on when the
engine is running, this indicates a
malfunction. Have your vehicle checked
as soon as possible.
Traction Control Indicator It flashes during a traction
control event. If it does not illuminate when you switch
the ignition on, or remains on when the
engine is running, this indicates a
malfunction. Have your vehicle checked
as soon as possible.
Traction Control System Off Illuminates when you switch the
system off.
Tow Haul Indicator Illuminates when you switch the
tow/haul feature on. If the light
flashes steadily, immediately
have the system serviced, damage to the
transmission could occur.
AUDIBLE WARNINGS AND
INDICATORS
Headlamps On Warning Chime
Sounds when you remove the key from the
ignition and open the driver's door and you
have left the headlamps or parking lamps
on.
Key in Ignition Warning Chime
Sounds when you open the driver's door
and you have left the key in the ignition.
Parking Brake On Warning Chime
Sounds when you have left the parking
brake on and drive your vehicle. If the
warning chime remains on after you have
released the parking brake, have the
system checked by your authorized dealer
immediately.
26
Motorhome (TY3) Canada/United States of America, enUSA, Edition date: 201910, Second-Printing Instrument Cluster E138639 E138639 E130458 E246592
Page 37 of 197
GENERAL INFORMATION
WARNING: Extended idling at high
engine speeds can produce very high
temperatures in the engine and exhaust
system, creating the risk of fire or other
damage. WARNING:
Do not park, idle or
drive your vehicle on dry grass or other
dry ground cover. The emission system
heats up the engine compartment and
exhaust system, creating the risk of fire. WARNING: Do not start the engine
in a closed garage or in other enclosed
areas. Exhaust fumes can be toxic.
Always open the garage door before you
start the engine. WARNING:
Exhaust leaks may
result in entry of harmful and potentially
lethal fumes into the passenger
compartment. If you smell exhaust
fumes inside your vehicle, have your
vehicle inspected immediately. Do not
drive if you smell exhaust fumes.
If you disconnect the battery, your vehicle
may exhibit some unusual driving
characteristics for approximately
5 mi
(8 km) after you reconnect it. This is
because the engine management system
must realign itself with the engine. You
can disregard any unusual driving
characteristics during this period.
The powertrain control system meets all
Canadian interference-causing equipment
standard requirements regulating the
impulse electrical field or radio noise.
When you start the engine, avoid pressing
the accelerator pedal before and during
operation. Only use the accelerator pedal
when you have difficulty starting the
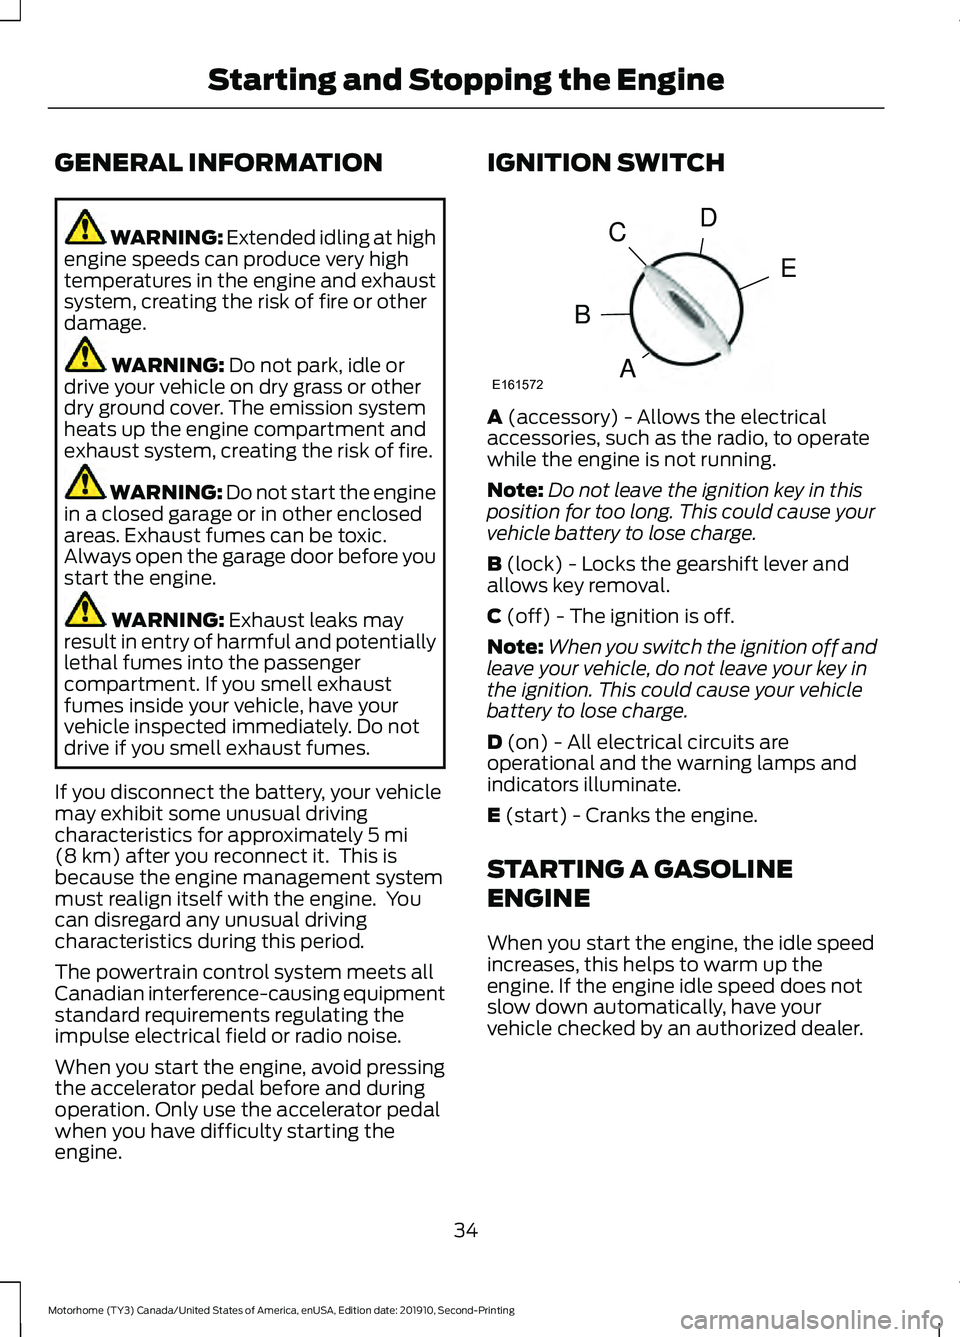
engine. IGNITION SWITCH
A
(accessory) - Allows the electrical
accessories, such as the radio, to operate
while the engine is not running.
Note: Do not leave the ignition key in this
position for too long. This could cause your
vehicle battery to lose charge.
B
(lock) - Locks the gearshift lever and
allows key removal.
C
(off) - The ignition is off.
Note: When you switch the ignition off and
leave your vehicle, do not leave your key in
the ignition. This could cause your vehicle
battery to lose charge.
D
(on) - All electrical circuits are
operational and the warning lamps and
indicators illuminate.
E
(start) - Cranks the engine.
STARTING A GASOLINE
ENGINE
When you start the engine, the idle speed
increases, this helps to warm up the
engine. If the engine idle speed does not
slow down automatically, have your
vehicle checked by an authorized dealer.
34
Motorhome (TY3) Canada/United States of America, enUSA, Edition date: 201910, Second-Printing Starting and Stopping the EngineE161572
D
E
C
B
A
Page 38 of 197
Before starting the engine check the
following:
•
Make sure all occupants have fastened
their safety belts.
• Make sure the headlamps and
electrical accessories are off.
• Make sure the parking brake is on.
• Make sure the transmission is in park
(P) or neutral (N).
• Turn the ignition key to the on position.
Note: Do not touch the accelerator pedal.
1. Fully press the brake pedal.
2. Turn the key to the start position to start the engine. Release the key when
the engine starts.
Note: The engine may continue cranking
for up to 15 seconds or until it starts.
Note: If you cannot start the engine on the
first try, wait for a short period and try again.
Failure to Start
If you cannot start the engine after three
attempts, wait 10 seconds and follow this
procedure:
1. Fully press the brake pedal.
2. Fully press the accelerator pedal and hold it there.
3. Start the engine.
Stopping the Engine When Your
Vehicle is Stationary
1. Shift into park (P) or neutral (N).
2. Turn the key to the off position.
3. Apply the parking brake. Stopping the Engine When Your
Vehicle is Moving WARNING: Switching off the
engine when the vehicle is still moving
will result in a loss of brake and steering
assistance. The steering will not lock, but
higher effort will be required. When the
ignition is switched off, some electrical
circuits, including air bags, warning lamps
and indicators may also be off. If the
ignition was turned off accidentally, you
can shift into neutral (N) and re-start the
engine.
1. Put the transmission into neutral (N) and use the brakes to bring your vehicle
to a safe stop.
2. When your vehicle has stopped, shift into park (P) or neutral (N) and switch
the ignition off.
3. Apply the parking brake.
Guarding Against Exhaust Fumes WARNING:
If you smell exhaust
fumes inside your vehicle, have your
vehicle checked by your authorized
dealer immediately. Do not drive your
vehicle if you smell exhaust fumes.
Carbon monoxide is present in exhaust
fumes. Take precautions to avoid its
dangerous effects.
Important Ventilating Information
If you stop your vehicle and then leave the
engine idling for long periods of time, we
recommend that you do one of the
following:
• Open the windows at least 1 in (3 cm).
• Set your climate control to outside air.
35
Motorhome (TY3) Canada/United States of America, enUSA, Edition date: 201910, Second-Printing Starting and Stopping the Engine
Page 42 of 197
Some fuel stations, particularly those in
high altitude areas, offer fuels posted as
regular unleaded gasoline with an octane
rating below 87. The use of these fuels
could result in engine damage that will not
be covered by the vehicle warranty.
For best overall vehicle and engine
performance, premium fuel with an octane
rating of 91 or higher is recommended. The
performance gained by using premium fuel
is most noticeable in hot weather as well
as other conditions, for example when
towing a trailer. See Towing (page 80).
Do not be concerned if the engine
sometimes knocks lightly. However, if the
engine knocks heavily while using fuel with
the recommended octane rating, contact
an authorized dealer to prevent any engine
damage.
We recommend Top Tier detergent
gasolines, where available to help minimize
engine deposits and maintain optimal
vehicle and engine performance. For
additional information, refer to
www.toptiergas.com.
Note: Use of any fuel for which the vehicle
was not designed can impair the emission
control system, cause loss of vehicle
performance, and cause damage to the
engine which may not be covered by the
vehicle Warranty.
Do not use:
• Diesel fuel.
• Fuels containing kerosene or paraffin.
• Fuel containing more than 15% ethanol
or E85 fuel.
• Fuels containing methanol.
• Fuels containing metallic-based
additives, including manganese-based
compounds. •
Fuels containing the octane booster
additive, methylcyclopentadienyl
manganese tricarbonyl (MMT).
• Leaded fuel, using leaded fuel is
prohibited by law.
The use of fuels with metallic compounds
such as methylcyclopentadienyl
manganese tricarbonyl (commonly known
as MMT), which is a manganese-based
fuel additive, will impair engine
performance and affect the emission
control system.
RUNNING OUT OF FUEL WARNING:
Flow of fuel through a
fuel pump nozzle can produce static
electricity. This can cause a fire if you are
filling an ungrounded fuel container.
Avoid running out of fuel because this
situation may have an adverse effect on
engine components.
If you have run out of fuel:
• You may need to cycle the ignition from
off to on several times after refueling
to allow the fuel system to pump the
fuel from the tank to the engine. On
restarting, cranking time will take a few
seconds longer than normal. With
keyless ignition, just start the engine.
Crank time will be longer than usual.
• Normally, adding
1 gal (4 L) of fuel is
enough to restart the engine. If the
vehicle is out of fuel and on a steep
grade, more than
1 gal (4 L) may be
required.
39
Motorhome (TY3) Canada/United States of America, enUSA, Edition date: 201910, Second-Printing Fuel and Refueling
Page 49 of 197
Readiness for Inspection and
Maintenance (I/M) Testing
Some state and provincial and local
governments may have
Inspection/Maintenance (I/M) programs
to inspect the emission control equipment
on your vehicle. Failure to pass this
inspection could prevent you from getting
a vehicle registration.
If the service engine soon
indicator is on or the bulb does
not work, your vehicle may need
service. See On-Board Diagnostics.
Your vehicle may not pass the I/M test if
the service engine soon indicator is on or
not working properly, for example, the bulb
does not work, or if the OBD-II system has
determined that some of the emission
control systems have not been properly
checked. In this case, the vehicle is not
ready for I/M testing.
If you have just serviced the vehicle ’s
engine or transmission or the battery has
recently run down or you have replaced it,
the OBD-II system may indicate that the
vehicle is not ready for I/M testing. To
determine if the vehicle is ready for I/M
testing, turn the ignition key to the on
position for 15 seconds without cranking
the engine. If the service engine soon
indicator blinks eight times, it means that
the vehicle is not ready for I/M testing; if
the service engine soon indicator stays on
solid, it means that your vehicle is ready
for I/M testing.
The OBD-II system checks the emission
control system during normal driving. A
complete check may take several days.
If the vehicle is not ready for I/M testing,
you can perform the following driving cycle
consisting of mixed city and highway
driving: 1. 15 minutes of steady driving on an
expressway or highway followed by 20
minutes of stop-and-go driving with at
least four 30-second idle periods.
2. Allow your vehicle to sit for at least eight hours with the ignition off. Then,
start the vehicle and complete the
above driving cycle. The vehicle must
warm up to its normal operating
temperature. Once started, do not turn
off the vehicle until the above driving
cycle is complete.
If the vehicle is still not ready for I/M
testing, you need to repeat the above
driving cycle.
46
Motorhome (TY3) Canada/United States of America, enUSA, Edition date: 201910, Second-Printing Engine Emission Control
Page 50 of 197
AUTOMATIC TRANSMISSION
WARNING: Apply the parking
brake, shift into park (P), switch the
ignition off and remove the key before
you leave your vehicle. Failure to follow
this instruction could result in personal
injury or death. WARNING:
Do not apply the brake
pedal and accelerator pedal
simultaneously. Applying both pedals
simultaneously for more than a few
seconds will limit engine performance,
which may result in difficulty maintaining
speed in traffic and could lead to serious
injury.
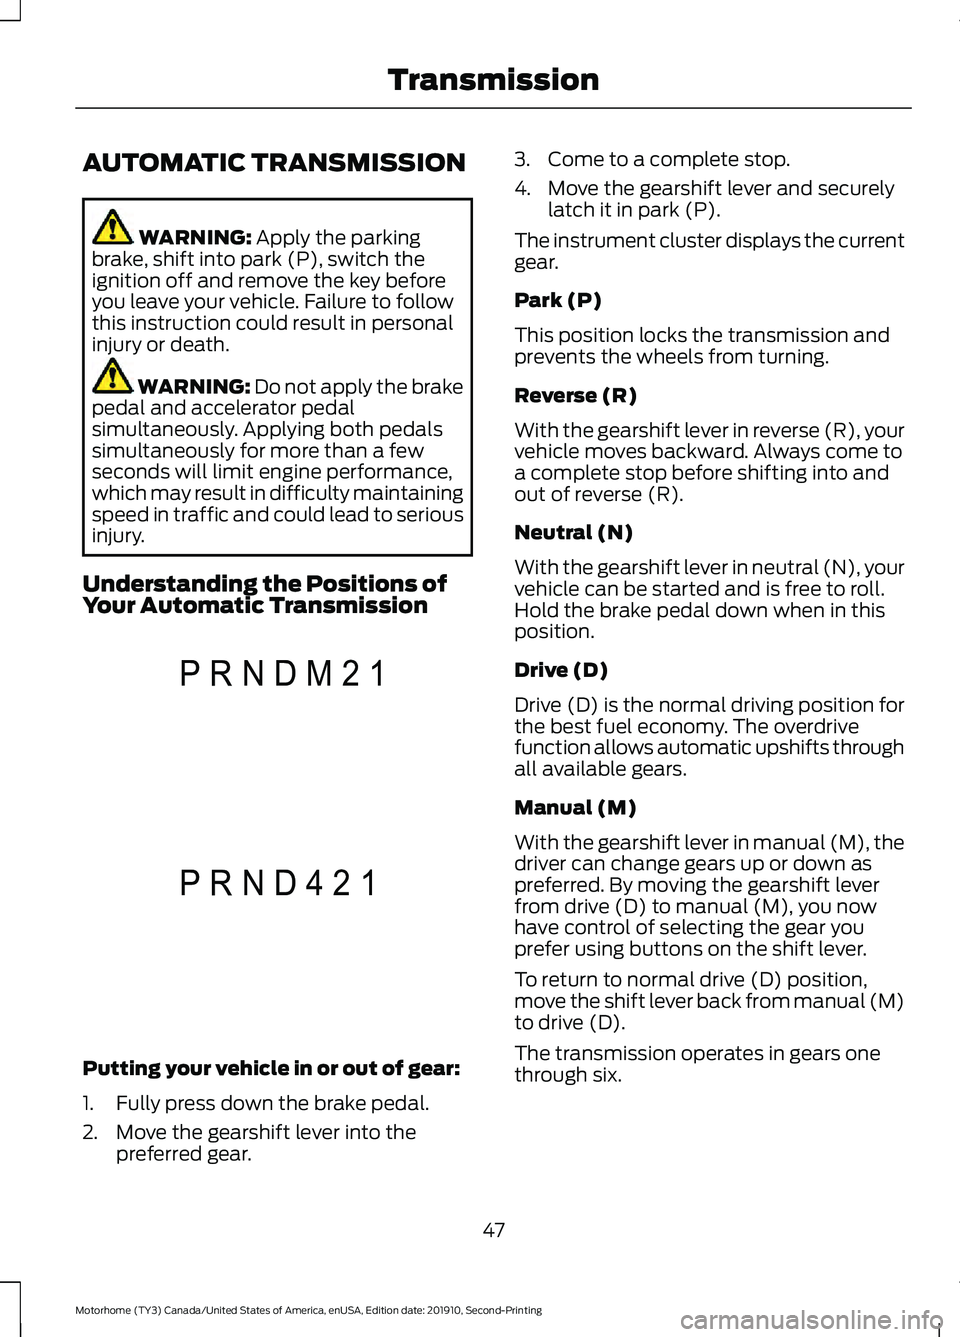
Understanding the Positions of
Your Automatic Transmission Putting your vehicle in or out of gear:
1. Fully press down the brake pedal.
2. Move the gearshift lever into the
preferred gear. 3. Come to a complete stop.
4. Move the gearshift lever and securely
latch it in park (P).
The instrument cluster displays the current
gear.
Park (P)
This position locks the transmission and
prevents the wheels from turning.
Reverse (R)
With the gearshift lever in reverse (R), your
vehicle moves backward. Always come to
a complete stop before shifting into and
out of reverse (R).
Neutral (N)
With the gearshift lever in neutral (N), your
vehicle can be started and is free to roll.
Hold the brake pedal down when in this
position.
Drive (D)
Drive (D) is the normal driving position for
the best fuel economy. The overdrive
function allows automatic upshifts through
all available gears.
Manual (M)
With the gearshift lever in manual (M), the
driver can change gears up or down as
preferred. By moving the gearshift lever
from drive (D) to manual (M), you now
have control of selecting the gear you
prefer using buttons on the shift lever.
To return to normal drive (D) position,
move the shift lever back from manual (M)
to drive (D).
The transmission operates in gears one
through six.
47
Motorhome (TY3) Canada/United States of America, enUSA, Edition date: 201910, Second-Printing TransmissionP R N D M 2 1E307627 P R N D 4 2 1E307626
Page 52 of 197
With the gearshift lever in drive (D), press
the – button to active PRS. The instrument
cluster indicates the available and selected
gears.
All available gears display with the current
gear indicated. Press the – button again to
lock out gears beginning with the highest
gear. Example: press the – button twice to
lock out 6th and 5th gears. Only the
available gears display, and the
transmission automatically shifts between
the available gears. Press the + button to
unlock gears to allow the transmission to
shift to higher gears. The transmission
shifts within the gear range you select.
Automatic Transmission Adaptive
Learning
This feature may increase durability and
provide consistent shift feel over the life
of your vehicle. A new vehicle or
transmission may have firm shifts, soft
shifts, or both. This is normal and does not
affect function or durability of the
transmission. Over time, the adaptive
learning process fully updates transmission
operation.
Brake-Shift Interlock
WARNING: Do not drive your
vehicle until you verify that the
stoplamps are working. WARNING:
When doing this
procedure, you need to take the
transmission out of park (P) which
means your vehicle can roll freely. To
avoid unwanted vehicle movement,
always fully apply the parking brake prior
to doing this procedure. Use wheels
chocks if appropriate. WARNING:
If the parking brake is
fully released, but the brake warning
lamp remains illuminated, the brakes
may not be working properly. Have your
vehicle checked as soon as possible.
Your vehicle has a brake-shift interlock
feature that prevents the gearshift lever
from moving from park (P) when the
ignition is in the 3 (on) position and the
brake pedal is not pressed.
If you cannot move the gearshift lever out
of park (P) position with the ignition in the
3 (on) position and the brake pedal
pressed, a malfunction may have occurred.
It is possible that a fuse has blown or your
vehicle ’s brake lamps are not operating
properly.
See Fuse Specification Chart
(page 101).
If the fuse is not blown and the brake
lamps are working properly, the following
procedure allows you to move the gearshift
lever from park (P):
1. Apply the parking brake. Switch the ignition key to 1 (off), then remove the
key.
2. Move the steering column to the full down and full rearward position,
toward the driver seat.
3. Remove the gearshift lever boot.
4. Place your fingers into the hole where you removed the gearshift lever boot
and pull the top half of the shroud up
and forward to separate it from the
lower half of the shroud. There is a
hinge at the forward edge of the top of
the shroud. Roll the top half of the
shroud upward on the hinge point, then
pull straight rearward toward the driver
seat to remove.
5. Remove the top half of the shroud.
49
Motorhome (TY3) Canada/United States of America, enUSA, Edition date: 201910, Second-Printing Transmission
Page 55 of 197
•
You take corners too fast.
• The road surface is poor.
Note: If the system activates, the brake
pedal may pulse and may travel further.
Maintain pressure on the brake pedal. You
may also hear a noise from the system. This
is normal.
PARKING BRAKE WARNING: Apply the parking
brake, shift into park (P), switch the
ignition off and remove the key before
you leave your vehicle. Failure to follow
this instruction could result in personal
injury or death.
Apply the parking brake whenever you park
your vehicle.
• For vehicles with a foot operated
parking brake, press the pedal down.
• For vehicles with a hand operated
parking brake, pull the parking brake
lever up. It illuminates when you switch
the ignition on and apply the
parking brake. It also illuminates
momentarily when you switch
the ignition on to confirm the
lamp is functional. If it does not
illuminate when you switch the ignition on
or begins to flash at any time, have the
system checked by an authorized dealer.
If it illuminates when your vehicle is
moving, make sure you disengage the
parking brake.
If the parking brake is disengaged, this
indicates a low brake fluid level or a brake
system fault. Have your vehicle checked
as soon as possible. To release the parking brake:
•
For vehicles with a foot operated
parking brake, pull the parking brake
release lever.
• For vehicles with a hand operated
parking brake, push the parking brake
lever down.
HILL START ASSIST WARNING: The system does not
replace the parking brake. When you
leave your vehicle, always apply the
parking brake. WARNING:
You must remain in
your vehicle when the system turns on.
At all times, you are responsible for
controlling your vehicle, supervising the
system and intervening, if required.
Failure to take care may result in the loss
of control of your vehicle, serious
personal injury or death. WARNING:
The system will turn
off if a malfunction is apparent or if you
rev the engine excessively. Failure to take
care may result in the loss of control of
your vehicle, serious personal injury or
death.
The system makes it easier to pull away
when your vehicle is on a slope without the
need to use the parking brake.
When the system is active, your vehicle
remains stationary on the slope for two to
three seconds after you release the brake
pedal. This allows time to move your foot
from the brake to the accelerator pedal.
The system releases the brakes
automatically once the engine has
52
Motorhome (TY3) Canada/United States of America, enUSA, Edition date: 201910, Second-Printing BrakesE270480
Page 68 of 197
DRIVER ALERT (IF EQUIPPED)
WARNING: You are responsible for
controlling your vehicle at all times. The
system is designed to be an aid and does
not relieve you of your responsibility to
drive with due care and attention. Failure
to follow this instruction could result in
the loss of control of your vehicle,
personal injury or death. WARNING:
The system may not
function if the sensor is blocked. WARNING:
Take regular rest
breaks if you feel tired. Do not wait for
the system to warn you. WARNING:
Certain driving styles
may result in the system warning you
even if you are not feeling tired. WARNING:
In cold and severe
weather conditions the system may not
function. Rain, snow and spray can all
limit sensor performance. WARNING:
The system will not
operate if the sensor cannot track the
road lane markings. WARNING:
If damage occurs in the
immediate area surrounding the sensor,
have your vehicle checked as soon as
possible. WARNING:
The system may not
correctly operate if your vehicle is fitted
with a suspension kit not approved by
us.
Note: Keep the windshield free from
obstructions. For example, bird droppings,
insects and snow or ice. Note:
If you have a blocked camera or
damaged windshield, the system may not
function.
Note: The system remembers the last
setting when you start your vehicle, unless
it detects a MyKey ™.
Note: If enabled in the menu, the system
activates at speeds above
40 mph
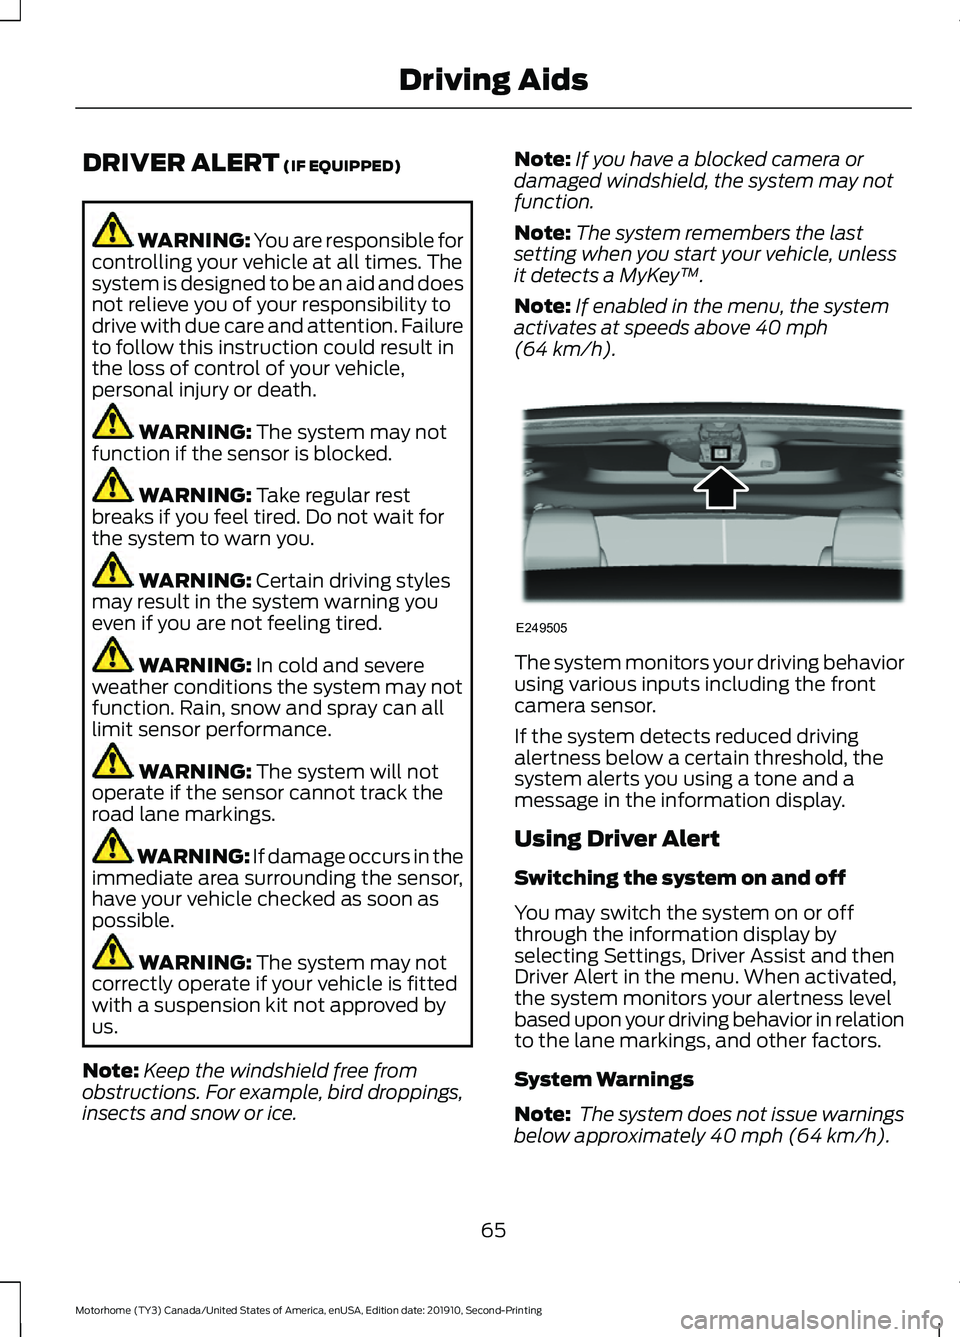
(64 km/h). The system monitors your driving behavior
using various inputs including the front
camera sensor.
If the system detects reduced driving
alertness below a certain threshold, the
system alerts you using a tone and a
message in the information display.
Using Driver Alert
Switching the system on and off
You may switch the system on or off
through the information display by
selecting Settings, Driver Assist and then
Driver Alert in the menu. When activated,
the system monitors your alertness level
based upon your driving behavior in relation
to the lane markings, and other factors.
System Warnings
Note:
The system does not issue warnings
below approximately
40 mph (64 km/h).
65
Motorhome (TY3) Canada/United States of America, enUSA, Edition date: 201910, Second-Printing Driving AidsE249505
Page 70 of 197
When you switch the system on and it
detects an unintentional drift out of your
lane is likely to occur, the system notifies
or assists you to stay in your lane through
the steering system and information
display. The system provides a warning by
an audible tone.
Switching the System On and Off
Note:
The system on or off setting is stored
until it is manually changed, unless a MyKey
is detected. If the system detects a MyKey,
it defaults to on and the mode is set to alert.
Note: If a MyKey is detected, pressing the
button does not affect the on or off status
of the system. You can only change the
mode and sensitivity settings. Press the button to switch the
system on or off. The button is
above the audio unit or on the
center console.
System Settings
The system sensitivity and intensity can
be adjusted through the display screen.
See General Information (page 27). The
system remembers the last selection. You
do not need to readjust the setting each
time you turn on your vehicle.
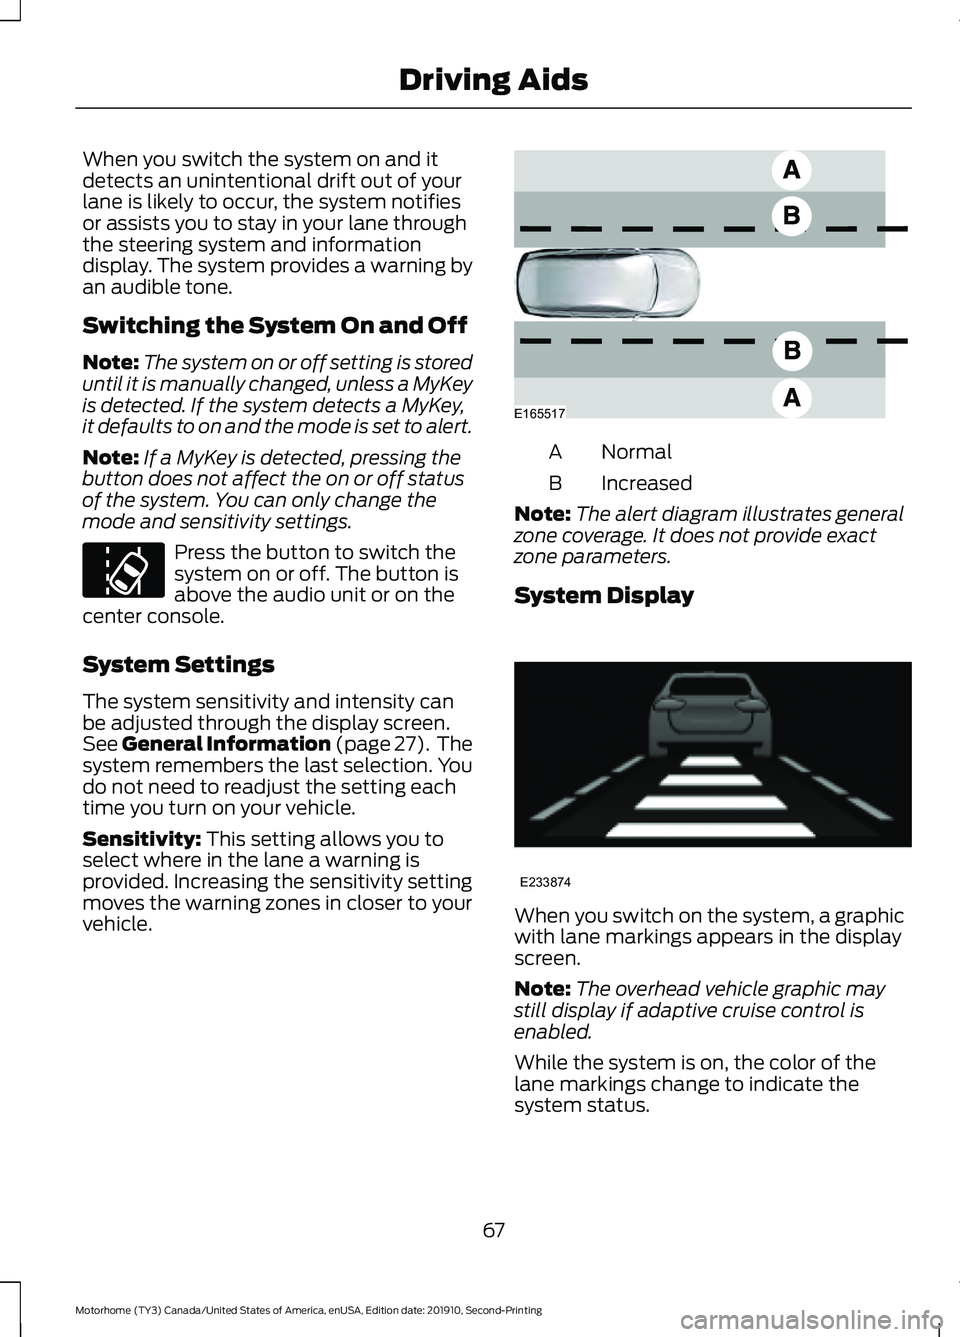
Sensitivity:
This setting allows you to
select where in the lane a warning is
provided. Increasing the sensitivity setting
moves the warning zones in closer to your
vehicle. Normal
A
Increased
B
Note: The alert diagram illustrates general
zone coverage. It does not provide exact
zone parameters.
System Display When you switch on the system, a graphic
with lane markings appears in the display
screen.
Note:
The overhead vehicle graphic may
still display if adaptive cruise control is
enabled.
While the system is on, the color of the
lane markings change to indicate the
system status.
67
Motorhome (TY3) Canada/United States of America, enUSA, Edition date: 201910, Second-Printing Driving AidsE173233 E165517 E233874