sensor FORD F-550 2019 Owners Manual
[x] Cancel search | Manufacturer: FORD, Model Year: 2019, Model line: F-550, Model: FORD F-550 2019Pages: 666, PDF Size: 13.6 MB
Page 4 of 666
Introduction
About This Manual
..........................................7
Symbols Glossary ............................................
8
Data Recording ...............................................
10
Perchlorate .......................................................
14
Ford Credit ........................................................
14
Replacement Parts Recommendation ........................................................................\
...
14
Special Notices ...............................................
14
Mobile Communications Equipment ........................................................................\
...
16
Export Unique Options ................................
16
Environment
Protecting the Environment .......................
17
At a Glance
Instrument Panel ...........................................
18
Child Safety
General Information .....................................
20
Installing Child Restraints ..........................
22
Booster Seats .................................................
33
Child Restraint Positioning ........................
35
Child Safety Locks .........................................
37
Seatbelts
Principle of Operation .................................
38
Fastening the Seatbelts .............................
39
Seatbelt Height Adjustment .....................
43
Seatbelt Warning Lamp and Indicator Chime ............................................................
43
Seatbelt Reminder .......................................
44
Child Restraint and Seatbelt Maintenance ...............................................
45
Seatbelt Extensions .....................................
46
Supplementary Restraints System
Principle of Operation ..................................
47Driver and Passenger Airbags
..................
48
Side Airbags ....................................................
54
Safety Canopy ™...........................................
55
Crash Sensors and Airbag Indicator ......
56
Airbag Disposal ..............................................
57
Keys and Remote Controls
General Information on Radio Frequencies .................................................
58
Remote Control .............................................
58
Replacing a Lost Key or Remote Control ........................................................................\
..
64
MyKey ™
Principle of Operation .................................
65
Creating a MyKey ..........................................
66
Clearing All MyKeys ......................................
67
Checking MyKey System Status ..............
67
Using MyKey With Remote Start Systems ........................................................
67
MyKey – Troubleshooting ..........................
67
Doors and Locks
Locking and Unlocking ...............................
69
Keyless Entry ...................................................
72
Tailgate
Tailgate Lock ...................................................
74
Removing the Tailgate .................................
74
Tailgate Step ...................................................
75
Bed Extender ...................................................
76
Security
Passive Anti-Theft System ........................
78
Anti-Theft Alarm ..........................................
80
Power Running Boards
Using Power Running Boards ...................
82
1
Super Duty (TFE) Canada/United States of America, enUSA, Edition date: 201804, Fourth-Printing Table of Contents
Page 42 of 666
•
Seatbelt warning light and chime. •
Crash sensors and monitoring system
with readiness indicator.
The seatbelt pretensioners at the front
seating positions are designed to tighten
the seatbelts when activated. In frontal
and near-frontal crashes, the seatbelt
pretensioners may be activated alone or,
if the crash is of sufficient severity, together
with the front airbags. In side crashes and
rollovers, the seatbelt pretensioners
activate when the Safety Canopy is
activated.
FASTENING THE SEATBELTS
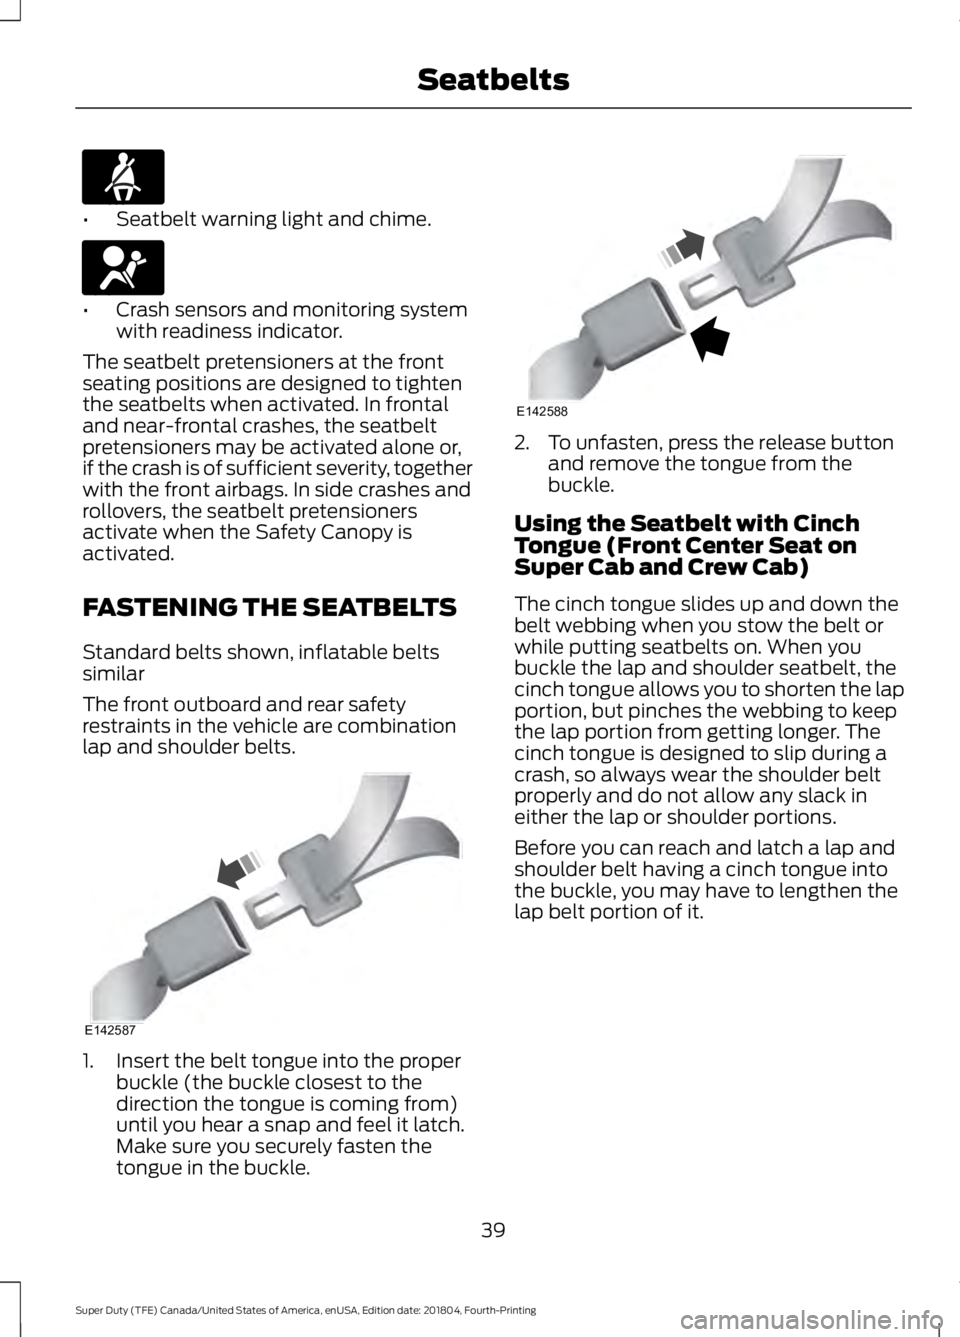
Standard belts shown, inflatable belts
similar
The front outboard and rear safety
restraints in the vehicle are combination
lap and shoulder belts. 1. Insert the belt tongue into the proper
buckle (the buckle closest to the
direction the tongue is coming from)
until you hear a snap and feel it latch.
Make sure you securely fasten the
tongue in the buckle. 2. To unfasten, press the release button
and remove the tongue from the
buckle.
Using the Seatbelt with Cinch
Tongue (Front Center Seat on
Super Cab and Crew Cab)
The cinch tongue slides up and down the
belt webbing when you stow the belt or
while putting seatbelts on. When you
buckle the lap and shoulder seatbelt, the
cinch tongue allows you to shorten the lap
portion, but pinches the webbing to keep
the lap portion from getting longer. The
cinch tongue is designed to slip during a
crash, so always wear the shoulder belt
properly and do not allow any slack in
either the lap or shoulder portions.
Before you can reach and latch a lap and
shoulder belt having a cinch tongue into
the buckle, you may have to lengthen the
lap belt portion of it.
39
Super Duty (TFE) Canada/United States of America, enUSA, Edition date: 201804, Fourth-Printing SeatbeltsE71880 E67017 E142587 E142588
Page 45 of 666
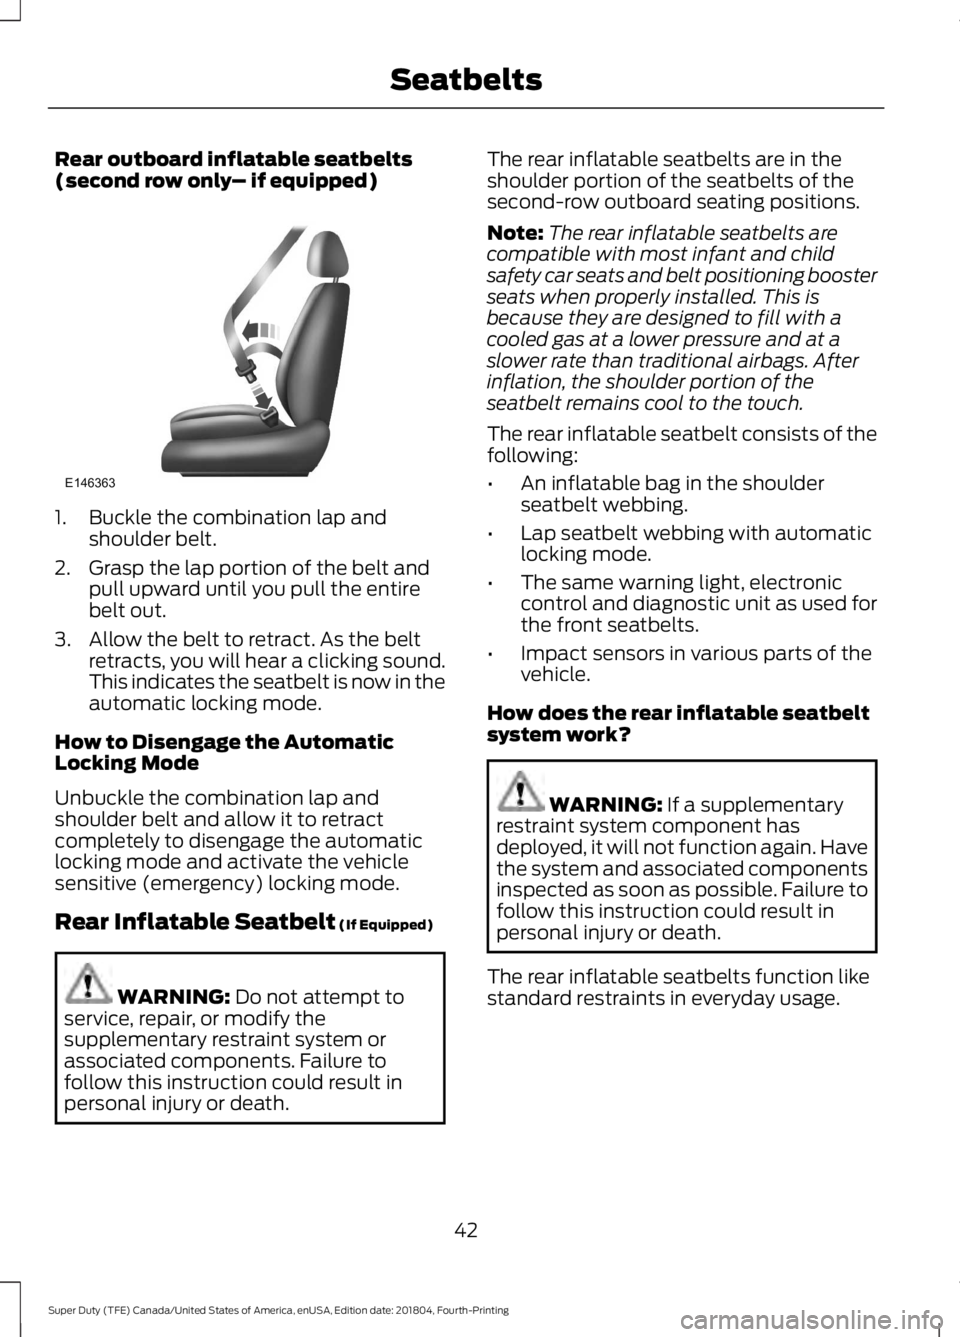
Rear outboard inflatable seatbelts
(second row only
– if equipped)1. Buckle the combination lap and
shoulder belt.
2. Grasp the lap portion of the belt and pull upward until you pull the entire
belt out.
3. Allow the belt to retract. As the belt retracts, you will hear a clicking sound.
This indicates the seatbelt is now in the
automatic locking mode.
How to Disengage the Automatic
Locking Mode
Unbuckle the combination lap and
shoulder belt and allow it to retract
completely to disengage the automatic
locking mode and activate the vehicle
sensitive (emergency) locking mode.
Rear Inflatable Seatbelt (If Equipped) WARNING:
Do not attempt to
service, repair, or modify the
supplementary restraint system or
associated components. Failure to
follow this instruction could result in
personal injury or death. The rear inflatable seatbelts are in the
shoulder portion of the seatbelts of the
second-row outboard seating positions.
Note:
The rear inflatable seatbelts are
compatible with most infant and child
safety car seats and belt positioning booster
seats when properly installed. This is
because they are designed to fill with a
cooled gas at a lower pressure and at a
slower rate than traditional airbags. After
inflation, the shoulder portion of the
seatbelt remains cool to the touch.
The rear inflatable seatbelt consists of the
following:
• An inflatable bag in the shoulder
seatbelt webbing.
• Lap seatbelt webbing with automatic
locking mode.
• The same warning light, electronic
control and diagnostic unit as used for
the front seatbelts.
• Impact sensors in various parts of the
vehicle.
How does the rear inflatable seatbelt
system work? WARNING:
If a supplementary
restraint system component has
deployed, it will not function again. Have
the system and associated components
inspected as soon as possible. Failure to
follow this instruction could result in
personal injury or death.
The rear inflatable seatbelts function like
standard restraints in everyday usage.
42
Super Duty (TFE) Canada/United States of America, enUSA, Edition date: 201804, Fourth-Printing SeatbeltsE146363
Page 51 of 666
While the system is designed to help
reduce serious injuries, contact with a
deploying airbag may also cause abrasions
or swelling. Temporary hearing loss is also
a possibility as a result of the noise
associated with a deploying airbag.
Because airbags must inflate rapidly and
with considerable force, there is the risk of
death or serious injuries such as fractures,
facial and eye injuries or internal injuries,
particularly to occupants who are not
properly restrained or are otherwise out of
position at the time of airbag deployment.
Thus, it is extremely important that
occupants be properly restrained as far
away from the airbag module as possible
while maintaining vehicle control.
Routine maintenance of the airbags is not
required.
DRIVER AND PASSENGER
AIRBAGS
WARNING: Never place your arm
over the airbag module as a deploying
airbag can result in serious arm fractures
or other injuries. WARNING:
Airbags can kill or
injure a child in a child restraint. Never
place a rear-facing child restraint in front
of an active airbag. If you must use a
forward-facing child restraint in the front
seat, move the seat upon which the child
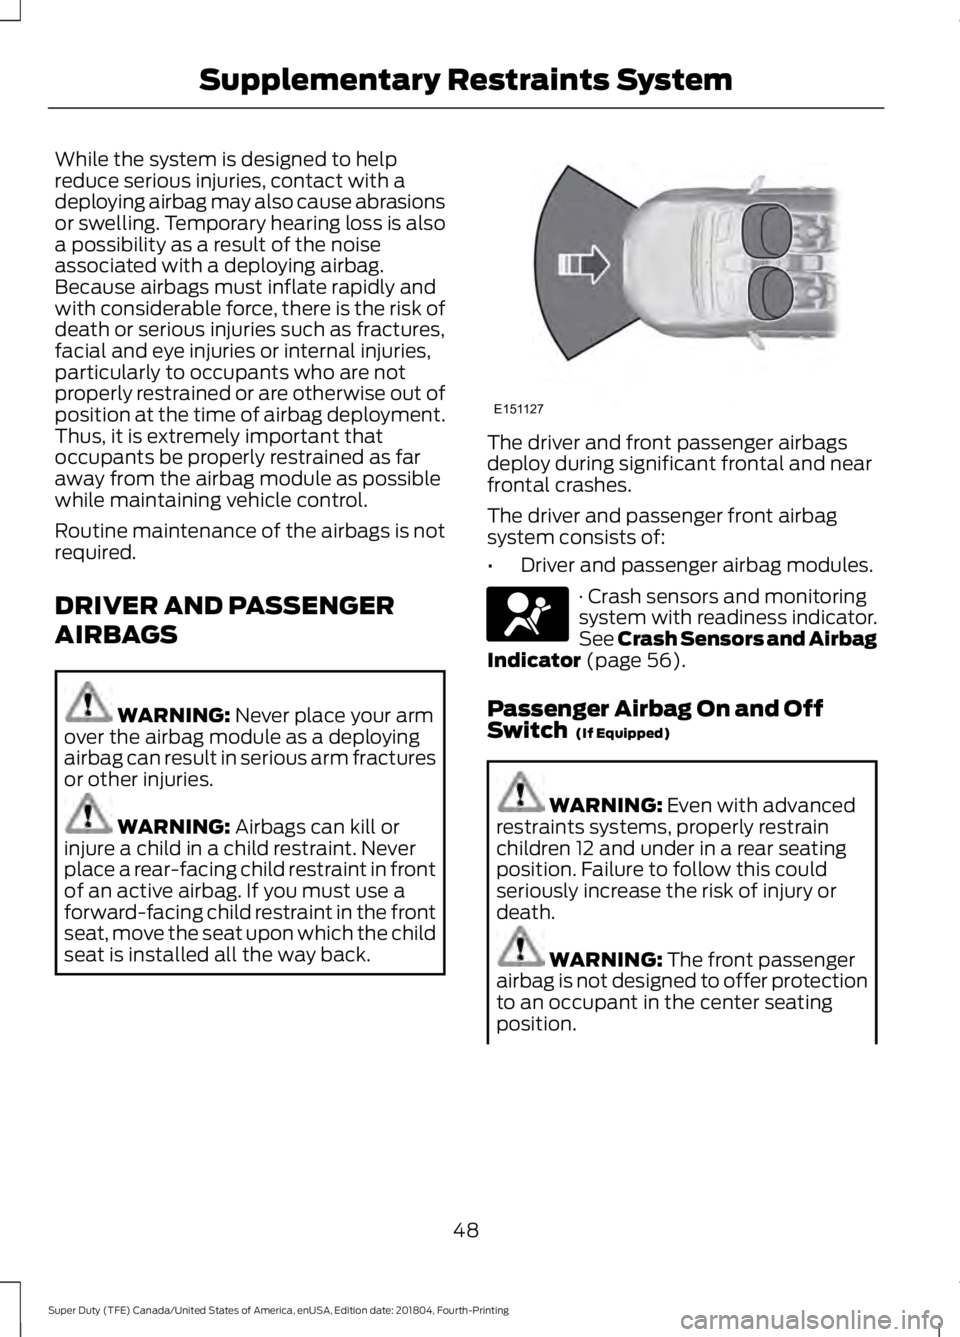
seat is installed all the way back. The driver and front passenger airbags
deploy during significant frontal and near
frontal crashes.
The driver and passenger front airbag
system consists of:
•
Driver and passenger airbag modules. · Crash sensors and monitoring
system with readiness indicator.
See Crash Sensors and Airbag
Indicator
(page 56).
Passenger Airbag On and Off
Switch
(If Equipped) WARNING:
Even with advanced
restraints systems, properly restrain
children 12 and under in a rear seating
position. Failure to follow this could
seriously increase the risk of injury or
death. WARNING:
The front passenger
airbag is not designed to offer protection
to an occupant in the center seating
position.
48
Super Duty (TFE) Canada/United States of America, enUSA, Edition date: 201804, Fourth-Printing Supplementary Restraints SystemE151127 E67017
Page 57 of 666
If two adults and a child occupy a Regular
Cab, properly restrain the child in the
center front unless doing so would interfere
with driving your vehicle. This provides lap
and shoulder belt protection for all
occupants, and airbag protection for the
adults. A child or infant properly restrained
in the center front seat should not incur
risk of serious injury from the airbags.
SIDE AIRBAGS
WARNING: Do not place objects
or mount equipment on or near the
airbag cover, on the side of the seatbacks
(of the front seats), or in front seat areas
that may come into contact with a
deploying airbag. Failure to follow these
instructions may increase the risk of
personal injury in the event of a crash. WARNING:
Do not use accessory
seat covers. The use of accessory seat
covers may prevent the deployment of
the side airbags and increase the risk of
injury in an accident. WARNING:
Do not lean your head
on the door. The side airbag could injure
you as it deploys from the side of the
seatback. WARNING:
Do not attempt to
service, repair, or modify the airbag, its
fuses or the seat cover on a seat
containing an airbag as you could be
seriously injured or killed. Contact your
authorized dealer as soon as possible. WARNING:
If the side airbag has
deployed, the airbag will not function
again. The side airbag system (including
the seat) must be inspected and serviced
by an authorized dealer. If the airbag is
not replaced, the unrepaired area will
increase the risk of injury in a crash.
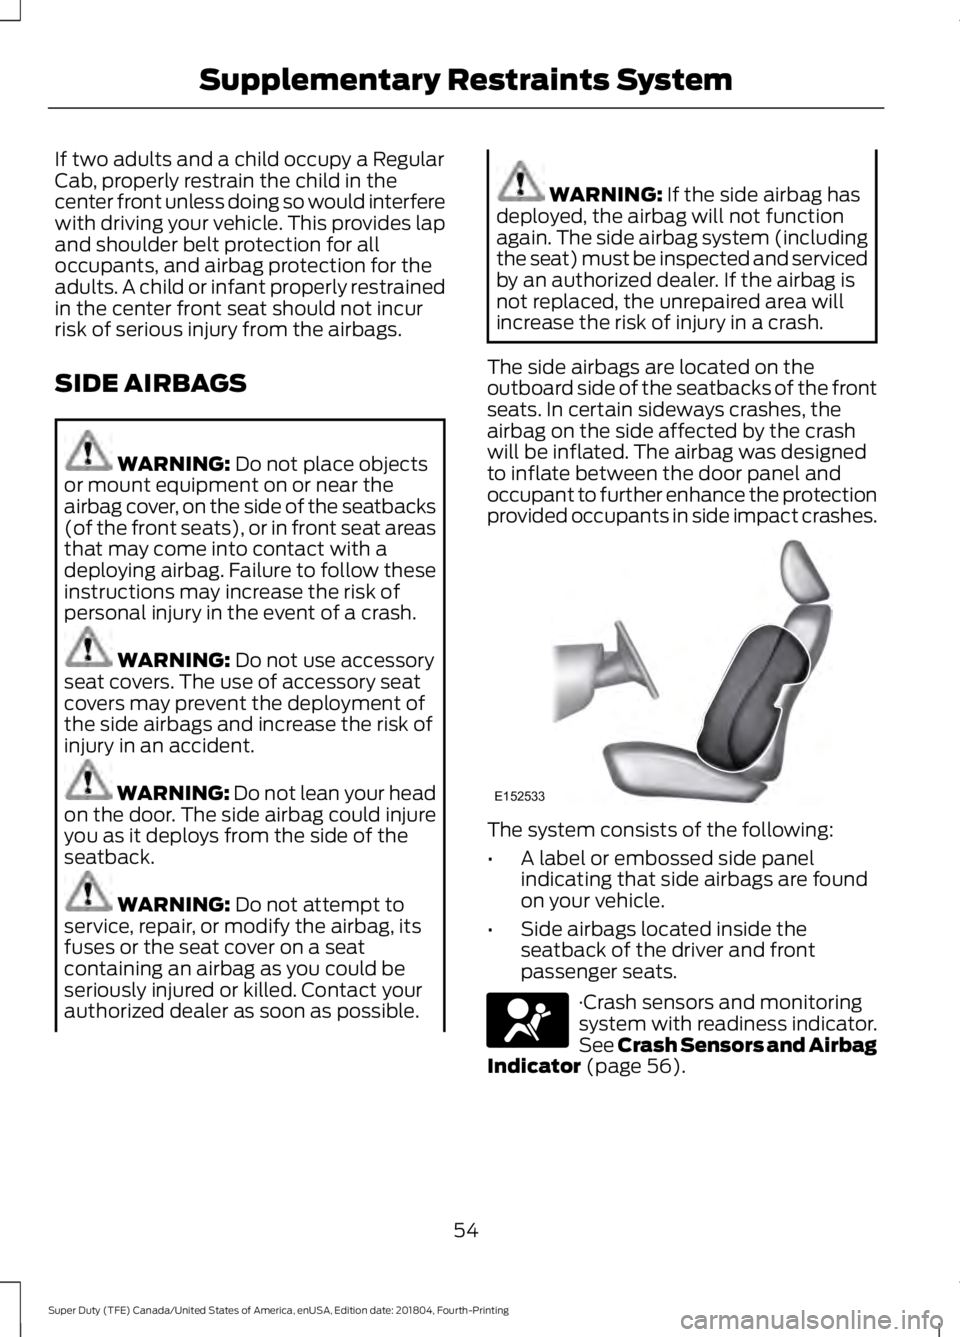
The side airbags are located on the
outboard side of the seatbacks of the front
seats. In certain sideways crashes, the
airbag on the side affected by the crash
will be inflated. The airbag was designed
to inflate between the door panel and
occupant to further enhance the protection
provided occupants in side impact crashes. The system consists of the following:
•
A label or embossed side panel
indicating that side airbags are found
on your vehicle.
• Side airbags located inside the
seatback of the driver and front
passenger seats. ·Crash sensors and monitoring
system with readiness indicator.
See Crash Sensors and Airbag
Indicator
(page 56).
54
Super Duty (TFE) Canada/United States of America, enUSA, Edition date: 201804, Fourth-Printing Supplementary Restraints SystemE152533 E67017
Page 58 of 666
The design and development of the side
airbag system included recommended
testing procedures that were developed
by a group of automotive safety experts
known as the Side Airbag Technical
Working Group. These recommended
testing procedures help reduce the risk of
injuries related to the deployment of side
airbags.
SAFETY CANOPY™
WARNING: Do not place objects
or mount equipment on or near the
headliner at the siderail that may come
into contact with a deploying curtain
airbag. Failure to follow these
instructions may increase the risk of
personal injury in the event of a crash. WARNING:
Do not lean your head
on the door. The curtain airbag could
injure you as it deploys from the
headliner. WARNING:
Do not attempt to
service, repair, or modify the
supplementary restraint system or
associated components. Failure to
follow this instruction could result in
personal injury or death. WARNING:
All occupants of your
vehicle, including the driver, should
always properly wear their seatbelts,
even when an airbag supplemental
restraint system is provided. Failure to
properly wear your seatbelt could
seriously increase the risk of injury or
death. WARNING:
To reduce risk of injury,
do not obstruct or place objects in the
deployment path of the airbag. WARNING:
If a supplementary
restraint system component has
deployed, it will not function again. Have
the system and associated components
inspected as soon as possible. Failure to
follow this instruction could result in
personal injury or death.
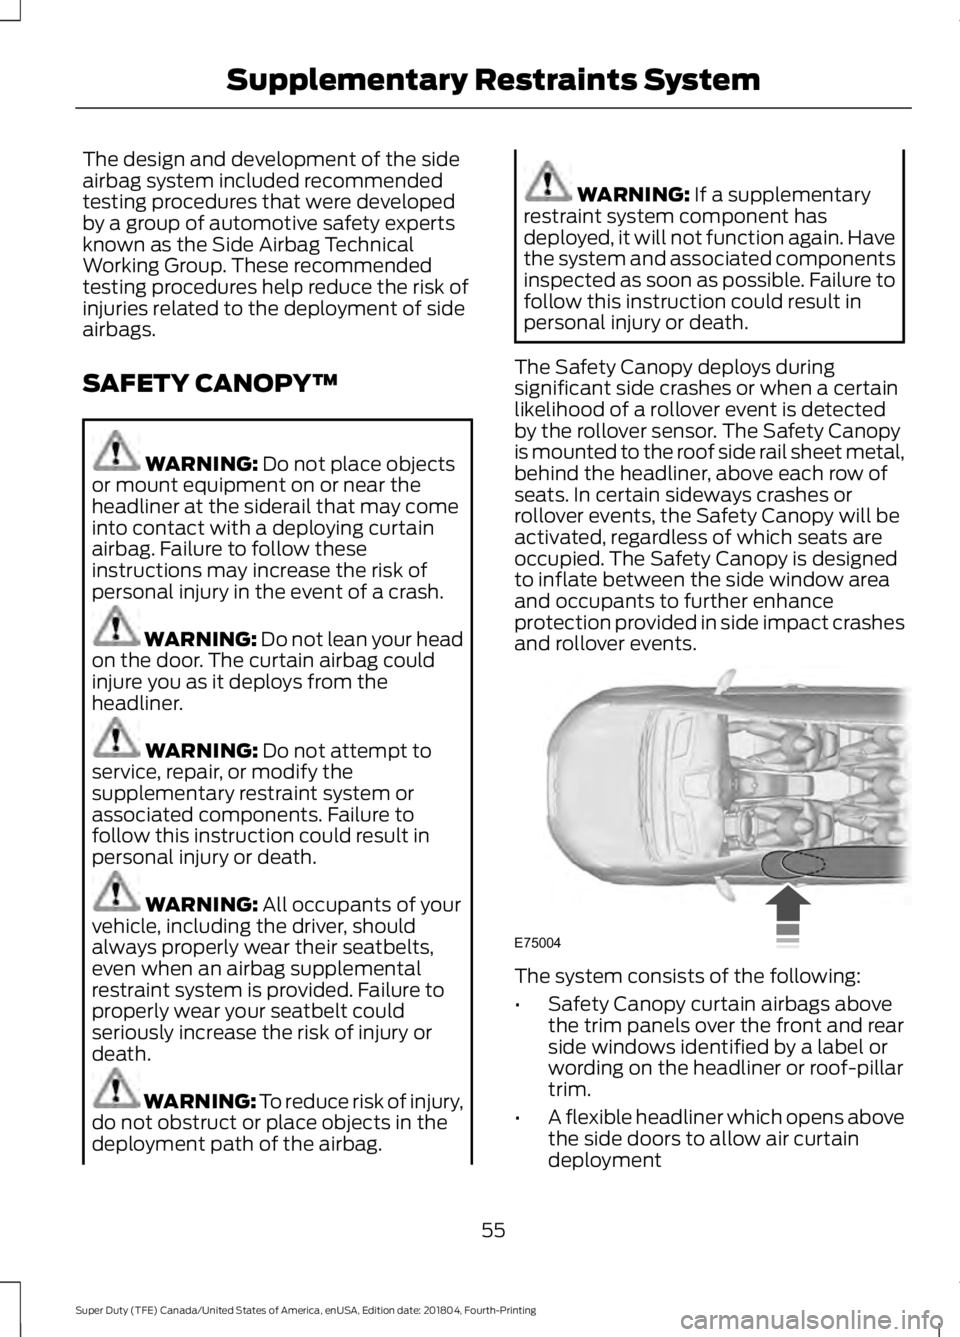
The Safety Canopy deploys during
significant side crashes or when a certain
likelihood of a rollover event is detected
by the rollover sensor. The Safety Canopy
is mounted to the roof side rail sheet metal,
behind the headliner, above each row of
seats. In certain sideways crashes or
rollover events, the Safety Canopy will be
activated, regardless of which seats are
occupied. The Safety Canopy is designed
to inflate between the side window area
and occupants to further enhance
protection provided in side impact crashes
and rollover events. The system consists of the following:
•
Safety Canopy curtain airbags above
the trim panels over the front and rear
side windows identified by a label or
wording on the headliner or roof-pillar
trim.
• A flexible headliner which opens above
the side doors to allow air curtain
deployment
55
Super Duty (TFE) Canada/United States of America, enUSA, Edition date: 201804, Fourth-Printing Supplementary Restraints SystemE75004
Page 59 of 666
· Crash sensors and monitoring
system with a readiness
indicator. See Crash Sensors
and Airbag Indicator (page 56).
Properly restrain children 12 years old and
under in the rear seats. The Safety Canopy
will not interfere with children restrained
using a properly installed child or booster
seat because it is designed to inflate
downward from the headliner above the
doors along the side window opening.
The design and development of the Safety
Canopy included recommended testing
procedures that were developed by a
group of automotive safety experts known
as the Side Airbag Technical Working
Group. These recommended testing
procedures help reduce the risk of injuries
related to the deployment of side airbags
(including the Safety Canopy).
CRASH SENSORS AND
AIRBAG INDICATOR WARNING:
Modifying or adding
equipment to the front end of your
vehicle (including hood, bumper system,
frame, front end body structure, tow
hooks and hood pins) may affect the
performance of the airbag system,
increasing the risk of injury. Do not
modify or add equipment to the front
end of your vehicle.
Your vehicle has a collection of crash and
occupant sensors that provide information
to the restraints control module which
deploys (activates) the front seatbelt
pretensioners, optional rear inflatable
seatbelts, driver airbag, passenger airbag,
seat mounted side airbags, and the Safety
Canopy. Based on the type of crash, the
restraints control module will deploy the
appropriate safety devices. The restraints control module also
monitors the readiness of the above safety
devices plus the crash and occupant
sensors. The readiness of the safety
system is indicated by a warning indicator
light in the instrument cluster or by a
backup tone if the warning light is not
working. See
Instrument Cluster (page
104). Routine maintenance of the airbag is
not required.
A difficulty with the system is indicated by
one or more of the following: The readiness light will not
illuminate immediately after you
switch the ignition on.
• The readiness light either flashes or
stays lit.
• A series of five beeps will be heard. The
tone pattern repeats periodically until
the problem, the light or both are
repaired.
If any of these things happen, even
intermittently, have the supplemental
restraint system serviced at an authorized
dealer immediately. Unless serviced, the
system may not function properly in the
event of a crash.
56
Super Duty (TFE) Canada/United States of America, enUSA, Edition date: 201804, Fourth-Printing Supplementary Restraints SystemE67017 E67017
Page 72 of 666
LOCKING AND UNLOCKING
You can use the power door lock control
or the remote control to lock and unlock
your doors and tailgate. See Tailgate
Lock (page 74).
Power Door Locks
(If Equipped)
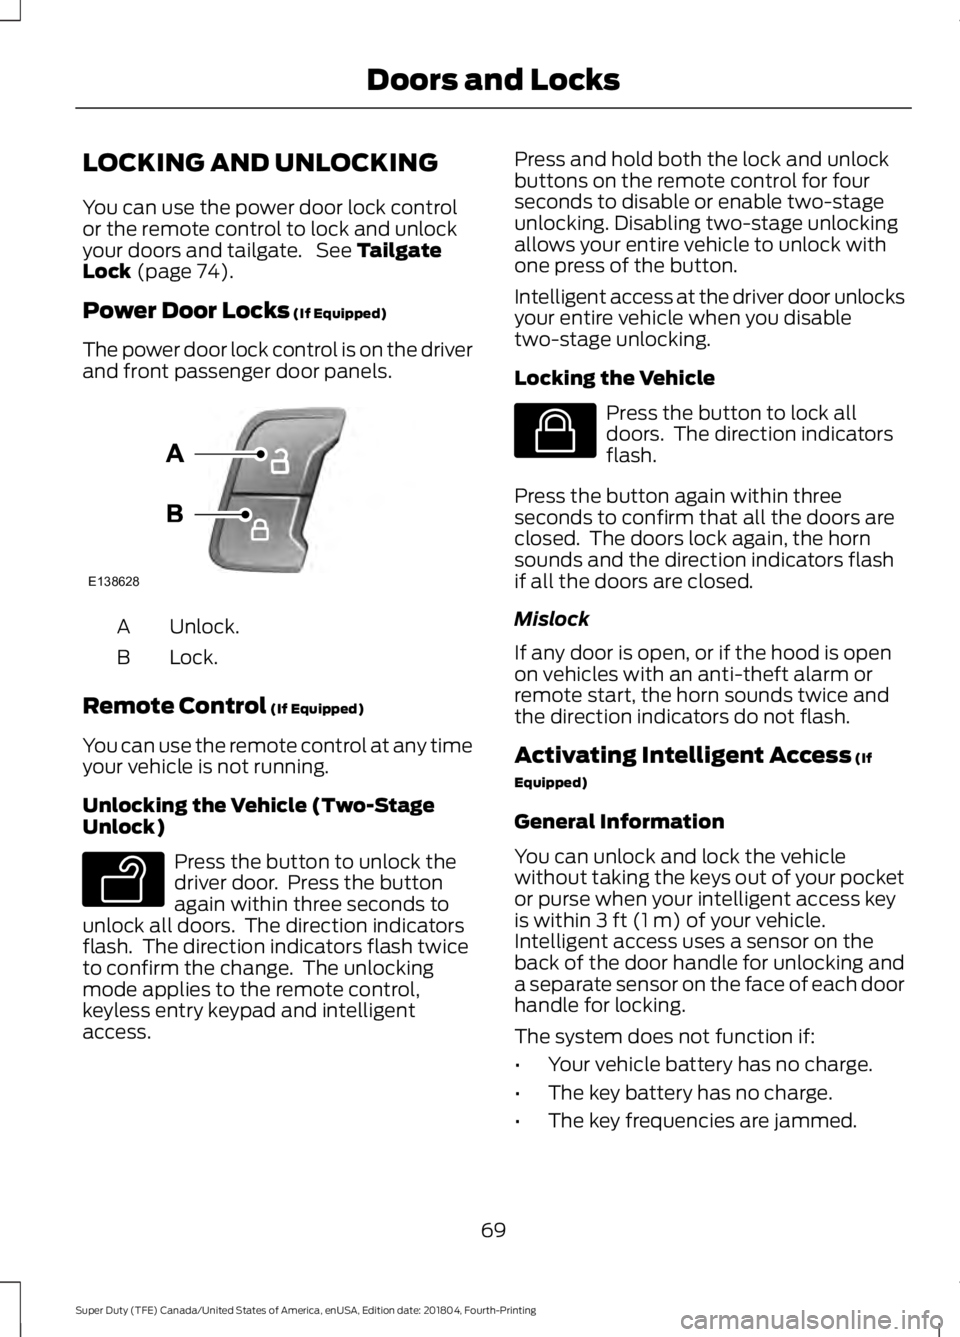
The power door lock control is on the driver
and front passenger door panels. Unlock.
A
Lock.
B
Remote Control
(If Equipped)
You can use the remote control at any time
your vehicle is not running.
Unlocking the Vehicle (Two-Stage
Unlock) Press the button to unlock the
driver door. Press the button
again within three seconds to
unlock all doors. The direction indicators
flash. The direction indicators flash twice
to confirm the change. The unlocking
mode applies to the remote control,
keyless entry keypad and intelligent
access. Press and hold both the lock and unlock
buttons on the remote control for four
seconds to disable or enable two-stage
unlocking. Disabling two-stage unlocking
allows your entire vehicle to unlock with
one press of the button.
Intelligent access at the driver door unlocks
your entire vehicle when you disable
two-stage unlocking.
Locking the Vehicle
Press the button to lock all
doors. The direction indicators
flash.
Press the button again within three
seconds to confirm that all the doors are
closed. The doors lock again, the horn
sounds and the direction indicators flash
if all the doors are closed.
Mislock
If any door is open, or if the hood is open
on vehicles with an anti-theft alarm or
remote start, the horn sounds twice and
the direction indicators do not flash.
Activating Intelligent Access
(If
Equipped)
General Information
You can unlock and lock the vehicle
without taking the keys out of your pocket
or purse when your intelligent access key
is within
3 ft (1 m) of your vehicle.
Intelligent access uses a sensor on the
back of the door handle for unlocking and
a separate sensor on the face of each door
handle for locking.
The system does not function if:
• Your vehicle battery has no charge.
• The key battery has no charge.
• The key frequencies are jammed.
69
Super Duty (TFE) Canada/United States of America, enUSA, Edition date: 201804, Fourth-Printing Doors and LocksE138628 E138629 E138623
Page 73 of 666
Note:
The system may not function if the
key is close to metal objects or electronic
devices, for example keys or a cell phone.
Note: If the system does not function, use
the key blade to lock and unlock your
vehicle. See Remote Control (page 58).
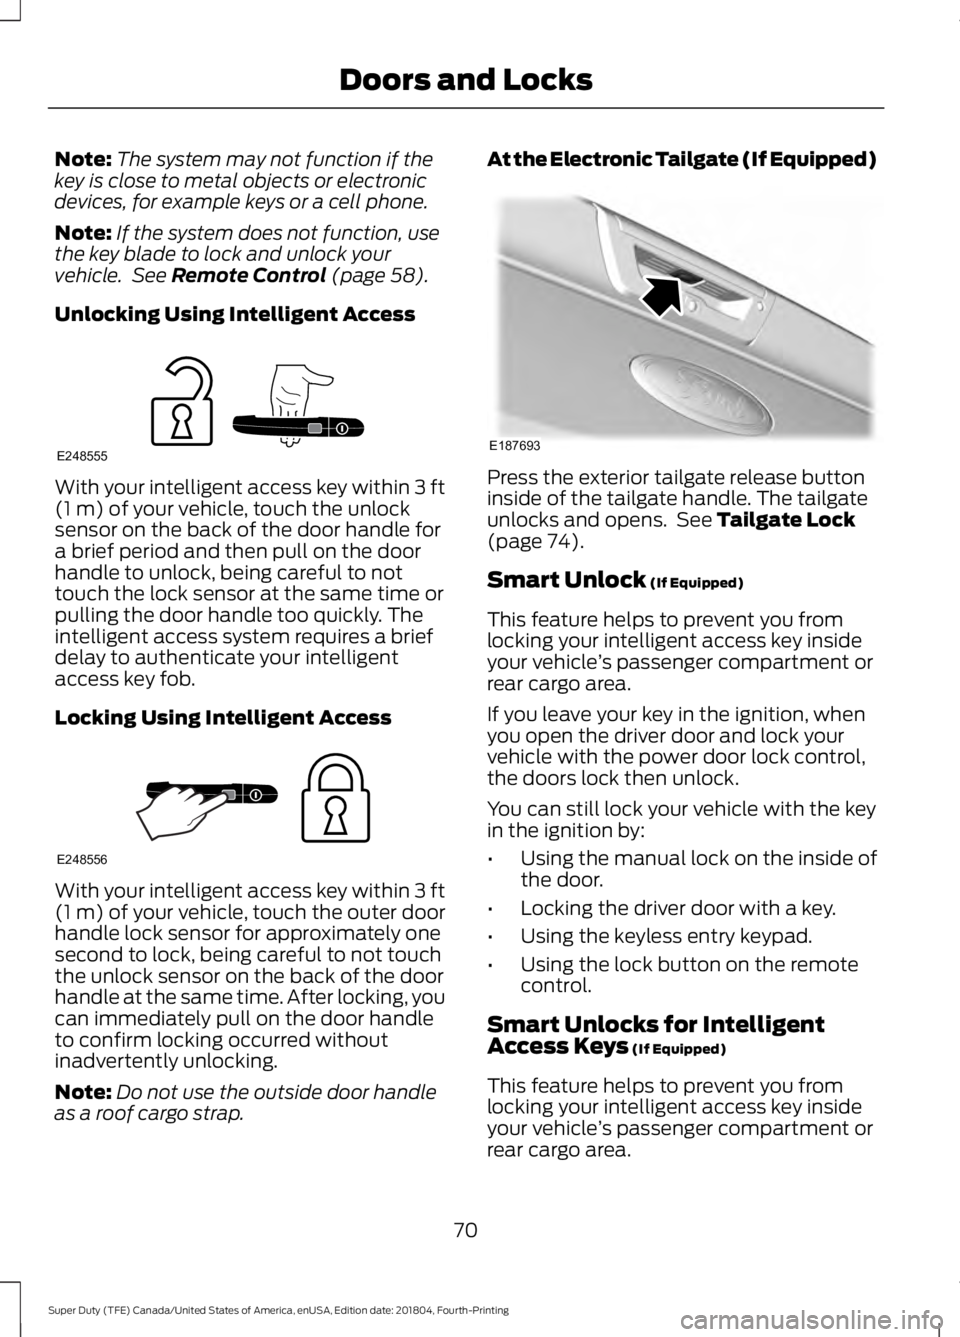
Unlocking Using Intelligent Access With your intelligent access key within
3 ft
(1 m) of your vehicle, touch the unlock
sensor on the back of the door handle for
a brief period and then pull on the door
handle to unlock, being careful to not
touch the lock sensor at the same time or
pulling the door handle too quickly. The
intelligent access system requires a brief
delay to authenticate your intelligent
access key fob.
Locking Using Intelligent Access With your intelligent access key within
3 ft
(1 m) of your vehicle, touch the outer door
handle lock sensor for approximately one
second to lock, being careful to not touch
the unlock sensor on the back of the door
handle at the same time. After locking, you
can immediately pull on the door handle
to confirm locking occurred without
inadvertently unlocking.
Note: Do not use the outside door handle
as a roof cargo strap. At the Electronic Tailgate (If Equipped)
Press the exterior tailgate release button
inside of the tailgate handle. The tailgate
unlocks and opens. See
Tailgate Lock
(page 74).
Smart Unlock
(If Equipped)
This feature helps to prevent you from
locking your intelligent access key inside
your vehicle ’s passenger compartment or
rear cargo area.
If you leave your key in the ignition, when
you open the driver door and lock your
vehicle with the power door lock control,
the doors lock then unlock.
You can still lock your vehicle with the key
in the ignition by:
• Using the manual lock on the inside of
the door.
• Locking the driver door with a key.
• Using the keyless entry keypad.
• Using the lock button on the remote
control.
Smart Unlocks for Intelligent
Access Keys
(If Equipped)
This feature helps to prevent you from
locking your intelligent access key inside
your vehicle ’s passenger compartment or
rear cargo area.
70
Super Duty (TFE) Canada/United States of America, enUSA, Edition date: 201804, Fourth-Printing Doors and LocksE248555 E248556 E187693
Page 84 of 666
Using the System
You can select two levels of alarm security.
You can change the level of security when
the ignition is switched off through the
information display with the two options
below:
Perimeter Only (If Equipped)
Perimeter only monitors the following:
•
Doors.
• Hood.
• Tailgate.
All Sensors (If Equipped)
All sensors monitors the following:
• Doors.
• Hood.
• Tailgate.
• Movement inside your vehicle.
• Change in vehicle inclination, for
example, unwanted towing.
Note: Do not choose all sensors monitor
mode when the vehicle is in transport or if
movement within the vehicle is likely to
occur.
Note: For correct operation of the interior
motion detection system, make sure you
close all the windows prior to arming the
system. This helps prevent accidental alarm
activation due to external influences.
Additionally, the interior motion sensing
system does not arm if any door is ajar.
Arming the Alarm
The alarm is ready to arm when there is
not a key in the ignition. Lock your vehicle
using the remote control or keyless entry
keypad. You can also lock your vehicle
using the lock sensor on the exterior door
handle if your vehicle is equipped with
intelligent access. See Locking and
Unlocking (page 69). The direction indicators flash once after
you lock your vehicle. This indicates the
alarm is in the pre-armed mode. It fully
arms after 20 seconds.
Disarming the Alarm
Disarm the alarm by any of the following
actions:
•
Press the power door unlock button
within the 20-second pre-armed mode.
• Unlock the doors with the remote
control or keyless entry keypad. If
equipped with intelligent access, you
can use the unlock sensor on the
exterior door handle. See
Locking and
Unlocking (page 69).
• Switch the ignition on or start your
vehicle.
• Use a key in the driver door lock
cylinder to unlock your vehicle, then
switch the ignition on within 12
seconds.
81
Super Duty (TFE) Canada/United States of America, enUSA, Edition date: 201804, Fourth-Printing Security