check engine light FORD F-550 2020 User Guide
[x] Cancel search | Manufacturer: FORD, Model Year: 2020, Model line: F-550, Model: FORD F-550 2020Pages: 631, PDF Size: 9.62 MB
Page 220 of 631
GENERAL INFORMATION
Note:
Occasional brake noise is normal. If
a metal-to-metal, continuous grinding or
continuous squeal sound is present, the
brake linings may be worn-out. Have the
system checked by an authorized dealer. If
your vehicle has continuous vibration or
shudder in the steering wheel while braking,
have it checked by an authorized dealer.
Note: Brake dust may accumulate on the
wheels, even under normal driving
conditions. Some dust is inevitable as the
brakes wear and does not contribute to
brake noise.
Wet brakes result in reduced braking
efficiency. Gently press the brake pedal a
few times when driving from a car wash or
standing water to dry the brakes.
Brake Over Accelerator
In the event the accelerator pedal
becomes stuck or entrapped, apply steady
and firm pressure to the brake pedal to
slow the vehicle and reduce engine power.
If you experience this condition, apply the
brakes and bring your vehicle to a safe
stop. Shift the transmission to park (P),
switch the engine off and apply the parking
brake. Inspect the accelerator pedal for
any interference. If none are found and the
condition persists, have your vehicle towed
to the nearest authorized dealer.
Brake Assist
Brake assist detects when you brake
rapidly by measuring the rate at which you
press the brake pedal. It provides
maximum braking efficiency as long as you
press the pedal, and can reduce stopping
distances in critical situations. Anti-lock Brake System
This system helps you maintain steering
control during emergency stops by keeping
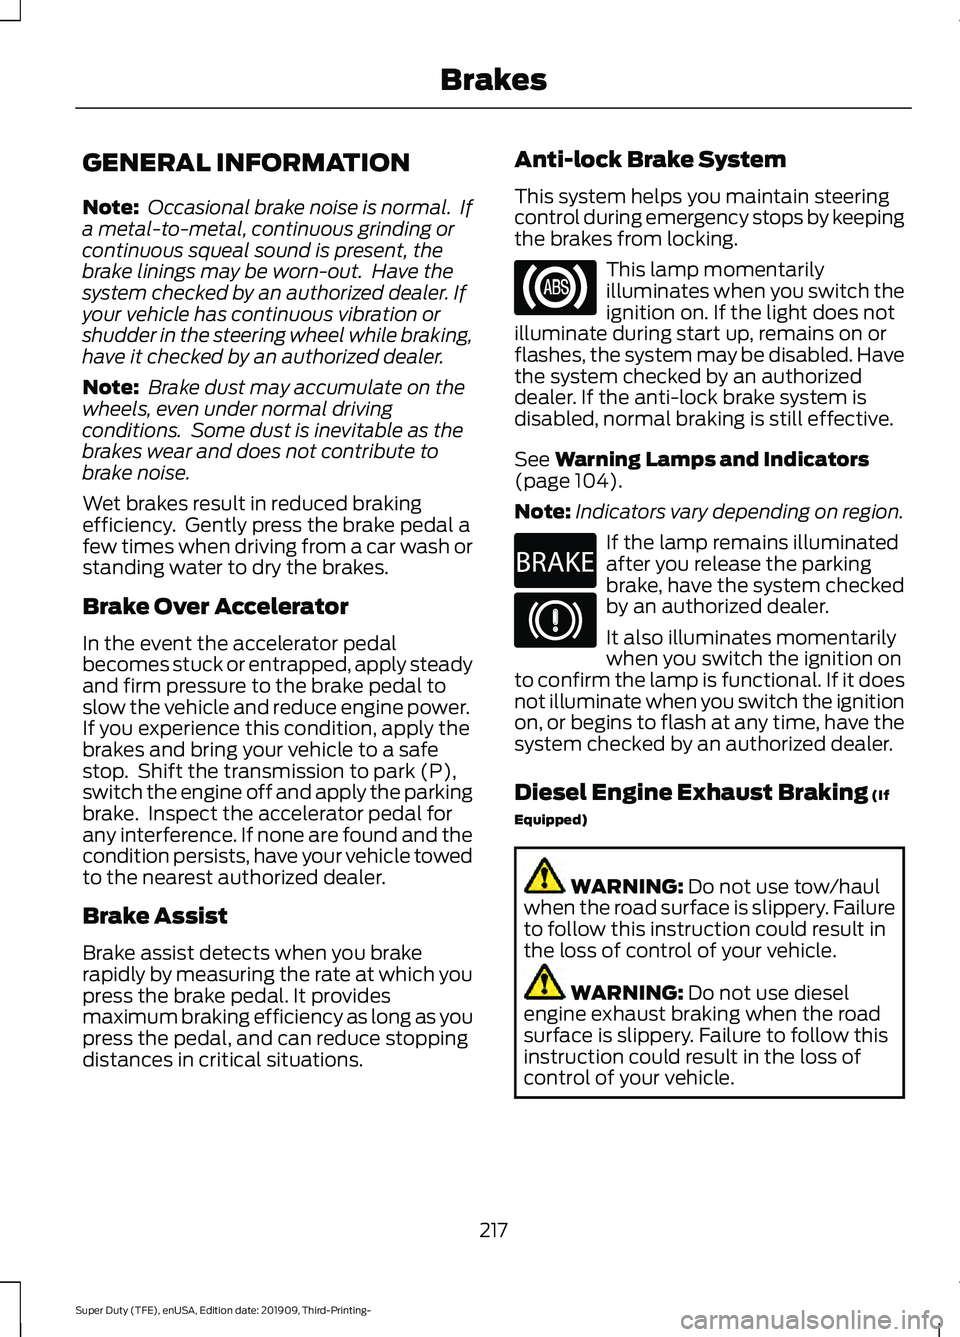
the brakes from locking. This lamp momentarily
illuminates when you switch the
ignition on. If the light does not
illuminate during start up, remains on or
flashes, the system may be disabled. Have
the system checked by an authorized
dealer. If the anti-lock brake system is
disabled, normal braking is still effective.
See Warning Lamps and Indicators
(page 104).
Note: Indicators vary depending on region. If the lamp remains illuminated
after you release the parking
brake, have the system checked
by an authorized dealer.
It also illuminates momentarily
when you switch the ignition on
to confirm the lamp is functional. If it does
not illuminate when you switch the ignition
on, or begins to flash at any time, have the
system checked by an authorized dealer.
Diesel Engine Exhaust Braking
(If
Equipped) WARNING:
Do not use tow/haul
when the road surface is slippery. Failure
to follow this instruction could result in
the loss of control of your vehicle. WARNING:
Do not use diesel
engine exhaust braking when the road
surface is slippery. Failure to follow this
instruction could result in the loss of
control of your vehicle.
217
Super Duty (TFE), enUSA, Edition date: 201909, Third-Printing- Brakes E270480
Page 293 of 631
•
The trailer is not detected. Once your
vehicle is stopped, additional warnings
indicate the trailer is not detected.
Refer to trailer not detected
troubleshooting tips.
• An internal condition for system
operation was not met which requires
your vehicle to return to manual control
of the steering. Using the system for an
extended period of time can cause the
steering system to heat up and turn off
Pro Trailer Backup Assist steering
control to protect itself. The system
may require a cool down time of up to
30 minutes. Keep the system off and
drive forward at a normal speed or
switch the vehicle off.
TRAILER SWAY CONTROL (IF
EQUIPPED) WARNING: Turning off trailer sway
control increases the risk of loss of
vehicle control, serious injury or death.
Ford does not recommend disabling this
feature except in situations where speed
reduction may be detrimental (such as
hill climbing), the driver has significant
trailer towing experience, and can control
trailer sway and maintain safe operation.
Note: This feature does not prevent trailer
sway, but reduces it once it begins.
Note: This feature cannot stop all trailers
from swaying.
Note: In some cases, if vehicle speed is too
high, the system may activate multiple
times, gradually reducing vehicle speed. This feature applies your vehicle brakes at
individual wheels and, if necessary, reduces
engine power. If the trailer begins to sway,
the stability control light flashes and the
message
TRAILER SWAY REDUCE
SPEED appears in the information display.
The first thing to do is slow your vehicle
down, then pull safely to the side of the
road and check for proper tongue load and
trailer load distribution. See
Load
Carrying (page 265).
RECOMMENDED TOWING
WEIGHTS WARNING:
You must use
the heavy-duty drawbar pin
supplied with your vehicle when
using the heavy-duty hitch.
Failure to follow this instruction
could result in the loss of control
of your vehicle, personal injury or
death.
Note: Vehicles with a
21,200 lb
(9,616 kg) hitch and above must
use the drawbar pin that came with
the vehicle. You can obtain a
replacement drawbar pin at your
authorized dealer.
Note: Make sure to take into
consideration trailer frontal area.
Do not exceed 60 ft² (5.6 m²)
trailer frontal area for conventional
trailers. Do not exceed 75 ft² (6.9
m²) trailer frontal area for fifth
wheel and gooseneck trailers.
290
Super Duty (TFE), enUSA, Edition date: 201909, Third-Printing- Towing
Page 298 of 631
ESSENTIAL TOWING CHECKS
WARNING: Do not exceed the
maximum vertical load on the tow ball.
Failure to follow this instruction could
result in the loss of control of your
vehicle, personal injury or death.
Follow these guidelines for safe towing:
• Do not tow a trailer until you drive your
vehicle at least
1,000 mi (1,600 km).
• Consult your local motor vehicle laws
for towing a trailer.
• See the instructions included with
towing accessories for the proper
installation and adjustment
specifications.
• Service your vehicle more frequently if
you tow a trailer. See your scheduled
maintenance information.
See
Scheduled Maintenance (page 553).
• If you use a rental trailer, follow the
instructions the rental agency gives
you.
See
Load Limits in the Load Carrying
chapter for load specification terms found
on the tire label and Safety Compliance
label and instructions on calculating your
vehicle's load.
Vehicles with a diesel engine have an
engine braking feature.
See General
Information (page 217).
Remember to account for the trailer
tongue weight as part of your vehicle load
when calculating the total vehicle weight.
Some vehicles will have the ability to
modify trailer towing features. See
General Information
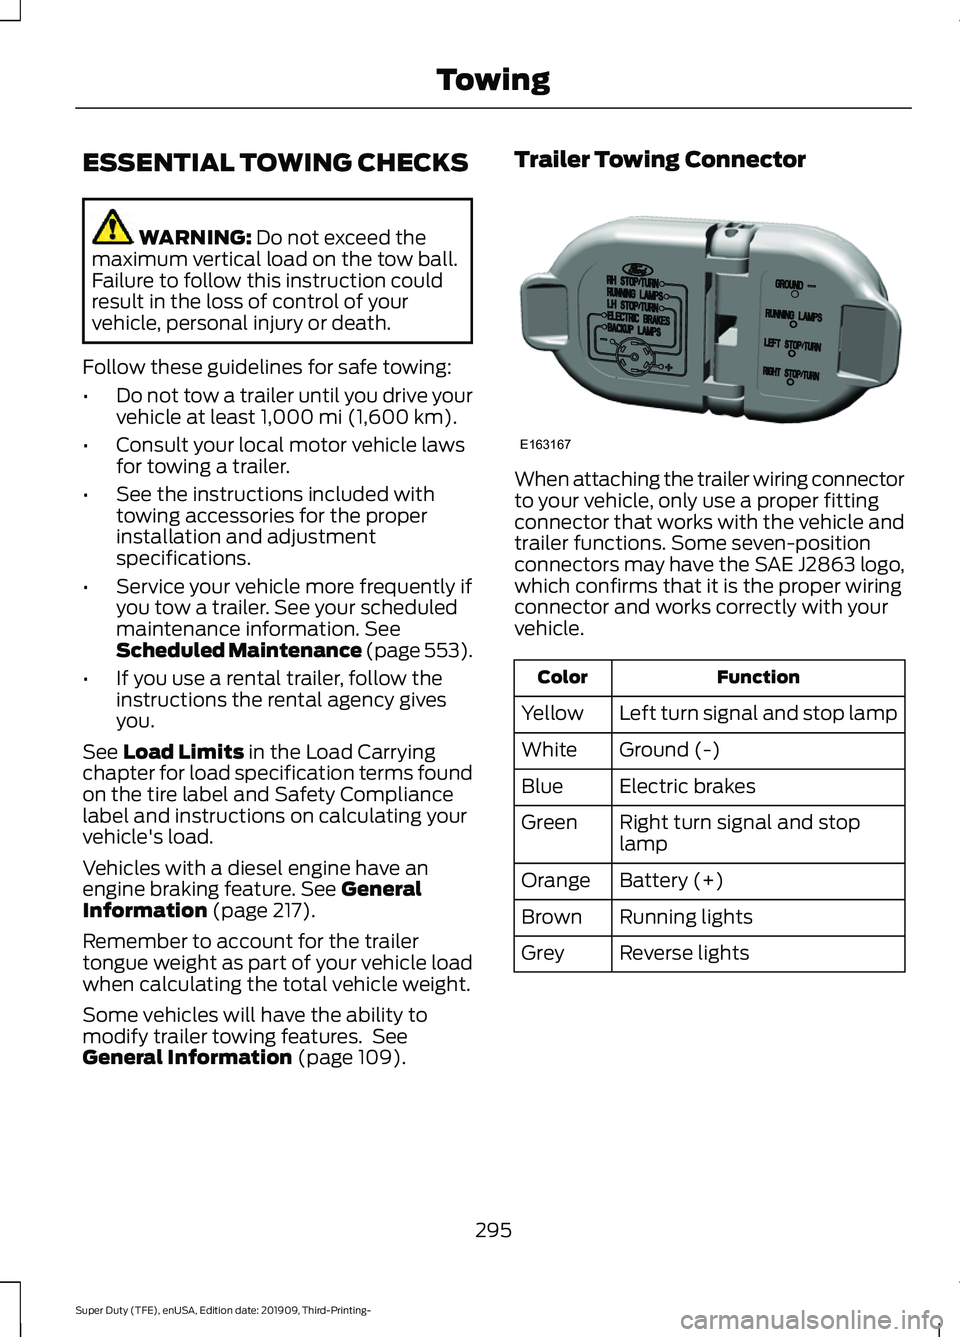
(page 109). Trailer Towing Connector
When attaching the trailer wiring connector
to your vehicle, only use a proper fitting
connector that works with the vehicle and
trailer functions. Some seven-position
connectors may have the SAE J2863 logo,
which confirms that it is the proper wiring
connector and works correctly with your
vehicle.
Function
Color
Left turn signal and stop lamp
Yellow
Ground (-)
White
Electric brakes
Blue
Right turn signal and stop
lamp
Green
Battery (+)
Orange
Running lights
Brown
Reverse lights
Grey
295
Super Duty (TFE), enUSA, Edition date: 201909, Third-Printing- TowingE163167
Page 306 of 631
•
Your vehicle's brake system and the
trailer brake system work
independently of each other. Changing
the gain setting on the controller does
not affect the operation of your
vehicle's brakes.
• When you switch the engine off, the
controller output is disabled and the
display and module shut down.
Trailer Lamps WARNING: Never connect any
trailer lamp wiring to the vehicle's tail
lamp wiring; this may damage the
electrical system resulting in fire. Contact
your authorized dealer as soon as
possible for assistance in proper trailer
tow wiring installation. Additional
electrical equipment may be required.
Trailer lamps are required on most towed
vehicles. Make sure all running lights, brake
lights, turn signals and hazard lights are
working.
Before Towing a Trailer
Practice turning, stopping and backing up
to get the feel of your vehicle-trailer
combination before starting on a trip.
When turning, make wider turns so the
trailer wheels clear curbs and other
obstacles.
When Towing a Trailer
• Check your hitch, electrical connections
and trailer wheel lug nuts thoroughly
after you have traveled 50 mi (80 km).
• Do not drive faster than
70 mph
(113 km/h) during the first 500 mi
(800 km).
• Do not make full-throttle starts. •
When stopped in congested or heavy
traffic during hot weather, place the
gearshift in park (P) to aid engine and
transmission cooling and to help A/C
performance.
• Turn off the speed control with heavy
loads or in hilly terrain. The speed
control may turn off automatically
when you are towing on long, steep
grades.
• Shift to a lower gear when driving down
a long or steep hill. Do not apply the
brakes continuously, as they may
overheat and become less effective.
• If your transmission is equipped with a
Grade Assist or Tow/Haul feature, use
this feature when towing. This provides
engine braking and helps eliminate
excessive transmission shifting for
optimum fuel economy and
transmission cooling.
• If your vehicle is equipped with
Adaptive Steering and you have
enabled Tow/Haul, the Adaptive
Steering system adjusts the steering
response to match your vehicle ’s load.
The system reduces vehicle sensitivity
to steering inputs at higher vehicle
speeds while it maintains the ease of
parking and maneuverability at low
speeds.
• If your vehicle is equipped with
AdvanceTrac with RSC, this system
may turn on during typical cornering
maneuvers with a heavily loaded trailer.
This is normal. Turning the corner at a
slower speed while towing may reduce
this tendency.
• If you are towing a trailer frequently in
hot weather, hilly conditions, at the
gross combined weight rating (or any
combination of these factors), consider
refilling your rear axle with synthetic
gear lubricant (if the axle is not already
filled with it). See
Capacities and
Specifications (page 429).
303
Super Duty (TFE), enUSA, Edition date: 201909, Third-Printing- Towing
Page 309 of 631
Note:
You can check four-wheel-down
towing status at any time by opening the
driver's door or turning the ignition to the
accessory or on position. A message
displays in the information display
confirming your vehicle is in neutral tow.
When finished towing with all four wheels
on the ground return the transfer case to
its 2H position:
1. With your vehicle still properly secured
to the tow vehicle, put the ignition in
the on position, but do not start the
engine. If your vehicle has an ignition
key, switch the key to on. If your vehicle
has intelligent access, switch the
vehicle into accessory mode. See
Starting and Stopping the Engine
(page
168).
2. Press and hold the brake pedal.
3. Shift out of neutral (N).
4. Release the brake pedal.
Note: If completed successfully, the
instrument cluster displays 2H and Neutral
Tow Disabled
.
Note: If the indicator light and message do
not display, you must perform the procedure
again from the beginning.
Note: If
Shift Delayed Pull Forward
displays in the instrument cluster, a transfer
case blockage is present. See resolving the
shift delayed pull forward message
instructions after this section.
5. Apply the parking brake and disconnect
the vehicle from the tow vehicle.
6. Release the parking brake, start the engine and shift the transmission to
drive (D) to make sure the transfer
case is out of neutral (N).
7. If the transfer case does not successfully shift out of neutral (N),
set the parking brake until you can have
your vehicle serviced. Resolving the
Shift Delayed Pull Forward
Message
1. Press and hold the brake pedal.
2. Put the transmission into neutral (N),
and then start the engine.
3. With the engine running, shift the transmission to drive (D) and let the
vehicle roll forward, up to
3 ft (1 m).
4. Make sure the instrument cluster displays that neutral tow is disabled.
306
Super Duty (TFE), enUSA, Edition date: 201909, Third-Printing- Towing
Page 313 of 631
•
Inspect exhaust system for damage or
looseness.
• Inspect undercarriage fasteners. If any
are loose or damaged, tighten or
replace ensuring that the proper torque
specification is used.
• Inspect the tires for any cuts in the
tread or sidewall area. Also inspect the
sidewall for any bulge indicating
damage to the tire.
• Inspect the wheels for dents, cracks,
or other damage.
• Refit the front license plate if removed
previously.
BREAKING-IN
You need to break in new tires for
approximately 300 mi (480 km). During
this time, your vehicle may exhibit some
unusual driving characteristics.
Avoid driving too fast during the first
1,000 mi (1,600 km)
. Vary your speed
frequently and change up through the
gears early. Do not labor the engine.
Drive your new vehicle at least
1,000 mi
(1,600 km) before towing a trailer. Make
sure you use the specified engine oil. See
Capacities and Specifications
(page
437).
Do not add friction modifier compounds
or special break-in oils during the first few
thousand miles (kilometers) of operation.
These additives may prevent piston ring
seating.
DRIVING THROUGH WATER WARNING:
Do not drive through
flowing or deep water as you may lose
control of your vehicle. Note:
Engine damage can occur if water
enters the air filter.
For Vehicles without Tremor Off-
Road Package
Note: Driving through standing water can
cause vehicle damage.
Note: Drive through water in an emergency
only and not as part of normal driving.
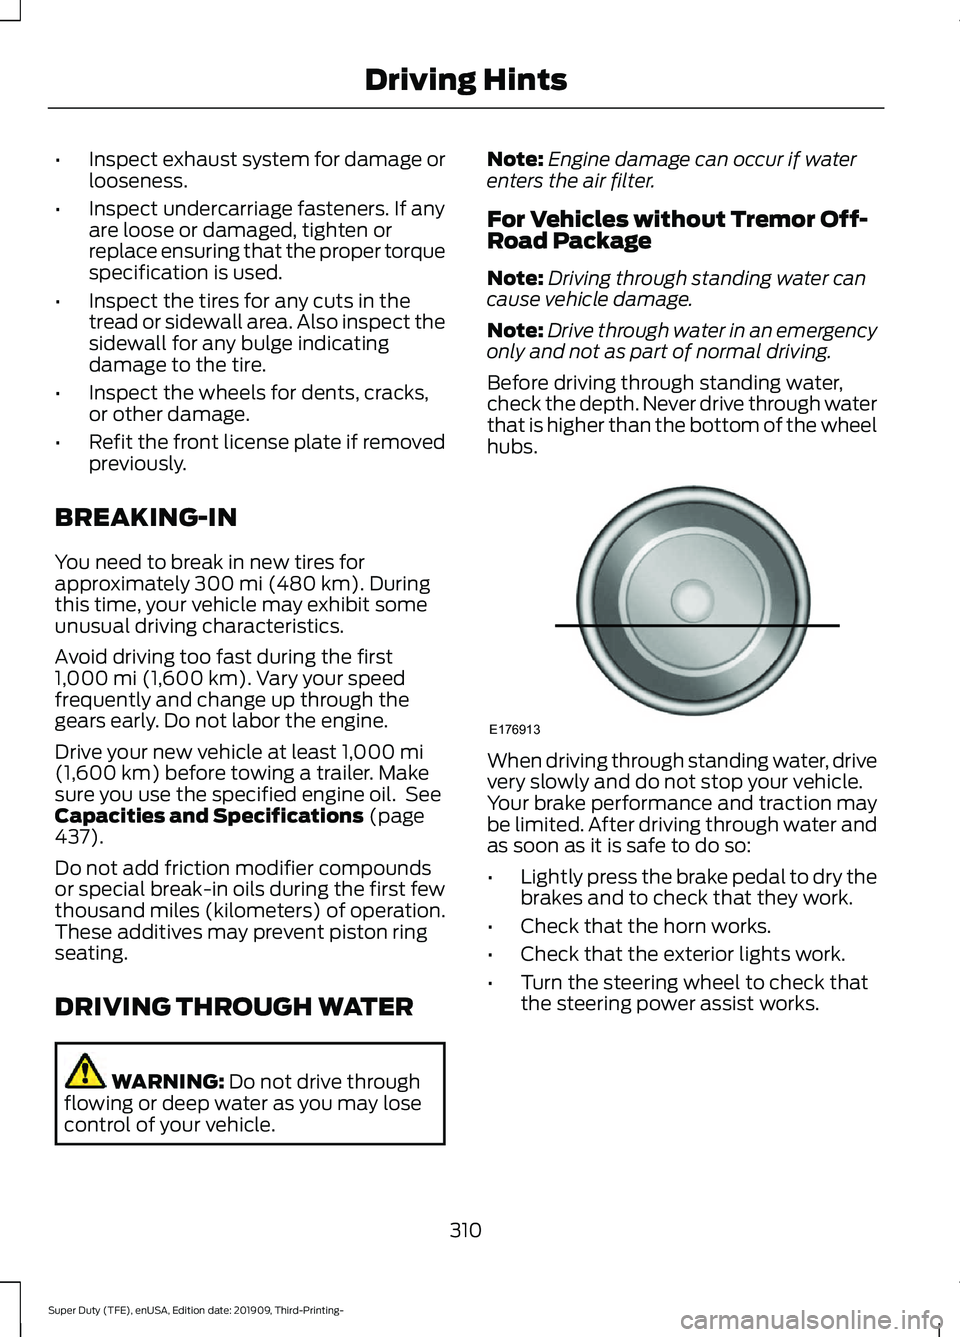
Before driving through standing water,
check the depth. Never drive through water
that is higher than the bottom of the wheel
hubs. When driving through standing water, drive
very slowly and do not stop your vehicle.
Your brake performance and traction may
be limited. After driving through water and
as soon as it is safe to do so:
•
Lightly press the brake pedal to dry the
brakes and to check that they work.
• Check that the horn works.
• Check that the exterior lights work.
• Turn the steering wheel to check that
the steering power assist works.
310
Super Duty (TFE), enUSA, Edition date: 201909, Third-Printing- Driving HintsE176913
Page 351 of 631
4. Remove the auxiliary foam filter from
the air filter housing.
5. To install, reverse the removal procedure. The housing cover can be
oscillated slightly left to right to assist
with installation as needed, until
positioned such that all three clips can
be re-engaged.
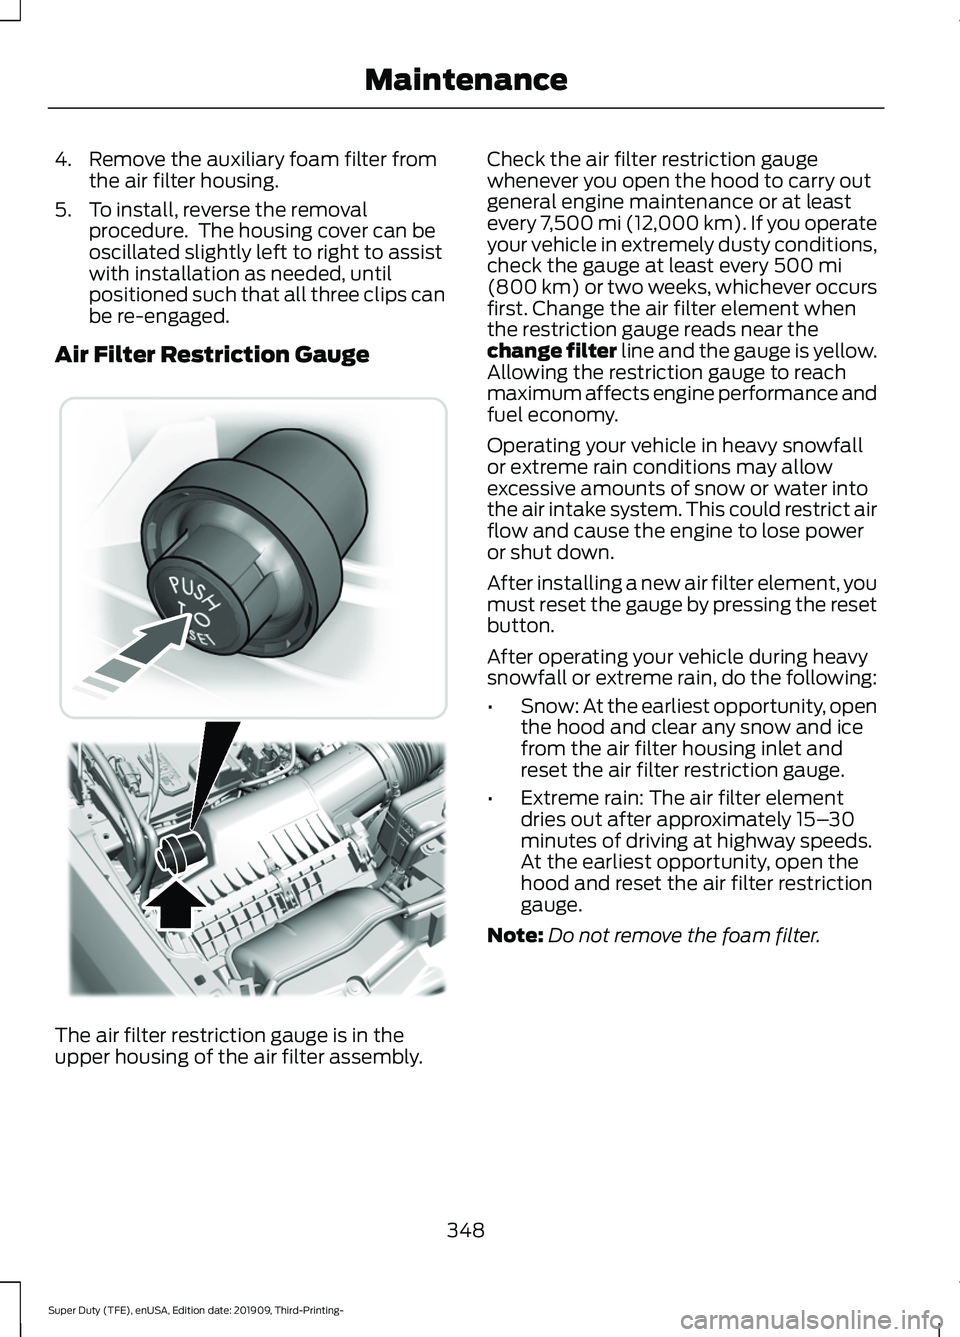
Air Filter Restriction Gauge The air filter restriction gauge is in the
upper housing of the air filter assembly. Check the air filter restriction gauge
whenever you open the hood to carry out
general engine maintenance or at least
every 7,500 mi (12,000 km). If you operate
your vehicle in extremely dusty conditions,
check the gauge at least every 500 mi
(800 km) or two weeks, whichever occurs
first. Change the air filter element when
the restriction gauge reads near the
change filter line and the gauge is yellow.
Allowing the restriction gauge to reach
maximum affects engine performance and
fuel economy.
Operating your vehicle in heavy snowfall
or extreme rain conditions may allow
excessive amounts of snow or water into
the air intake system. This could restrict air
flow and cause the engine to lose power
or shut down.
After installing a new air filter element, you
must reset the gauge by pressing the reset
button.
After operating your vehicle during heavy
snowfall or extreme rain, do the following:
• Snow: At the earliest opportunity, open
the hood and clear any snow and ice
from the air filter housing inlet and
reset the air filter restriction gauge.
• Extreme rain: The air filter element
dries out after approximately 15– 30
minutes of driving at highway speeds.
At the earliest opportunity, open the
hood and reset the air filter restriction
gauge.
Note: Do not remove the foam filter.
348
Super Duty (TFE), enUSA, Edition date: 201909, Third-Printing- Maintenance E310420
Page 356 of 631
ENGINE COOLANT CHECK -
6.2L
WARNING: Do not remove the
coolant reservoir cap when the engine is
on or the cooling system is hot. Wait 10
minutes for the cooling system to cool
down. Cover the coolant reservoir cap
with a thick cloth to prevent the
possibility of scalding and slowly remove
the cap. Failure to follow this instruction
could result in personal injury. WARNING:
Do not put coolant in
the windshield washer reservoir. If
sprayed on the windshield, coolant could
make it difficult to see through the
windshield. WARNING:
To reduce the risk of
personal injury, make sure the engine is
cool before unscrewing the coolant
pressure relief cap. The cooling system
is under pressure. Steam and hot liquid
can come out forcefully when you loosen
the cap slightly. WARNING:
Do not add coolant
further than the MAX mark.
When the engine is cold, check the
concentration and level of the coolant at
the intervals listed in the scheduled
maintenance information. See Scheduled
Maintenance
(page 553).
Note: Make sure that the coolant level is
between the
MIN and the MAX marks on
the coolant reservoir.
Note: Coolant expands when it is hot. The
level may extend beyond the
MAX mark. Maintain coolant concentration within
48% to 50%, which equates to a freeze
point between -30°F (-34°C) and -34°F
(-37°C). Coolant concentration should be
checked using a refractometer. We
recommend Robinair® Coolant and
Battery Refractometer 75240 (Rotunda
tool part number: ROB75240). We do not
recommend the use of hydrometers or
coolant test strips for measuring coolant
concentration.
Note:
Automotive fluids are not
interchangeable. Do not use coolant or
windshield washer fluid outside of its
specified function and vehicle location.
Note: Do not use stop leak pellets, cooling
system sealants, or additives as they can
cause damage to the engine cooling or
heating systems. Resulting component
damage may not be covered by the vehicle
Warranty.
Adding Coolant WARNING:
Do not remove the
coolant reservoir cap when the engine is
on or the cooling system is hot. Wait 10
minutes for the cooling system to cool
down. Cover the coolant reservoir cap
with a thick cloth to prevent the
possibility of scalding and slowly remove
the cap. Failure to follow this instruction
could result in personal injury.
It is very important to use prediluted
coolant meeting the correct specification
in order to avoid plugging the small
passageways in the engine cooling system.
See
Capacities and Specifications
(page 437). Incorrect prediluted coolant
use can cause damage not covered by the
vehicle Warranty.
If the coolant level is at or below the
minimum mark, add prediluted coolant
immediately.
353
Super Duty (TFE), enUSA, Edition date: 201909, Third-Printing- Maintenance
Page 360 of 631
ENGINE COOLANT CHECK -
6.7L DIESEL
WARNING: Do not remove the
coolant reservoir cap when the engine is
on or the cooling system is hot. Wait 10
minutes for the cooling system to cool
down. Cover the coolant reservoir cap
with a thick cloth to prevent the
possibility of scalding and slowly remove
the cap. Failure to follow this instruction
could result in personal injury. WARNING:
Do not put coolant in
the windshield washer reservoir. If
sprayed on the windshield, coolant could
make it difficult to see through the
windshield. WARNING:
To reduce the risk of
personal injury, make sure the engine is
cool before unscrewing the coolant
pressure relief cap. The cooling system
is under pressure. Steam and hot liquid
can come out forcefully when you loosen
the cap slightly. WARNING:
Do not add coolant
further than the MAX mark.
When the engine is cold, check the
concentration and level of the coolant at
the intervals listed in the scheduled
maintenance information. See Scheduled
Maintenance
(page 553).
Note: Make sure that the coolant level is
between the
MIN and MAX marks on the
coolant reservoir.
Note: Coolant expands when it is hot. The
level may extend beyond the
MAX mark. Maintain coolant concentration within
48% to 50%, which equates to a freeze
point between -30°F (-34°C) and -34°F
(-37°C). Check the coolant concentration
using a refractometer. We do not
recommend the use of hydrometers or
coolant test strips for measuring coolant
concentration.
Adding Coolant
WARNING:
Do not add engine
coolant when the engine is on or the
cooling system is hot. Failure to follow
this instruction could result in personal
injury. WARNING:
Do not remove the
coolant reservoir cap when the engine is
on or the cooling system is hot. Wait 10
minutes for the cooling system to cool
down. Cover the coolant reservoir cap
with a thick cloth to prevent the
possibility of scalding and slowly remove
the cap. Failure to follow this instruction
could result in personal injury.
Note: Automotive fluids are not
interchangeable. Do not use coolant or
windshield washer fluid outside of its
specified function and vehicle location.
Note: Do not use stop leak pellets, cooling
system sealants, or additives as they can
cause damage to the engine cooling or
heating systems. Resulting component
damage may not be covered by the vehicle
Warranty.
357
Super Duty (TFE), enUSA, Edition date: 201909, Third-Printing- Maintenance
Page 364 of 631
WARNING: To reduce the risk of
personal injury, make sure the engine is
cool before unscrewing the coolant
pressure relief cap. The cooling system
is under pressure. Steam and hot liquid
can come out forcefully when you loosen
the cap slightly. WARNING:
Do not add coolant
further than the MAX mark.
When the engine is cold, check the
concentration and level of the coolant at
the intervals listed in the scheduled
maintenance information. See Scheduled
Maintenance
(page 553).
Note: Make sure that the coolant level is
between the
MIN and MAX marks on the
coolant reservoir.
Note: Coolant expands when it is hot. The
level may extend beyond the
MAX mark.
Maintain coolant concentration within
48% to 50%, which equates to a freeze
point between -30°F (-34°C) and -34°F
(-37°C). Check the coolant concentration
using a refractometer. We do not
recommend the use of hydrometers or
coolant test strips for measuring coolant
concentration.
Adding Coolant WARNING:
Do not add engine
coolant when the engine is on or the
cooling system is hot. Failure to follow
this instruction could result in personal
injury. WARNING:
Do not remove the
coolant reservoir cap when the engine is
on or the cooling system is hot. Wait 10
minutes for the cooling system to cool
down. Cover the coolant reservoir cap
with a thick cloth to prevent the
possibility of scalding and slowly remove
the cap. Failure to follow this instruction
could result in personal injury.
Note: Automotive fluids are not
interchangeable. Do not use coolant or
windshield washer fluid outside of its
specified function and vehicle location.
Note: Do not use stop leak pellets, cooling
system sealants, or non-specified additives
as they can cause damage to the engine
cooling or heating systems. Resulting
component damage may not be covered by
the vehicle Warranty.
It is very important to use prediluted
coolant approved to the correct
specification in order to avoid plugging the
small passageways in the engine cooling
system. See
Capacities and
Specifications (page 457). Do not mix
different colors or types of coolant in your
vehicle. Mixing of engine coolants or using
an incorrect coolant may harm the engine
or cooling system components and may
not be covered by the vehicle Warranty.
Note: Coolants marketed for all makes and
models may not be approved to our
specifications and may cause damage to
the cooling system. Resulting component
damage may not be covered by the vehicle
Warranty.
If the coolant level is at or below the
minimum mark, add prediluted coolant
immediately.
361
Super Duty (TFE), enUSA, Edition date: 201909, Third-Printing- Maintenance