transmission FORD F-550 2020 Workshop Manual
[x] Cancel search | Manufacturer: FORD, Model Year: 2020, Model line: F-550, Model: FORD F-550 2020Pages: 631, PDF Size: 9.62 MB
Page 237 of 631
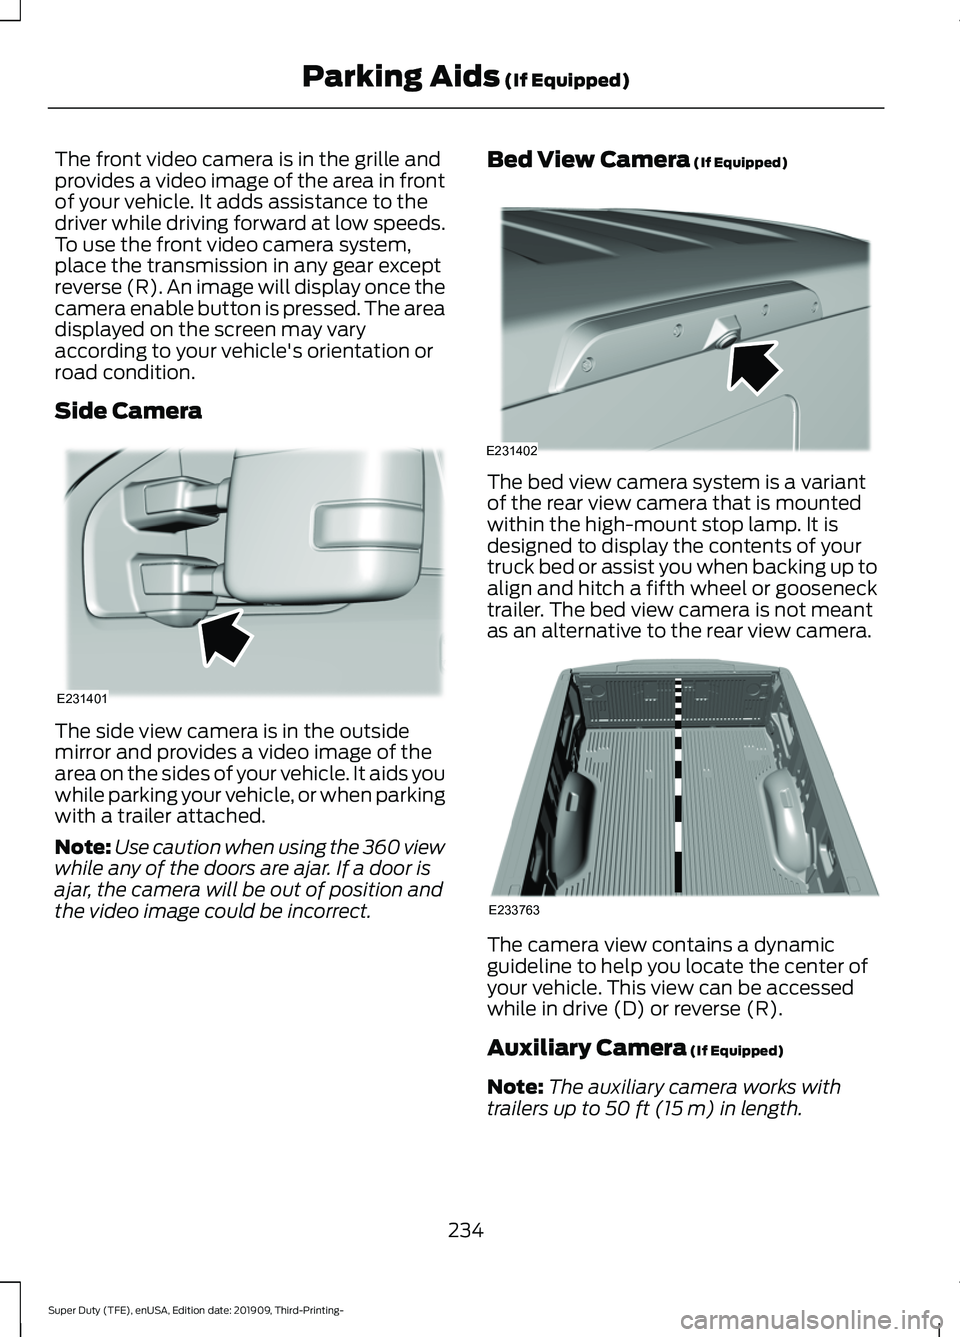
The front video camera is in the grille and
provides a video image of the area in front
of your vehicle. It adds assistance to the
driver while driving forward at low speeds.
To use the front video camera system,
place the transmission in any gear except
reverse (R). An image will display once the
camera enable button is pressed. The area
displayed on the screen may vary
according to your vehicle's orientation or
road condition.
Side Camera
The side view camera is in the outside
mirror and provides a video image of the
area on the sides of your vehicle. It aids you
while parking your vehicle, or when parking
with a trailer attached.
Note:
Use caution when using the 360 view
while any of the doors are ajar. If a door is
ajar, the camera will be out of position and
the video image could be incorrect. Bed View Camera (If Equipped) The bed view camera system is a variant
of the rear view camera that is mounted
within the high-mount stop lamp. It is
designed to display the contents of your
truck bed or assist you when backing up to
align and hitch a fifth wheel or gooseneck
trailer. The bed view camera is not meant
as an alternative to the rear view camera.
The camera view contains a dynamic
guideline to help you locate the center of
your vehicle. This view can be accessed
while in drive (D) or reverse (R).
Auxiliary Camera
(If Equipped)
Note: The auxiliary camera works with
trailers up to
50 ft (15 m) in length.
234
Super Duty (TFE), enUSA, Edition date: 201909, Third-Printing- Parking Aids
(If Equipped)E231401 E231402 E233763
Page 243 of 631
Adaptive Cruise Control Gap Settings
Dynamic
Behavior
Distance Gap
Graphic
Display,
Bars Indic- ated
Between Vehicles
Sport.
Closest.
1
Normal.
Close.
2
Normal.
Medium.
3
Comfort.
Far.
4
Each time you switch the system on, it
selects the last chosen gap setting.
Overriding the Set Speed WARNING: If you override the
system by pressing the accelerator
pedal, it does not automatically apply
the brakes to maintain a gap from any
vehicle ahead.
When you press the accelerator pedal, you
override the set speed and gap distance. Use the accelerator pedal
normally to intentionally exceed
the set speed limit.
When you override the system, the green
indicator light illuminates and the vehicle
image does not appear in the information
display.
The system resumes operation when you
release the accelerator pedal. The vehicle
speed decreases to the set speed, or a
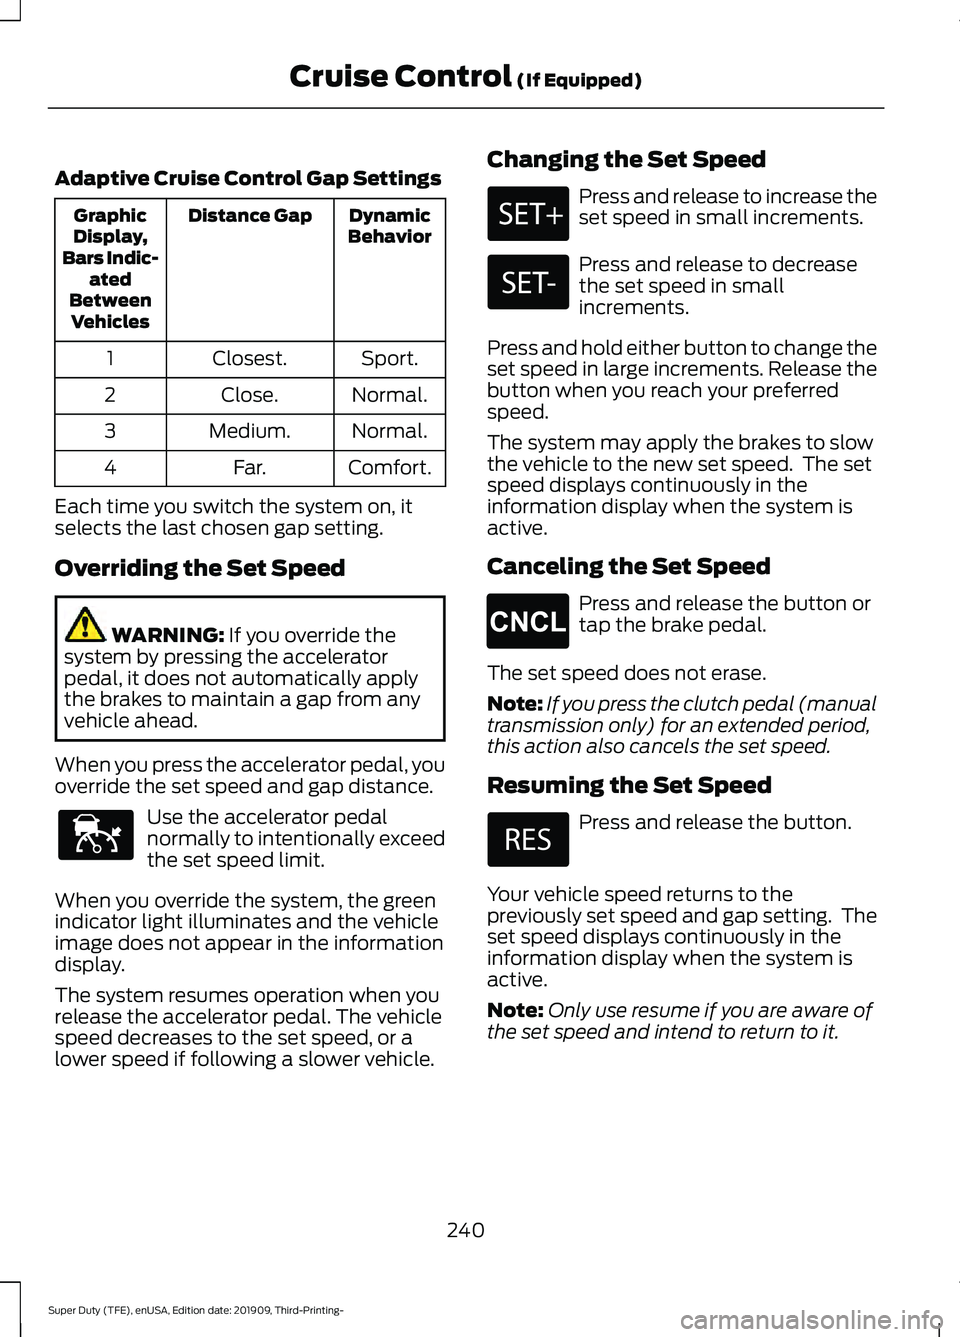
lower speed if following a slower vehicle. Changing the Set Speed Press and release to increase the
set speed in small increments.
Press and release to decrease
the set speed in small
increments.
Press and hold either button to change the
set speed in large increments. Release the
button when you reach your preferred
speed.
The system may apply the brakes to slow
the vehicle to the new set speed. The set
speed displays continuously in the
information display when the system is
active.
Canceling the Set Speed Press and release the button or
tap the brake pedal.
The set speed does not erase.
Note: If you press the clutch pedal (manual
transmission only) for an extended period,
this action also cancels the set speed.
Resuming the Set Speed Press and release the button.
Your vehicle speed returns to the
previously set speed and gap setting. The
set speed displays continuously in the
information display when the system is
active.
Note: Only use resume if you are aware of
the set speed and intend to return to it.
240
Super Duty (TFE), enUSA, Edition date: 201909, Third-Printing- Cruise Control
(If Equipped)E144529 E265298
Page 252 of 631
Note:
The Blind Spot Information System
does not prevent contact with other vehicles
or objects; nor detect parked vehicles,
people, animals or infrastructure (fences,
guardrails, trees). It is only designed to alert
you to moving vehicles in the blind spot
zones.
Note: When a vehicle passes quickly
through the blind spot zone, typically fewer
than two seconds, the system does not
trigger.
Using the System
The Blind Spot Information System turns
on when you start the engine and you drive
your vehicle forward above 5 mph
(8 km/h).
For automatic transmissions, the Blind
Spot Information System remains on while
the transmission is in drive (D). If shifted
into reverse (R) or park (P) the Blind Spot
Information System turns off. Once shifted
back into drive (D), the Blind Spot
Information System turns back on when
you drive your vehicle above
5 mph
(8 km/h).
Note: For automatic transmissions, the
Blind Spot Information System does not
function in reverse (R) or park (P).
For manual transmissions, the Blind Spot
Information System is on for all gears
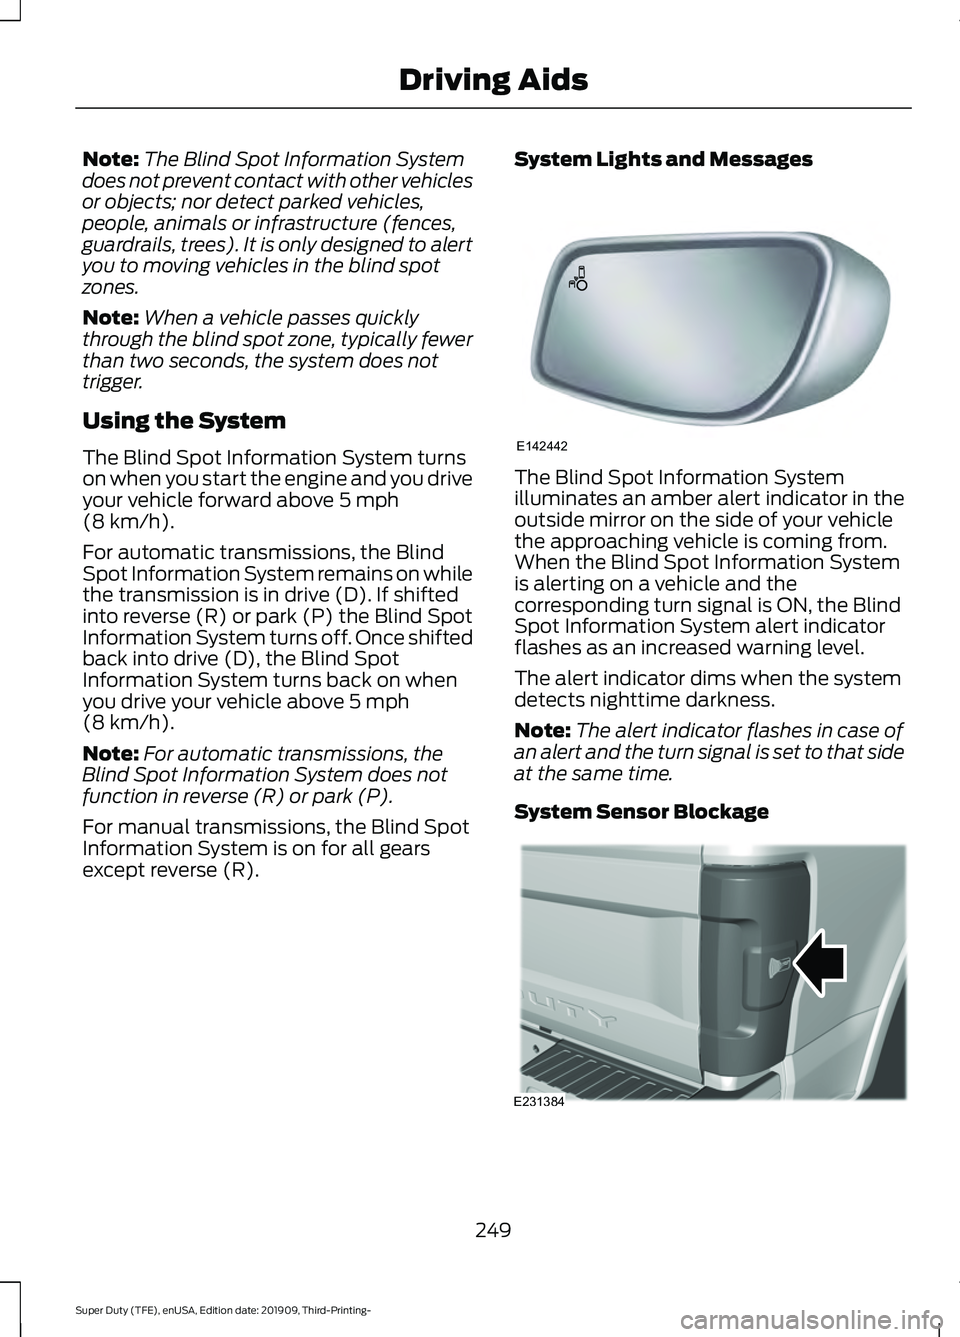
except reverse (R). System Lights and Messages The Blind Spot Information System
illuminates an amber alert indicator in the
outside mirror on the side of your vehicle
the approaching vehicle is coming from.
When the Blind Spot Information System
is alerting on a vehicle and the
corresponding turn signal is ON, the Blind
Spot Information System alert indicator
flashes as an increased warning level.
The alert indicator dims when the system
detects nighttime darkness.
Note:
The alert indicator flashes in case of
an alert and the turn signal is set to that side
at the same time.
System Sensor Blockage 249
Super Duty (TFE), enUSA, Edition date: 201909, Third-Printing- Driving AidsE142442 E231384
Page 260 of 631
The electronic torque overlay steering
system adds supplemental steering assist
to the hydraulic gear when needed,
dependent on vehicle conditions such as
vehicle speed, steering wheel angle, and
steering wheel torque. The hydraulic
steering system provides the majority of
steering assistance. The electronic torque
overlay enables features such as pro trailer
backup assistance and lane departure
warning.
If your vehicle loses electrical power while
you are driving, your vehicle loses electric
power steering assistance. The steering
system still operates, and you can steer
your vehicle with hydraulic assist. Steering
your vehicle with only hydraulic assist
requires more effort.
Extreme continuous steering may increase
the effort required for you to steer your
vehicle. This increased effort prevents
overheating and permanent damage to
the steering system. You do not lose the
ability to steer your vehicle manually.
Typical steering and driving maneuvers
allow the system to cool and return to
normal operation.
Adaptive Learning (If Equipped)
The electronic power steering system
adaptive learning helps correct road
irregularities and improves overall handling
and steering feel. It communicates with
the brake system to help operate
advanced stability control and accident
avoidance systems. Whenever the battery
is disconnected or a new battery installed,
you must drive your vehicle a short
distance before the system relearns the
strategy and reactivates all systems. Adaptive Steering
(If Equipped)
Note: The adaptive steering system has
diagnostic checks that continuously monitor
the system. If the system detects a fault, a
message displays in the information display.
If a red warning message displays, stop your
vehicle as soon as it is safe to do so. The
message may clear if the fault is no longer
present. If an adaptive steering system
warning message appears each time you
start your vehicle, have the system checked
as soon as possible.
The adaptive steering system continually
changes the steering ratio with changes to
vehicle speed, optimizing the steering
response in all conditions. The system also
changes when you switch on the
transmission tow/haul feature. When you
select the tow/haul button, the adaptive
steering system reduces vehicle sensitivity
to steering inputs at higher vehicle speeds,
while maintaining the ease of parking and
maneuverability at low speeds.
Note: The adaptive steering system is
designed with a locking device. With the
lock engaged, the adaptive steering system
remains mechanically locked at a fixed
steering ratio. You may also notice a click
when you switch the vehicle on or after you
switch it off, as the lock disengages or
engages.
Note: If your vehicle loses electrical power
or detects a fault when you are driving, the
system automatically shuts down and you
retain normal steering function with a fixed
steering ratio. During this time it is possible
that the steering wheel may not be straight
when the vehicle is driving straight ahead.
In addition, the driver may notice that the
steering wheel angle required to steer the
vehicle may be different.
257
Super Duty (TFE), enUSA, Edition date: 201909, Third-Printing- Driving Aids
Page 266 of 631
•
Electronic stability control and traction
control maintains your vehicle control
in adverse conditions or
high-performance driving.
• Electronic throttle control enhances
the powertrain response to your inputs.
• Transmission controls are optimized
with shift schedules tuned to each
terrain.
Using the System
The system tailors your vehicle
configuration for each mode you select.
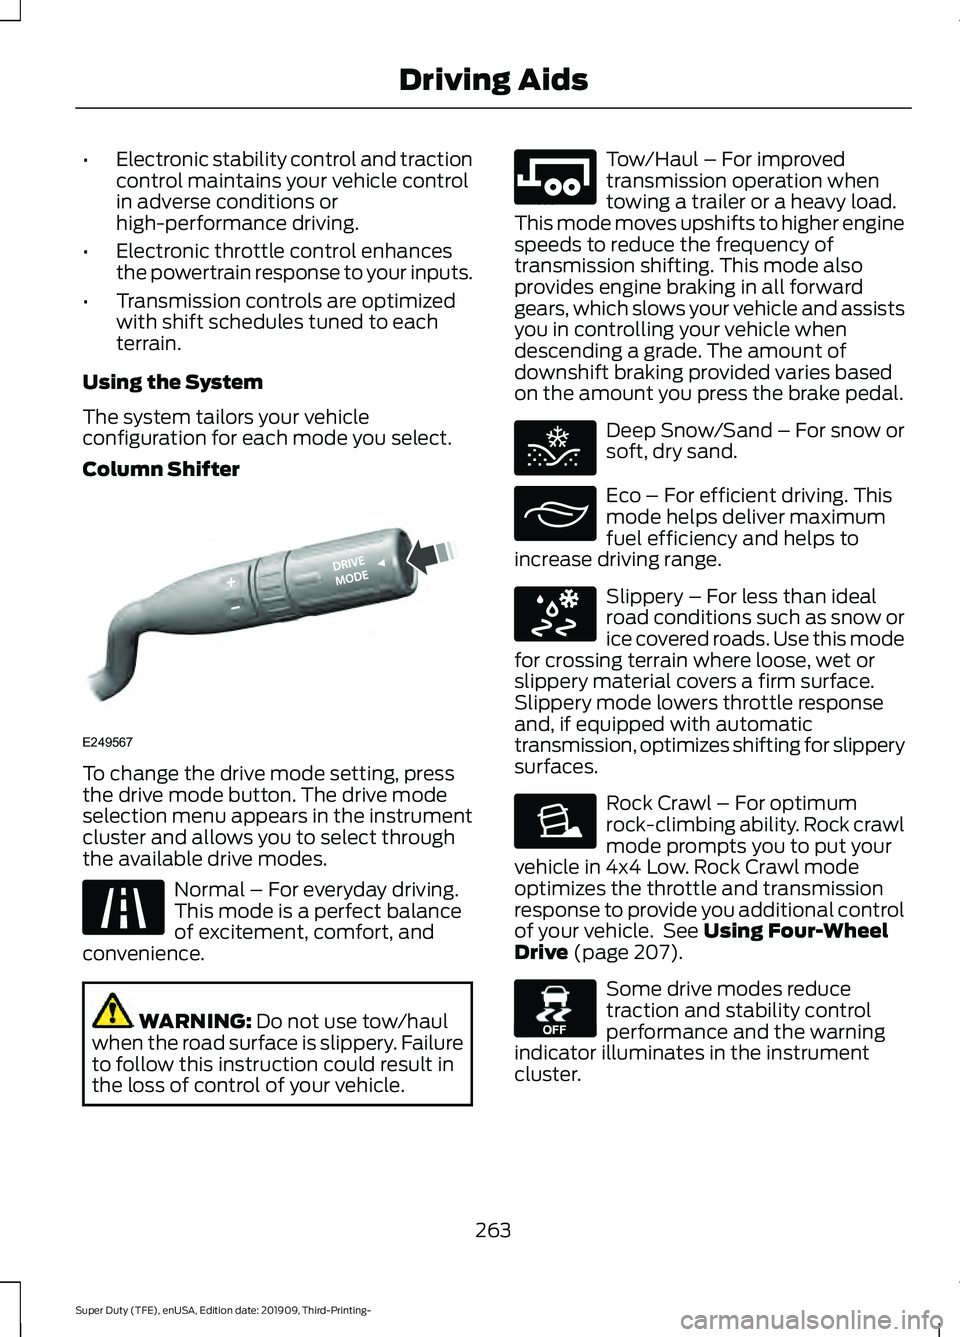
Column Shifter To change the drive mode setting, press
the drive mode button. The drive mode
selection menu appears in the instrument
cluster and allows you to select through
the available drive modes.
Normal – For everyday driving.
This mode is a perfect balance
of excitement, comfort, and
convenience. WARNING: Do not use tow/haul
when the road surface is slippery. Failure
to follow this instruction could result in
the loss of control of your vehicle. Tow/Haul – For improved
transmission operation when
towing a trailer or a heavy load.
This mode moves upshifts to higher engine
speeds to reduce the frequency of
transmission shifting. This mode also
provides engine braking in all forward
gears, which slows your vehicle and assists
you in controlling your vehicle when
descending a grade. The amount of
downshift braking provided varies based
on the amount you press the brake pedal. Deep Snow/Sand – For snow or
soft, dry sand.
Eco – For efficient driving. This
mode helps deliver maximum
fuel efficiency and helps to
increase driving range. Slippery – For less than ideal
road conditions such as snow or
ice covered roads. Use this mode
for crossing terrain where loose, wet or
slippery material covers a firm surface.
Slippery mode lowers throttle response
and, if equipped with automatic
transmission, optimizes shifting for slippery
surfaces. Rock Crawl – For optimum
rock-climbing ability. Rock crawl
mode prompts you to put your
vehicle in 4x4 Low. Rock Crawl mode
optimizes the throttle and transmission
response to provide you additional control
of your vehicle. See
Using Four-Wheel
Drive (page 207). Some drive modes reduce
traction and stability control
performance and the warning
indicator illuminates in the instrument
cluster.
263
Super Duty (TFE), enUSA, Edition date: 201909, Third-Printing- Driving AidsE249567 E225310 E246592 E295420 E295413 E295414 E225315 E130458
Page 275 of 631
TOWING A TRAILER
WARNING: Do not exceed
the GVWR or the GAWR
specified on the certification
label. WARNING:
Towing trailers
beyond the maximum
recommended gross trailer
weight exceeds the limit of your
vehicle and could result in engine
damage, transmission damage,
structural damage, loss of
vehicle control, vehicle rollover
and personal injury. WARNING:
Do not exceed
the lowest rating capacity for
your vehicle or trailer hitch.
Overloading your vehicle or
trailer hitch can impair your
vehicle stability and handling.
Failure to follow this instruction
could result in the loss of control
of your vehicle, personal injury or
death. WARNING:
Do not cut,
drill, weld or modify the trailer
hitch. Modifying the trailer hitch
could reduce the hitch rating. Note:
To prevent your trailer from
accumulating distance, and the
trailer information status appearing
when you restart your vehicle after
disconnecting your trailer, you must
deactivate your trailer. Using the
information display, go to the
Towing menu and then the Select
Trailer option. Select the No active
trailer option. See
Information
Displays (page 109).
Your vehicle may have electrical
items, such as fuses or relays,
related to towing. See
Fuses
(page 329).
Your vehicle may have ability to
modify trailer towing features.
See
General Information (page
109).
Your vehicle's load capacity
designation is by weight, not by
volume, so you cannot necessarily
use all available space when
loading a vehicle or trailer.
Towing a trailer places an extra
load on your vehicle's engine,
transmission, axle, brakes, tires
and suspension. Inspect these
components periodically during,
and after, any towing operation.
272
Super Duty (TFE), enUSA, Edition date: 201909, Third-Printing- Towing
Page 278 of 631
Positioning Your Vehicle and
Trailer
Hitch your trailer to your vehicle and
connect the electrical wiring harness.
Check to make sure that the wiring is
working. See Essential Towing Checks
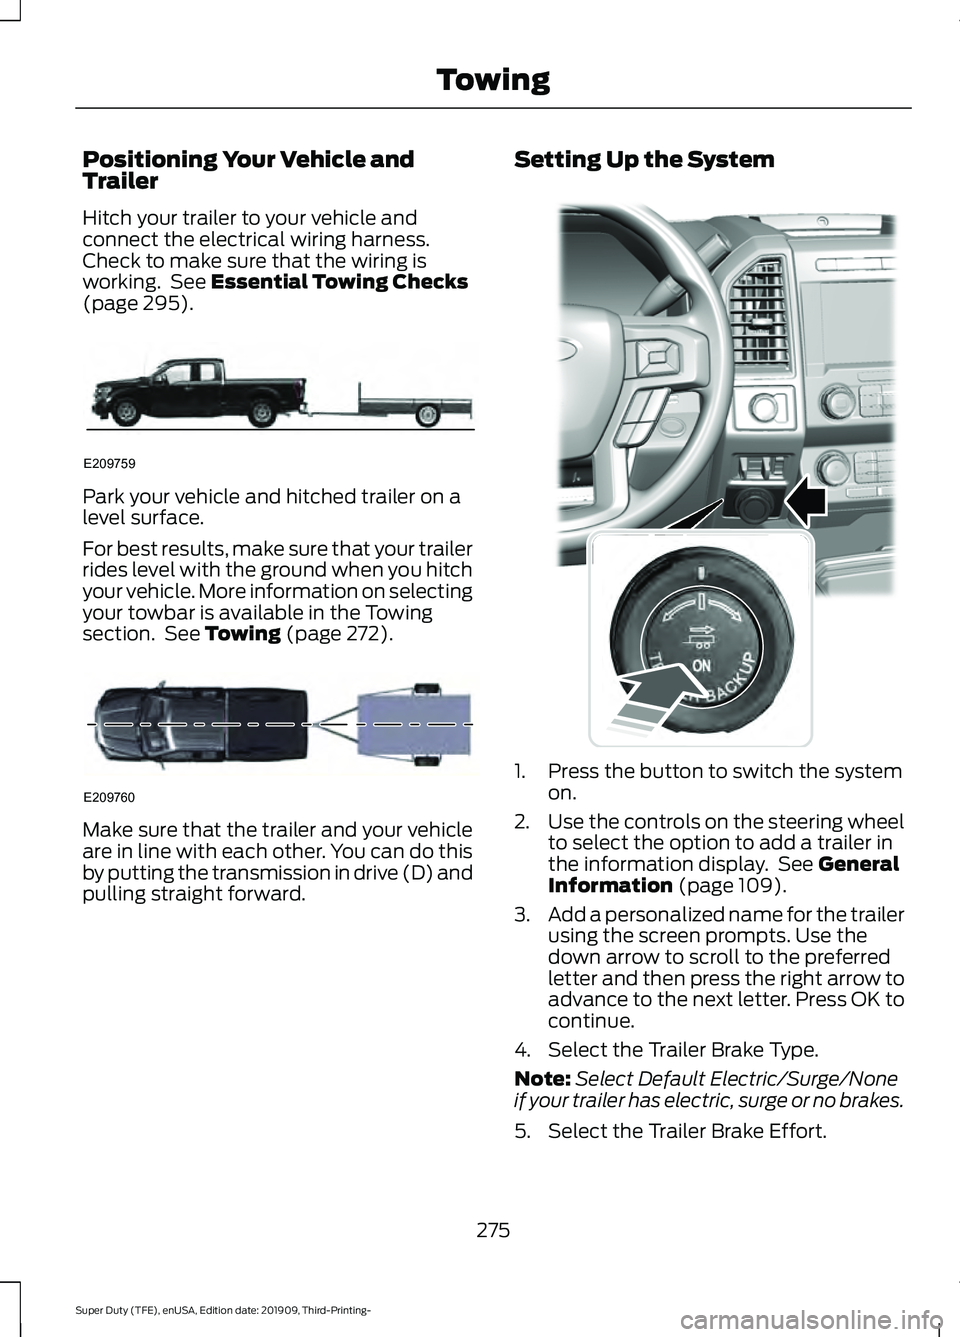
(page 295). Park your vehicle and hitched trailer on a
level surface.
For best results, make sure that your trailer
rides level with the ground when you hitch
your vehicle. More information on selecting
your towbar is available in the Towing
section. See
Towing (page 272).
Make sure that the trailer and your vehicle
are in line with each other. You can do this
by putting the transmission in drive (D) and
pulling straight forward. Setting Up the System
1. Press the button to switch the system
on.
2. Use the controls on the steering wheel
to select the option to add a trailer in
the information display. See
General
Information (page 109).
3. Add a personalized name for the trailer
using the screen prompts. Use the
down arrow to scroll to the preferred
letter and then press the right arrow to
advance to the next letter. Press OK to
continue.
4. Select the Trailer Brake Type.
Note: Select Default Electric/Surge/None
if your trailer has electric, surge or no brakes.
5. Select the Trailer Brake Effort.
275
Super Duty (TFE), enUSA, Edition date: 201909, Third-Printing- TowingE209759 E209760 E318266
Page 299 of 631
Note:
If your vehicle is equipped with a
factory brake controller, the Battery (+)
Orange wire is powered when you start the
engine and you apply the brakes at least
once when a trailer with brake lamps is
connected. If your vehicle is not equipped
with a factory brake controller, relays control
the system and it becomes active when you
power on your vehicle.
Dynamic Hitching Using the Rear
View Camera System
Note: Active guidelines and fixed guidelines
are only available when the transmission is
in reverse (R).
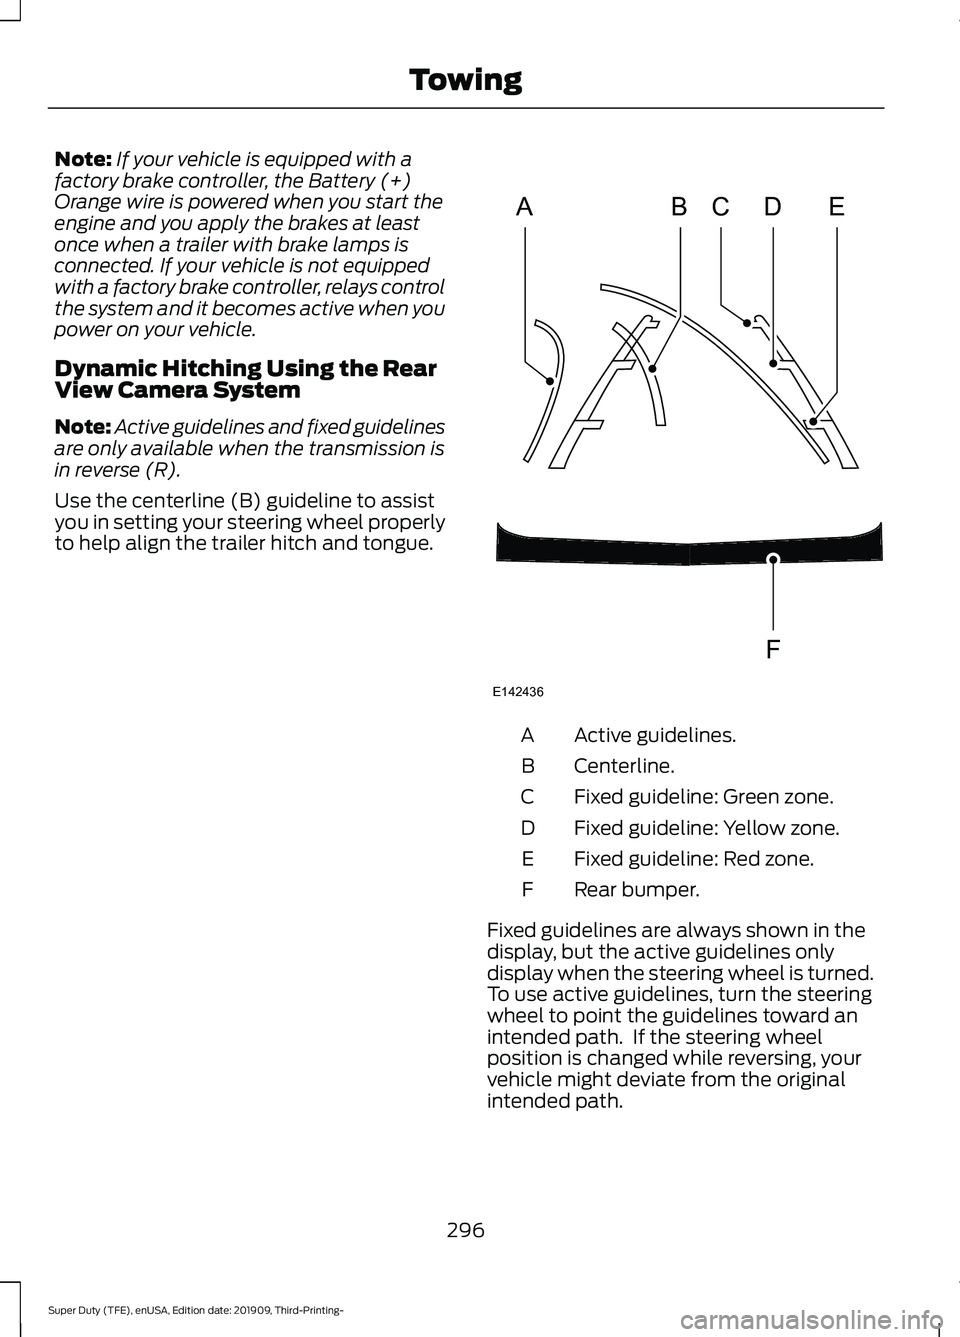
Use the centerline (B) guideline to assist
you in setting your steering wheel properly
to help align the trailer hitch and tongue. Active guidelines.
A
Centerline.
B
Fixed guideline: Green zone.
C
Fixed guideline: Yellow zone.
D
Fixed guideline: Red zone.
E
Rear bumper.
F
Fixed guidelines are always shown in the
display, but the active guidelines only
display when the steering wheel is turned.
To use active guidelines, turn the steering
wheel to point the guidelines toward an
intended path. If the steering wheel
position is changed while reversing, your
vehicle might deviate from the original
intended path.
296
Super Duty (TFE), enUSA, Edition date: 201909, Third-Printing- TowingABCD
F
E
E142436
Page 306 of 631
•
Your vehicle's brake system and the
trailer brake system work
independently of each other. Changing
the gain setting on the controller does
not affect the operation of your
vehicle's brakes.
• When you switch the engine off, the
controller output is disabled and the
display and module shut down.
Trailer Lamps WARNING: Never connect any
trailer lamp wiring to the vehicle's tail
lamp wiring; this may damage the
electrical system resulting in fire. Contact
your authorized dealer as soon as
possible for assistance in proper trailer
tow wiring installation. Additional
electrical equipment may be required.
Trailer lamps are required on most towed
vehicles. Make sure all running lights, brake
lights, turn signals and hazard lights are
working.
Before Towing a Trailer
Practice turning, stopping and backing up
to get the feel of your vehicle-trailer
combination before starting on a trip.
When turning, make wider turns so the
trailer wheels clear curbs and other
obstacles.
When Towing a Trailer
• Check your hitch, electrical connections
and trailer wheel lug nuts thoroughly
after you have traveled 50 mi (80 km).
• Do not drive faster than
70 mph
(113 km/h) during the first 500 mi
(800 km).
• Do not make full-throttle starts. •
When stopped in congested or heavy
traffic during hot weather, place the
gearshift in park (P) to aid engine and
transmission cooling and to help A/C
performance.
• Turn off the speed control with heavy
loads or in hilly terrain. The speed
control may turn off automatically
when you are towing on long, steep
grades.
• Shift to a lower gear when driving down
a long or steep hill. Do not apply the
brakes continuously, as they may
overheat and become less effective.
• If your transmission is equipped with a
Grade Assist or Tow/Haul feature, use
this feature when towing. This provides
engine braking and helps eliminate
excessive transmission shifting for
optimum fuel economy and
transmission cooling.
• If your vehicle is equipped with
Adaptive Steering and you have
enabled Tow/Haul, the Adaptive
Steering system adjusts the steering
response to match your vehicle ’s load.
The system reduces vehicle sensitivity
to steering inputs at higher vehicle
speeds while it maintains the ease of
parking and maneuverability at low
speeds.
• If your vehicle is equipped with
AdvanceTrac with RSC, this system
may turn on during typical cornering
maneuvers with a heavily loaded trailer.
This is normal. Turning the corner at a
slower speed while towing may reduce
this tendency.
• If you are towing a trailer frequently in
hot weather, hilly conditions, at the
gross combined weight rating (or any
combination of these factors), consider
refilling your rear axle with synthetic
gear lubricant (if the axle is not already
filled with it). See
Capacities and
Specifications (page 429).
303
Super Duty (TFE), enUSA, Edition date: 201909, Third-Printing- Towing
Page 307 of 631
•
Allow more distance for stopping with
a trailer attached. Anticipate stops and
brake gradually.
• Avoid parking on a grade. However, if
you must park on a grade:
1. Turn the steering wheel to point your vehicle tires away from traffic flow.
2. Set your vehicle parking brake.
3. Place the transmission in park (P).
4. Place wheel chocks in front and back of the trailer wheels. (Chocks not
included with vehicle.)
Your vehicle may be equipped with a
temporary or conventional spare tire. A
"temporary" spare tire is different in size
(diameter or width), tread-type
(All-Season or All Terrain) or is from a
different manufacturer than the road tires
on your vehicle. Consult information on the
tire label or Safety Compliance label for
limitations when using.
Launching or Retrieving a Boat or
Personal Watercraft (PWC)
Note: Disconnect the wiring to the trailer
before backing the trailer into the water.
Note: Reconnect the wiring to the trailer
after
you remove the trailer from the water.
When backing down a ramp during boat
launching or retrieval:
• Do not allow the static water level to
rise above the bottom edge of the rear
bumper.
• Do not allow waves to break higher
than
6 in (15 cm) above the bottom
edge of the rear bumper.
Exceeding these limits may allow water to
enter vehicle components:
• Causing internal damage to the
components.
• Affecting driveability, emissions, and
reliability. Replace the rear axle lubricant anytime
the rear axle has been submerged in water.
Water may have contaminated the rear
axle lubricant, which is not normally
checked or changed unless a leak is
suspected or other axle repair is required.
TOWING THE VEHICLE ON
FOUR WHEELS
WARNING:
If your vehicle has a
steering wheel lock make sure the
ignition is in the accessory or on position
when being towed.
Emergency Towing
If your vehicle becomes inoperable
(without access to wheel dollies,
car-hauling trailer, or flatbed transport
vehicle), it can be flat-towed (all wheels
on the ground, regardless of the powertrain
and transmission configuration) under the
following conditions:
• Your vehicle is facing forward for
towing in a forward direction.
• Place the transmission in neutral (N).
If you cannot move the transmission
into neutral (N), you may need to
override it. See
Transmission (page
201).
• Maximum speed is 35 mph (56 km/h).
• Maximum distance is
50 mi (80 km).
Recreational Towing
Note: Put your climate control system in
recirculated air mode to prevent exhaust
fumes from entering your vehicle.
See
Climate Control (page 139).
304
Super Duty (TFE), enUSA, Edition date: 201909, Third-Printing- Towing