instrument cluster FORD F-600 2021 User Guide
[x] Cancel search | Manufacturer: FORD, Model Year: 2021, Model line: F-600, Model: FORD F-600 2021Pages: 666, PDF Size: 11.3 MB
Page 110 of 666
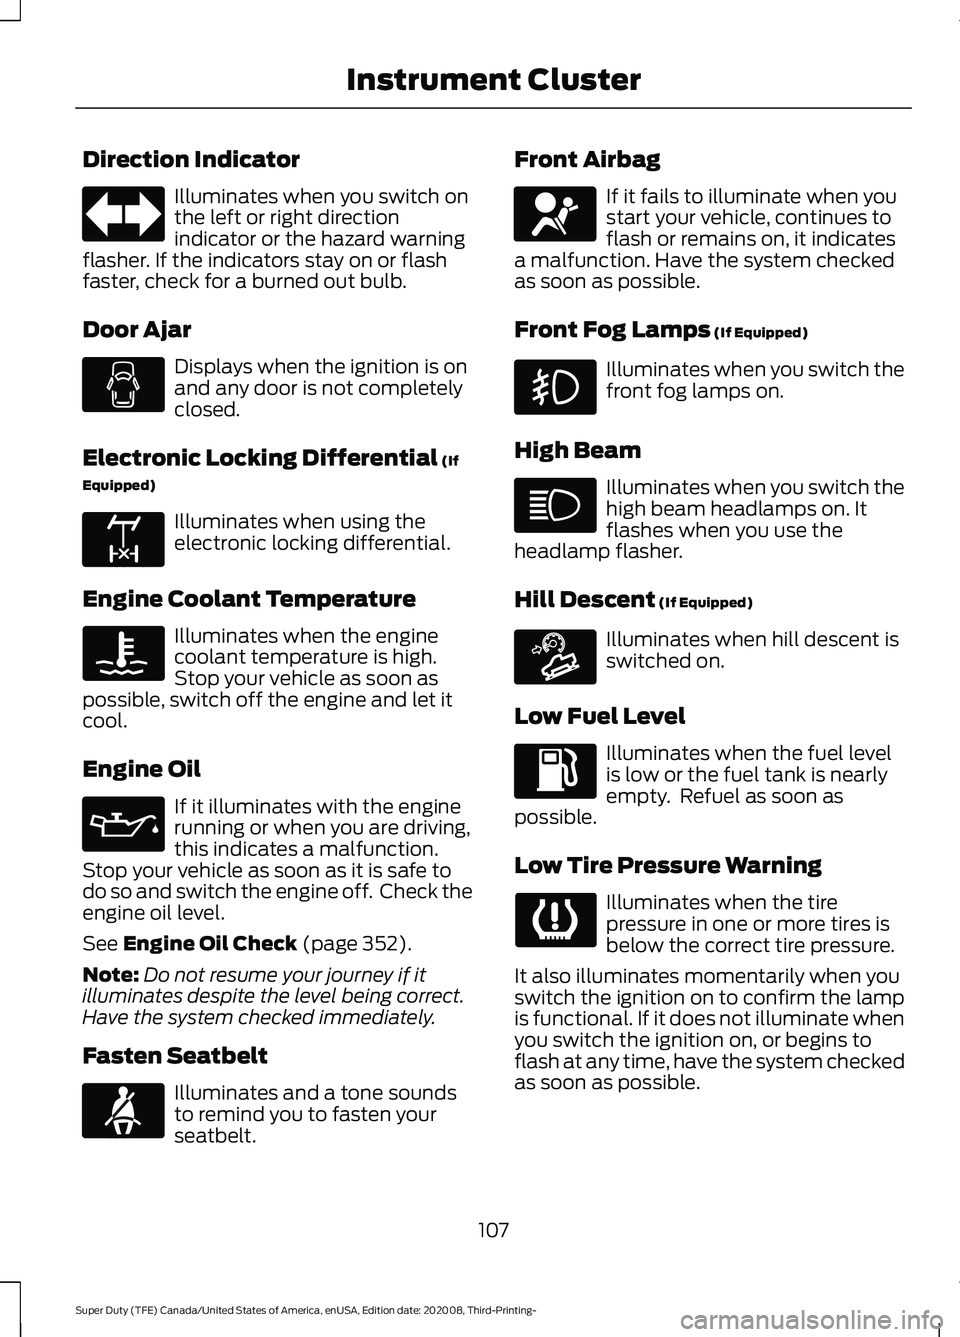
Direction Indicator
Illuminates when you switch on
the left or right direction
indicator or the hazard warning
flasher. If the indicators stay on or flash
faster, check for a burned out bulb.
Door Ajar Displays when the ignition is on
and any door is not completely
closed.
Electronic Locking Differential (If
Equipped) Illuminates when using the
electronic locking differential.
Engine Coolant Temperature Illuminates when the engine
coolant temperature is high.
Stop your vehicle as soon as
possible, switch off the engine and let it
cool.
Engine Oil If it illuminates with the engine
running or when you are driving,
this indicates a malfunction.
Stop your vehicle as soon as it is safe to
do so and switch the engine off. Check the
engine oil level.
See
Engine Oil Check (page 352).
Note: Do not resume your journey if it
illuminates despite the level being correct.
Have the system checked immediately.
Fasten Seatbelt Illuminates and a tone sounds
to remind you to fasten your
seatbelt. Front Airbag If it fails to illuminate when you
start your vehicle, continues to
flash or remains on, it indicates
a malfunction. Have the system checked
as soon as possible.
Front Fog Lamps
(If Equipped) Illuminates when you switch the
front fog lamps on.
High Beam Illuminates when you switch the
high beam headlamps on. It
flashes when you use the
headlamp flasher.
Hill Descent
(If Equipped) Illuminates when hill descent is
switched on.
Low Fuel Level Illuminates when the fuel level
is low or the fuel tank is nearly
empty. Refuel as soon as
possible.
Low Tire Pressure Warning Illuminates when the tire
pressure in one or more tires is
below the correct tire pressure.
It also illuminates momentarily when you
switch the ignition on to confirm the lamp
is functional. If it does not illuminate when
you switch the ignition on, or begins to
flash at any time, have the system checked
as soon as possible.
107
Super Duty (TFE) Canada/United States of America, enUSA, Edition date: 202008, Third-Printing- Instrument Cluster E163170 E71880 E67017 E163171
Page 111 of 666
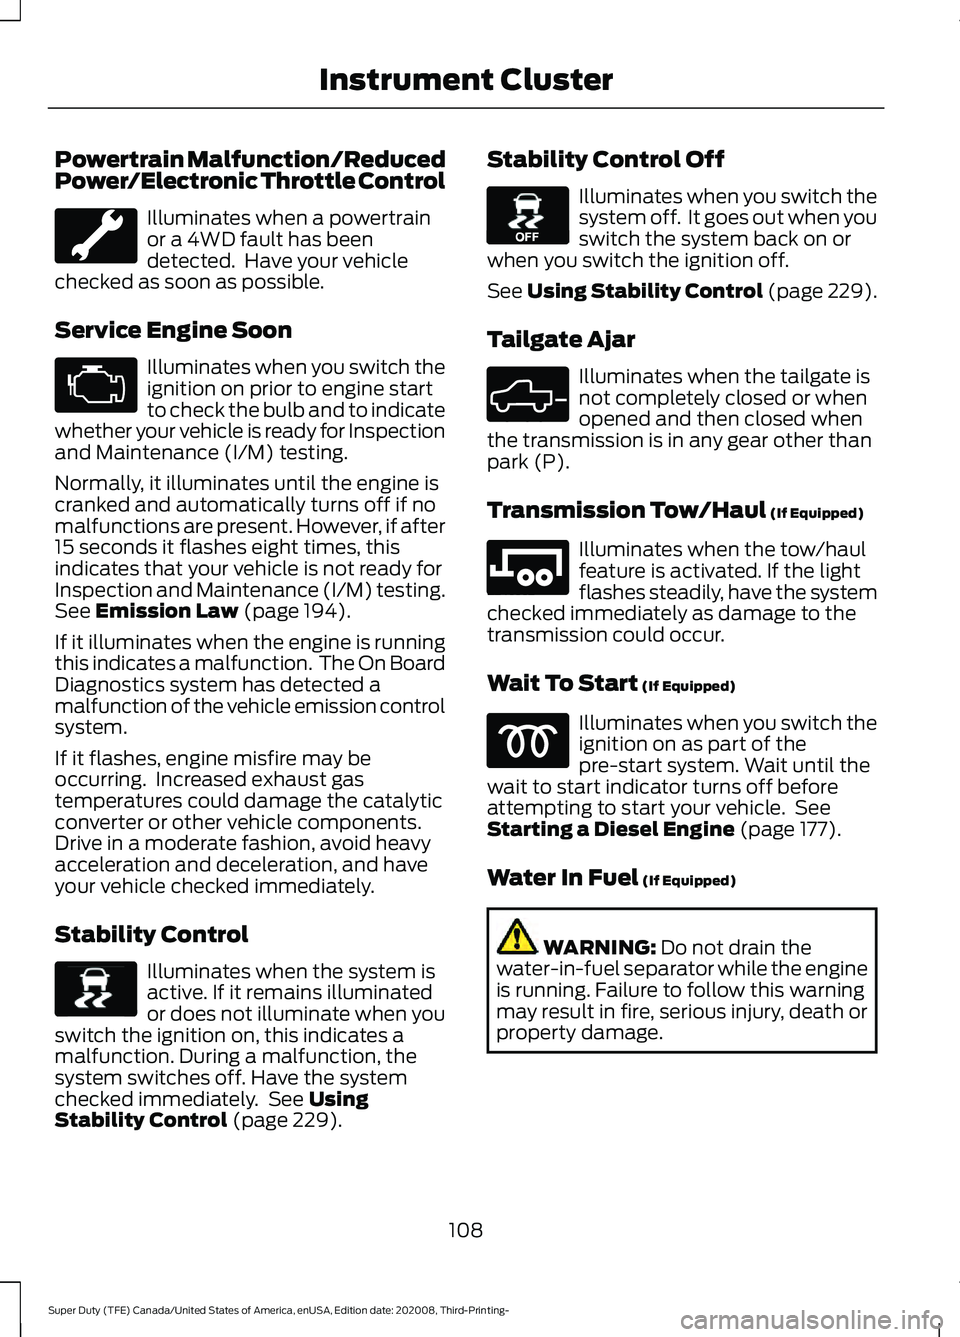
Powertrain Malfunction/Reduced
Power/Electronic Throttle Control
Illuminates when a powertrain
or a 4WD fault has been
detected. Have your vehicle
checked as soon as possible.
Service Engine Soon Illuminates when you switch the
ignition on prior to engine start
to check the bulb and to indicate
whether your vehicle is ready for Inspection
and Maintenance (I/M) testing.
Normally, it illuminates until the engine is
cranked and automatically turns off if no
malfunctions are present. However, if after
15 seconds it flashes eight times, this
indicates that your vehicle is not ready for
Inspection and Maintenance (I/M) testing.
See Emission Law (page 194).
If it illuminates when the engine is running
this indicates a malfunction. The On Board
Diagnostics system has detected a
malfunction of the vehicle emission control
system.
If it flashes, engine misfire may be
occurring. Increased exhaust gas
temperatures could damage the catalytic
converter or other vehicle components.
Drive in a moderate fashion, avoid heavy
acceleration and deceleration, and have
your vehicle checked immediately.
Stability Control Illuminates when the system is
active. If it remains illuminated
or does not illuminate when you
switch the ignition on, this indicates a
malfunction. During a malfunction, the
system switches off. Have the system
checked immediately. See
Using
Stability Control (page 229). Stability Control Off Illuminates when you switch the
system off. It goes out when you
switch the system back on or
when you switch the ignition off.
See Using Stability Control (page 229).
Tailgate Ajar Illuminates when the tailgate is
not completely closed or when
opened and then closed when
the transmission is in any gear other than
park (P).
Transmission Tow/Haul
(If Equipped) Illuminates when the tow/haul
feature is activated. If the light
flashes steadily, have the system
checked immediately as damage to the
transmission could occur.
Wait To Start
(If Equipped) Illuminates when you switch the
ignition on as part of the
pre-start system. Wait until the
wait to start indicator turns off before
attempting to start your vehicle. See
Starting a Diesel Engine
(page 177).
Water In Fuel
(If Equipped) WARNING:
Do not drain the
water-in-fuel separator while the engine
is running. Failure to follow this warning
may result in fire, serious injury, death or
property damage.
108
Super Duty (TFE) Canada/United States of America, enUSA, Edition date: 202008, Third-Printing- Instrument Cluster E138639 E130458 E324523 E246592
Page 112 of 666
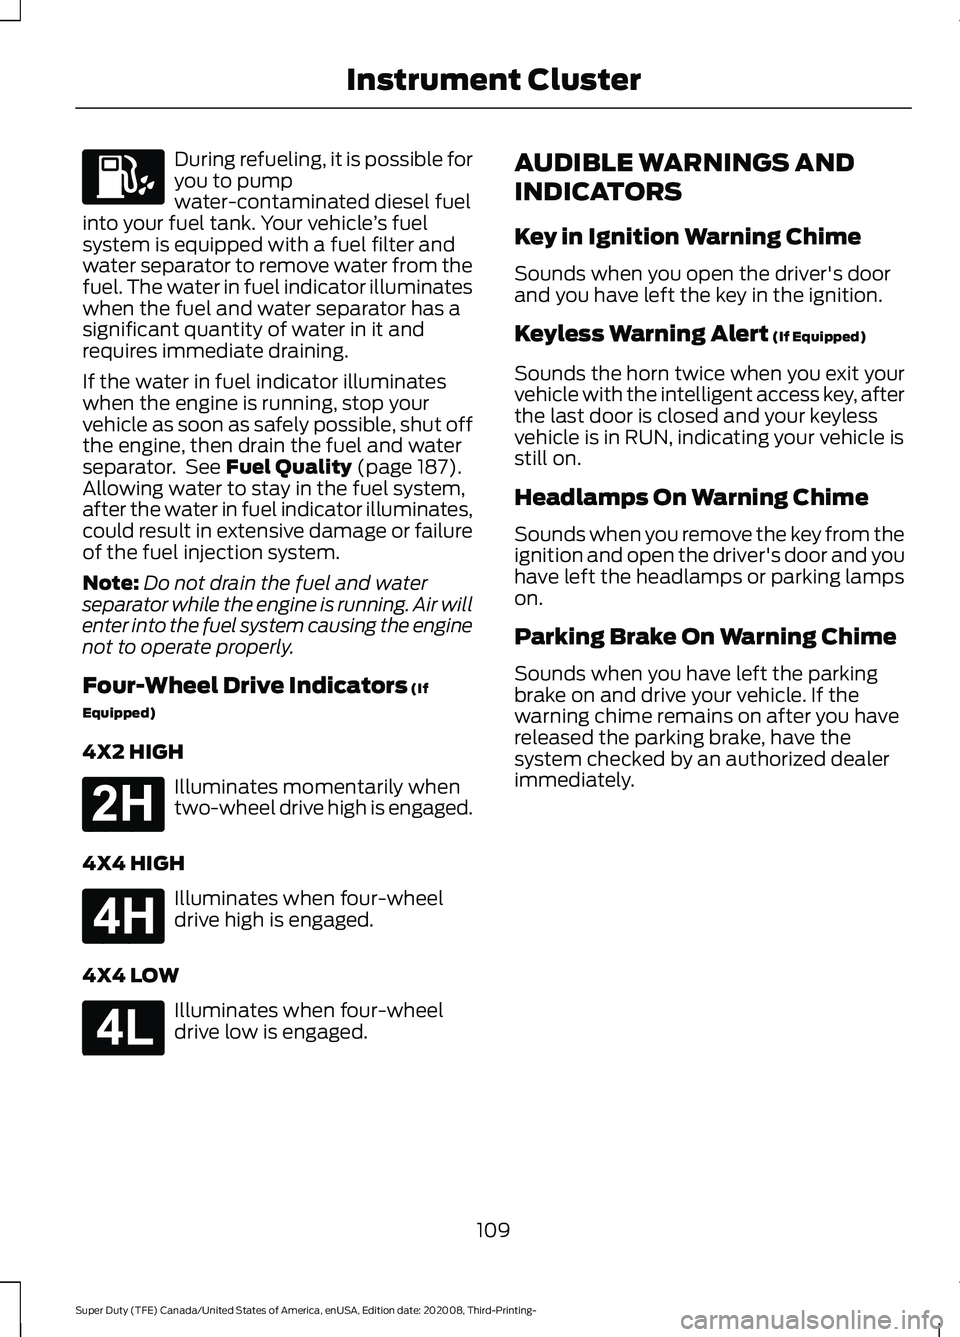
During refueling, it is possible for
you to pump
water-contaminated diesel fuel
into your fuel tank. Your vehicle ’s fuel
system is equipped with a fuel filter and
water separator to remove water from the
fuel. The water in fuel indicator illuminates
when the fuel and water separator has a
significant quantity of water in it and
requires immediate draining.
If the water in fuel indicator illuminates
when the engine is running, stop your
vehicle as soon as safely possible, shut off
the engine, then drain the fuel and water
separator. See Fuel Quality (page 187).
Allowing water to stay in the fuel system,
after the water in fuel indicator illuminates,
could result in extensive damage or failure
of the fuel injection system.
Note: Do not drain the fuel and water
separator while the engine is running. Air will
enter into the fuel system causing the engine
not to operate properly.
Four-Wheel Drive Indicators
(If
Equipped)
4X2 HIGH Illuminates momentarily when
two-wheel drive high is engaged.
4X4 HIGH Illuminates when four-wheel
drive high is engaged.
4X4 LOW Illuminates when four-wheel
drive low is engaged. AUDIBLE WARNINGS AND
INDICATORS
Key in Ignition Warning Chime
Sounds when you open the driver's door
and you have left the key in the ignition.
Keyless Warning Alert
(If Equipped)
Sounds the horn twice when you exit your
vehicle with the intelligent access key, after
the last door is closed and your keyless
vehicle is in RUN, indicating your vehicle is
still on.
Headlamps On Warning Chime
Sounds when you remove the key from the
ignition and open the driver's door and you
have left the headlamps or parking lamps
on.
Parking Brake On Warning Chime
Sounds when you have left the parking
brake on and drive your vehicle. If the
warning chime remains on after you have
released the parking brake, have the
system checked by an authorized dealer
immediately.
109
Super Duty (TFE) Canada/United States of America, enUSA, Edition date: 202008, Third-Printing- Instrument Cluster E181778 E181779 E181780
Page 113 of 666
GENERAL INFORMATION
WARNING: Driving while distracted
can result in loss of vehicle control, crash
and injury. We strongly recommend that
you use extreme caution when using any
device that may take your focus off the
road. Your primary responsibility is the
safe operation of your vehicle. We
recommend against the use of any
hand-held device while driving and
encourage the use of voice-operated
systems when possible. Make sure you
are aware of all applicable local laws
that may affect the use of electronic
devices while driving.
Various systems on your vehicle can be
controlled using the information display
controls on the steering wheel.
Corresponding information displays on the
instrument cluster information display.
Note: Some options could appear slightly
different or not at all if the items are
optional.
Note: Trailer options are not available if
your vehicle speed is greater than 3 mph
(5 km/h). Note:
Some MyKey menu options only
appear if MyKey is enabled and at least one
MyKey is programmed.
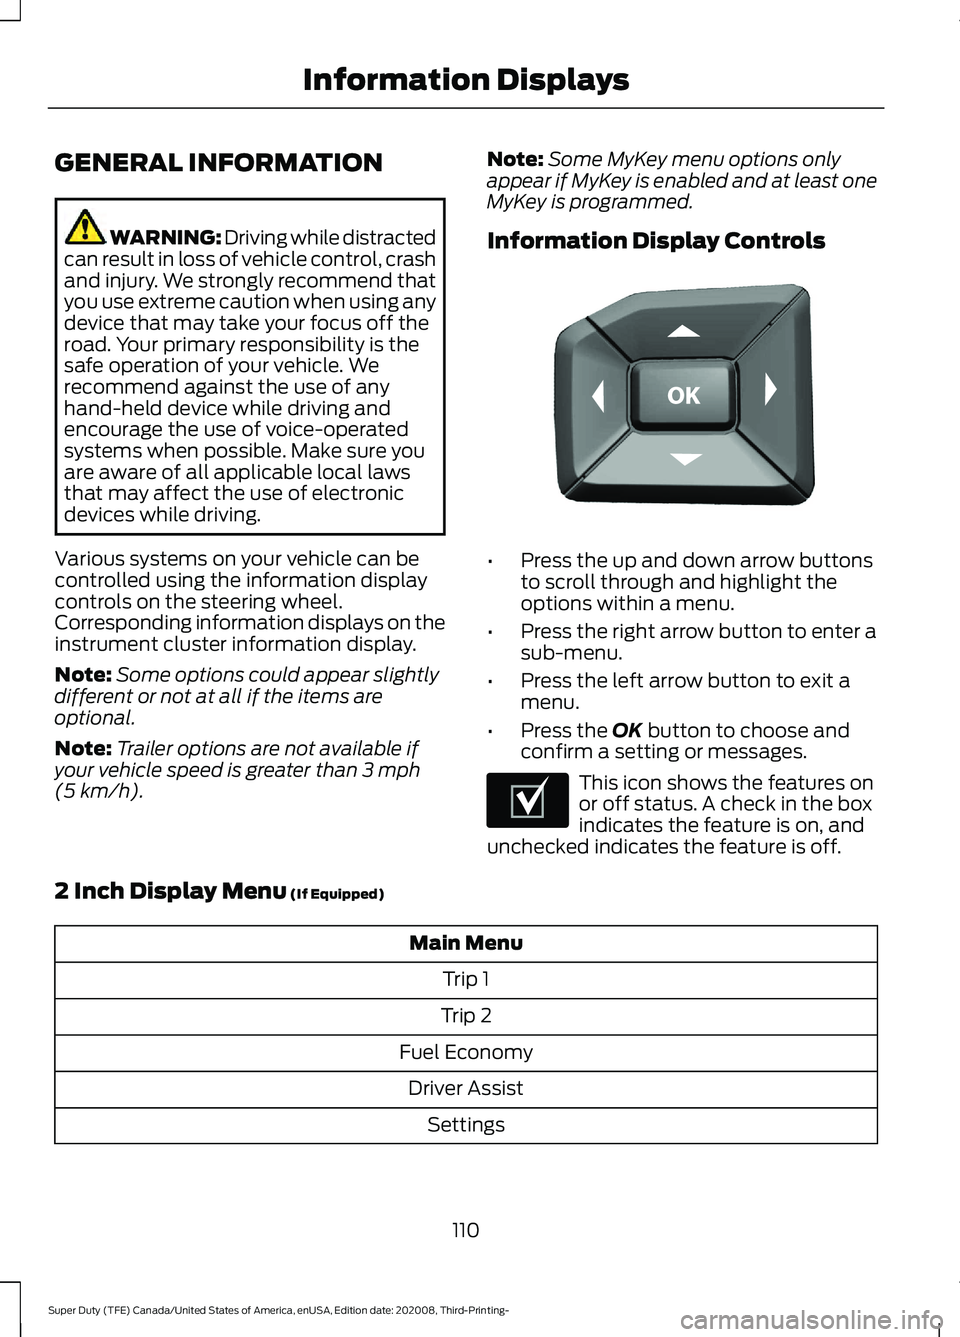
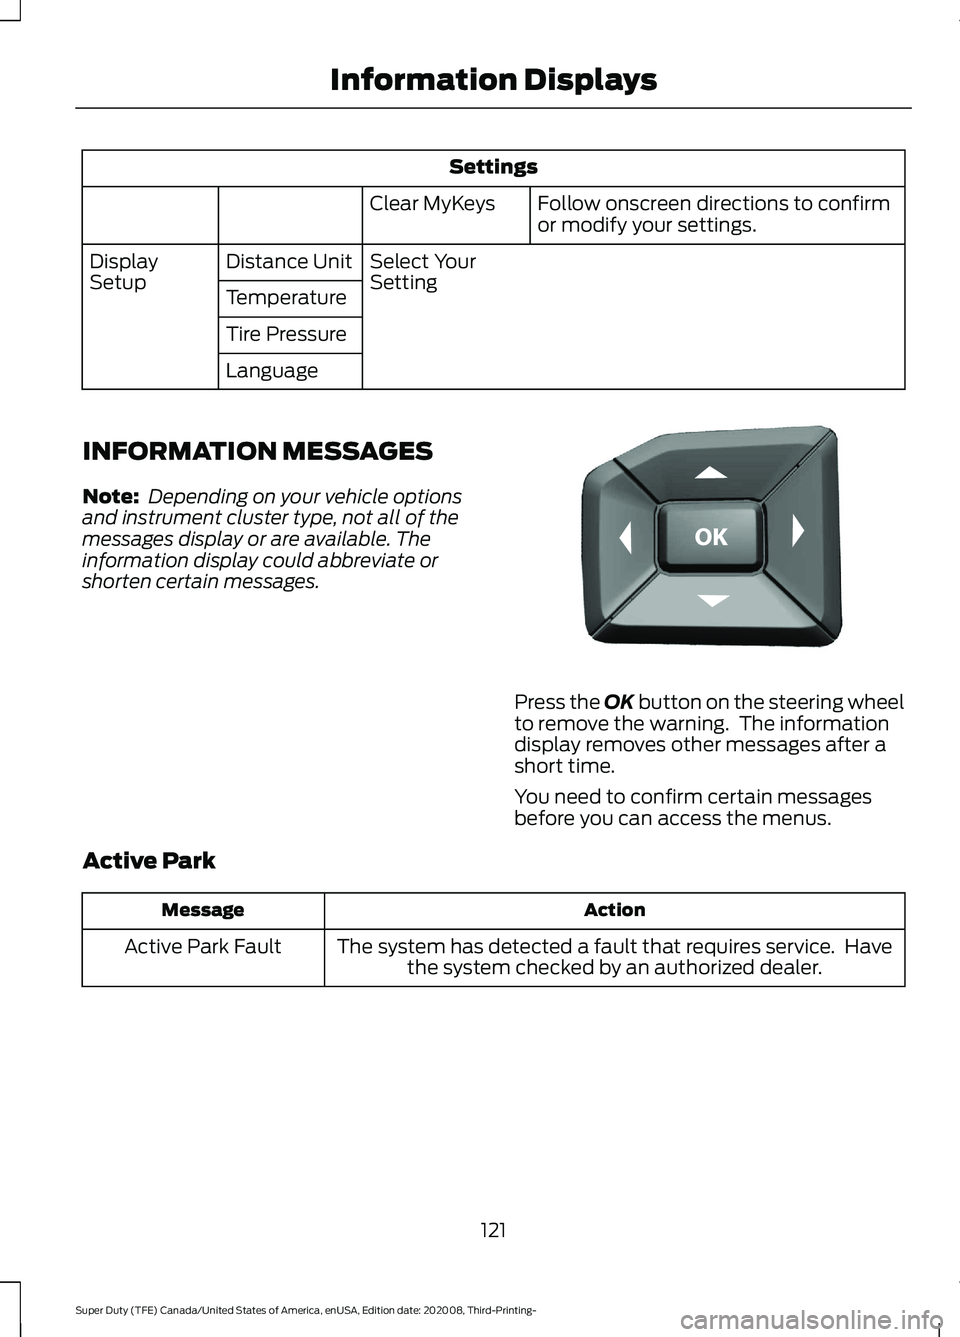
Information Display Controls •
Press the up and down arrow buttons
to scroll through and highlight the
options within a menu.
• Press the right arrow button to enter a
sub-menu.
• Press the left arrow button to exit a
menu.
• Press the
OK button to choose and
confirm a setting or messages. This icon shows the features on
or off status. A check in the box
indicates the feature is on, and
unchecked indicates the feature is off.
2 Inch Display Menu
(If Equipped) Main Menu
Trip 1
Trip 2
Fuel Economy Driver Assist Settings
110
Super Duty (TFE) Canada/United States of America, enUSA, Edition date: 202008, Third-Printing- Information DisplaysE184451 E204495
Page 124 of 666
Settings
Follow onscreen directions to confirm
or modify your settings.
Clear MyKeys
Select Your
Setting
Distance Unit
Display
Setup
Temperature
Tire Pressure
Language
INFORMATION MESSAGES
Note: Depending on your vehicle options
and instrument cluster type, not all of the
messages display or are available. The
information display could abbreviate or
shorten certain messages. Press the OK button on the steering wheel
to remove the warning. The information
display removes other messages after a
short time.
You need to confirm certain messages
before you can access the menus.
Active Park Action
Message
The system has detected a fault that requires service. Havethe system checked by an authorized dealer.
Active Park Fault
121
Super Duty (TFE) Canada/United States of America, enUSA, Edition date: 202008, Third-Printing- Information DisplaysE184451
Page 193 of 666
WARNING: Stop refueling after the
fuel pump nozzle automatically shuts
off for the second time. Failure to follow
this will fill the expansion space in the
fuel tank and could lead to fuel
overflowing. WARNING: Do not remove the fuel
pump nozzle from its fully inserted
position when refueling.
Use the following guidelines to avoid
electrostatic charge build-up when filling
an ungrounded fuel container:
• Place approved fuel container on the
ground.
• Do not fill a fuel container while it is in
the vehicle - including the cargo area.
• Keep the fuel pump nozzle in contact
with the fuel container while filling.
• Do not use a device that would hold
the fuel pump handle in the fill position.
Fuel Filler Cap WARNING: The fuel system may
be under pressure. If you hear a hissing
sound near the fuel filler inlet, do not
refuel until the sound stops. Otherwise,
fuel may spray out, which could cause
serious personal injury.
Note: If you must replace the fuel filler cap,
replace it with a fuel filler cap designed for
your vehicle. The vehicle warranty may be
void for any damage to the fuel tank or fuel
system if you do not use the correct genuine
Ford or Motorcraft® fuel filler cap.
When fueling your vehicle:
1. Put your vehicle in park (P).
2. Switch the engine off. 3. Carefully turn the filler cap
counterclockwise until it spins off.
4. Pull to remove the cap from the fuel filler pipe.
5. To install the cap, align the tabs on the
cap with the notches on the filler pipe.
6. Turn the filler cap clockwise until it clicks at least once.
If the Check Fuel Cap light or a Check Fuel
Cap message appears in the instrument
cluster and stays on after you start the
engine, you may not have installed the fuel
filler properly.
If the fuel cap light remains on, at the next
opportunity, safely pull off of the road,
remove the fuel filler cap, align the cap
properly and reinstall it. The check fuel cap
light or Check fuel cap message may not
reset immediately. It may take several
driving cycles for the indicators to turn off.
A driving cycle consists of an engine
start-up, after four or more hours with the
engine off, followed by normal city and
highway driving.
REFUELING - DIESEL WARNING: Read and follow all the
instructions on the pump island. WARNING:
Stay outside your
vehicle and do not leave the fuel pump
unattended when refueling your vehicle. WARNING:
Keep children away
from the fuel pump. Never let children
pump fuel. WARNING:
Wait at least five
seconds before removing the fuel pump
nozzle to allow any residual fuel to drain
into the fuel tank.
190
Super Duty (TFE) Canada/United States of America, enUSA, Edition date: 202008, Third-Printing- Fuel and Refueling
Page 210 of 666
AUTOMATIC TRANSMISSION
WARNING: Apply the parking
brake, shift into park (P), switch the
ignition off and remove the key before
you leave your vehicle. Failure to follow
this instruction could result in personal
injury or death. WARNING:
When your vehicle is
stationary, keep the brake pedal fully
pressed when shifting gears. Failure to
follow this instruction could result in
personal injury, death or property
damage.
Note: You may not be able to shift out of
park (P) unless the intelligent access key is
inside your vehicle.
Understanding the Shift Positions
of Your Automatic Transmission
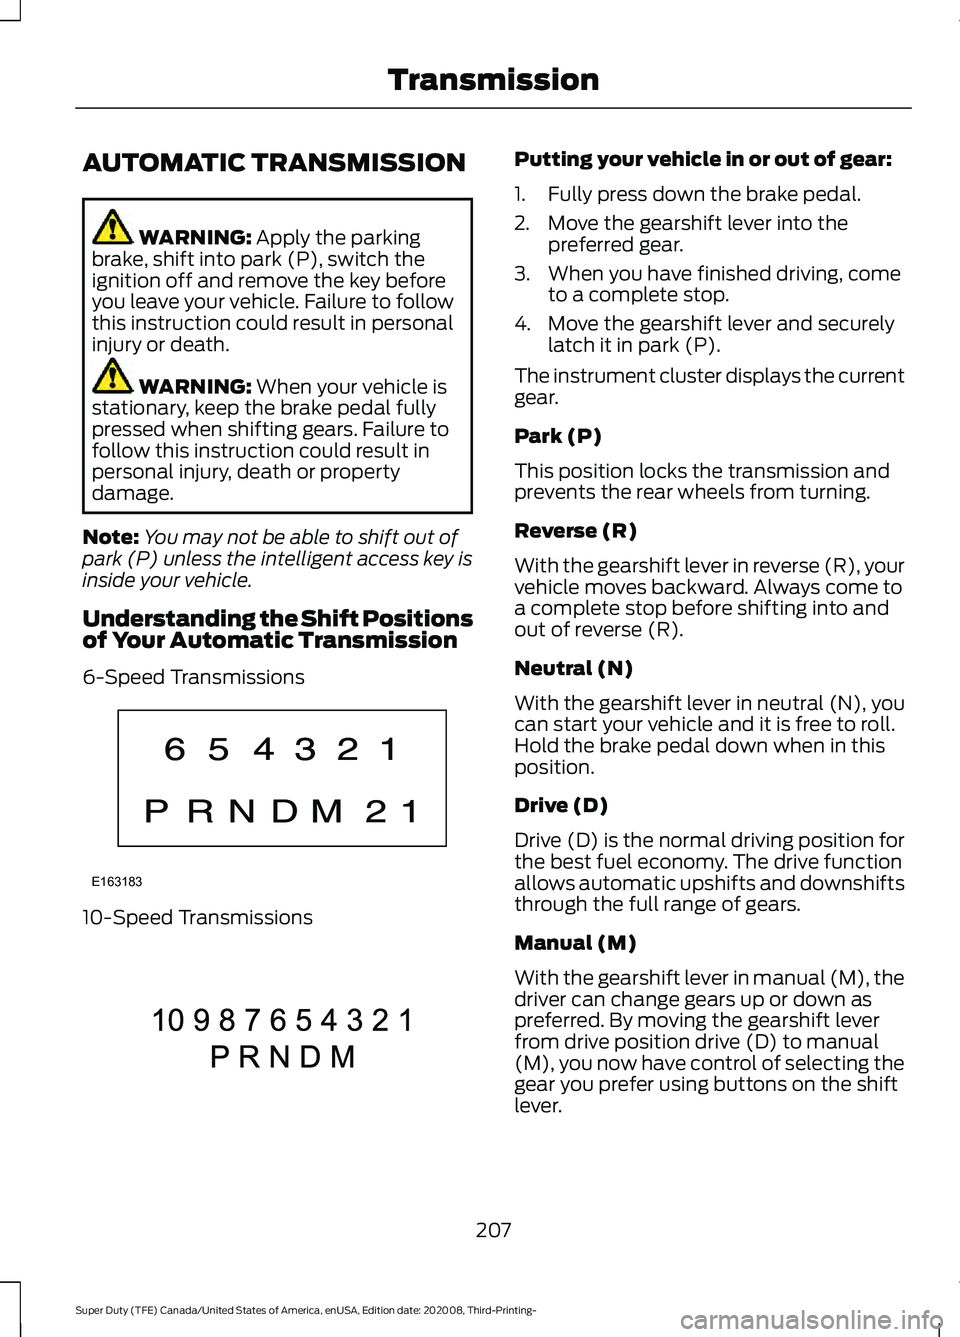
6-Speed Transmissions 10-Speed Transmissions Putting your vehicle in or out of gear:
1. Fully press down the brake pedal.
2. Move the gearshift lever into the
preferred gear.
3. When you have finished driving, come to a complete stop.
4. Move the gearshift lever and securely latch it in park (P).
The instrument cluster displays the current
gear.
Park (P)
This position locks the transmission and
prevents the rear wheels from turning.
Reverse (R)
With the gearshift lever in reverse (R), your
vehicle moves backward. Always come to
a complete stop before shifting into and
out of reverse (R).
Neutral (N)
With the gearshift lever in neutral (N), you
can start your vehicle and it is free to roll.
Hold the brake pedal down when in this
position.
Drive (D)
Drive (D) is the normal driving position for
the best fuel economy. The drive function
allows automatic upshifts and downshifts
through the full range of gears.
Manual (M)
With the gearshift lever in manual (M), the
driver can change gears up or down as
preferred. By moving the gearshift lever
from drive position drive (D) to manual
(M), you now have control of selecting the
gear you prefer using buttons on the shift
lever.
207
Super Duty (TFE) Canada/United States of America, enUSA, Edition date: 202008, Third-Printing- TransmissionE163183 E308145
Page 211 of 666
To return to the normal drive (D) position,
move the shift lever from manual (M) to
drive (D).
The transmission operates through the full
range of gears.
Forced downshifts
•
Allowed in drive (D) with the tow/haul
feature on or off.
• Press the accelerator to the floor.
• Allows transmission to select an
appropriate gear.
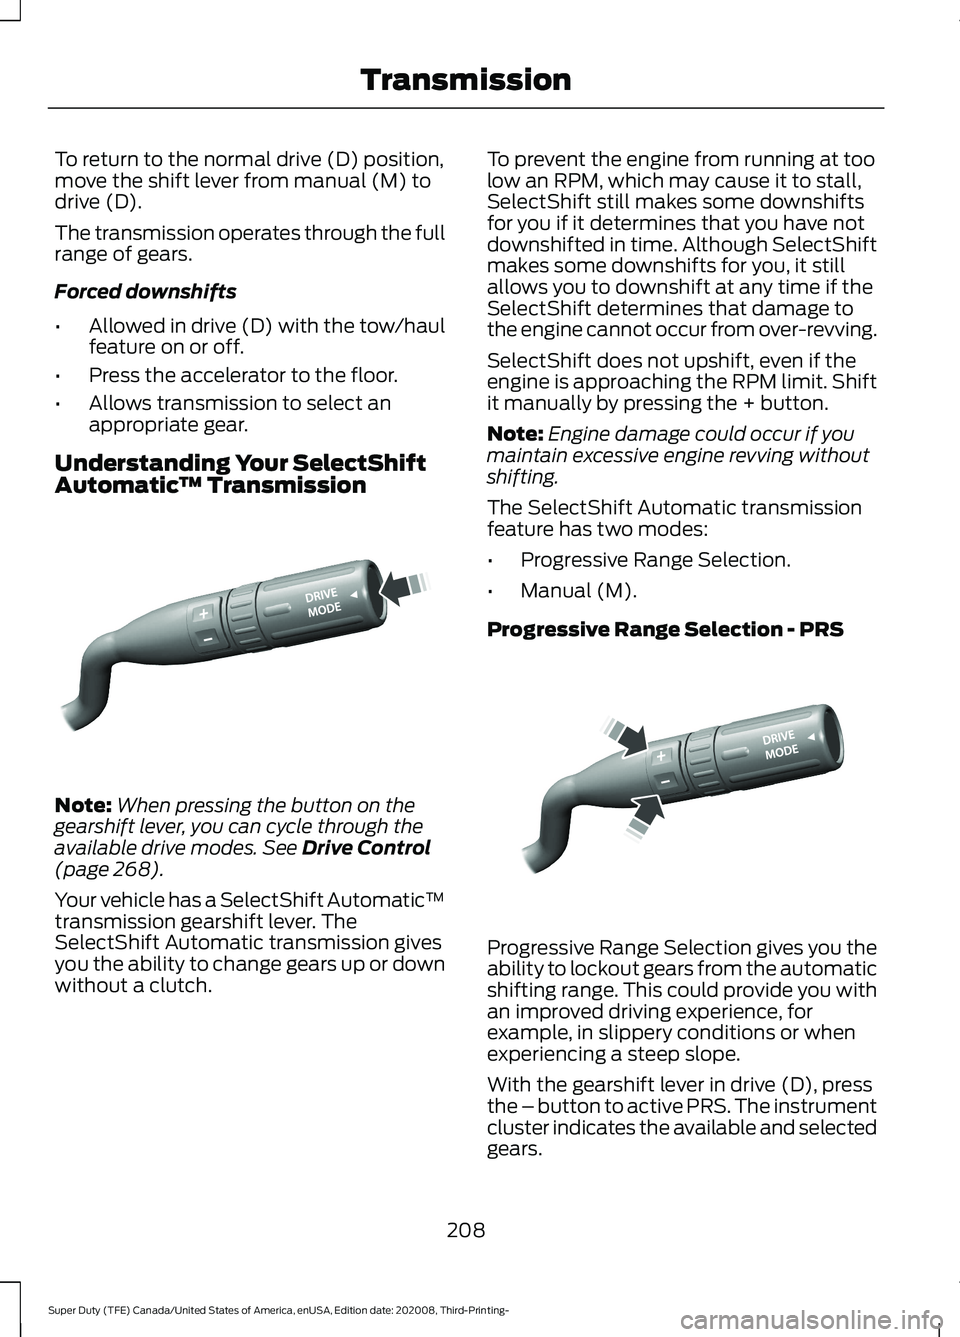
Understanding Your SelectShift
Automatic ™ TransmissionNote:
When pressing the button on the
gearshift lever, you can cycle through the
available drive modes. See Drive Control
(page 268).
Your vehicle has a SelectShift Automatic ™
transmission gearshift lever. The
SelectShift Automatic transmission gives
you the ability to change gears up or down
without a clutch. To prevent the engine from running at too
low an RPM, which may cause it to stall,
SelectShift still makes some downshifts
for you if it determines that you have not
downshifted in time. Although SelectShift
makes some downshifts for you, it still
allows you to downshift at any time if the
SelectShift determines that damage to
the engine cannot occur from over-revving.
SelectShift does not upshift, even if the
engine is approaching the RPM limit. Shift
it manually by pressing the + button.
Note:
Engine damage could occur if you
maintain excessive engine revving without
shifting.
The SelectShift Automatic transmission
feature has two modes:
• Progressive Range Selection.
• Manual (M).
Progressive Range Selection - PRS Progressive Range Selection gives you the
ability to lockout gears from the automatic
shifting range. This could provide you with
an improved driving experience, for
example, in slippery conditions or when
experiencing a steep slope.
With the gearshift lever in drive (D), press
the – button to active PRS. The instrument
cluster indicates the available and selected
gears.
208
Super Duty (TFE) Canada/United States of America, enUSA, Edition date: 202008, Third-Printing- TransmissionE249567 E312894
Page 224 of 666
LIMITED SLIP DIFFERENTIAL
(IF EQUIPPED)
This axle provides added traction on
slippery surfaces, particularly when one
wheel is on a poor traction surface. Under
normal conditions, the limited-slip axle
functions like a standard rear axle. The axle
may exhibit a slight noise or vibration
during tight turns with low vehicle speed.
This is normal behavior and indicates the
axle is working.
ELECTRONIC LOCKING
DIFFERENTIAL (IF EQUIPPED)
Note: The electronic locking differential is
for off-road use only and is not for use on
dry pavement. Using the electronic locking
differential on dry pavement will result in
increased tire wear, noise and vibration.
The electronic locking differential is a
device housed in the rear axle that allows
both rear wheels to turn at the same
speed. The electronic locking differential
can provide additional traction should your
vehicle become stuck. You can activate
the differential electronically and shift it
on the fly within the differential operating
speed range. The differential is for use in
mud, rocks, sand, or any off-road condition
where you need maximum traction. It is
not for use on dry pavement.
The following conditions will affect the
electronic locking differential:
• The electronic locking differential will
not engage if your vehicle speed is
above 20 mph (32 km/h) in 4x2, or 4x4
High modes.
• The electronic locking differential will
not engage if your vehicle speed is
above or
56 mph (90 km/h) in 4X4
Low. •
The electronic locking differential may
not engage if you press your
accelerator pedal during an
engagement attempt. A message may
display in the instrument display
guiding you to release the accelerator
pedal.
• In 4x2, and 4x4 High modes, the
electronic locking differential will
automatically disengage at speeds
above
25 mph (41 km/h) and will
automatically reengage at speeds
below
20 mph (32 km/h).
• In 4L (4X4 low), the electronic locking
differential will automatically
disengage at speeds above
62 mph
(100 km/h) and will automatically
reengage at speeds below 56 mph
(90 km/h).
• The AdvanceTrac system has the
ability to take over control of the
electronic locking differential and
disable it during driving maneuvers
when necessary.
When you switch the system on, if you do
not meet the required conditions for
electronic locking differential activation,
the instrument cluster will display the
appropriate information guiding you
through the proper activation process.
Activating the Electronic Locking
Differential
Note: Do not use electronic locking
differential on dry, hard surfaced roads.
Doing so will produce excessive noise,
vibration and increase tire wear.
Note: If the electronic locking differential
has difficulty disengaging, release the
accelerator pedal and turn the steering
wheel in the opposite direction while rolling.
221
Super Duty (TFE) Canada/United States of America, enUSA, Edition date: 202008, Third-Printing- Rear Axle
Page 228 of 666
You can use this feature with tow/haul or
progressive range selection to provide
further increased engine braking. The
transmission automatically upshifts to
prevent the engine from entering the red
zone on the tachometer. See Automatic
Transmission (page 207).
HINTS ON DRIVING WITH
ANTI-LOCK BRAKES
The anti-lock brake system does not
eliminate the risks when:
• You drive too closely to the vehicle in
front of you.
• Your vehicle is hydroplaning.
• You take corners too fast.
• The road surface is poor.
Note: If the system activates, the brake
pedal could pulse and may travel further.
Maintain pressure on the brake pedal. You
may also hear a noise from the system. This
is normal.
PARKING BRAKE WARNING:
Always set the parking
brake fully and make sure the
transmission is placed in park (P). Failure
to set the parking brake and engage park
could result in vehicle roll-away, property
damage or bodily injury. Turn the ignition
to the lock position and remove the key
whenever you leave your vehicle.
Apply the parking brake whenever your
vehicle is parked. Press the pedal
downward to set the parking brake. The
brake warning lamp in the instrument
cluster will illuminate and remains
illuminated until the parking brake is
released. To release, pull the brake release lever
located at the lower left side of the
instrument panel.
If you are parking your vehicle on a grade
or with a trailer, press and hold the brake
pedal down, then set the parking brake.
There may be a little vehicle movement as
the parking brake sets to hold the vehicle's
weight. This is normal and should be no
reason for concern. If needed, press and
hold the service brake pedal down, then
try reapplying the parking brake. Chock the
wheels if required. If the parking brake
cannot hold the weight of the vehicle, the
parking brake may need to be serviced or
the vehicle may be overloaded.
HILL START ASSIST
WARNING:
The system does not
replace the parking brake. When you
leave your vehicle, always apply the
parking brake. WARNING:
You must remain in
your vehicle when the system turns on.
At all times, you are responsible for
controlling your vehicle, supervising the
system and intervening, if required.
Failure to take care may result in the loss
of control of your vehicle, serious
personal injury or death. WARNING:
The system will turn
off if a malfunction is apparent or if you
rev the engine excessively. Failure to take
care may result in the loss of control of
your vehicle, serious personal injury or
death.
The system makes it easier to pull away
when your vehicle is on a slope without the
need to use the parking brake.
225
Super Duty (TFE) Canada/United States of America, enUSA, Edition date: 202008, Third-Printing- Brakes