warning FORD F-600 2021 Service Manual
[x] Cancel search | Manufacturer: FORD, Model Year: 2021, Model line: F-600, Model: FORD F-600 2021Pages: 666, PDF Size: 11.3 MB
Page 81 of 666
USING POWER RUNNING
BOARDS
WARNING: In extreme climates,
excessive ice buildup may occur, causing
the running boards not to deploy. Make
sure that the running boards have
deployed, and have finished moving
before attempting to step on them. The
running boards will resume normal
function once the blockage is cleared. WARNING:
Switch off the running
boards before jacking or placing any
object under your vehicle. Never place
your hand between the extended running
board and your vehicle. A moving running
board may cause injury.
Note: Do not use the running boards, front
and rear hinge assemblies, running board
motors, or the running board underbody
mounts to lift your vehicle when jacking.
Always use proper jacking points.
Note: The running boards may operate
more slowly in cool temperatures.
Note: The running board mechanism may
trap debris such as mud, dirt, snow, ice and
salt. This may cause unwanted noise. If this
happens, manually set the running boards
to the deployed position. Then, wash the
system, in particular the front and rear hinge
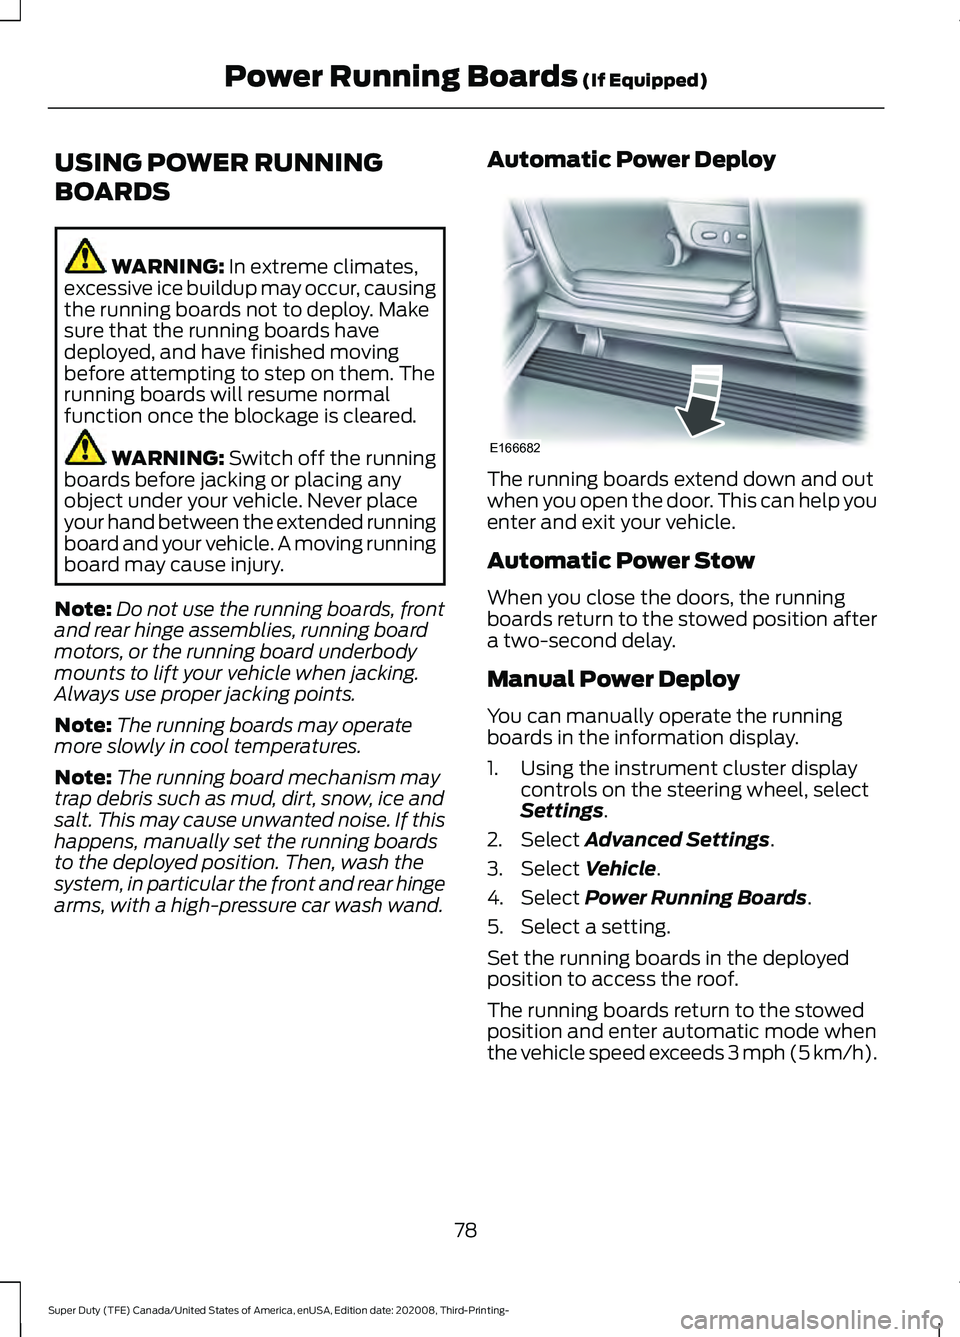
arms, with a high-pressure car wash wand. Automatic Power Deploy The running boards extend down and out
when you open the door. This can help you
enter and exit your vehicle.
Automatic Power Stow
When you close the doors, the running
boards return to the stowed position after
a two-second delay.
Manual Power Deploy
You can manually operate the running
boards in the information display.
1. Using the instrument cluster display
controls on the steering wheel, select
Settings
.
2. Select
Advanced Settings.
3. Select
Vehicle.
4. Select
Power Running Boards.
5. Select a setting.
Set the running boards in the deployed
position to access the roof.
The running boards return to the stowed
position and enter automatic mode when
the vehicle speed exceeds 3 mph (5 km/h).
78
Super Duty (TFE) Canada/United States of America, enUSA, Edition date: 202008, Third-Printing- Power Running Boards
(If Equipped)E166682
Page 83 of 666
ADJUSTING THE STEERING
WHEEL - VEHICLES WITH:
POWER ADJUSTABLE
STEERING COLUMN
WARNING: Do not adjust the
steering wheel when your vehicle is
moving.
Note: Make sure that you are sitting in the
correct position. See
Sitting in the Correct
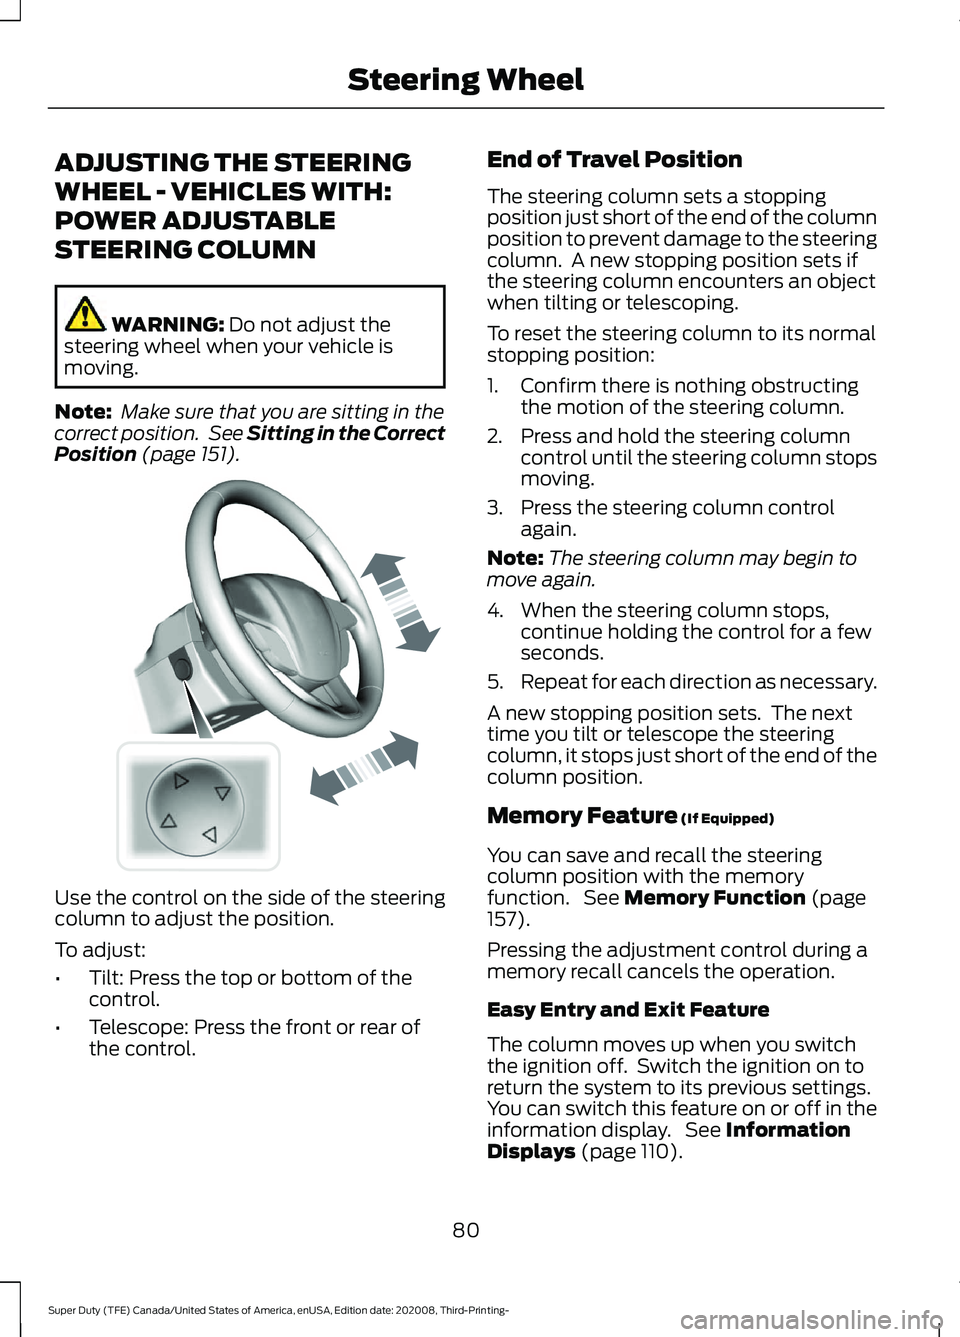
Position (page 151). Use the control on the side of the steering
column to adjust the position.
To adjust:
•
Tilt: Press the top or bottom of the
control.
• Telescope: Press the front or rear of
the control. End of Travel Position
The steering column sets a stopping
position just short of the end of the column
position to prevent damage to the steering
column. A new stopping position sets if
the steering column encounters an object
when tilting or telescoping.
To reset the steering column to its normal
stopping position:
1. Confirm there is nothing obstructing
the motion of the steering column.
2. Press and hold the steering column control until the steering column stops
moving.
3. Press the steering column control again.
Note: The steering column may begin to
move again.
4. When the steering column stops, continue holding the control for a few
seconds.
5. Repeat for each direction as necessary.
A new stopping position sets. The next
time you tilt or telescope the steering
column, it stops just short of the end of the
column position.
Memory Feature
(If Equipped)
You can save and recall the steering
column position with the memory
function. See
Memory Function (page
157).
Pressing the adjustment control during a
memory recall cancels the operation.
Easy Entry and Exit Feature
The column moves up when you switch
the ignition off. Switch the ignition on to
return the system to its previous settings.
You can switch this feature on or off in the
information display. See
Information
Displays (page 110).
80
Super Duty (TFE) Canada/United States of America, enUSA, Edition date: 202008, Third-Printing- Steering WheelE261582
Page 84 of 666
Note:
If you press any adjustment or
memory button when in easy exit mode, the
system cancels the operation.
Note: Depending on your vehicle, the
column may move up and in.
ADJUSTING THE STEERING
WHEEL - VEHICLES WITH:
MANUAL ADJUSTABLE
STEERING COLUMN WARNING: Do not adjust the
steering wheel when your vehicle is
moving.
Note: Make sure that you are sitting in the
correct position. See
Sitting in the Correct
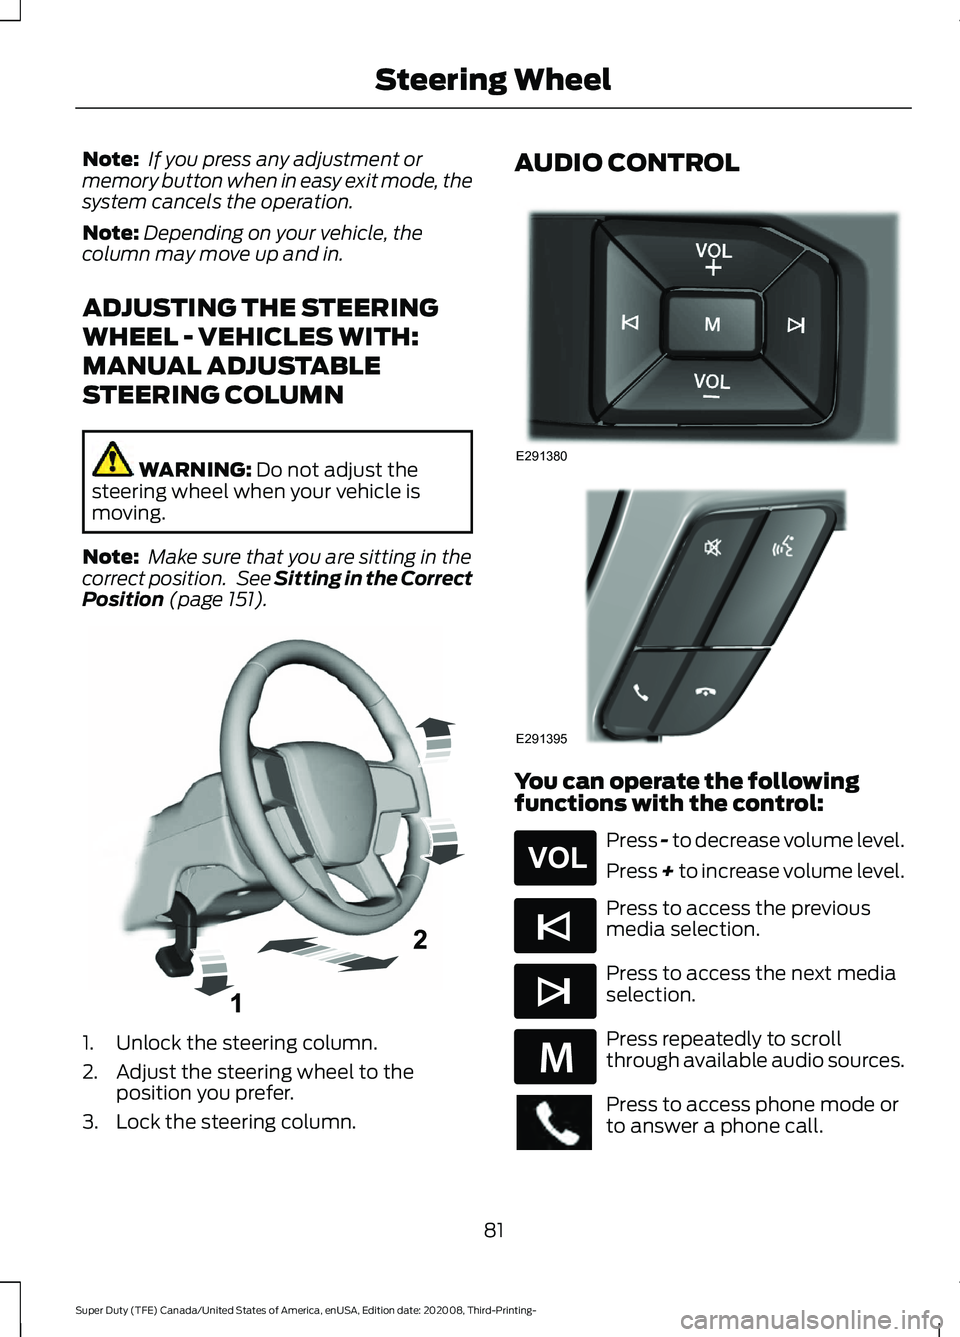
Position (page 151). 1. Unlock the steering column.
2. Adjust the steering wheel to the
position you prefer.
3. Lock the steering column. AUDIO CONTROL
You can operate the following
functions with the control:
Press - to decrease volume level.
Press + to increase volume level.
Press to access the previous
media selection.
Press to access the next media
selection.
Press repeatedly to scroll
through available audio sources.
Press to access phone mode or
to answer a phone call.
81
Super Duty (TFE) Canada/United States of America, enUSA, Edition date: 202008, Third-Printing- Steering WheelE261502 E291380 E291395 E265304 E265045 E265044 E289636
Page 87 of 666
ADJUSTING THE PEDALS
WARNING: Never use the pedal
adjustment controls when your feet are
on the accelerator or brake pedal when
the vehicle is moving.
Note: Adjust the pedals only when your
vehicle is in park (P).
Depending on your vehicle and equipment
level, the shape and location of your
power-adjustable pedal control can vary.
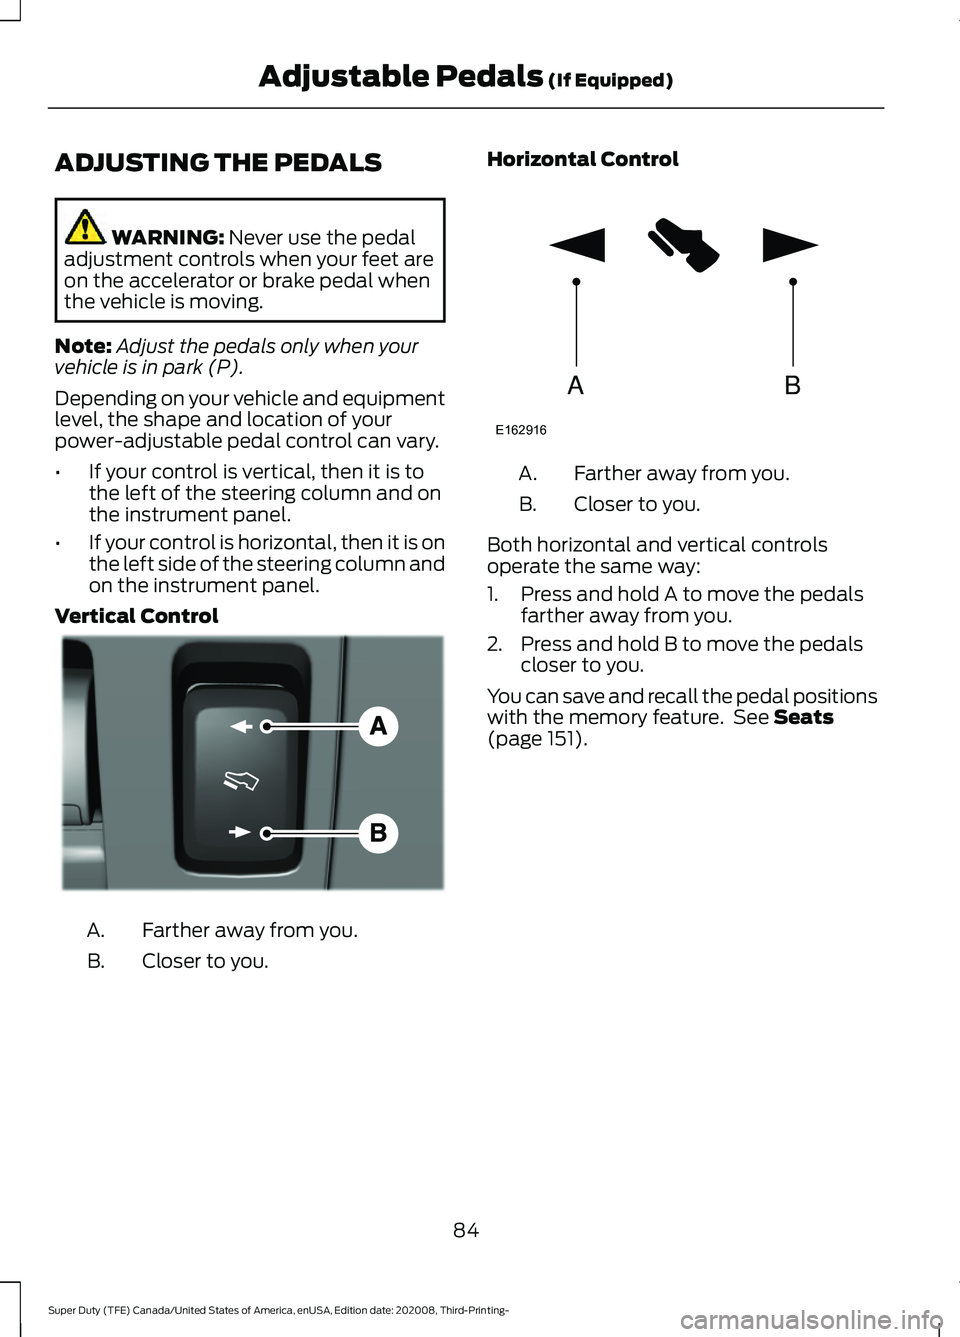
• If your control is vertical, then it is to
the left of the steering column and on
the instrument panel.
• If your control is horizontal, then it is on
the left side of the steering column and
on the instrument panel.
Vertical Control Farther away from you.
A.
Closer to you.
B. Horizontal Control Farther away from you.
A.
Closer to you.
B.
Both horizontal and vertical controls
operate the same way:
1. Press and hold A to move the pedals farther away from you.
2. Press and hold B to move the pedals closer to you.
You can save and recall the pedal positions
with the memory feature. See
Seats
(page 151).
84
Super Duty (TFE) Canada/United States of America, enUSA, Edition date: 202008, Third-Printing- Adjustable Pedals
(If Equipped)E176213 AB
E162916
Page 91 of 666
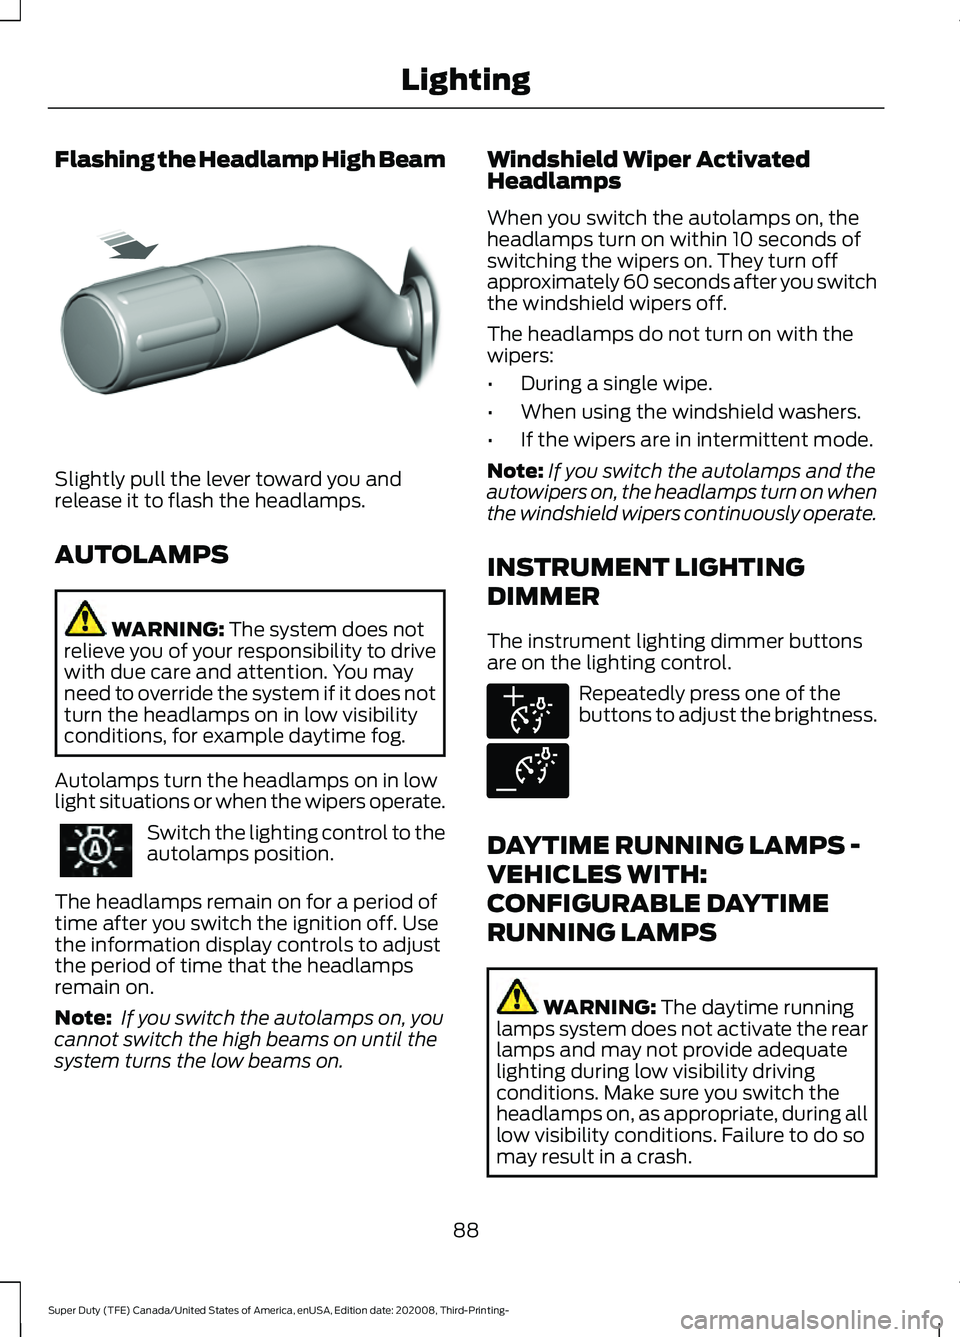
Flashing the Headlamp High Beam
Slightly pull the lever toward you and
release it to flash the headlamps.
AUTOLAMPS
WARNING: The system does not
relieve you of your responsibility to drive
with due care and attention. You may
need to override the system if it does not
turn the headlamps on in low visibility
conditions, for example daytime fog.
Autolamps turn the headlamps on in low
light situations or when the wipers operate. Switch the lighting control to the
autolamps position.
The headlamps remain on for a period of
time after you switch the ignition off. Use
the information display controls to adjust
the period of time that the headlamps
remain on.
Note: If you switch the autolamps on, you
cannot switch the high beams on until the
system turns the low beams on. Windshield Wiper Activated
Headlamps
When you switch the autolamps on, the
headlamps turn on within 10 seconds of
switching the wipers on. They turn off
approximately 60 seconds after you switch
the windshield wipers off.
The headlamps do not turn on with the
wipers:
•
During a single wipe.
• When using the windshield washers.
• If the wipers are in intermittent mode.
Note: If you switch the autolamps and the
autowipers on, the headlamps turn on when
the windshield wipers continuously operate.
INSTRUMENT LIGHTING
DIMMER
The instrument lighting dimmer buttons
are on the lighting control. Repeatedly press one of the
buttons to adjust the brightness.
DAYTIME RUNNING LAMPS -
VEHICLES WITH:
CONFIGURABLE DAYTIME
RUNNING LAMPS WARNING:
The daytime running
lamps system does not activate the rear
lamps and may not provide adequate
lighting during low visibility driving
conditions. Make sure you switch the
headlamps on, as appropriate, during all
low visibility conditions. Failure to do so
may result in a crash.
88
Super Duty (TFE) Canada/United States of America, enUSA, Edition date: 202008, Third-Printing- LightingE311233 E291299 E291298
Page 92 of 666
Switch the daytime running lamps on or
off using the information display. See
General Information (page 110).
The daytime running lamps turn on when:
1. The lamps are on in the information display.
2. You switch the ignition on.
3. The transmission is not in park (P) for vehicles with automatic transmissions
or you release the parking brake for
vehicles with manual transmissions.
4. The lighting control is in the autolamps
position.
5. The headlamps are off.
The other lighting control switch positions
do not turn on the daytime running lamps.
If the daytime running lamps are off in the
information display, the lamps stay off in
all switch positions.
DAYTIME RUNNING LAMPS -
VEHICLES WITH: DAYTIME
RUNNING LAMPS (DRL) WARNING:
The daytime running
lamps system does not activate the rear
lamps and may not provide adequate
lighting during low visibility driving
conditions. Make sure you switch the
headlamps on, as appropriate, during all
low visibility conditions. Failure to do so
may result in a crash.
The system turns the lamps on in daylight
conditions.
To switch the system on, switch the
lighting control to any position except
headlamps. FRONT FOG LAMPS
(IF EQUIPPED)
Switching the Front Fog Lamps On
or Off
Only switch the front fog lamps on during
reduced visibility.
You can switch the front fog lamps on if
any of the following occur:
• You set the lighting control to the
parking lamps position.
• You set the lighting control to the
headlamps position.
• You set the lighting control to the
autolamps position and the headlamps
are on.
The front fog lamp button is on the lighting
control. Press the button to switch the
front fog lamps on or off.
Note: The brightness of the daytime running
lamps may decrease when the front fog
lamps are switched on.
Front Fog Lamp Indicator It illuminates when you switch
the front fog lamps on.
89
Super Duty (TFE) Canada/United States of America, enUSA, Edition date: 202008, Third-Printing- Lighting
Page 96 of 666

WHAT IS AUTOMATIC HIGH
BEAM CONTROL
The system turns on high beams if it is dark
enough and no other traffic is present. If it
detects an approaching vehicle
’s
headlamps or tail lamps, or street lighting
ahead, the system turns the high beams
off. Low beams remain on.
A camera sensor, centrally mounted
behind the windshield of your vehicle,
continuously monitors conditions to turn
the high beams on and off.
SWITCHING AUTOMATIC HIGH
BEAM CONTROL ON AND OFF
Switch the system on or off using the
information display. See General
Information (page 110).
Activating the Automatic High
Beam Control Switch the lighting control to the
autolamps position to activate.
See
Autolamps (page 88).
Note: Automatic high beams are not
available when autolamps are not turned
on.
When active, the high beams turn on if:
• The ambient light level is low enough.
• There is no traffic in front of your
vehicle.
• The vehicle speed is greater than
approximately
32 mph (52 km/h).
When active, the high beams turn off if:
• The ambient light level is high enough
that high beams are not required.
• The system detects an approaching
vehicle's headlamps or tail lamps.
• The system detects severe rain, snow
or fog. •
The camera is blocked.
• The vehicle speed falls below
approximately
27 mph (44 km/h).
Note: The deactivation speed is lower on
curves.
Note: High beam reactivation may be
delayed in certain curvy road situations.
Note: The system may not operate properly
if the sensor is blocked. Keep the windshield
free from obstruction or damage.
Note: The system may not operate properly
in cold or inclement conditions. You can
switch on the high beams by overriding the
system.
Note: If the system detects a blockage, for
example bird droppings, bug splatter, snow
or ice, the system goes into low beam mode
until you clear the blockage. A message may
appear in the information display if the
camera is blocked.
Note: Using much larger tires or equipping
vehicle accessories such as snowplows can
modify your vehicle's ride height and
degrade automatic high beam control
performance.
AUTOMATIC HIGH BEAM
CONTROL INDICATORS The indicator illuminates to
confirm when the system is
ready to assist.
OVERRIDING AUTOMATIC
HIGH BEAM CONTROL WARNING:
The system does not
relieve you of your responsibility to drive
with due care and attention. You may
need to override the system if it does not
turn the high beams on or off.
93
Super Duty (TFE) Canada/United States of America, enUSA, Edition date: 202008, Third-Printing- Automatic High Beam Control
(If Equipped)
Page 97 of 666
WARNING: You may need to
override the system when approaching
other road users. WARNING:
You may need to
override the system during inclement
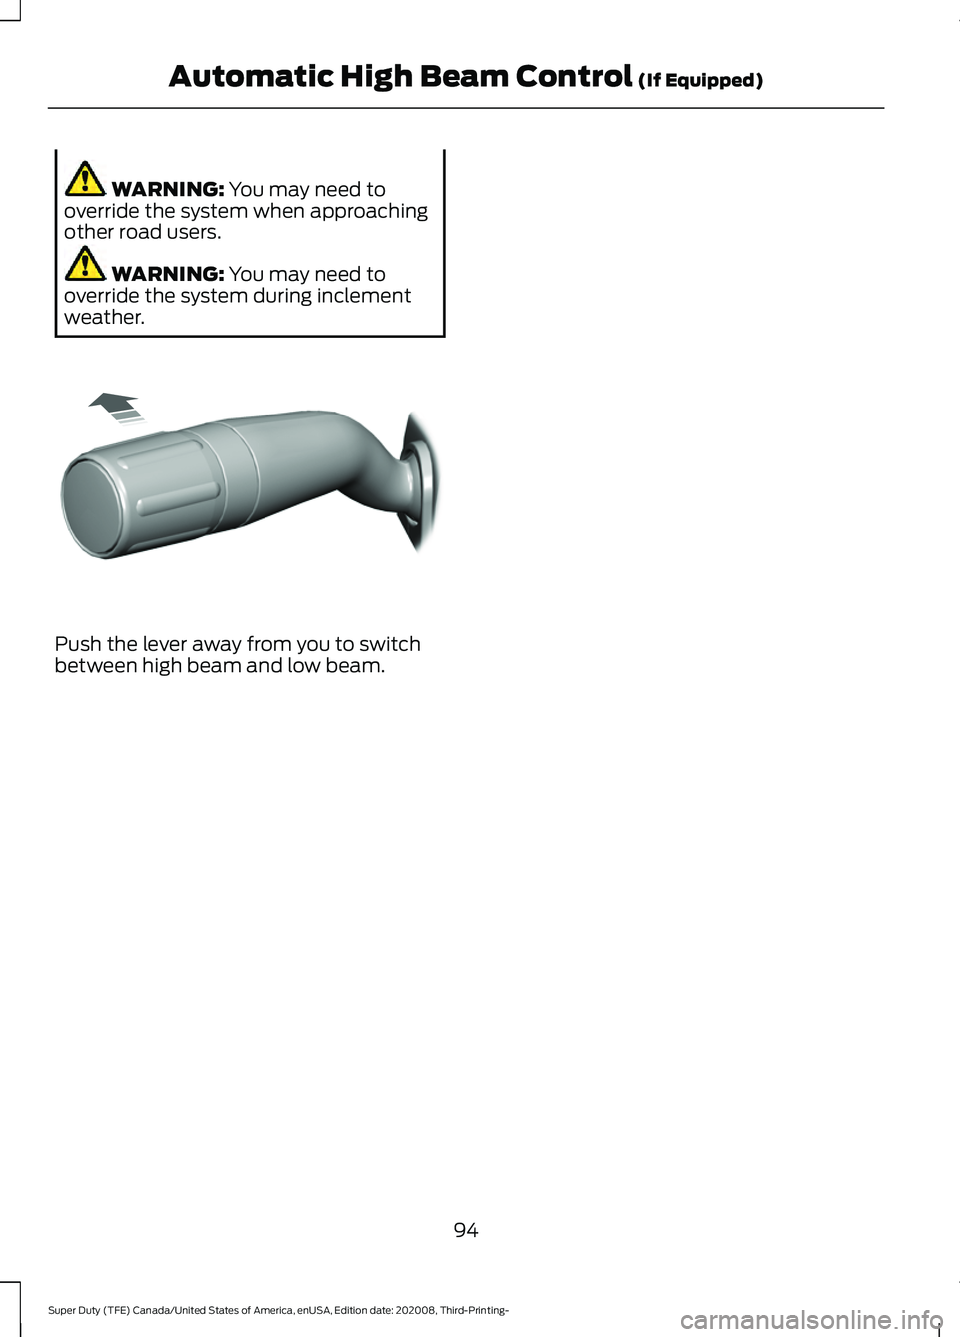
weather. Push the lever away from you to switch
between high beam and low beam.
94
Super Duty (TFE) Canada/United States of America, enUSA, Edition date: 202008, Third-Printing- Automatic High Beam Control
(If Equipped)E308790
Page 98 of 666
POWER WINDOWS (IF EQUIPPED)
WARNING:
Do not leave children
unattended in your vehicle and do not
let them play with the power windows.
They may seriously injure themselves. WARNING:
When closing the
power windows, you should verify they
are free of obstructions and make sure
that children and pets are not in the
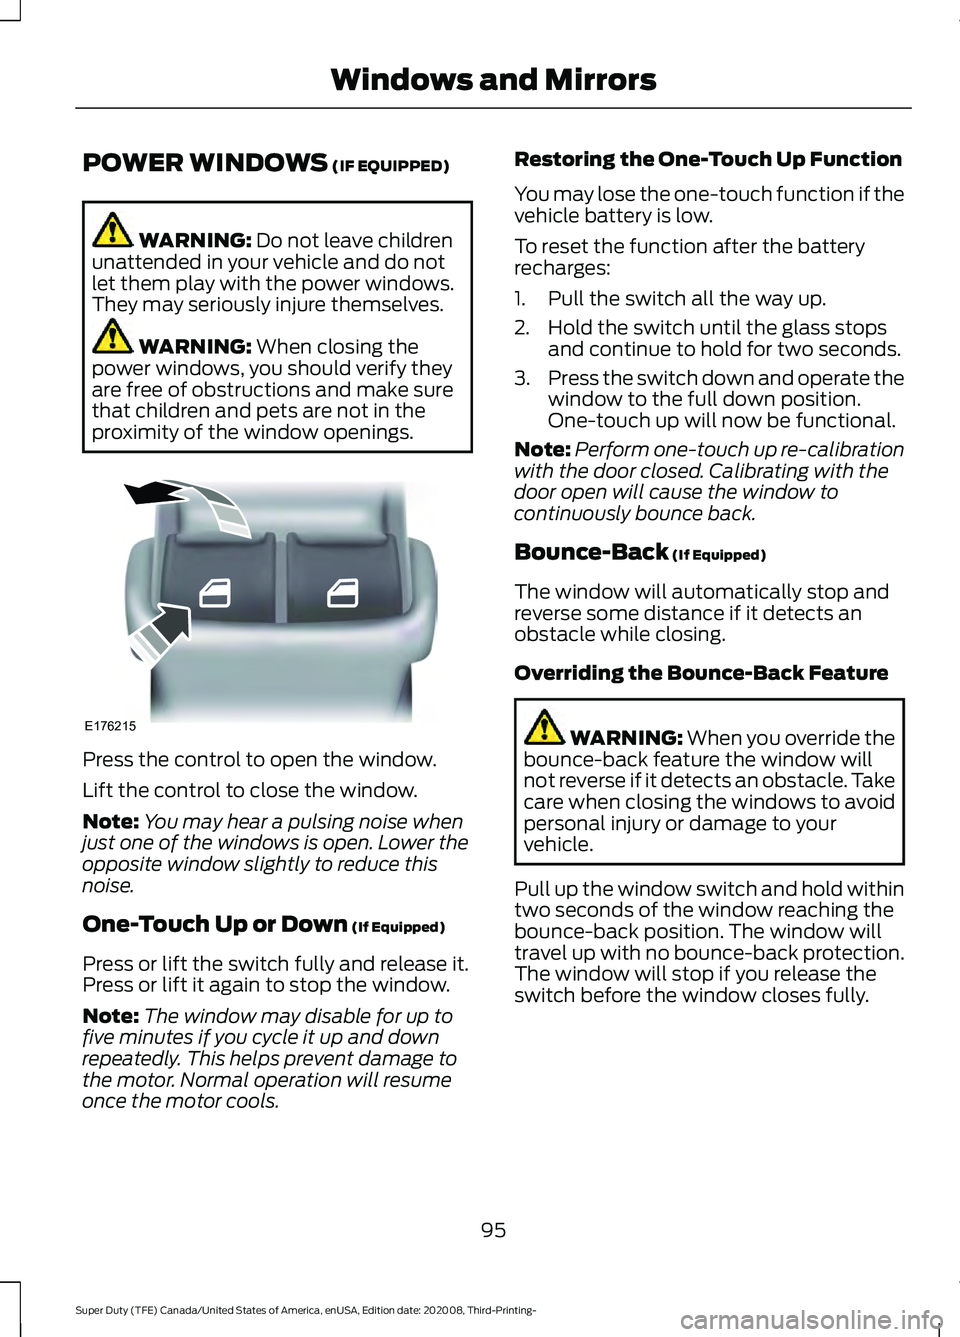
proximity of the window openings. Press the control to open the window.
Lift the control to close the window.
Note:
You may hear a pulsing noise when
just one of the windows is open. Lower the
opposite window slightly to reduce this
noise.
One-Touch Up or Down
(If Equipped)
Press or lift the switch fully and release it.
Press or lift it again to stop the window.
Note: The window may disable for up to
five minutes if you cycle it up and down
repeatedly. This helps prevent damage to
the motor. Normal operation will resume
once the motor cools. Restoring the One-Touch Up Function
You may lose the one-touch function if the
vehicle battery is low.
To reset the function after the battery
recharges:
1. Pull the switch all the way up.
2. Hold the switch until the glass stops
and continue to hold for two seconds.
3. Press the switch down and operate the
window to the full down position.
One-touch up will now be functional.
Note: Perform one-touch up re-calibration
with the door closed. Calibrating with the
door open will cause the window to
continuously bounce back.
Bounce-Back
(If Equipped)
The window will automatically stop and
reverse some distance if it detects an
obstacle while closing.
Overriding the Bounce-Back Feature WARNING:
When you override the
bounce-back feature the window will
not reverse if it detects an obstacle. Take
care when closing the windows to avoid
personal injury or damage to your
vehicle.
Pull up the window switch and hold within
two seconds of the window reaching the
bounce-back position. The window will
travel up with no bounce-back protection.
The window will stop if you release the
switch before the window closes fully.
95
Super Duty (TFE) Canada/United States of America, enUSA, Edition date: 202008, Third-Printing- Windows and MirrorsE176215
Page 99 of 666
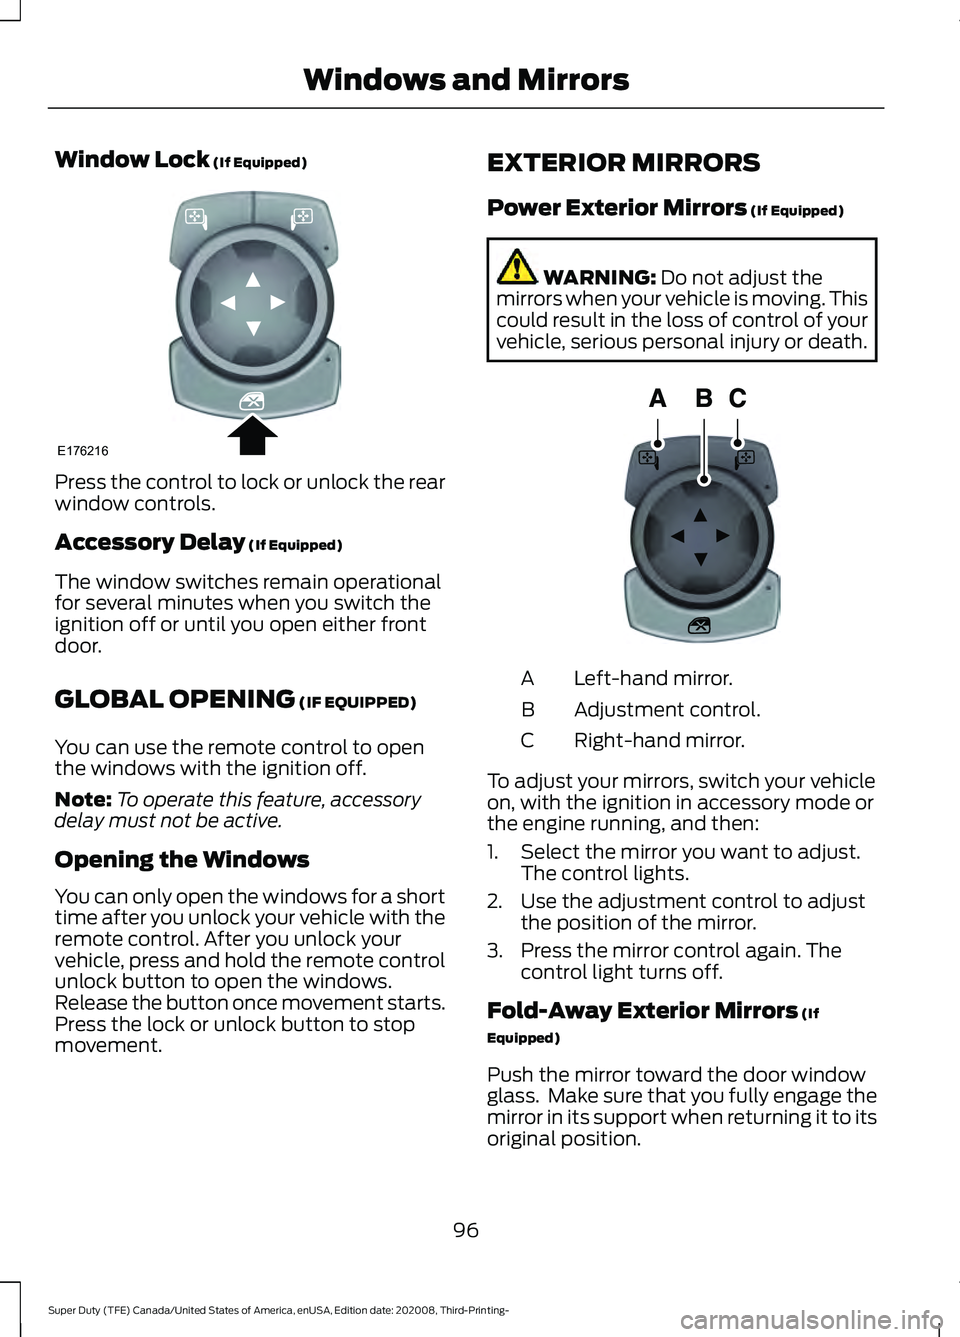
Window Lock (If Equipped)
Press the control to lock or unlock the rear
window controls.
Accessory Delay
(If Equipped)
The window switches remain operational
for several minutes when you switch the
ignition off or until you open either front
door.
GLOBAL OPENING
(IF EQUIPPED)
You can use the remote control to open
the windows with the ignition off.
Note: To operate this feature, accessory
delay must not be active.
Opening the Windows
You can only open the windows for a short
time after you unlock your vehicle with the
remote control. After you unlock your
vehicle, press and hold the remote control
unlock button to open the windows.
Release the button once movement starts.
Press the lock or unlock button to stop
movement. EXTERIOR MIRRORS
Power Exterior Mirrors
(If Equipped) WARNING:
Do not adjust the
mirrors when your vehicle is moving. This
could result in the loss of control of your
vehicle, serious personal injury or death. Left-hand mirror.
A
Adjustment control.
B
Right-hand mirror.
C
To adjust your mirrors, switch your vehicle
on, with the ignition in accessory mode or
the engine running, and then:
1. Select the mirror you want to adjust. The control lights.
2. Use the adjustment control to adjust the position of the mirror.
3. Press the mirror control again. The control light turns off.
Fold-Away Exterior Mirrors
(If
Equipped)
Push the mirror toward the door window
glass. Make sure that you fully engage the
mirror in its support when returning it to its
original position.
96
Super Duty (TFE) Canada/United States of America, enUSA, Edition date: 202008, Third-Printing- Windows and MirrorsE176216 E144073