CD changer FORD F150 1997 10.G Audio Guide
[x] Cancel search | Manufacturer: FORD, Model Year: 1997, Model line: F150, Model: FORD F150 1997 10.GPages: 28, PDF Size: 0.15 MB
Page 4 of 28
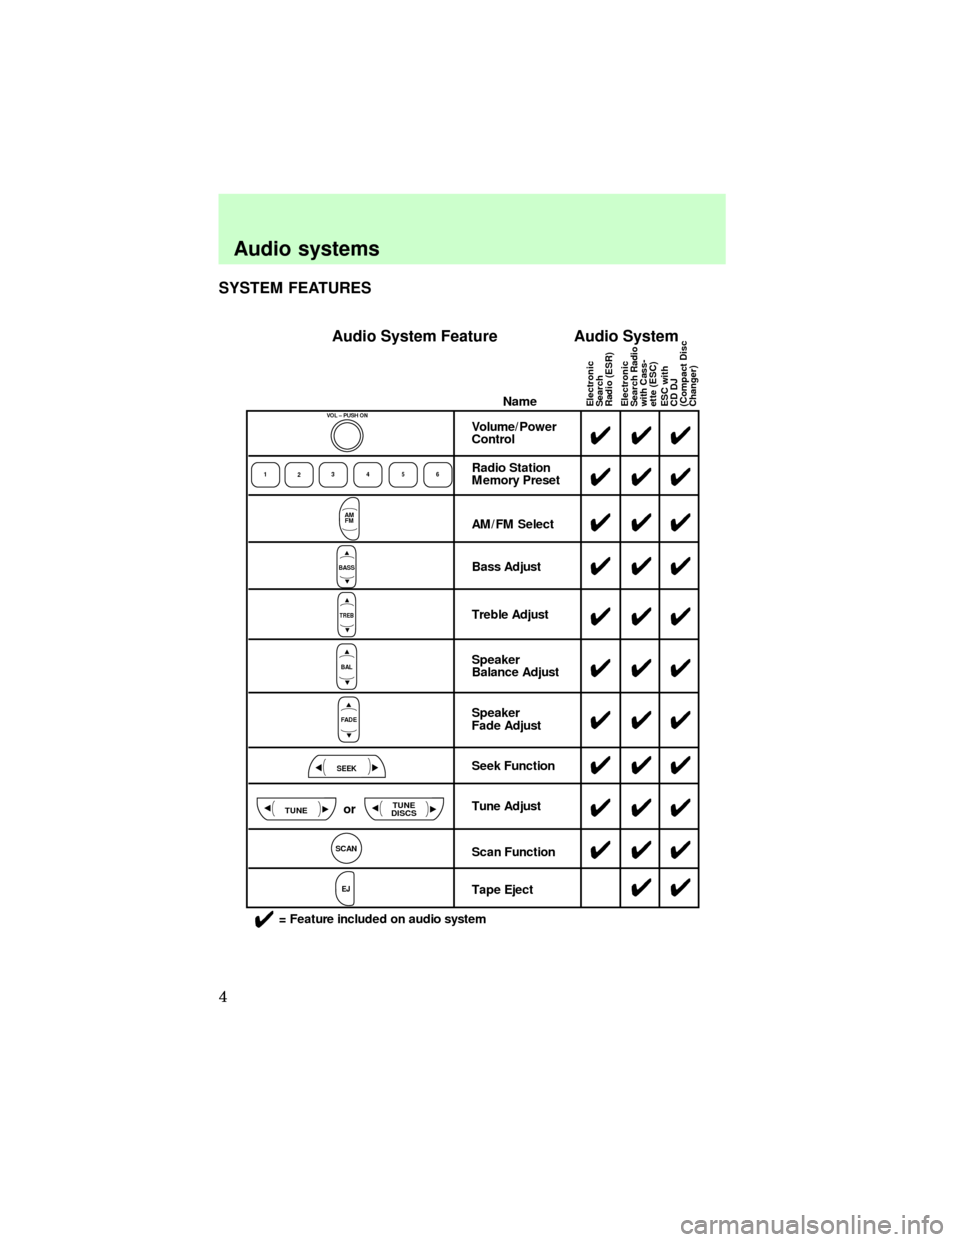
SYSTEM FEATURES
Electronic
Search
Radio (ESR)
Electronic
Search Radio
with Cass-
ette (ESC)
ESC with
CD DJ
(Compact Disc
Changer)Name
Radio Station
Memory Preset
AM/FM Select
Bass Adjust
Treble Adjust
Speaker
Balance Adjust
Speaker
Fade Adjust
Seek Function
Tune Adjust
Scan Function
Tape Eject4
4
4
4
4
4
4
4
44
4
4
4
4
4
4
4
4
44
Volume/Power
Control444
4
4
4
4
4
4
4
4
4
1
23456
AM
FM
BASS
TREB
BAL
FADE
TUNETUNE
DISCS
SEEK
SCAN
EJ
4= Feature included on audio system
VOL – PUSH ON
Audio System Feature Audio System
or
Audio systems
4
Page 5 of 28
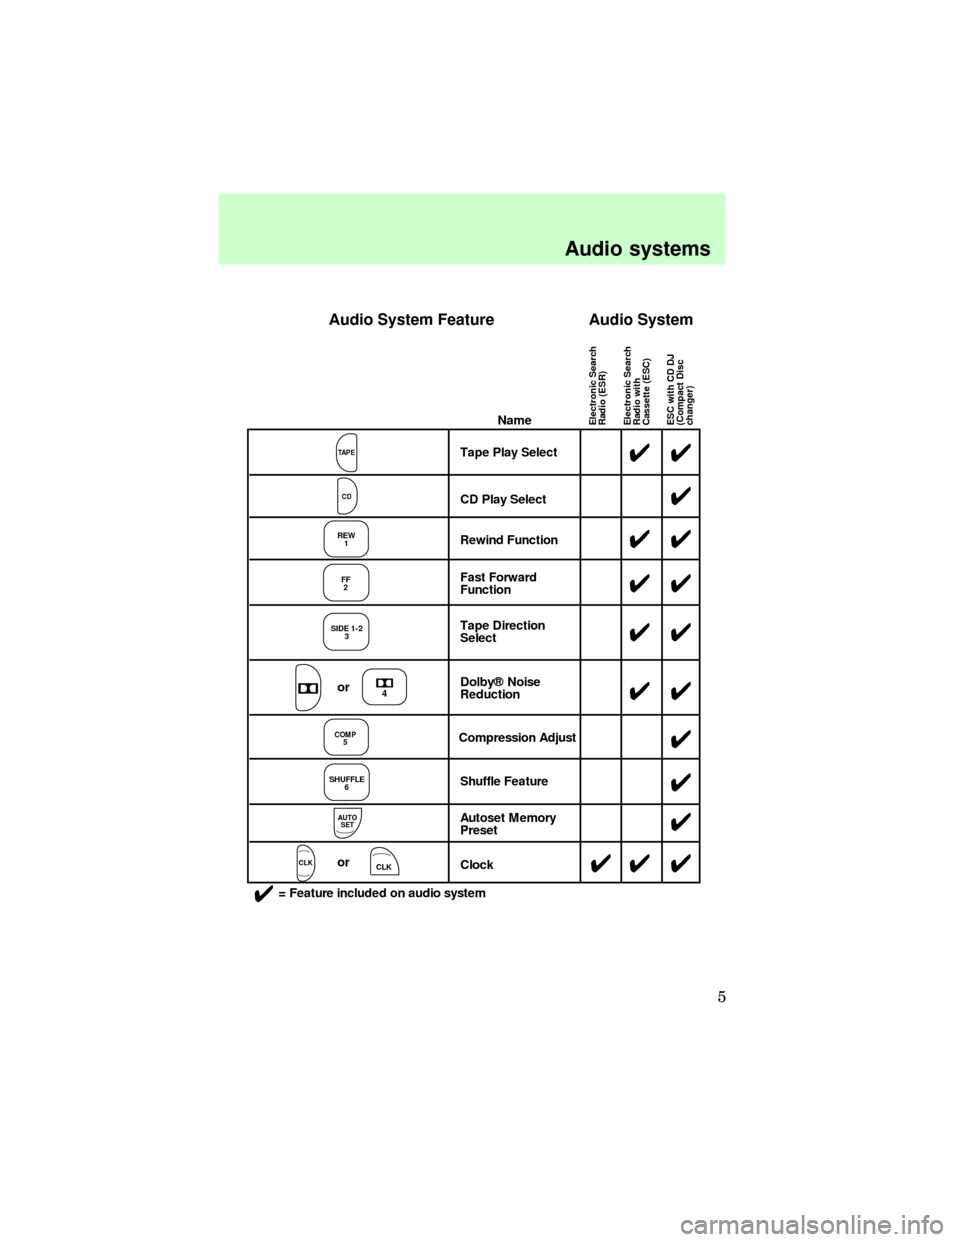
Electronic Search
Radio (ESR)
Electronic Search
Radio with
Cassette (ESC)
ESC with CD DJ
(Compact Disc
changer)Name
Tape Play Select
CD Play Select
Rewind Function
Fast Forward
Function
Tape Direction
Select
Dolby® Noise
Reduction
Compression Adjust
Shuffle Feature
Autoset Memory
Preset
Clock44
4
44
44
44
44
4
4
4
4 4
4
4
TAPE
CD
REW
1
FF
2
SIDE 1-2
3
COMP5
SHUFFLE
6
AUTO
SET
CLK
= Feature included on audio system
4or
or
CLK
Audio System Feature Audio System
Audio systems
5
Page 12 of 28
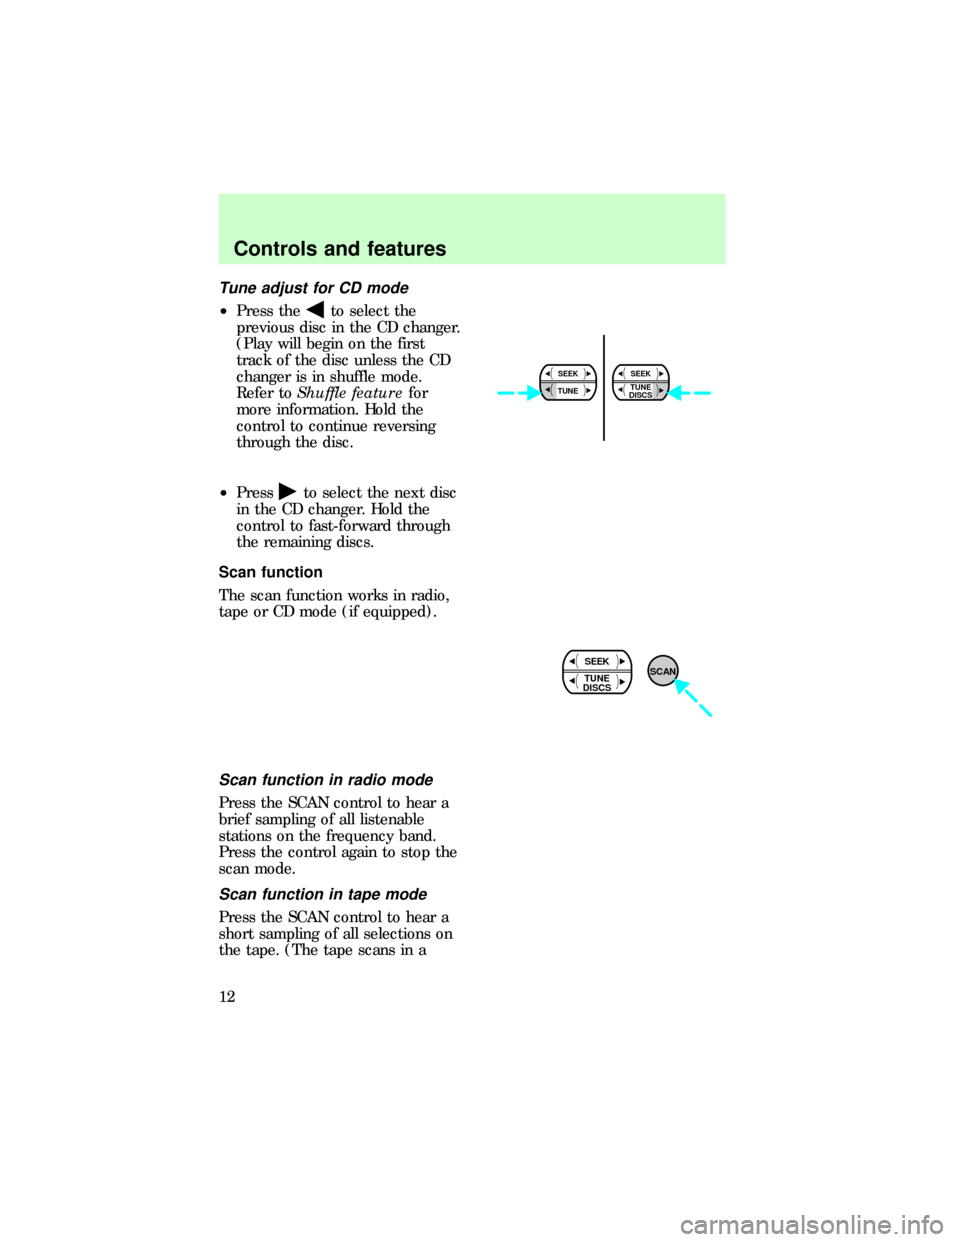
Tune adjust for CD mode
²Press theto select the
previous disc in the CD changer.
(Play will begin on the first
track of the disc unless the CD
changer is in shuffle mode.
Refer toShuffle featurefor
more information. Hold the
control to continue reversing
through the disc.
²Press
to select the next disc
in the CD changer. Hold the
control to fast-forward through
the remaining discs.
Scan function
The scan function works in radio,
tape or CD mode (if equipped).
Scan function in radio mode
Press the SCAN control to hear a
brief sampling of all listenable
stations on the frequency band.
Press the control again to stop the
scan mode.
Scan function in tape mode
Press the SCAN control to hear a
short sampling of all selections on
the tape. (The tape scans in a
SEEK
TUNETUNE
DISCSSEEK
SCANSEEK
TUNE
DISCS
Controls and features
12
Page 14 of 28
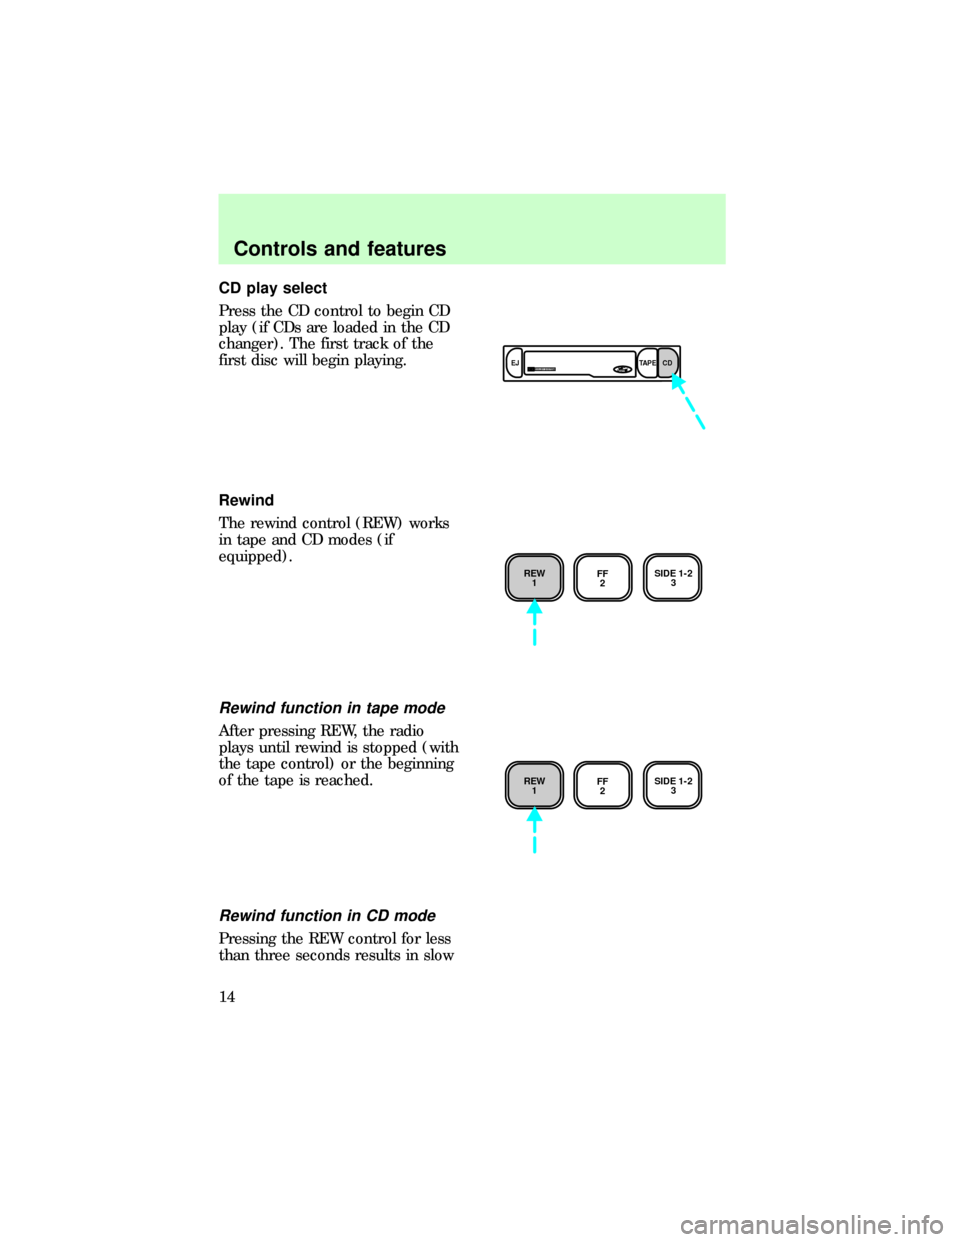
CD play select
Press the CD control to begin CD
play (if CDs are loaded in the CD
changer). The first track of the
first disc will begin playing.
Rewind
The rewind control (REW) works
in tape and CD modes (if
equipped).
Rewind function in tape mode
After pressing REW, the radio
plays until rewind is stopped (with
the tape control) or the beginning
of the tape is reached.
Rewind function in CD mode
Pressing the REW control for less
than three seconds results in slow
DOLBY SYSTEMEJTAPECD
REW
1FF
2SIDE 1-2
3
REW
1FF
2SIDE 1-2
3
Controls and features
14
Page 17 of 28
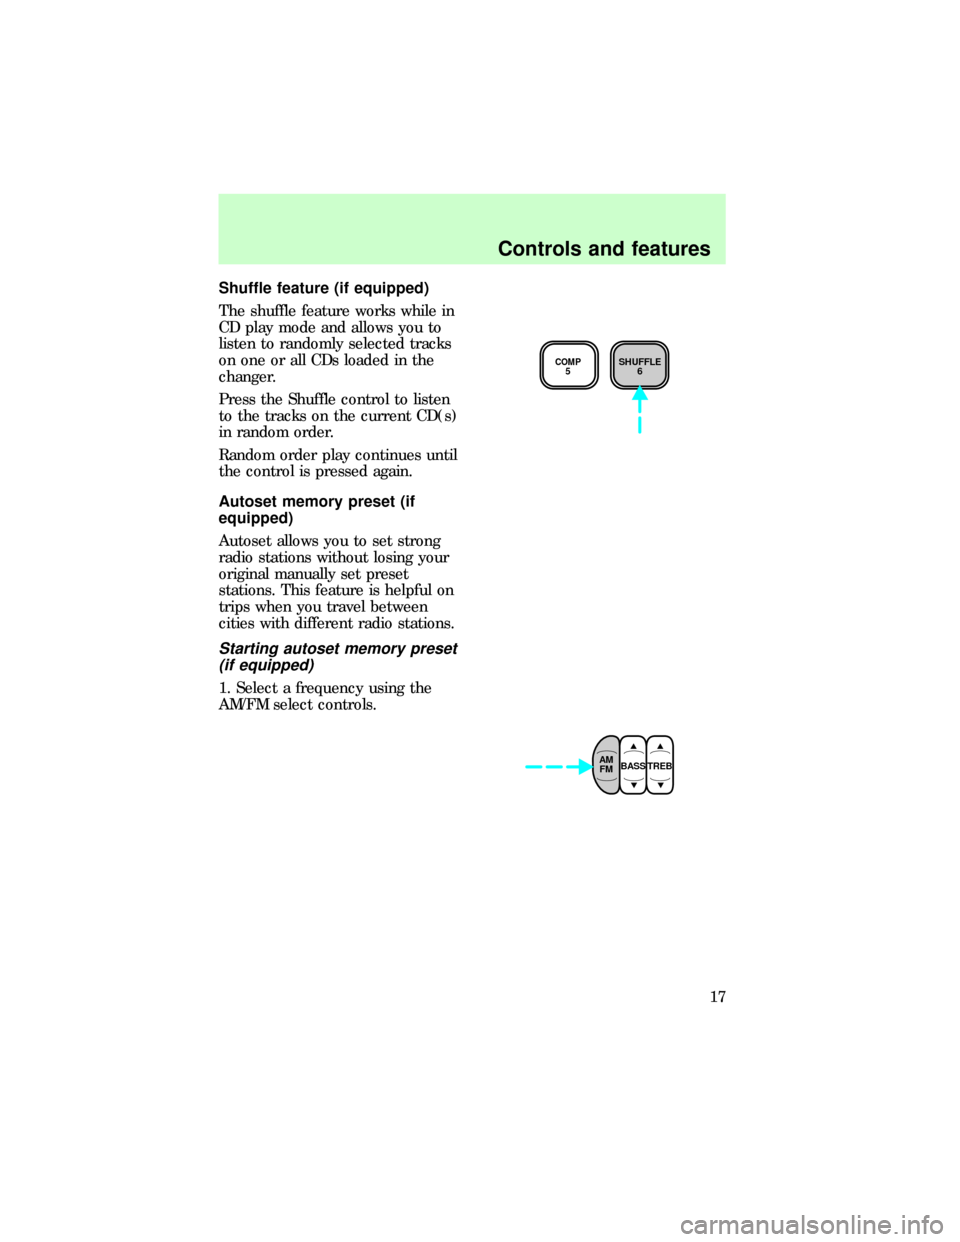
Shuffle feature (if equipped)
The shuffle feature works while in
CD play mode and allows you to
listen to randomly selected tracks
on one or all CDs loaded in the
changer.
Press the Shuffle control to listen
to the tracks on the current CD(s)
in random order.
Random order play continues until
the control is pressed again.
Autoset memory preset (if
equipped)
Autoset allows you to set strong
radio stations without losing your
original manually set preset
stations. This feature is helpful on
trips when you travel between
cities with different radio stations.
Starting autoset memory preset
(if equipped)
1. Select a frequency using the
AM/FM select controls.
COMP5SHUFFLE
6
AM
FMBASS TREB
Controls and features
17
Page 20 of 28
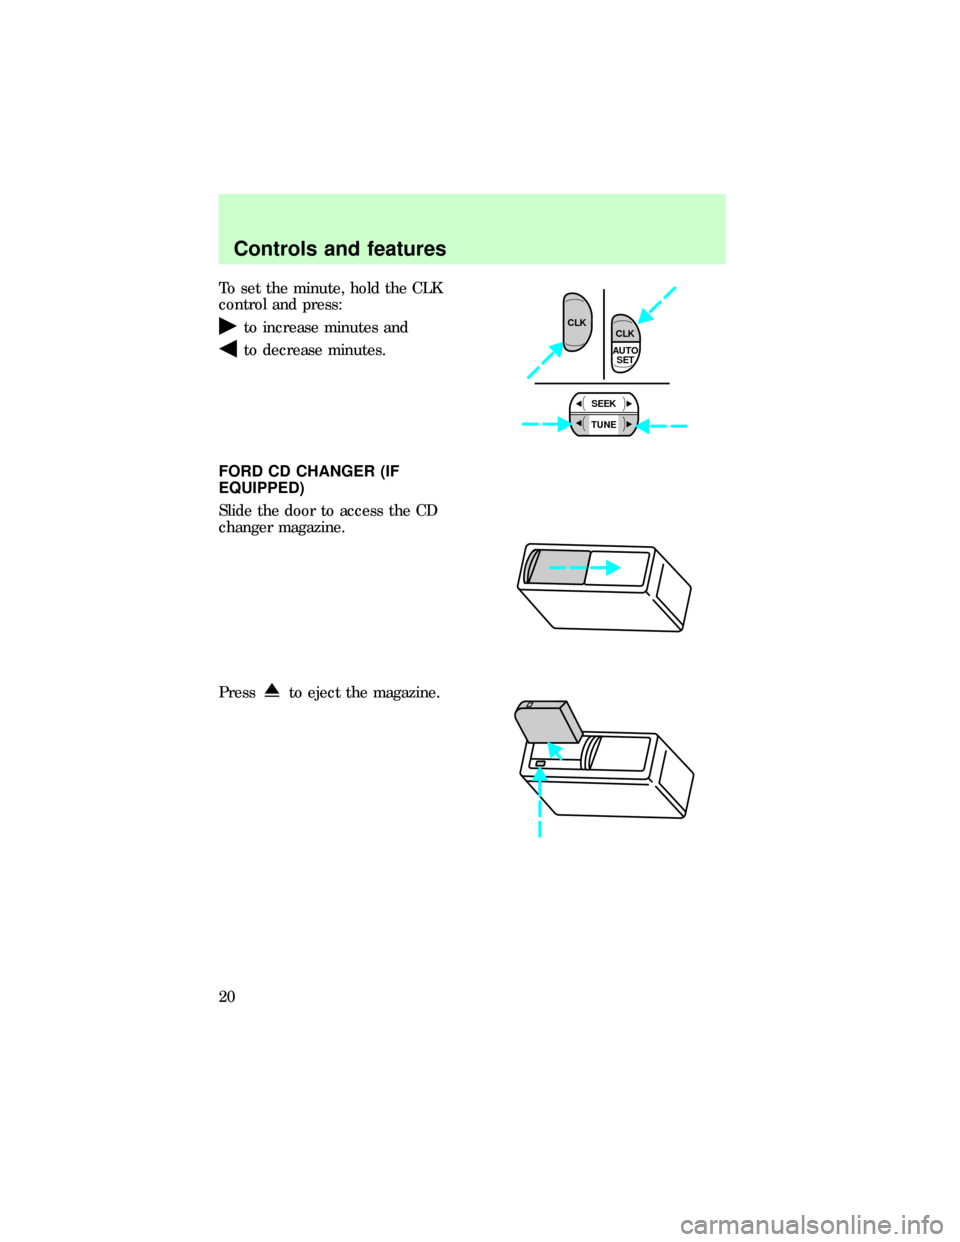
To set the minute, hold the CLK
control and press:
to increase minutes and
to decrease minutes.
FORD CD CHANGER (IF
EQUIPPED)
Slide the door to access the CD
changer magazine.
Press
to eject the magazine.
AUTO
SET CLK
SEEK
TUNE
CLK
Controls and features
20
Page 21 of 28
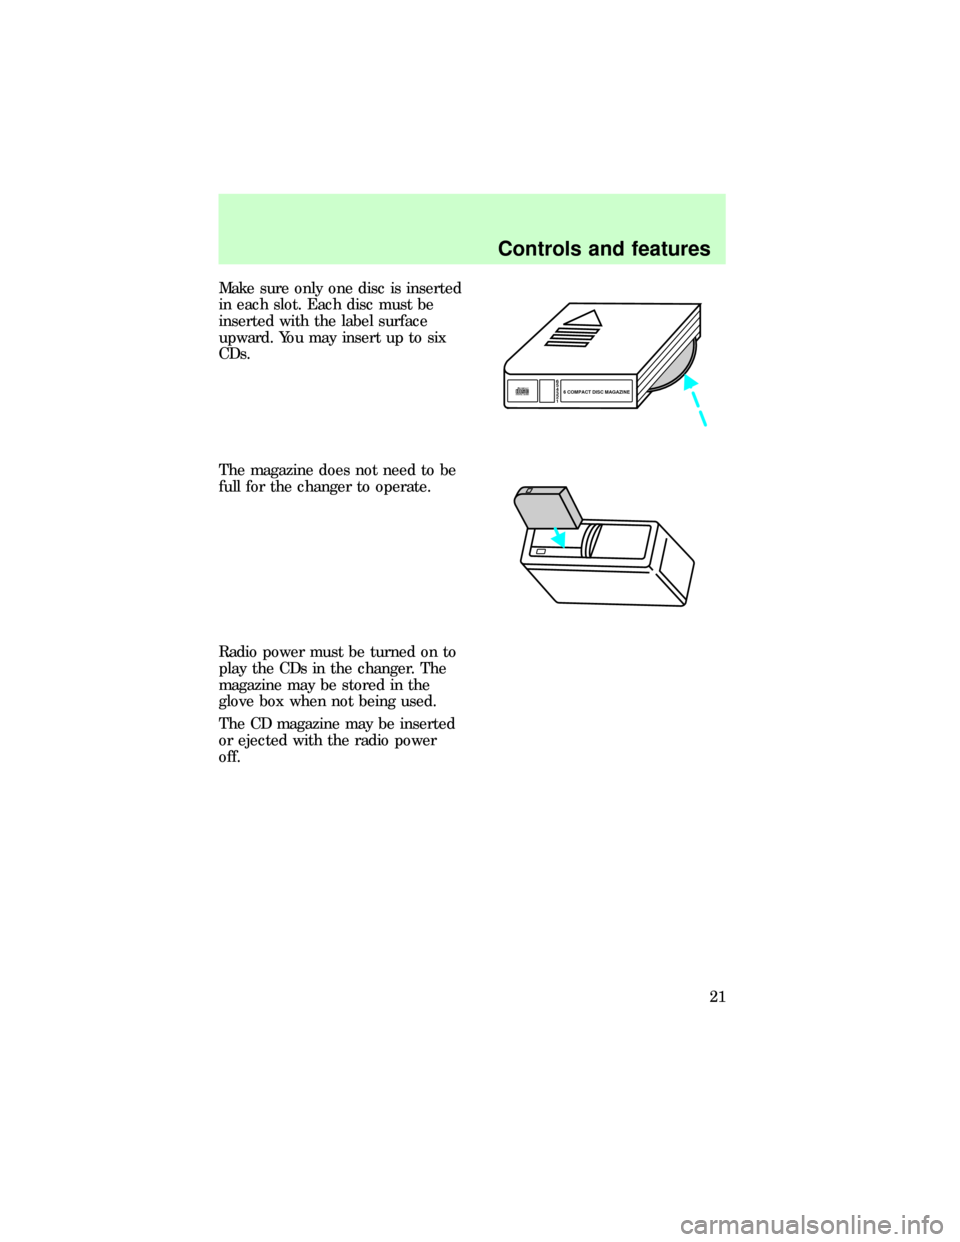
Make sure only one disc is inserted
in each slot. Each disc must be
inserted with the label surface
upward. You may insert up to six
CDs.
The magazine does not need to be
full for the changer to operate.
Radio power must be turned on to
play the CDs in the changer. The
magazine may be stored in the
glove box when not being used.
The CD magazine may be inserted
or ejected with the radio power
off.
6
5
4
3
2
16 COMPACT DISC MAGAZINECOMPACT
DIGITAL AUDIO
Controls and features
21
Page 23 of 28

Display Information
NO CDIndicates empty changer, no disc in
magazine, mechanical error, unreadable
disc, focus error, or system shutdown
due to high heat.
NO DJIndicates CD changer not connected or
not communicating.
Display
23
Page 24 of 28
CARE AND CLEANING
Troubleshooting the CD
changer
The laser beam used in the
compact disc player is
harmful to the eyes. Do not
attempt to disassemble the case.
If sound skips:
²You may be traveling on a rough
road, playing badly scratched
discs or the disc may be dirty.
Skipping will not scratch the
discs or damage the player.
If changer does not work:
²A disc is already loaded where
you want to insert disc.
²The disc is inserted with the
label surface downward.
²The disc is dusty or defective.
²The player's internal
temperature is above 75ÉC
(167ÉF). Allow the player to
cool down before operating.
²A disc with format and
dimensions not within industry
standards is inserted.
Cleaning compact discs
Inspect all discs for contamination
before playing. If necessary, clean
discs only with an approved CD
cleaner and wipe the center out to
the edge. Do not use circular
motion.
Care and cleaning
24
Page 25 of 28

CD and CD changer care
²Handle discs by their edges only.
Never touch the playing surface.
²Do not expose discs to direct
sunlight or heat sources for
extended periods of time.
²Do not insert more than one
disc into each slot of the CD
changer magazine.
Cleaning cassette player
Clean the tape player head with a
cassette cleaning cartridge after
ten to twelve hours of play to
maintain the best sound and
operation.
Cassette and cassette player
care
²Use only cassettes that are 90
minutes long or less.
²Do not expose tapes to direct
sunlight, high humidity, extreme
heat or extreme cold. Allow
tapes that may have been
exposed to extreme
temperatures to reach a
moderate temperature before
playing.
²Tighten very loose tapes by
inserting a finger or pencil into
the hole and turning the hub.
²Remove loose labels before
inserting tapes.
²Do not leave tapes in the
cassette player for a long time
when not being played.
Care and cleaning
25