air suspension FORD F150 1998 10.G Owners Manual
[x] Cancel search | Manufacturer: FORD, Model Year: 1998, Model line: F150, Model: FORD F150 1998 10.GPages: 219, PDF Size: 1.49 MB
Page 11 of 219

oil pressure gaugein this chapter
for more information.
Four wheel drive low (if
equipped)
Illuminates when four-wheel drive
low is selected.
Four wheel drive indicator (if
equipped)
Illuminates when 4x4 range is
selected.
Check air suspension (if
equipped)
Illuminates briefly when the
ignition is turned to the ON
position and the engine is OFF.
The light also illuminates when the
air suspension system requires
servicing.
For information, refer toAir
suspension systemin theDriving
chapter.
Door ajar
Illuminates when the ignition
switch is in the ON or START
position and any door is open.
LOW
RANGE
4x4
CHECK
SUSP
DOOR
AJAR
Instrumentation
11
Page 87 of 219

normal driving and should not be
noticeable to the driver.
To avoid injury, never run
the engine with one wheel
off the ground, such as when
changing a tire.
AIR SUSPENSION SYSTEM (IF
EQUIPPED)
The air suspension system is
designed to improve ride, handling
and general vehicle performance
for static, on and off-road driving
conditions.
²The load leveling feature of the
air suspension automatically
keeps the vehicle at a constant
level if a load is added or
removed from the vehicle.
²The height adjustment feature
automatically controls the
vehicle height over a range of
approximately 5 cm (2 inches)
based on vehicle speed, ignition
position and selection of two or
four-wheel drive modes.
Driving
87
Page 88 of 219

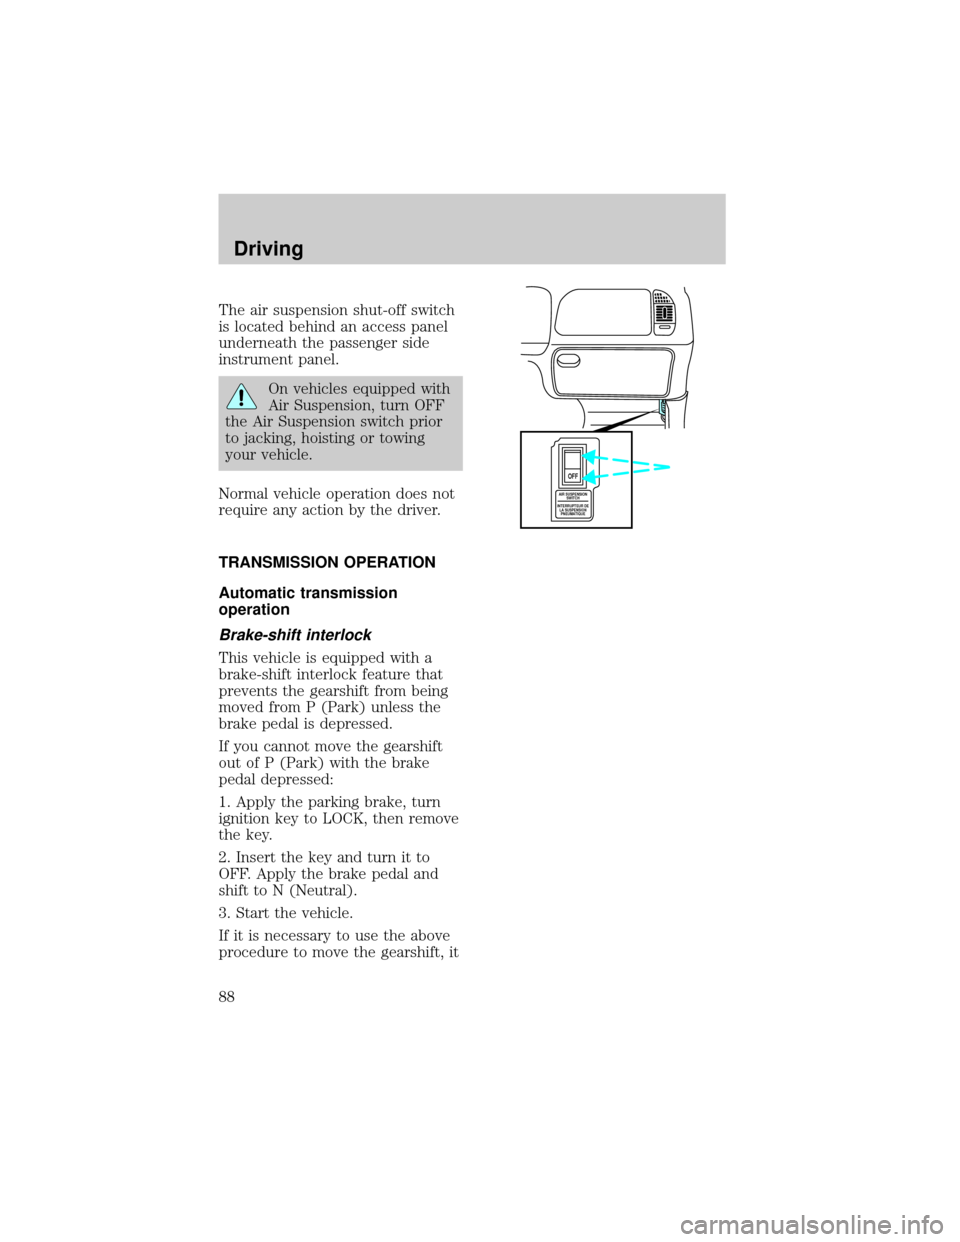
The air suspension shut-off switch
is located behind an access panel
underneath the passenger side
instrument panel.
On vehicles equipped with
Air Suspension, turn OFF
the Air Suspension switch prior
to jacking, hoisting or towing
your vehicle.
Normal vehicle operation does not
require any action by the driver.
TRANSMISSION OPERATION
Automatic transmission
operation
Brake-shift interlock
This vehicle is equipped with a
brake-shift interlock feature that
prevents the gearshift from being
moved from P (Park) unless the
brake pedal is depressed.
If you cannot move the gearshift
out of P (Park) with the brake
pedal depressed:
1. Apply the parking brake, turn
ignition key to LOCK, then remove
the key.
2. Insert the key and turn it to
OFF. Apply the brake pedal and
shift to N (Neutral).
3. Start the vehicle.
If it is necessary to use the above
procedure to move the gearshift, it
AIR SUSPENSION
SWITCH
INTERRUPTEUR DE
LA SUSPENSION
PNEUMATIQUE
OFF
Driving
88
Page 118 of 219

Engine Rear axle
ratioMaximum
GCWR-kg
(lbs.)Maximum
trailer
weight-kg
(lbs.)Maximum
frontal area
of trailer-m
(ft)
SuperCab F-250
4.6L 3.31 3 261 (7 200) 952 (2 100) 5.52 (60)
4.6L 3.73 3 533 (7 800) 1 224 (2 700) 5.52 (60)
Preparing to tow
Use the proper equipment for
towing a trailer, and make sure it
is properly attached to your
vehicle. See your dealer or a
reliable trailer dealer if you require
assistance.
Hitches
Do not use hitches that clamp onto
the vehicle's bumper or attach to
the axle. You must distribute the
load in your trailer so that 10 to
15% of the total weight of the
trailer is on the tongue.
Load equalizing hitch
When hooking up a trailer using a
load equalizing hitch, always use
the following procedure:
1. Park the unloaded vehicle on a
level surface. With the ignition on
and all doors closed, allow the
vehicle to stand for several
minutes so that it can level.
2. Turn the air suspension (if
equipped) control to OFF.
Driving
118
Page 119 of 219

3. Measure the height of a
reference point on the front and
rear bumpers at the center of the
vehicle.
4. Attach the trailer to the vehicle
and adjust the hitch equalizers so
that the front bumper height is
within 0±13 mm (0.5 in) of the
reference point. After proper
adjustment, the rear bumper
should be no higher than in Step 3.
5. Turn the air suspension (if
equipped) control to ON.
Adjusting an equalizing
hitch so the rear bumper
of the vehicle is lower or higher
than it was unloaded will defeat
the function of the load
equalizing hitch and may cause
unpredictable handling.
Safety chains
Always connect the trailer's safety
chains to the vehicle. To connect
the trailer's safety chains, cross the
chains under the trailer tongue and
allow slack for turning corners.
If you use a rental trailer, follow
the instructions that the rental
agency gives to you.
Trailer brakes
Electric brakes and manual,
automatic or surge-type brakes are
safe if installed properly and
adjusted to the manufacturer's
specifications. The trailer brakes
Driving
119
Page 135 of 219

Fuse/Relay Location Fuse Amp Rating Description
5 15A Digital Transmission
Range (DTR) Sensor
(A/T), Backup Lamp
Switch (M/T), Daytime
Running Lights (DRL)
Module, Speed Control
Servo/Amplifier
Assembly, Heater-A/C
Control Assembly,
Blend Door Actuator
6 5A Shift Lock Actuator,
Generic Electronic
Module (GEM), Rear
Air Suspension (RAS)
Module
7 Ð Not Used
8 5A Radio, Main Light
Switch, Remote
Anti-Theft Personality
(RAP) Module
9 Ð Not Used
10 Ð Not Used
11 30A Washer Pump Relay,
Wiper Run/Park Relay,
Wiper Hi/LO Relay,
Windshield Wiper
Motor
12 5A Data Link Connector
(DLC)
13 15A Rear Anti-Lock Brake
System (RABS)
Module, Brake On/Off
(BOO) Switch, Brake
Pressure Switch
Roadside emergencies
135
Page 140 of 219

Fuse/Relay Location Fuse Amp Rating Description
4 15A* Rear Air Suspension
(RAS)
5 20A* Horn Relay
6 15A* Radio, Premium Sound
Amplifier, CD Changer
7 15A* Main Light Switch,
Park Lamp Relay
8 30A* Main Light Switch,
Headlamp Relay,
Multi-Function Switch
9 15A* Daytime Running
Lamps (DRL) Module,
Fog Lamp Relay
10 25A* Auxiliary Power
Socket
11 Ð Not Used
12 Ð Not Used
13 Ð Not Used
14 60A**/20A** 4 Wheel Anti-Lock
Brake System
(4WABS)
Module/Ignition Switch
(W/RABS Only)
15 50A** Rear Air Suspension
Compressor
16 40A** Trailer Tow Battery
Charge Relay, Engine
Fuse Module (Fuse 2)
17 30A** Shift on the Fly Relay,
Transfer Case Shift
Relay
18 30A** Power Seat Control
Switch
19 20A** Fuel Pump Relay
Roadside emergencies
140
Page 143 of 219

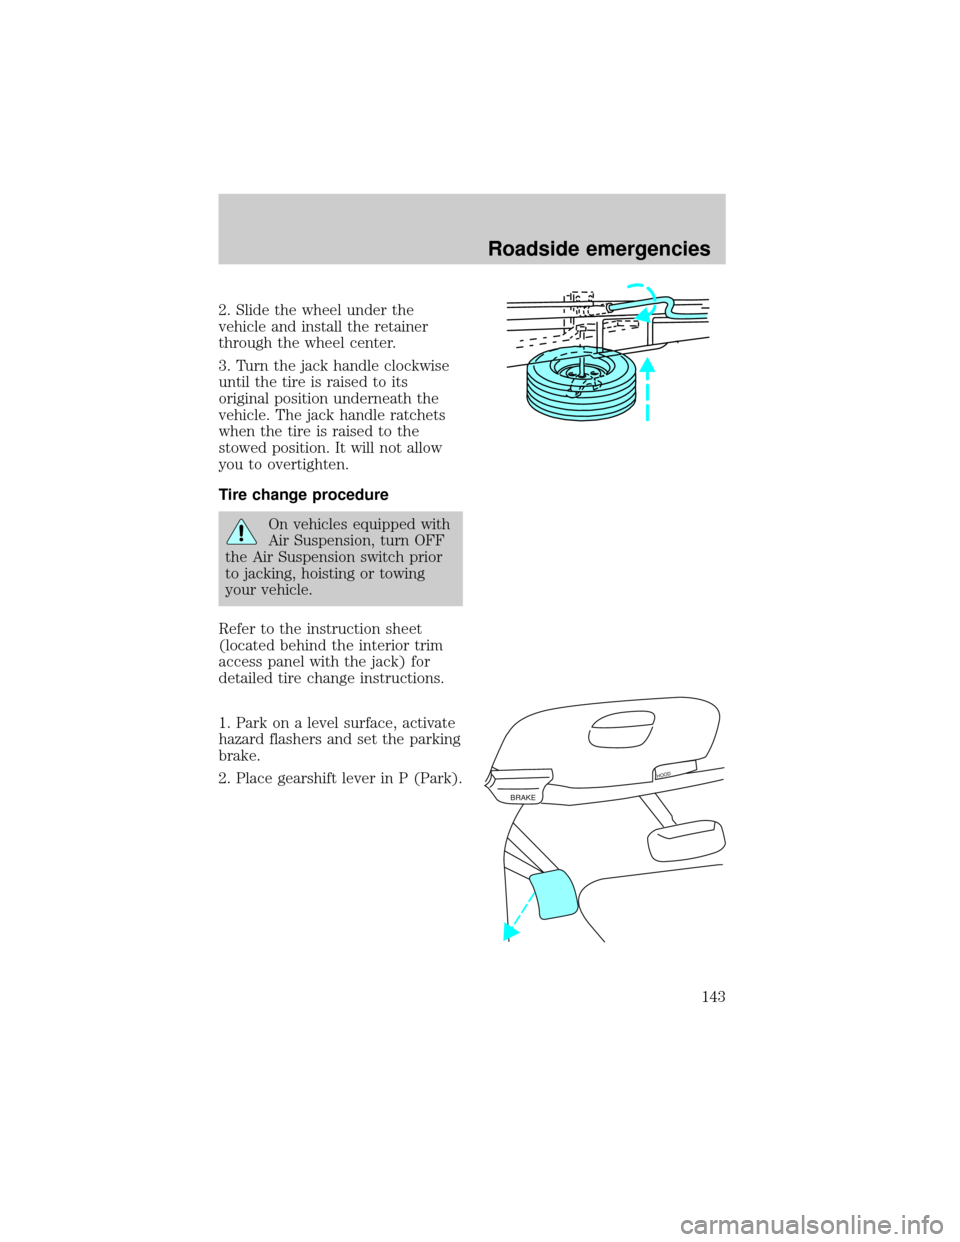
2. Slide the wheel under the
vehicle and install the retainer
through the wheel center.
3. Turn the jack handle clockwise
until the tire is raised to its
original position underneath the
vehicle. The jack handle ratchets
when the tire is raised to the
stowed position. It will not allow
you to overtighten.
Tire change procedure
On vehicles equipped with
Air Suspension, turn OFF
the Air Suspension switch prior
to jacking, hoisting or towing
your vehicle.
Refer to the instruction sheet
(located behind the interior trim
access panel with the jack) for
detailed tire change instructions.
1. Park on a level surface, activate
hazard flashers and set the parking
brake.
2. Place gearshift lever in P (Park).
BRAKE
HOOD
Roadside emergencies
143
Page 144 of 219

3. Block the diagonally opposite
wheel.
4. Obtain the spare tire and jack
from their storage locations.
5. Use the tip of the lug wrench to
remove any wheel trim.
6. Loosen each wheel lug nuts
one-half turn counterclockwise but
do not remove them until the
wheel is raised off the ground.
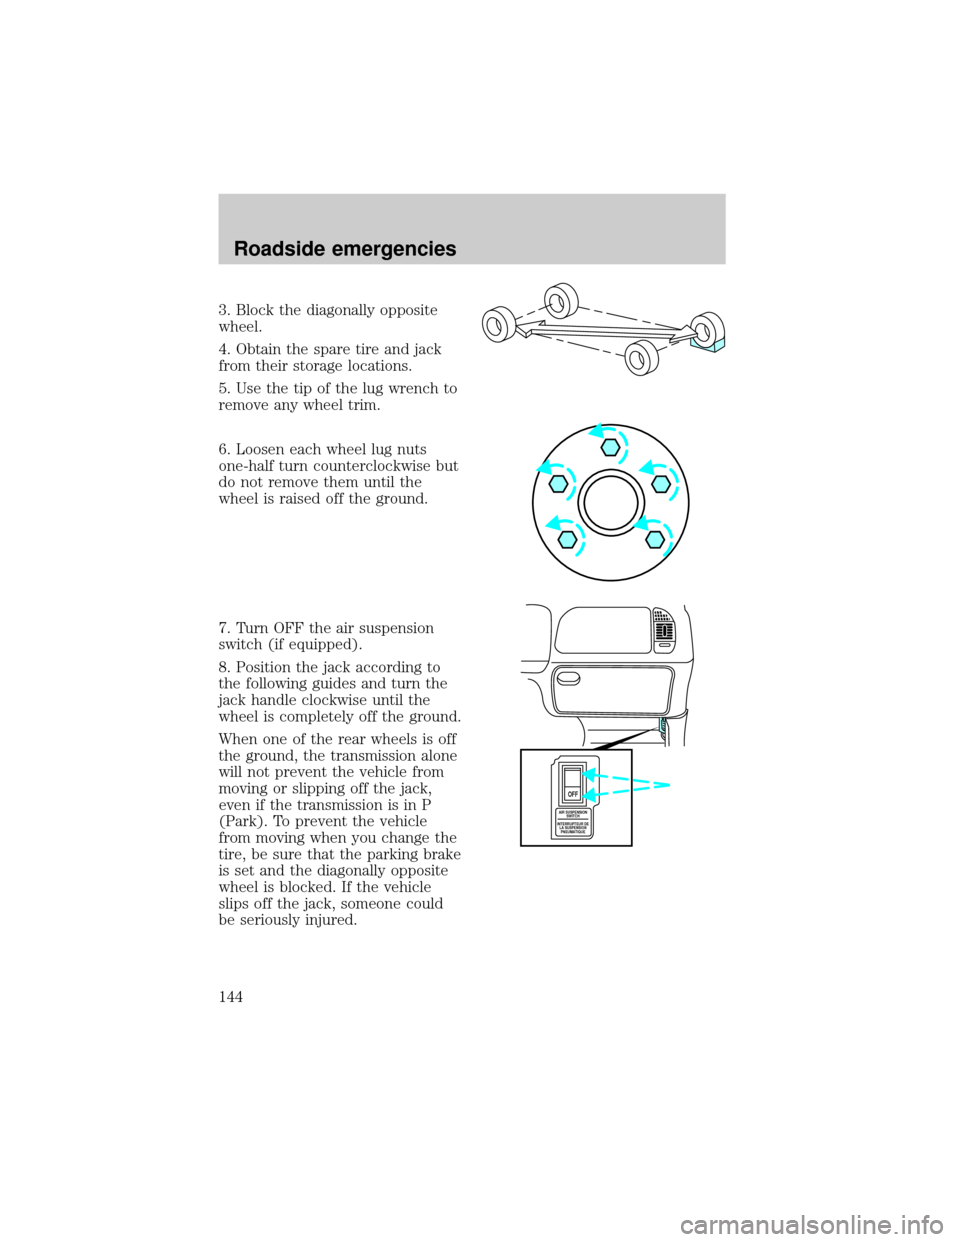
7. Turn OFF the air suspension
switch (if equipped).
8. Position the jack according to
the following guides and turn the
jack handle clockwise until the
wheel is completely off the ground.
When one of the rear wheels is off
the ground, the transmission alone
will not prevent the vehicle from
moving or slipping off the jack,
even if the transmission is in P
(Park). To prevent the vehicle
from moving when you change the
tire, be sure that the parking brake
is set and the diagonally opposite
wheel is blocked. If the vehicle
slips off the jack, someone could
be seriously injured.
AIR SUSPENSION
SWITCH
INTERRUPTEUR DE
LA SUSPENSION
PNEUMATIQUE
OFF
Roadside emergencies
144
Page 146 of 219

²Never use the front or rear
differential as a jacking
point.
9. Remove the lug nuts with the
lug wrench.
10. Replace the flat tire with the
spare tire, making sure the valve
stem is facing outward. Reinstall
the lug nuts until the wheel is snug
against the hub. Do not fully
tighten the lug nuts until the
wheel has been lowered.
11. Lower the wheel by turning the
jack handle counterclockwise.
12. Remove the jack and fully
tighten the lug nuts in the order
shown.
13. Put flat tire, jack and lug
wrench away. Make sure the jack is
fastened so it does not rattle when
you drive.
14. Unblock the wheels.
15. Turn on the air suspension
switch (if equipped).
1
4 3
52
Roadside emergencies
146