ESP FORD F150 2000 10.G Owners Manual
[x] Cancel search | Manufacturer: FORD, Model Year: 2000, Model line: F150, Model: FORD F150 2000 10.GPages: 280, PDF Size: 1.89 MB
Page 57 of 280
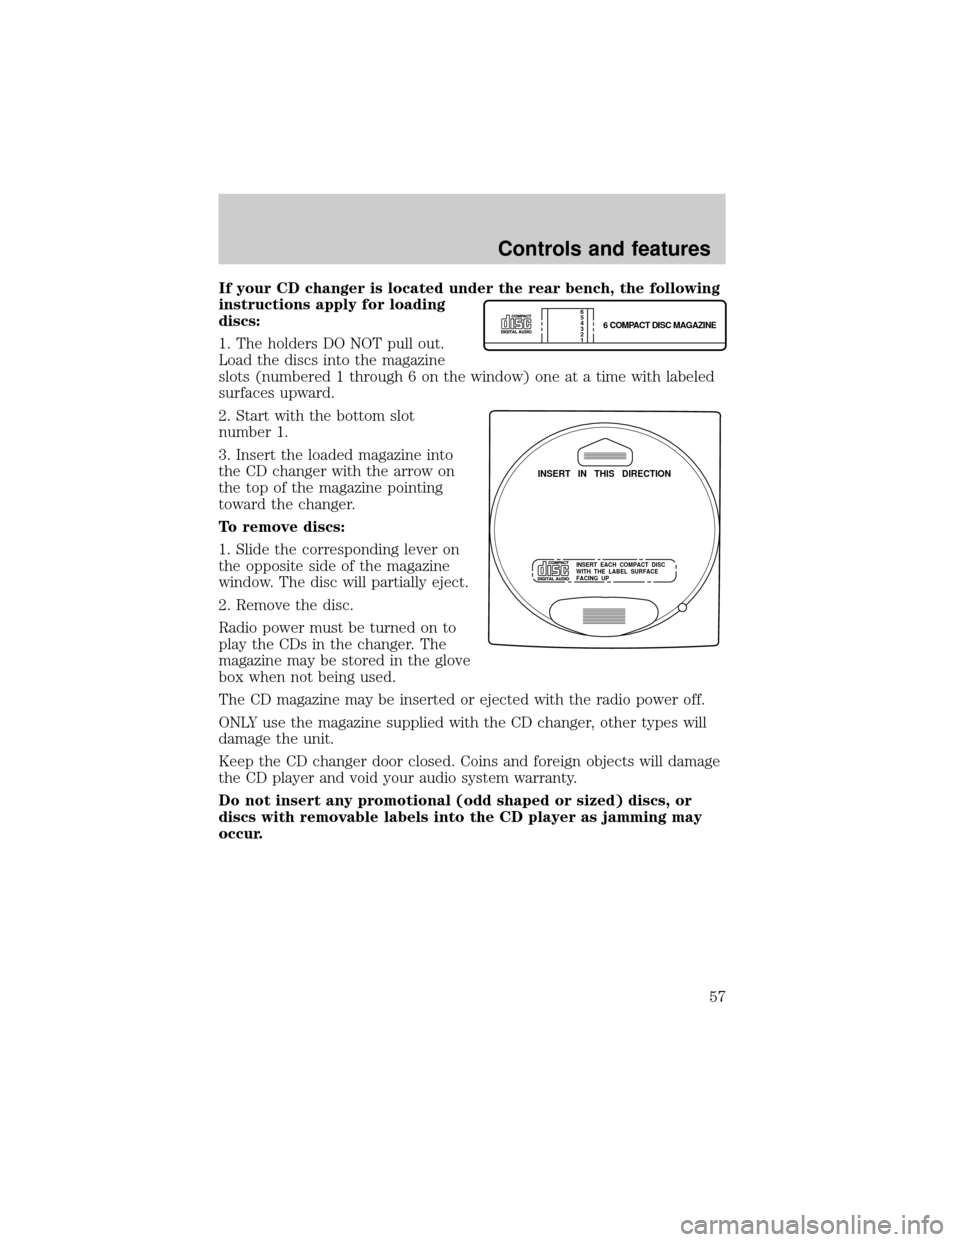
If your CD changer is located under the rear bench, the following
instructions apply for loading
discs:
1. The holders DO NOT pull out.
Load the discs into the magazine
slots (numbered 1 through 6 on the window) one at a time with labeled
surfaces upward.
2. Start with the bottom slot
number 1.
3. Insert the loaded magazine into
the CD changer with the arrow on
the top of the magazine pointing
toward the changer.
To remove discs:
1. Slide the corresponding lever on
the opposite side of the magazine
window. The disc will partially eject.
2. Remove the disc.
Radio power must be turned on to
play the CDs in the changer. The
magazine may be stored in the glove
box when not being used.
The CD magazine may be inserted or ejected with the radio power off.
ONLY use the magazine supplied with the CD changer, other types will
damage the unit.
Keep the CD changer door closed. Coins and foreign objects will damage
the CD player and void your audio system warranty.
Do not insert any promotional (odd shaped or sized) discs, or
discs with removable labels into the CD player as jamming may
occur.
6 COMPACT DISC MAGAZINE1 2 3 4 5
6
INSERT IN THIS DIRECTION
INSERT EACH COMPACT DISC
WITH THE LABEL SURFACE
FACING UP
Controls and features
57
Page 89 of 280

1. Insert the first previously programmed coded key into the ignition and
turn the ignition from OFF to ON (maintain ignition in ON for at least
one second).
2. Turn ignition to OFF and remove the first coded key from the ignition.
3. Within five seconds of turning the ignition to OFF, insert the second
previously programmed coded key into the ignition and turn the ignition
from OFF to ON (maintain ignition in ON for at least one second but no
more than five seconds).
4. Turn the ignition to OFF and remove the second coded key from the
ignition.
5. Within 10 seconds of turning the ignition to OFF, insert the new
unprogrammed key (new key/valet key) into the ignition and turn the
ignition from OFF to ON (maintain ignition in ON for at least one
second). This step will program your new key to a coded key.
6. To program additional new unprogrammed key(s), repeat this
procedure from step 1.
If the programming procedure was successful, the new coded key(s) will
start the vehicle's engine. The theft indicator (located on the instrument
panel) will light for three seconds and then go out.
If the programming procedure was not successful, the new coded key(s)
will not operate the vehicle's engine. The theft indicator will flash on and
off. Wait at least one minute and then repeat the procedure from step 1.
If failure repeats, bring your vehicle to your dealership to have the new
spare key(s) programmed.
REMOTE ENTRY SYSTEM (IF EQUIPPED)
This device complies with part 15 of the FCC rules and with RS-210 of
Industry Canada. Operation is subject to the following two conditions:
(1) This device may not cause harmful interference, and (2) This device
must accept any interference received, including interference that may
cause undesired operation.
Changes or modifications not expressly approved by the party
responsible for compliance could void the user's authority to
operate the equipment.
Your vehicle is equipped with a remote entry system which allows you to:
²unlock the vehicle doors without a key.
²lock all the vehicle doors without a key.
²activate the personal alarm.
Controls and features
89
Page 95 of 280
Programming your own personal entry code
To program your own code:
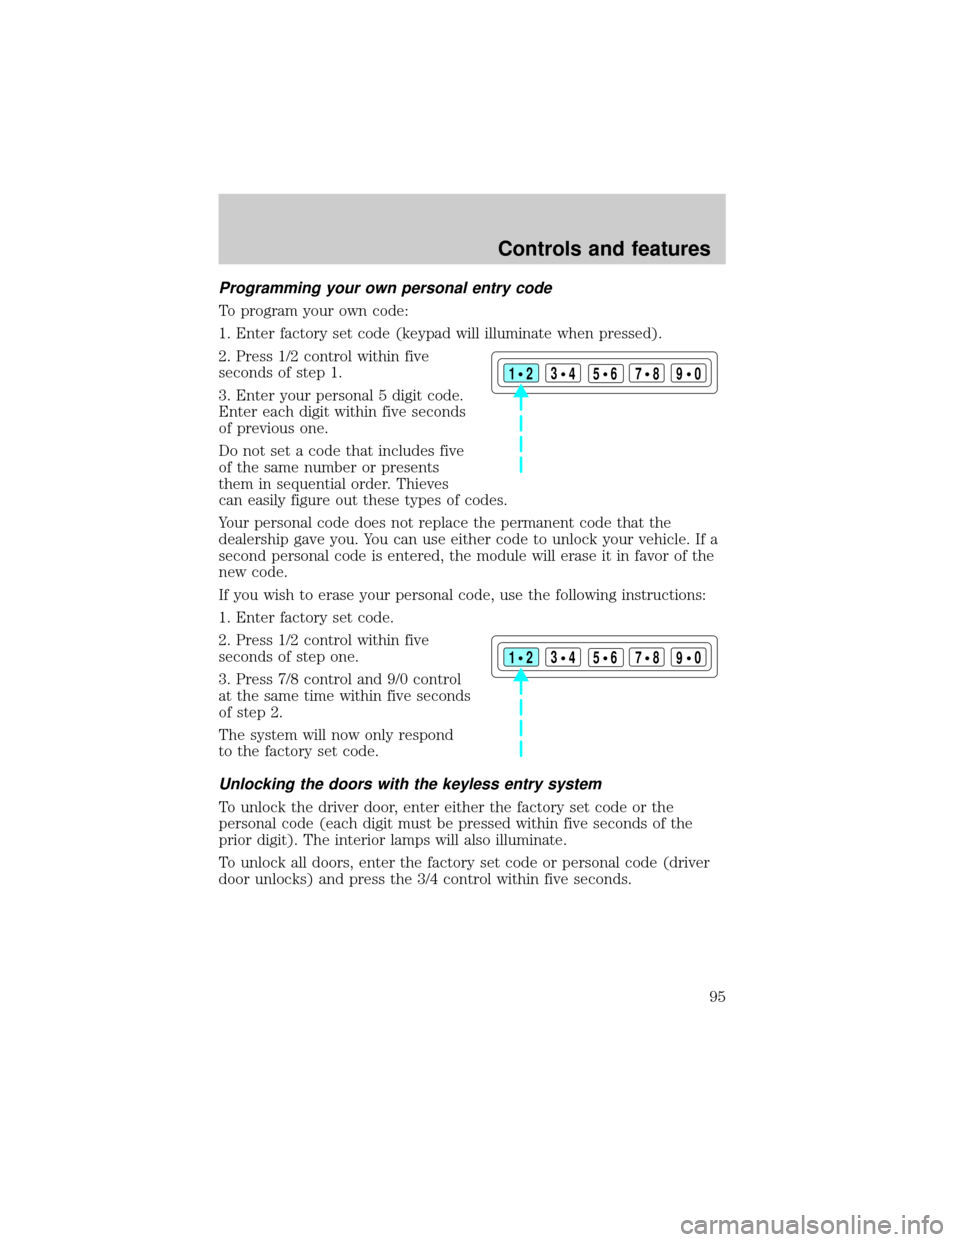
1. Enter factory set code (keypad will illuminate when pressed).
2. Press 1/2 control within five
seconds of step 1.
3. Enter your personal 5 digit code.
Enter each digit within five seconds
of previous one.
Do not set a code that includes five
of the same number or presents
them in sequential order. Thieves
can easily figure out these types of codes.
Your personal code does not replace the permanent code that the
dealership gave you. You can use either code to unlock your vehicle. If a
second personal code is entered, the module will erase it in favor of the
new code.
If you wish to erase your personal code, use the following instructions:
1. Enter factory set code.
2. Press 1/2 control within five
seconds of step one.
3. Press 7/8 control and 9/0 control
at the same time within five seconds
of step 2.
The system will now only respond
to the factory set code.
Unlocking the doors with the keyless entry system
To unlock the driver door, enter either the factory set code or the
personal code (each digit must be pressed within five seconds of the
prior digit). The interior lamps will also illuminate.
To unlock all doors, enter the factory set code or personal code (driver
door unlocks) and press the 3/4 control within five seconds.
123
45678
90
123
45678
90
Controls and features
95
Page 104 of 280
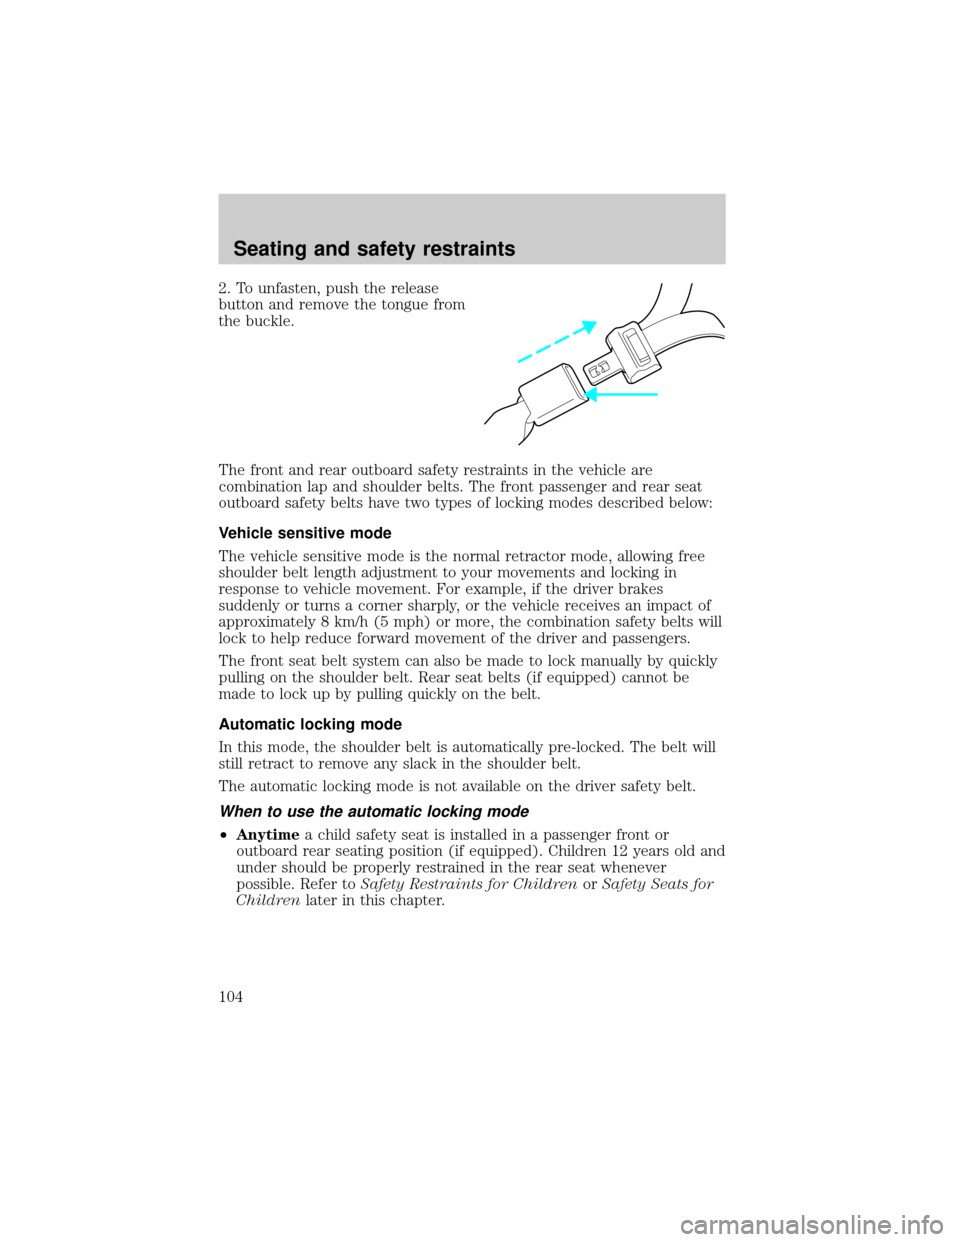
2. To unfasten, push the release
button and remove the tongue from
the buckle.
The front and rear outboard safety restraints in the vehicle are
combination lap and shoulder belts. The front passenger and rear seat
outboard safety belts have two types of locking modes described below:
Vehicle sensitive mode
The vehicle sensitive mode is the normal retractor mode, allowing free
shoulder belt length adjustment to your movements and locking in
response to vehicle movement. For example, if the driver brakes
suddenly or turns a corner sharply, or the vehicle receives an impact of
approximately 8 km/h (5 mph) or more, the combination safety belts will
lock to help reduce forward movement of the driver and passengers.
The front seat belt system can also be made to lock manually by quickly
pulling on the shoulder belt. Rear seat belts (if equipped) cannot be
made to lock up by pulling quickly on the belt.
Automatic locking mode
In this mode, the shoulder belt is automatically pre-locked. The belt will
still retract to remove any slack in the shoulder belt.
The automatic locking mode is not available on the driver safety belt.
When to use the automatic locking mode
²Anytimea child safety seat is installed in a passenger front or
outboard rear seating position (if equipped). Children 12 years old and
under should be properly restrained in the rear seat whenever
possible. Refer toSafety Restraints for ChildrenorSafety Seats for
Childrenlater in this chapter.
Seating and safety restraints
104
Page 120 of 280
Always transport children who are 12 and younger in the rear
seat. Always use safety belts and child restraints properly. If a
child in a rear facing infant seat must be transported in front, the
passenger air bagmustbe turned OFF. This is because the back of the
infant seat is too close to the inflating air bag and the risk of a fatal
injury to the infant when the air bag inflates is substantial.
The vast majority of drivers and passengers are much safer with an air
bag than without. To do their job and reduce the risk of life threatening
injuries, air bags must open with great force, and this force can pose a
potentially deadly risk in some situations, particularly when a front seat
occupant is not properly buckled up. The most effective way to reduce
the risk of unnecessary air bag injuries without reducing the overall
safety of the vehicle is to make sure all occupants are properly
restrained in the vehicle, especially in the front seat. This provides the
protection of safety belts and permits the air bags to provide the
additional protection they were designed to provide. If you choose to
deactivate your air bag, you are losing the very significant risk reducing
benefits of the air bag and you are also reducing the effectiveness of the
safety belts, because safety belts in modern vehicles are designed to
work as a safety system with the air bags.
Read all air bag Warning labels in the vehicle as well as the other
important air bag instructions and Warnings in this Owner's Guide.
NHTSA deactivation criteria (excluding Canada)
1.Infant.An infant (less than 1 year old) must ride in the front seat
because:
²the vehicle has no rear seat;
²the vehicle has a rear seat too small to accommodate a rear-facing
infant seat; or
²the infant has a medical condition which, according to the infant's
physician, makes it necessary for the infant to ride in the front so that
the driver can constantly monitor the child's condition.
Seating and safety restraints
120
Page 122 of 280
3.Medical condition:A passenger has a medical condition that,
according to his or her physician:
²poses a special risk for the passenger if the air bag deploys; and
²makes the potential harm from the passenger air bag deployment
greater than the potential harm from turning OFF the air bag and
experiencing a crash without the protection offered by the air bag
SAFETY RESTRAINTS FOR CHILDREN
See the following sections for directions on how to properly use safety
restraints for children. Also seeAir Bag Supplemental Restraint
System (SRS)in this chapter for special instructions about using air
bags.
Important child restraint precautions
You are required by law to use safety restraints for children in the U.S.
and Canada. If small children ride in your vehicle (generally children who
are four years old or younger and who weigh 18 kg [40 lbs] or less), you
must put them in safety seats made especially for children. Check your
local and state or provincial laws for specific requirements regarding the
safety of children in your vehicle.
Never let a passenger hold a child on his or her lap while the
vehicle is moving. The passenger cannot protect the child from
injury in a collision.
Always follow the instructions and warnings that come with any infant or
child restraint you might use.
When possible, always place children under age 12 in the rear seat of
your vehicle. Accident statistics suggest that children are safer when
properly restrained in the rear seating positions than in the front seating
position.
Children and safety belts
If the child is the proper size, restrain the child in a safety seat.
Children who are too large for child safety seats (as specified by your
child safety seat manufacturer) should always wear safety belts.
Follow all the important safety restraint and air bag precautions that
apply to adult passengers in your vehicle.
Seating and safety restraints
122
Page 135 of 280
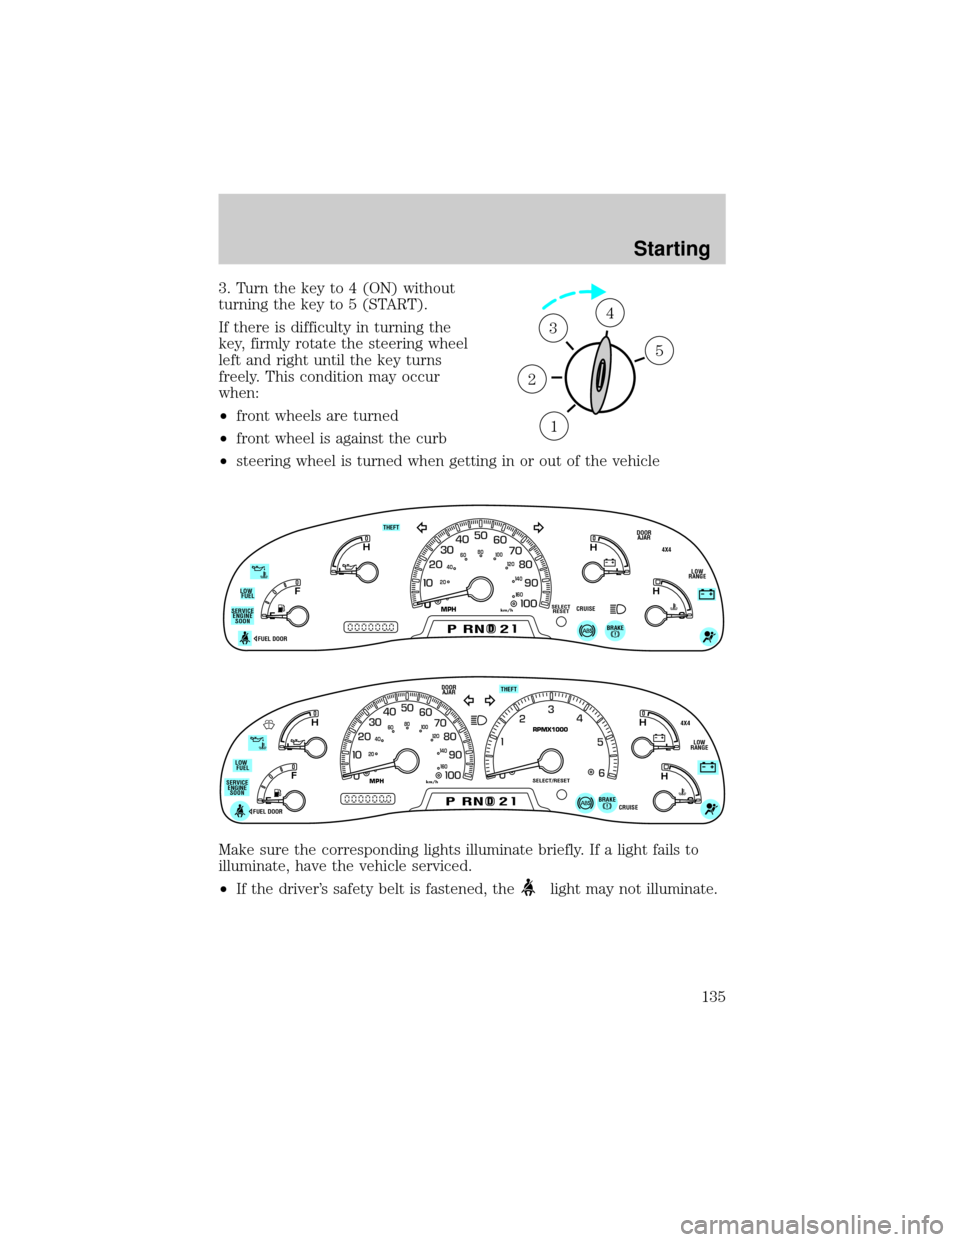
3. Turn the key to 4 (ON) without
turning the key to 5 (START).
If there is difficulty in turning the
key, firmly rotate the steering wheel
left and right until the key turns
freely. This condition may occur
when:
²front wheels are turned
²front wheel is against the curb
²steering wheel is turned when getting in or out of the vehicle
Make sure the corresponding lights illuminate briefly. If a light fails to
illuminate, have the vehicle serviced.
²If the driver's safety belt is fastened, the
light may not illuminate.
1
2
34
5
0
E
L
L
H H
F
CH
DPRND2
DOOR
AJAR
SELECT
RESET
4X4
LOW
RANGE THEFT
FUEL DOOR
20406080
00
20
40
60
BRAKE
MPHkm/hSERVICE
ENGINE
SOONLOW
FUEL
CRUISE
D
L
H
L
H
E
F
C
H
BRAKEPRND2CRUISE DOOR
AJAR
SELECT/RESET
4X4
LOW
RANGE THEFT
FUEL DOOR SERVICE
ENGINE
SOONLOW
FUEL
0MPHRPMX1000km/h
20406080
00
20
40
60
Starting
135
Page 136 of 280
STARTING THE ENGINE
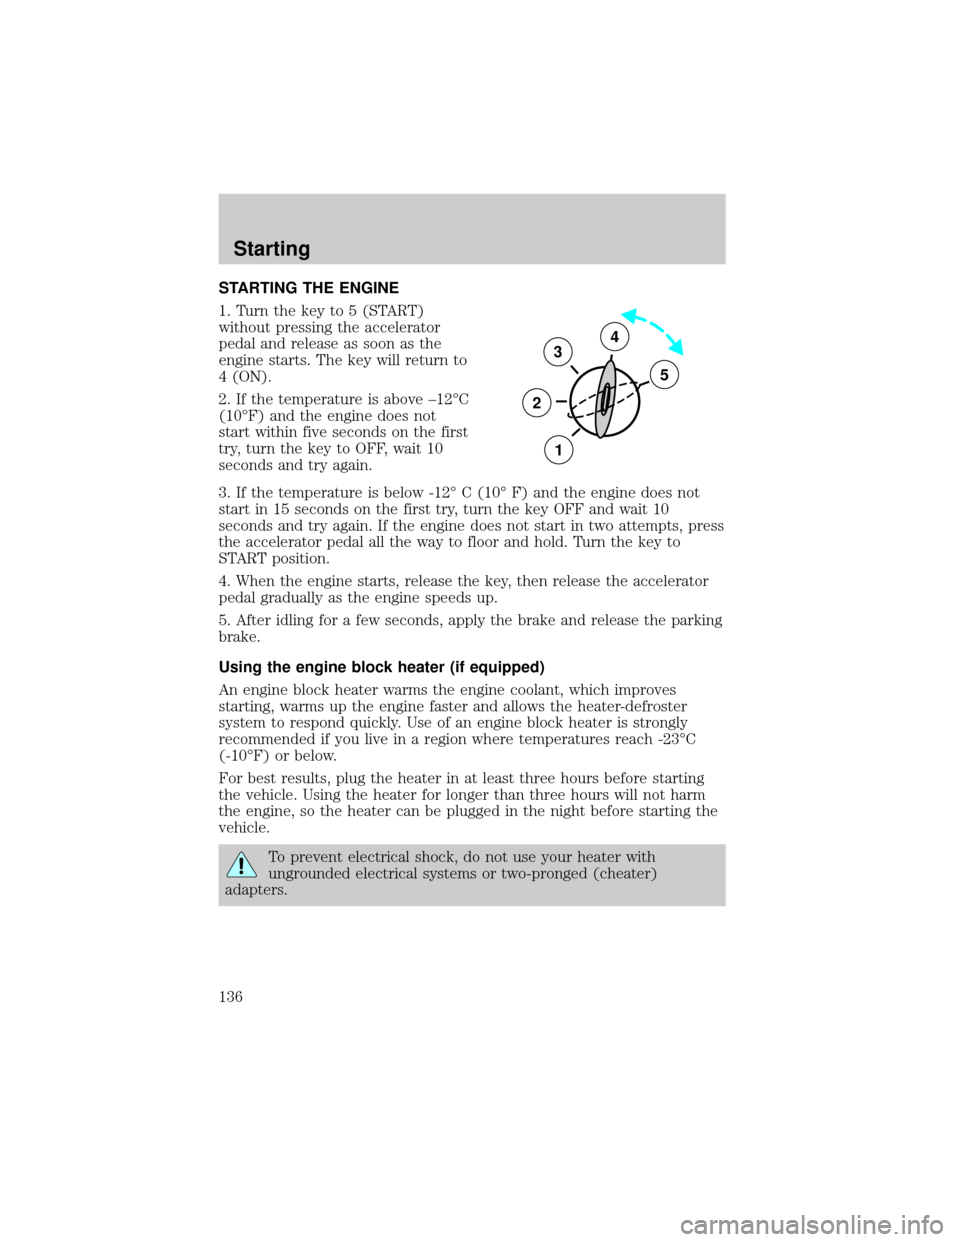
1. Turn the key to 5 (START)
without pressing the accelerator
pedal and release as soon as the
engine starts. The key will return to
4 (ON).
2. If the temperature is above ±12ÉC
(10ÉF) and the engine does not
start within five seconds on the first
try, turn the key to OFF, wait 10
seconds and try again.
3. If the temperature is below -12É C (10É F) and the engine does not
start in 15 seconds on the first try, turn the key OFF and wait 10
seconds and try again. If the engine does not start in two attempts, press
the accelerator pedal all the way to floor and hold. Turn the key to
START position.
4. When the engine starts, release the key, then release the accelerator
pedal gradually as the engine speeds up.
5. After idling for a few seconds, apply the brake and release the parking
brake.
Using the engine block heater (if equipped)
An engine block heater warms the engine coolant, which improves
starting, warms up the engine faster and allows the heater-defroster
system to respond quickly. Use of an engine block heater is strongly
recommended if you live in a region where temperatures reach -23ÉC
(-10ÉF) or below.
For best results, plug the heater in at least three hours before starting
the vehicle. Using the heater for longer than three hours will not harm
the engine, so the heater can be plugged in the night before starting the
vehicle.
To prevent electrical shock, do not use your heater with
ungrounded electrical systems or two-pronged (cheater)
adapters.
3
2
1
5
4
Starting
136
Page 157 of 280
Shifting from 4H (4WD high) to 2H (2WD high)
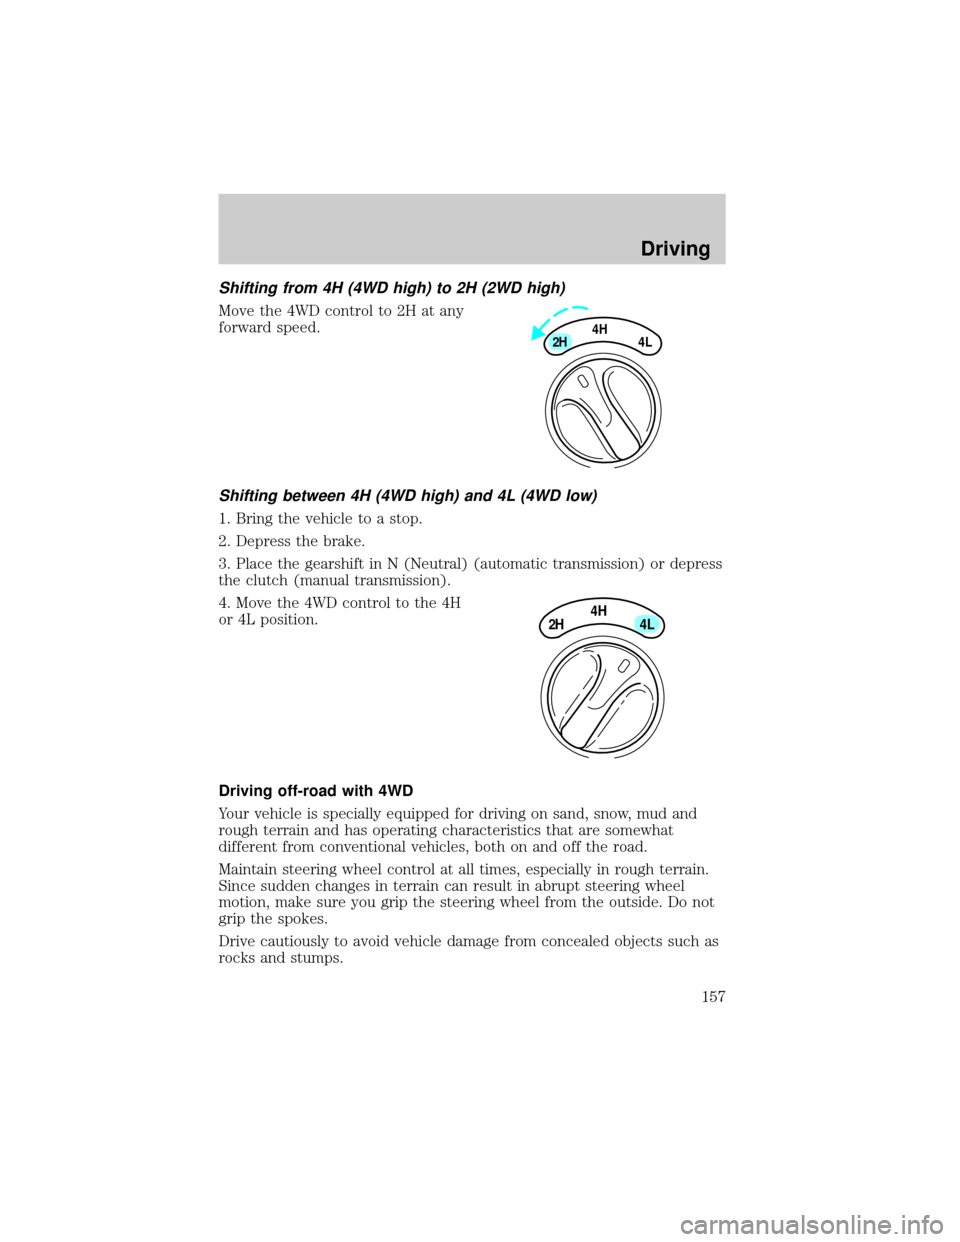
Move the 4WD control to 2H at any
forward speed.
Shifting between 4H (4WD high) and 4L (4WD low)
1. Bring the vehicle to a stop.
2. Depress the brake.
3. Place the gearshift in N (Neutral) (automatic transmission) or depress
the clutch (manual transmission).
4. Move the 4WD control to the 4H
or 4L position.
Driving off-road with 4WD
Your vehicle is specially equipped for driving on sand, snow, mud and
rough terrain and has operating characteristics that are somewhat
different from conventional vehicles, both on and off the road.
Maintain steering wheel control at all times, especially in rough terrain.
Since sudden changes in terrain can result in abrupt steering wheel
motion, make sure you grip the steering wheel from the outside. Do not
grip the spokes.
Drive cautiously to avoid vehicle damage from concealed objects such as
rocks and stumps.
4H
2H
4L
4H
2H
4L
Driving
157
Page 159 of 280

Water intrusion into the transmission may damage the
transmission.
Replace rear axle lubricant any time the axle has been submerged in
water. The rear axle does not normally require a lubricant change for the
life of the vehicle. Rear axle lubricant quantities are not to be checked or
changed unless a leak is suspected or repair is required.
Driving on hilly or sloping terrain
When driving on a hill, avoid driving crosswise or turning on steep
slopes. You could lose traction and slip sideways. Drive straight up,
straight down or avoid the hill completely. Know the conditions on the
other side of a hill before driving over the crest.
When climbing a steep hill, start in a lower gear rather than downshifting
to a lower gear from a higher gear once the ascent has started. This
reduces strain on the engine and the possibility of stalling.
When descending a steep hill, avoid sudden braking. Shift to a lower gear
when added engine braking is desired.
When speed control is on and you are driving uphill, your vehicle speed
may drop considerably, especially if you are carrying a heavy load.
If vehicle speed drops more than 16 km/h (10 mph), the speed control
will cancel automatically. Resume speed with accelerator pedal.
If speed control cancels after climbing the hill, reset speed by pressing
and holding the SET ACCEL button (to resume speeds over 50 km/h [30
mph]).
Automatic transmissions may shift frequently while driving up steep
grades. Eliminate frequent shifting by shifting out of
(Overdrive) into
a lower gear.
Driving on snow and ice
A 4WD vehicle has advantages over 2WD vehicles in snow and ice but
can skid like any other vehicle.
Avoid sudden applications of power and quick changes of direction on
snow and ice. Apply the accelerator slowly and steadily when starting
from a full stop.
When braking, apply the brakes as you normally would. In order to allow
the anti-lock brake system (ABS) to operate properly, keep steady
pressure on the brake pedal.
Driving
159