child lock FORD F250 2016 Owners Manual
[x] Cancel search | Manufacturer: FORD, Model Year: 2016, Model line: F250, Model: FORD F250 2016Pages: 507, PDF Size: 6.81 MB
Page 4 of 507
Introduction
About This Manual...........................................7
Symbols Glossary
.............................................7
Data Recording
..................................................9
California Proposition 65..............................11
Perchlorate.........................................................11
Ford Credit
..........................................................11
Replacement Parts Recommendation
........................................11
Special Notices................................................12
Mobile Communications Equipment.....................................................13
Export Unique Options..................................13
Environment
Protecting the Environment........................14
Child Safety
General Information
.......................................15
Installing Child Seats.....................................16
Booster Seats
..................................................24
Child Seat Positioning..................................26
Child Safety Locks..........................................27
Safety Belts
Principle of Operation..................................29
Fastening the Safety Belts
.........................30
Safety Belt Height Adjustment.................33
Safety Belt Warning Lamp and Indicator Chime
.............................................................33
Safety Belt Minder.........................................34
Child Restraint and Safety Belt Maintenance................................................36
Supplementary Restraints System
Principle of Operation...................................37
Driver and Passenger Airbags...................38
Side Airbags
.....................................................43
Safety Canopy ™
............................................44Crash Sensors and Airbag Indicator.......45
Airbag Disposal
..............................................46
Keys and Remote Controls
General Information on Radio Frequencies..................................................47
Remote Control
...............................................47
Replacing a Lost Key or Remote Control...........................................................50
MyKey ™
Principle of Operation
...................................51
Creating a MyKey............................................52
Clearing All MyKeys.......................................53
Checking MyKey System Status...............53
Using MyKey With Remote Start Systems.........................................................55
MyKey Troubleshooting...............................55
Locks
Locking and Unlocking
.................................56
Keyless Entry
....................................................57
Tailgate
Tailgate Lock
...................................................60
Removing the Tailgate.................................60
Tailgate Step.....................................................61
Bed Extender...................................................62
Security
Passive Anti-Theft System........................64
Anti-Theft Alarm
............................................65
Steering Wheel
Adjusting the Steering Wheel...................66
Audio Control
..................................................66
Voice Control....................................................67
Cruise Control
..................................................67
Information Display Control
.......................67
Heated Steering Wheel
...............................68
1
Super Duty (TFA) Canada/United States of America, enUSA, First Printing Table of Contents
Page 11 of 507
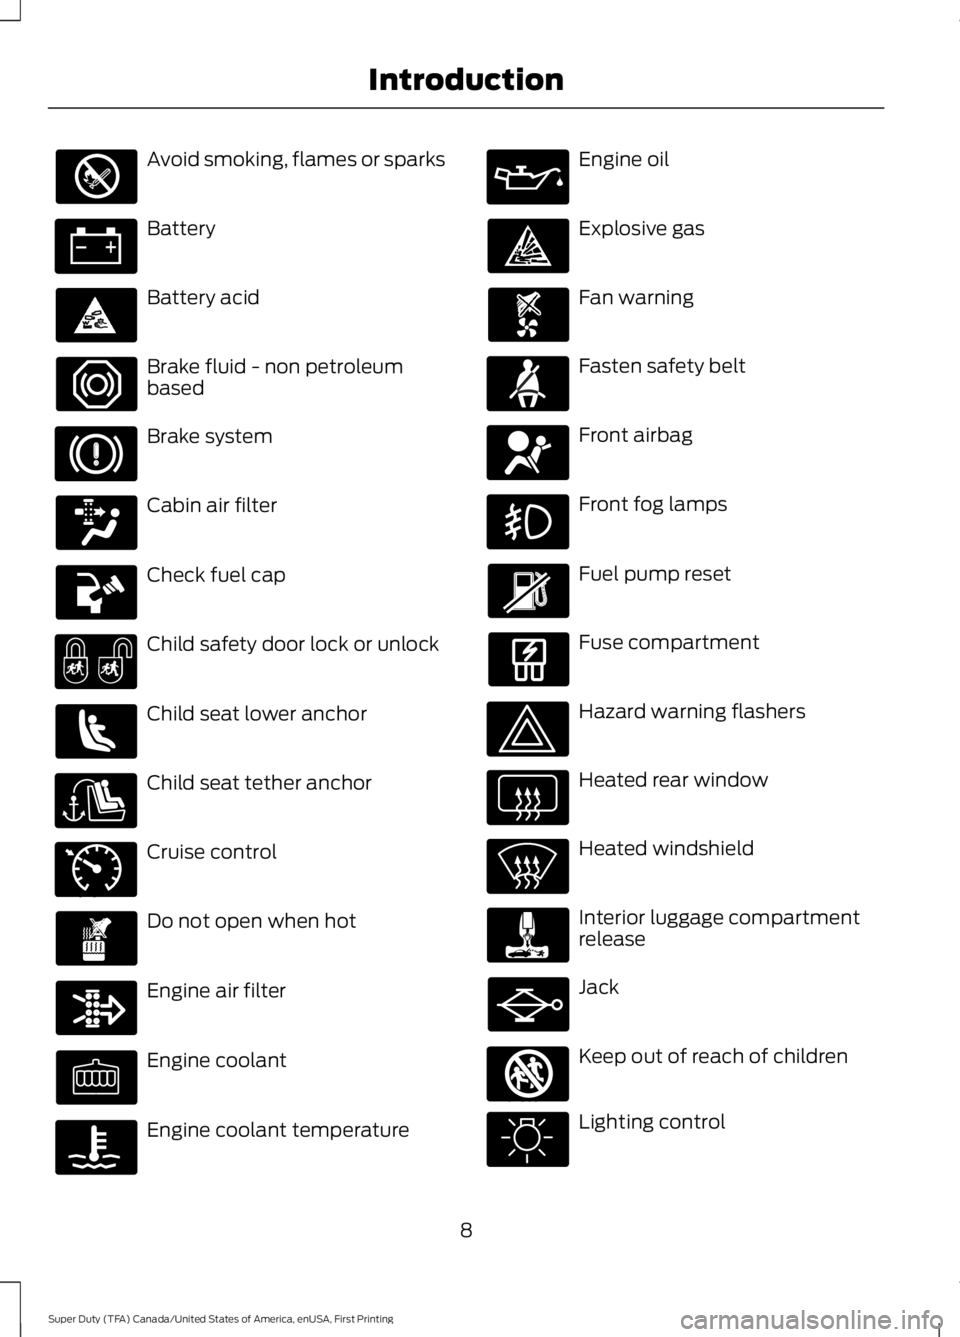
Avoid smoking, flames or sparks
Battery
Battery acid
Brake fluid - non petroleum
based
Brake system
Cabin air filter
Check fuel cap
Child safety door lock or unlock
Child seat lower anchor
Child seat tether anchor
Cruise control
Do not open when hot
Engine air filter
Engine coolant
Engine coolant temperature Engine oil
Explosive gas
Fan warning
Fasten safety belt
Front airbag
Front fog lamps
Fuel pump reset
Fuse compartment
Hazard warning flashers
Heated rear window
Heated windshield
Interior luggage compartment
release
Jack
Keep out of reach of children
Lighting control
8
Super Duty (TFA) Canada/United States of America, enUSA, First Printing Introduction E71340 E161353
Page 20 of 507
Use a child safety seat (sometimes called
an infant carrier, convertible seat, or
toddler seat) for infants, toddlers, or
children weighing 40 pounds (18
kilograms) or less (generally age four or
younger).
Using Lap and Shoulder Belts
WARNINGS
Airbags can kill or injure a child in a
child seat. Never place a rear-facing
child seat in front of an active airbag.
If you must use a forward-facing child seat
in the front seat, move the seat upon which
the child seat is installed all the way back. Airbags can kill or injure a child in a
child seat. Children 12 and under
should be properly restrained in the
rear seat whenever possible. Depending on where you secure a
child restraint, and depending on the
child restraint design, you may block
access to certain safety belt buckle
assemblies and LATCH lower anchors,
rendering those features potentially
unusable. To avoid risk of injury, occupants
should only use seating positions where
they are able to be properly restrained. When installing a child safety seat with
combination lap and shoulder belts:
•
Use the correct safety belt buckle for
that seating position.
• Insert the belt tongue into the proper
buckle until you hear a snap and feel it
latch. Make sure the tongue is securely
fastened in the buckle.
• Keep the buckle release button
pointing up and away from the safety
seat, with the tongue between the child
seat and the release button, to prevent
accidental unbuckling. •
Place the vehicle seat upon which the
child seat will be installed in the upright
position.
• This vehicle does not require the use
of a locking clip.
Perform the following steps when
installing the child seat with combination
lap and shoulder belts:
Note: Although the child seat illustrated is
a forward facing child seat, the steps are
the same for installing a rear facing child
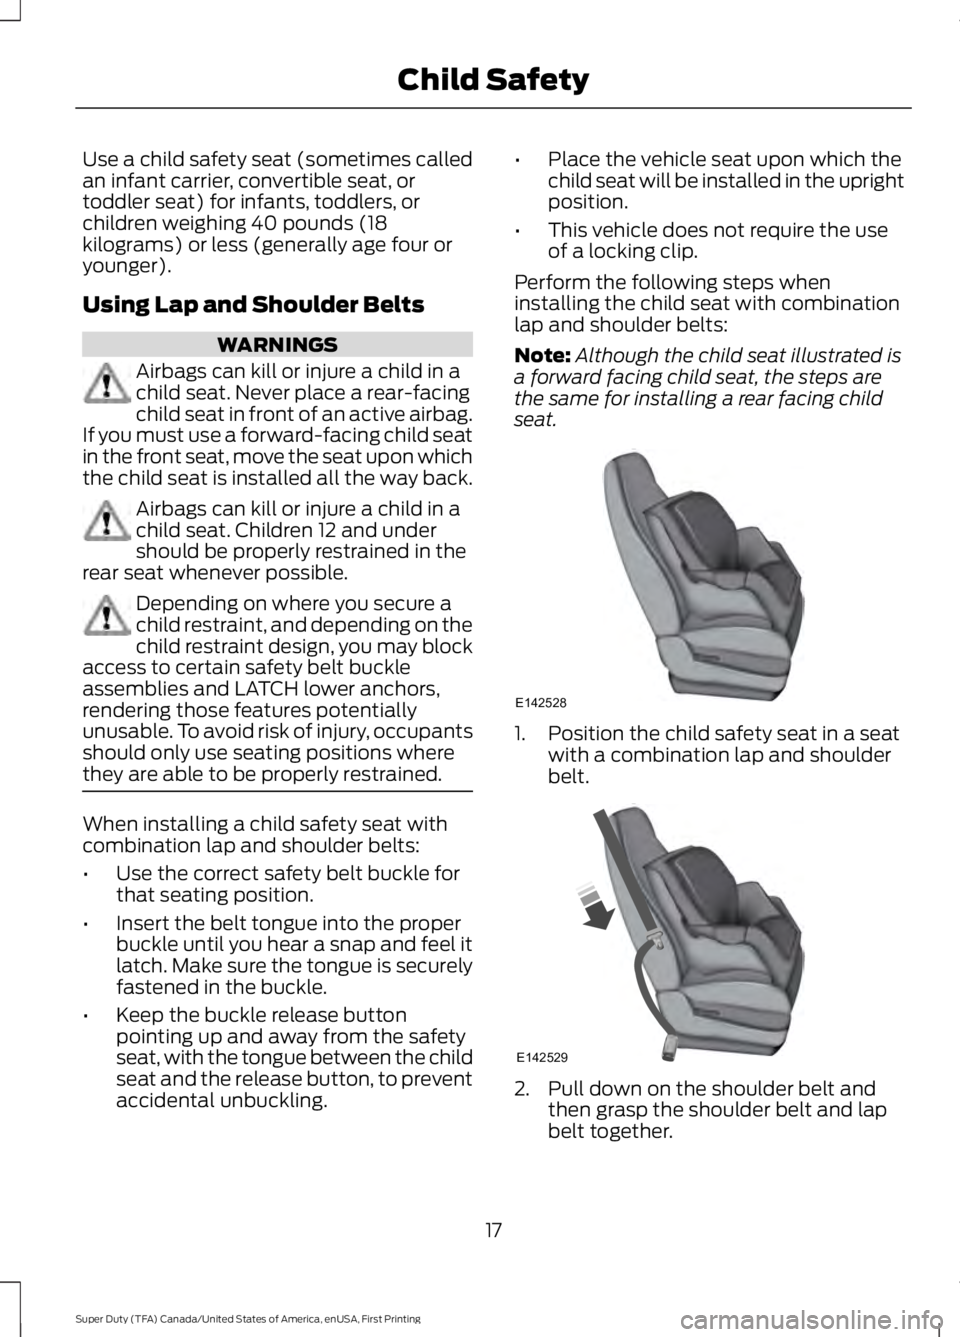
seat. 1. Position the child safety seat in a seat
with a combination lap and shoulder
belt. 2. Pull down on the shoulder belt and
then grasp the shoulder belt and lap
belt together.
17
Super Duty (TFA) Canada/United States of America, enUSA, First Printing Child SafetyE142528 E142529
Page 21 of 507
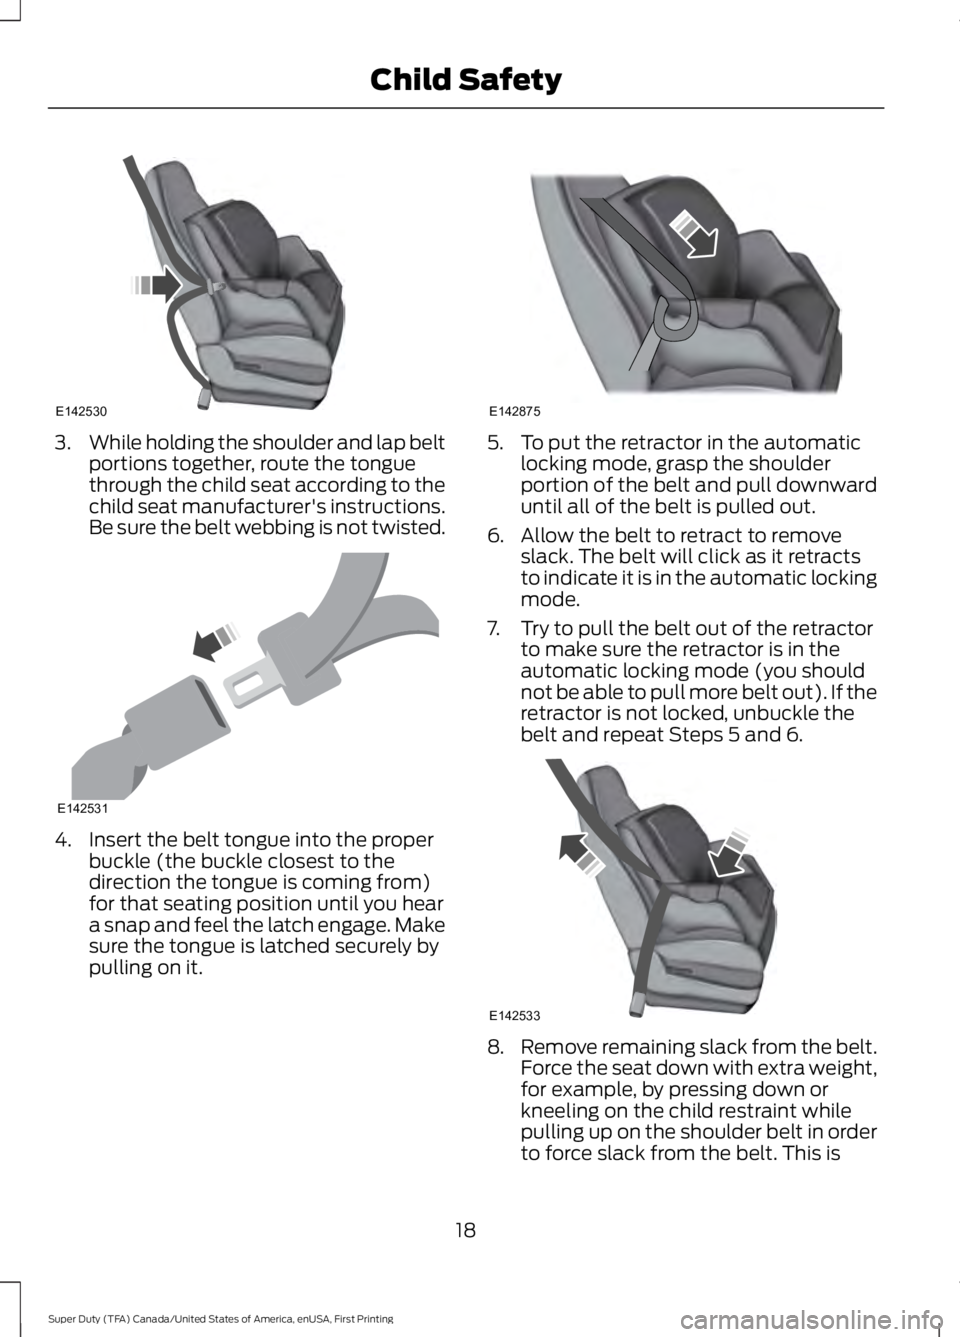
3.
While holding the shoulder and lap belt
portions together, route the tongue
through the child seat according to the
child seat manufacturer's instructions.
Be sure the belt webbing is not twisted. 4. Insert the belt tongue into the proper
buckle (the buckle closest to the
direction the tongue is coming from)
for that seating position until you hear
a snap and feel the latch engage. Make
sure the tongue is latched securely by
pulling on it. 5. To put the retractor in the automatic
locking mode, grasp the shoulder
portion of the belt and pull downward
until all of the belt is pulled out.
6. Allow the belt to retract to remove slack. The belt will click as it retracts
to indicate it is in the automatic locking
mode.
7. Try to pull the belt out of the retractor to make sure the retractor is in the
automatic locking mode (you should
not be able to pull more belt out). If the
retractor is not locked, unbuckle the
belt and repeat Steps 5 and 6. 8.
Remove remaining slack from the belt.
Force the seat down with extra weight,
for example, by pressing down or
kneeling on the child restraint while
pulling up on the shoulder belt in order
to force slack from the belt. This is
18
Super Duty (TFA) Canada/United States of America, enUSA, First Printing Child SafetyE142530 E142531 E142875 E142533
Page 25 of 507
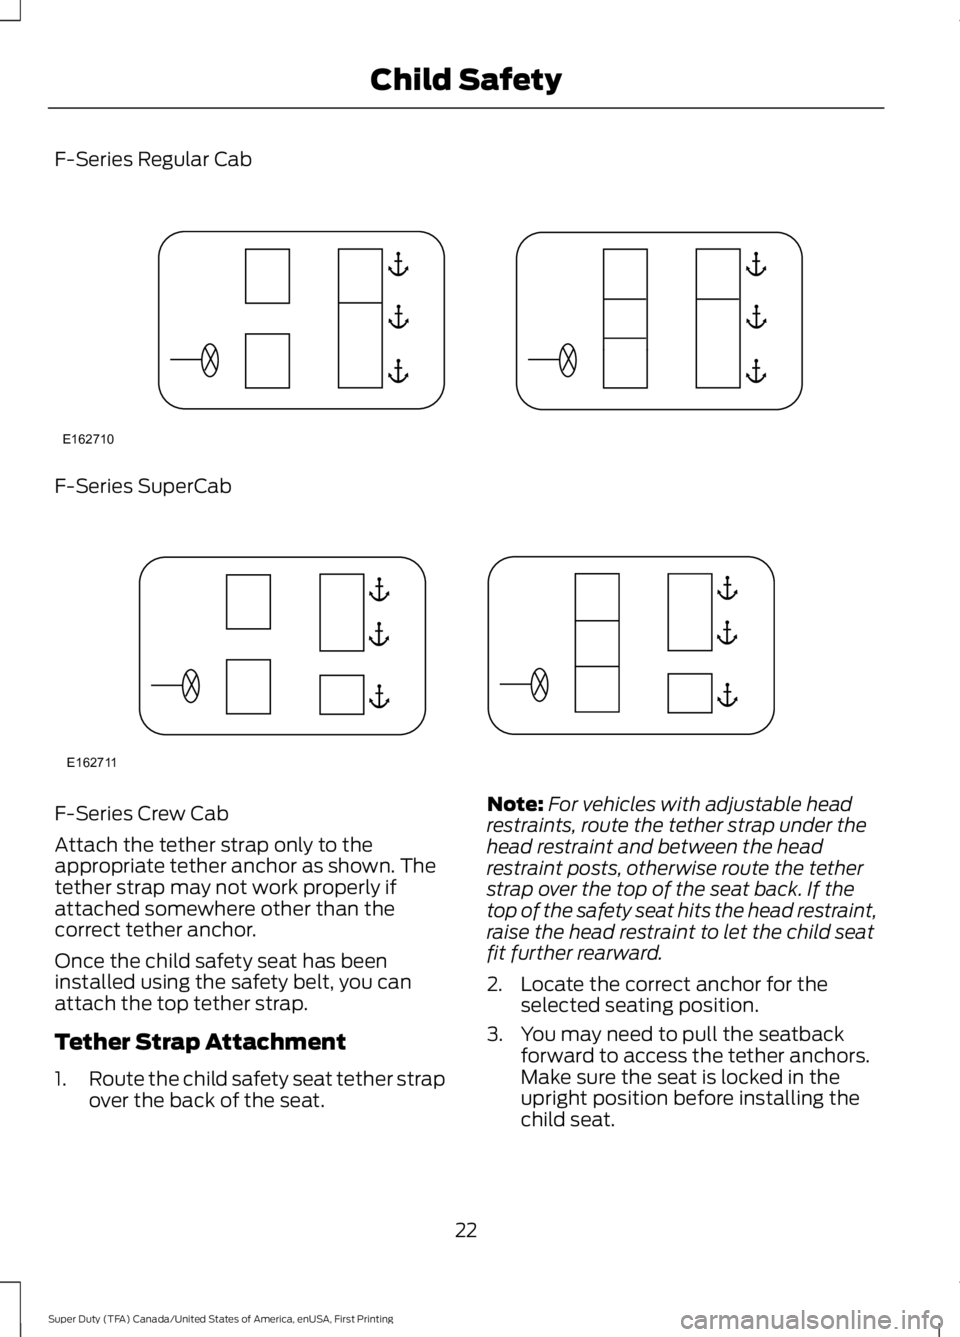
F-Series Regular Cab
F-Series SuperCab
F-Series Crew Cab
Attach the tether strap only to the
appropriate tether anchor as shown. The
tether strap may not work properly if
attached somewhere other than the
correct tether anchor.
Once the child safety seat has been
installed using the safety belt, you can
attach the top tether strap.
Tether Strap Attachment
1.
Route the child safety seat tether strap
over the back of the seat. Note:
For vehicles with adjustable head
restraints, route the tether strap under the
head restraint and between the head
restraint posts, otherwise route the tether
strap over the top of the seat back. If the
top of the safety seat hits the head restraint,
raise the head restraint to let the child seat
fit further rearward.
2. Locate the correct anchor for the selected seating position.
3. You may need to pull the seatback forward to access the tether anchors.
Make sure the seat is locked in the
upright position before installing the
child seat.
22
Super Duty (TFA) Canada/United States of America, enUSA, First Printing Child SafetyE162710 E162711
Page 30 of 507
WARNINGS
manufacturer. A safety seat that is
improperly installed or utilized, is
inappropriate for your child's height, age,
or weight or does not properly fit the child
may increase the risk of serious injury or
death. Never let a passenger hold a child on
his or her lap while your vehicle is
moving. The passenger cannot
protect the child from injury in a crash,
which may result in serious injury or death. Never use pillows, books, or towels
to boost a child. They can slide
around and increase the likelihood
of injury or death in a crash. WARNINGS
Always restrain an unoccupied child
seat or booster seat. These objects
may become projectiles in a crash or
sudden stop, which may increase the risk
of serious injury. Never place, or allow a child to place,
the shoulder belt under a child's arm
or behind the back because it
reduces the protection for the upper part
of the body and may increase the risk of
injury or death in a crash. To avoid risk of injury, do not leave
children or pets unattended in your
vehicle.
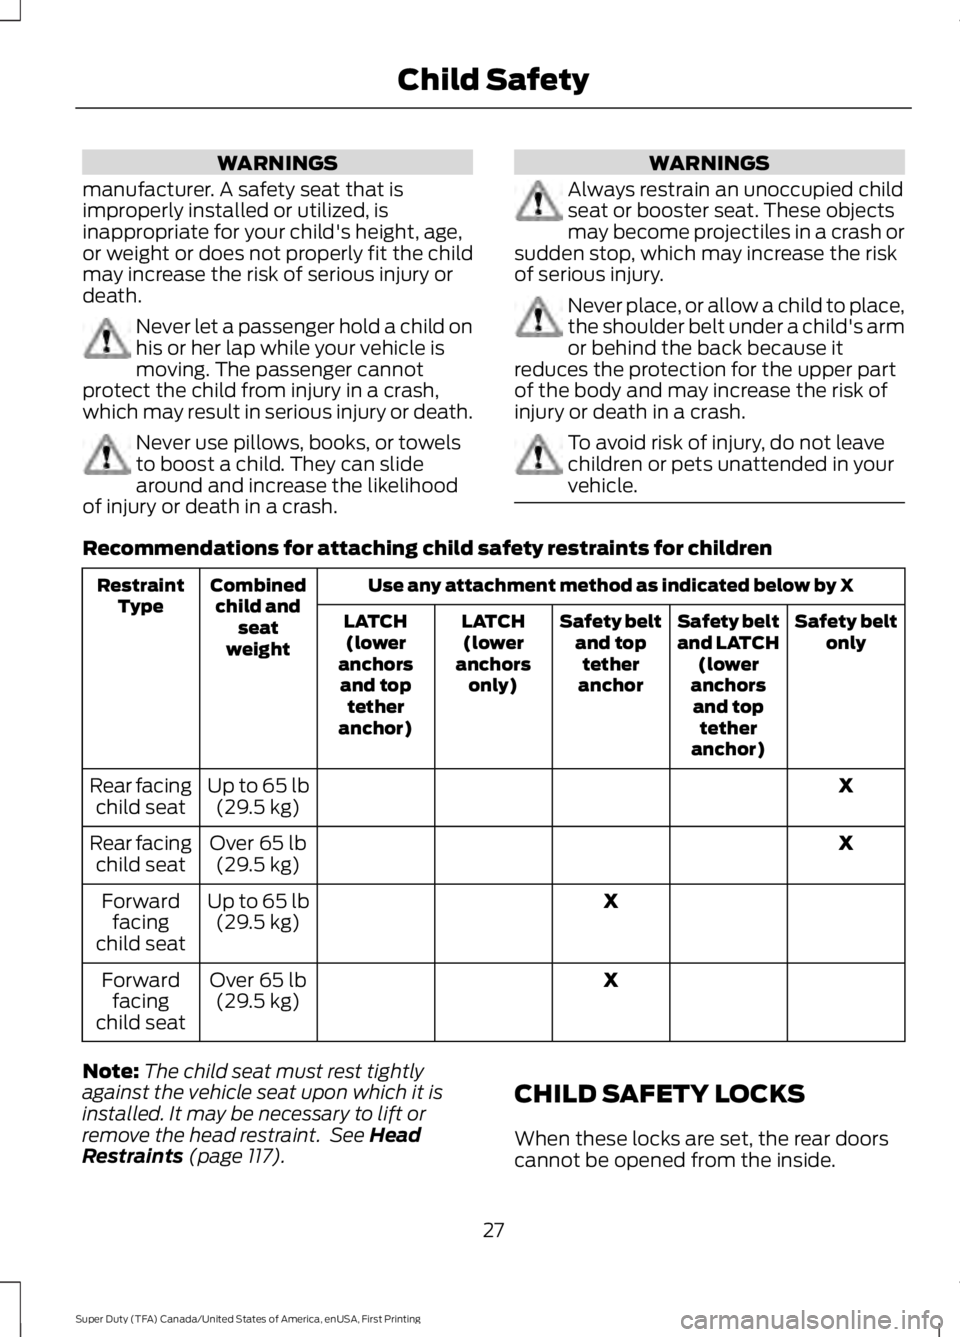
Recommendations for attaching child safety restraints for children
Use any attachment method as indicated below by X
Combined
child and seat
weight
Restraint
Type Safety belt
only
Safety belt
and LATCH
(lower
anchors and top tether
anchor)
Safety belt
and toptether
anchor
LATCH
(lower
anchors only)
LATCH
(lower
anchors and top tether
anchor)
X
Up to 65 lb
(29.5 kg)
Rear facing
child seat
X
Over 65 lb
(29.5 kg)
Rear facing
child seat
X
Up to 65 lb
(29.5 kg)
Forward
facing
child seat
X
Over 65 lb
(29.5 kg)
Forward
facing
child seat
Note: The child seat must rest tightly
against the vehicle seat upon which it is
installed. It may be necessary to lift or
remove the head restraint. See Head
Restraints (page 117). CHILD SAFETY LOCKS
When these locks are set, the rear doors
cannot be opened from the inside.
27
Super Duty (TFA) Canada/United States of America, enUSA, First Printing Child Safety
Page 31 of 507
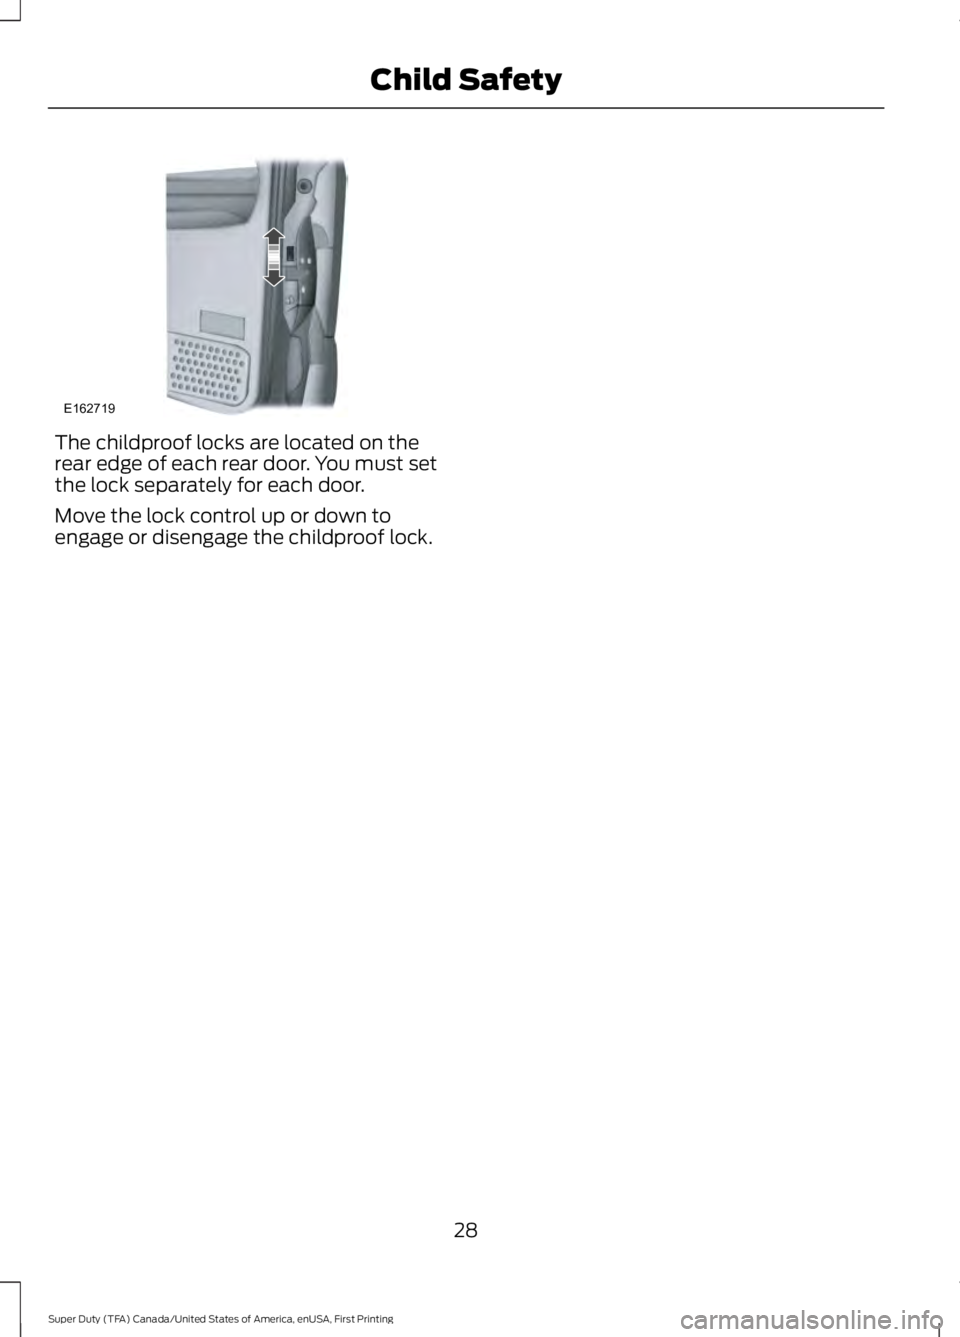
The childproof locks are located on the
rear edge of each rear door. You must set
the lock separately for each door.
Move the lock control up or down to
engage or disengage the childproof lock.
28
Super Duty (TFA) Canada/United States of America, enUSA, First Printing Child SafetyE162719
Page 32 of 507
PRINCIPLE OF OPERATION
WARNINGS
Always drive and ride with the
seatback upright and the lap belt
snug and low across the hips.
To reduce the risk of injury, make
sure children sit where they can be
properly restrained.
Never let a passenger hold a child on
his or her lap while your vehicle is
moving. The passenger cannot
protect the child from injury in a crash
which may result in serious injury or death. All occupants of the vehicle,
including the driver, should always
properly wear their safety belts, even
when an airbag supplemental restraint
system is provided. Failure to properly wear
your safety belt could seriously increase
the risk of injury or death. It is extremely dangerous to ride in a
cargo area, inside or outside of a
vehicle. In a crash, people riding in
these areas are more likely to be seriously
injured or killed. Do not allow people to ride
in any area of your vehicle that is not
equipped with seats and safety belts. Be
sure everyone in your vehicle is in a seat
and using a safety belt properly. In a rollover crash, an unbelted
person is significantly more likely to
die than a person wearing a safety
belt. Each seating position in your vehicle
has a specific safety belt assembly
which is made up of one buckle and
one tongue that are designed to be used
as a pair. 1) Use the shoulder belt on the
outside shoulder only. Never wear the
shoulder belt under the arm. 2) Never
swing the safety belt around your neck over
the inside shoulder. 3) Never use a single
belt for more than one person. WARNINGS
When possible, all children 12 years
old and under should be properly
restrained in a rear seating position.
Failure to follow this could seriously
increase the risk of injury or death. Safety belts and seats can become
hot in a vehicle that has been closed
up in sunny weather; they could burn
a small child. Check seat covers and
buckles before you place a child anywhere
near them. Front and rear seat occupants,
including pregnant women, should
wear safety belts for optimum
protection in an accident. All seating positions in this vehicle have
lap and shoulder safety belts. All
occupants of the vehicle should always
properly wear their safety belts, even when
an airbag supplemental restraint system
is provided.
The safety belt system consists of:
•
Lap and shoulder safety belts.
• Shoulder safety belt with automatic
locking mode, (except driver safety
belt).
• Height adjuster at the front outboard
seating positions.
• Safety belt pretensioner at the front
outboard seating positions. •
Safety belt warning light and chime. •
Crash sensors and monitoring system
with readiness indicator.
29
Super Duty (TFA) Canada/United States of America, enUSA, First Printing Safety Belts
Page 35 of 507
Safety Belt Locking Modes
WARNINGS
After any vehicle crash, the safety
belt system at all passenger seating
positions must be checked by an
authorized dealer to verify that the
automatic locking retractor feature for
child seats is still functioning properly. In
addition, all safety belts should be checked
for proper function. The belt and retractor must be
replaced if the safety belt assembly
automatic locking retractor feature
or any other safety belt function is not
operating properly when checked by an
authorized dealer. Failure to replace the
belt and retractor assembly could increase
the risk of injury in crashes. All safety restraints in the vehicle are
combination lap and shoulder belts. The
driver safety belt has the first type of
locking mode. The front outboard
passenger and rear outboard seat safety
belts have both types of locking modes
described as follows:
Vehicle Sensitive Mode
This is the normal retractor mode, which
allows free shoulder belt length
adjustment to your movements and
locking in response to vehicle movement.
For example, if the driver brakes suddenly
or turns a corner sharply, or the vehicle
receives an impact of about 5 mph
(8 km/h) or more, the combination safety
belts will lock to help reduce forward
movement of the driver and passengers.
In addition, the retractor is designed to lock
if the webbing is pulled out too quickly. If
this occurs, let the belt retract slightly and
pull webbing out again in a slow and
controlled manner. Automatic Locking Mode
In this mode, the shoulder belt is
automatically pre-locked. The belt will still
retract to remove any slack in the shoulder
belt. The automatic locking mode is not
available on the driver safety belt.
When to Use the Automatic Locking
Mode
Use this mode any time a child safety seat,
except a booster, is installed in passenger
front or rear seating positions. You should
properly restrain children 12 years old and
under in a rear seating position whenever
possible. See
Child Safety (page 15).
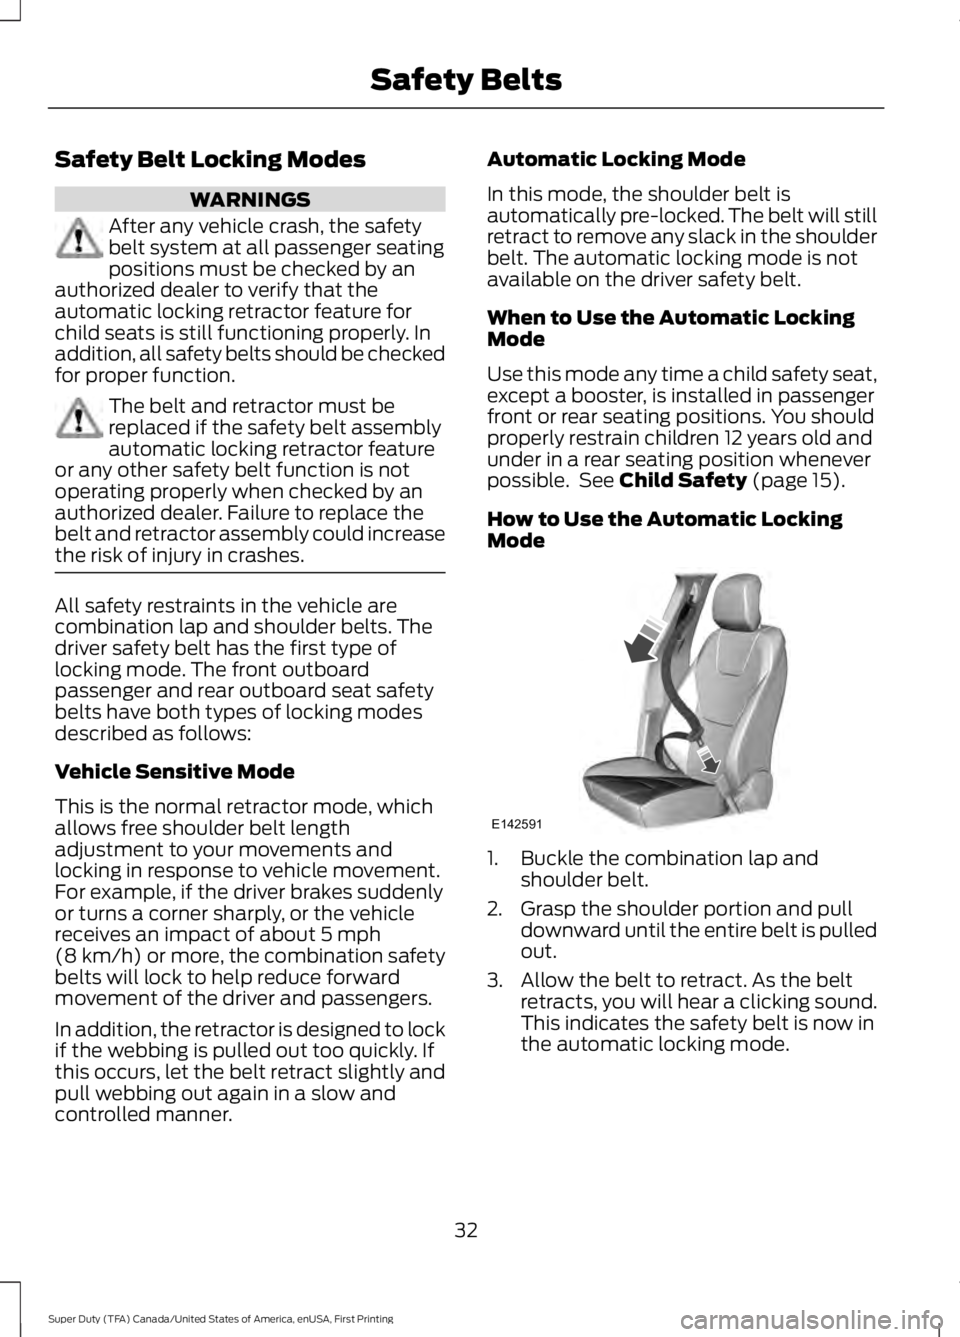
How to Use the Automatic Locking
Mode 1. Buckle the combination lap and
shoulder belt.
2. Grasp the shoulder portion and pull downward until the entire belt is pulled
out.
3. Allow the belt to retract. As the belt retracts, you will hear a clicking sound.
This indicates the safety belt is now in
the automatic locking mode.
32
Super Duty (TFA) Canada/United States of America, enUSA, First Printing Safety BeltsE142591
Page 82 of 507
To adjust the mirrors:
•
Press and hold the control.
• When you position the mirrors in or out,
the motors will run as long as you hold
the control. The running motors allow
you to make adjustments as needed.
• After positioning the mirrors, return the
control to the center position to help
protect the motors from overheating.
INTERIOR MIRROR WARNING
Do not adjust the mirror when your
vehicle is moving.
Note:
Do not clean the housing or glass of
any mirror with harsh abrasives, fuel or other
petroleum or ammonia-based cleaning
products.
You can adjust the interior mirror to your
preference. Some mirrors also have a
second pivot point. This lets you move the
mirror head up or down and from side to
side.
Pull the tab below the mirror toward you
to reduce glare at night.
Auto-Dimming Mirror (If Equipped)
Note: Do not block the sensors on the front
and back of the mirror. Mirror performance
may be affected. A rear center passenger or
raised rear center head restraint may also
block light from reaching the sensor.
The mirror will dim automatically to reduce
glare when bright lights are detected from
behind your vehicle. It will automatically
return to normal reflection when you select
reverse gear to make sure you have a clear
view when backing up. SLIDING WINDOWS
(If Equipped)
Power Sliding Back Window
(If
Equipped) WARNINGS
When operating the power sliding
back window, you must make sure
all rear seat occupants and cargo are
not in the proximity of the back window. Do not leave children unattended in
your vehicle and do not let them play
with the power sliding back window.
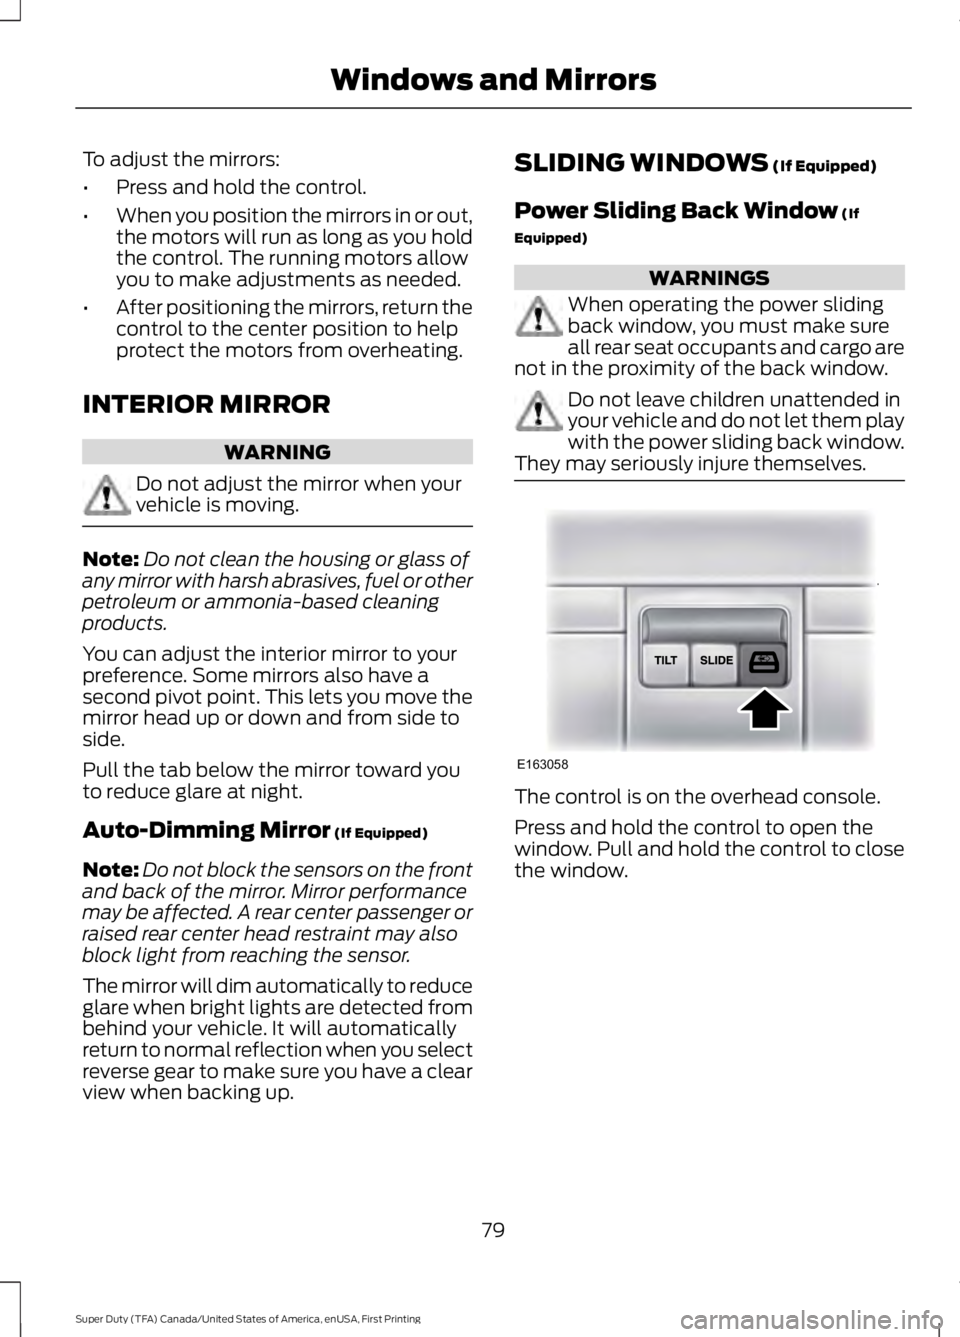
They may seriously injure themselves. The control is on the overhead console.
Press and hold the control to open the
window. Pull and hold the control to close
the window.
79
Super Duty (TFA) Canada/United States of America, enUSA, First Printing Windows and MirrorsE163058