tire pressure FORD F250 2016 Owners Manual
[x] Cancel search | Manufacturer: FORD, Model Year: 2016, Model line: F250, Model: FORD F250 2016Pages: 507, PDF Size: 6.81 MB
Page 7 of 507
Reporting Safety Defects (U.S.
Only)..............................................................221
Reporting Safety Defects (Canada Only).............................................................222
Fuses
Fuse Specification Chart...........................223
Changing a Fuse............................................231
Maintenance
General Information
....................................232
Opening and Closing the Hood..............232
Under Hood Overview - 6.2L...................233
Under Hood Overview - 6.8L..................234
Engine Oil Dipstick......................................235
Engine Oil Check
..........................................235
Oil Change Indicator Reset......................236
Engine Coolant Check
...............................236
Automatic Transmission Fluid Check...........................................................240
Transfer Case Fluid Check........................243
Brake Fluid Check........................................244
Power Steering Fluid Check....................244
Washer Fluid Check
....................................244
Fuel Filter........................................................244
Changing the 12V Battery.........................245
Checking the Wiper Blades
......................247
Changing the Wiper Blades
.....................247
Adjusting the Headlamps.........................247
Removing a Headlamp.............................249
Changing a Bulb..........................................249
Bulb Specification Chart
...........................252
Changing the Engine Air Filter................254
Vehicle Care
General Information...................................256
Cleaning Products.......................................256
Cleaning the Exterior
..................................256
Waxing
..............................................................257
Cleaning the Engine....................................257 Cleaning the Windows and Wiper
Blades..........................................................258
Cleaning the Interior
...................................258
Cleaning the Instrument Panel and Instrument Cluster Lens
.......................259
Cleaning Leather Seats.............................259
Repairing Minor Paint Damage...............261
Cleaning the Alloy Wheels........................261
Vehicle Storage.............................................261
Wheels and Tires
General Information
...................................264
Tire Care..........................................................267
Using Snow Chains
.....................................284
Tire Pressure Monitoring System..........284
Changing a Road Wheel...........................290
Technical Specifications
............................301
Capacities and Specific- ations
Engine Specifications
................................303
Motorcraft Parts
..........................................304
Vehicle Identification Number...............305
Vehicle Certification Label
......................306
Transmission Code Designation...........306
Capacities and Specifications -
6.2L
V8..................................................................307
Capacities and Specifications -
6.8L
Triton-30V - V10........................................311
Audio System
General Information
.....................................317
Audio Unit - Vehicles With: AM/FM.......318
Audio Unit - Vehicles With: AM/FM/CD/ SYNC.............................................................319
Audio Unit - Vehicles With: AM/FM/CD/ Touchscreen Display
..............................322
Digital Radio..................................................323
Satellite Radio
..............................................325
USB Port
.........................................................328
Media Hub
......................................................328
4
Super Duty (TFA) Canada/United States of America, enUSA, First Printing Table of Contents
Page 12 of 507
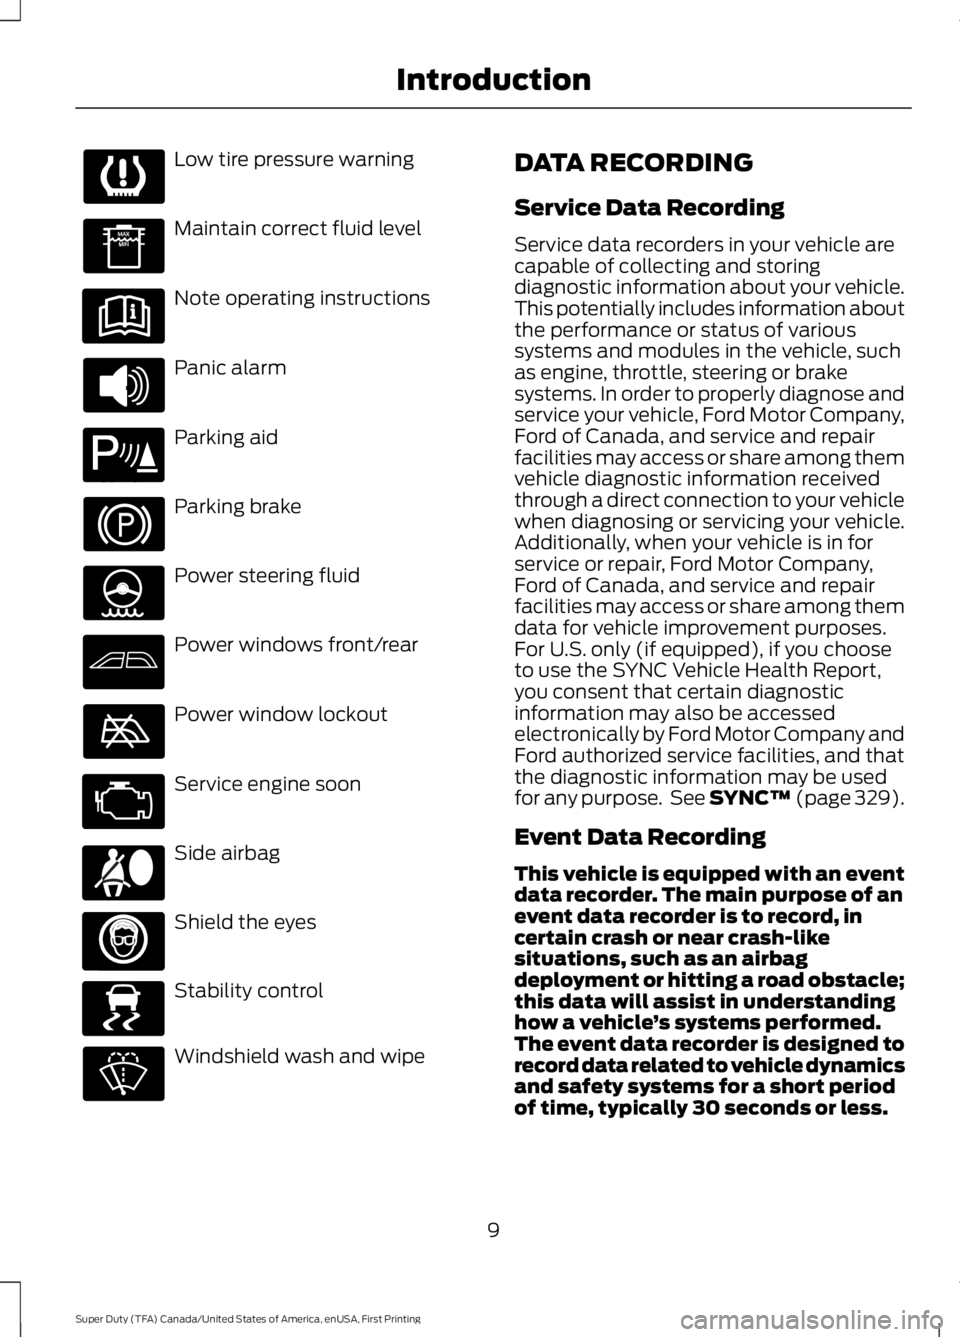
Low tire pressure warning
Maintain correct fluid level
Note operating instructions
Panic alarm
Parking aid
Parking brake
Power steering fluid
Power windows front/rear
Power window lockout
Service engine soon
Side airbag
Shield the eyes
Stability control
Windshield wash and wipe DATA RECORDING
Service Data Recording
Service data recorders in your vehicle are
capable of collecting and storing
diagnostic information about your vehicle.
This potentially includes information about
the performance or status of various
systems and modules in the vehicle, such
as engine, throttle, steering or brake
systems. In order to properly diagnose and
service your vehicle, Ford Motor Company,
Ford of Canada, and service and repair
facilities may access or share among them
vehicle diagnostic information received
through a direct connection to your vehicle
when diagnosing or servicing your vehicle.
Additionally, when your vehicle is in for
service or repair, Ford Motor Company,
Ford of Canada, and service and repair
facilities may access or share among them
data for vehicle improvement purposes.
For U.S. only (if equipped), if you choose
to use the SYNC Vehicle Health Report,
you consent that certain diagnostic
information may also be accessed
electronically by Ford Motor Company and
Ford authorized service facilities, and that
the diagnostic information may be used
for any purpose. See SYNC™ (page 329).
Event Data Recording
This vehicle is equipped with an event
data recorder. The main purpose of an
event data recorder is to record, in
certain crash or near crash-like
situations, such as an airbag
deployment or hitting a road obstacle;
this data will assist in understanding
how a vehicle
’s systems performed.
The event data recorder is designed to
record data related to vehicle dynamics
and safety systems for a short period
of time, typically 30 seconds or less.
9
Super Duty (TFA) Canada/United States of America, enUSA, First Printing Introduction E139213 E167012 E138639
Page 89 of 507
Low Fuel Level
Illuminates when the fuel level
is low or the fuel tank is nearly
empty. Refuel as soon as
possible.
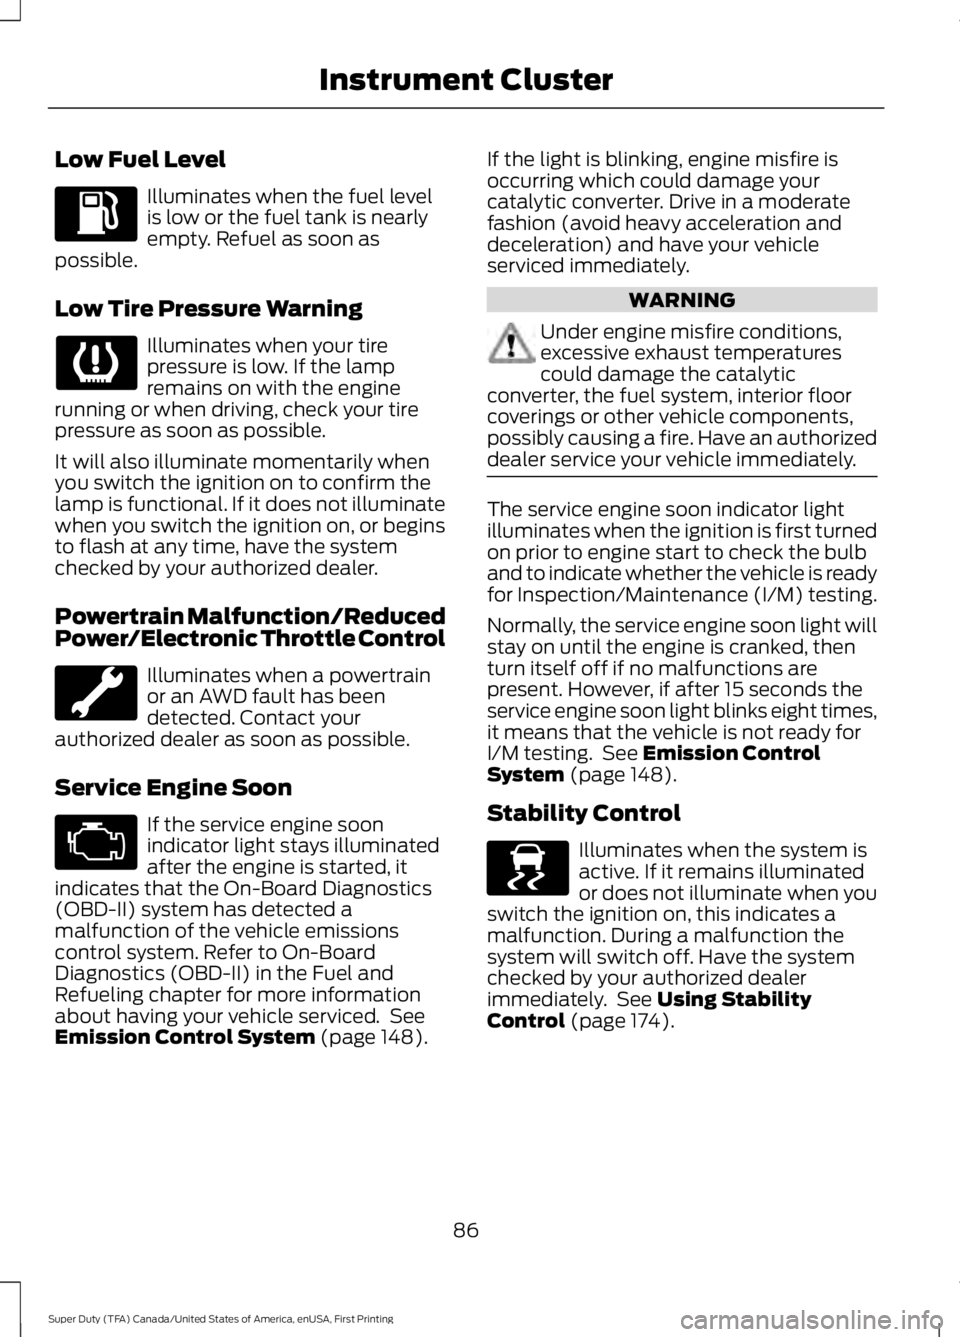
Low Tire Pressure Warning Illuminates when your tire
pressure is low. If the lamp
remains on with the engine
running or when driving, check your tire
pressure as soon as possible.
It will also illuminate momentarily when
you switch the ignition on to confirm the
lamp is functional. If it does not illuminate
when you switch the ignition on, or begins
to flash at any time, have the system
checked by your authorized dealer.
Powertrain Malfunction/Reduced
Power/Electronic Throttle Control Illuminates when a powertrain
or an AWD fault has been
detected. Contact your
authorized dealer as soon as possible.
Service Engine Soon If the service engine soon
indicator light stays illuminated
after the engine is started, it
indicates that the On-Board Diagnostics
(OBD-II) system has detected a
malfunction of the vehicle emissions
control system. Refer to On-Board
Diagnostics (OBD-II) in the Fuel and
Refueling chapter for more information
about having your vehicle serviced. See
Emission Control System (page 148). If the light is blinking, engine misfire is
occurring which could damage your
catalytic converter. Drive in a moderate
fashion (avoid heavy acceleration and
deceleration) and have your vehicle
serviced immediately. WARNING
Under engine misfire conditions,
excessive exhaust temperatures
could damage the catalytic
converter, the fuel system, interior floor
coverings or other vehicle components,
possibly causing a fire. Have an authorized
dealer service your vehicle immediately. The service engine soon indicator light
illuminates when the ignition is first turned
on prior to engine start to check the bulb
and to indicate whether the vehicle is ready
for Inspection/Maintenance (I/M) testing.
Normally, the service engine soon light will
stay on until the engine is cranked, then
turn itself off if no malfunctions are
present. However, if after 15 seconds the
service engine soon light blinks eight times,
it means that the vehicle is not ready for
I/M testing. See
Emission Control
System (page 148).
Stability Control Illuminates when the system is
active. If it remains illuminated
or does not illuminate when you
switch the ignition on, this indicates a
malfunction. During a malfunction the
system will switch off. Have the system
checked by your authorized dealer
immediately. See
Using Stability
Control (page 174).
86
Super Duty (TFA) Canada/United States of America, enUSA, First Printing Instrument Cluster E138639
Page 111 of 507
Action
Message
Hill descent control mode is no longer active and thedriver must resume control.
HILL DESCENT - DRIVER
RESUME CONTROL
A hill descent system fault is present.
HILL DESCENT CONTROL
FAULT
The hill descent system is cooling due to overuse.
HILL DESCENT CONTROL OFF
SYSTEM COOLING
Hill descent control is active.
HILL DESCENT CONTROL
READY
Tire Pressure Monitoring System Action
Message
One or more tires on your vehicle have low tire pressure. SeeTire Pressure Monitoring System (page 284).
LOW TIRE PRESSURE
The tire pressure monitoring system is malfunctioning. If thewarning stays on or continues to come on, have the system
checked by an authorized dealer. See
Tire Pressure Monit-
oring System (page 284).
TIRE PRESSURE
MONITOR FAULT
A tire pressure sensor is malfunctioning, or your spare tire isin use. For more information on how the system operates
under these conditions, see
See Tire Pressure Monitoring
System (page 284). If the warning stays on or continues to
come on, have the system checked by an authorized dealer as soon as possible.
TIRE PRESSURE
SENSOR FAULT
Trailer Action
Message
The current gain setting for the trailer brake.
TRAILER BRAKE GAIN: XX.X
[OUTPUT]
The current gain setting for the trailer brake when atrailer is not connected.
TRAILER BRAKE GAIN: XX.X NO
TRAILER
Accompanied by a single chime, in response to faults
sensed by the TBC. See Trailer Sway Control (page 193
).
TRAILER BRAKE MODULE
FAULT
108
Super Duty (TFA) Canada/United States of America, enUSA, First Printing Information Displays
Page 159 of 507
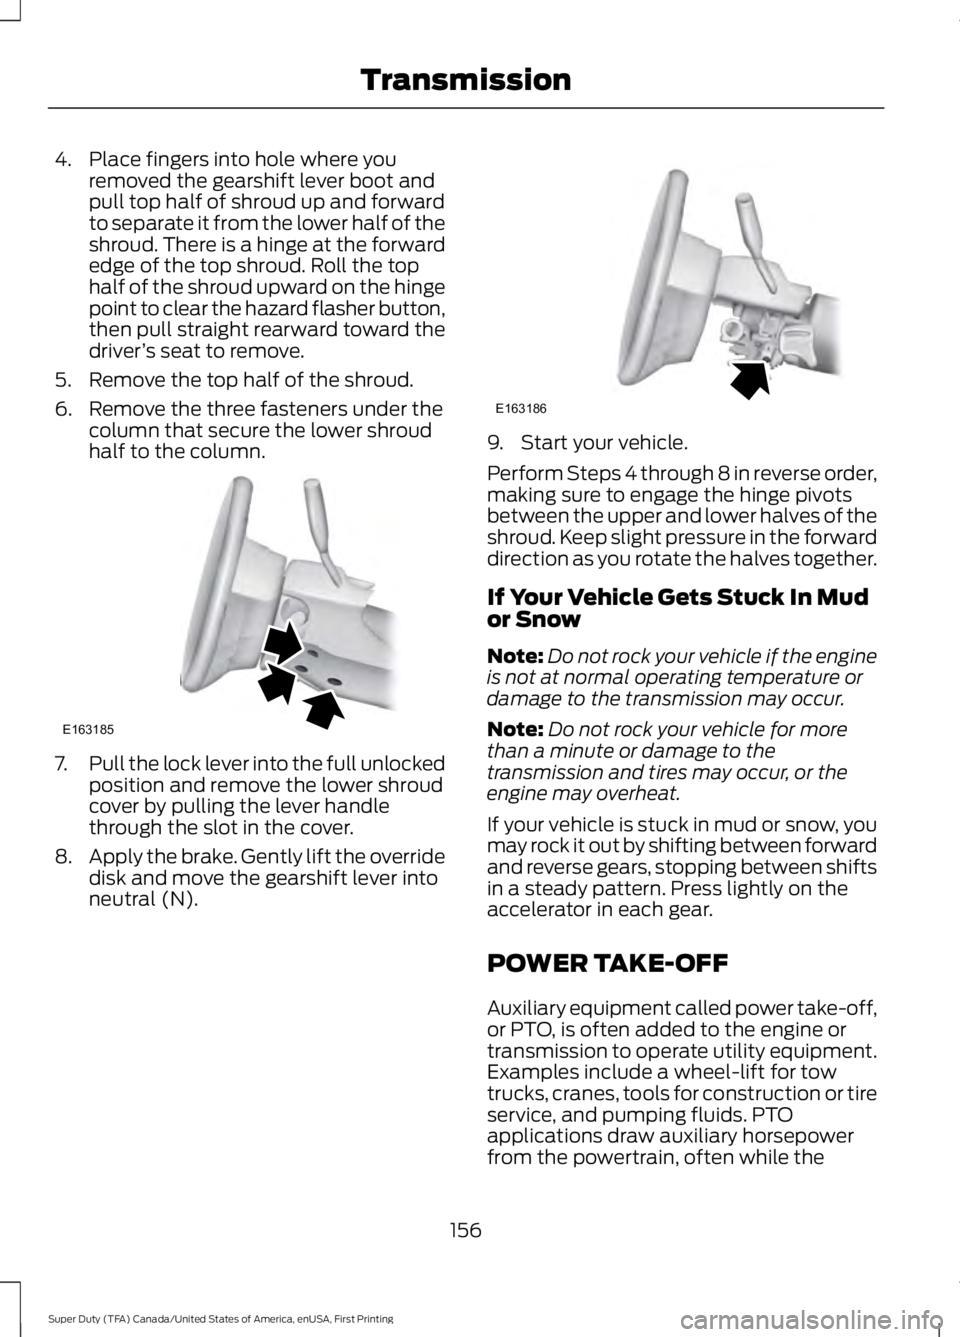
4. Place fingers into hole where you
removed the gearshift lever boot and
pull top half of shroud up and forward
to separate it from the lower half of the
shroud. There is a hinge at the forward
edge of the top shroud. Roll the top
half of the shroud upward on the hinge
point to clear the hazard flasher button,
then pull straight rearward toward the
driver ’s seat to remove.
5. Remove the top half of the shroud.
6. Remove the three fasteners under the column that secure the lower shroud
half to the column. 7.
Pull the lock lever into the full unlocked
position and remove the lower shroud
cover by pulling the lever handle
through the slot in the cover.
8. Apply the brake. Gently lift the override
disk and move the gearshift lever into
neutral (N). 9. Start your vehicle.
Perform Steps 4 through 8 in reverse order,
making sure to engage the hinge pivots
between the upper and lower halves of the
shroud. Keep slight pressure in the forward
direction as you rotate the halves together.
If Your Vehicle Gets Stuck In Mud
or Snow
Note:
Do not rock your vehicle if the engine
is not at normal operating temperature or
damage to the transmission may occur.
Note: Do not rock your vehicle for more
than a minute or damage to the
transmission and tires may occur, or the
engine may overheat.
If your vehicle is stuck in mud or snow, you
may rock it out by shifting between forward
and reverse gears, stopping between shifts
in a steady pattern. Press lightly on the
accelerator in each gear.
POWER TAKE-OFF
Auxiliary equipment called power take-off,
or PTO, is often added to the engine or
transmission to operate utility equipment.
Examples include a wheel-lift for tow
trucks, cranes, tools for construction or tire
service, and pumping fluids. PTO
applications draw auxiliary horsepower
from the powertrain, often while the
156
Super Duty (TFA) Canada/United States of America, enUSA, First Printing TransmissionE163185 E163186
Page 166 of 507
Four-wheel drive (when you select a 4WD
mode) uses all four wheels to power the
vehicle. This increases traction, enabling
you to drive over terrain and road
conditions that a conventional two-wheel
drive vehicle cannot.
Basic Operating Principles
•
Drive slower in strong crosswinds which
can affect the normal steering
characteristics of your vehicle.
• When driving your vehicle on surfaces
made slippery by loose sand, water,
gravel, snow or ice proceed with care.
• Do not use four-wheel drive on dry,
hard surfaced roads. Doing so will
produce excessive noise, increase tire
wear and may damage drive
components. Four-wheel drive modes
are only intended for consistently
slippery or loose surfaces.
If Your Vehicle leaves the Road
If your vehicle leaves the road, reduce your
vehicle speed and avoid severe braking.
When your vehicle speed has been reduced
ease your vehicle back onto the road. Do
not turn the steering wheel sharply while
returning your vehicle to the road.
It may be safer to stay on the shoulder of
the road and slow down gradually before
returning to the road. You may lose control
if you do not slow down or if you turn the
steering wheel too sharply or abruptly.
It may be less risky to strike small objects,
such as freeway reflectors, with minor
damage to your vehicle rather than
attempt a sudden return to the road which
could cause your vehicle to slide sideways
out of control or roll over. Remember, your
safety and the safety of others should be
your primary concern. Emergency Maneuvers
In an unavoidable emergency situation
where a sudden sharp turn must be made,
remember to avoid over-driving your
vehicle (i.e. turn the steering wheel only as
rapidly and as far as required to avoid the
emergency). Excessive steering can result
in loss of vehicle control. Apply smooth
pressure to the accelerator pedal or brake
pedal when changes in vehicle speed are
required. Avoid abrupt steering,
acceleration and braking. This could result
in an increased risk of vehicle roll over, loss
of vehicle control and personal injury. Use
all available road surface to bring your
vehicle to a safe direction of travel.
In the event of an emergency stop, avoid
skidding the tires and do not attempt any
sharp steering wheel movements.
If your vehicle goes from one type of
surface to another (i.e. from concrete to
gravel) there will be a change in the way
your vehicle responds to a maneuver (i.e.
steering, acceleration or braking).
Sand
When driving over sand, try to keep all four
wheels on the most solid area of the trail.
Avoid reducing the tire pressures but shift
to a lower gear and drive steadily through
the terrain. Apply the accelerator slowly
and avoid excessive wheel slip.
When driving at slow speeds in deep sand
under high outside temperatures, use a low
gear when possible. Low gear operation
will maximize the engine and transmission
cooling capability.
Avoid driving at excessive speeds, this
causes vehicle momentum to work against
you and your vehicle could become stuck
to the point that assistance may be
required from another vehicle. Remember,
you may be able to back out the way you
came if you proceed with caution.
163
Super Duty (TFA) Canada/United States of America, enUSA, First Printing Four-Wheel Drive (If Equipped)
Page 167 of 507

Mud and Water
Mud
Be cautious of sudden changes in vehicle
speed or direction when you are driving in
mud. Even four-wheel drive vehicles can
lose traction in slick mud. If your vehicle
does slide, steer in the direction of the slide
until you regain control of your vehicle.
After driving through mud, clean off residue
stuck to rotating driveshafts and tires.
Excess mud stuck on tires and rotating
driveshafts can cause an imbalance that
could damage drive components.
Water
If you must drive through high water, drive
slowly. Traction or brake capability may
be limited.
When driving through water, determine the
depth and avoid water higher than the
bottom of the hubs. If the ignition system
gets wet, your vehicle may stall.
Once through water, always try the brakes.
Wet brakes do not stop your vehicle as
effectively as dry brakes. Drying can be
improved by applying light pressure to the
brake pedal while moving slowly.
Note:
Driving through deep water may
damage the transmission. If the front or rear
axle is submerged in water, the axle
lubricant and power transfer unit lubricant
should be checked and changed if
necessary.
Driving on Hilly or Sloping Terrain
Although natural obstacles may make it
necessary to travel diagonally up or down
a hill or steep incline, you should always
try to drive straight up or straight down. Note:
Avoid turning on steep slopes or hills.
A danger lies in losing traction, slipping
sideways and possible vehicle roll over.
Whenever driving on a hill, determine
beforehand the route you will use. Do not
drive over the crest of a hill without seeing
what conditions are on the other side. Do
not drive in reverse over a hill without the
aid of an observer.
When climbing a steep slope or hill, start
in a lower gear rather than downshifting to
a lower gear from a higher gear once the
ascent has started. This reduces strain on
the engine and the possibility of stalling.
If your vehicle stalls, do not try to turn
around because this could cause vehicle
roll over. It is better to reverse back to a
safe location.
Apply just enough power to the wheels to
climb the hill. Too much power will cause
the tires to slip, spin or lose traction,
resulting in loss of vehicle control. Descend a hill in the same gear you would
use to climb up the hill to avoid excessive
brake application and brake overheating.
Do not descend in neutral. Disengage
overdrive or move the transmission
selector lever to a lower gear. When
descending a steep hill, avoid sudden hard
braking as you could lose control. The front
wheels have to be turning in order to steer
your vehicle.
164
Super Duty (TFA) Canada/United States of America, enUSA, First Printing Four-Wheel Drive (If Equipped)E143949
Page 213 of 507
•
The tire air pressures recommended
for general driving are on the vehicle ’s
Safety Certification Label. The
maximum cold inflation pressure for
the tire and associated load rating is
on the tire sidewall. Tire air pressure
may require re-adjustment within these
pressure limits to accommodate the
additional weight of the snowplow
installation.
• Federal and some local regulations
require additional exterior lamps for
snowplow-equipped vehicles. Consult
your authorized dealer for additional
information.
Operating the Vehicle with the
Snowplow Attached
Note: Do not use your vehicle for snow
removal until you have driven at least
500 mi (800 km).
Ford recommends vehicle speed does not
exceed
45 mph (72 km/h) when
snowplowing.
The attached snowplow blade restricts
airflow to the radiator, and may cause the
engine to run at a higher temperature:
Attention to engine temperature is
especially important when outside
temperatures are above freezing. Angle
the blade to maximize airflow to the
radiator and monitor engine temperature
to determine whether a left or right angle
provides the best performance.
Follow the severe duty schedule in your
Scheduled Maintenance information for
engine oil and transmission fluid change
intervals. Snowplowing with your Airbag
Equipped Vehicle WARNINGS
Do not attempt to service, repair, or
modify the airbag supplemental
restraint system (SRS) or its fuses.
Contact an authorized dealer. Additional equipment such as
snowplow equipment may affect the
performance of the airbag sensors
increasing the risk of injury. Please refer to
the Body Builders Layout Book for
instructions about the appropriate
installation of additional equipment. All occupants of the vehicle,
including the driver, should always
properly wear their safety belts, even
when provided with an airbag
supplemental restraint system (SRS). Your vehicle is equipped with a driver and
passenger airbag supplemental restraint
system. The supplemental restraint system
will activate in certain frontal and offset
frontal collisions when the vehicle sustains
sufficient frontal deceleration.
Careless or high speed driving while
plowing snow that results in sufficient
vehicle decelerations can deploy the
airbag. Such driving also increases the risk
of accidents
Never remove or defeat the tripping
mechanisms designed into the snow
removal equipment by its manufacturer.
Doing so may cause damage to the vehicle
and the snow removal equipment as well
as possible airbag deployment.
Engine temperature while plowing
When driving with a plow, your engine may
run at a higher temperature than normal
because the attached snowplow blade will
restrict airflow to the radiator.
210
Super Duty (TFA) Canada/United States of America, enUSA, First Printing Driving Hints
Page 265 of 507
•
Touch-up exposed or primed metal to
prevent rust.
• Cover chrome and stainless steel parts
with a thick coat of auto wax to prevent
discoloration. Re-wax as necessary
when you wash your vehicle.
• Lubricate all hood, door and luggage
compartment hinges and latches with
a light grade oil.
• Cover interior trim to prevent fading.
• Keep all rubber parts free from oil and
solvents.
Engine
• Change the engine oil and filter prior to
storage because used engine oil
contains contaminates which may
cause engine damage.
• Start the engine every 15 days for a
minimum of 15 minutes. Run at fast idle
with the climate controls set to defrost
until the engine reaches normal
operating temperature.
• With your foot on the brake, shift
through all the gears while the engine
is running.
• We recommend that you change the
engine oil before you use your vehicle
again.
Fuel system
• Fill the fuel tank with high-quality fuel
until the first automatic shutoff of the
fuel pump nozzle.
Cooling system
• Protect against freezing temperatures.
• When removing your vehicle from
storage, check coolant fluid level.
Confirm that there are no cooling
system leaks and that fluid is at the
recommended level. Battery
•
Check and recharge as necessary. Keep
connections clean.
• If storing your vehicle for more than 30
days without recharging the battery,
we recommend that you disconnect
the battery cables to maintain battery
charge for quick starting.
Note: It is necessary to reset memory
features if battery cables are disconnected.
Brakes
• Make sure the brakes and parking brake
release fully.
Tires
• Maintain recommended air pressure.
Miscellaneous
• Make sure all linkages, cables, levers
and pins under your vehicle are covered
with grease to prevent rust.
• Move vehicles at least 25 ft (7.5 m)
every 15 days to lubricate working parts
and prevent corrosion.
Removing Vehicle From Storage
When your vehicle is ready to come out of
storage, do the following:
• Wash your vehicle to remove any dirt
or grease film build-up on window
surfaces.
• Check windshield wipers for any
deterioration.
• Check under the hood for any foreign
material that may have collected
during storage such as mice or squirrel
nests.
• Check the exhaust for any foreign
material that may have collected
during storage.
262
Super Duty (TFA) Canada/United States of America, enUSA, First Printing Vehicle Care
Page 266 of 507
•
Check tire pressures and set tire
inflation per the Tire Label.
• Check brake pedal operation. Drive
your vehicle 15 ft (4.5 m) back and
forth to remove rust build-up.
• Check fluid levels (including coolant,
oil and gas) to make sure there are no
leaks, and fluids are at recommended
levels.
• If you remove the battery, clean the
battery cable ends and check for
damage.
Contact an authorized dealer if you have
any concerns or issues.
263
Super Duty (TFA) Canada/United States of America, enUSA, First Printing Vehicle Care