bulb FORD F250 SUPER DUTY 2016 Owners Manual
[x] Cancel search | Manufacturer: FORD, Model Year: 2016, Model line: F250 SUPER DUTY, Model: FORD F250 SUPER DUTY 2016Pages: 507, PDF Size: 8.13 MB
Page 7 of 507
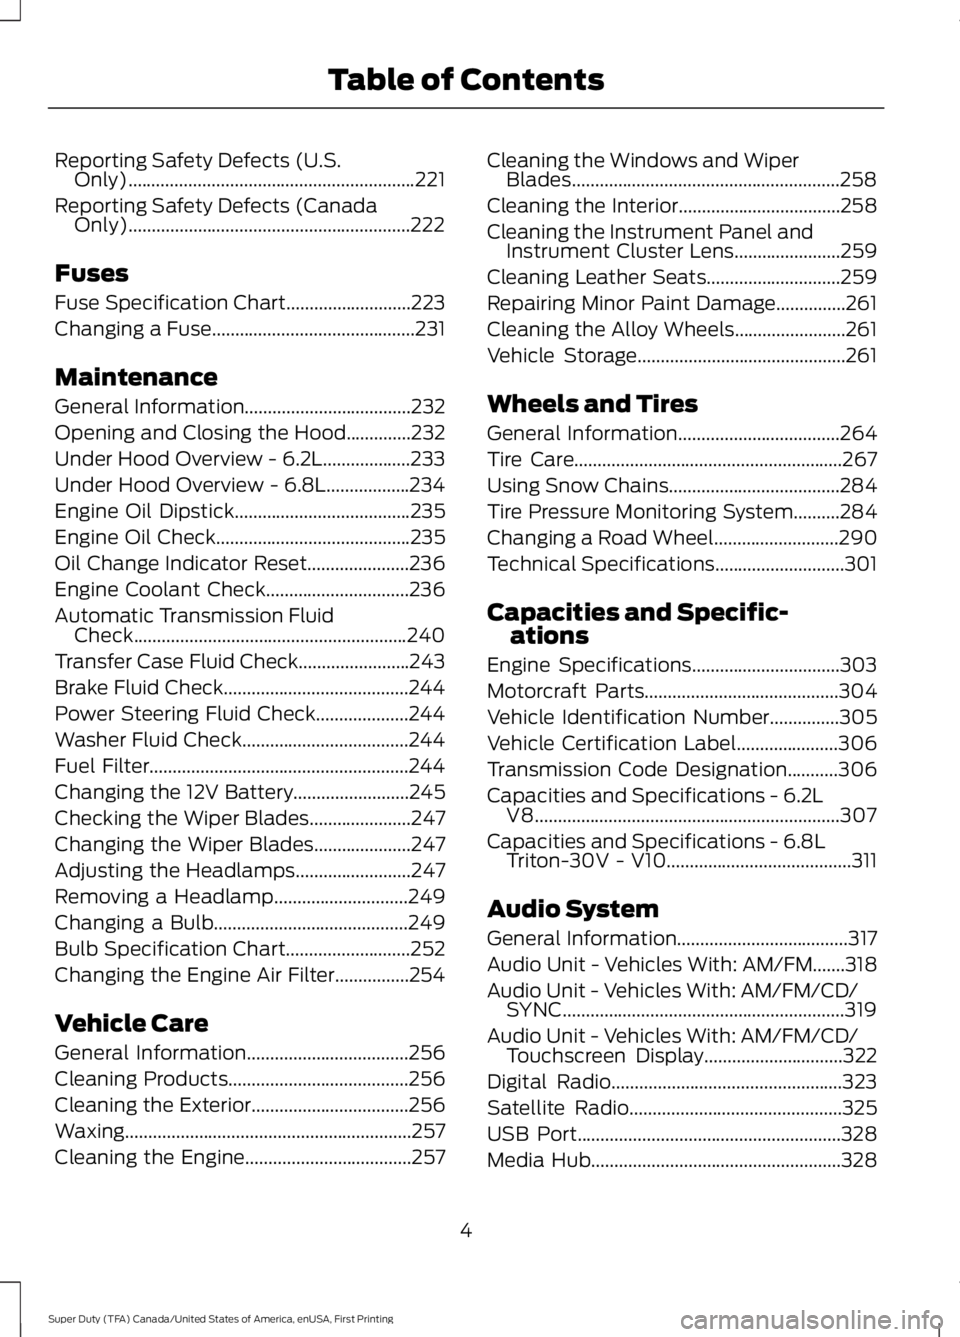
Reporting Safety Defects (U.S.Only)..............................................................221
Reporting Safety Defects (CanadaOnly).............................................................222
Fuses
Fuse Specification Chart...........................223
Changing a Fuse............................................231
Maintenance
General Information....................................232
Opening and Closing the Hood..............232
Under Hood Overview - 6.2L...................233
Under Hood Overview - 6.8L..................234
Engine Oil Dipstick......................................235
Engine Oil Check..........................................235
Oil Change Indicator Reset......................236
Engine Coolant Check...............................236
Automatic Transmission FluidCheck...........................................................240
Transfer Case Fluid Check........................243
Brake Fluid Check........................................244
Power Steering Fluid Check....................244
Washer Fluid Check....................................244
Fuel Filter........................................................244
Changing the 12V Battery.........................245
Checking the Wiper Blades......................247
Changing the Wiper Blades.....................247
Adjusting the Headlamps.........................247
Removing a Headlamp.............................249
Changing a Bulb..........................................249
Bulb Specification Chart...........................252
Changing the Engine Air Filter................254
Vehicle Care
General Information...................................256
Cleaning Products.......................................256
Cleaning the Exterior..................................256
Waxing..............................................................257
Cleaning the Engine....................................257
Cleaning the Windows and WiperBlades..........................................................258
Cleaning the Interior...................................258
Cleaning the Instrument Panel andInstrument Cluster Lens.......................259
Cleaning Leather Seats.............................259
Repairing Minor Paint Damage...............261
Cleaning the Alloy Wheels........................261
Vehicle Storage.............................................261
Wheels and Tires
General Information...................................264
Tire Care..........................................................267
Using Snow Chains.....................................284
Tire Pressure Monitoring System..........284
Changing a Road Wheel...........................290
Technical Specifications............................301
Capacities and Specific-ations
Engine Specifications................................303
Motorcraft Parts..........................................304
Vehicle Identification Number...............305
Vehicle Certification Label......................306
Transmission Code Designation...........306
Capacities and Specifications - 6.2LV8..................................................................307
Capacities and Specifications - 6.8LTriton-30V - V10........................................311
Audio System
General Information.....................................317
Audio Unit - Vehicles With: AM/FM.......318
Audio Unit - Vehicles With: AM/FM/CD/SYNC.............................................................319
Audio Unit - Vehicles With: AM/FM/CD/Touchscreen Display..............................322
Digital Radio..................................................323
Satellite Radio..............................................325
USB Port.........................................................328
Media Hub......................................................328
4
Super Duty (TFA) Canada/United States of America, enUSA, First Printing
Table of Contents
Page 88 of 507
WARNING
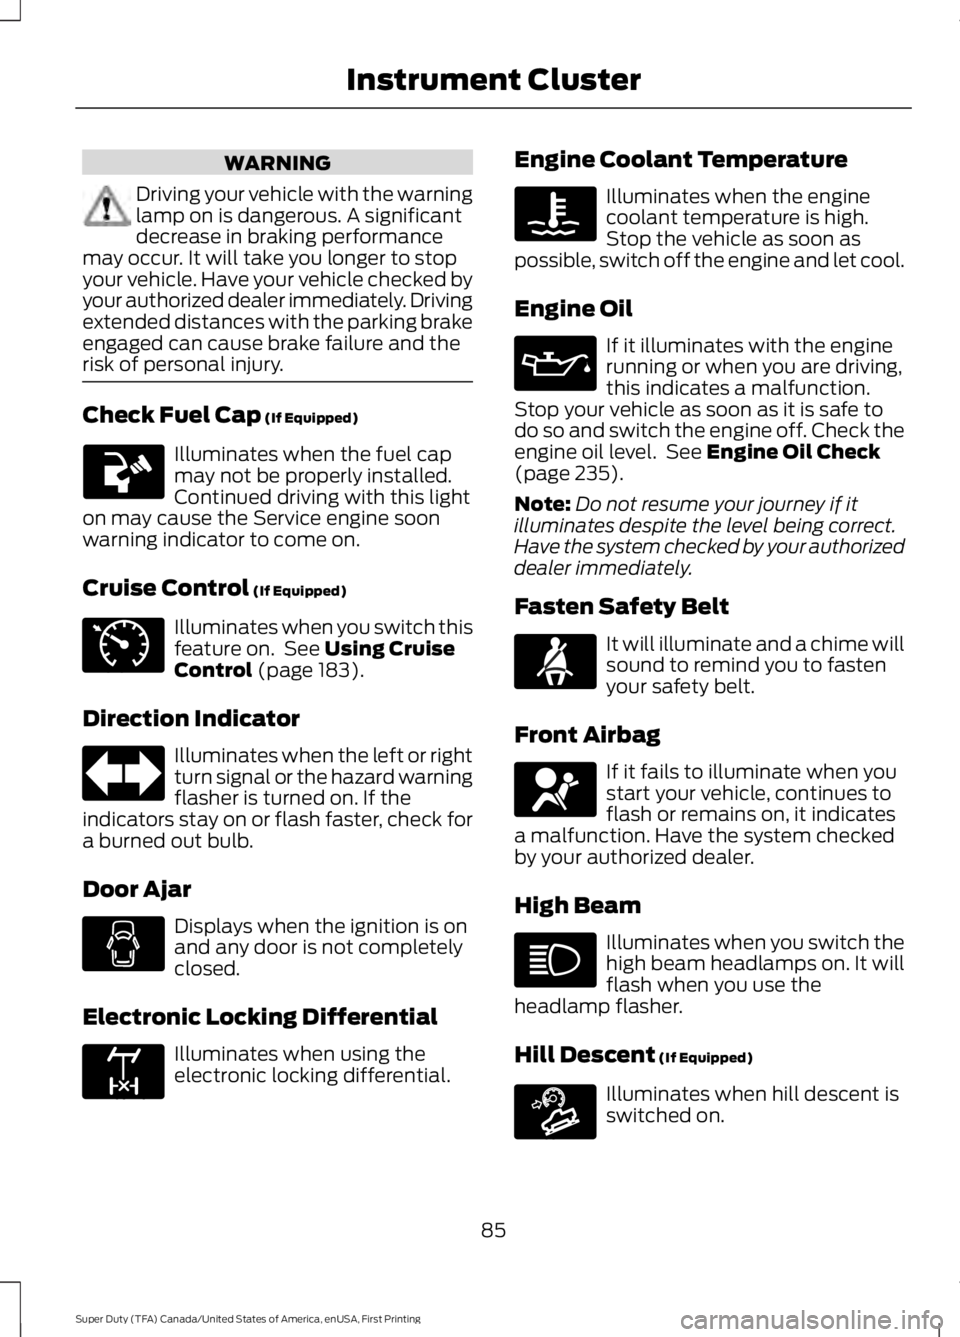
Driving your vehicle with the warninglamp on is dangerous. A significantdecrease in braking performancemay occur. It will take you longer to stopyour vehicle. Have your vehicle checked byyour authorized dealer immediately. Drivingextended distances with the parking brakeengaged can cause brake failure and therisk of personal injury.
Check Fuel Cap (If Equipped)
Illuminates when the fuel capmay not be properly installed.Continued driving with this lighton may cause the Service engine soonwarning indicator to come on.
Cruise Control (If Equipped)
Illuminates when you switch thisfeature on. See Using CruiseControl (page 183).
Direction Indicator
Illuminates when the left or rightturn signal or the hazard warningflasher is turned on. If theindicators stay on or flash faster, check fora burned out bulb.
Door Ajar
Displays when the ignition is onand any door is not completelyclosed.
Electronic Locking Differential
Illuminates when using theelectronic locking differential.
Engine Coolant Temperature
Illuminates when the enginecoolant temperature is high.Stop the vehicle as soon aspossible, switch off the engine and let cool.
Engine Oil
If it illuminates with the enginerunning or when you are driving,this indicates a malfunction.Stop your vehicle as soon as it is safe todo so and switch the engine off. Check theengine oil level. See Engine Oil Check(page 235).
Note:Do not resume your journey if itilluminates despite the level being correct.Have the system checked by your authorizeddealer immediately.
Fasten Safety Belt
It will illuminate and a chime willsound to remind you to fastenyour safety belt.
Front Airbag
If it fails to illuminate when youstart your vehicle, continues toflash or remains on, it indicatesa malfunction. Have the system checkedby your authorized dealer.
High Beam
Illuminates when you switch thehigh beam headlamps on. It willflash when you use theheadlamp flasher.
Hill Descent (If Equipped)
Illuminates when hill descent isswitched on.
85
Super Duty (TFA) Canada/United States of America, enUSA, First Printing
Instrument Cluster E71340 E163170 E163171
Page 89 of 507
Low Fuel Level
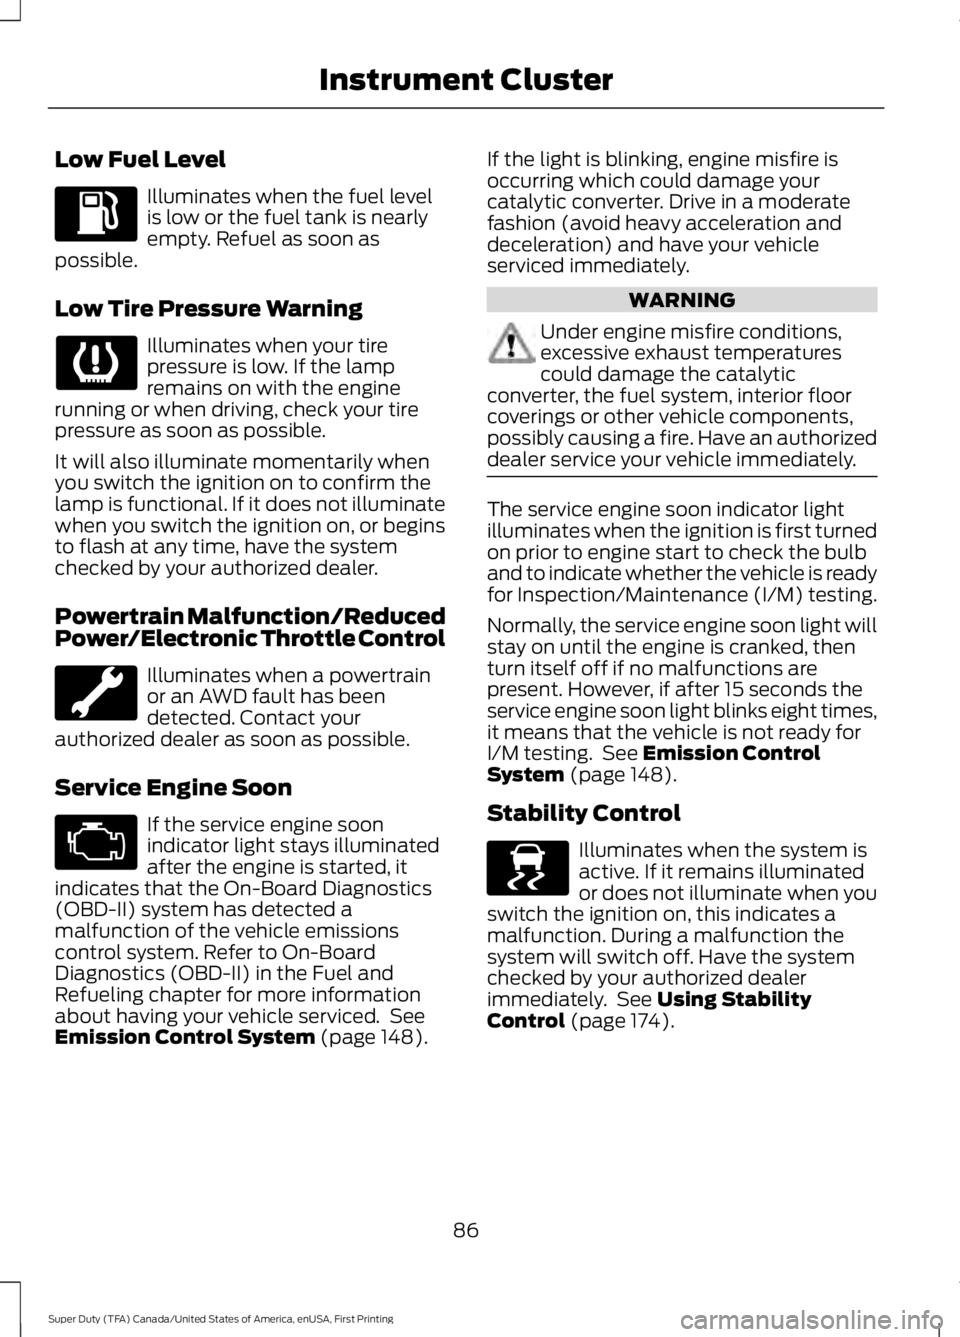
Illuminates when the fuel levelis low or the fuel tank is nearlyempty. Refuel as soon aspossible.
Low Tire Pressure Warning
Illuminates when your tirepressure is low. If the lampremains on with the enginerunning or when driving, check your tirepressure as soon as possible.
It will also illuminate momentarily whenyou switch the ignition on to confirm thelamp is functional. If it does not illuminatewhen you switch the ignition on, or beginsto flash at any time, have the systemchecked by your authorized dealer.
Powertrain Malfunction/ReducedPower/Electronic Throttle Control
Illuminates when a powertrainor an AWD fault has beendetected. Contact yourauthorized dealer as soon as possible.
Service Engine Soon
If the service engine soonindicator light stays illuminatedafter the engine is started, itindicates that the On-Board Diagnostics(OBD-II) system has detected amalfunction of the vehicle emissionscontrol system. Refer to On-BoardDiagnostics (OBD-II) in the Fuel andRefueling chapter for more informationabout having your vehicle serviced. SeeEmission Control System (page 148).
If the light is blinking, engine misfire isoccurring which could damage yourcatalytic converter. Drive in a moderatefashion (avoid heavy acceleration anddeceleration) and have your vehicleserviced immediately.
WARNING
Under engine misfire conditions,excessive exhaust temperaturescould damage the catalyticconverter, the fuel system, interior floorcoverings or other vehicle components,possibly causing a fire. Have an authorizeddealer service your vehicle immediately.
The service engine soon indicator lightilluminates when the ignition is first turnedon prior to engine start to check the bulband to indicate whether the vehicle is readyfor Inspection/Maintenance (I/M) testing.
Normally, the service engine soon light willstay on until the engine is cranked, thenturn itself off if no malfunctions arepresent. However, if after 15 seconds theservice engine soon light blinks eight times,it means that the vehicle is not ready forI/M testing. See Emission ControlSystem (page 148).
Stability Control
Illuminates when the system isactive. If it remains illuminatedor does not illuminate when youswitch the ignition on, this indicates amalfunction. During a malfunction thesystem will switch off. Have the systemchecked by your authorized dealerimmediately. See Using StabilityControl (page 174).
86
Super Duty (TFA) Canada/United States of America, enUSA, First Printing
Instrument Cluster E138639
Page 153 of 507
present, the service engine soon indicatorshould stay off the next time you start theengine. A driving cycle consists of a coldengine startup followed by mixedcity/highway driving. No additional vehicleservice is required.
If the service engine soon indicator remainson, have your vehicle serviced at the firstavailable opportunity. Although somemalfunctions detected by the OBD-II maynot have symptoms that are apparent,continued driving with the service enginesoon indicator on can result in increasedemissions, lower fuel economy, reducedengine and transmission smoothness, andlead to more costly repairs.
Readiness forInspection/Maintenance (I/M)Testing
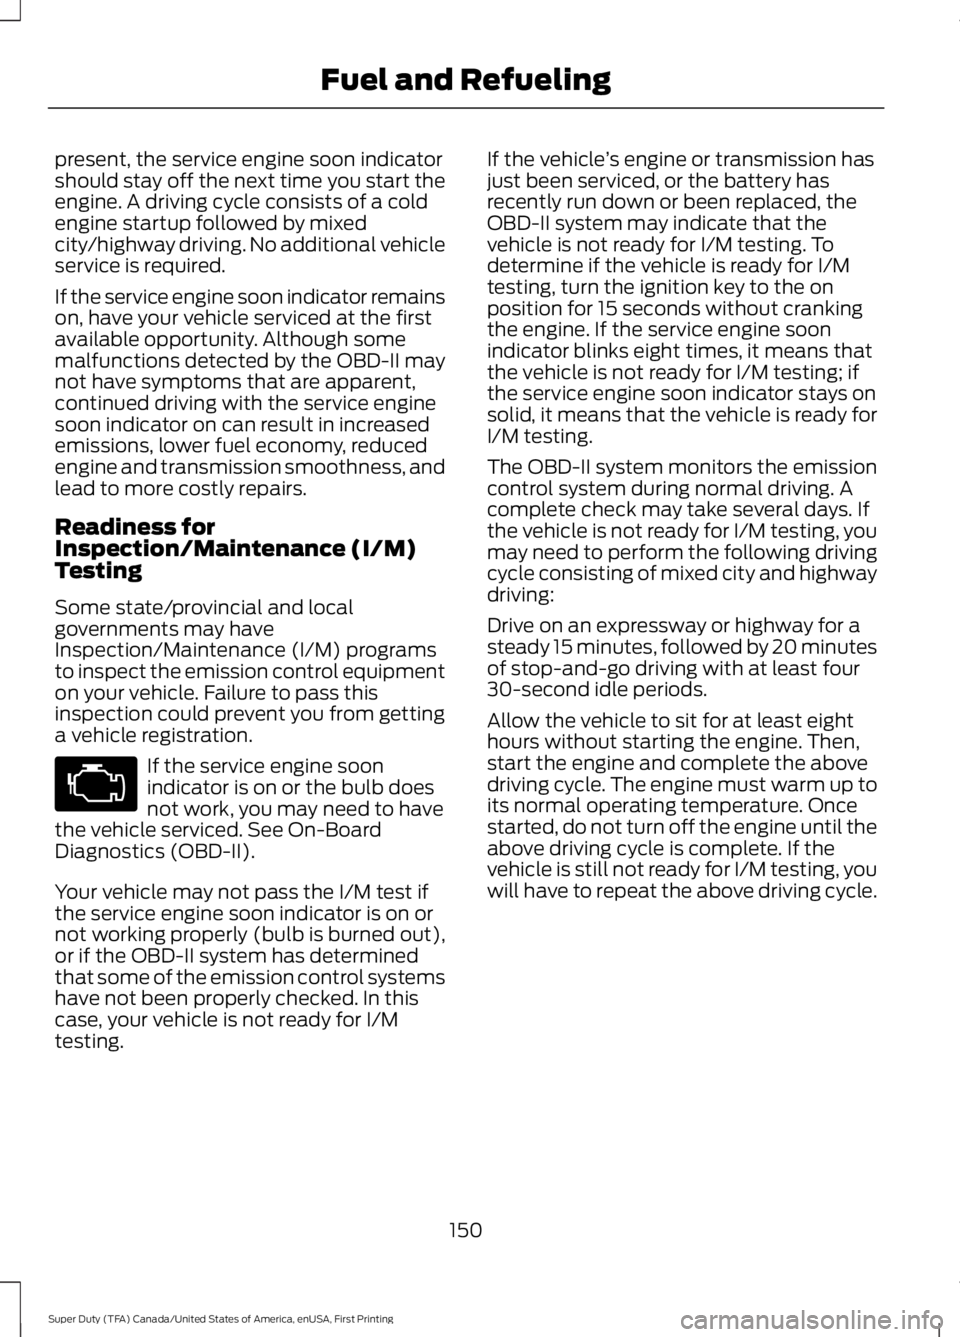
Some state/provincial and localgovernments may haveInspection/Maintenance (I/M) programsto inspect the emission control equipmenton your vehicle. Failure to pass thisinspection could prevent you from gettinga vehicle registration.
If the service engine soonindicator is on or the bulb doesnot work, you may need to havethe vehicle serviced. See On-BoardDiagnostics (OBD-II).
Your vehicle may not pass the I/M test ifthe service engine soon indicator is on ornot working properly (bulb is burned out),or if the OBD-II system has determinedthat some of the emission control systemshave not been properly checked. In thiscase, your vehicle is not ready for I/Mtesting.
If the vehicle’s engine or transmission hasjust been serviced, or the battery hasrecently run down or been replaced, theOBD-II system may indicate that thevehicle is not ready for I/M testing. Todetermine if the vehicle is ready for I/Mtesting, turn the ignition key to the onposition for 15 seconds without crankingthe engine. If the service engine soonindicator blinks eight times, it means thatthe vehicle is not ready for I/M testing; ifthe service engine soon indicator stays onsolid, it means that the vehicle is ready forI/M testing.
The OBD-II system monitors the emissioncontrol system during normal driving. Acomplete check may take several days. Ifthe vehicle is not ready for I/M testing, youmay need to perform the following drivingcycle consisting of mixed city and highwaydriving:
Drive on an expressway or highway for asteady 15 minutes, followed by 20 minutesof stop-and-go driving with at least four30-second idle periods.
Allow the vehicle to sit for at least eighthours without starting the engine. Then,start the engine and complete the abovedriving cycle. The engine must warm up toits normal operating temperature. Oncestarted, do not turn off the engine until theabove driving cycle is complete. If thevehicle is still not ready for I/M testing, youwill have to repeat the above driving cycle.
150
Super Duty (TFA) Canada/United States of America, enUSA, First Printing
Fuel and Refueling
Page 178 of 507
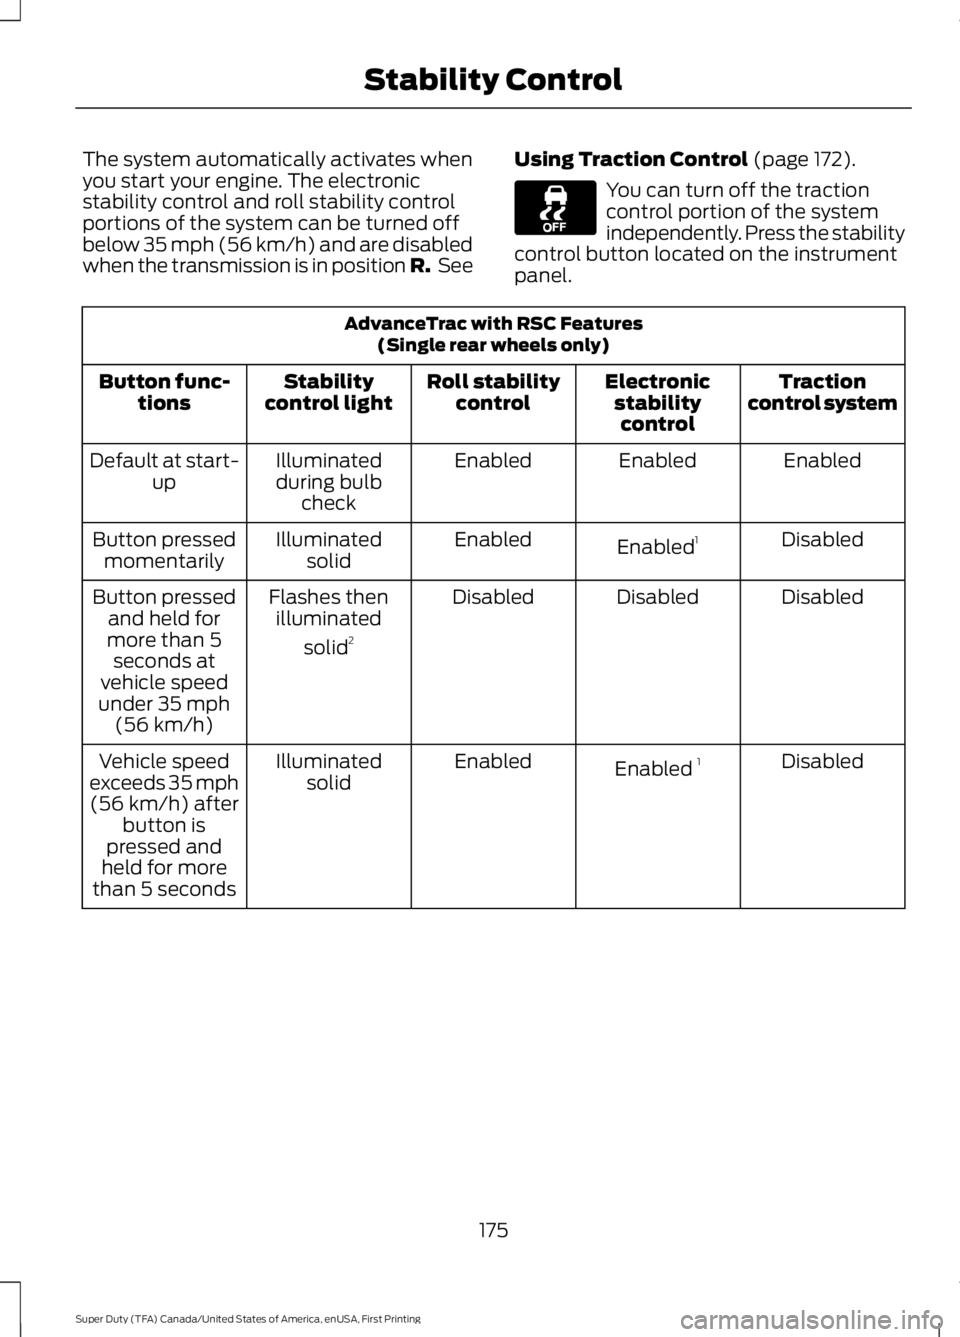
The system automatically activates whenyou start your engine. The electronicstability control and roll stability controlportions of the system can be turned offbelow 35 mph (56 km/h) and are disabledwhen the transmission is in position R. See
Using Traction Control (page 172).
You can turn off the tractioncontrol portion of the systemindependently. Press the stabilitycontrol button located on the instrumentpanel.
AdvanceTrac with RSC Features(Single rear wheels only)
Tractioncontrol systemElectronicstabilitycontrol
Roll stabilitycontrolStabilitycontrol lightButton func-tions
EnabledEnabledEnabledIlluminatedduring bulbcheck
Default at start-up
DisabledEnabled1EnabledIlluminatedsolidButton pressedmomentarily
DisabledDisabledDisabledFlashes thenilluminated
solid2
Button pressedand held formore than 5seconds atvehicle speedunder 35 mph(56 km/h)
DisabledEnabled 1EnabledIlluminatedsolidVehicle speedexceeds 35 mph(56 km/h) afterbutton ispressed andheld for morethan 5 seconds
175
Super Duty (TFA) Canada/United States of America, enUSA, First Printing
Stability Control
Page 251 of 507
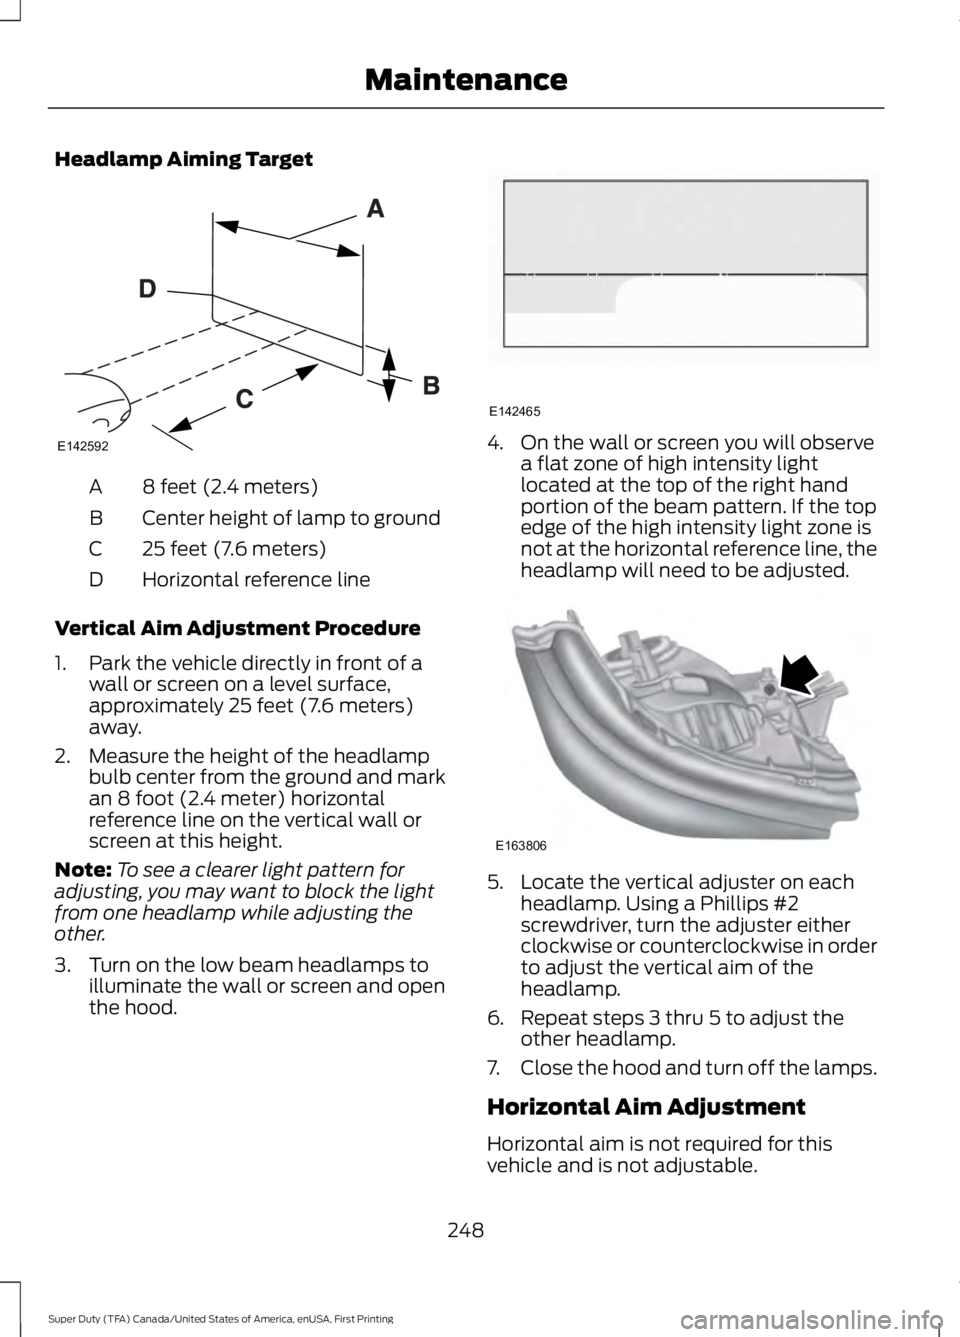
Headlamp Aiming Target
8 feet (2.4 meters)A
Center height of lamp to groundB
25 feet (7.6 meters)C
Horizontal reference lineD
Vertical Aim Adjustment Procedure
1. Park the vehicle directly in front of awall or screen on a level surface,approximately 25 feet (7.6 meters)away.
2. Measure the height of the headlampbulb center from the ground and markan 8 foot (2.4 meter) horizontalreference line on the vertical wall orscreen at this height.
Note:To see a clearer light pattern foradjusting, you may want to block the lightfrom one headlamp while adjusting theother.
3. Turn on the low beam headlamps toilluminate the wall or screen and openthe hood.
4. On the wall or screen you will observea flat zone of high intensity lightlocated at the top of the right handportion of the beam pattern. If the topedge of the high intensity light zone isnot at the horizontal reference line, theheadlamp will need to be adjusted.
5. Locate the vertical adjuster on eachheadlamp. Using a Phillips #2screwdriver, turn the adjuster eitherclockwise or counterclockwise in orderto adjust the vertical aim of theheadlamp.
6. Repeat steps 3 thru 5 to adjust theother headlamp.
7.Close the hood and turn off the lamps.
Horizontal Aim Adjustment
Horizontal aim is not required for thisvehicle and is not adjustable.
248
Super Duty (TFA) Canada/United States of America, enUSA, First Printing
MaintenanceE142592 E142465 E163806
Page 252 of 507
REMOVING A HEADLAMP
WARNING
Handle a halogen headlamp bulbcarefully and keep out of children’sreach. Grasp the bulb only by itsplastic base and do not touch the glass.The oil from your hand could cause thebulb to break the next time the headlampsare operated.
Note:If the bulb is accidentally touched, itshould be cleaned with rubbing alcoholbefore being used.
Note:This procedure is for replacing theheadlamps, park lamps or turn lamps.
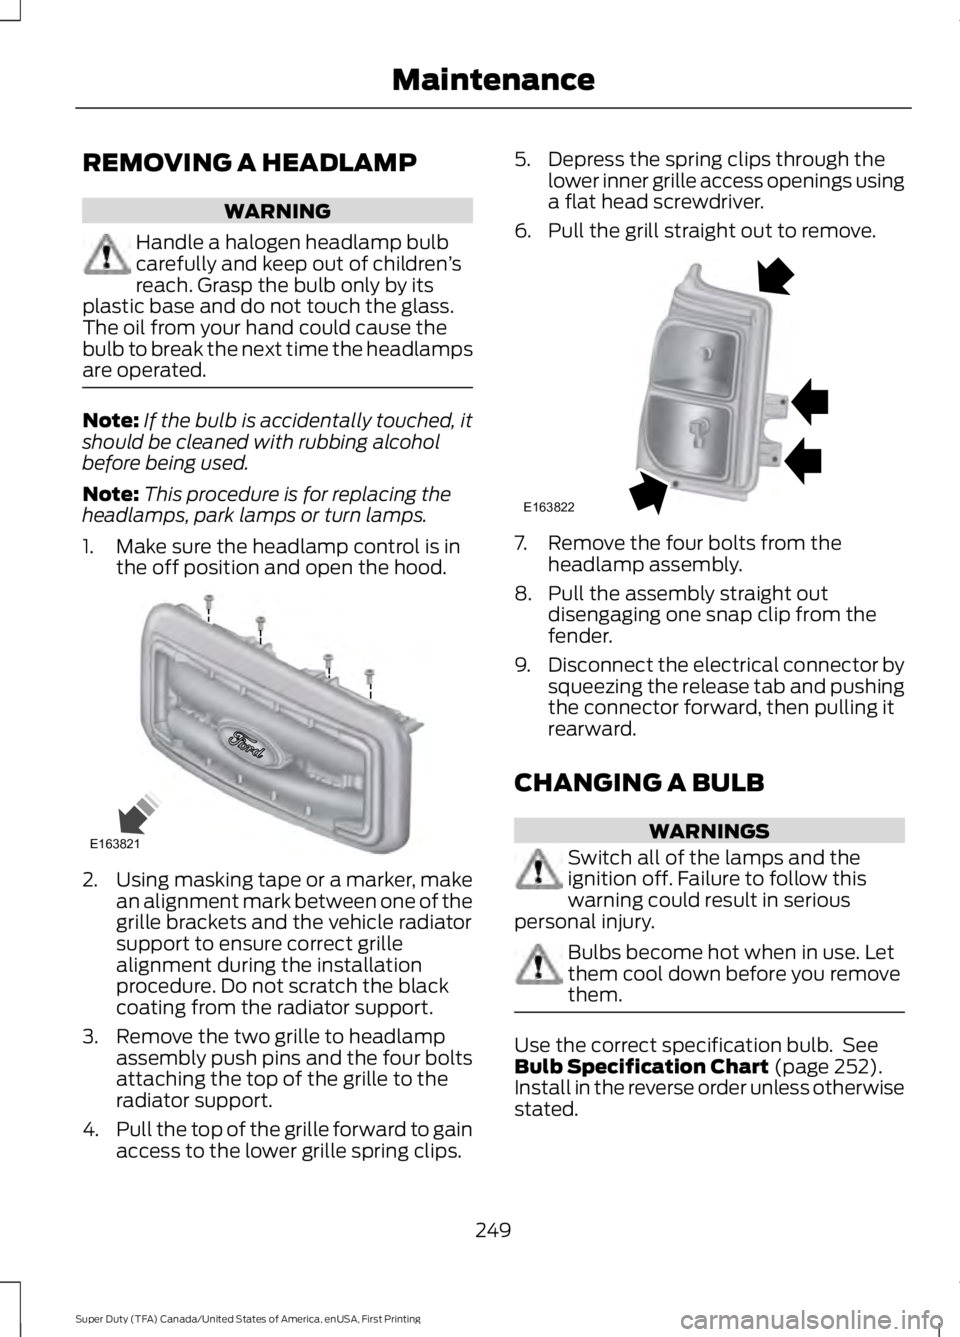
1. Make sure the headlamp control is inthe off position and open the hood.
2.Using masking tape or a marker, makean alignment mark between one of thegrille brackets and the vehicle radiatorsupport to ensure correct grillealignment during the installationprocedure. Do not scratch the blackcoating from the radiator support.
3. Remove the two grille to headlampassembly push pins and the four boltsattaching the top of the grille to theradiator support.
4.Pull the top of the grille forward to gainaccess to the lower grille spring clips.
5. Depress the spring clips through thelower inner grille access openings usinga flat head screwdriver.
6. Pull the grill straight out to remove.
7. Remove the four bolts from theheadlamp assembly.
8. Pull the assembly straight outdisengaging one snap clip from thefender.
9.Disconnect the electrical connector bysqueezing the release tab and pushingthe connector forward, then pulling itrearward.
CHANGING A BULB
WARNINGS
Switch all of the lamps and theignition off. Failure to follow thiswarning could result in seriouspersonal injury.
Bulbs become hot when in use. Letthem cool down before you removethem.
Use the correct specification bulb. SeeBulb Specification Chart (page 252).Install in the reverse order unless otherwisestated.
249
Super Duty (TFA) Canada/United States of America, enUSA, First Printing
MaintenanceE163821 E163822
Page 253 of 507
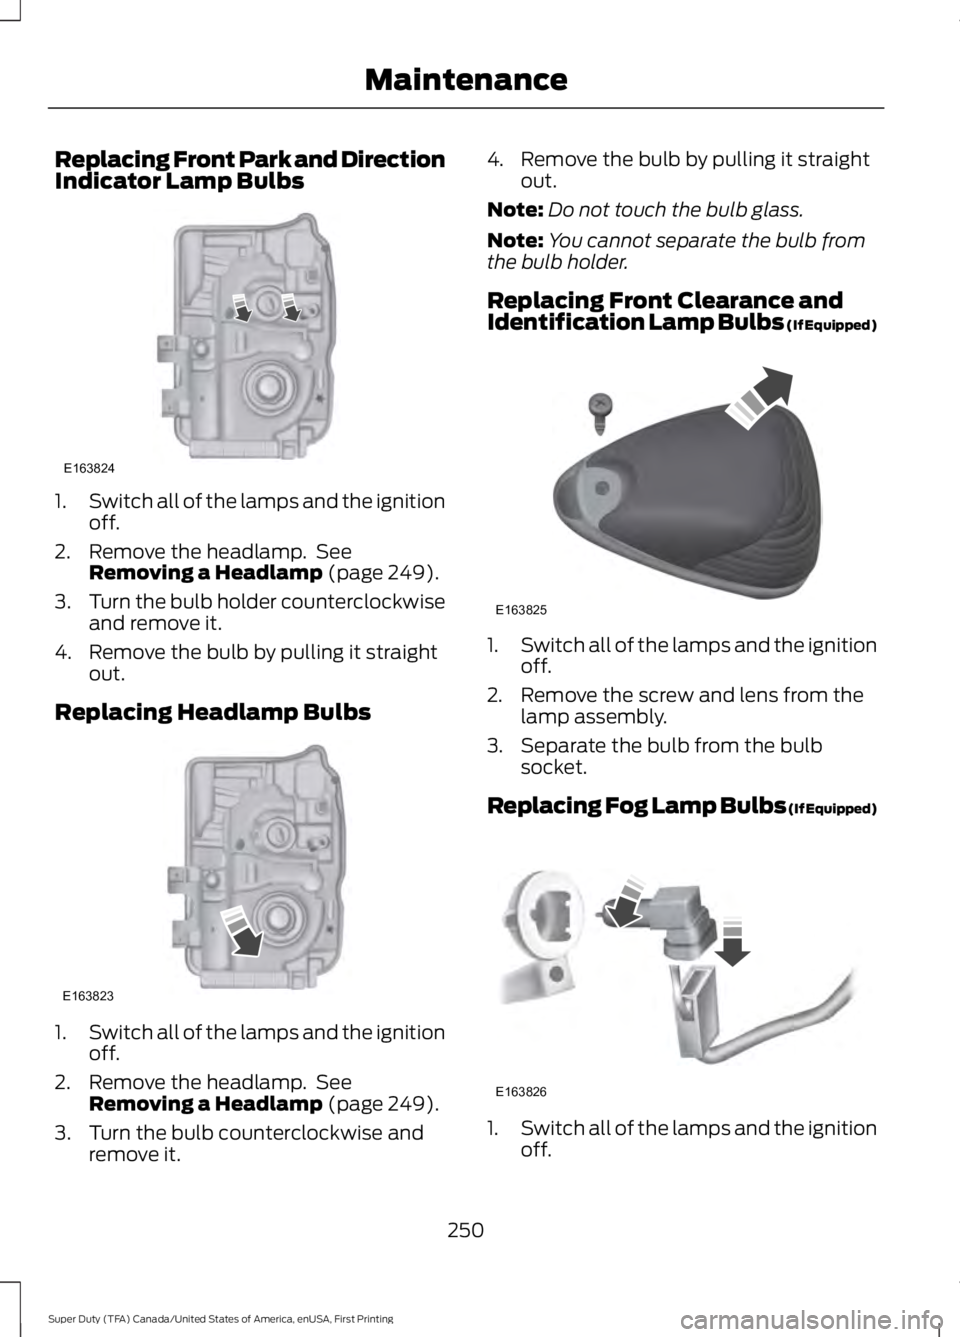
Replacing Front Park and DirectionIndicator Lamp Bulbs
1.Switch all of the lamps and the ignitionoff.
2. Remove the headlamp. SeeRemoving a Headlamp (page 249).
3.Turn the bulb holder counterclockwiseand remove it.
4. Remove the bulb by pulling it straightout.
Replacing Headlamp Bulbs
1.Switch all of the lamps and the ignitionoff.
2. Remove the headlamp. SeeRemoving a Headlamp (page 249).
3. Turn the bulb counterclockwise andremove it.
4. Remove the bulb by pulling it straightout.
Note:Do not touch the bulb glass.
Note:You cannot separate the bulb fromthe bulb holder.
Replacing Front Clearance andIdentification Lamp Bulbs (If Equipped)
1.Switch all of the lamps and the ignitionoff.
2. Remove the screw and lens from thelamp assembly.
3. Separate the bulb from the bulbsocket.
Replacing Fog Lamp Bulbs (If Equipped)
1.Switch all of the lamps and the ignitionoff.
250
Super Duty (TFA) Canada/United States of America, enUSA, First Printing
MaintenanceE163824 E163823 E163825 E163826
Page 254 of 507
2. Disconnect the electrical connector.
3.Turn the bulb holder counterclockwiseand remove it.
Note:Do not touch the bulb glass.
Note:You cannot separate the bulb fromthe bulb holder.
ReplacingBrake/Tail/Turn/Reverse LampBulbs
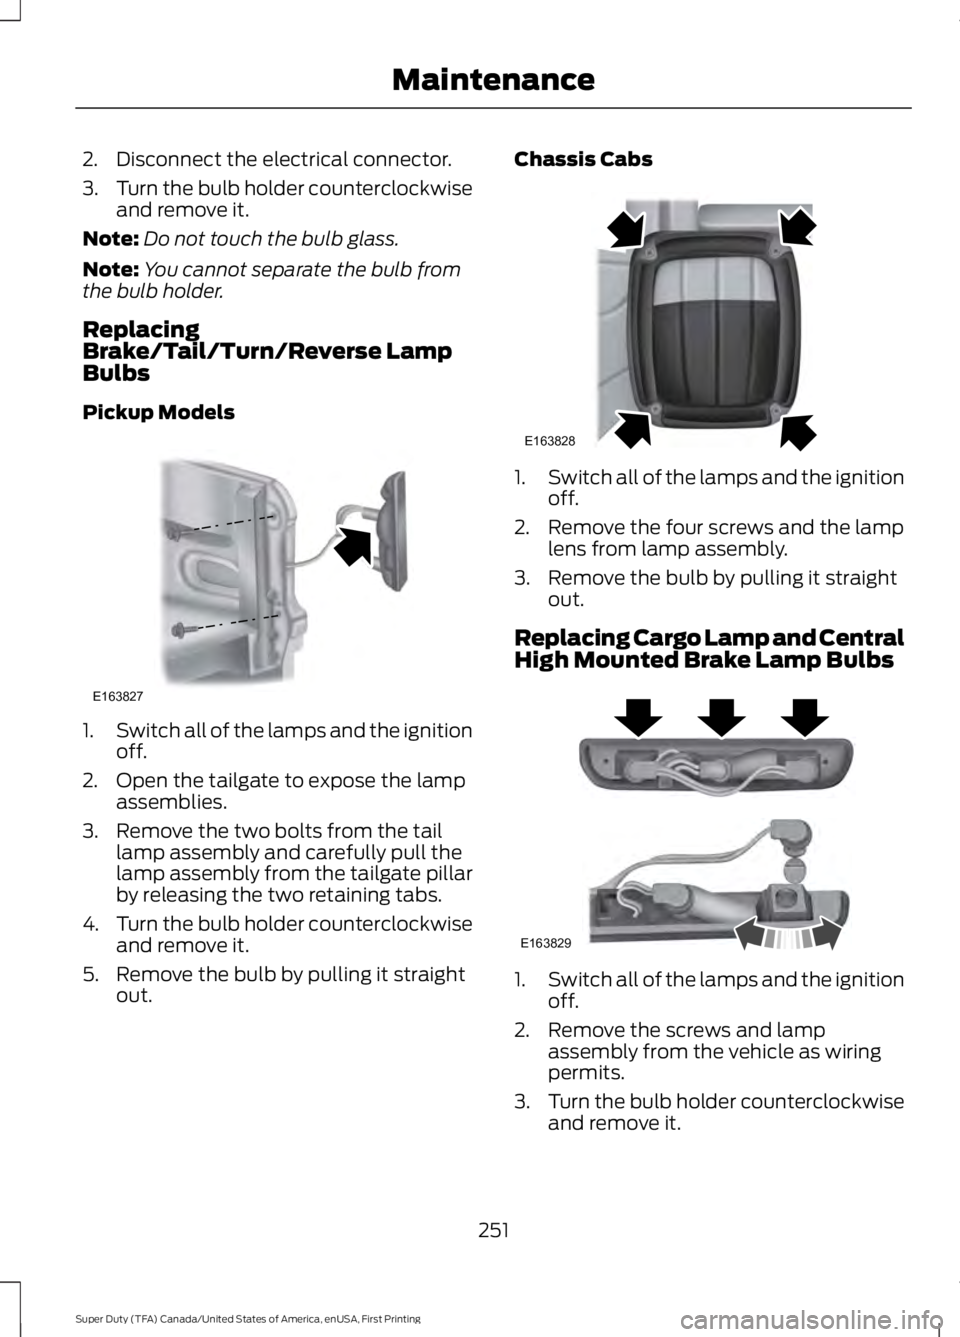
Pickup Models
1.Switch all of the lamps and the ignitionoff.
2. Open the tailgate to expose the lampassemblies.
3. Remove the two bolts from the taillamp assembly and carefully pull thelamp assembly from the tailgate pillarby releasing the two retaining tabs.
4.Turn the bulb holder counterclockwiseand remove it.
5. Remove the bulb by pulling it straightout.
Chassis Cabs
1.Switch all of the lamps and the ignitionoff.
2. Remove the four screws and the lamplens from lamp assembly.
3. Remove the bulb by pulling it straightout.
Replacing Cargo Lamp and CentralHigh Mounted Brake Lamp Bulbs
1.Switch all of the lamps and the ignitionoff.
2. Remove the screws and lampassembly from the vehicle as wiringpermits.
3.Turn the bulb holder counterclockwiseand remove it.
251
Super Duty (TFA) Canada/United States of America, enUSA, First Printing
MaintenanceE163827 E163828 E163829
Page 255 of 507
4. Remove the bulb by pulling it straightout.
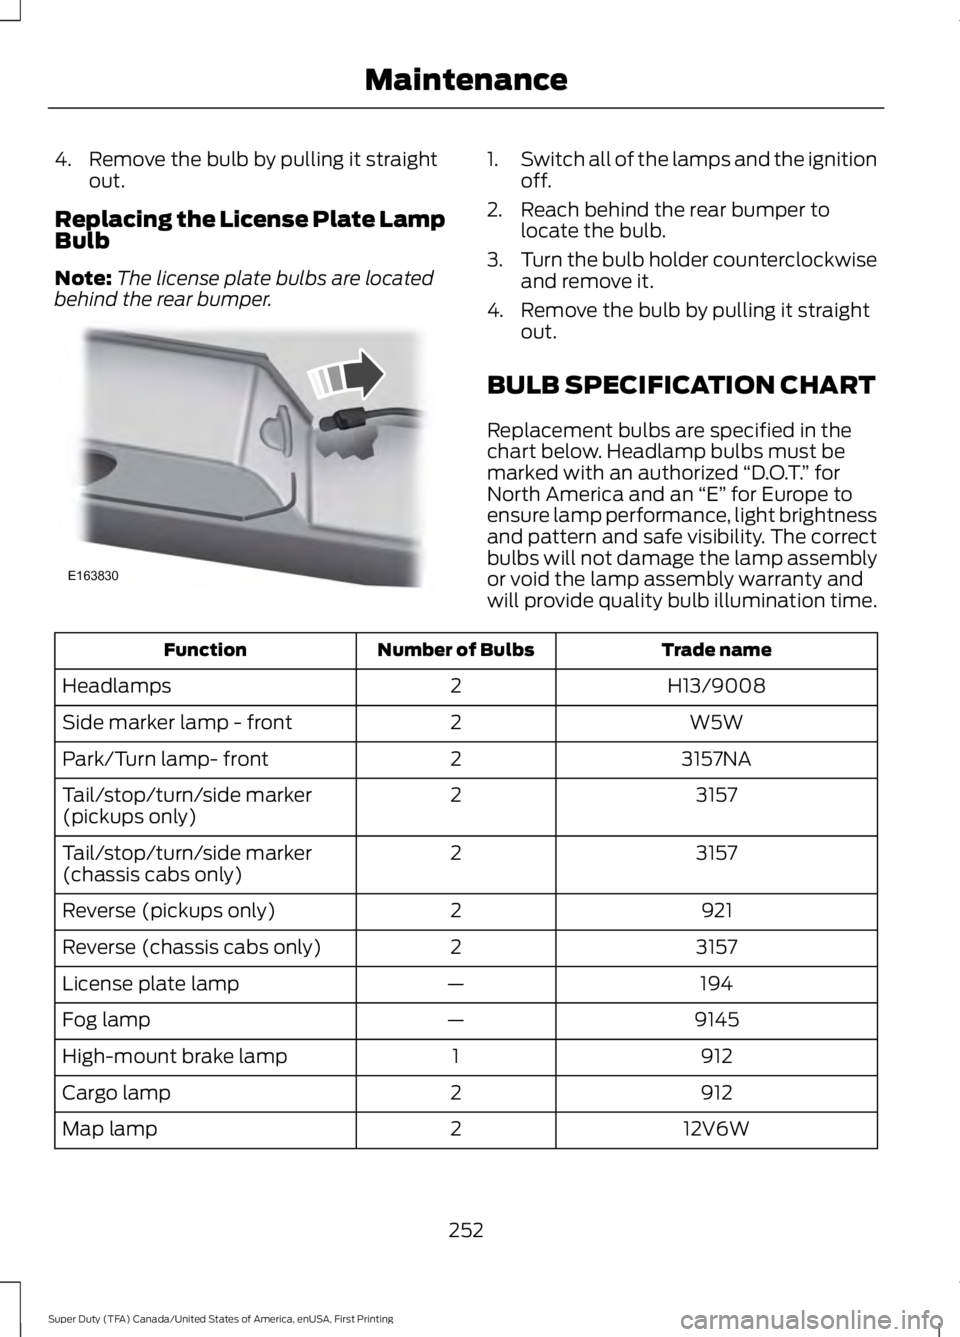
Replacing the License Plate LampBulb
Note:The license plate bulbs are locatedbehind the rear bumper.
1.Switch all of the lamps and the ignitionoff.
2. Reach behind the rear bumper tolocate the bulb.
3.Turn the bulb holder counterclockwiseand remove it.
4. Remove the bulb by pulling it straightout.
BULB SPECIFICATION CHART
Replacement bulbs are specified in thechart below. Headlamp bulbs must bemarked with an authorized “D.O.T.” forNorth America and an “E” for Europe toensure lamp performance, light brightnessand pattern and safe visibility. The correctbulbs will not damage the lamp assemblyor void the lamp assembly warranty andwill provide quality bulb illumination time.
Trade nameNumber of BulbsFunction
H13/90082Headlamps
W5W2Side marker lamp - front
3157NA2Park/Turn lamp- front
31572Tail/stop/turn/side marker(pickups only)
31572Tail/stop/turn/side marker(chassis cabs only)
9212Reverse (pickups only)
31572Reverse (chassis cabs only)
194—License plate lamp
9145—Fog lamp
9121High-mount brake lamp
9122Cargo lamp
12V6W2Map lamp
252
Super Duty (TFA) Canada/United States of America, enUSA, First Printing
MaintenanceE163830