FORD F250 SUPER DUTY 2017 Owners Manual
Manufacturer: FORD, Model Year: 2017, Model line: F250 SUPER DUTY, Model: FORD F250 SUPER DUTY 2017Pages: 642, PDF Size: 12.35 MB
Page 91 of 642
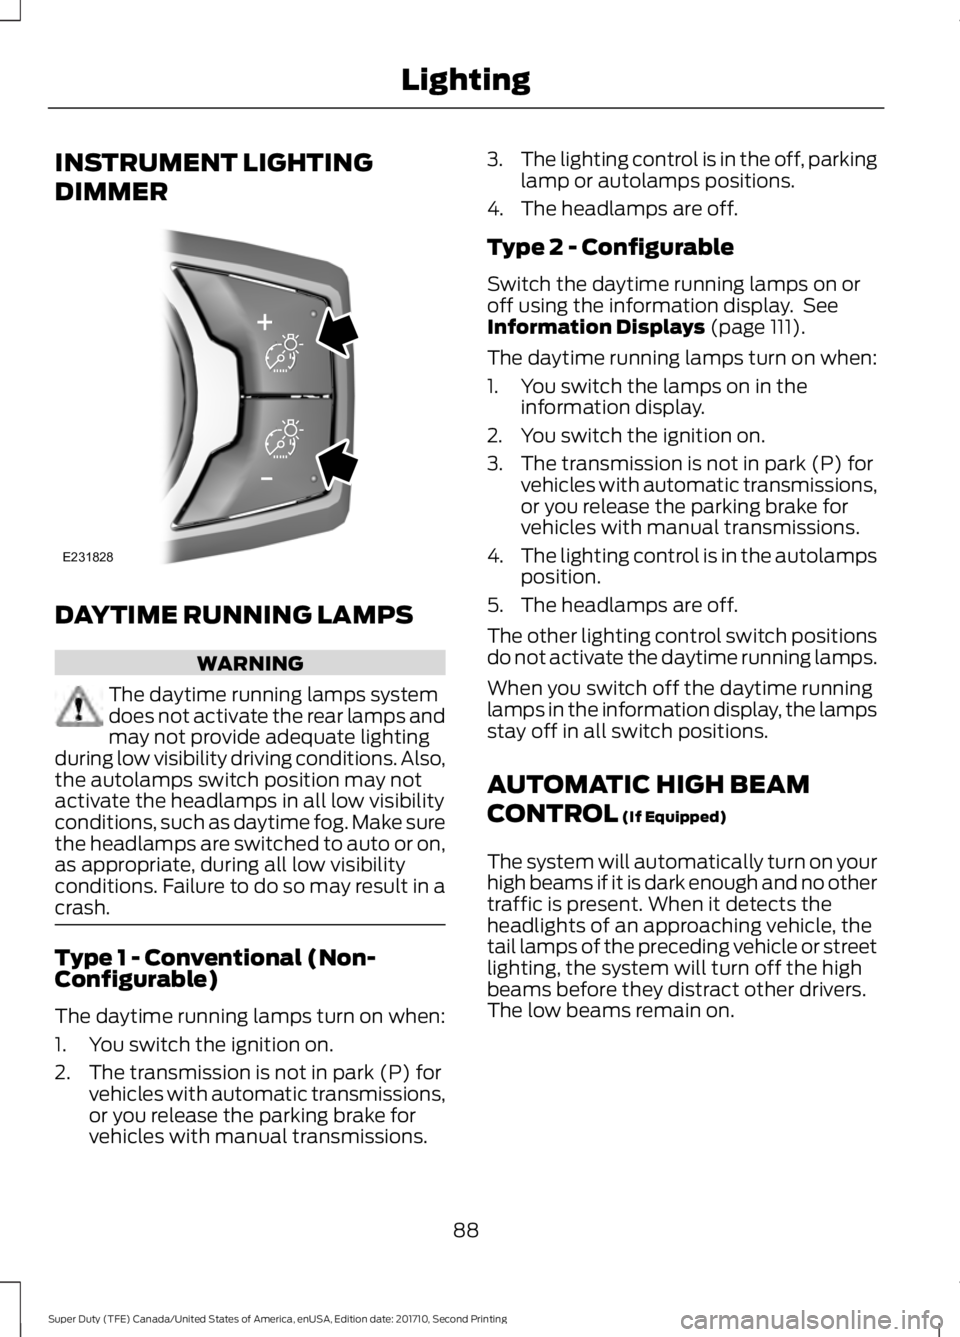
INSTRUMENT LIGHTING
DIMMER
DAYTIME RUNNING LAMPS
WARNING
The daytime running lamps systemdoes not activate the rear lamps andmay not provide adequate lightingduring low visibility driving conditions. Also,the autolamps switch position may notactivate the headlamps in all low visibilityconditions, such as daytime fog. Make surethe headlamps are switched to auto or on,as appropriate, during all low visibilityconditions. Failure to do so may result in acrash.
Type 1 - Conventional (Non-Configurable)
The daytime running lamps turn on when:
1. You switch the ignition on.
2. The transmission is not in park (P) forvehicles with automatic transmissions,or you release the parking brake forvehicles with manual transmissions.
3.The lighting control is in the off, parkinglamp or autolamps positions.
4. The headlamps are off.
Type 2 - Configurable
Switch the daytime running lamps on oroff using the information display. SeeInformation Displays (page 111).
The daytime running lamps turn on when:
1. You switch the lamps on in theinformation display.
2. You switch the ignition on.
3. The transmission is not in park (P) forvehicles with automatic transmissions,or you release the parking brake forvehicles with manual transmissions.
4.The lighting control is in the autolampsposition.
5. The headlamps are off.
The other lighting control switch positionsdo not activate the daytime running lamps.
When you switch off the daytime runninglamps in the information display, the lampsstay off in all switch positions.
AUTOMATIC HIGH BEAM
CONTROL (If Equipped)
The system will automatically turn on yourhigh beams if it is dark enough and no othertraffic is present. When it detects theheadlights of an approaching vehicle, thetail lamps of the preceding vehicle or streetlighting, the system will turn off the highbeams before they distract other drivers.The low beams remain on.
88
Super Duty (TFE) Canada/United States of America, enUSA, Edition date: 201710, Second Printing
LightingE231828
Page 92 of 642
Note:If it appears that automatic controlof the high beams is not functioningproperly, check the windshield in front ofthe camera for a blockage. A clear view ofthe road is required for proper systemoperation. Have any windshield damage inthe area of the camera’s field-of-viewrepaired.
Note:If the system detects a blockage, forexample bird droppings, bug splatter, snowor ice, the system will go into low beammode until you clear the blockage. Amessage may also appear in the instrumentcluster display noting the front camera isblocked.
Note:Typical road dust, dirt and waterspots will not affect the performance of theautomatic high beam system. However, incold or inclement weather conditions, youwill notice a decrease in the availability ofthe high beam system, especially at startup. If you want to change the beam stateindependently of the system, you mayswitch the high beams on or off using themultifunction switch. Automatic control willresume when conditions are correct.
Note:Modification of the vehicle ride heightsuch as using much larger tires, maydegrade feature performance.
A camera sensor, centrally mountedbehind the windshield of your vehicle,continuously monitors conditions to decidewhen to switch the high beams off and on.
Once the system is active, the high beamswill switch on if:
•the ambient light level is low enough
•there is no traffic in front of the vehicle
•the vehicle speed is greater thanapproximately 32 mph (52 km/h).
The high beams will switch off if:
•the system detects the headlamps ofan approaching vehicle or the taillamps of a preceding vehicle.
•vehicle speed falls belowapproximately 27 mph (44 km/h)
•the ambient light level is high enoughthat high beams are not required
•the system detects severe rain, snowor fog
•the camera is blocked.
Activating the System
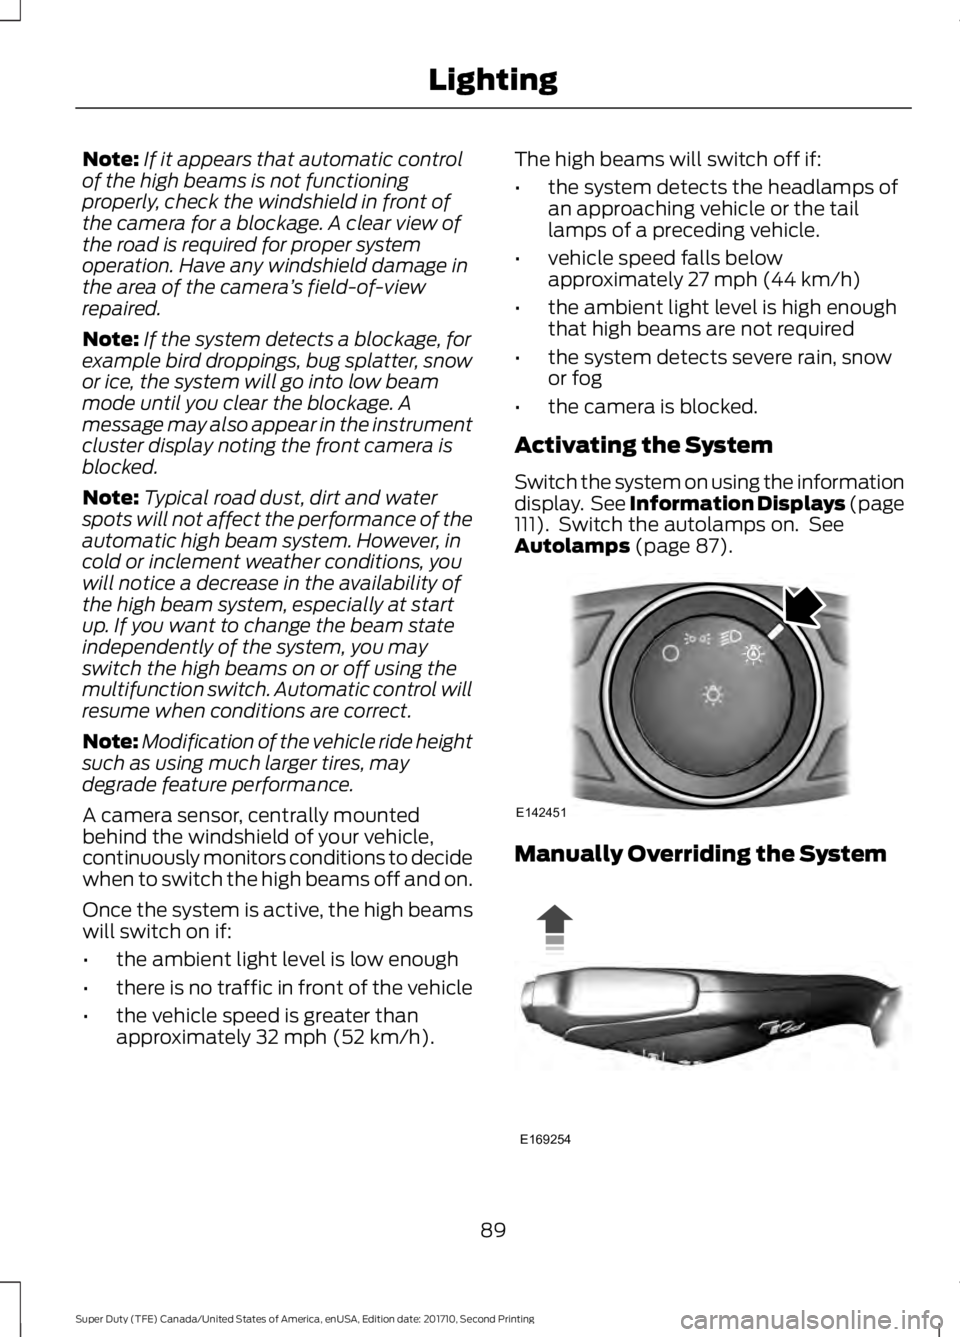
Switch the system on using the informationdisplay. See Information Displays (page111). Switch the autolamps on. SeeAutolamps (page 87).
Manually Overriding the System
89
Super Duty (TFE) Canada/United States of America, enUSA, Edition date: 201710, Second Printing
LightingE142451 E169254
Page 93 of 642
When the automatic control has activatedthe high beams, pushing or pulling the stalkwill provide a temporary override to lowbeam.
Use the information display menu topermanently deactivate the system, or turnthe lighting control switch from autolampsto headlamps.
FRONT FOG LAMPS (If Equipped)
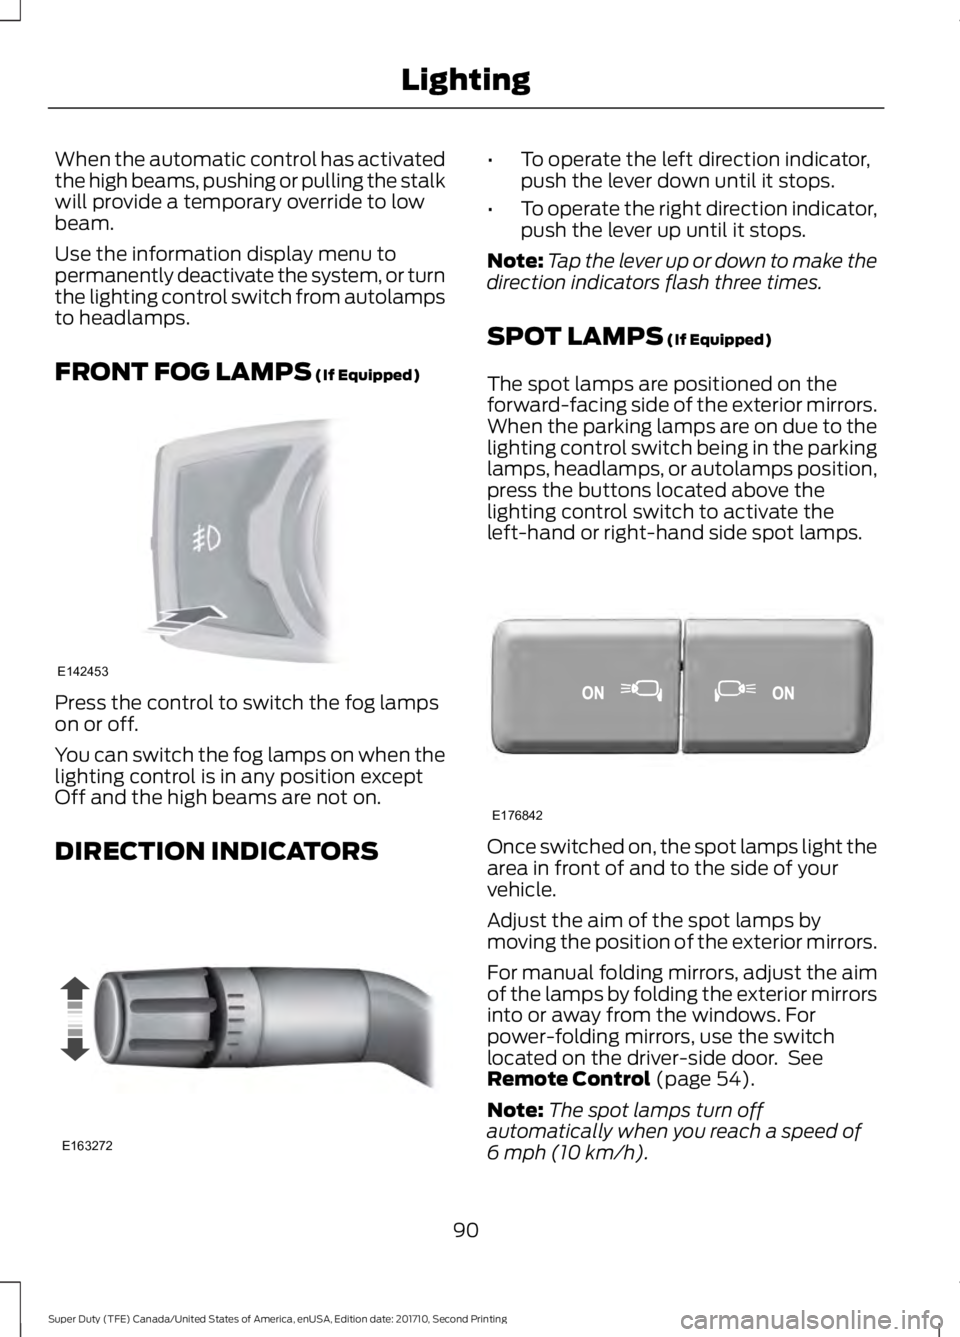
Press the control to switch the fog lampson or off.
You can switch the fog lamps on when thelighting control is in any position exceptOff and the high beams are not on.
DIRECTION INDICATORS
•To operate the left direction indicator,push the lever down until it stops.
•To operate the right direction indicator,push the lever up until it stops.
Note:Tap the lever up or down to make thedirection indicators flash three times.
SPOT LAMPS (If Equipped)
The spot lamps are positioned on theforward-facing side of the exterior mirrors.When the parking lamps are on due to thelighting control switch being in the parkinglamps, headlamps, or autolamps position,press the buttons located above thelighting control switch to activate theleft-hand or right-hand side spot lamps.
Once switched on, the spot lamps light thearea in front of and to the side of yourvehicle.
Adjust the aim of the spot lamps bymoving the position of the exterior mirrors.
For manual folding mirrors, adjust the aimof the lamps by folding the exterior mirrorsinto or away from the windows. Forpower-folding mirrors, use the switchlocated on the driver-side door. SeeRemote Control (page 54).
Note:The spot lamps turn offautomatically when you reach a speed of6 mph (10 km/h).
90
Super Duty (TFE) Canada/United States of America, enUSA, Edition date: 201710, Second Printing
LightingE142453 E163272 E176842
Page 94 of 642
Cargo and Trailer Hookup Lamps
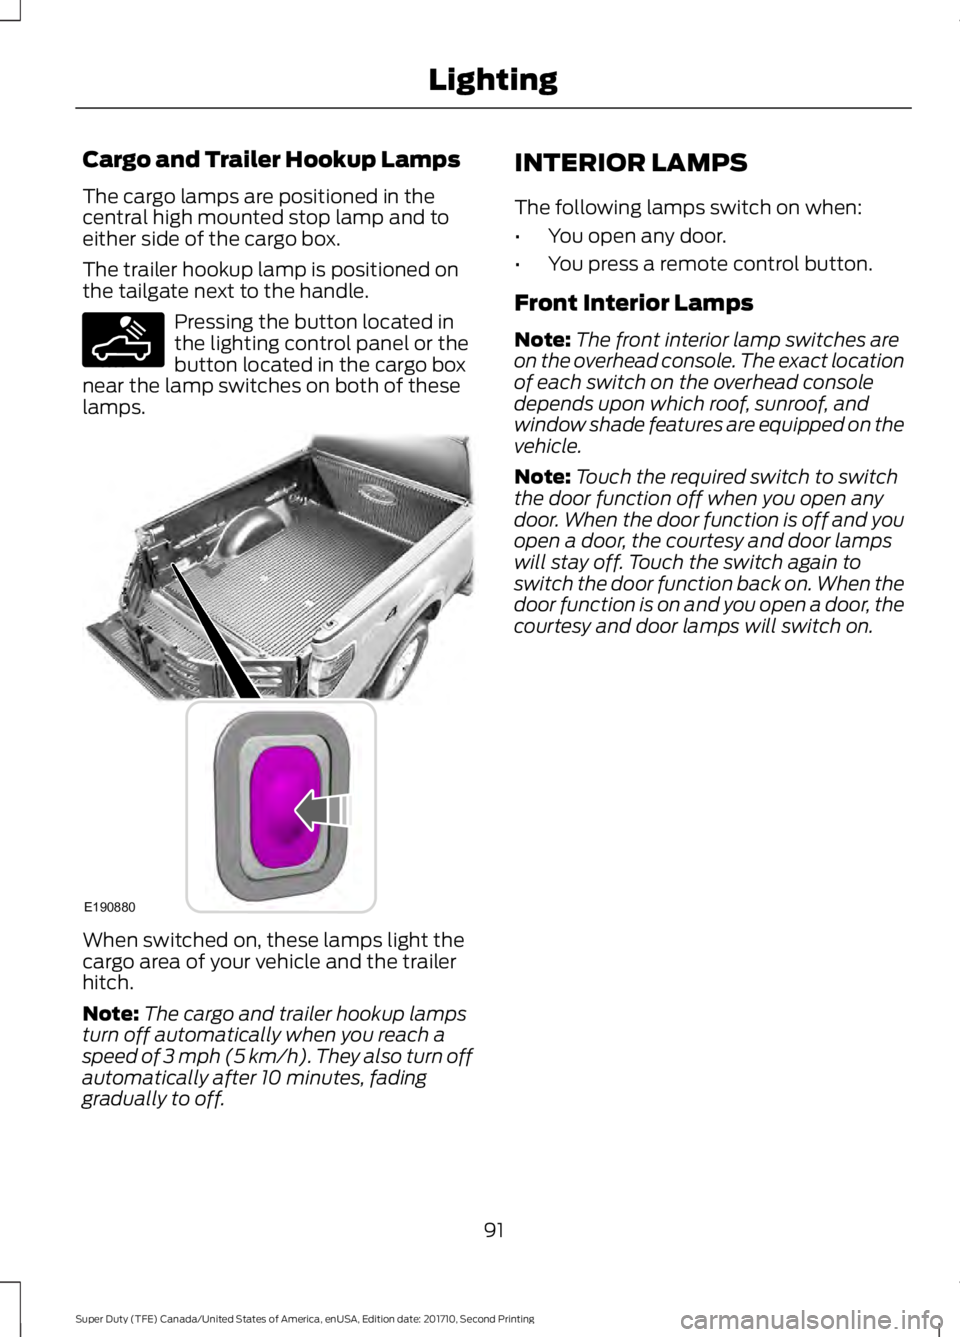
The cargo lamps are positioned in thecentral high mounted stop lamp and toeither side of the cargo box.
The trailer hookup lamp is positioned onthe tailgate next to the handle.
Pressing the button located inthe lighting control panel or thebutton located in the cargo boxnear the lamp switches on both of theselamps.
When switched on, these lamps light thecargo area of your vehicle and the trailerhitch.
Note:The cargo and trailer hookup lampsturn off automatically when you reach aspeed of 3 mph (5 km/h). They also turn offautomatically after 10 minutes, fadinggradually to off.
INTERIOR LAMPS
The following lamps switch on when:
•You open any door.
•You press a remote control button.
Front Interior Lamps
Note:The front interior lamp switches areon the overhead console. The exact locationof each switch on the overhead consoledepends upon which roof, sunroof, andwindow shade features are equipped on thevehicle.
Note:Touch the required switch to switchthe door function off when you open anydoor. When the door function is off and youopen a door, the courtesy and door lampswill stay off. Touch the switch again toswitch the door function back on. When thedoor function is on and you open a door, thecourtesy and door lamps will switch on.
91
Super Duty (TFE) Canada/United States of America, enUSA, Edition date: 201710, Second Printing
LightingE189587 E190880
Page 95 of 642
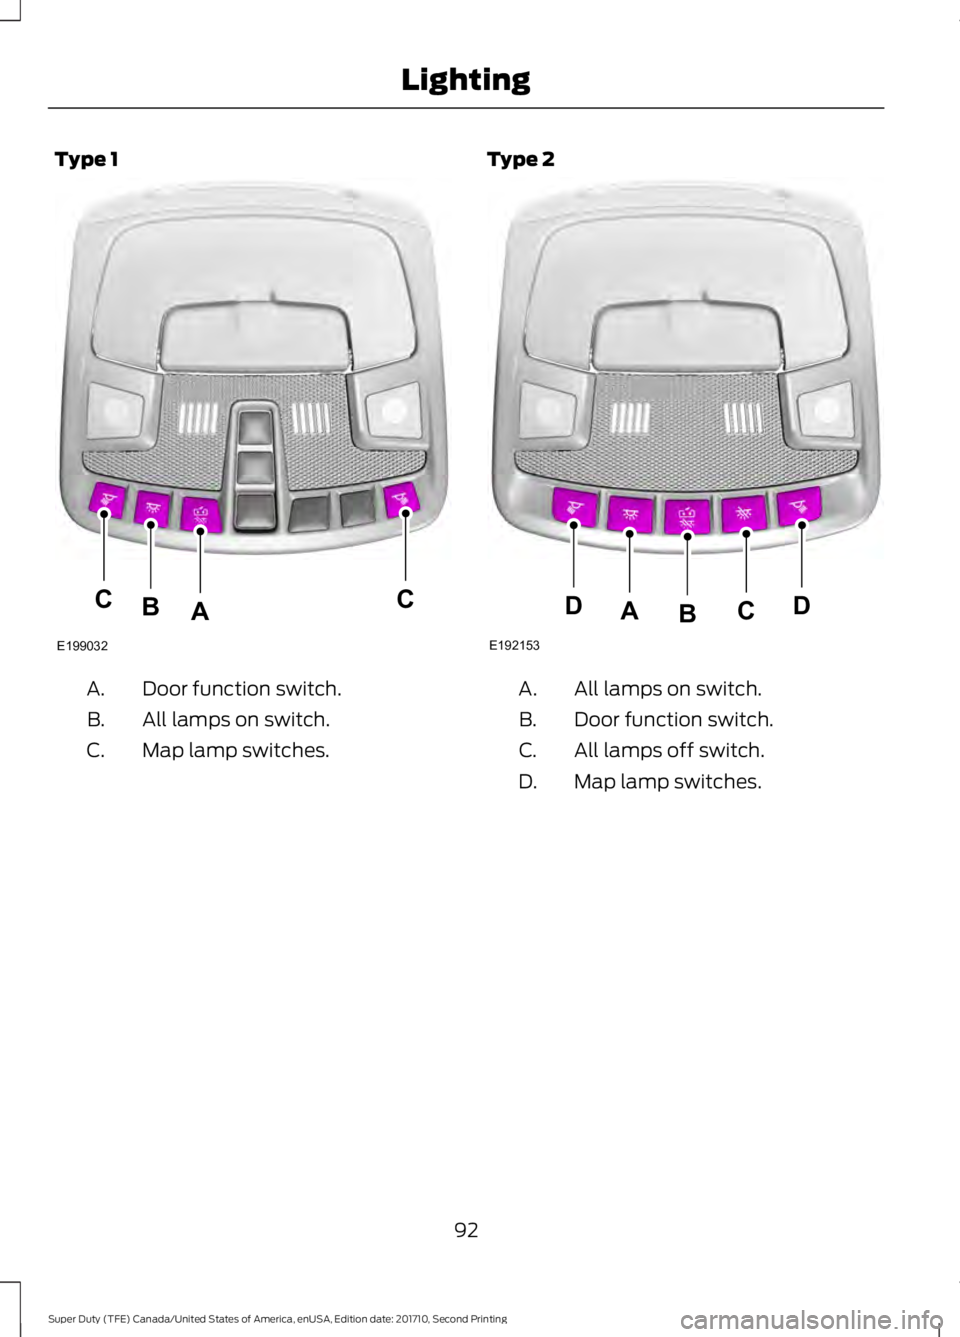
Type 1
Door function switch.A.
All lamps on switch.B.
Map lamp switches.C.
Type 2
All lamps on switch.A.
Door function switch.B.
All lamps off switch.C.
Map lamp switches.D.
92
Super Duty (TFE) Canada/United States of America, enUSA, Edition date: 201710, Second Printing
LightingE199032
CCAB E192153
DDCAB
Page 96 of 642
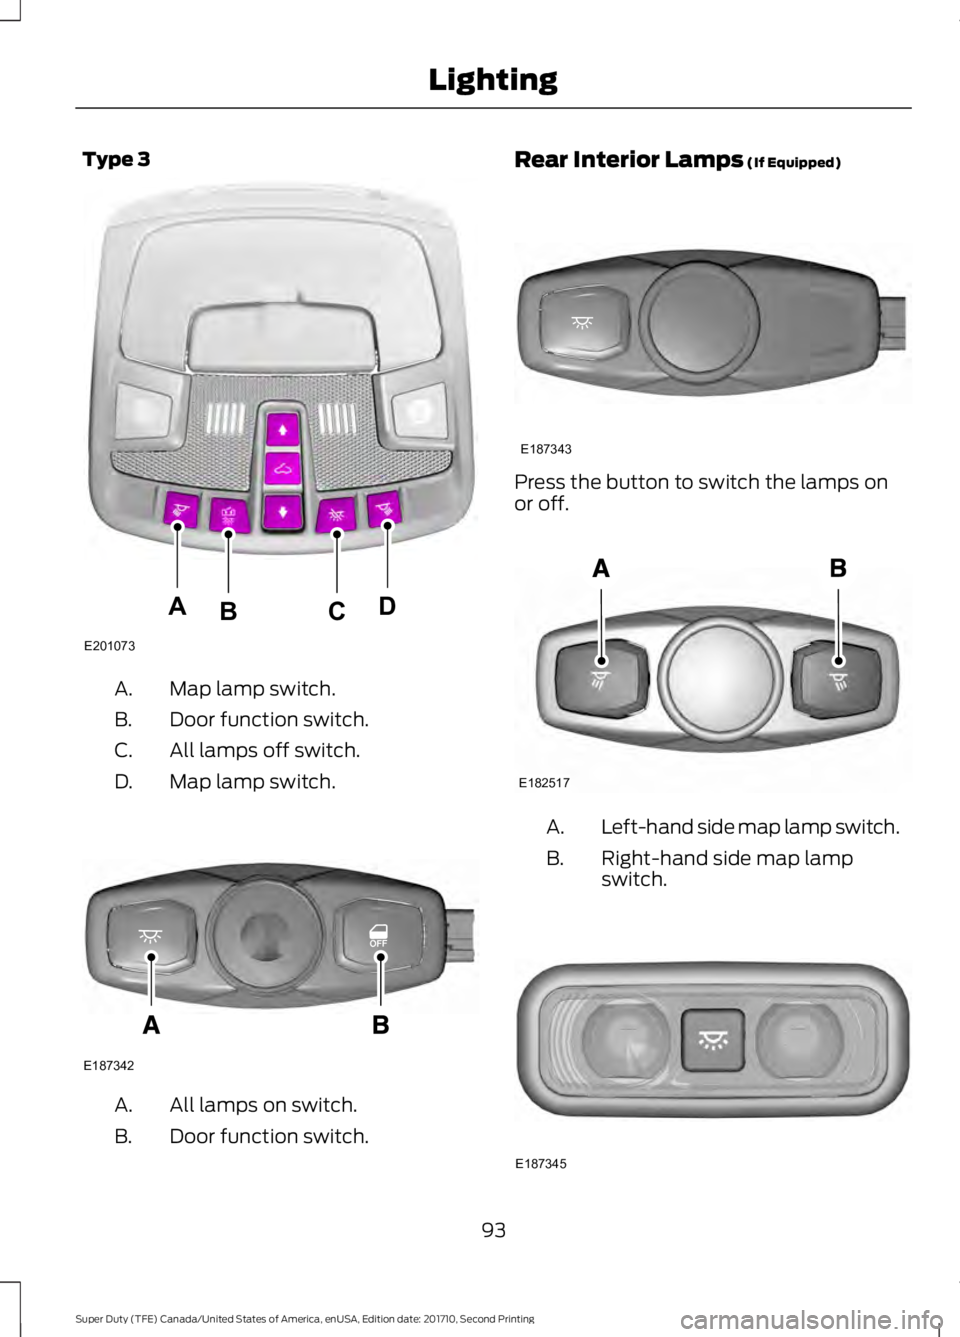
Type 3
Map lamp switch.A.
Door function switch.B.
All lamps off switch.C.
Map lamp switch.D.
All lamps on switch.A.
Door function switch.B.
Rear Interior Lamps (If Equipped)
Press the button to switch the lamps onor off.
Left-hand side map lamp switch.A.
Right-hand side map lampswitch.B.
93
Super Duty (TFE) Canada/United States of America, enUSA, Edition date: 201710, Second Printing
LightingE201073
ADCB E187342 E187343 E182517 E187345
Page 97 of 642
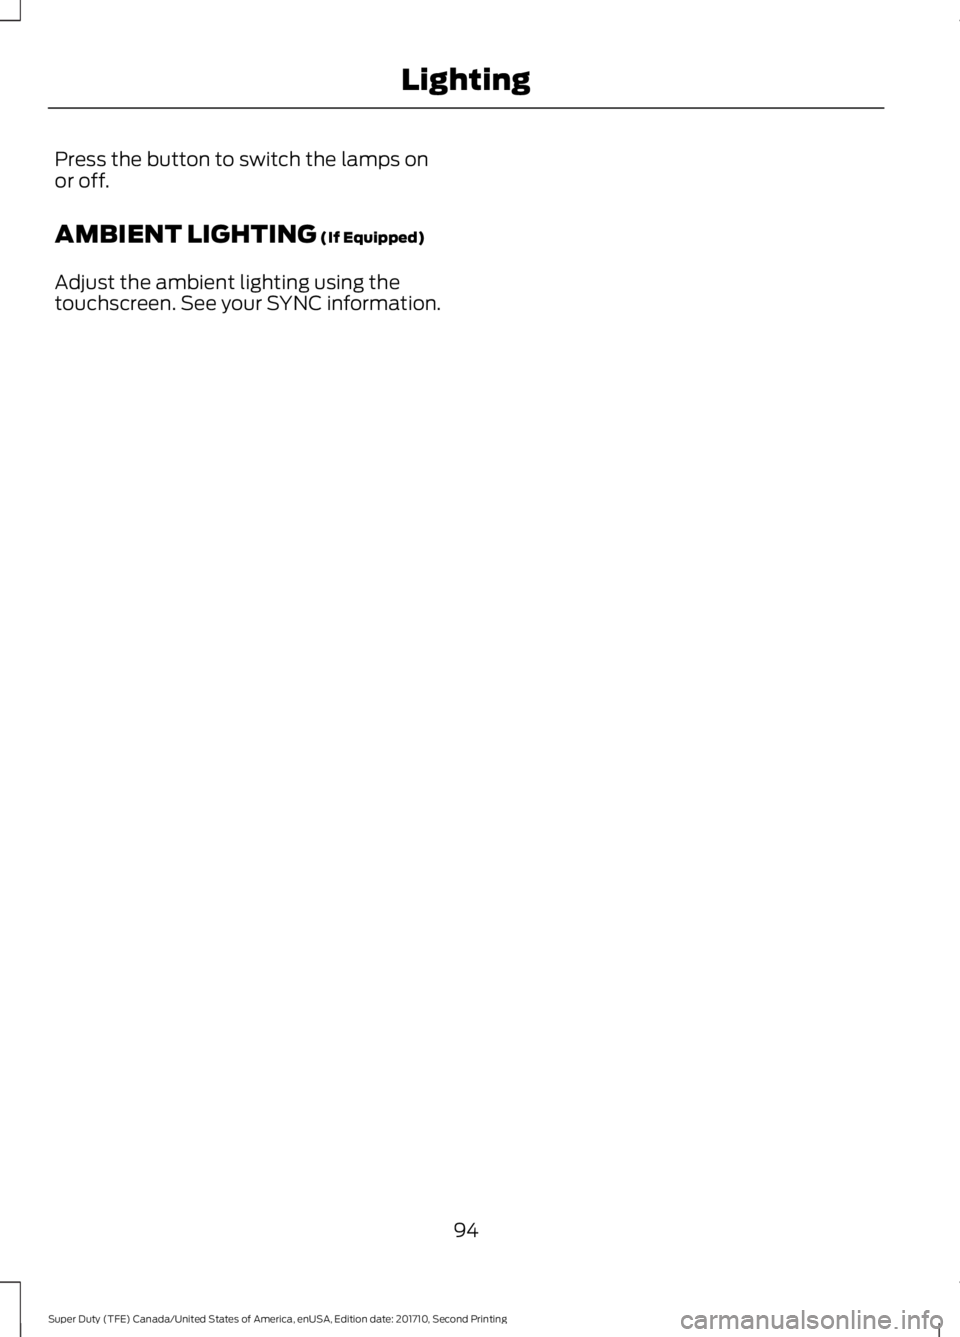
Press the button to switch the lamps onor off.
AMBIENT LIGHTING (If Equipped)
Adjust the ambient lighting using thetouchscreen. See your SYNC information.
94
Super Duty (TFE) Canada/United States of America, enUSA, Edition date: 201710, Second Printing
Lighting
Page 98 of 642
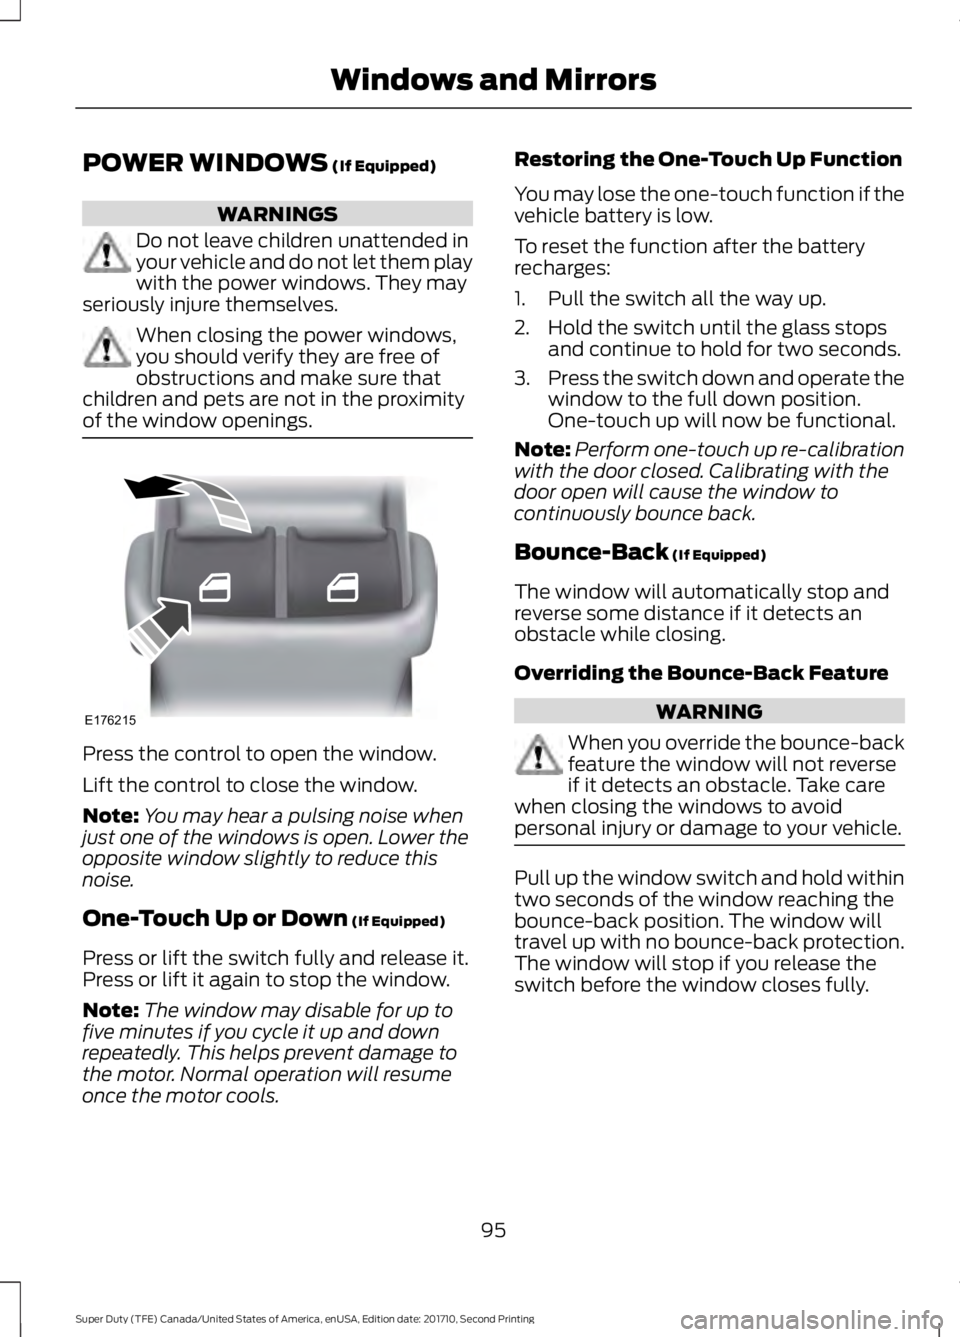
POWER WINDOWS (If Equipped)
WARNINGS
Do not leave children unattended inyour vehicle and do not let them playwith the power windows. They mayseriously injure themselves.
When closing the power windows,you should verify they are free ofobstructions and make sure thatchildren and pets are not in the proximityof the window openings.
Press the control to open the window.
Lift the control to close the window.
Note:You may hear a pulsing noise whenjust one of the windows is open. Lower theopposite window slightly to reduce thisnoise.
One-Touch Up or Down (If Equipped)
Press or lift the switch fully and release it.Press or lift it again to stop the window.
Note:The window may disable for up tofive minutes if you cycle it up and downrepeatedly. This helps prevent damage tothe motor. Normal operation will resumeonce the motor cools.
Restoring the One-Touch Up Function
You may lose the one-touch function if thevehicle battery is low.
To reset the function after the batteryrecharges:
1. Pull the switch all the way up.
2. Hold the switch until the glass stopsand continue to hold for two seconds.
3.Press the switch down and operate thewindow to the full down position.One-touch up will now be functional.
Note:Perform one-touch up re-calibrationwith the door closed. Calibrating with thedoor open will cause the window tocontinuously bounce back.
Bounce-Back (If Equipped)
The window will automatically stop andreverse some distance if it detects anobstacle while closing.
Overriding the Bounce-Back Feature
WARNING
When you override the bounce-backfeature the window will not reverseif it detects an obstacle. Take carewhen closing the windows to avoidpersonal injury or damage to your vehicle.
Pull up the window switch and hold withintwo seconds of the window reaching thebounce-back position. The window willtravel up with no bounce-back protection.The window will stop if you release theswitch before the window closes fully.
95
Super Duty (TFE) Canada/United States of America, enUSA, Edition date: 201710, Second Printing
Windows and MirrorsE176215
Page 99 of 642
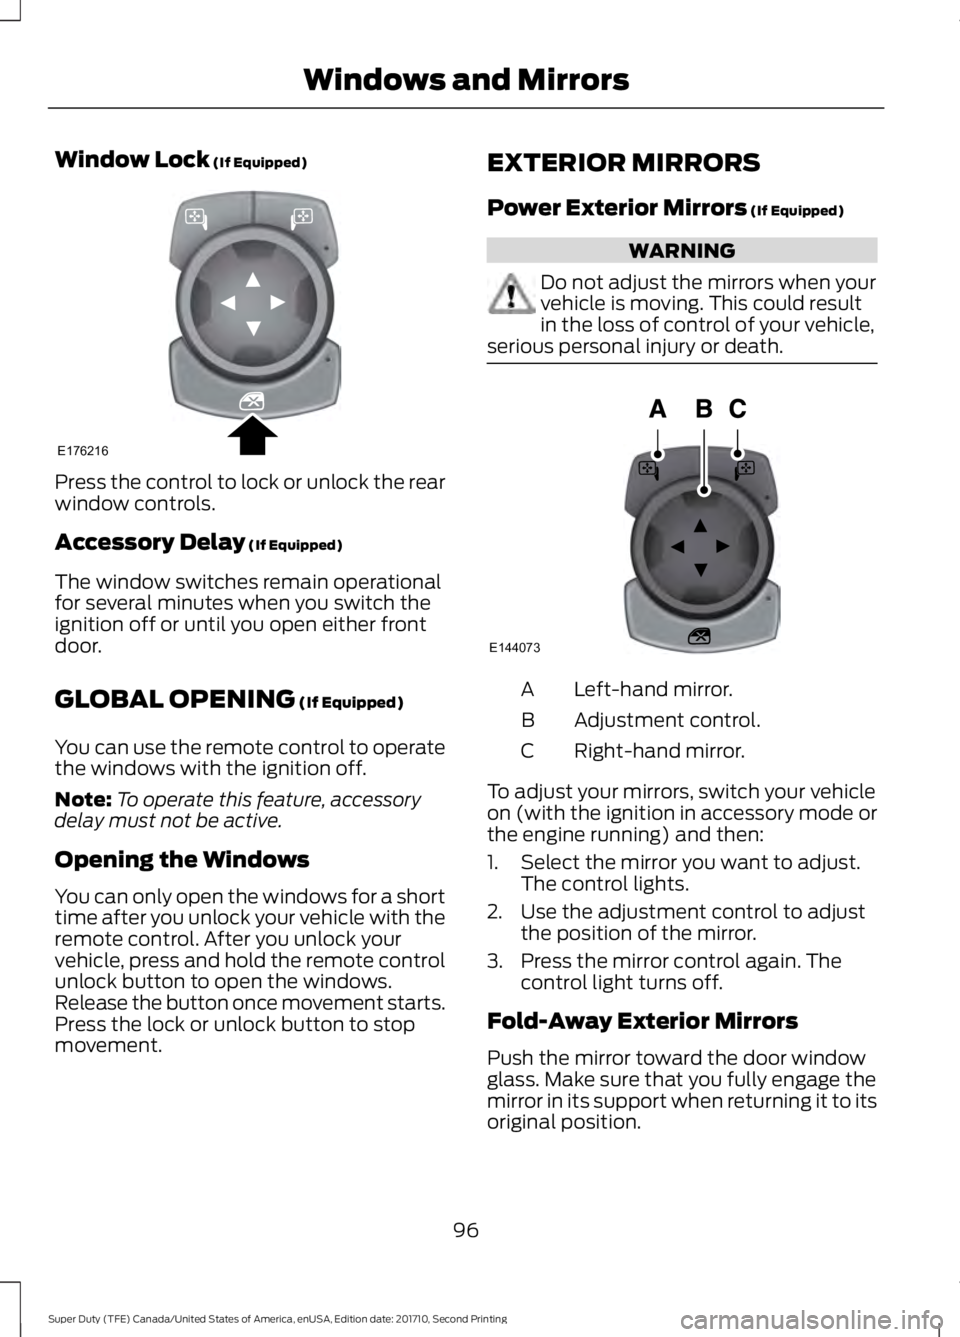
Window Lock (If Equipped)
Press the control to lock or unlock the rearwindow controls.
Accessory Delay (If Equipped)
The window switches remain operationalfor several minutes when you switch theignition off or until you open either frontdoor.
GLOBAL OPENING (If Equipped)
You can use the remote control to operatethe windows with the ignition off.
Note:To operate this feature, accessorydelay must not be active.
Opening the Windows
You can only open the windows for a shorttime after you unlock your vehicle with theremote control. After you unlock yourvehicle, press and hold the remote controlunlock button to open the windows.Release the button once movement starts.Press the lock or unlock button to stopmovement.
EXTERIOR MIRRORS
Power Exterior Mirrors (If Equipped)
WARNING
Do not adjust the mirrors when yourvehicle is moving. This could resultin the loss of control of your vehicle,serious personal injury or death.
Left-hand mirror.A
Adjustment control.B
Right-hand mirror.C
To adjust your mirrors, switch your vehicleon (with the ignition in accessory mode orthe engine running) and then:
1. Select the mirror you want to adjust.The control lights.
2. Use the adjustment control to adjustthe position of the mirror.
3. Press the mirror control again. Thecontrol light turns off.
Fold-Away Exterior Mirrors
Push the mirror toward the door windowglass. Make sure that you fully engage themirror in its support when returning it to itsoriginal position.
96
Super Duty (TFE) Canada/United States of America, enUSA, Edition date: 201710, Second Printing
Windows and MirrorsE176216 E144073
Page 100 of 642
Telescoping Mirrors
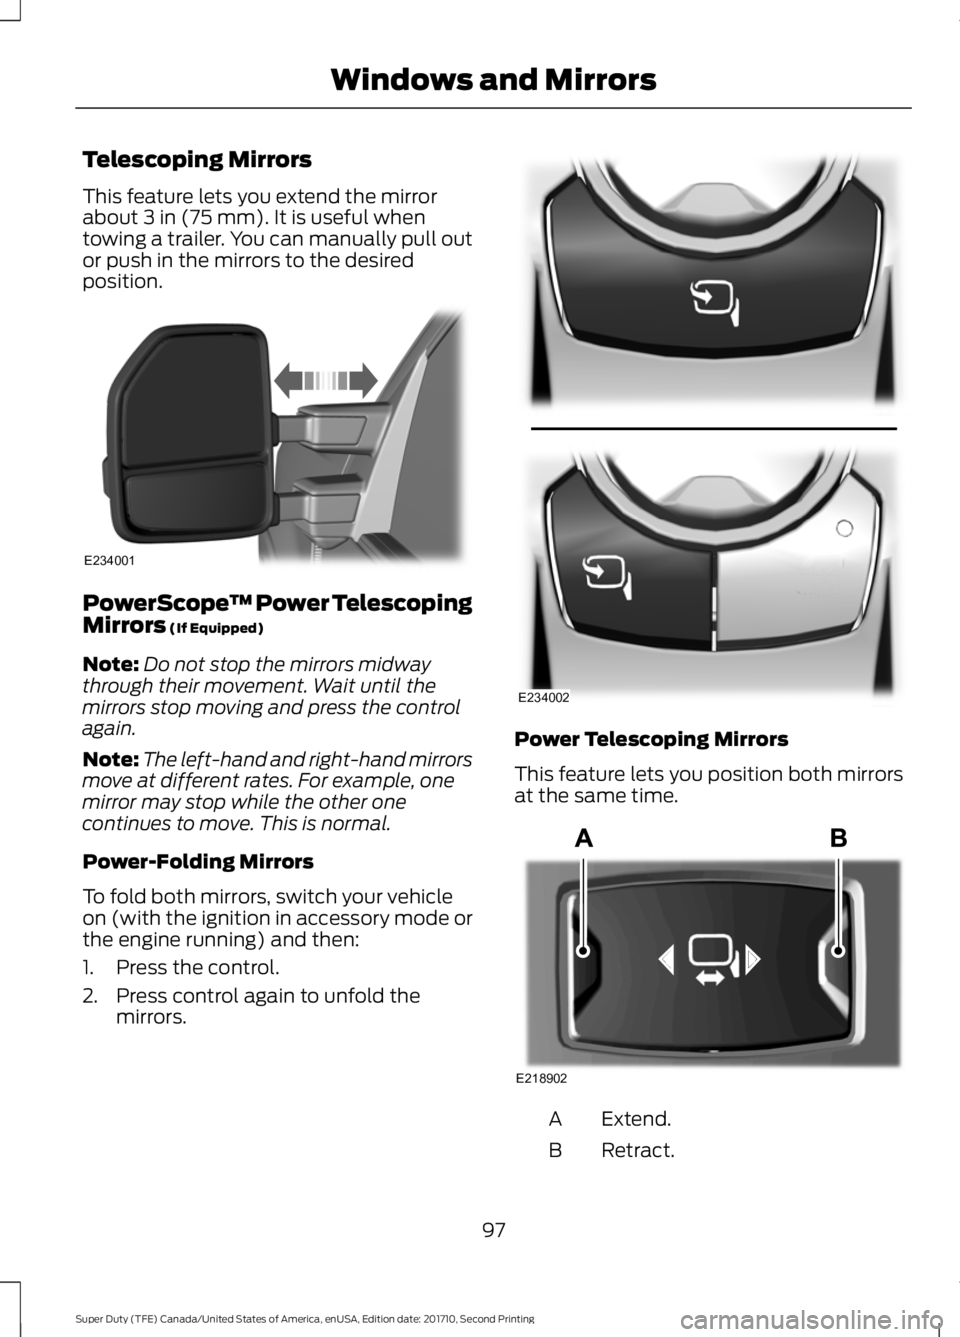
This feature lets you extend the mirrorabout 3 in (75 mm). It is useful whentowing a trailer. You can manually pull outor push in the mirrors to the desiredposition.
PowerScope™ Power TelescopingMirrors (If Equipped)
Note:Do not stop the mirrors midwaythrough their movement. Wait until themirrors stop moving and press the controlagain.
Note:The left-hand and right-hand mirrorsmove at different rates. For example, onemirror may stop while the other onecontinues to move. This is normal.
Power-Folding Mirrors
To fold both mirrors, switch your vehicleon (with the ignition in accessory mode orthe engine running) and then:
1. Press the control.
2. Press control again to unfold themirrors.
Power Telescoping Mirrors
This feature lets you position both mirrorsat the same time.
Extend.A
Retract.B
97
Super Duty (TFE) Canada/United States of America, enUSA, Edition date: 201710, Second Printing
Windows and MirrorsE234001 E234002 E218902