high beam FORD F250 SUPER DUTY 2020 Owners Manual
[x] Cancel search | Manufacturer: FORD, Model Year: 2020, Model line: F250 SUPER DUTY, Model: FORD F250 SUPER DUTY 2020Pages: 633, PDF Size: 9.18 MB
Page 5 of 633
Steering Wheel
Adjusting the Steering Wheel - Vehicles
With: Manual Adjustable Steering
Column .........................................................82
Adjusting the Steering Wheel - Vehicles With: Power Adjustable Steering
Column .........................................................
82
Audio Control .................................................
84
Voice Control ..................................................
84
Cruise Control - Vehicles With: Cruise Control ..........................................................
84
Cruise Control - Vehicles With: Adaptive Cruise Control ............................................
85
Information Display Control ......................
85
Heated Steering Wheel ..............................
85
Horn ...................................................................
85
Adjustable Pedals
Adjusting the Pedals ...................................
86
Wipers and Washers
Windshield Wipers ........................................
87
Autowipers .......................................................
87
Windshield Washers ....................................
88
Lighting
General Information ....................................
89
Lighting Control .............................................
89
Autolamps .......................................................
90
Instrument Lighting Dimmer ....................
90
Daytime Running Lamps - Vehicles With: Configurable Daytime Running Lamps
........................................................................\
..
90
Daytime Running Lamps - Vehicles With: Daytime Running Lamps (DRL) ...........
91
Front Fog Lamps ............................................
91
Direction Indicators ......................................
92
Spot Lamps .....................................................
92
Interior Lamps ................................................
92
Ambient Lighting ...........................................
93
Cargo Lamps ...................................................
93Automatic High Beam Control
What Is Automatic High Beam Control
........................................................................\
..
95
Switching Automatic High Beam Control On and Off ...................................................
95
Automatic High Beam Control Indicators ........................................................................\
..
95
Overriding Automatic High Beam Control ........................................................................\
..
95
Windows and Mirrors
Power Windows .............................................
97
Global Opening .............................................
98
Exterior Mirrors ...............................................
98
Interior Mirror ..................................................
101
Sliding Windows ...........................................
101
Sun Visors .......................................................
102
Moonroof ........................................................
102
Instrument Cluster
Gauges ............................................................
104
Warning Lamps and Indicators ..............
107
Audible Warnings and Indicators .............
111
Information Displays
General Information ....................................
112
Information Messages ...............................
123
Climate Control
Manual Climate Control ............................
142
Automatic Climate Control ......................
143
Hints on Controlling the Interior Climate - Vehicles With: Automatic
Temperature Control .............................
145
Hints on Controlling the Interior Climate - Vehicles With: Manual Temperature
Control ........................................................
146
Heated Windshield ......................................
147
Heated Rear Window .................................
147
Heated Exterior Mirrors ..............................
147
2
Super Duty (TFE) Canada/United States of America, enUSA, Edition date: 201909, Second-Printing Table of Contents
Page 92 of 633
GENERAL INFORMATION
Condensation in the Exterior Front
Lamps and Rear Lamps
Exterior front lamps and rear lamps have
vents to accommodate normal changes
in air pressure.
Condensation can be a natural by-product
of this design. When moist air enters the
lamp assembly through the vents, there is
a possibility that condensation can occur
when the temperature is cold. When
normal condensation occurs, a fine mist
can form on the interior of the lens. The
fine mist eventually clears and exits
through the vents during normal operation.
Clearing time may take as long as 48 hours
under dry weather conditions.
Examples of acceptable condensation are:
•
The presence of a fine mist (no streaks,
drip marks or large droplets).
• A fine mist covers less than 50% of the
lens.
Examples of unacceptable condensation
are:
• A water puddle inside the lamp.
• Streaks, drip marks or large droplets
present on the interior of the lens.
If you see any unacceptable condensation,
have your vehicle checked by an authorized
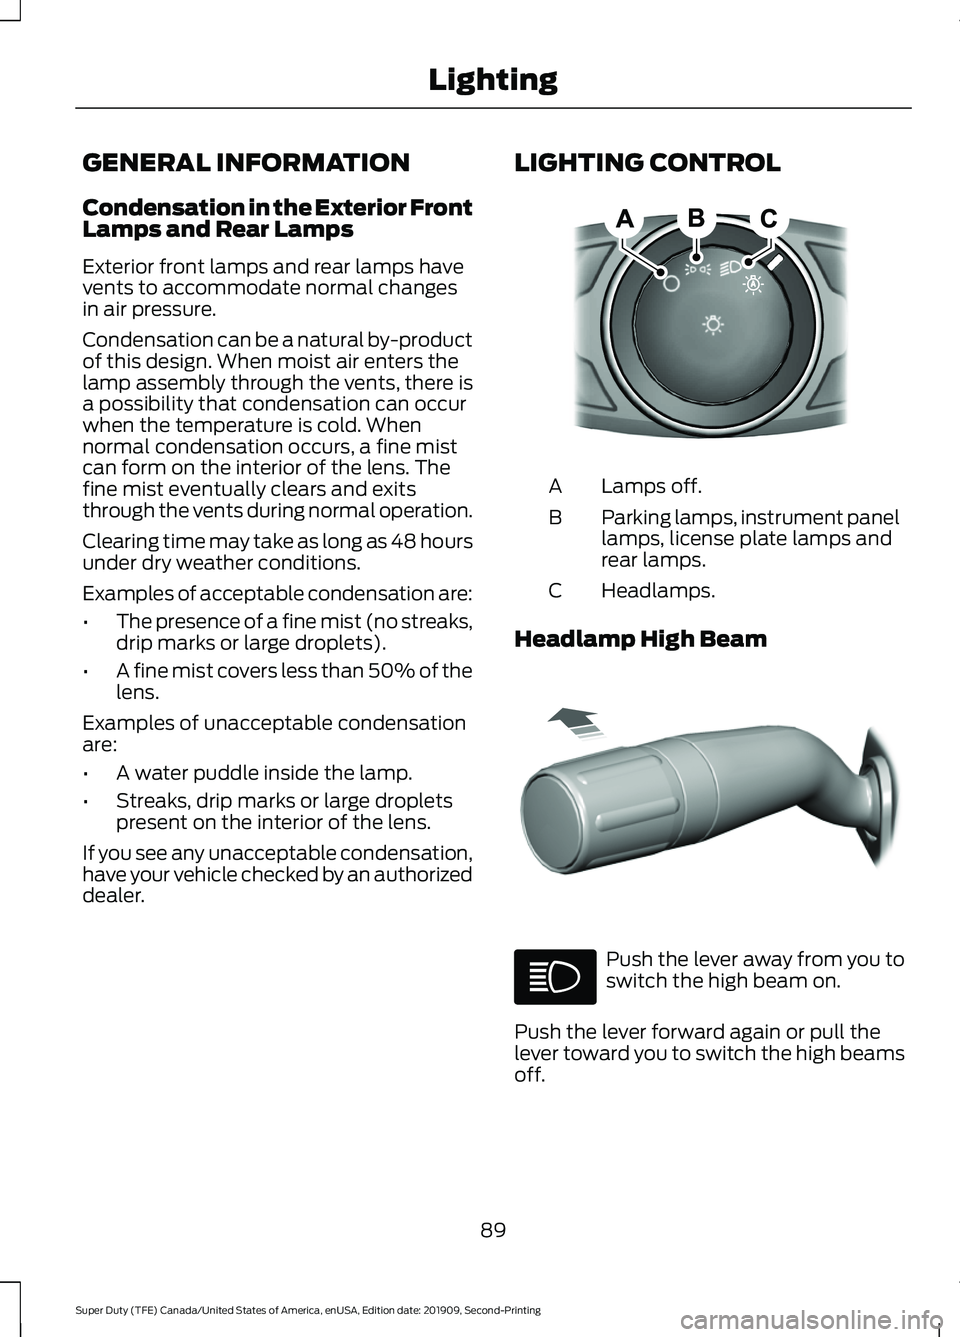
dealer. LIGHTING CONTROL Lamps off.
A
Parking lamps, instrument panel
lamps, license plate lamps and
rear lamps.
B
Headlamps.
C
Headlamp High Beam Push the lever away from you to
switch the high beam on.
Push the lever forward again or pull the
lever toward you to switch the high beams
off.
89
Super Duty (TFE) Canada/United States of America, enUSA, Edition date: 201909, Second-Printing LightingE142449 E308790
Page 93 of 633
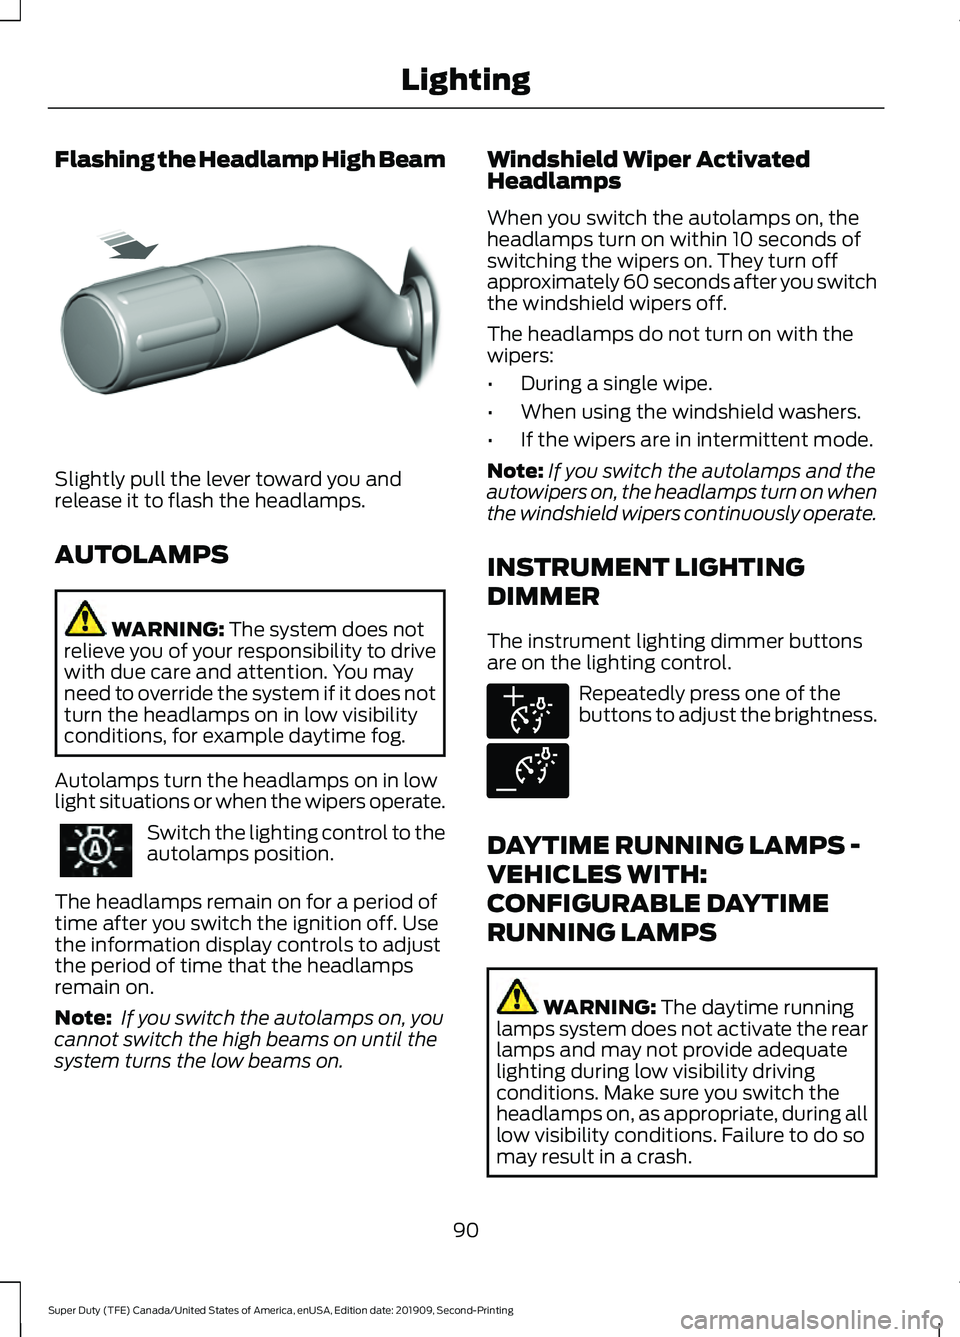
Flashing the Headlamp High Beam
Slightly pull the lever toward you and
release it to flash the headlamps.
AUTOLAMPS
WARNING: The system does not
relieve you of your responsibility to drive
with due care and attention. You may
need to override the system if it does not
turn the headlamps on in low visibility
conditions, for example daytime fog.
Autolamps turn the headlamps on in low
light situations or when the wipers operate. Switch the lighting control to the
autolamps position.
The headlamps remain on for a period of
time after you switch the ignition off. Use
the information display controls to adjust
the period of time that the headlamps
remain on.
Note: If you switch the autolamps on, you
cannot switch the high beams on until the
system turns the low beams on. Windshield Wiper Activated
Headlamps
When you switch the autolamps on, the
headlamps turn on within 10 seconds of
switching the wipers on. They turn off
approximately 60 seconds after you switch
the windshield wipers off.
The headlamps do not turn on with the
wipers:
•
During a single wipe.
• When using the windshield washers.
• If the wipers are in intermittent mode.
Note: If you switch the autolamps and the
autowipers on, the headlamps turn on when
the windshield wipers continuously operate.
INSTRUMENT LIGHTING
DIMMER
The instrument lighting dimmer buttons
are on the lighting control. Repeatedly press one of the
buttons to adjust the brightness.
DAYTIME RUNNING LAMPS -
VEHICLES WITH:
CONFIGURABLE DAYTIME
RUNNING LAMPS WARNING:
The daytime running
lamps system does not activate the rear
lamps and may not provide adequate
lighting during low visibility driving
conditions. Make sure you switch the
headlamps on, as appropriate, during all
low visibility conditions. Failure to do so
may result in a crash.
90
Super Duty (TFE) Canada/United States of America, enUSA, Edition date: 201909, Second-Printing LightingE311233 E291299 E291298
Page 98 of 633
WHAT IS AUTOMATIC HIGH
BEAM CONTROL
The system turns on high beams if it is dark
enough and no other traffic is present. If it
detects an approaching vehicle
’s
headlamps or tail lamps, or street lighting
ahead, the system turns the high beams
off. Low beams remain on.
A camera sensor, centrally mounted
behind the windshield of your vehicle,
continuously monitors conditions to turn
the high beams on and off.
SWITCHING AUTOMATIC HIGH
BEAM CONTROL ON AND OFF
Switch the system on or off using the
information display. See General
Information (page 112).
Activating the Automatic High
Beam Control Switch the lighting control to the
autolamps position to activate.
See
Autolamps (page 90).
Note: Automatic high beams are not
available when autolamps are not turned
on.
When active, the high beams turn on if:
• The ambient light level is low enough.
• There is no traffic in front of your
vehicle.
• The vehicle speed is greater than
approximately
32 mph (52 km/h).
When active, the high beams turn off if:
• The ambient light level is high enough
that high beams are not required.
• The system detects an approaching
vehicle's headlamps or tail lamps.
• The system detects severe rain, snow
or fog. •
The camera is blocked.
• The vehicle speed falls below
approximately
27 mph (44 km/h).
Note: The deactivation speed is lower on
curves.
Note: High beam reactivation may be
delayed in certain curvy road situations.
Note: The system may not operate properly
if the sensor is blocked. Keep the windshield
free from obstruction or damage.
Note: The system may not operate properly
in cold or inclement conditions. You can
switch on the high beams by overriding the
system.
Note: If the system detects a blockage, for
example bird droppings, bug splatter, snow
or ice, the system goes into low beam mode
until you clear the blockage. A message may
appear in the information display if the
camera is blocked.
Note: Using much larger tires or equipping
vehicle accessories such as snowplows can
modify your vehicle's ride height and
degrade automatic high beam control
performance.
AUTOMATIC HIGH BEAM
CONTROL INDICATORS The indicator illuminates to
confirm when the system is
ready to assist.
OVERRIDING AUTOMATIC
HIGH BEAM CONTROL WARNING:
The system does not
relieve you of your responsibility to drive
with due care and attention. You may
need to override the system if it does not
turn the high beams on or off.
95
Super Duty (TFE) Canada/United States of America, enUSA, Edition date: 201909, Second-Printing Automatic High Beam Control
(If Equipped)
Page 99 of 633
WARNING: You may need to
override the system when approaching
other road users. WARNING:
You may need to
override the system during inclement
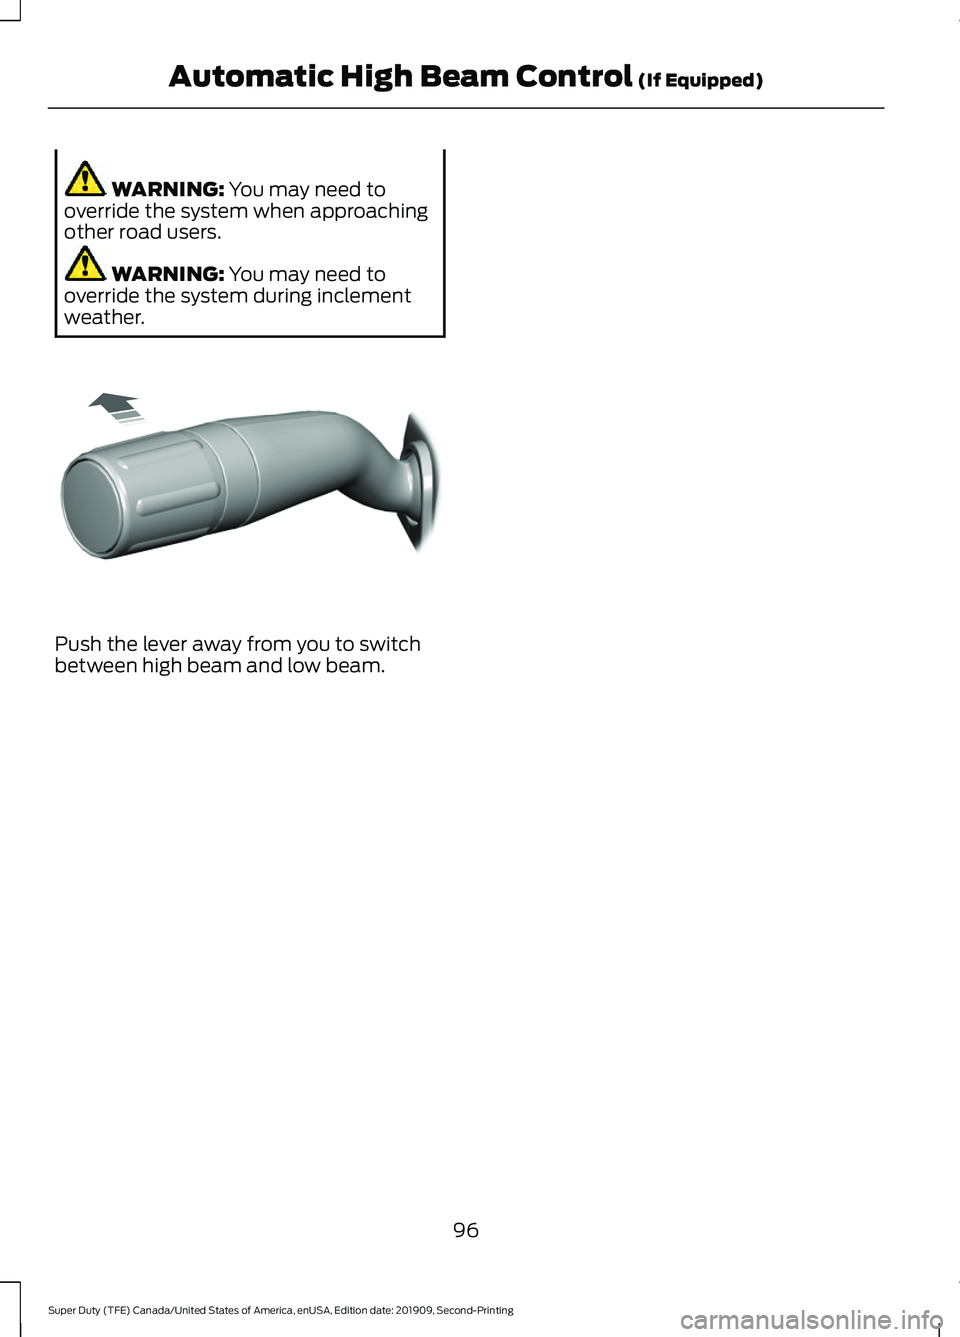
weather. Push the lever away from you to switch
between high beam and low beam.
96
Super Duty (TFE) Canada/United States of America, enUSA, Edition date: 201909, Second-Printing Automatic High Beam Control
(If Equipped)E308790
Page 110 of 633
WARNING LAMPS AND
INDICATORS
The following warning lamps and
indicators alert you to a vehicle condition
that may become serious. Some lamps
illuminate when you start your vehicle to
make sure they work. If any lamps remain
on after starting your vehicle, refer to the
respective system warning lamp for further
information.
Note:
Some warning indicators appear in
the information display and operate the
same as a warning lamp but do not
illuminate when you start your vehicle.
Adaptive Cruise Control (If Equipped) The speed control system
indicator light changes color to
indicate what mode the system
is in. See Using Adaptive Cruise Control
(page
242).
On (white light): Illuminates when the
adaptive cruise control system is turned
on. Turns off when the speed control
system is turned off.
Engaged (green light): Illuminates when
the adaptive cruise control system is
engaged. Turns off when the speed control
system is disengaged.
Adaptive Steering
(If Equipped) The adaptive steering system
indicator illuminates if the
system detects a fault during the
continuous diagnostic checks. Adaptive Steering Initialization (yellow,
flashing): The adaptive steering system
has detected a difference between
steering wheel angle and the desired road
wheel angle. The steering wheel adjusts
itself to correct this difference. This
adjustment is part of normal system
operation.
Adaptive Steering Off (yellow, solid): The
adaptive steering system is off. It is
possible that the steering wheel may not
be straight when the vehicle is driving
straight ahead. If this message persists,
see an authorized dealer.
Adaptive Steering Loss (red, solid): The
adaptive steering system integrity cannot
be verified. Do not drive the vehicle and
contact an authorized dealer immediately.
See
Steering (page 261).
Anti-Lock Braking System It illuminates momentarily when
you switch on the ignition to
confirm that the lamp is
functional. If it does not illuminate when
you switch on the ignition or begins to flash
at anytime, have the system checked as
soon as possible.
If it illuminates when you are driving, this
indicates a malfunction. You will continue
to have the normal braking system
(without ABS) unless the brake system
warning lamp is also illuminated. Have the
system checked as soon as possible.
Automatic High Beam
(If Equipped) Illuminates when this feature is
on. See
What Is Automatic
High Beam Control (page 95).
107
Super Duty (TFE) Canada/United States of America, enUSA, Edition date: 201909, Second-Printing Instrument ClusterE144524 E223375
Page 112 of 633
Direction Indicator
Illuminates when the left or right
turn signal or the hazard warning
flasher is turned on. If the
indicators stay on or flash faster, check for
a burned out bulb.
Door Ajar Displays when the ignition is on
and any door is not completely
closed.
Electronic Locking Differential (If
Equipped) Illuminates when using the
electronic locking differential.
Engine Coolant Temperature Illuminates when the engine
coolant temperature is high.
Stop the vehicle as soon as
possible, switch off the engine and let cool.
Engine Oil If it illuminates with the engine
running or when you are driving,
this indicates a malfunction.
Stop your vehicle as soon as it is safe to
do so and switch the engine off. Check the
engine oil level.
See
Engine Oil Check (page 346).
Note: Do not resume your journey if it
illuminates despite the level being correct.
Have the system checked by your authorized
dealer immediately.
Fasten Seatbelt It illuminates and a chime
sounds to remind you to fasten
your seatbelt. Front Airbag If it fails to illuminate when you
start your vehicle, continues to
flash or remains on, it indicates
a malfunction. Have the system checked
by your authorized dealer.
Front Fog Lamps
(If Equipped) It illuminates when you switch
the front fog lamps on.
High Beam Illuminates when you switch the
high beam headlamps on. It will
flash when you use the
headlamp flasher.
Hill Descent
(If Equipped) Illuminates when hill descent is
switched on.
Low Fuel Level Illuminates when the fuel level
is low or the fuel tank is nearly
empty. Refuel as soon as
possible.
Low Tire Pressure Warning It illuminates if the tire pressure
in one or more tires is below the
correct tire pressure.
It also illuminates momentarily when you
switch the ignition on to confirm the lamp
is functional. If it does not illuminate when
you switch the ignition on, or begins to
flash at any time, have the system checked
by your authorized dealer.
109
Super Duty (TFE) Canada/United States of America, enUSA, Edition date: 201909, Second-Printing Instrument Cluster E163170 E71880 E67017 E163171
Page 245 of 633
RESUMING THE SET SPEED
Press the button.
CRUISE CONTROL
INDICATORS Illuminates when you switch the
system on.
USING ADAPTIVE CRUISE
CONTROL WARNING: You are responsible for
controlling your vehicle at all times. The
system is designed to be an aid and does
not relieve you of your responsibility to
drive with due care and attention. Failure
to follow this instruction could result in
the loss of control of your vehicle,
personal injury or death. WARNING: Pay close attention to
changing road conditions such as
entering or leaving a highway, on roads
with intersections or roundabouts, roads
without visible lanes of travel, roads that
are winding, slippery, unpaved, or steep
slopes. WARNING:
Do not use the system
in poor visibility, for example fog, heavy
rain, spray or snow. WARNING:
Do not use the system
when towing a trailer that has
aftermarket electronic trailer brake
controls. Failure to follow this instruction
could result in the loss of control of your
vehicle, personal injury or death. WARNING:
Do not use tire sizes
other than those recommended because
this can affect the normal operation of
the system. Failure to do so may result
in a loss of vehicle control, which could
result in serious injury. WARNING:
The system may not
detect stationary or slow moving
vehicles below
6 mph (10 km/h). WARNING:
The system does not
detect pedestrians or objects in the road. WARNING:
The system does not
detect oncoming vehicles in the same
lane. WARNING:
The system is not a
crash warning or avoidance system. WARNING:
Do not use the system
with a snow plow blade installed.
The system adjusts your vehicle speed to
maintain the set gap between you and the
vehicle in front of you in the same lane.
You can select four gap settings.
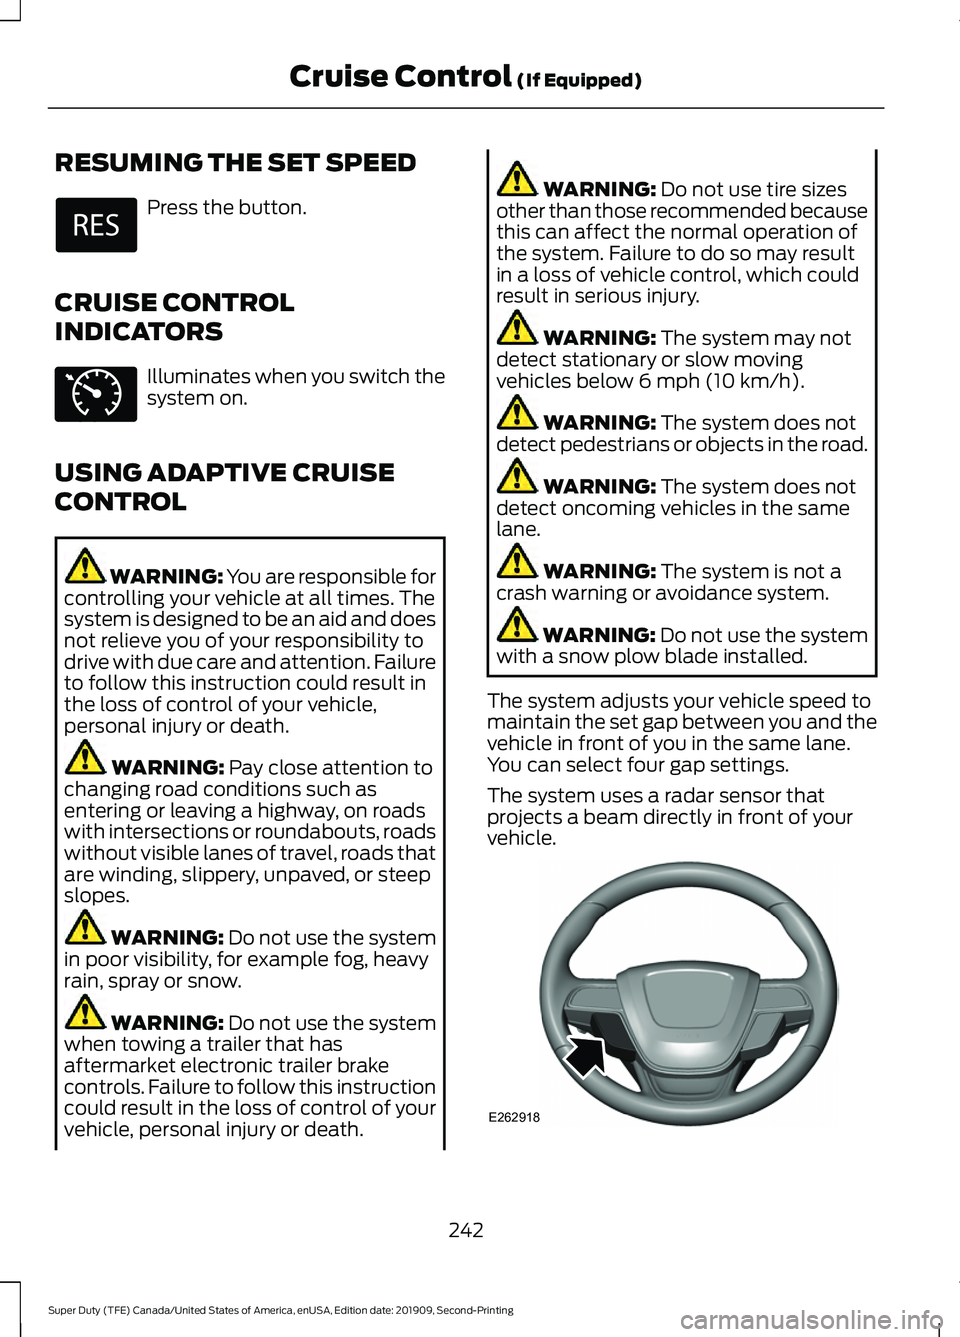
The system uses a radar sensor that
projects a beam directly in front of your
vehicle. 242
Super Duty (TFE) Canada/United States of America, enUSA, Edition date: 201909, Second-Printing Cruise Control
(If Equipped) E71340 E262918
Page 378 of 633
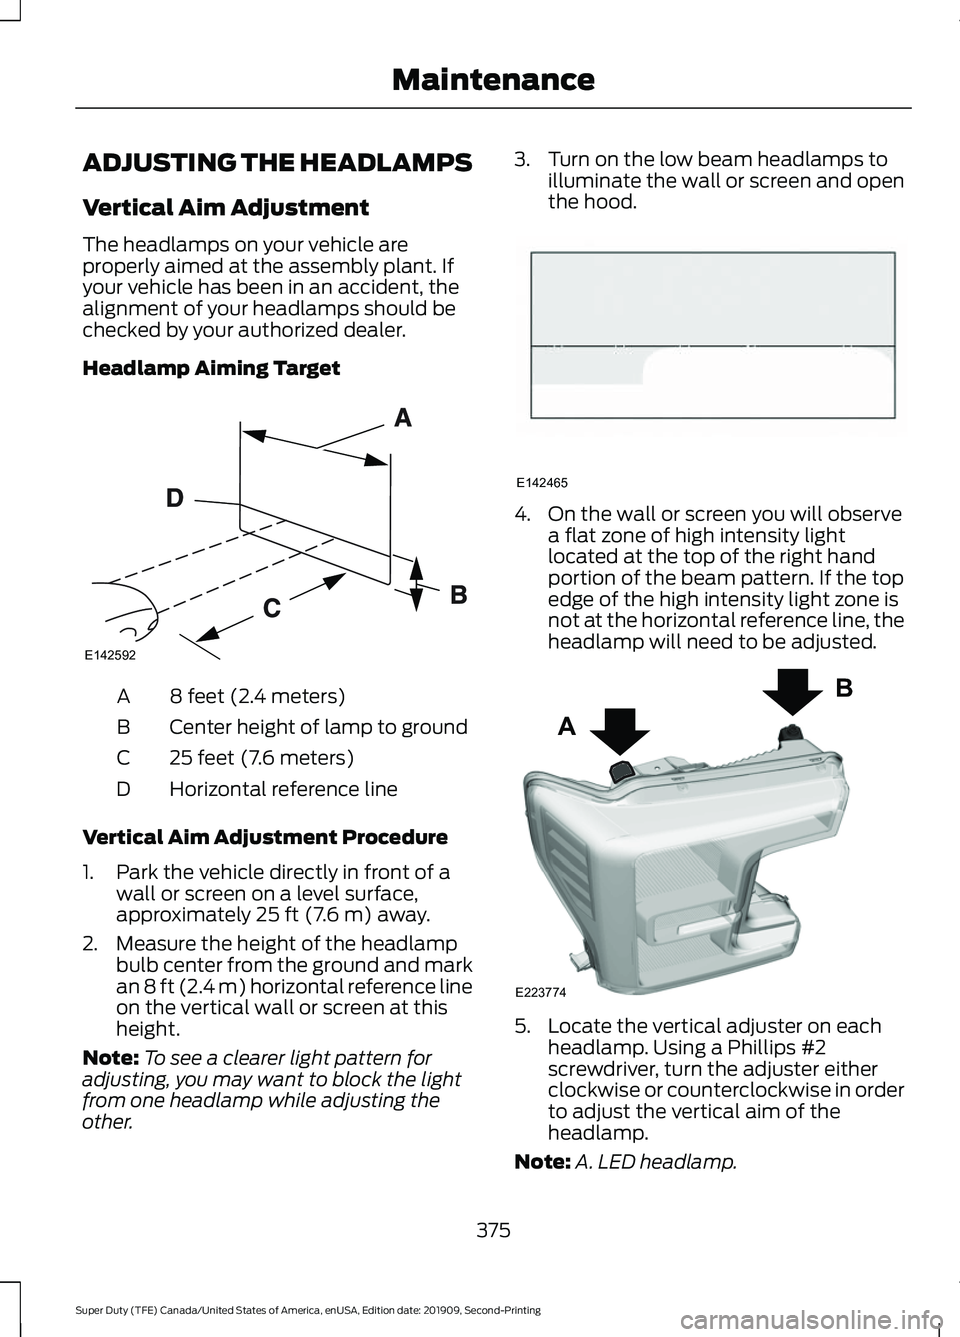
ADJUSTING THE HEADLAMPS
Vertical Aim Adjustment
The headlamps on your vehicle are
properly aimed at the assembly plant. If
your vehicle has been in an accident, the
alignment of your headlamps should be
checked by your authorized dealer.
Headlamp Aiming Target
8 feet (2.4 meters)
A
Center height of lamp to ground
B
25 feet (7.6 meters)
C
Horizontal reference line
D
Vertical Aim Adjustment Procedure
1. Park the vehicle directly in front of a wall or screen on a level surface,
approximately 25 ft (7.6 m) away.
2. Measure the height of the headlamp bulb center from the ground and mark
an
8 ft (2.4 m) horizontal reference line
on the vertical wall or screen at this
height.
Note: To see a clearer light pattern for
adjusting, you may want to block the light
from one headlamp while adjusting the
other. 3. Turn on the low beam headlamps to
illuminate the wall or screen and open
the hood. 4. On the wall or screen you will observe
a flat zone of high intensity light
located at the top of the right hand
portion of the beam pattern. If the top
edge of the high intensity light zone is
not at the horizontal reference line, the
headlamp will need to be adjusted. 5. Locate the vertical adjuster on each
headlamp. Using a Phillips #2
screwdriver, turn the adjuster either
clockwise or counterclockwise in order
to adjust the vertical aim of the
headlamp.
Note: A. LED headlamp.
375
Super Duty (TFE) Canada/United States of America, enUSA, Edition date: 201909, Second-Printing MaintenanceE142592 E142465 A
B
E223774
Page 619 of 633
Accessing the Phone Features....................
480
Accessing the Settings Menu....................... 480
Accessing the Sound Settings..................... 480
Adjusting the Volume....................................... 481
Changing Radio Stations................................. 481
Listening to the Radio....................................... 481
Playing or Pausing Media................................ 481
Switching Radio Text On and Off.................481
Switching Repeat Mode On and Off...........481
Switching Shuffle Mode On and Off...........481
Switching the Audio Unit On and Off.........481
Switching the Display On and Off...............481
Using Seek, Fast Forward and Reverse............................................................. 482
Using the Display Control............................... 482
Using the Number Block................................. 482
Autolamps........................................................90 Windshield Wiper Activated
Headlamps........................................................ 90
Automatic Climate Control.......................143 Directing the Airflow.......................................... 143
Setting the Blower Motor Speed.................. 144
Setting the Temperature................................. 144
Switching Auto Mode On and Off................144
Switching Dual Zone Mode On and Off....................................................................... 144
Switching Maximum Air Conditioning On and Off.............................................................. 144
Switching Maximum Defrost On and Off....................................................................... 144
Switching Recirculated Air On and Off........................................................................\
145
Switching the Air Conditioning On and Off....................................................................... 144
Switching the Climate Control On and Off....................................................................... 144
Automatic High Beam Control.................95
Automatic High Beam Control Indicators.......................................................95
Automatic Transmission...........................207
Brake-Shift Interlock........................................ 209
For F350, F450, F550 and F600 Chassis Cab Vehicles................................................... 209
If Your Vehicle Gets Stuck in Mud or Snow.................................................................... 211
Understanding the Shift Positions of Your Automatic Transmission............................ 207Understanding Your SelectShift
Automatic ™ Transmission....................... 208
Automatic Transmission Fluid Check
.............................................................370
Autowipers........................................................87
Auxiliary Power Points
................................167
400 Watt AC Power Point............................... 167
DC Power Point.................................................... 167
Locations............................................................... 168
Auxiliary Switches
........................................551
Upfitter Interface Module............................... 554
B
Battery See: Changing the 12V Battery...................... 373
Bed Extender....................................................73 Grocery mode........................................................ 75
Tailgate mode........................................................ 74
Bed Ramps.....................................................274 Installing the Ramp Holder............................ 276
Stowing the Bed Ramp.................................... 276
Using the Bed Ramp......................................... 275
Blind Spot Information System..............253 Blind Spot Information System with Trailer
Tow..................................................................... 255
Switching the System Off and On...............257
System Errors....................................................... 257
Using the System............................................... 254
BLIS See: Blind Spot Information System..........253
Bonnet Lock See: Opening and Closing the Hood..........342
Booster Seats..................................................33 Types of Booster Seats...................................... 34
Brake Fluid Check.........................................371 Brake Fluid Service Interval............................ 372
Brakes...............................................................222 General Information.......................................... 222
Breaking-In......................................................315
Bulb Specification Chart
............................471
C
Canceling the Set Speed..........................230
Capacities and Specifications - 6.2L.................................................................441
Air Conditioning System.................................. 441
616
Super Duty (TFE) Canada/United States of America, enUSA, Edition date: 201909, Second-Printing Index