4WD FORD F350 1999 Owners Manual
[x] Cancel search | Manufacturer: FORD, Model Year: 1999, Model line: F350, Model: FORD F350 1999Pages: 248, PDF Size: 1.72 MB
Page 3 of 248
SPECIAL NOTICES
Notice to owners of diesel-powered vehicles
Read the 7.3 Liter Power Stroke Direct Injection Turbo Diesel Owner’s
Guide Supplement for information regarding correct operation and
maintenance of your diesel-powered light truck.
Notice to owners of utility type vehicles
Before you drive your vehicle, please read this Owner’s Guide carefully.
Your vehicle is not a passenger car. As with other vehicles of this type,
failure to operate this vehicle correctly may result in loss of control or an
accident.
Be sure to readDriving off roadin theDrivingchapter as well as the
“Four Wheeling” supplement included with 4WD and utility type vehicles.
Using your vehicle with a snowplow
For more information and guidelines for using your vehicle with a
snowplow, refer to theDrivingchapter.
Using your vehicle as an ambulance
If your light truck is equipped with theFord ambulance preparation
package,it may be utilized as an ambulance. Ford urges ambulance
manufacturers to follow the recommendations of theFord incomplete
vehicle manual, Ford truck body builder’s layout bookand theQVM
guidelinesas well as pertinent supplements. For additional information,
please contact the Light Truck Body Builders Advisory Service
1–800–635–5560.
Use of your Ford light truck as an ambulance, without the Ford
Ambulance Preparation Package voids the Ford New Vehicle Limited
Warranty and may void the Emissions Warranties. In addition, ambulance
usage without the preparation package could cause high underbody
temperatures, overpressurized fuel and a risk of spraying fuel which
could lead to fires.
Introduction
3
ProCarManuals.com
Page 7 of 248
1
2
3
4
5
6
FM1ST
SCANEJ
REW
FF
SIDE 1-2
COMP
SHUFFLE
TAPE
CDDISCS
B
A
S
ST
R
E
BB
A
LF
A
D
EA
U
T
O
S
E
TVOL - PUSH ON
SEEKTUNE
A
M
F
M
w
A/C
MAX
A/COFFOFF
OFF ON
P
A
S
S
E
N
G
E
R
A
I
R
B
A
G
O
V
E
R
D
R
I
V
E
W
D4
X
4
H
I
G
H4
X
4
L
O
W
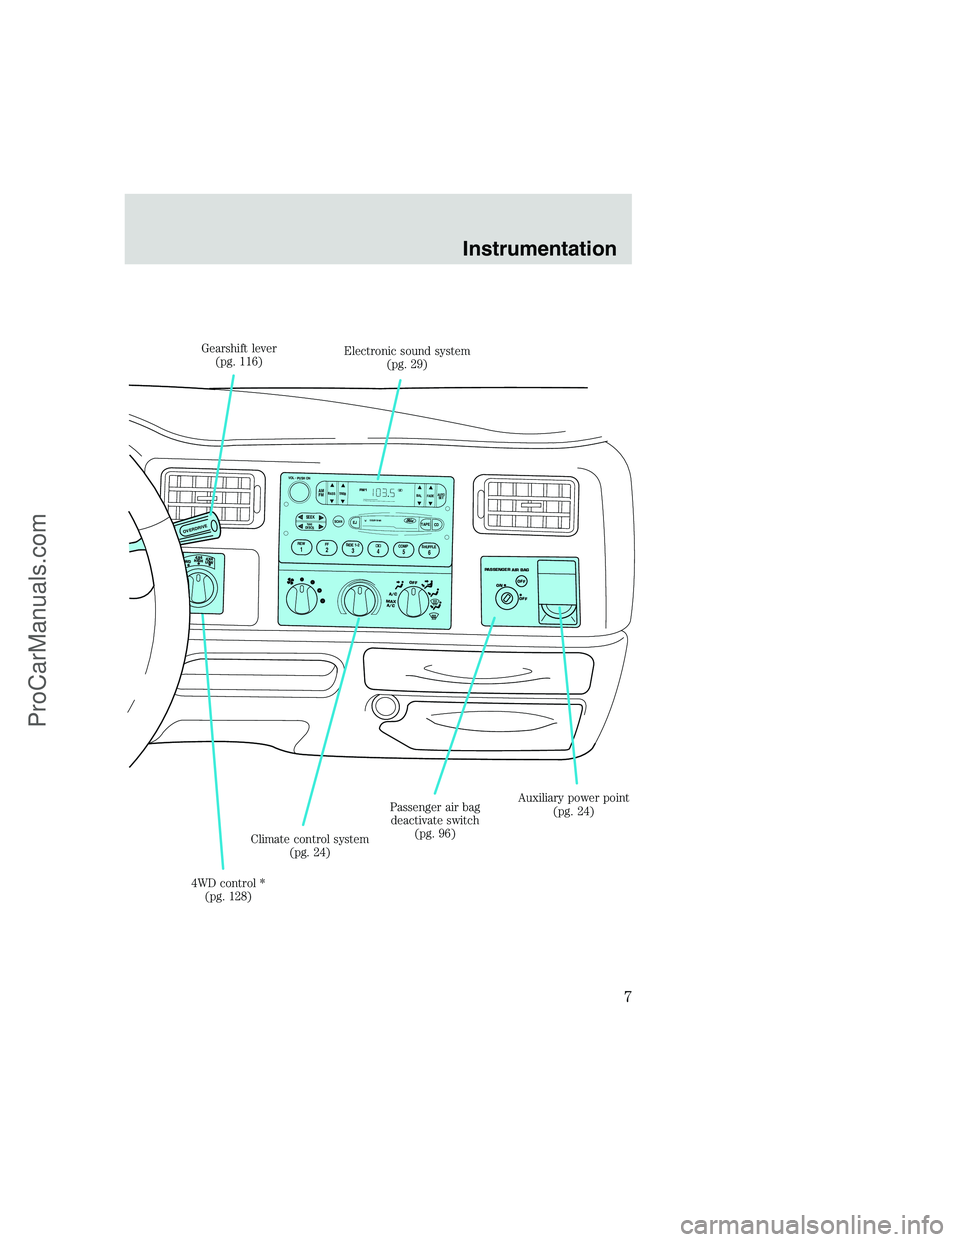
Passenger air bag
deactivate switch
(pg. 96)
Climate control system
(pg. 24) Gearshift lever
(pg. 116)
Auxiliary power point
(pg. 24) Electronic sound system
(pg. 29)
4WD control *
(pg. 128)
Instrumentation
7
ProCarManuals.com
Page 23 of 248
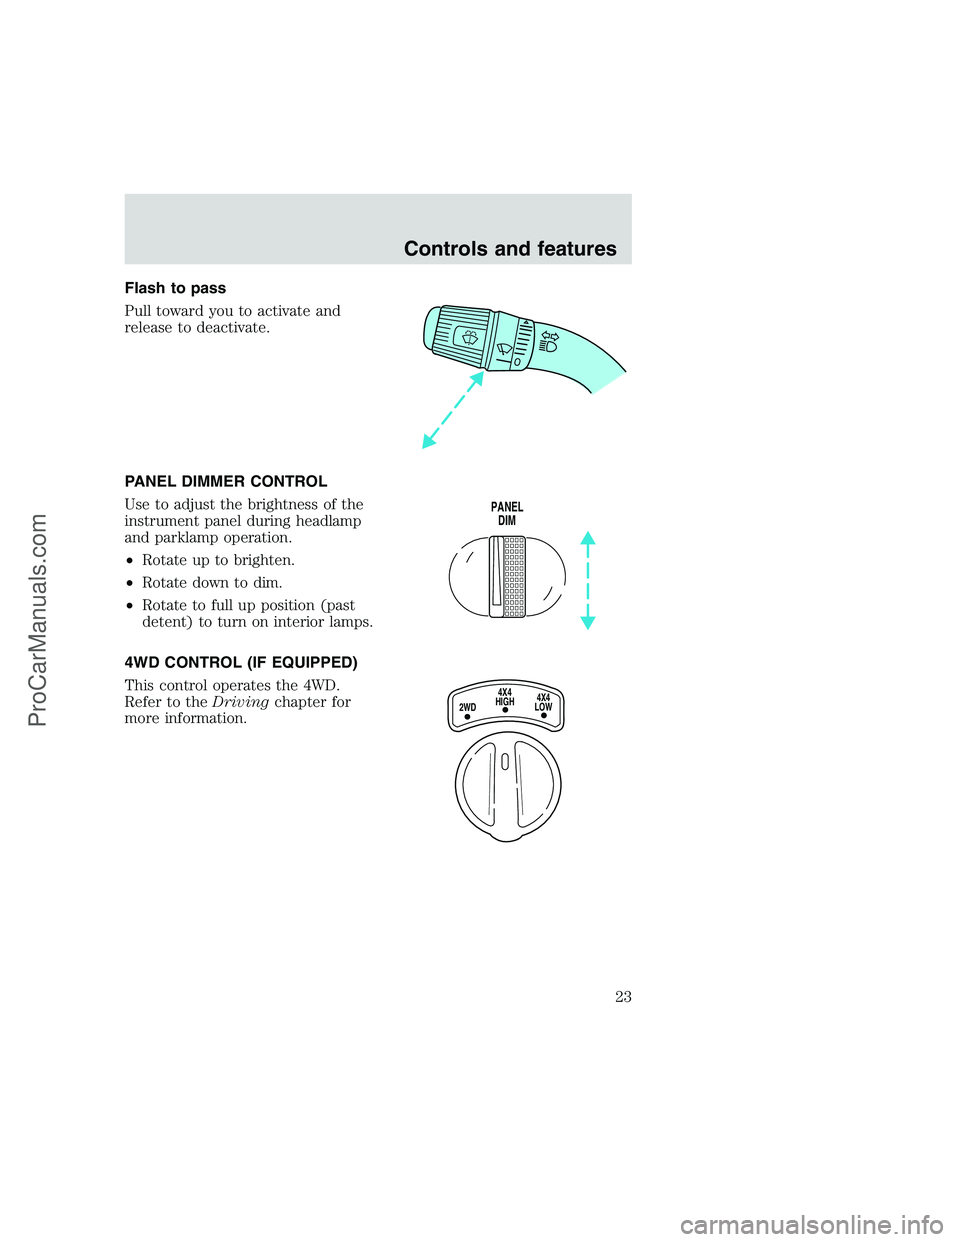
Flash to pass
Pull toward you to activate and
release to deactivate.
PANEL DIMMER CONTROL
Use to adjust the brightness of the
instrument panel during headlamp
and parklamp operation.
•Rotate up to brighten.
•Rotate down to dim.
•Rotate to full up position (past
detent) to turn on interior lamps.
4WD CONTROL (IF EQUIPPED)
This control operates the 4WD.
Refer to theDrivingchapter for
more information.
PANEL
DIM
4X4
HIGH
2WD4X4
LOW
Controls and features
23
ProCarManuals.com
Page 120 of 248
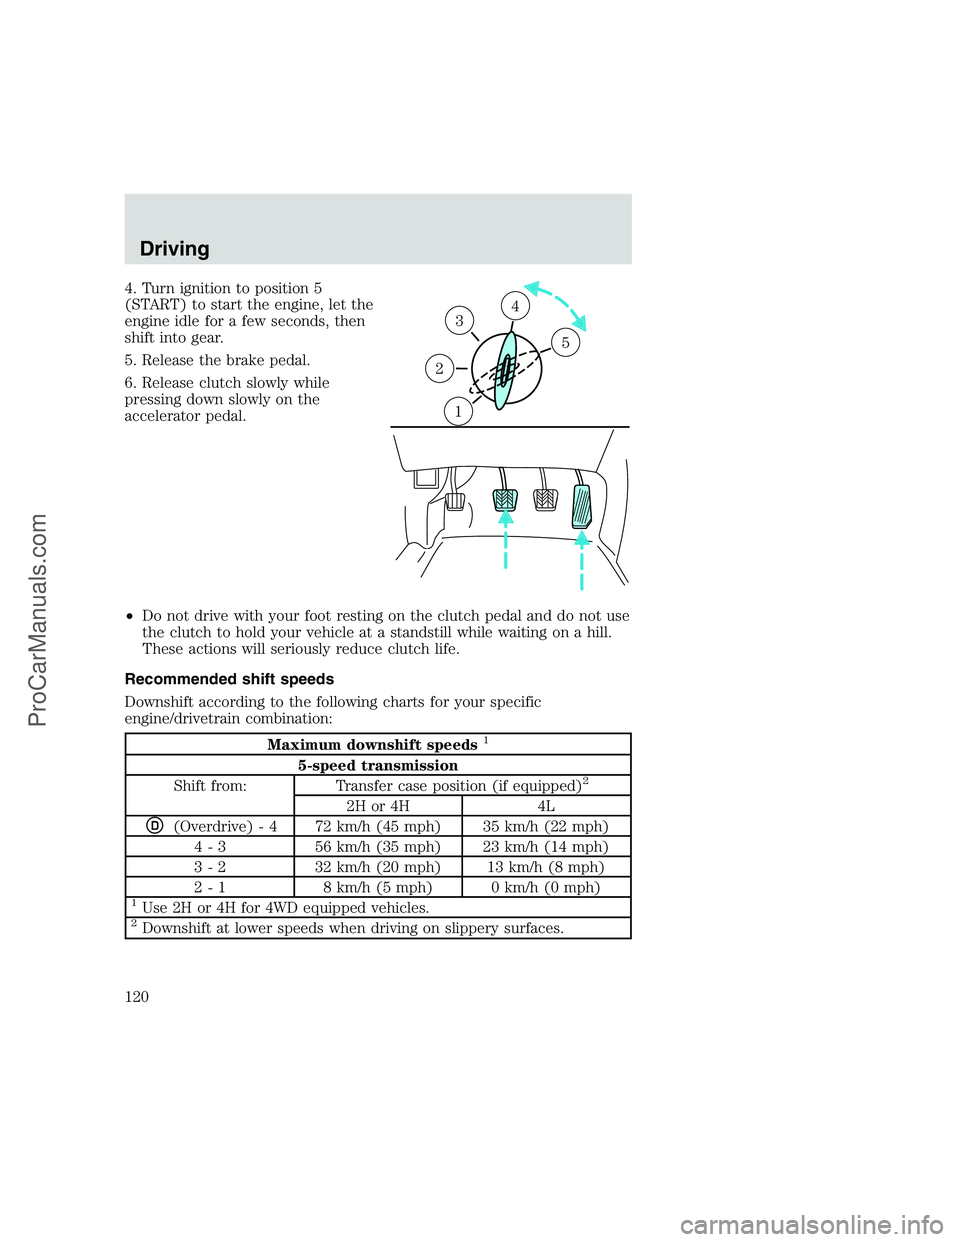
4. Turn ignition to position 5
(START) to start the engine, let the
engine idle for a few seconds, then
shift into gear.
5. Release the brake pedal.
6. Release clutch slowly while
pressing down slowly on the
accelerator pedal.
•Do not drive with your foot resting on the clutch pedal and do not use
the clutch to hold your vehicle at a standstill while waiting on a hill.
These actions will seriously reduce clutch life.
Recommended shift speeds
Downshift according to the following charts for your specific
engine/drivetrain combination:
Maximum downshift speeds1
5-speed transmission
Shift from: Transfer case position (if equipped)2
2H or 4H 4L
D(Overdrive) - 4 72 km/h (45 mph) 35 km/h (22 mph)
4 - 3 56 km/h (35 mph) 23 km/h (14 mph)
3 - 2 32 km/h (20 mph) 13 km/h (8 mph)
2 - 1 8 km/h (5 mph) 0 km/h (0 mph)
1Use 2H or 4H for 4WD equipped vehicles.2Downshift at lower speeds when driving on slippery surfaces.
1
2
34
5
Driving
120
ProCarManuals.com
Page 121 of 248
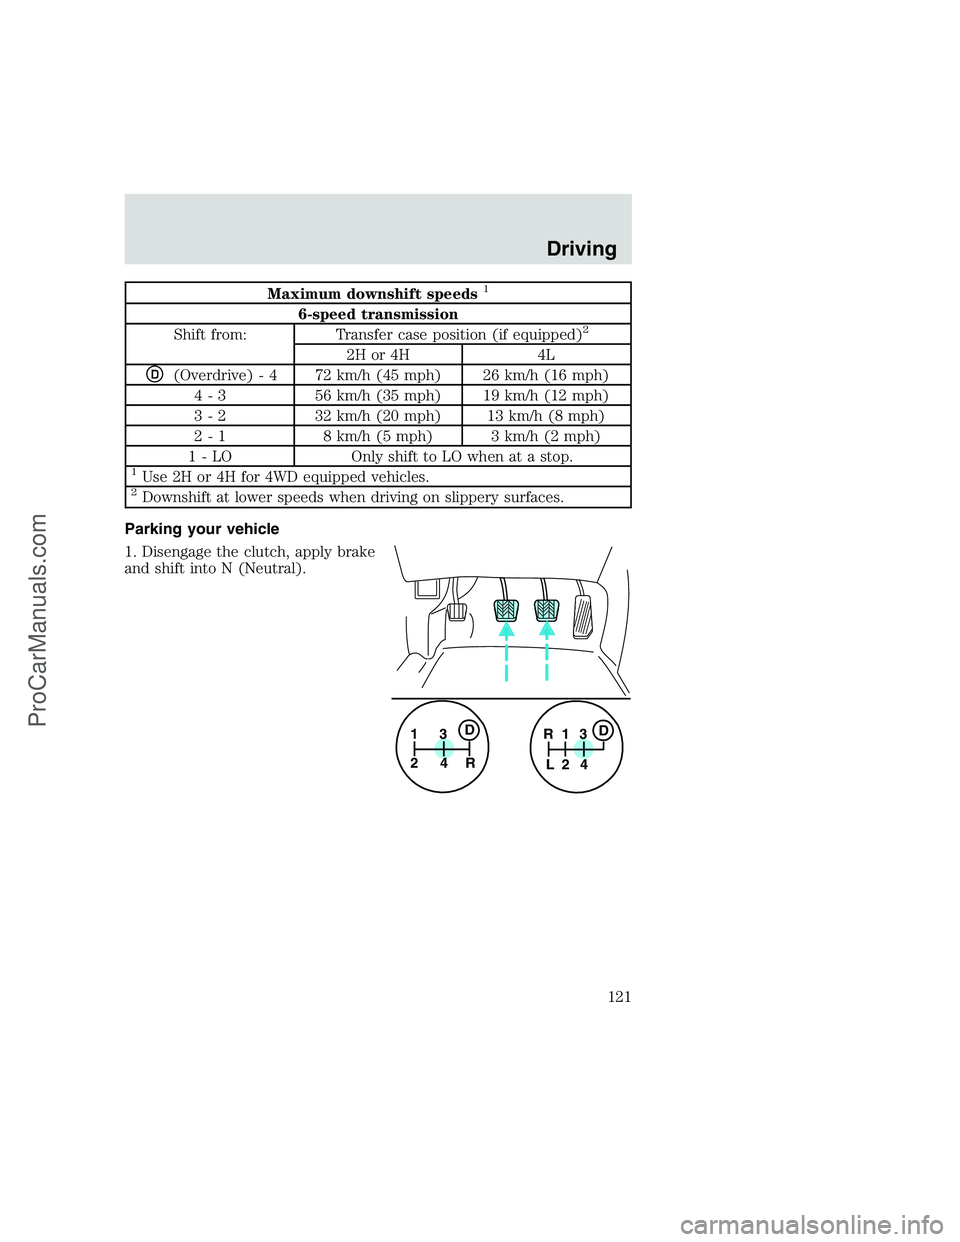
Maximum downshift speeds1
6-speed transmission
Shift from: Transfer case position (if equipped)2
2H or 4H 4L
D(Overdrive) - 4 72 km/h (45 mph) 26 km/h (16 mph)
4 - 3 56 km/h (35 mph) 19 km/h (12 mph)
3 - 2 32 km/h (20 mph) 13 km/h (8 mph)
2 - 1 8 km/h (5 mph) 3 km/h (2 mph)
1 - LO Only shift to LO when at a stop.
1Use 2H or 4H for 4WD equipped vehicles.2Downshift at lower speeds when driving on slippery surfaces.
Parking your vehicle
1. Disengage the clutch, apply brake
and shift into N (Neutral).
1
24R3D1
24 R
L3D
Driving
121
ProCarManuals.com
Page 125 of 248
FOUR-WHEEL DRIVE (4WD) OPERATION (IF EQUIPPED)
When Four–wheel drive (4WD) is engaged, power is supplied to all four
wheels through a transfer case. 4WD power can be selected when
additional driving power is desired.
If equipped with the Electronic Shift 4WD System, and the
instrument panel control is moved to 4WD Low while the vehicle
is moving, the system will not engage and no damage will occur to
the 4WD system.
All utility-type vehicles and 4WD vehicles have special design and
equipment features to make them capable of performing in a wide
variety of off-road applications. Specific design characteristics give them
higher centers of gravity than ordinary passenger cars.
Utility and four-wheel drive vehicles arenotdesigned for
cornering at speeds as high as passenger cars any more than
low-slung sports cars are designed to perform satisfactorily under
off-road conditions. Avoid sharp turns or abrupt maneuvers in these
vehicles.
4WD operation is not recommended on dry pavement. Doing so could
result in difficult disengagement of the transfer case, increased tire wear
and decreased fuel economy.
Electronic shift on the fly (ESOF) 4x4 system (if equipped)
The 4WD system:
•provides 4x4 High engagement and disengagement while the vehicle is
moving.
•is operated by a rotary control located on the instrument panel that
allows you select 2WD, 4x4 High or 4x4 Low operation.
•uses hub locks that can be engaged and disengaged automatically by
using a rotary control located on the instrument panel.
Driving
125
ProCarManuals.com
Page 126 of 248
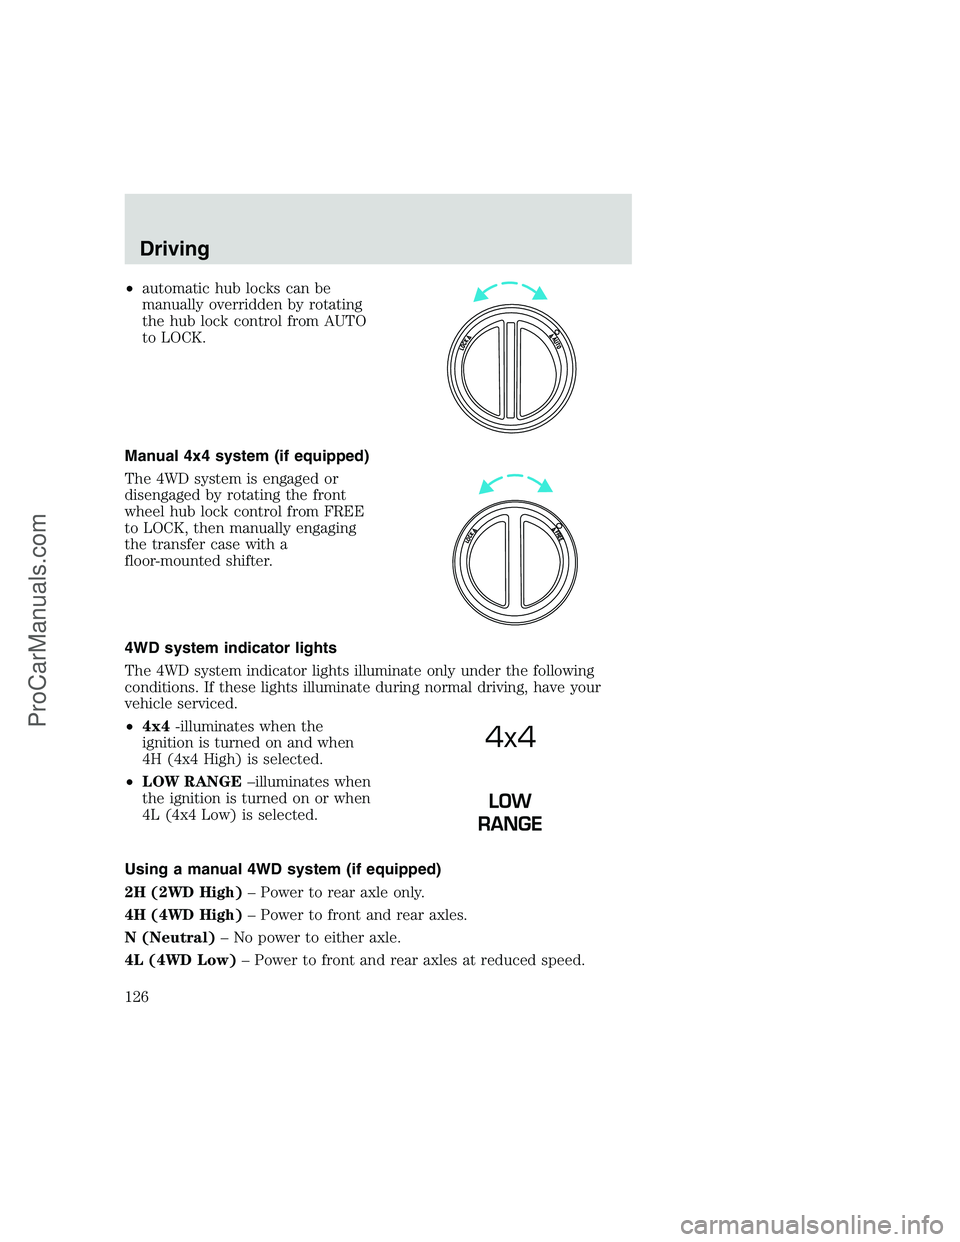
•automatic hub locks can be
manually overridden by rotating
the hub lock control from AUTO
to LOCK.
Manual 4x4 system (if equipped)
The 4WD system is engaged or
disengaged by rotating the front
wheel hub lock control from FREE
to LOCK, then manually engaging
the transfer case with a
floor-mounted shifter.
4WD system indicator lights
The 4WD system indicator lights illuminate only under the following
conditions. If these lights illuminate during normal driving, have your
vehicle serviced.
•4x4-illuminates when the
ignition is turned on and when
4H (4x4 High) is selected.
•LOW RANGE–illuminates when
the ignition is turned on or when
4L (4x4 Low) is selected.
Using a manual 4WD system (if equipped)
2H (2WD High)– Power to rear axle only.
4H (4WD High)– Power to front and rear axles.
N (Neutral)– No power to either axle.
4L (4WD Low)– Power to front and rear axles at reduced speed.
4x4
Driving
126
ProCarManuals.com
Page 127 of 248
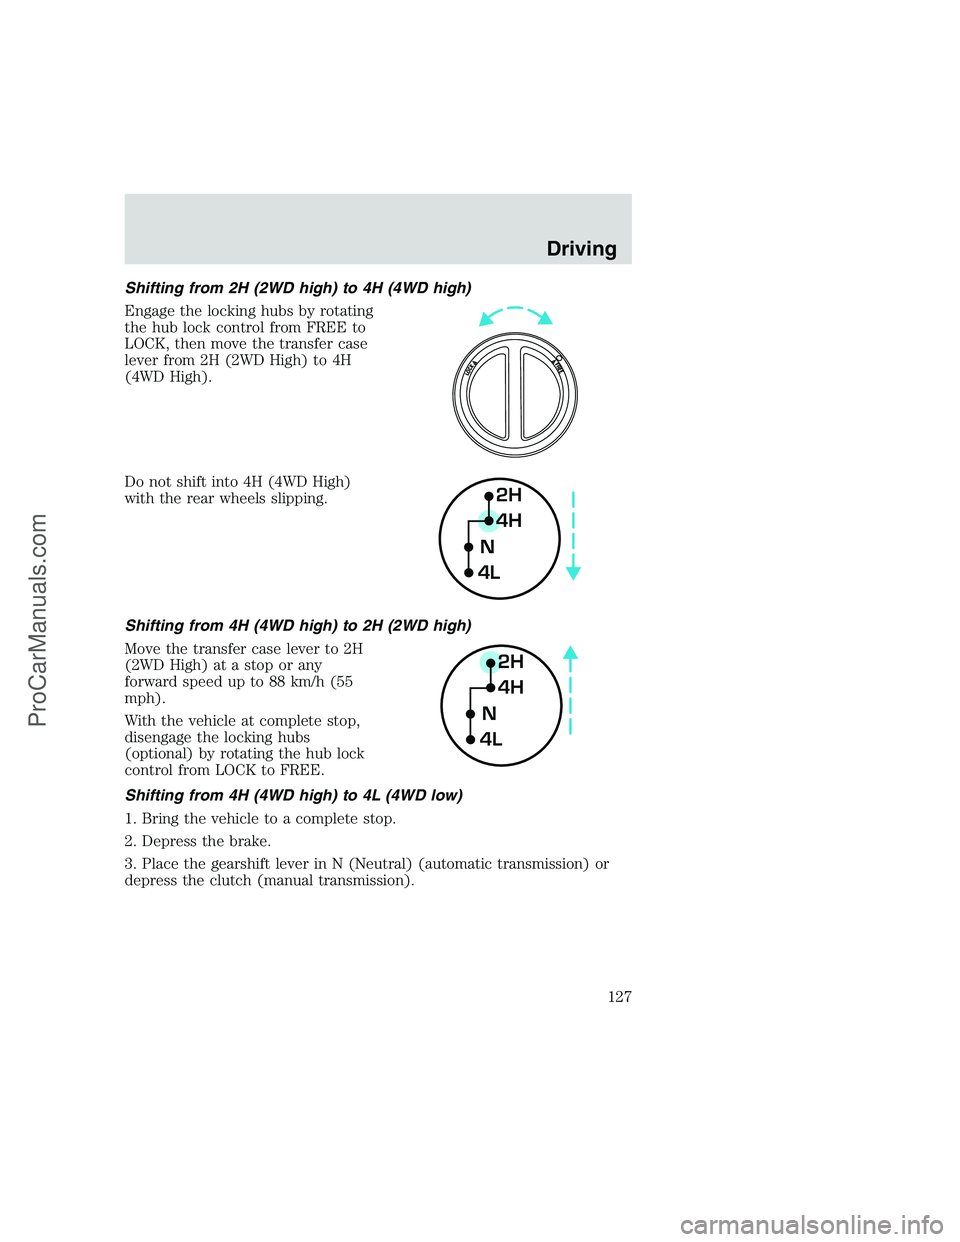
Shifting from 2H (2WD high) to 4H (4WD high)
Engage the locking hubs by rotating
the hub lock control from FREE to
LOCK, then move the transfer case
lever from 2H (2WD High) to 4H
(4WD High).
Do not shift into 4H (4WD High)
with the rear wheels slipping.
Shifting from 4H (4WD high) to 2H (2WD high)
Move the transfer case lever to 2H
(2WD High) at a stop or any
forward speed up to 88 km/h (55
mph).
With the vehicle at complete stop,
disengage the locking hubs
(optional) by rotating the hub lock
control from LOCK to FREE.
Shifting from 4H (4WD high) to 4L (4WD low)
1. Bring the vehicle to a complete stop.
2. Depress the brake.
3. Place the gearshift lever in N (Neutral) (automatic transmission) or
depress the clutch (manual transmission).
2H
4H
4LN
2H
4H
4LN
Driving
127
ProCarManuals.com
Page 128 of 248
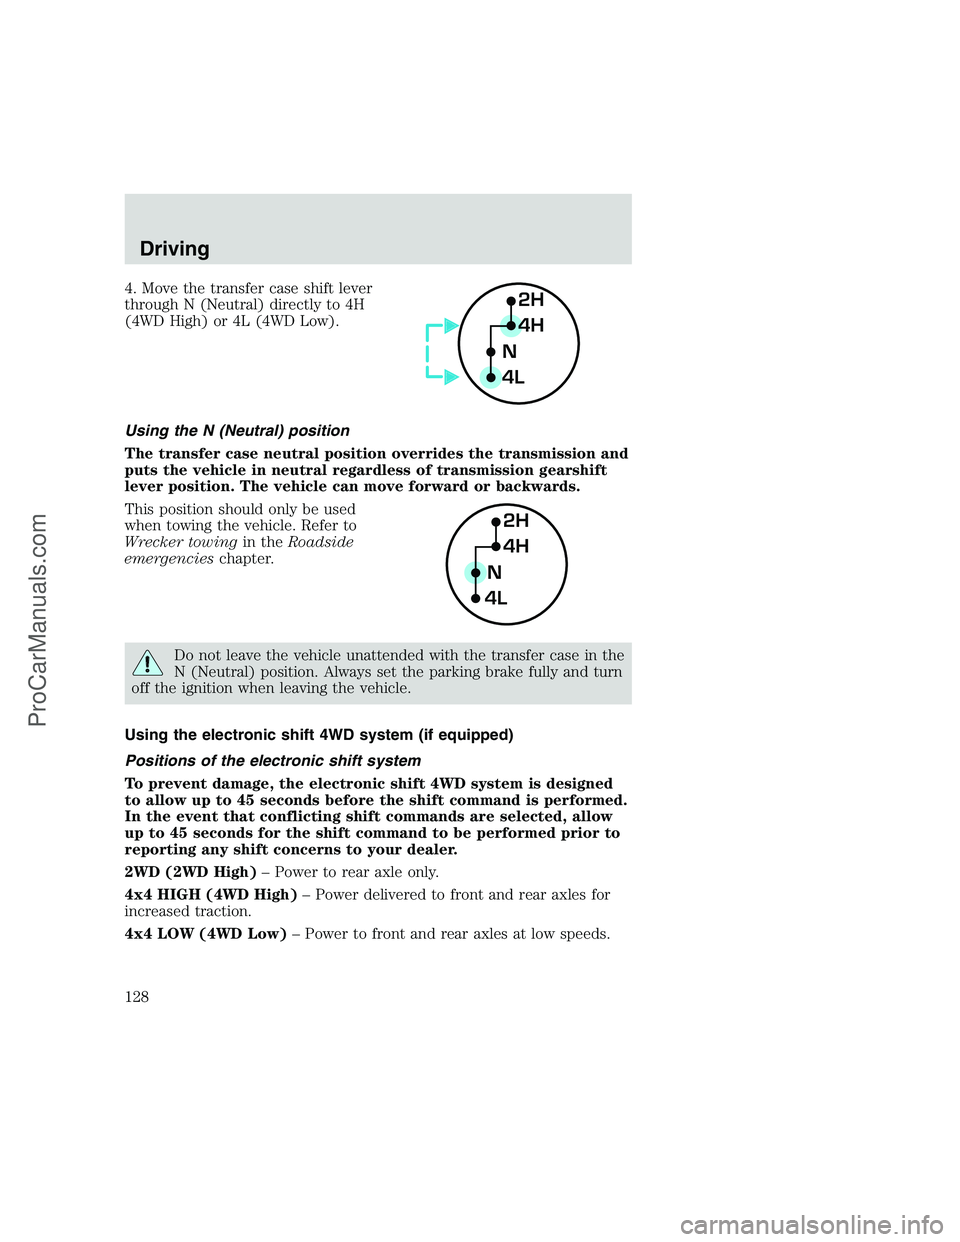
4. Move the transfer case shift lever
through N (Neutral) directly to 4H
(4WD High) or 4L (4WD Low).
Using the N (Neutral) position
The transfer case neutral position overrides the transmission and
puts the vehicle in neutral regardless of transmission gearshift
lever position. The vehicle can move forward or backwards.
This position should only be used
when towing the vehicle. Refer to
Wrecker towingin theRoadside
emergencieschapter.
Do not leave the vehicle unattended with the transfer case in the
N (Neutral) position. Always set the parking brake fully and turn
off the ignition when leaving the vehicle.
Using the electronic shift 4WD system (if equipped)
Positions of the electronic shift system
To prevent damage, the electronic shift 4WD system is designed
to allow up to 45 seconds before the shift command is performed.
In the event that conflicting shift commands are selected, allow
up to 45 seconds for the shift command to be performed prior to
reporting any shift concerns to your dealer.
2WD (2WD High)– Power to rear axle only.
4x4 HIGH (4WD High)– Power delivered to front and rear axles for
increased traction.
4x4 LOW (4WD Low)– Power to front and rear axles at low speeds.
2H
4H
4LN
2H
4H
4LN
Driving
128
ProCarManuals.com
Page 129 of 248
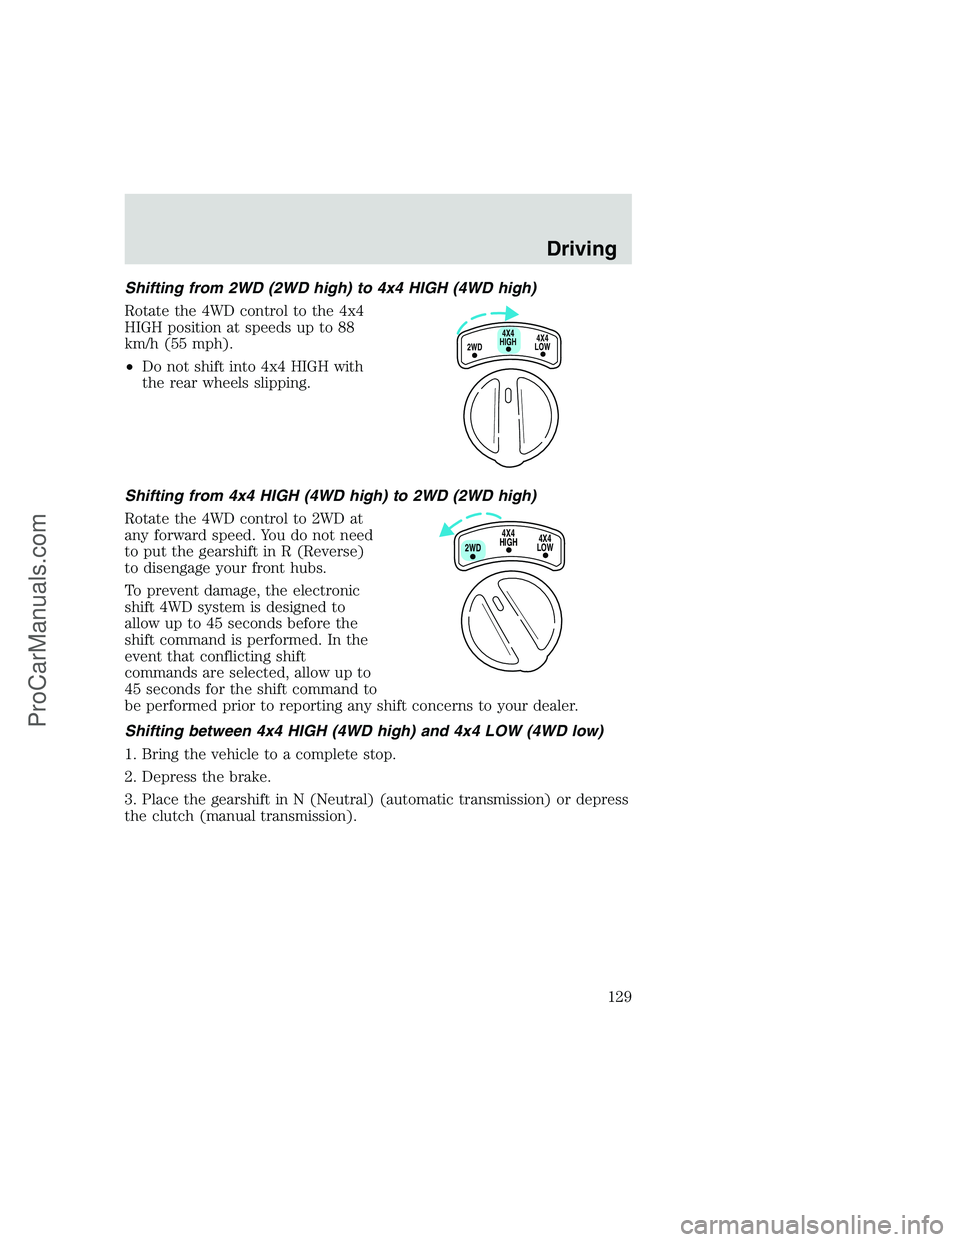
Shifting from 2WD (2WD high) to 4x4 HIGH (4WD high)
Rotate the 4WD control to the 4x4
HIGH position at speeds up to 88
km/h (55 mph).
•Do not shift into 4x4 HIGH with
the rear wheels slipping.
Shifting from 4x4 HIGH (4WD high) to 2WD (2WD high)
Rotate the 4WD control to 2WD at
any forward speed. You do not need
to put the gearshift in R (Reverse)
to disengage your front hubs.
To prevent damage, the electronic
shift 4WD system is designed to
allow up to 45 seconds before the
shift command is performed. In the
event that conflicting shift
commands are selected, allow up to
45 seconds for the shift command to
be performed prior to reporting any shift concerns to your dealer.
Shifting between 4x4 HIGH (4WD high) and 4x4 LOW (4WD low)
1. Bring the vehicle to a complete stop.
2. Depress the brake.
3. Place the gearshift in N (Neutral) (automatic transmission) or depress
the clutch (manual transmission).
4X4
HIGH
2WD4X4
LOW
4X4
HIGH
2WD4X4
LOW
Driving
129
ProCarManuals.com