clutch FORD F350 2002 Owners Manual
[x] Cancel search | Manufacturer: FORD, Model Year: 2002, Model line: F350, Model: FORD F350 2002Pages: 264, PDF Size: 2.37 MB
Page 52 of 264
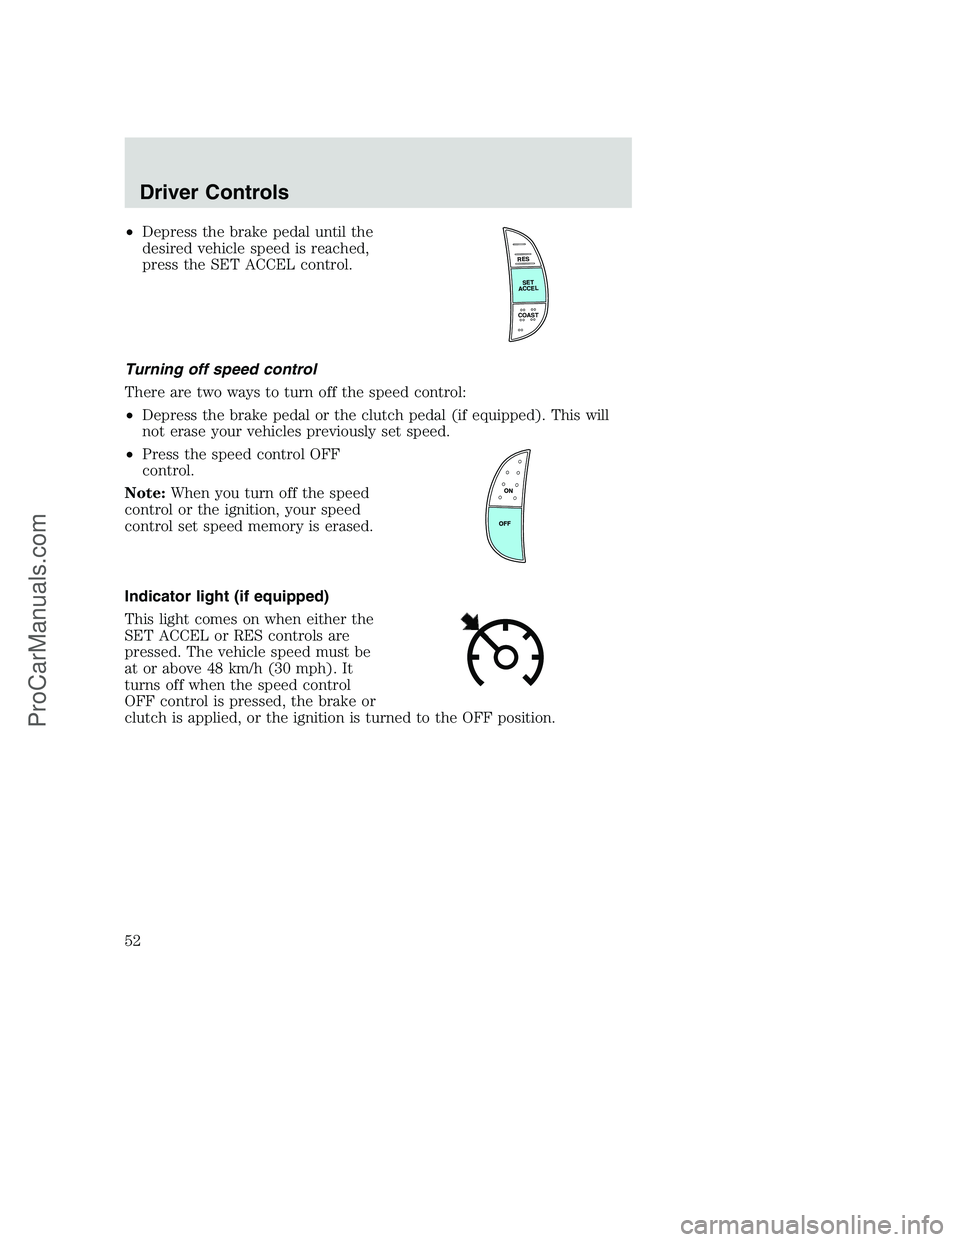
•Depress the brake pedal until the
desired vehicle speed is reached,
press the SET ACCEL control.
Turning off speed control
There are two ways to turn off the speed control:
•Depress the brake pedal or the clutch pedal (if equipped). This will
not erase your vehicles previously set speed.
•Press the speed control OFF
control.
Note:When you turn off the speed
control or the ignition, your speed
control set speed memory is erased.
Indicator light (if equipped)
This light comes on when either the
SET ACCEL or RES controls are
pressed. The vehicle speed must be
at or above 48 km/h (30 mph). It
turns off when the speed control
OFF control is pressed, the brake or
clutch is applied, or the ignition is turned to the OFF position.
R
E
S
S
E
T
A
C
C
E
L
COAST
Driver Controls
52
ProCarManuals.com
Page 103 of 264
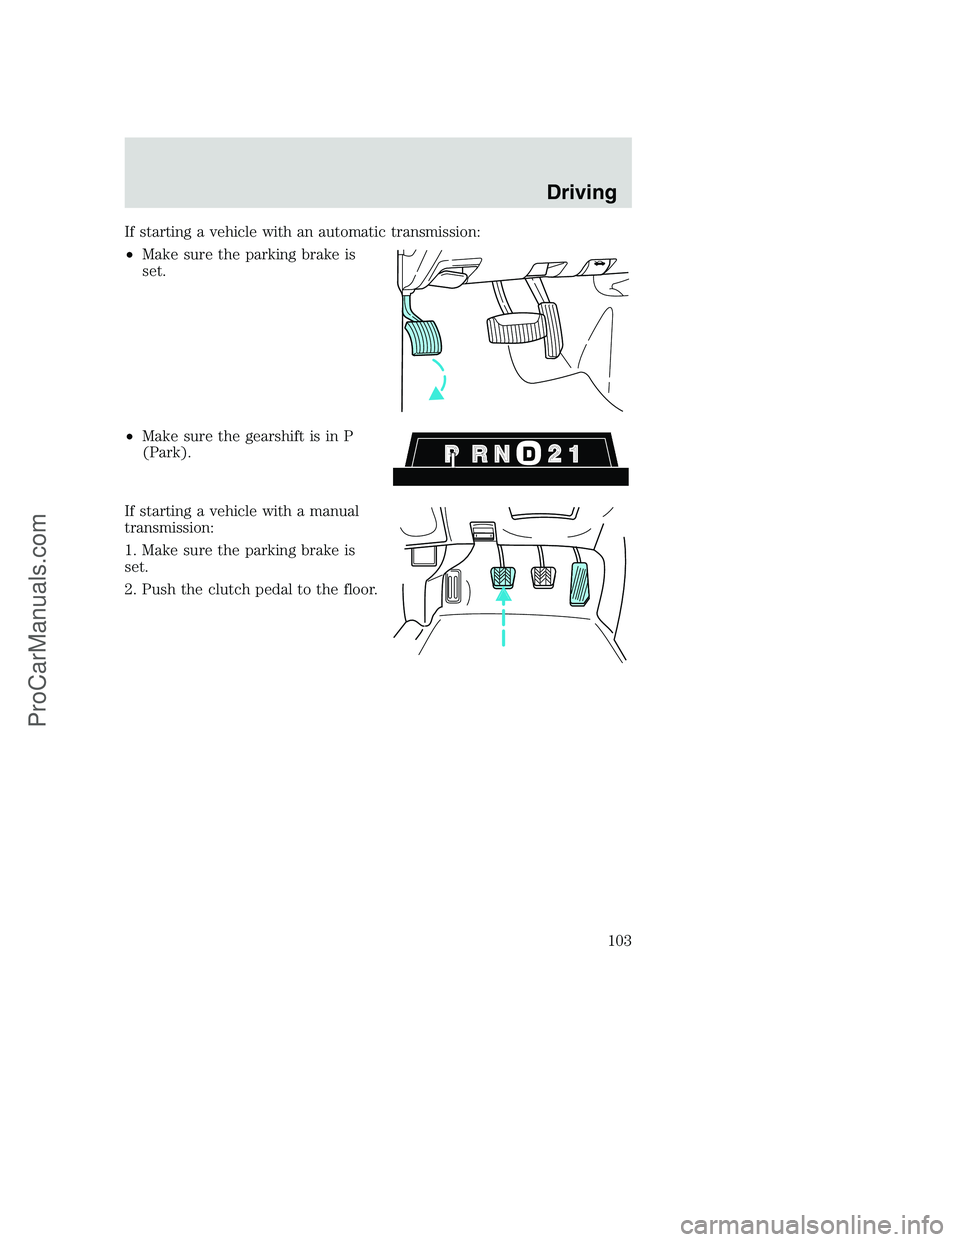
If starting a vehicle with an automatic transmission:
•Make sure the parking brake is
set.
•Make sure the gearshift is in P
(Park).
If starting a vehicle with a manual
transmission:
1. Make sure the parking brake is
set.
2. Push the clutch pedal to the floor.
Driving
103
ProCarManuals.com
Page 112 of 264
Forced downshifts
•Allowed in
(Overdrive) or Drive.
•Depress the accelerator to the floor.
•Allows transmission to select an appropriate gear.
Shift strategy (4R100 automatic transmission)
To account for customer driving habits and conditions, your 4R100
automatic transmission electronically controls the shift quality by using
an adaptive learning strategy. The adaptive learning strategy is
maintained by power from the battery. When the battery is disconnected
or a new battery is installed, the transmission must relearn its adaptive
strategy. Optimal shifting will resume within a few hundred kilometers
(miles) of operation.
If the shift quality does not improve within a few hundred
kilometers (miles) of operation, or if the downshifts and other
throttle conditions do not function normally, see your dealer or a
qualified service technician as soon as possible.
If your vehicle gets stuck in mud or snow
If your vehicle gets stuck in mud or snow, it may be rocked out by
shifting from forward and reverse gears, stopping between shifts in a
steady pattern. Press lightly on the accelerator in each gear.
Do not rock the vehicle if the engine is not at normal operating
temperature or damage to the transmission may occur.
Do not rock the vehicle for more than a minute or damage to the
transmission and tires may occur, or the engine may overheat.
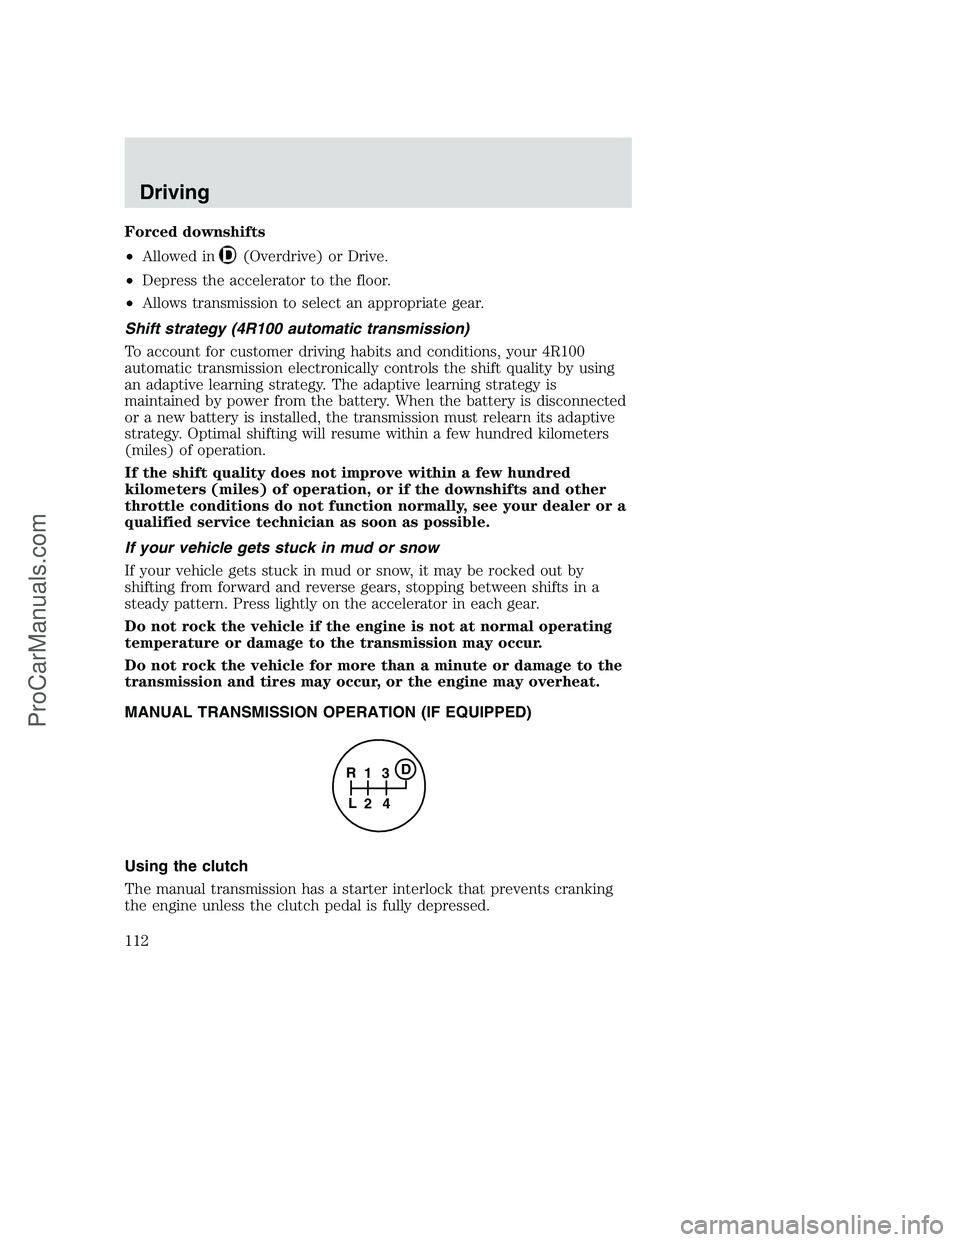
MANUAL TRANSMISSION OPERATION (IF EQUIPPED)
Using the clutch
The manual transmission has a starter interlock that prevents cranking
the engine unless the clutch pedal is fully depressed.
1
24 R
L3D
Driving
112
ProCarManuals.com
Page 113 of 264
To start the vehicle:
1. Make sure the parking brake is fully set.
2. Press the clutch pedal to the floor, then put the gearshift lever in the
neutral position.
3. Start the engine, then press the brake pedal and release the parking
brake.
4. Move the gearshift lever to the desired gear, then slowly release the
clutch pedal while slowly pressing on the accelerator.
Do not drive with your foot resting on the clutch pedal or use the clutch
pedal to hold your vehicle at a standstill while waiting on a hill. These
actions will reduce the life of the clutch.
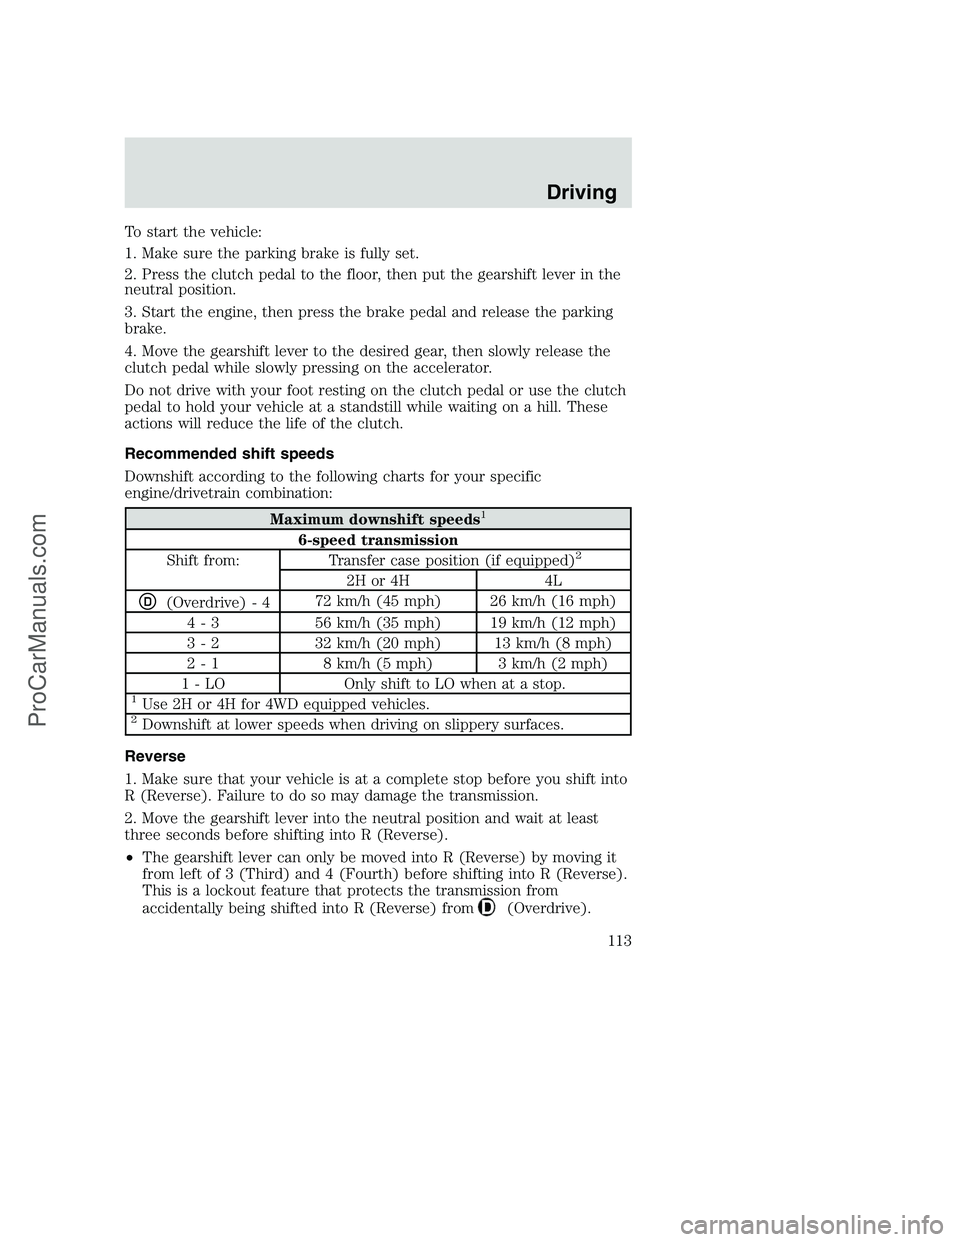
Recommended shift speeds
Downshift according to the following charts for your specific
engine/drivetrain combination:
Maximum downshift speeds1
6-speed transmission
Shift from: Transfer case position (if equipped)2
2H or 4H 4L
D(Overdrive) - 472 km/h (45 mph) 26 km/h (16 mph)
4 - 3 56 km/h (35 mph) 19 km/h (12 mph)
3 - 2 32 km/h (20 mph) 13 km/h (8 mph)
2 - 1 8 km/h (5 mph) 3 km/h (2 mph)
1 - LO Only shift to LO when at a stop.
1Use 2H or 4H for 4WD equipped vehicles.2Downshift at lower speeds when driving on slippery surfaces.
Reverse
1. Make sure that your vehicle is at a complete stop before you shift into
R (Reverse). Failure to do so may damage the transmission.
2. Move the gearshift lever into the neutral position and wait at least
three seconds before shifting into R (Reverse).
•The gearshift lever can only be moved into R (Reverse) by moving it
from left of 3 (Third) and 4 (Fourth) before shifting into R (Reverse).
This is a lockout feature that protects the transmission from
accidentally being shifted into R (Reverse) from
(Overdrive).
Driving
113
ProCarManuals.com
Page 118 of 264
Note:Do not perform this operation if the rear wheels are slipping.
Shifting to/from 4L (4WD Low)
1. Bring the vehicle to a complete stop.
2. Depress the brake.
3. On vehicles equipped with an automatic transmission, place the
transmission in N (Neutral); on vehicles equipped with a manual
transmission, depress the clutch.
4. Move the transfer case lever through N (Neutral) directly to the
desired position. The LOW RANGE indicator will illuminate once the
transfer case has engaged.
•If the transfer casedoes notengage, repeat steps 1 through 4.
Using the N (Neutral) position
The transfer case N (Neutral) position overrides the transmission
and puts the vehicle in neutral regardless of transmission
gearshift lever position. The vehicle can move forward or
backward.
This position should only be used when towing the vehicle.
Do not leave the vehicle unattended with the transfer case in the
N (Neutral) position. Always set the parking brake fully and turn
off the ignition when leaving the vehicle.
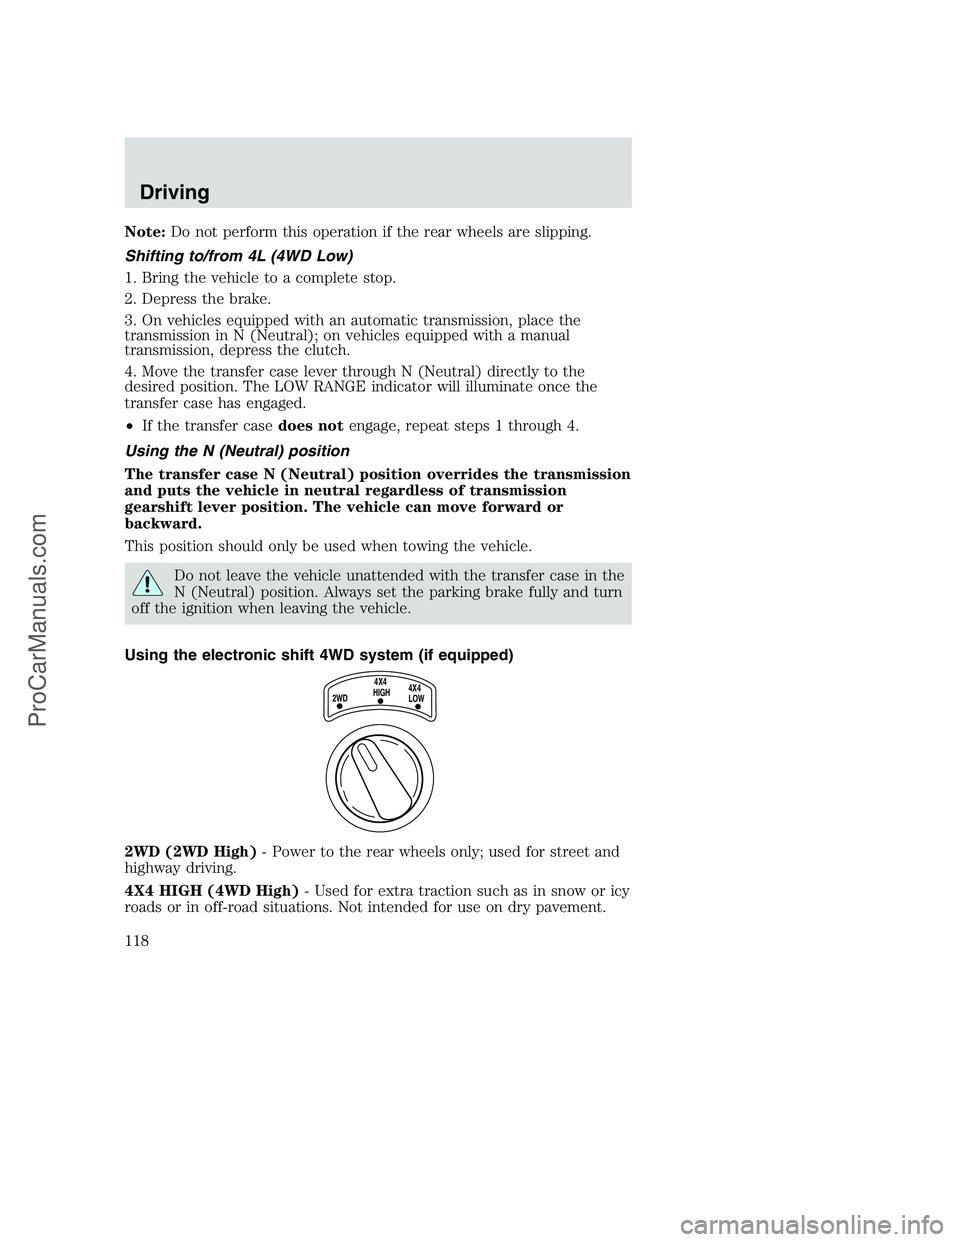
Using the electronic shift 4WD system (if equipped)
2WD (2WD High)- Power to the rear wheels only; used for street and
highway driving.
4X4 HIGH (4WD High)- Used for extra traction such as in snow or icy
roads or in off-road situations. Not intended for use on dry pavement.
2WD4X4
HIGH4X4
LOW
Driving
118
ProCarManuals.com
Page 119 of 264
4X4 LOW (4WD Low)- Uses extra gearing to provide maximum power
to all four wheels. Intended only for off-road applications such as deep
sand, steep grades or pulling heavy objects. 4L (4WD Low) will not
engage while the vehicle is moving; this is normal and should be no
reason for concern. Refer toShifting to/from 4L (4WD Low)for proper
operation.
Shifting between 2WD (2WD High) and 4X4 HIGH (4WD High)
•Move the 4WD control between 2WD and 4X4 HIGH at any forward
speed.
Note:Do not perform this operation at speeds above 72 km/h (45 mph)
if the outside temperature is below 0°C (32°F).
Note:Do not perform this operation if the rear wheels are slipping.
Shifting to/from 4X4 LOW (4WD Low)
1. Bring the vehicle to a complete stop
2. Depress the brake
3. On vehicles equipped with an automatic transmission, place the
transmission in N (Neutral); on vehicles equipped with a manual
transmission, depress the clutch.
4. Move the 4WD control to the desired position.
•If shifting into 4X4 LOW (4WD Low), wait for the LOW RANGE light
in the instrument cluster to turnonindicating the shift is complete.
•If shifting out of 4X4 LOW (4WD Low), wait for the LOW RANGE light
in the instrument cluster to turnoffindicating the shift is complete.
Driving off-road with truck and utility vehicles
4WD vehicles are specially equipped for driving on sand, snow, mud and
rough terrain and have operating characteristics that are somewhat
different from conventional vehicles, both on and off the road.
How your vehicle differs from other vehicles
Truck and utility vehicles can differ from some other vehicles. Your
vehicle may be higher to allow it to travel over rough terrain without
getting hung up or damaging underbody components.
The differences that make your vehicle so versatile also make it handle
differently than an ordinary passenger car.
Maintain steering wheel control at all times, especially in rough terrain.
Since sudden changes in terrain can result in abrupt steering wheel
motion, make sure you grip the steering wheel from the outside. Do not
grip the spokes.
Driving
119
ProCarManuals.com
Page 162 of 264
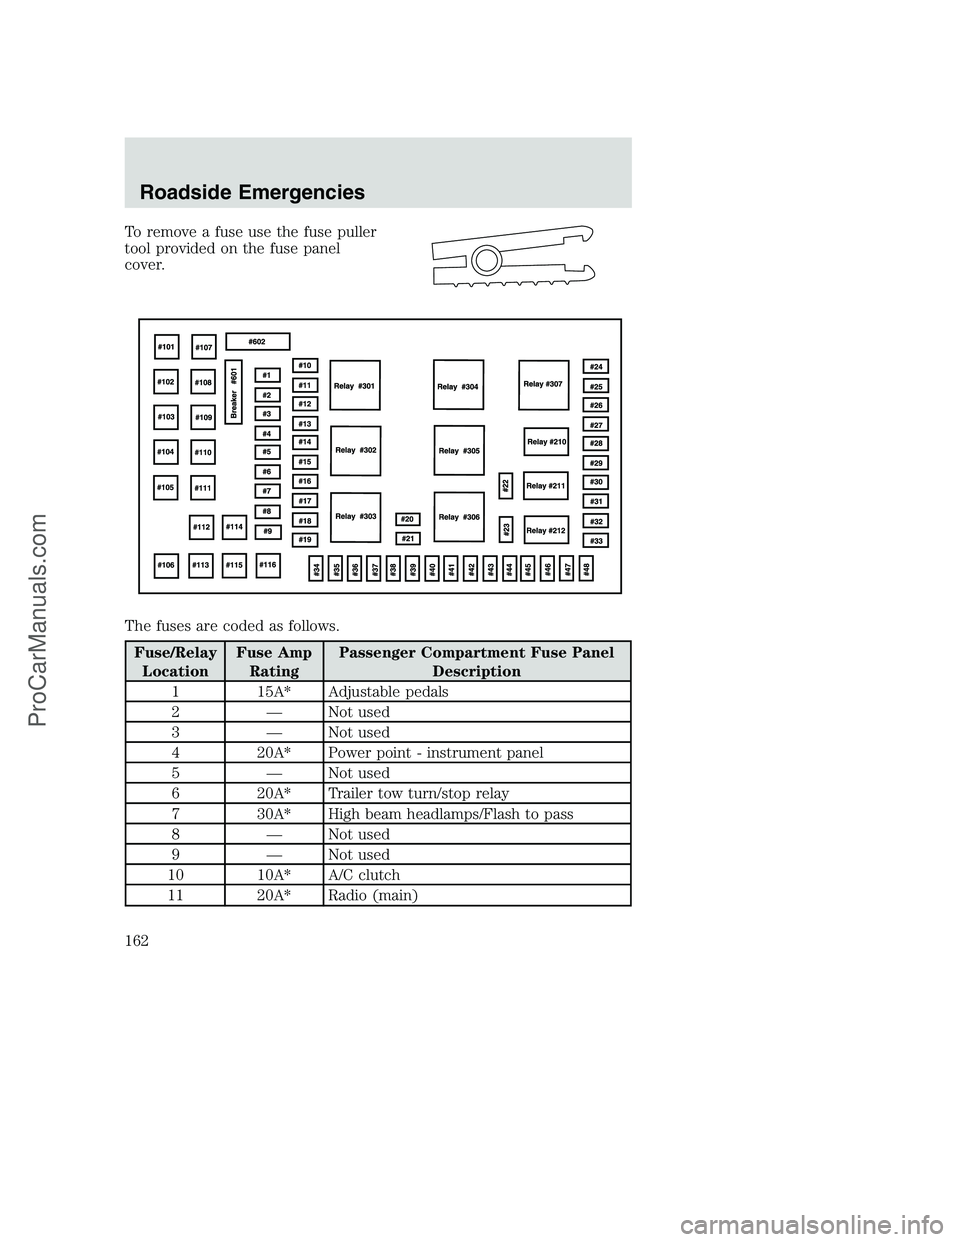
To remove a fuse use the fuse puller
tool provided on the fuse panel
cover.
The fuses are coded as follows.
Fuse/Relay
LocationFuse Amp
RatingPassenger Compartment Fuse Panel
Description
1 15A* Adjustable pedals
2 — Not used
3 — Not used
4 20A* Power point - instrument panel
5 — Not used
6 20A* Trailer tow turn/stop relay
7 30A* High beam headlamps/Flash to pass
8 — Not used
9 — Not used
10 10A* A/C clutch
11 20A* Radio (main)
Roadside Emergencies
162
ProCarManuals.com
Page 163 of 264
Fuse/Relay
LocationFuse Amp
RatingPassenger Compartment Fuse Panel
Description
12 20A* Cigar lighter / OBD II
13 5A* Power mirrors/switches
14 15A* Daytime running lamps (DRL)
15 — Not used
16 — Not used
17 15A* Exterior lamps
18 20A* Turn lamps/Brake on-off switch (high)
19 10A* Body security module/4x4 module
20 — Not used
21 — Not used
22 20A* Engine control
23 20A* Engine control (gasoline engine only)
24 15A* Not used (spare)
25 10A* 4-Wheel Anti-lock Brake System (4WABS)
module
26 10A* Air bags
27 15A* Ignition switch Run feed
28 10A* EATC module/Front blower relay coil
29 10A* Customer access
30 15A* Highbeam headlamps
31 15A* Clutch interlock switch (manual
transmissions only), Transmission range
sensor (automatic transmissions only)
then to starter relay coil (all
transmissions)
32 5A* Radio (start)
33 15A* Front wiper
34 10A* Brake on-off switch
35 10A* Instrument cluster
36 10A* PCM Keep-Alive
37 15A* Horn
38 20A* Trailer tow park lamps and backup lamps
Roadside Emergencies
163
ProCarManuals.com
Page 196 of 264
SERVICE RECOMMENDATIONS
To help you service your vehicle:
•We highlight do-it-yourself items in the engine compartment for easy
location.
•We provide a scheduled maintenance guide which makes tracking
routine service easy.
If your vehicle requires professional service, your dealership can provide
the necessary parts and service. Check yourWarranty Guide/Owner
Information Guideto find out which parts and services are covered.
Use only recommended fuels, lubricants, fluids and service parts
conforming to specifications. Motorcraft parts are designed and built to
provide the best performance in your vehicle.
PRECAUTIONS WHEN SERVICING YOUR VEHICLE
•Do not work on a hot engine.
•Make sure that nothing gets caught in moving parts.
•Do not work on a vehicle with the engine running in an enclosed
space, unless you are sure you have enough ventilation.
•Keep all open flames and other burning (cigarettes) material away
from the battery and all fuel related parts.
Working with the engine off
•Automatic transmission:
1. Set the parking brake and shift to P (Park).
2. Turn off the engine and remove the key.
3. Block the wheels.
•Manual transmission:
1. Set the parking brake, depress the clutch and place the gearshift in 1
(First).
2. Turn off the engine and remove the key.
3. Block the wheels.
Maintenance and Specifications
196
ProCarManuals.com
Page 197 of 264
Working with the engine on
•Automatic transmission:
1. Set the parking brake and shift to P (Park).
2. Block the wheels.
•Manual transmission:
1. Set the parking brake, depress the clutch and place the gearshift in N
(Neutral).
2. Block the wheels.
Note:Do not start your engine with the air cleaner removed and do not
remove it while the engine is running.
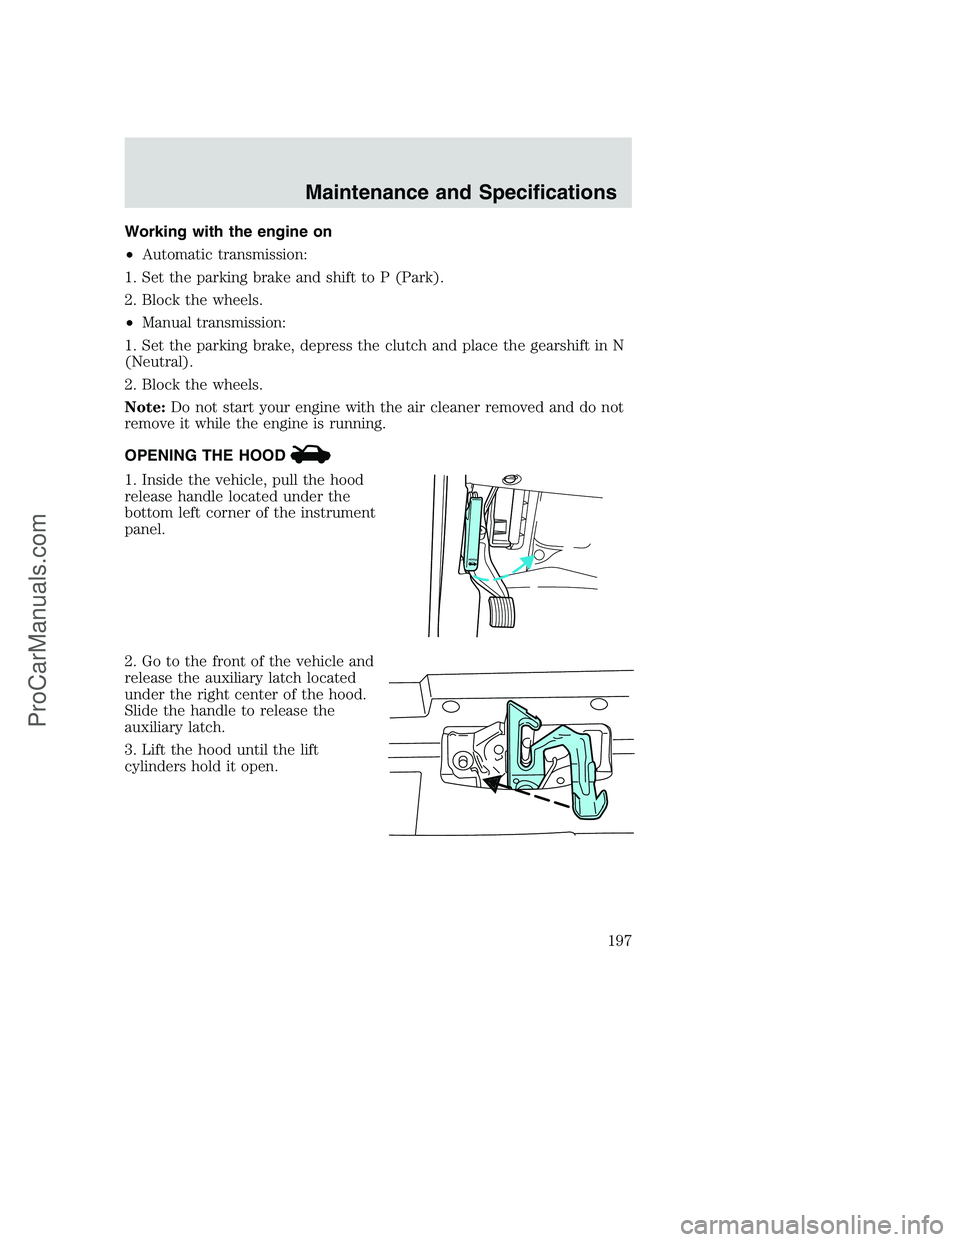
OPENING THE HOOD
1. Inside the vehicle, pull the hood
release handle located under the
bottom left corner of the instrument
panel.
2. Go to the front of the vehicle and
release the auxiliary latch located
under the right center of the hood.
Slide the handle to release the
auxiliary latch.
3. Lift the hood until the lift
cylinders hold it open.
HOOD
Maintenance and Specifications
197
ProCarManuals.com