key FORD F350 2003 Owners Manual
[x] Cancel search | Manufacturer: FORD, Model Year: 2003, Model line: F350, Model: FORD F350 2003Pages: 280, PDF Size: 4.18 MB
Page 2 of 280
Locks and Security 65
Keys 65
Locks 65
Anti-theft system 67
Seating and Safety Restraints 72
Seating 72
Safety restraints 77
Air bags 90
Child restraints 99
Driving 110
Starting 110
Brakes 114
Transmission operation 118
Trailer towing 145
Roadside Emergencies 175
Getting roadside assistance 175
Hazard flasher switch 176
Fuel pump shut-off switch 176
Fuses and relays 177
Changing tires 182
Jump starting 193
Wrecker towing 198
Customer Assistance 200
Reporting safety defects (U.S. only) 208
Cleaning 209
Table of Contents
2
ProCarManuals.com
Page 15 of 280
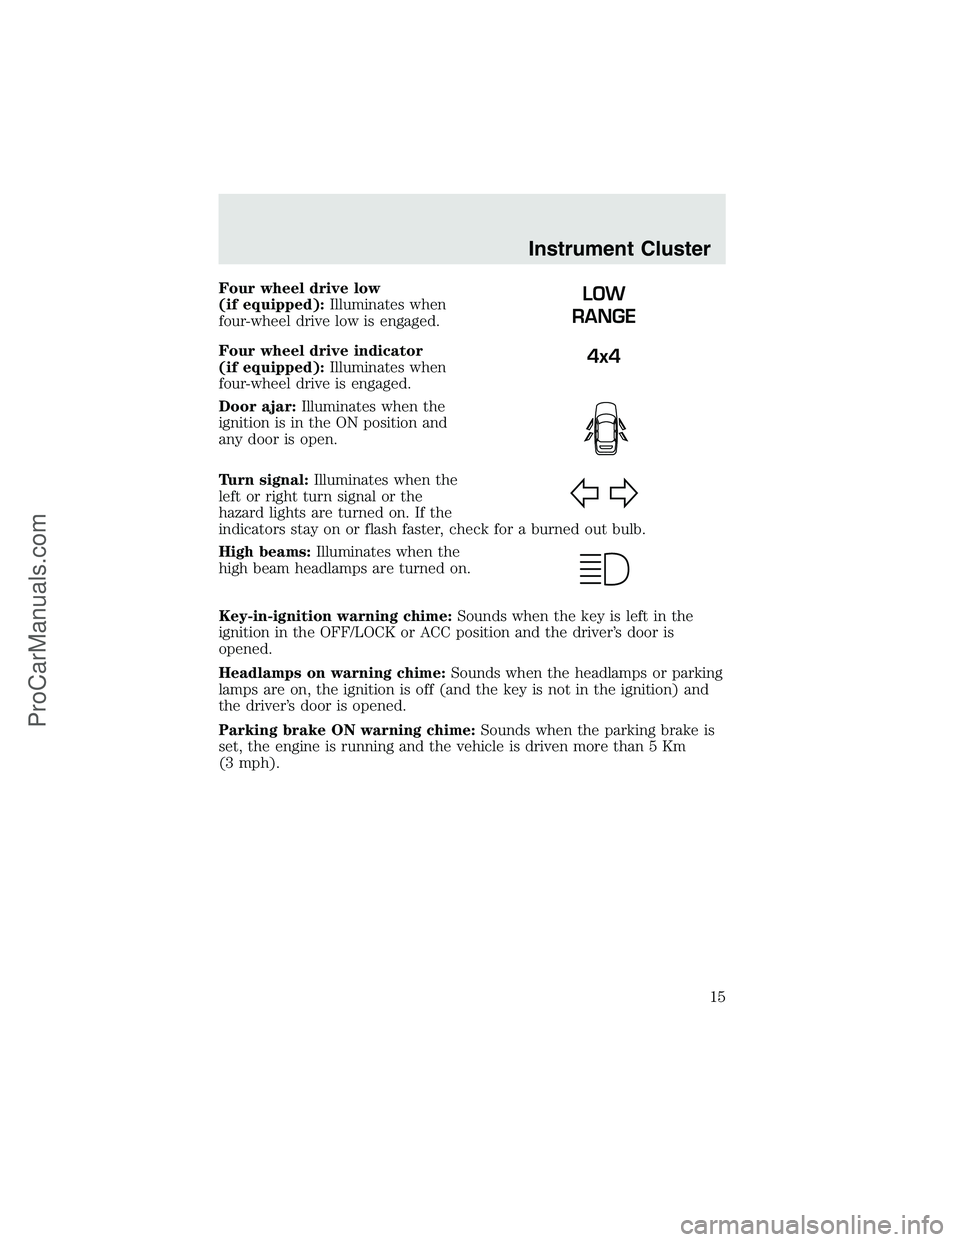
Four wheel drive low
(if equipped):Illuminates when
four-wheel drive low is engaged.
Four wheel drive indicator
(if equipped):Illuminates when
four-wheel drive is engaged.
Door ajar:Illuminates when the
ignition is in the ON position and
any door is open.
Turn signal:Illuminates when the
left or right turn signal or the
hazard lights are turned on. If the
indicators stay on or flash faster, check for a burned out bulb.
High beams:Illuminates when the
high beam headlamps are turned on.
Key-in-ignition warning chime:Sounds when the key is left in the
ignition in the OFF/LOCK or ACC position and the driver’s door is
opened.
Headlamps on warning chime:Sounds when the headlamps or parking
lamps are on, the ignition is off (and the key is not in the ignition) and
the driver’s door is opened.
Parking brake ON warning chime:Sounds when the parking brake is
set, the engine is running and the vehicle is driven more than 5 Km
(3 mph).LOW
RANGE
4x4
Instrument Cluster
15
ProCarManuals.com
Page 64 of 280
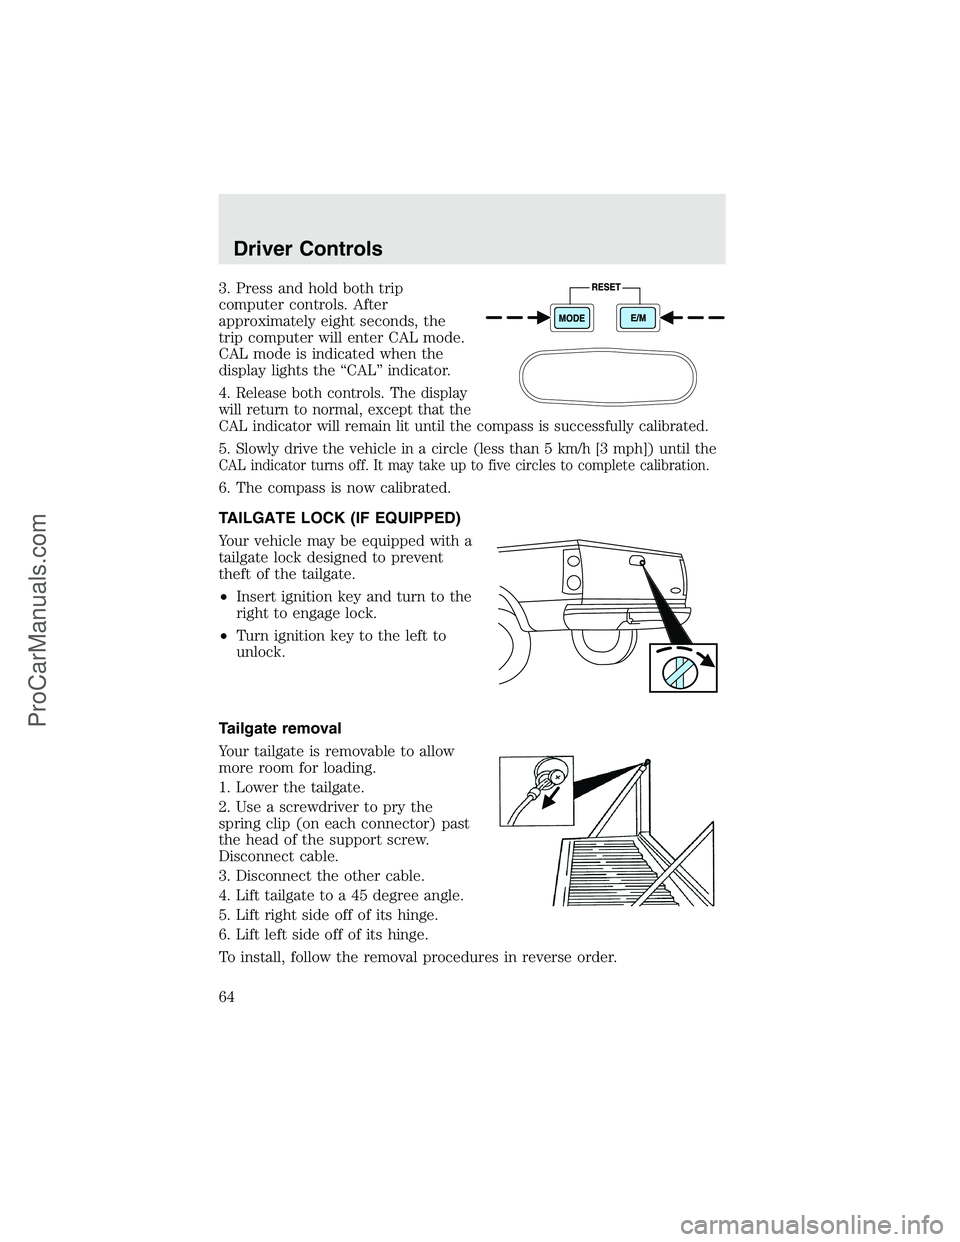
3. Press and hold both trip
computer controls. After
approximately eight seconds, the
trip computer will enter CAL mode.
CAL mode is indicated when the
display lights the“CAL”indicator.
4.
Release both controls. The display
will return to normal, except that the
CAL indicator will remain lit until the compass is successfully calibrated.
5.Slowly drive the vehicle in a circle (less than 5 km/h [3 mph]) until the
CAL indicator turns off. It may take up to five circles to complete calibration.
6. The compass is now calibrated.
TAILGATE LOCK (IF EQUIPPED)
Your vehicle may be equipped with a
tailgate lock designed to prevent
theft of the tailgate.
•Insert ignition key and turn to the
right to engage lock.
•Turn ignition key to the left to
unlock.
Tailgate removal
Your tailgate is removable to allow
more room for loading.
1. Lower the tailgate.
2. Use a screwdriver to pry the
spring clip (on each connector) past
the head of the support screw.
Disconnect cable.
3. Disconnect the other cable.
4. Lift tailgate to a 45 degree angle.
5. Lift right side off of its hinge.
6. Lift left side off of its hinge.
To install, follow the removal procedures in reverse order.
Driver Controls
64
ProCarManuals.com
Page 65 of 280
KEYS
The key operates all locks on your vehicle. In case of loss, replacement
keys are available from your dealer.
You should always carry a second key with you in a safe place in case
you require it in an emergency.
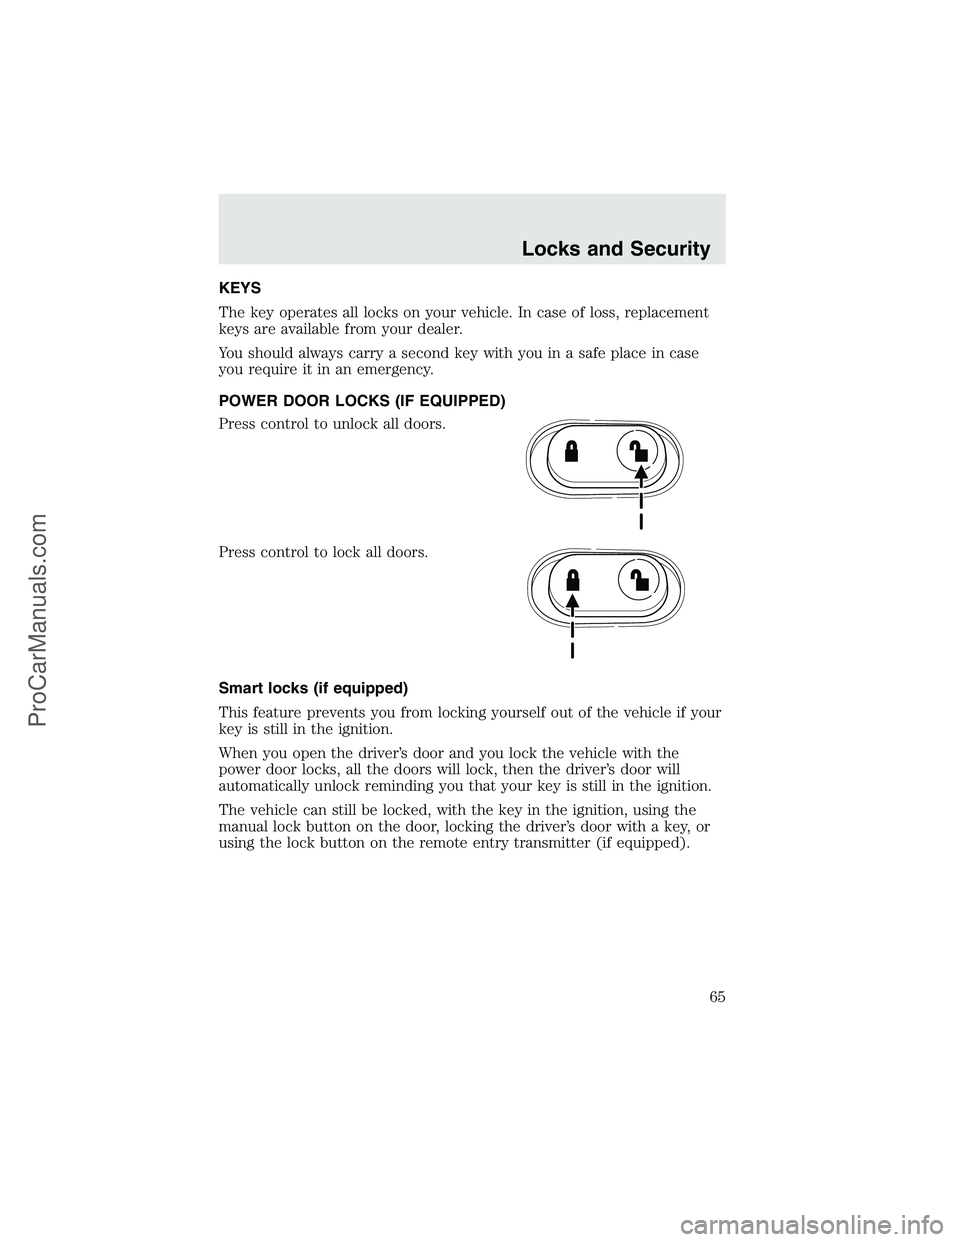
POWER DOOR LOCKS (IF EQUIPPED)
Press control to unlock all doors.
Press control to lock all doors.
Smart locks (if equipped)
This feature prevents you from locking yourself out of the vehicle if your
key is still in the ignition.
When you open the driver’s door and you lock the vehicle with the
power door locks, all the doors will lock, then the driver’s door will
automatically unlock reminding you that your key is still in the ignition.
The vehicle can still be locked, with the key in the ignition, using the
manual lock button on the door, locking the driver’s door with a key, or
using the lock button on the remote entry transmitter (if equipped).
Locks and Security
65
ProCarManuals.com
Page 67 of 280
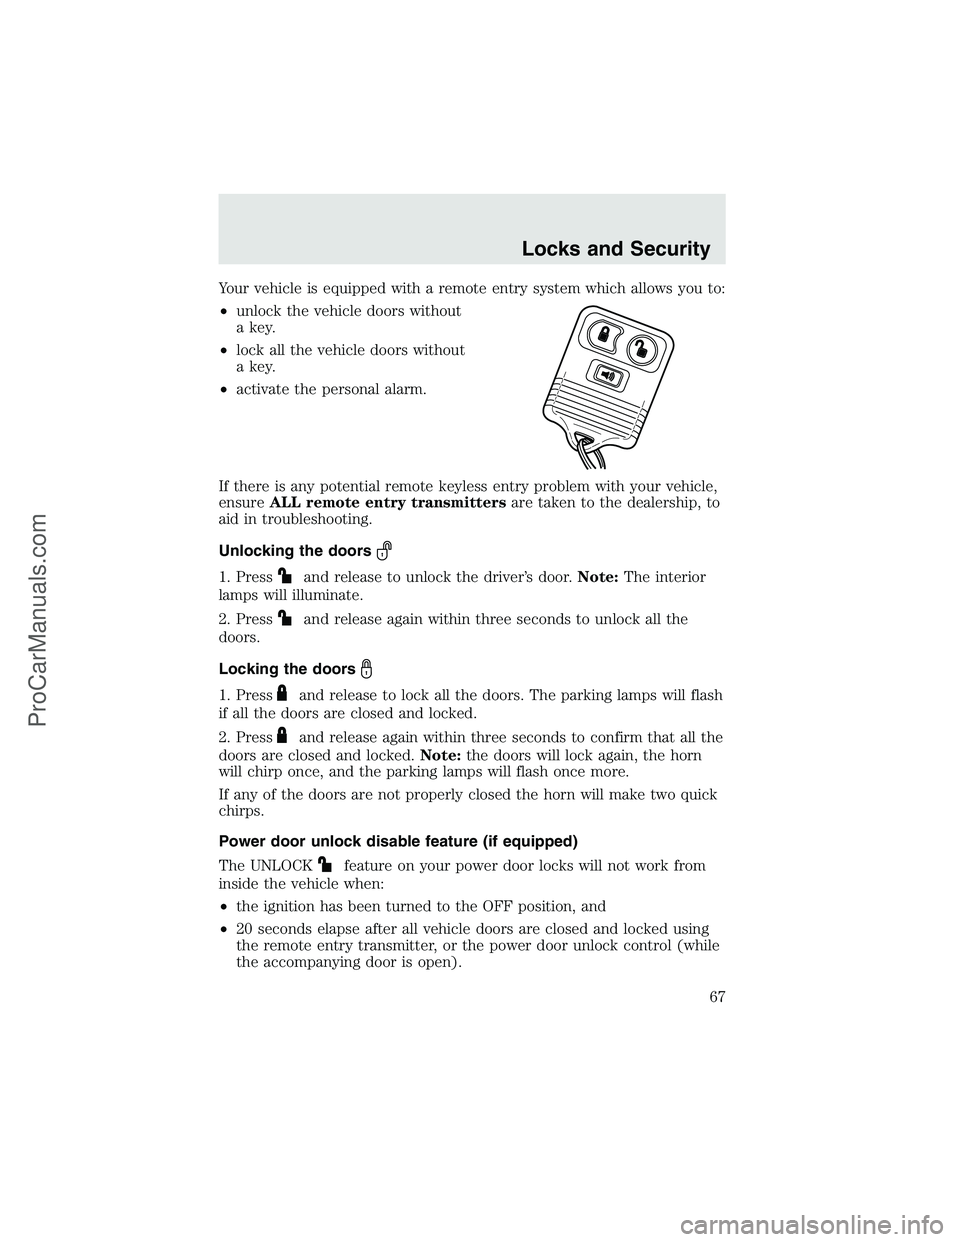
Your vehicle is equipped with a remote entry system which allows you to:
•unlock the vehicle doors without
a key.
•lock all the vehicle doors without
a key.
•activate the personal alarm.
If there is any potential remote keyless entry problem with your vehicle,
ensureALL remote entry transmittersare taken to the dealership, to
aid in troubleshooting.
Unlocking the doors
1. Pressand release to unlock the driver’s door.Note:The interior
lamps will illuminate.
2. Press
and release again within three seconds to unlock all the
doors.
Locking the doors
1. Pressand release to lock all the doors. The parking lamps will flash
if all the doors are closed and locked.
2. Press
and release again within three seconds to confirm that all the
doors are closed and locked.Note:the doors will lock again, the horn
will chirp once, and the parking lamps will flash once more.
If any of the doors are not properly closed the horn will make two quick
chirps.
Power door unlock disable feature (if equipped)
The UNLOCK
feature on your power door locks will not work from
inside the vehicle when:
•the ignition has been turned to the OFF position, and
•20 seconds elapse after all vehicle doors are closed and locked using
the remote entry transmitter, or the power door unlock control (while
the accompanying door is open).
Locks and Security
67
ProCarManuals.com
Page 68 of 280
The UNLOCKfeature will work again after:
•a door has become ajar,
•the ignition is turned to the ON position, or
•using the UNLOCK
control on your remote entry transmitter.
This feature is initially turned off, but may be turned on by following the
instruction in the activation/deactivation procedure provided.
Power door unlock disable feature—activation/deactivation
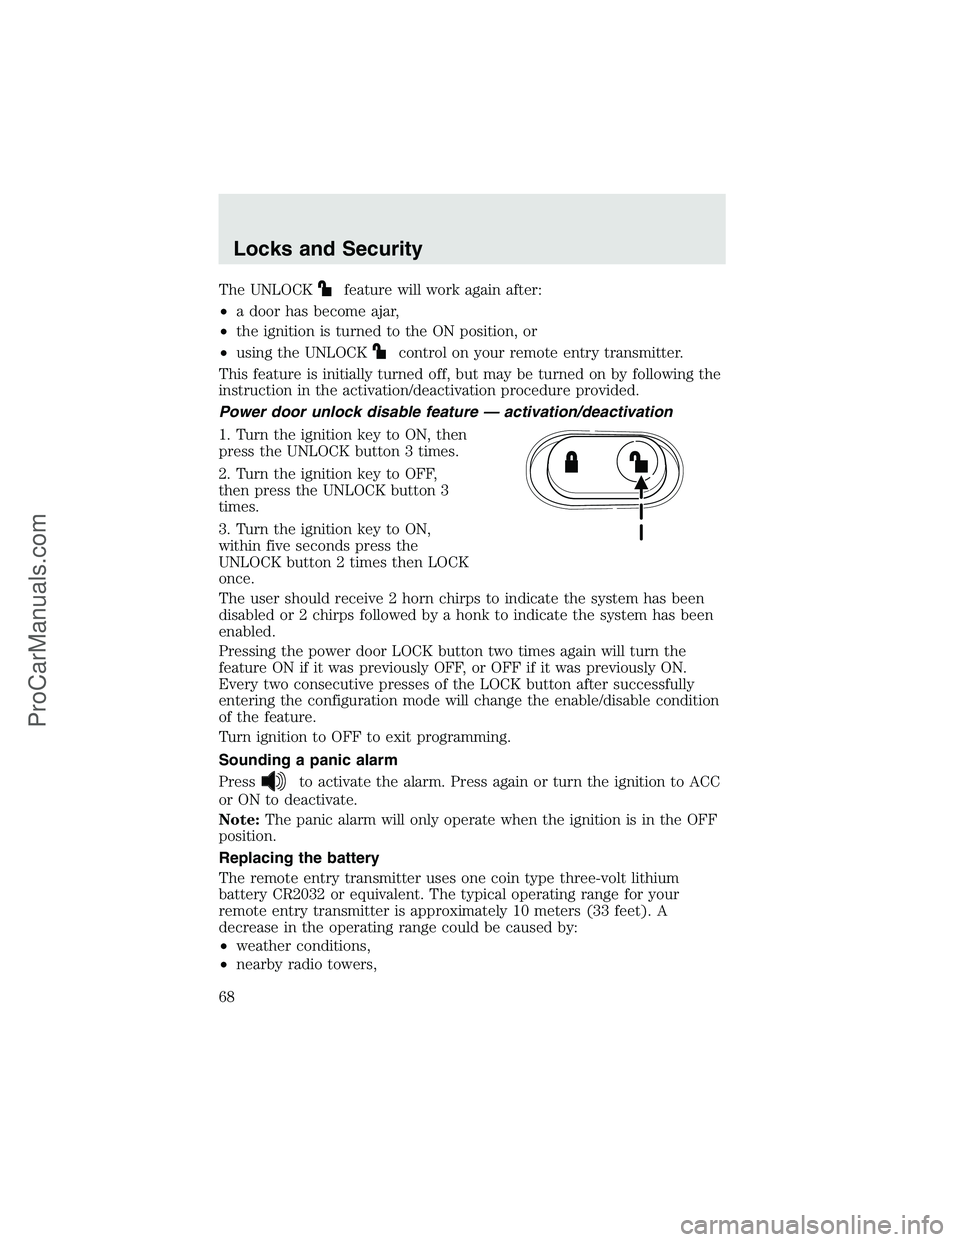
1. Turn the ignition key to ON, then
press the UNLOCK button 3 times.
2. Turn the ignition key to OFF,
then press the UNLOCK button 3
times.
3. Turn the ignition key to ON,
within five seconds press the
UNLOCK button 2 times then LOCK
once.
The user should receive 2 horn chirps to indicate the system has been
disabled or 2 chirps followed by a honk to indicate the system has been
enabled.
Pressing the power door LOCK button two times again will turn the
feature ON if it was previously OFF, or OFF if it was previously ON.
Every two consecutive presses of the LOCK button after successfully
entering the configuration mode will change the enable/disable condition
of the feature.
Turn ignition to OFF to exit programming.
Sounding a panic alarm
Press
to activate the alarm. Press again or turn the ignition to ACC
or ON to deactivate.
Note:The panic alarm will only operate when the ignition is in the OFF
position.
Replacing the battery
The remote entry transmitter uses one coin type three-volt lithium
battery CR2032 or equivalent. The typical operating range for your
remote entry transmitter is approximately 10 meters (33 feet). A
decrease in the operating range could be caused by:
•weather conditions,
•nearby radio towers,
Locks and Security
68
ProCarManuals.com
Page 69 of 280
•structures around the vehicle and
•other vehicles parked next to the vehicle.
To replace the battery:
1. Twist a thin coin between the two
halves of the remote entry
transmitter near the key ring. DO
NOT TAKE THE FRONT PART OF
THE REMOTE ENTRY
TRANSMITTER APART.
2. Remove the old battery.
3. Insert the new battery. Refer to
the diagram inside the remote entry
transmitter for the correct orientation of the battery.
4. Snap the two halves back together.
Note:Replacement of the battery willnotcause the remote transmitter
to become deprogrammed from your vehicle. The remote transmitter
should operate normally after battery replacement.
Replacing lost remote entry transmitters
If you would like to have your remote entry transmitter reprogrammed
because you lost one, or would like to buy additional remote entry
transmitters, you can either reprogram them yourself, or takeall
remote entry transmittersto your authorized dealer for
reprogramming.
How to reprogram your remote entry transmitters
You must haveall remote entry transmitters(maximum of four)
available before beginning this procedure.
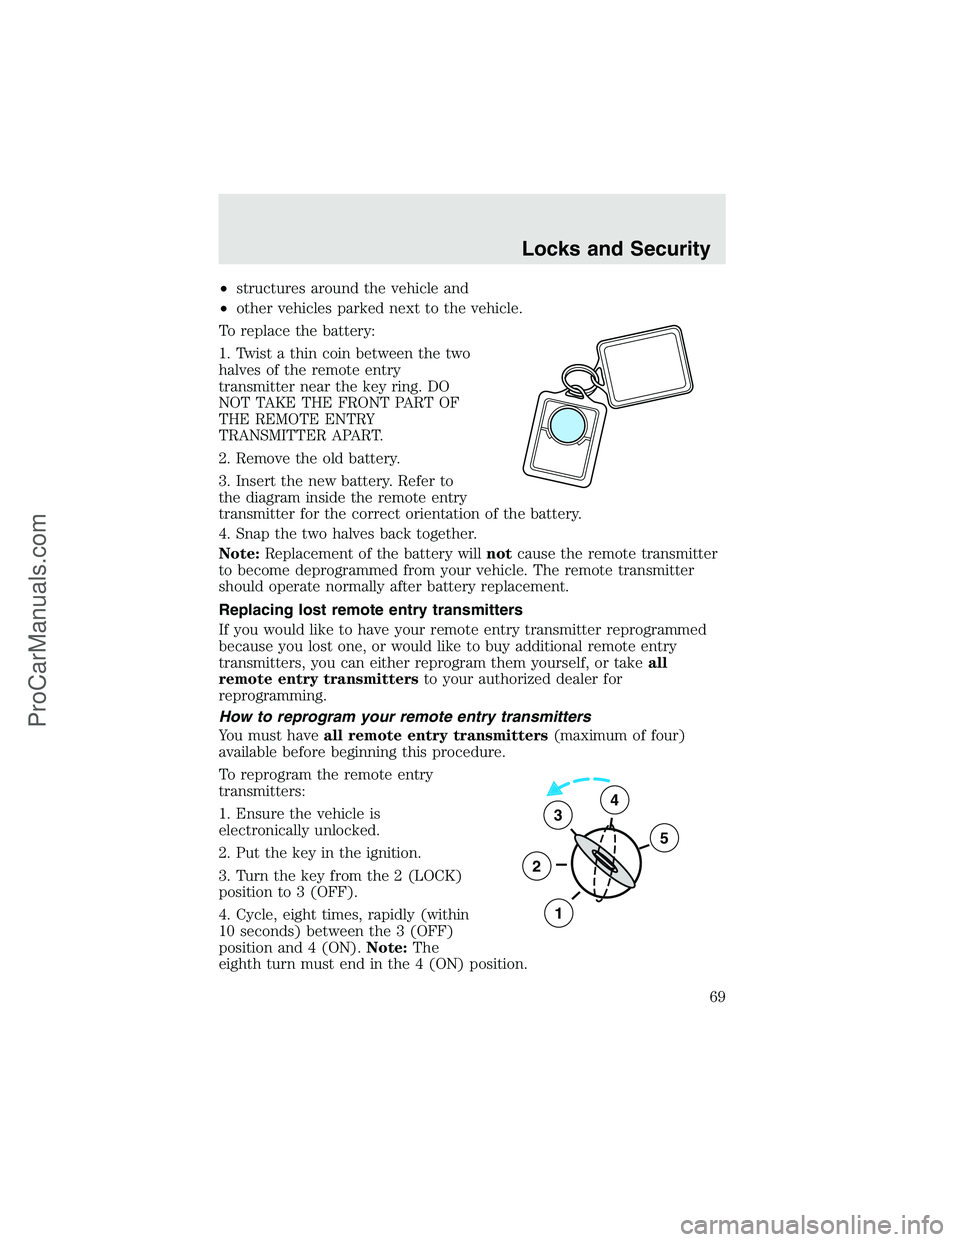
To reprogram the remote entry
transmitters:
1. Ensure the vehicle is
electronically unlocked.
2. Put the key in the ignition.
3. Turn the key from the 2 (LOCK)
position to 3 (OFF).
4. Cycle, eight times, rapidly (within
10 seconds) between the 3 (OFF)
position and 4 (ON).Note:The
eighth turn must end in the 4 (ON) position.
3
2
1
5
4
Locks and Security
69
ProCarManuals.com
Page 71 of 280
•the brake is pressed before reaching 8 km/h (5 mph) and
•the vehicle is traveling more than 8 km/h (5 mph).
Relock
The autolock feature repeats when the following conditions are met:
•the vehicle’s speed is less than 8 km/h (5 mph), and
•any door is opened then closed while the ignition is in the RUN
position, and
•the brake is pressed before reaching 8 km/h (5 mph), and
•the vehicle is traveling more than 8 km/h (5 mph).
Deactivating/activating the autolock feature
Before following the procedure, make sure that the ignition is OFF and
all vehicle doors are closed.
You must complete steps 1-7 within 30 seconds or the procedure will
have to be repeated. If the procedure needs to be repeated, you must
wait 30 seconds.
1. Turn the ignition key to ON.
2. Press the power door unlock control three times.
3. Turn the ignition key from ON to OFF.
4. Press the power door unlock control three times.
5. Turn the ignition back to ON. The horn will chirp.
6. Press the unlock control, then press the lock control. The horn will
chirp once if autolock was deactivated or twice (one short and one long
chirp) if autolock was activated.Note:Pressing the power door
lock/unlock control again will toggle between activating and deactivating
the autolock feature.
7. Turn the ignition to OFF. The horn will chirp once to confirm the
procedure is complete.
Locks and Security
71
ProCarManuals.com
Page 95 of 280
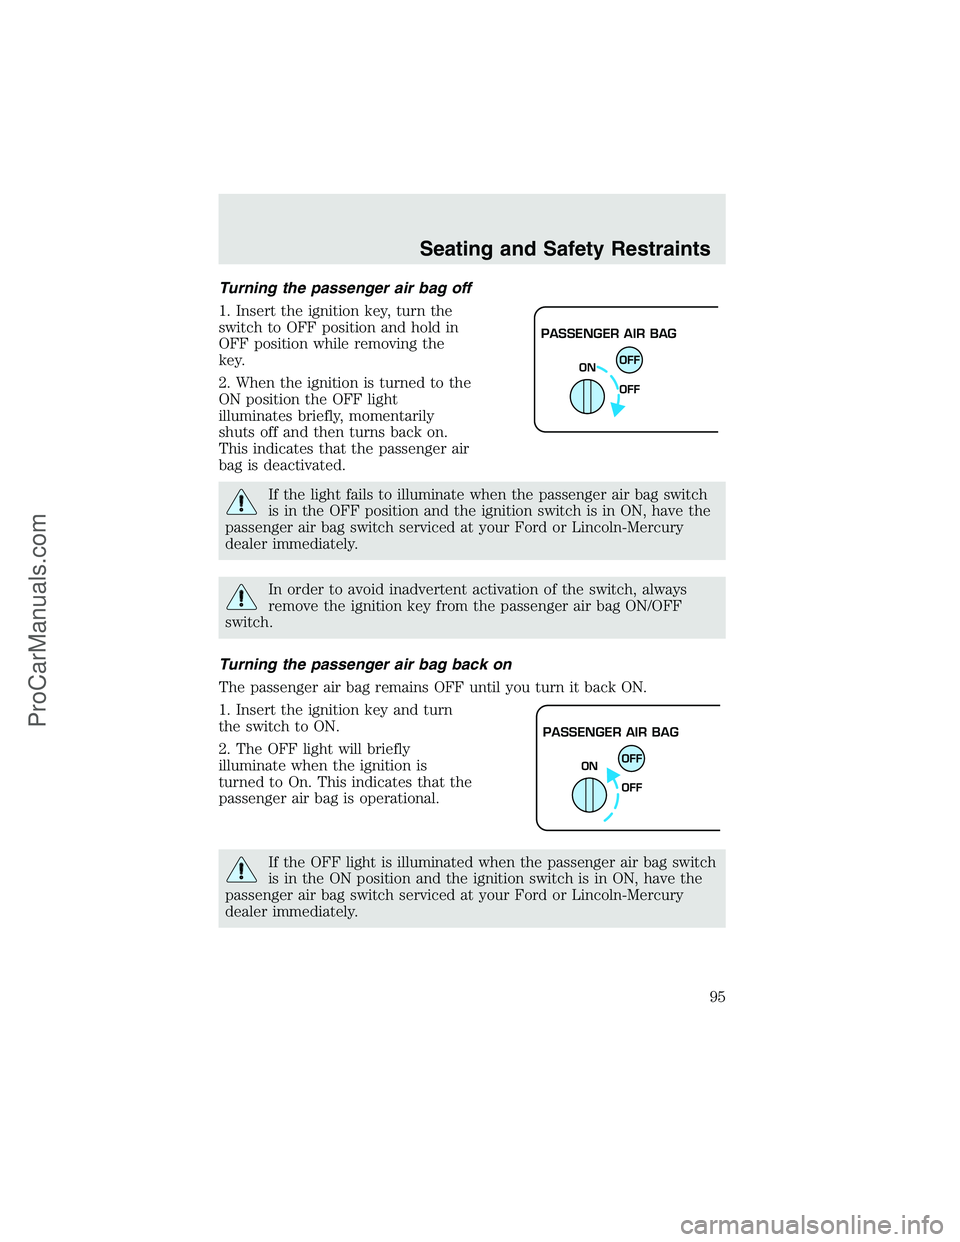
Turning the passenger air bag off
1. Insert the ignition key, turn the
switch to OFF position and hold in
OFF position while removing the
key.
2. When the ignition is turned to the
ON position the OFF light
illuminates briefly, momentarily
shuts off and then turns back on.
This indicates that the passenger air
bag is deactivated.
If the light fails to illuminate when the passenger air bag switch
is in the OFF position and the ignition switch is in ON, have the
passenger air bag switch serviced at your Ford or Lincoln-Mercury
dealer immediately.
In order to avoid inadvertent activation of the switch, always
remove the ignition key from the passenger air bag ON/OFF
switch.
Turning the passenger air bag back on
The passenger air bag remains OFF until you turn it back ON.
1. Insert the ignition key and turn
the switch to ON.
2. The OFF light will briefly
illuminate when the ignition is
turned to On. This indicates that the
passenger air bag is operational.
If the OFF light is illuminated when the passenger air bag switch
is in the ON position and the ignition switch is in ON, have the
passenger air bag switch serviced at your Ford or Lincoln-Mercury
dealer immediately.
PASSENGER AIR BAG
OFF
OFF ON
PASSENGER AIR BAG
OFF
OFF ON
Seating and Safety Restraints
95
ProCarManuals.com
Page 110 of 280
STARTING
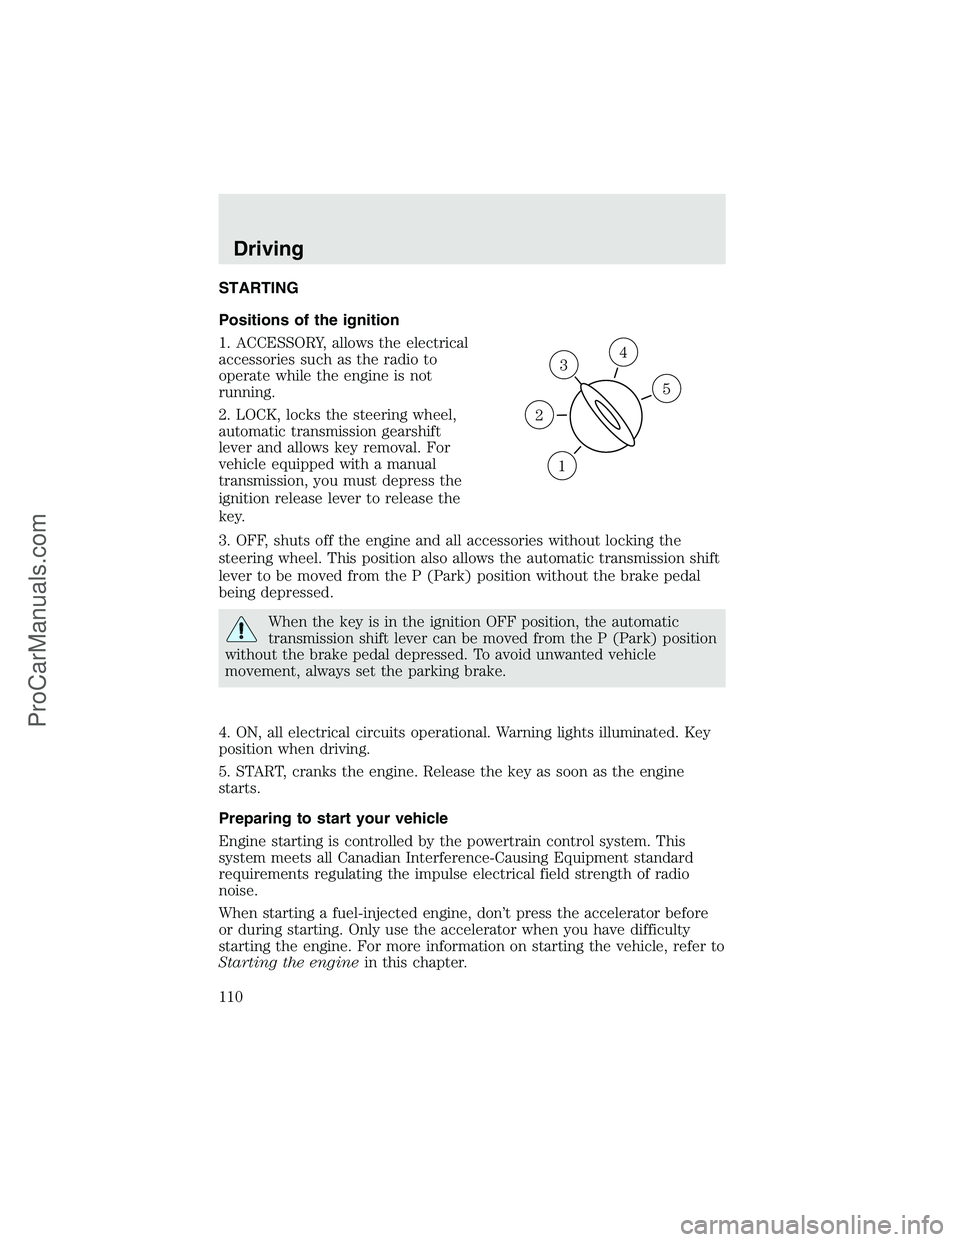
Positions of the ignition
1. ACCESSORY, allows the electrical
accessories such as the radio to
operate while the engine is not
running.
2. LOCK, locks the steering wheel,
automatic transmission gearshift
lever and allows key removal. For
vehicle equipped with a manual
transmission, you must depress the
ignition release lever to release the
key.
3. OFF, shuts off the engine and all accessories without locking the
steering wheel. This position also allows the automatic transmission shift
lever to be moved from the P (Park) position without the brake pedal
being depressed.
When the key is in the ignition OFF position, the automatic
transmission shift lever can be moved from the P (Park) position
without the brake pedal depressed. To avoid unwanted vehicle
movement, always set the parking brake.
4. ON, all electrical circuits operational. Warning lights illuminated. Key
position when driving.
5. START, cranks the engine. Release the key as soon as the engine
starts.
Preparing to start your vehicle
Engine starting is controlled by the powertrain control system. This
system meets all Canadian Interference-Causing Equipment standard
requirements regulating the impulse electrical field strength of radio
noise.
When starting a fuel-injected engine, don’t press the accelerator before
or during starting. Only use the accelerator when you have difficulty
starting the engine. For more information on starting the vehicle, refer to
Starting the enginein this chapter.
3
1
2
5
4
Driving
110
ProCarManuals.com