key FORD F350 2008 Owner's Guide
[x] Cancel search | Manufacturer: FORD, Model Year: 2008, Model line: F350, Model: FORD F350 2008Pages: 400, PDF Size: 3.83 MB
Page 231 of 400
3. Press and hold the brake pedal for two (2) seconds, then release.
4. Turn the ignition to OFF/LOCK (DO NOTremove the key.)
5. Cycle the ignition from OFF/LOCK to RUN three (3) times ending in
RUN.DO NOTstart the engine.
If reset mode has been entered successfully, the horn will sound once,
the TPMS indicator will flash and the message center will displayTRAIN
LF TIRE.
If after repeated attempts to enter reset mode, the horn does not sound,
the TPMS indicator does not flash and the message center does not
display TRAIN LF TIRE, seek service from your authorized dealer.
TPMS reset sequence
The TPMS system needs to be reset starting with the left front tire in
the following clockwise order:
1. Left front tire
2. Right front tire
3. Right rear tire
4. Left rear tire
2008 F-250/350/450/550(f23)
Owners Guide (post-2002-fmt)
USA(fus)
Tires, Wheels and Loading
231
ProCarManuals.com
Page 232 of 400
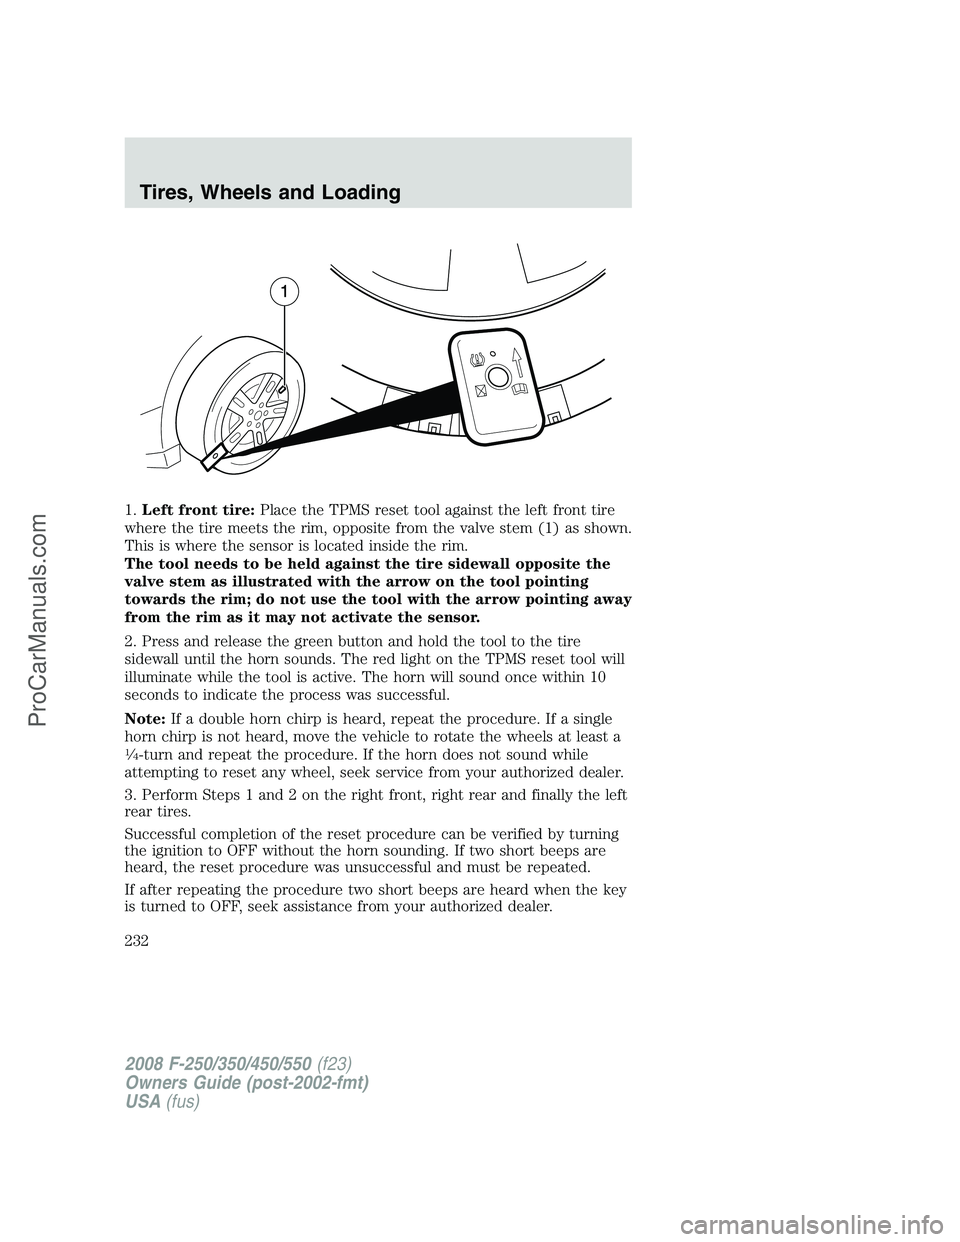
1.Left front tire:Place the TPMS reset tool against the left front tire
where the tire meets the rim, opposite from the valve stem (1) as shown.
This is where the sensor is located inside the rim.
The tool needs to be held against the tire sidewall opposite the
valve stem as illustrated with the arrow on the tool pointing
towards the rim; do not use the tool with the arrow pointing away
from the rim as it may not activate the sensor.
2. Press and release the green button and hold the tool to the tire
sidewall until the horn sounds. The red light on the TPMS reset tool will
illuminate while the tool is active. The horn will sound once within 10
seconds to indicate the process was successful.
Note:If a double horn chirp is heard, repeat the procedure. If a single
horn chirp is not heard, move the vehicle to rotate the wheels at least a
1�4-turn and repeat the procedure. If the horn does not sound while
attempting to reset any wheel, seek service from your authorized dealer.
3. Perform Steps 1 and 2 on the right front, right rear and finally the left
rear tires.
Successful completion of the reset procedure can be verified by turning
the ignition to OFF without the horn sounding. If two short beeps are
heard, the reset procedure was unsuccessful and must be repeated.
If after repeating the procedure two short beeps are heard when the key
is turned to OFF, seek assistance from your authorized dealer.
2008 F-250/350/450/550(f23)
Owners Guide (post-2002-fmt)
USA(fus)
Tires, Wheels and Loading
232
ProCarManuals.com
Page 255 of 400
STARTING
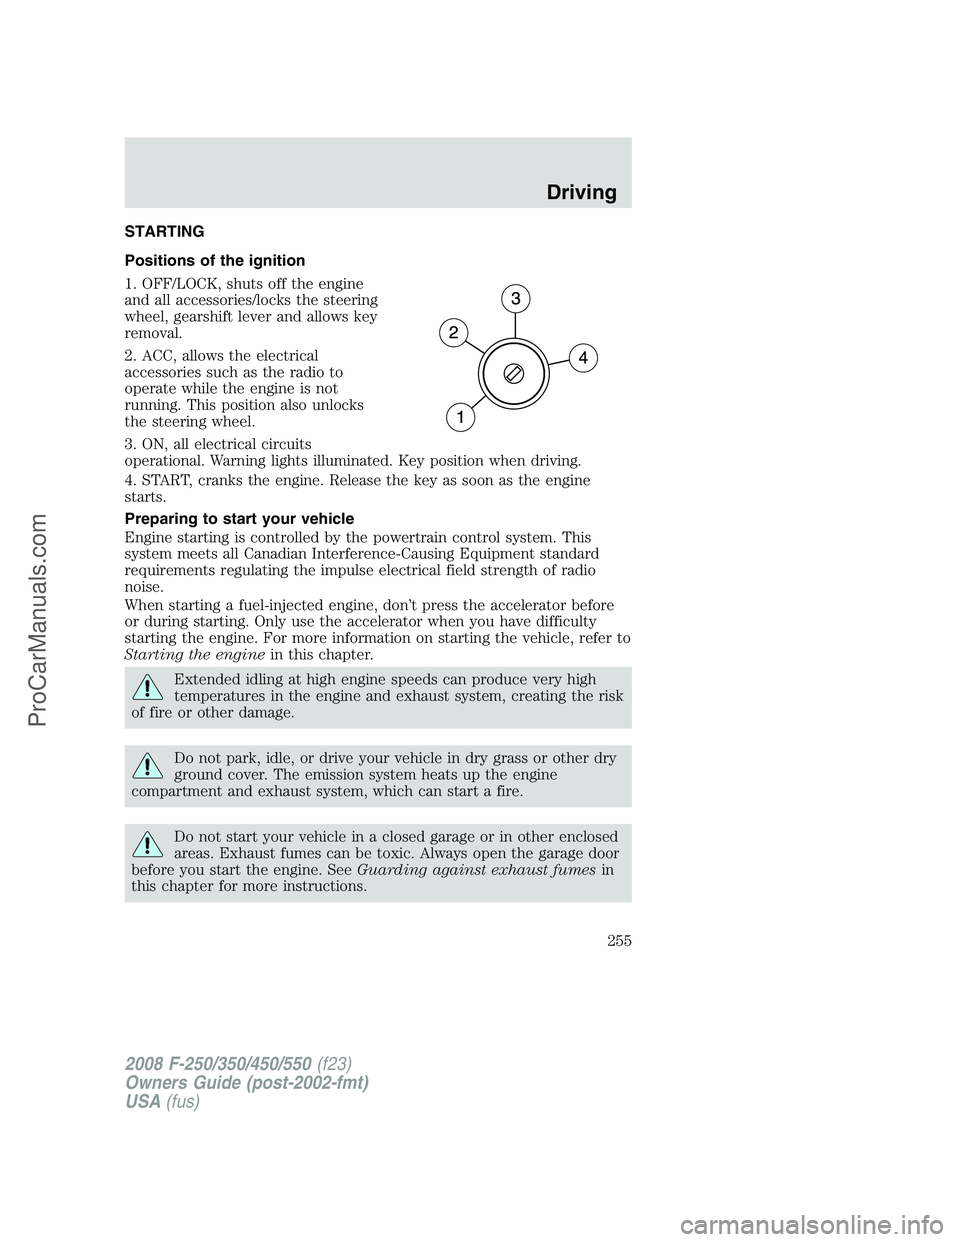
Positions of the ignition
1. OFF/LOCK, shuts off the engine
and all accessories/locks the steering
wheel, gearshift lever and allows key
removal.
2. ACC, allows the electrical
accessories such as the radio to
operate while the engine is not
running. This position also unlocks
the steering wheel.
3. ON, all electrical circuits
operational. Warning lights illuminated. Key position when driving.
4. START, cranks the engine. Release the key as soon as the engine
starts.
Preparing to start your vehicle
Engine starting is controlled by the powertrain control system. This
system meets all Canadian Interference-Causing Equipment standard
requirements regulating the impulse electrical field strength of radio
noise.
When starting a fuel-injected engine, don’t press the accelerator before
or during starting. Only use the accelerator when you have difficulty
starting the engine. For more information on starting the vehicle, refer to
Starting the enginein this chapter.
Extended idling at high engine speeds can produce very high
temperatures in the engine and exhaust system, creating the risk
of fire or other damage.
Do not park, idle, or drive your vehicle in dry grass or other dry
ground cover. The emission system heats up the engine
compartment and exhaust system, which can start a fire.
Do not start your vehicle in a closed garage or in other enclosed
areas. Exhaust fumes can be toxic. Always open the garage door
before you start the engine. SeeGuarding against exhaust fumesin
this chapter for more instructions.
2008 F-250/350/450/550(f23)
Owners Guide (post-2002-fmt)
USA(fus)
Driving
255
ProCarManuals.com
Page 257 of 400
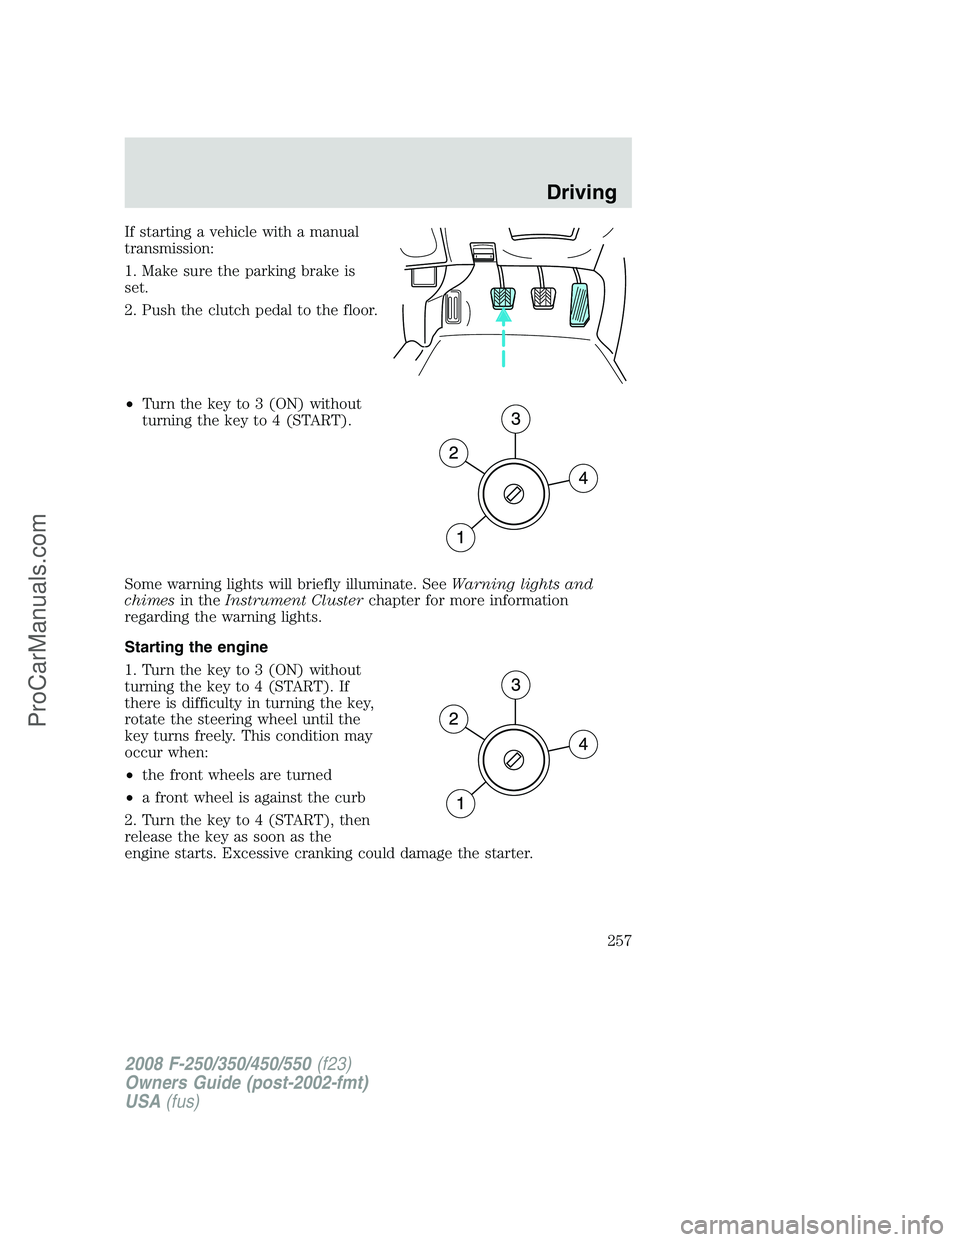
If starting a vehicle with a manual
transmission:
1. Make sure the parking brake is
set.
2. Push the clutch pedal to the floor.
•Turn the key to 3 (ON) without
turning the key to 4 (START).
Some warning lights will briefly illuminate. SeeWarning lights and
chimesin theInstrument Clusterchapter for more information
regarding the warning lights.
Starting the engine
1. Turn the key to 3 (ON) without
turning the key to 4 (START). If
there is difficulty in turning the key,
rotate the steering wheel until the
key turns freely. This condition may
occur when:
•the front wheels are turned
•a front wheel is against the curb
2. Turn the key to 4 (START), then
release the key as soon as the
engine starts. Excessive cranking could damage the starter.
2008 F-250/350/450/550(f23)
Owners Guide (post-2002-fmt)
USA(fus)
Driving
257
ProCarManuals.com
Page 258 of 400
Note:If the engine does not start on the first try, turn the key to OFF,
wait 10 seconds and try again. If the engine still fails to start, press the
accelerator to the floor and try again; this will allow the engine to crank
with the fuel shut off in case the engine is flooded with fuel.
If your vehicle has an automatic transmission,it will have a
computer assisted cranking system. This feature assists in starting the
engine. If the ignition key is turned to the 4 (START) position, and then
released when the engine begins cranking, the engine may continue
cranking for up to 10 seconds or until the vehicle starts
Guarding against exhaust fumes
Carbon monoxide is present in exhaust fumes. Take precautions to avoid
its dangerous effects.
If you smell exhaust fumes inside your vehicle, have your dealer
inspect your vehicle immediately. Do not drive if you smell
exhaust fumes.
Important ventilating information
If the engine is idling while the vehicle is stopped for a long period of
time, open the windows at least one inch (2.5 cm) or adjust the heating
or air conditioning to bring in fresh air.
ENGINE BLOCK HEATER
An engine block heater warms the engine coolant which aids in starting
and allows the heater/defroster system to respond quickly. If your vehicle
is equipped with this system, your equipment includes a heater element
which is installed in your engine block and a wire harness which allows
the user to connect the system to a grounded 120 volt a/c electrical
source. The block heater system is most effective when outdoor
temperatures reach below 0°F (-18°C).
Failure to follow engine block heater instructions could result in
property damage or physical harm.
To reduce the risk of electrical shock, do not use your heater
with ungrounded electrical systems or two-pronged (cheater)
adapters.
2008 F-250/350/450/550(f23)
Owners Guide (post-2002-fmt)
USA(fus)
Driving
258
ProCarManuals.com
Page 265 of 400
Vehicles with a higher center of gravity such as utility vehicles
and trucks handle differently than vehicles with a lower center
of gravity. Utility vehicles and trucks arenotdesigned for cornering at
speeds as high as passenger cars any more than low-slung sports cars
are designed to perform satisfactorily under off-road conditions. Avoid
sharp turns, excessive speed or abrupt maneuvers in these vehicles.
Failure to drive cautiously could result in an increased risk of loss of
vehicle control, vehicle rollover, personal injury and death.
Loaded vehicles, with a higher center of gravity, may handle
differently than unloaded vehicles. Do not overload your vehicle
and use extra precautions, such as driving at slower speeds, avoiding
abrupt steering changes and allowing for increased stopping distance,
when driving a heavily loaded vehicle. Over loading or loading the
vehicle improperly can deteriorate handling capability and contribute
to loss of vehicle control and vehicle rollover.
AUTOMATIC TRANSMISSION OPERATION (IF EQUIPPED)
Brake-shift interlock
This vehicle is equipped with a brake-shift interlock feature that prevents
the gearshift lever from being moved from P (Park) when the ignition is
in the 3 (ON) position and the brake pedal is not depressed.
If you cannot move the gearshift lever out of the P (Park) position with
the ignition in the 3 (ON) position and the brake pedal depressed:
1. Apply the parking brake. Turn the
ignition key to 1 (OFF/LOCK), then
remove the key. Locate the access
cover plate for the brake-shift
interlock override. It is located on
top of the steering column shroud.
2008 F-250/350/450/550(f23)
Owners Guide (post-2002-fmt)
USA(fus)
Driving
265
ProCarManuals.com
Page 266 of 400
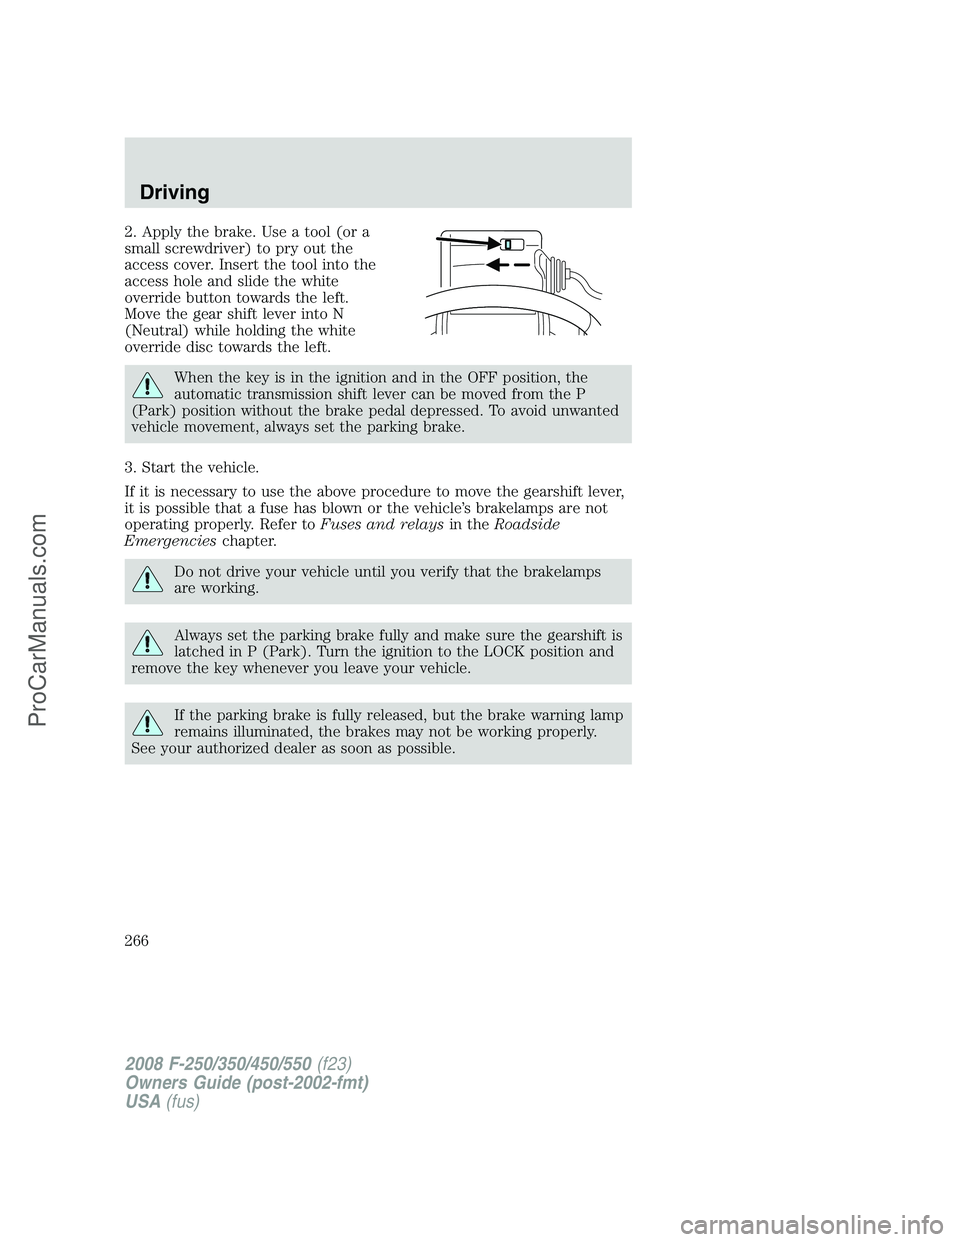
2. Apply the brake. Use a tool (or a
small screwdriver) to pry out the
access cover. Insert the tool into the
access hole and slide the white
override button towards the left.
Move the gear shift lever into N
(Neutral) while holding the white
override disc towards the left.
When the key is in the ignition and in the OFF position, the
automatic transmission shift lever can be moved from the P
(Park) position without the brake pedal depressed. To avoid unwanted
vehicle movement, always set the parking brake.
3. Start the vehicle.
If it is necessary to use the above procedure to move the gearshift lever,
it is possible that a fuse has blown or the vehicle’s brakelamps are not
operating properly. Refer toFuses and relaysin theRoadside
Emergencieschapter.
Do not drive your vehicle until you verify that the brakelamps
are working.
Always set the parking brake fully and make sure the gearshift is
latched in P (Park). Turn the ignition to the LOCK position and
remove the key whenever you leave your vehicle.
If the parking brake is fully released, but the brake warning lamp
remains illuminated, the brakes may not be working properly.
See your authorized dealer as soon as possible.
2008 F-250/350/450/550(f23)
Owners Guide (post-2002-fmt)
USA(fus)
Driving
266
ProCarManuals.com
Page 267 of 400
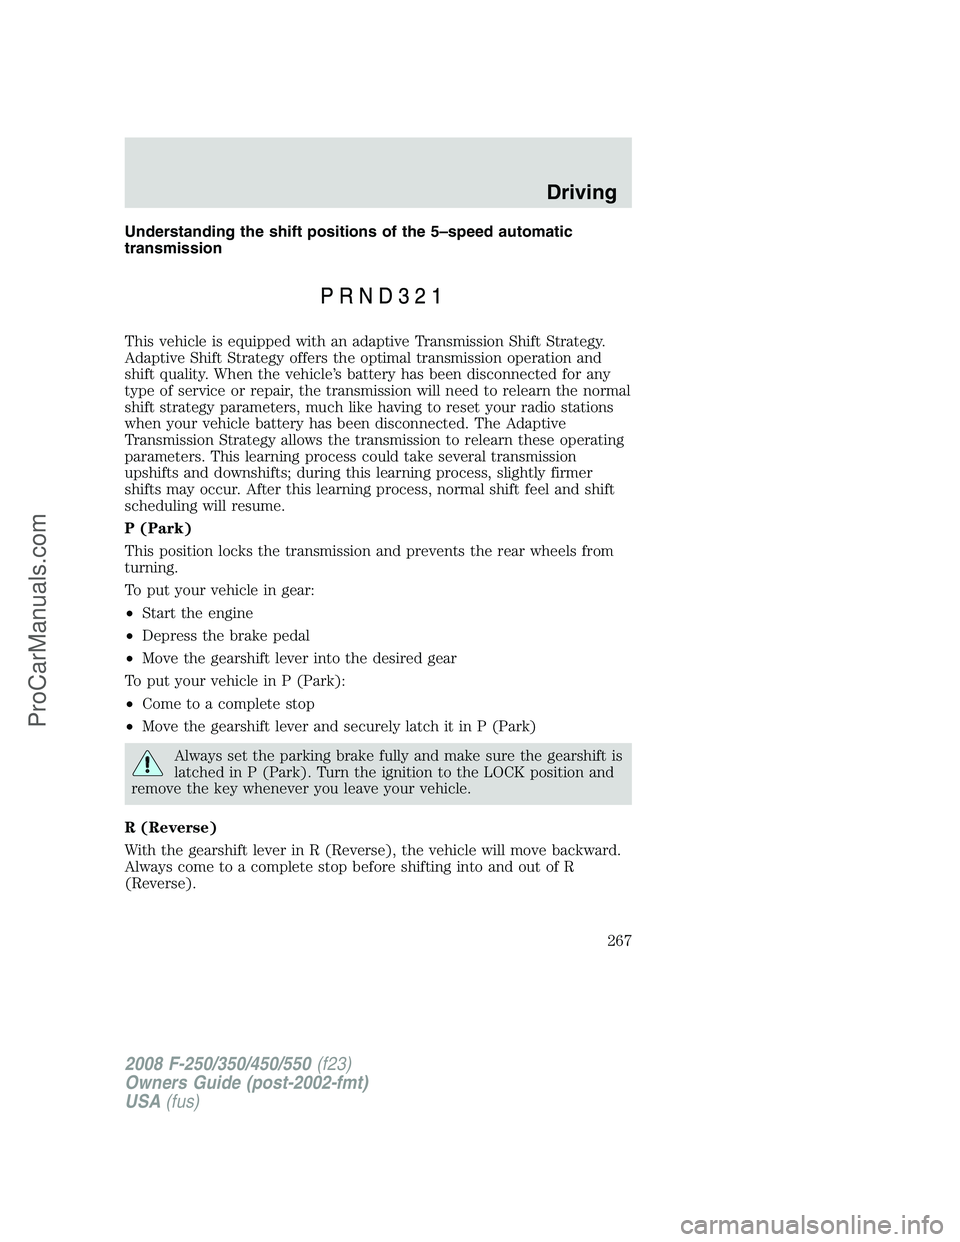
Understanding the shift positions of the 5–speed automatic
transmission
This vehicle is equipped with an adaptive Transmission Shift Strategy.
Adaptive Shift Strategy offers the optimal transmission operation and
shift quality. When the vehicle’s battery has been disconnected for any
type of service or repair, the transmission will need to relearn the normal
shift strategy parameters, much like having to reset your radio stations
when your vehicle battery has been disconnected. The Adaptive
Transmission Strategy allows the transmission to relearn these operating
parameters. This learning process could take several transmission
upshifts and downshifts; during this learning process, slightly firmer
shifts may occur. After this learning process, normal shift feel and shift
scheduling will resume.
P (Park)
This position locks the transmission and prevents the rear wheels from
turning.
To put your vehicle in gear:
•Start the engine
•Depress the brake pedal
•Move the gearshift lever into the desired gear
To put your vehicle in P (Park):
•Come to a complete stop
•Move the gearshift lever and securely latch it in P (Park)
Always set the parking brake fully and make sure the gearshift is
latched in P (Park). Turn the ignition to the LOCK position and
remove the key whenever you leave your vehicle.
R (Reverse)
With the gearshift lever in R (Reverse), the vehicle will move backward.
Always come to a complete stop before shifting into and out of R
(Reverse).
2008 F-250/350/450/550(f23)
Owners Guide (post-2002-fmt)
USA(fus)
Driving
267
ProCarManuals.com
Page 286 of 400
transmission is in P (Park) or the manual transmission is in gear. Do not
leave the vehicle unattended with the transfer case in the N (Neutral)
position. Always set the parking brake fully and turn off the ignition
when leaving the vehicle.
Always set the parking brake fully and make sure the gearshift is
latched in P (Park). Turn the ignition to the LOCK position and
remove the key whenever you leave your vehicle.
If the parking brake is fully released, but the brake warning lamp
remains illuminated, the brakes may not be working properly.
See your authorized dealer.
4WD Systems
4WD (when you select a 4WD mode), uses all four wheels to power the
vehicle. This increases traction, enabling you to drive over terrain and
road conditions that a conventional two-wheel drive vehicle cannot.
Power is supplied to all four wheels through a transfer case. On 4WD
vehicles, the transfer case allows you to select 4WD when necessary.
Information on transfer case operation and shifting procedures can be
found in theDrivingchapter. Information on transfer case maintenance
can be found in theMaintenance and Specificationschapter. You
should become thoroughly familiar with this information before you
operate your vehicle.
Normal characteristics
On some 4WD models, the initial shift from two-wheel drive to 4x4 while
the vehicle is moving can cause some momentary clunk and ratcheting
sounds. This is the front drivetrain coming up to speed and the
automatic locking hubs engaging and is not cause for concern.
Sand
When driving over sand, try to keep all four wheels on the most solid
area of the trail. Avoid reducing the tire pressures but shift to a lower
gear and drive steadily through the terrain. Apply the accelerator slowly
and avoid spinning the wheels.
Avoid excessive speed because vehicle momentum can work against you
and cause the vehicle to become stuck to the point that assistance may
be required from another vehicle. Remember, you may be able to back
out the way you came if you proceed with caution.
2008 F-250/350/450/550(f23)
Owners Guide (post-2002-fmt)
USA(fus)
Driving
286
ProCarManuals.com
Page 294 of 400
ROADSIDE ASSISTANCE
Getting roadside assistance
To fully assist you should you have a vehicle concern, Ford Motor
Company offers a complimentary roadside assistance program. This
program is separate from the New Vehicle Limited Warranty. The service
is available:
•24–hours, seven days a week
•for the coverage period listed on the Roadside Assistance Card
included in your Owner Guide portfolio.
Roadside assistance will cover:
•a flat tire change with a good spare (except vehicles that have been
supplied with a tire inflation kit)
•battery jump start
•lock-out assistance (key replacement cost is the customer’s
responsibility)
•fuel delivery – Independent Service Contractors, if not prohibited by
state, local or municipal law shall deliver up to 2.0 gallons (7.5L) of
gasoline or 5 gallons (18.9L) of diesel fuel to a disabled vehicle. Fuel
delivery service is limited to two no-charge occurrences within a
12-month period.
•winch out – available within 100 feet (30.5 meters) of a paved or
county maintained road, no recoveries.
•towing – Ford/Mercury/Lincoln eligible vehicle towed to an authorized
dealer within 35 miles (56.3 km) of the disablement location or to the
nearest authorized dealer. If a member requests to be towed to an
authorized dealer more than 35 miles (56.3 km) from the disablement
location, the member shall be responsible for any mileage costs in
excess of 35 miles (56.3 km).
Trailers shall be covered up to $200 if the disabled eligible vehicle
requires service at the nearest authorized dealer. If the trailer is disabled,
but the towing vehicle is operational, the trailer does not qualify for any
roadside services.
2008 F-250/350/450/550(f23)
Owners Guide (post-2002-fmt)
USA(fus)
Roadside Emergencies
294
ProCarManuals.com