lock FORD F350 2009 User Guide
[x] Cancel search | Manufacturer: FORD, Model Year: 2009, Model line: F350, Model: FORD F350 2009Pages: 419, PDF Size: 3.93 MB
Page 75 of 419
LOCKED (disabled). To change the level of control, press the memory
preset controls 3 and 5 simultaneously on the front audio controls. The
control level will cycle each time the buttons are pressed simultaneously.
The three states are described as:
FULL(enabled): The FES has control over the primary (speaker) and
secondary (headphone) audio sources.
LOCAL: The FES has control over the secondary source (headphones)
only. The radio will ignore button presses that affect the primary
(speaker) audio source.
LOCKED(disabled): The FES buttons are locked and all FES button
presses are ignored by the radio and the FES except for load and eject.
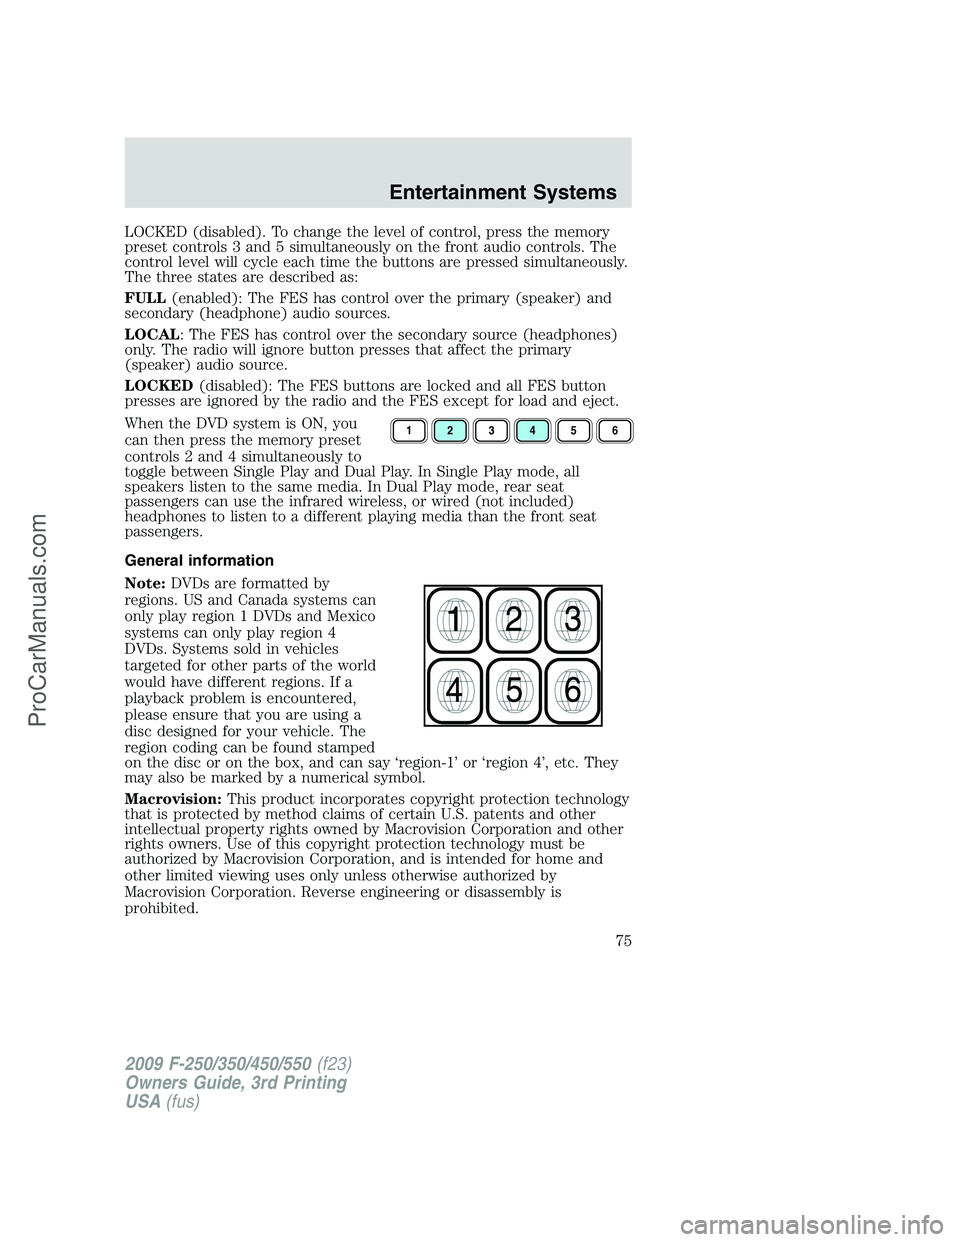
When the DVD system is ON, you
can then press the memory preset
controls 2 and 4 simultaneously to
toggle between Single Play and Dual Play. In Single Play mode, all
speakers listen to the same media. In Dual Play mode, rear seat
passengers can use the infrared wireless, or wired (not included)
headphones to listen to a different playing media than the front seat
passengers.
General information
Note:DVDs are formatted by
regions. US and Canada systems can
only play region 1 DVDs and Mexico
systems can only play region 4
DVDs. Systems sold in vehicles
targeted for other parts of the world
would have different regions. If a
playback problem is encountered,
please ensure that you are using a
disc designed for your vehicle. The
region coding can be found stamped
on the disc or on the box, and can say ‘region-1’ or ‘region 4’, etc. They
may also be marked by a numerical symbol.
Macrovision:This product incorporates copyright protection technology
that is protected by method claims of certain U.S. patents and other
intellectual property rights owned by Macrovision Corporation and other
rights owners. Use of this copyright protection technology must be
authorized by Macrovision Corporation, and is intended for home and
other limited viewing uses only unless otherwise authorized by
Macrovision Corporation. Reverse engineering or disassembly is
prohibited.
123456
2009 F-250/350/450/550(f23)
Owners Guide, 3rd Printing
USA(fus)
Entertainment Systems
75
ProCarManuals.com
Page 89 of 419
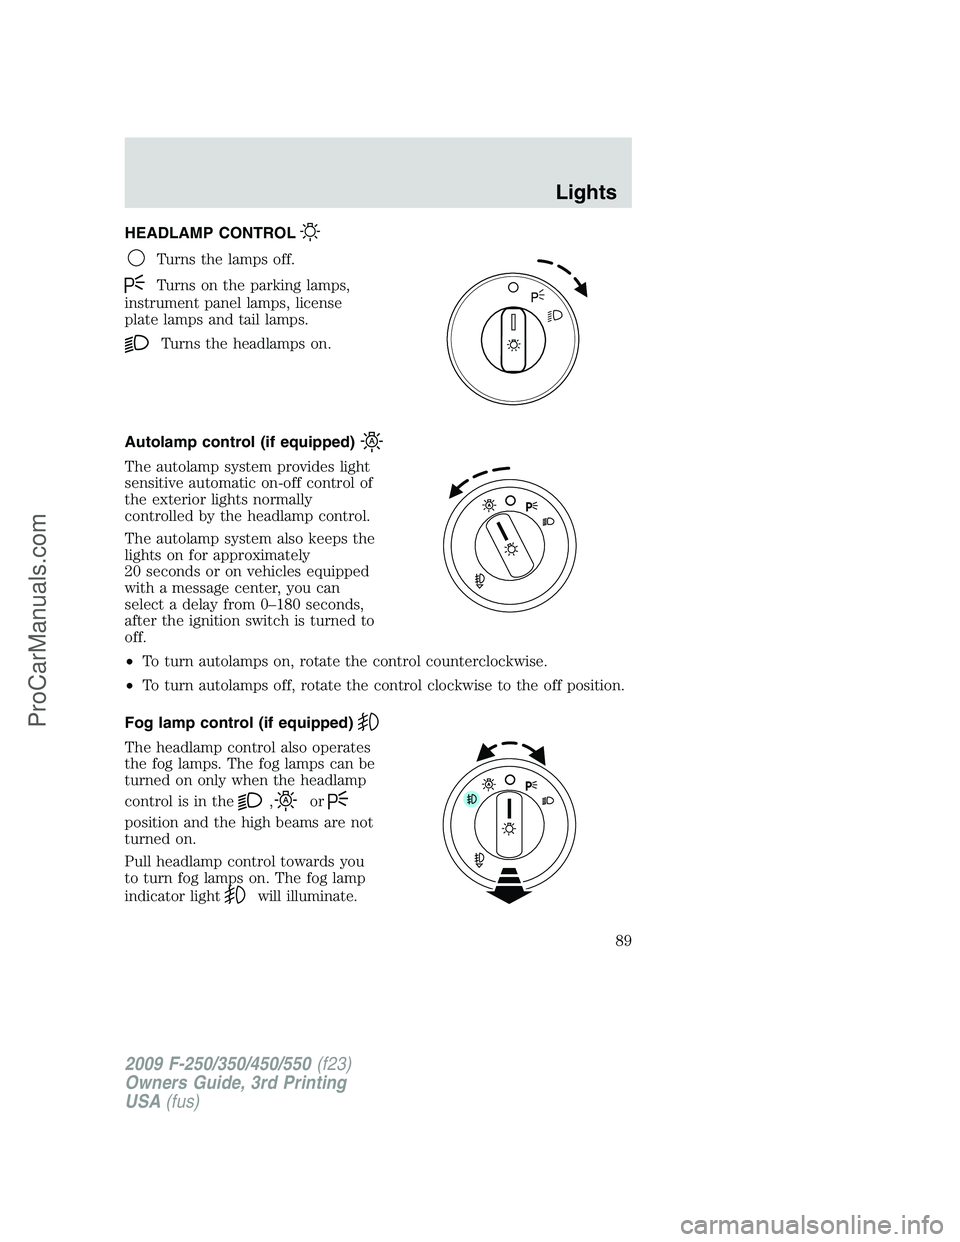
HEADLAMP CONTROL
Turns the lamps off.
Turns on the parking lamps,
instrument panel lamps, license
plate lamps and tail lamps.
Turns the headlamps on.
Autolamp control (if equipped)
The autolamp system provides light
sensitive automatic on-off control of
the exterior lights normally
controlled by the headlamp control.
The autolamp system also keeps the
lights on for approximately
20 seconds or on vehicles equipped
with a message center, you can
select a delay from 0–180 seconds,
after the ignition switch is turned to
off.
•To turn autolamps on, rotate the control counterclockwise.
•To turn autolamps off, rotate the control clockwise to the off position.
Fog lamp control (if equipped)
The headlamp control also operates
the fog lamps. The fog lamps can be
turned on only when the headlamp
control is in the
,or
position and the high beams are not
turned on.
Pull headlamp control towards you
to turn fog lamps on. The fog lamp
indicator light
will illuminate.
2009 F-250/350/450/550(f23)
Owners Guide, 3rd Printing
USA(fus)
Lights
89
ProCarManuals.com
Page 91 of 419
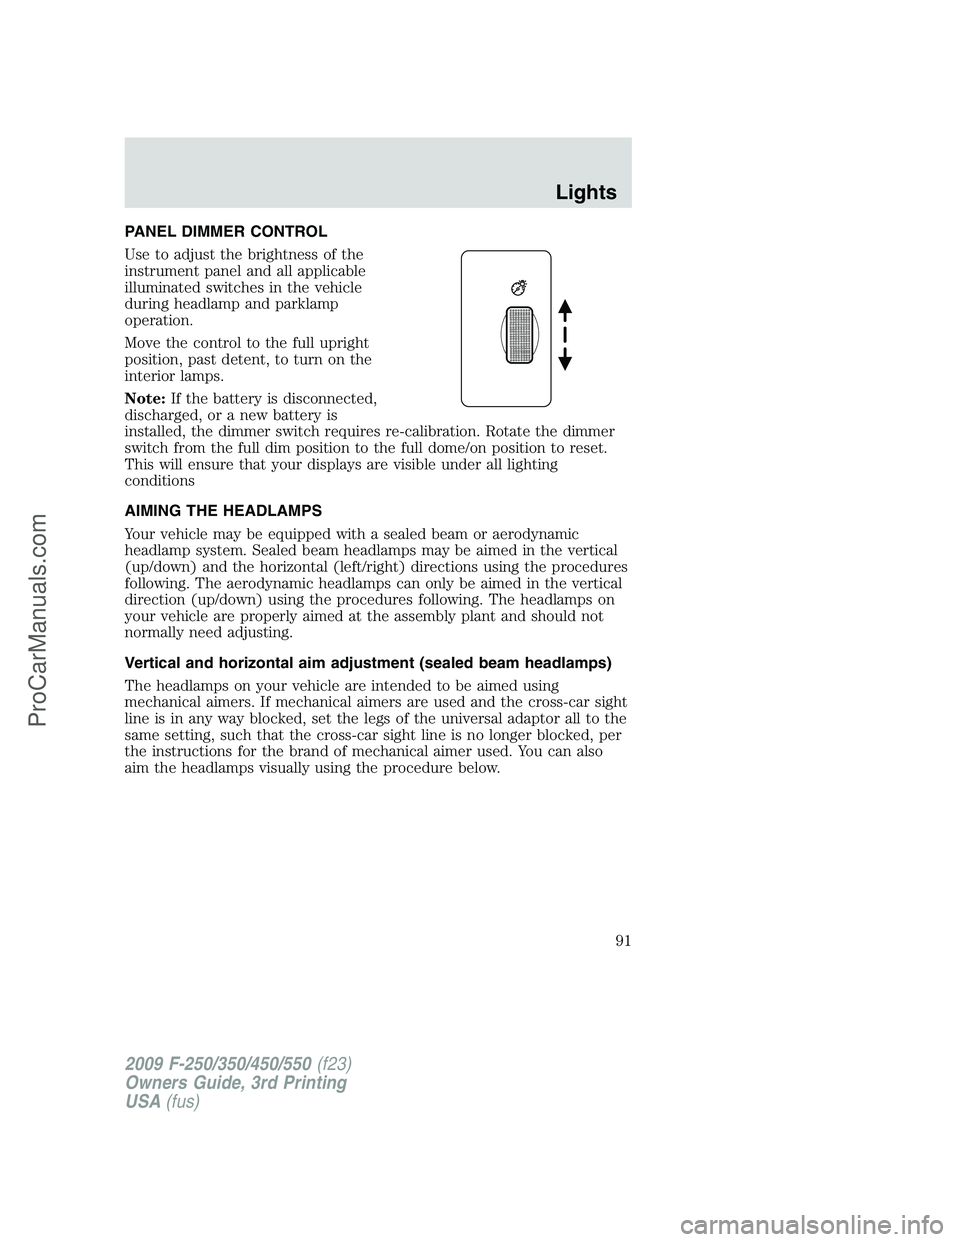
PANEL DIMMER CONTROL
Use to adjust the brightness of the
instrument panel and all applicable
illuminated switches in the vehicle
during headlamp and parklamp
operation.
Move the control to the full upright
position, past detent, to turn on the
interior lamps.
Note:If the battery is disconnected,
discharged, or a new battery is
installed, the dimmer switch requires re-calibration. Rotate the dimmer
switch from the full dim position to the full dome/on position to reset.
This will ensure that your displays are visible under all lighting
conditions
AIMING THE HEADLAMPS
Your vehicle may be equipped with a sealed beam or aerodynamic
headlamp system. Sealed beam headlamps may be aimed in the vertical
(up/down) and the horizontal (left/right) directions using the procedures
following. The aerodynamic headlamps can only be aimed in the vertical
direction (up/down) using the procedures following. The headlamps on
your vehicle are properly aimed at the assembly plant and should not
normally need adjusting.
Vertical and horizontal aim adjustment (sealed beam headlamps)
The headlamps on your vehicle are intended to be aimed using
mechanical aimers. If mechanical aimers are used and the cross-car sight
line is in any way blocked, set the legs of the universal adaptor all to the
same setting, such that the cross-car sight line is no longer blocked, per
the instructions for the brand of mechanical aimer used. You can also
aim the headlamps visually using the procedure below.
2009 F-250/350/450/550(f23)
Owners Guide, 3rd Printing
USA(fus)
Lights
91
ProCarManuals.com
Page 93 of 419
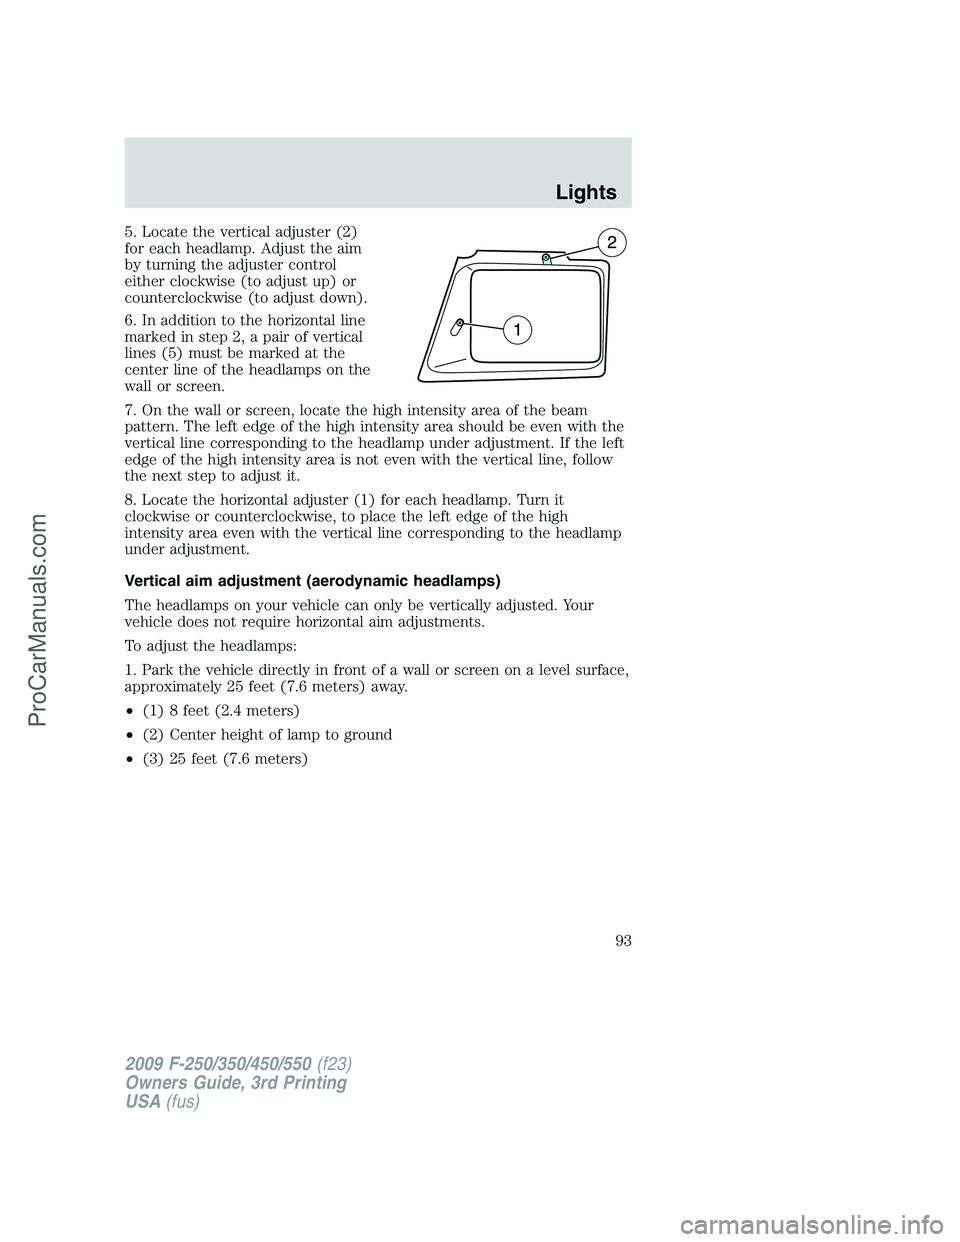
5. Locate the vertical adjuster (2)
for each headlamp. Adjust the aim
by turning the adjuster control
either clockwise (to adjust up) or
counterclockwise (to adjust down).
6. In addition to the horizontal line
marked in step 2, a pair of vertical
lines (5) must be marked at the
center line of the headlamps on the
wall or screen.
7. On the wall or screen, locate the high intensity area of the beam
pattern. The left edge of the high intensity area should be even with the
vertical line corresponding to the headlamp under adjustment. If the left
edge of the high intensity area is not even with the vertical line, follow
the next step to adjust it.
8. Locate the horizontal adjuster (1) for each headlamp. Turn it
clockwise or counterclockwise, to place the left edge of the high
intensity area even with the vertical line corresponding to the headlamp
under adjustment.
Vertical aim adjustment (aerodynamic headlamps)
The headlamps on your vehicle can only be vertically adjusted. Your
vehicle does not require horizontal aim adjustments.
To adjust the headlamps:
1. Park the vehicle directly in front of a wall or screen on a level surface,
approximately 25 feet (7.6 meters) away.
•(1) 8 feet (2.4 meters)
•(2) Center height of lamp to ground
•(3) 25 feet (7.6 meters)
2009 F-250/350/450/550(f23)
Owners Guide, 3rd Printing
USA(fus)
Lights
93
ProCarManuals.com
Page 94 of 419
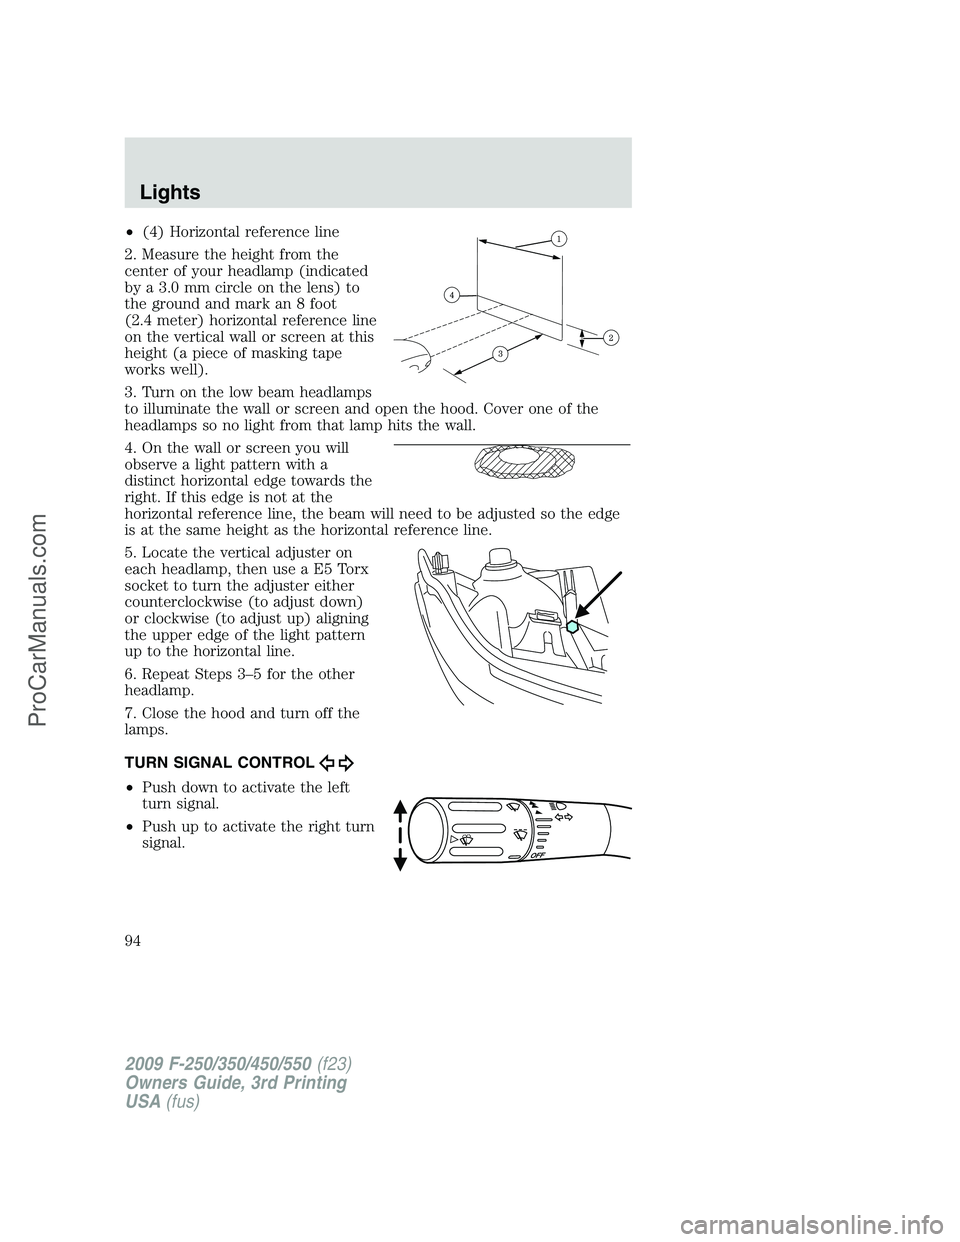
•(4) Horizontal reference line
2. Measure the height from the
center of your headlamp (indicated
by a 3.0 mm circle on the lens) to
the ground and mark an 8 foot
(2.4 meter) horizontal reference line
on the vertical wall or screen at this
height (a piece of masking tape
works well).
3. Turn on the low beam headlamps
to illuminate the wall or screen and open the hood. Cover one of the
headlamps so no light from that lamp hits the wall.
4. On the wall or screen you will
observe a light pattern with a
distinct horizontal edge towards the
right. If this edge is not at the
horizontal reference line, the beam will need to be adjusted so the edge
is at the same height as the horizontal reference line.
5. Locate the vertical adjuster on
each headlamp, then use a E5 Torx
socket to turn the adjuster either
counterclockwise (to adjust down)
or clockwise (to adjust up) aligning
the upper edge of the light pattern
up to the horizontal line.
6. Repeat Steps 3–5 for the other
headlamp.
7. Close the hood and turn off the
lamps.
TURN SIGNAL CONTROL
•Push down to activate the left
turn signal.
•Push up to activate the right turn
signal.
2009 F-250/350/450/550(f23)
Owners Guide, 3rd Printing
USA(fus)
Lights
94
ProCarManuals.com
Page 97 of 419
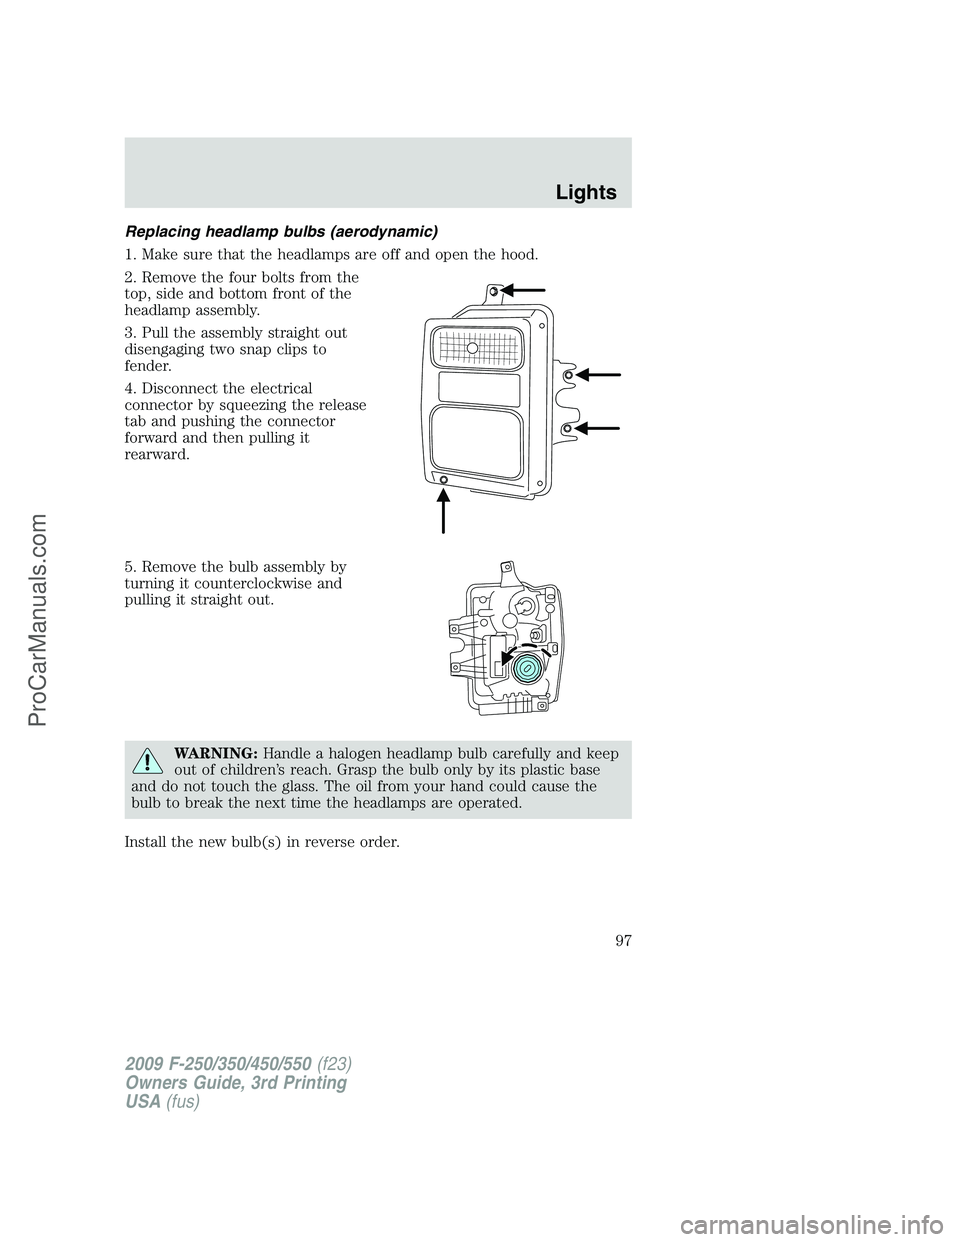
Replacing headlamp bulbs (aerodynamic)
1. Make sure that the headlamps are off and open the hood.
2. Remove the four bolts from the
top, side and bottom front of the
headlamp assembly.
3. Pull the assembly straight out
disengaging two snap clips to
fender.
4. Disconnect the electrical
connector by squeezing the release
tab and pushing the connector
forward and then pulling it
rearward.
5. Remove the bulb assembly by
turning it counterclockwise and
pulling it straight out.
WARNING:Handle a halogen headlamp bulb carefully and keep
out of children’s reach. Grasp the bulb only by its plastic base
and do not touch the glass. The oil from your hand could cause the
bulb to break the next time the headlamps are operated.
Install the new bulb(s) in reverse order.
2009 F-250/350/450/550(f23)
Owners Guide, 3rd Printing
USA(fus)
Lights
97
ProCarManuals.com
Page 98 of 419
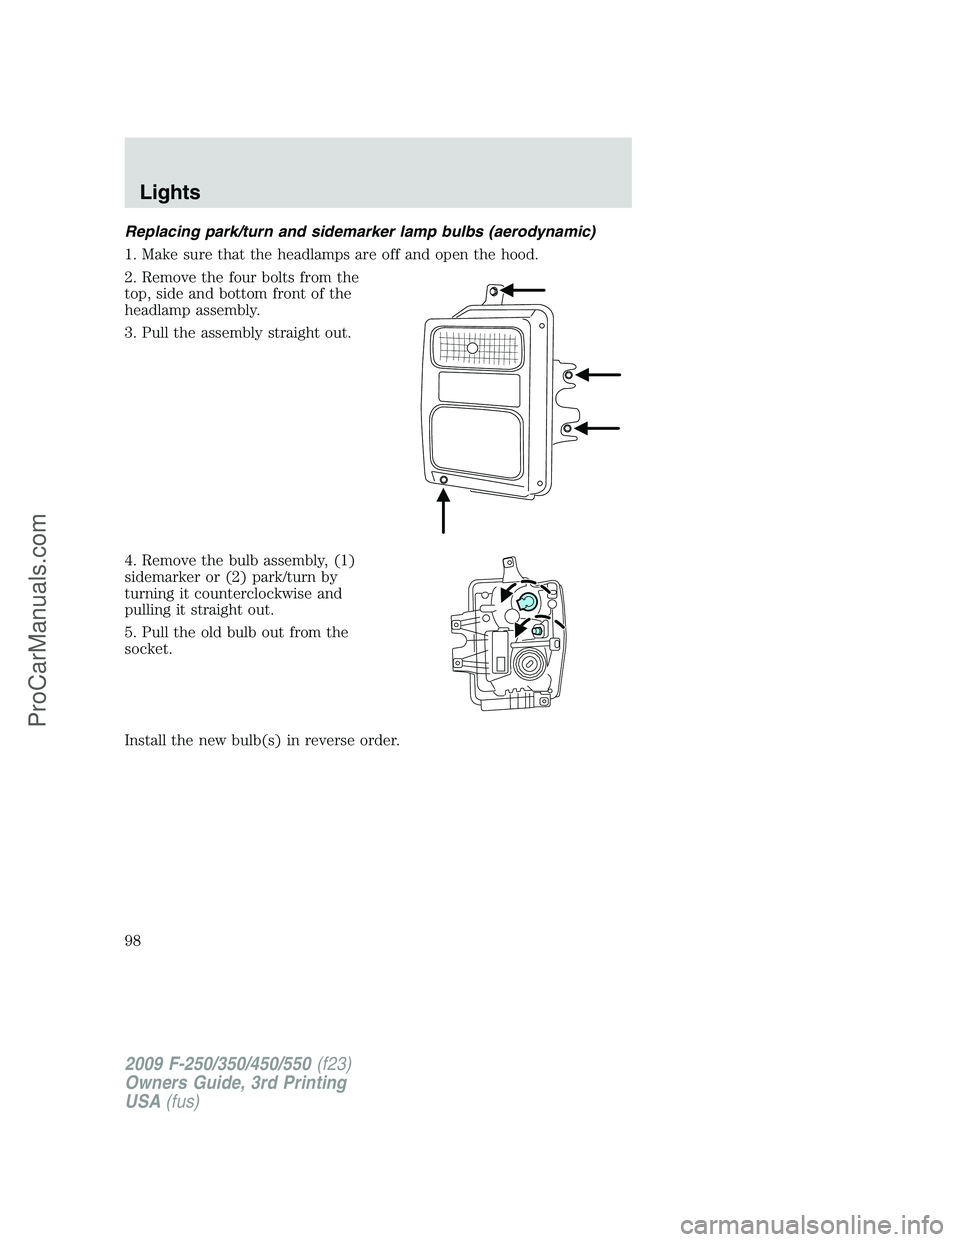
Replacing park/turn and sidemarker lamp bulbs (aerodynamic)
1. Make sure that the headlamps are off and open the hood.
2. Remove the four bolts from the
top, side and bottom front of the
headlamp assembly.
3. Pull the assembly straight out.
4. Remove the bulb assembly, (1)
sidemarker or (2) park/turn by
turning it counterclockwise and
pulling it straight out.
5. Pull the old bulb out from the
socket.
Install the new bulb(s) in reverse order.
2009 F-250/350/450/550(f23)
Owners Guide, 3rd Printing
USA(fus)
Lights
98
ProCarManuals.com
Page 100 of 419
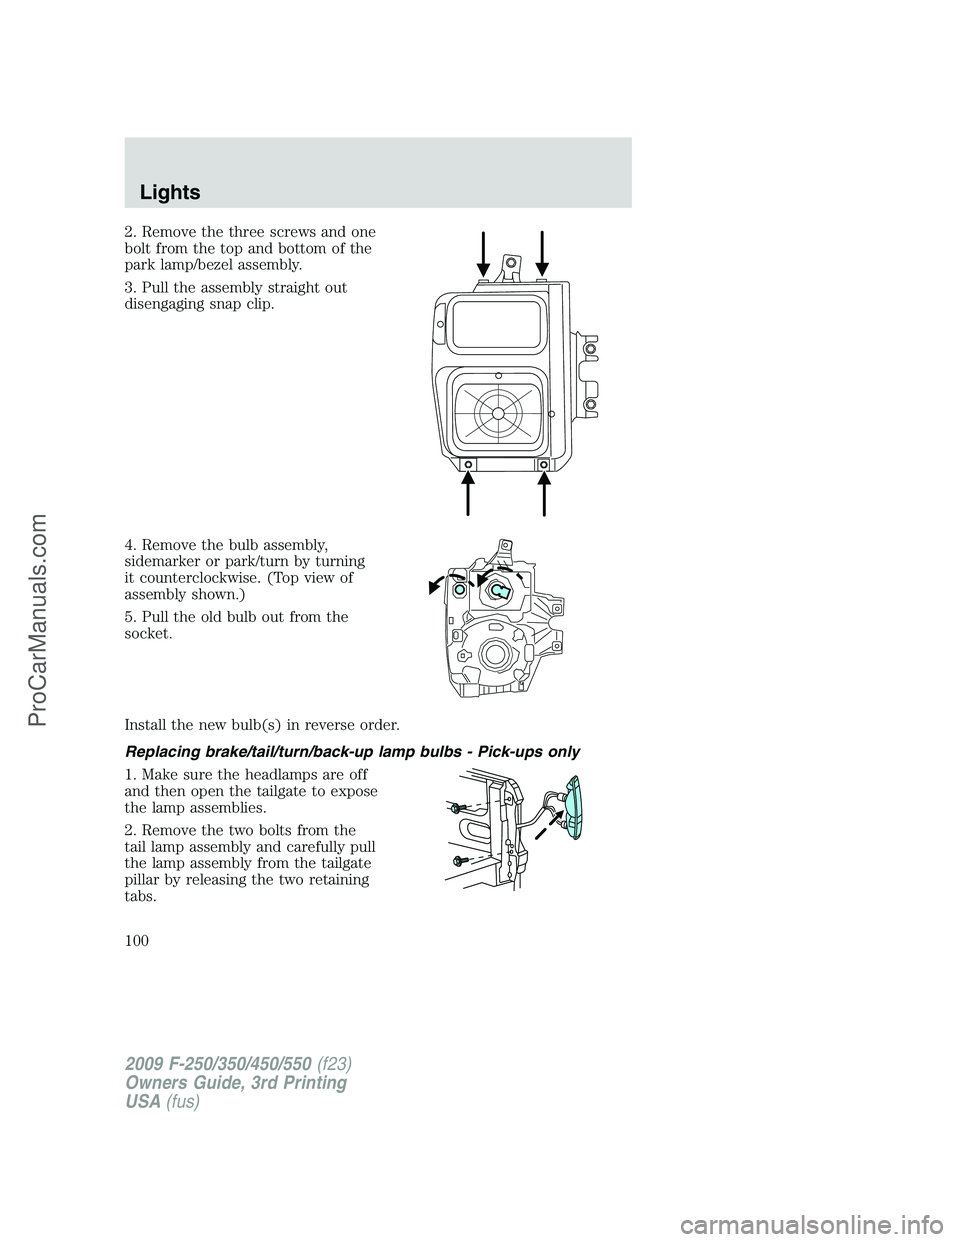
2. Remove the three screws and one
bolt from the top and bottom of the
park lamp/bezel assembly.
3. Pull the assembly straight out
disengaging snap clip.
4. Remove the bulb assembly,
sidemarker or park/turn by turning
it counterclockwise. (Top view of
assembly shown.)
5. Pull the old bulb out from the
socket.
Install the new bulb(s) in reverse order.
Replacing brake/tail/turn/back-up lamp bulbs - Pick-ups only
1. Make sure the headlamps are off
and then open the tailgate to expose
the lamp assemblies.
2. Remove the two bolts from the
tail lamp assembly and carefully pull
the lamp assembly from the tailgate
pillar by releasing the two retaining
tabs.
2009 F-250/350/450/550(f23)
Owners Guide, 3rd Printing
USA(fus)
Lights
100
ProCarManuals.com
Page 101 of 419
3. Rotate the bulb socket counterclockwise and remove from lamp
assembly.
4. Pull the bulb straight out of the socket.
Install the new bulb(s) in reverse order.
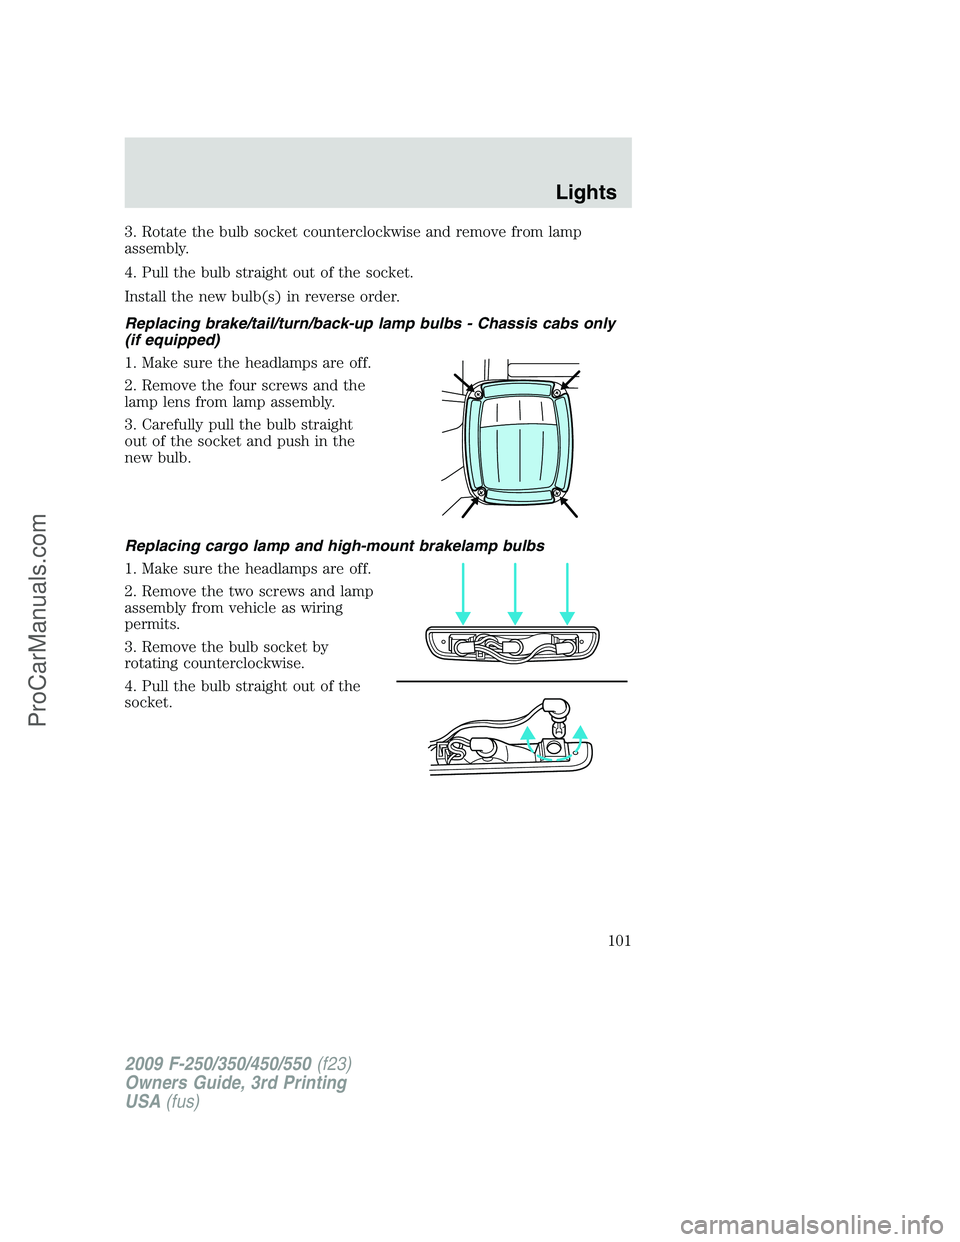
Replacing brake/tail/turn/back-up lamp bulbs - Chassis cabs only
(if equipped)
1. Make sure the headlamps are off.
2. Remove the four screws and the
lamp lens from lamp assembly.
3. Carefully pull the bulb straight
out of the socket and push in the
new bulb.
Replacing cargo lamp and high-mount brakelamp bulbs
1. Make sure the headlamps are off.
2. Remove the two screws and lamp
assembly from vehicle as wiring
permits.
3. Remove the bulb socket by
rotating counterclockwise.
4. Pull the bulb straight out of the
socket.
2009 F-250/350/450/550(f23)
Owners Guide, 3rd Printing
USA(fus)
Lights
101
ProCarManuals.com
Page 102 of 419
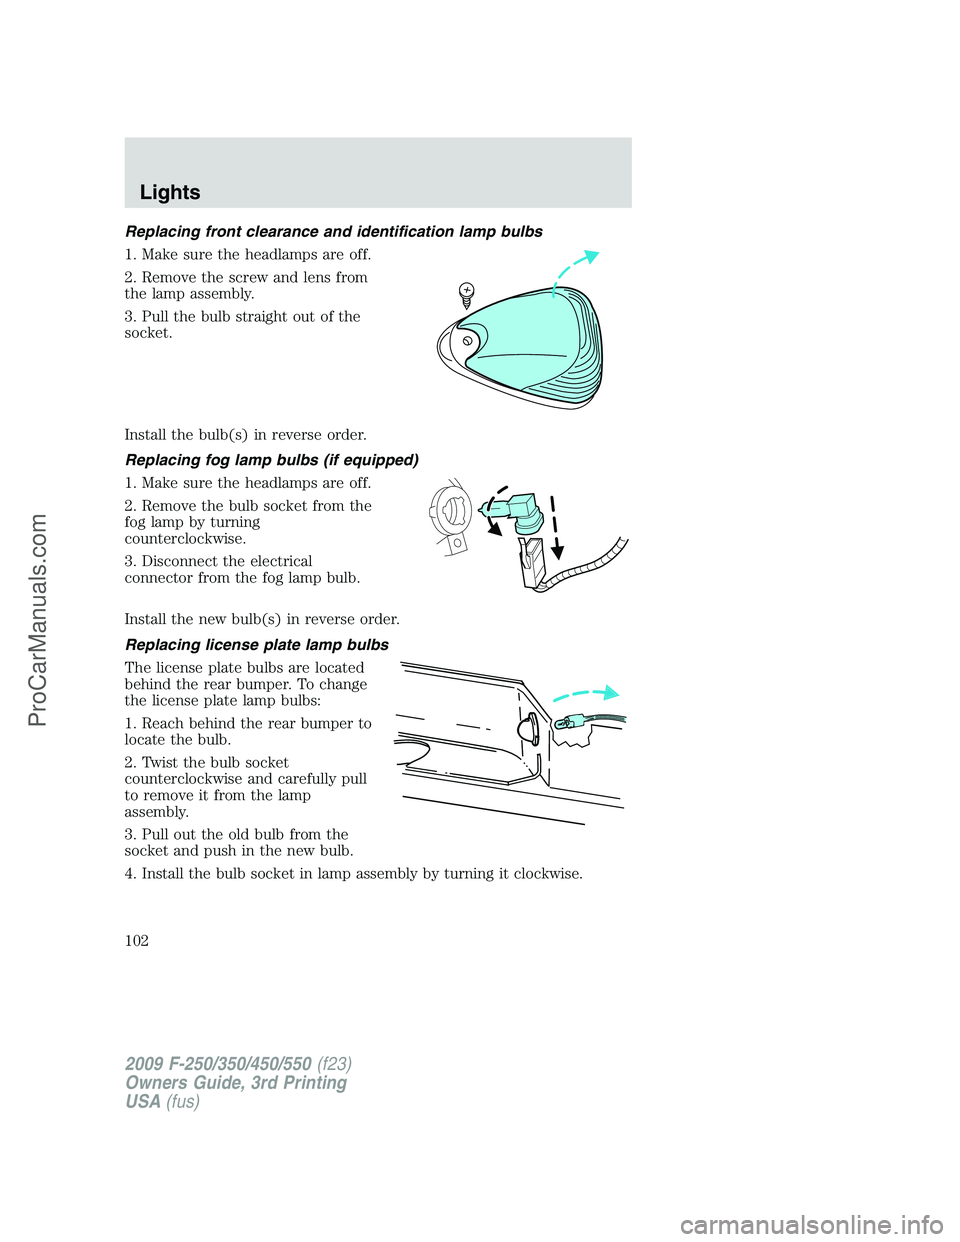
Replacing front clearance and identification lamp bulbs
1. Make sure the headlamps are off.
2. Remove the screw and lens from
the lamp assembly.
3. Pull the bulb straight out of the
socket.
Install the bulb(s) in reverse order.
Replacing fog lamp bulbs (if equipped)
1. Make sure the headlamps are off.
2. Remove the bulb socket from the
fog lamp by turning
counterclockwise.
3. Disconnect the electrical
connector from the fog lamp bulb.
Install the new bulb(s) in reverse order.
Replacing license plate lamp bulbs
The license plate bulbs are located
behind the rear bumper. To change
the license plate lamp bulbs:
1. Reach behind the rear bumper to
locate the bulb.
2. Twist the bulb socket
counterclockwise and carefully pull
to remove it from the lamp
assembly.
3. Pull out the old bulb from the
socket and push in the new bulb.
4. Install the bulb socket in lamp assembly by turning it clockwise.
2009 F-250/350/450/550(f23)
Owners Guide, 3rd Printing
USA(fus)
Lights
102
ProCarManuals.com