automatic transmission FORD F350 2011 Owners Manual
[x] Cancel search | Manufacturer: FORD, Model Year: 2011, Model line: F350, Model: FORD F350 2011Pages: 449, PDF Size: 3.78 MB
Page 21 of 449
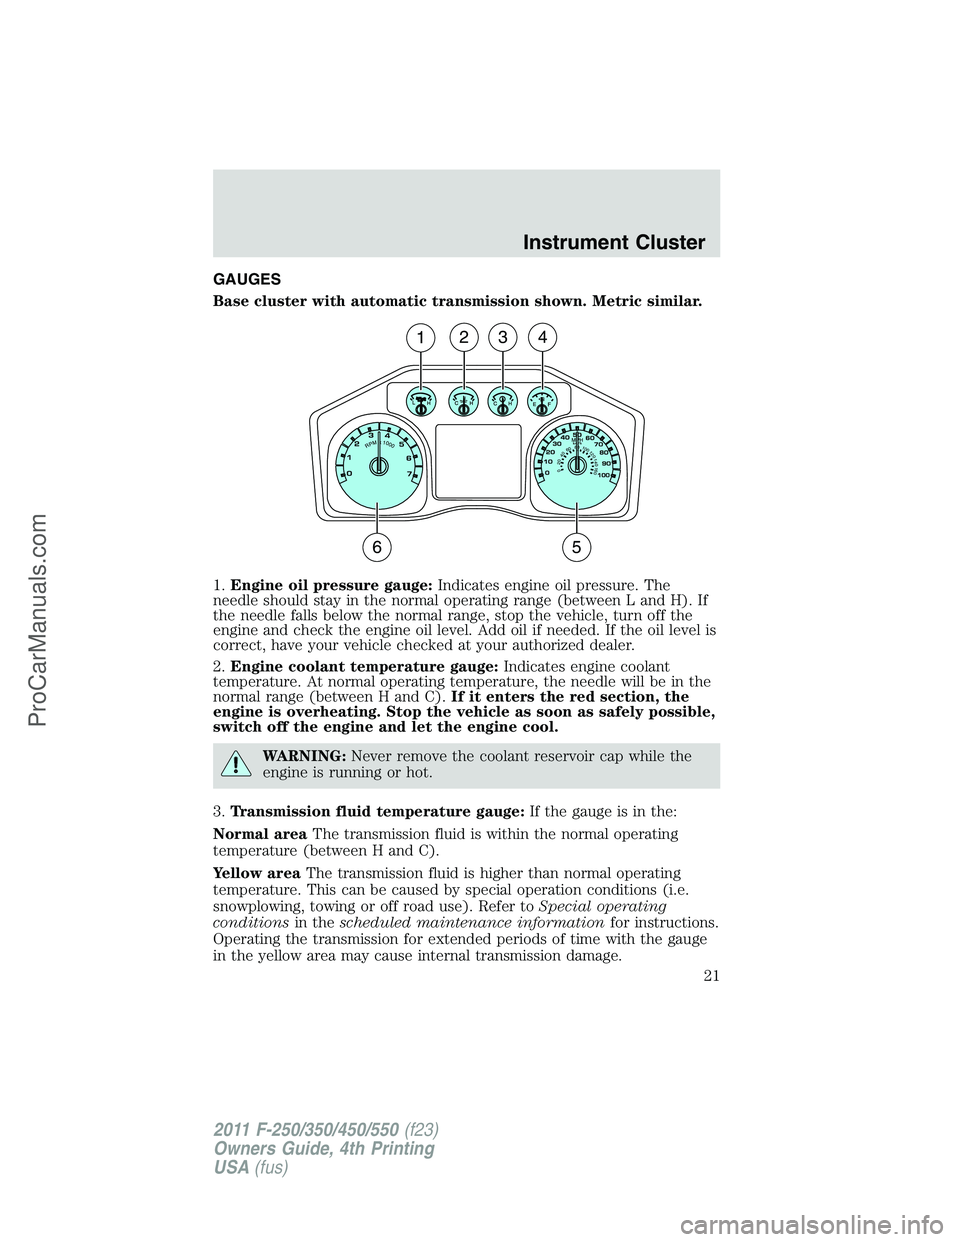
GAUGES
Base cluster with automatic transmission shown. Metric similar.
1.Engine oil pressure gauge:Indicates engine oil pressure. The
needle should stay in the normal operating range (between L and H). If
the needle falls below the normal range, stop the vehicle, turn off the
engine and check the engine oil level. Add oil if needed. If the oil level is
correct, have your vehicle checked at your authorized dealer.
2.Engine coolant temperature gauge:Indicates engine coolant
temperature. At normal operating temperature, the needle will be in the
normal range (between H and C).If it enters the red section, the
engine is overheating. Stop the vehicle as soon as safely possible,
switch off the engine and let the engine cool.
WARNING:Never remove the coolant reservoir cap while the
engine is running or hot.
3.Transmission fluid temperature gauge:If the gauge is in the:
Normal areaThe transmission fluid is within the normal operating
temperature (between H and C).
Yellow areaThe transmission fluid is higher than normal operating
temperature. This can be caused by special operation conditions (i.e.
snowplowing, towing or off road use). Refer toSpecial operating
conditionsin thescheduled maintenance informationfor instructions.
Operating the transmission for extended periods of time with the gauge
in the yellow area may cause internal transmission damage.
km/hRPMx1000
0204060801001
2
01
4
016
0
MPH
1234
65
Instrument Cluster
21
2011 F-250/350/450/550(f23)
Owners Guide, 4th Printing
USA(fus)
ProCarManuals.com
Page 47 of 449
System Check
Oil Life
Engine Hours
Engine Idle Hours
Doors
Exhaust Fluid Level (diesel only)
Brakes
Trailer Brake
Ctrl.Gain and Output (when trailer is connected)
No trailer (when no trailer is connected)
Trailer Sway
Park Aid Check Rear Park Aid
Fuel Level (distance to empty)
Some items will only display during a system check if a problem has
been detected. If an issue exists on one of the monitored systems, the
message center will display the number of warnings that need immediate
attention in red and the number of informational warnings will be listed
in amber. Use the up/down arrow buttons to scroll through the list; press
the right arrow button to display specific information on the highlighted
warning.
Compass/transmission indicator displays
The compass heading will display in the upper right corner of the
message center; the transmission gear indicator displays in the right side
of the message center when using the SelectShift Automatic™
transmission feature. These displays will not be shown in all screen
modes. For example: when programming certain vehicle features or in
certain information menus.
System warnings and status messages
System warnings alert you to possible problems or malfunctions in your
vehicle’s operating systems.
In the event of a multiple warning situation, the message center will
cycle the display to show all warnings by displaying each one for four
seconds.
The message center will display the last selected feature if there are no
more warning messages.
Types of messages and warnings:
•Some messages will appear briefly to inform you of something you
may need to take action on or be informed of.
Instrument Cluster
47
2011 F-250/350/450/550(f23)
Owners Guide, 4th Printing
USA(fus)
ProCarManuals.com
Page 83 of 449
•To improve the A/C cool down, drive with the windows slightly open
for 2-3 minutes after start up or until the vehicle has been “aired out”.
•A small amount of air may be felt from the floor vent regardless of the
air distribution setting that is selected.
During extreme high ambient temperatures when idling stationary for
extended periods of time in gear, it is recommended to run the A/C in
the max A/C position, reduce blower fan speed from the highest setting
and put the vehicle’s transmission into the P (Park) gear position
(automatic transmission only) to continue to receive cool air from your
A/C system.
For maximum cooling performance:
•Automatic operation:
1. Press AUTO for full automatic operation.
2. Do not override A/C or
(recirculated air).
3. Set the temperature to 60°F (16°C).
•Manual operation:
1. Select MAX A/C.
2. Select
(recirculated air). Use(recirculated air) with A/C to
provide colder airflow.
3. Set the temperature to 60°F (16°C).
4. Set highest fan speed initially, then adjust to maintain comfort.
To aid in side window defogging/demisting in cold weather:
1. Select
(panel/floor).
2. Select A/C.
3. Adjust the temperature control to maintain comfort.
4. Set the fan speed to the highest setting.
5. Direct the outer instrument panel vents towards the side windows.
To increase airflow to the outer instrument panel vents, close the vents
located in the middle of the instrument panel.
Climate Controls
83
2011 F-250/350/450/550(f23)
Owners Guide, 4th Printing
USA(fus)
ProCarManuals.com
Page 161 of 449
Memory seats/power mirrors/adjustable pedals (if equipped)
This system allows automatic
positioning of the driver seat, power
mirrors, and adjustable pedals to
two programmable positions.
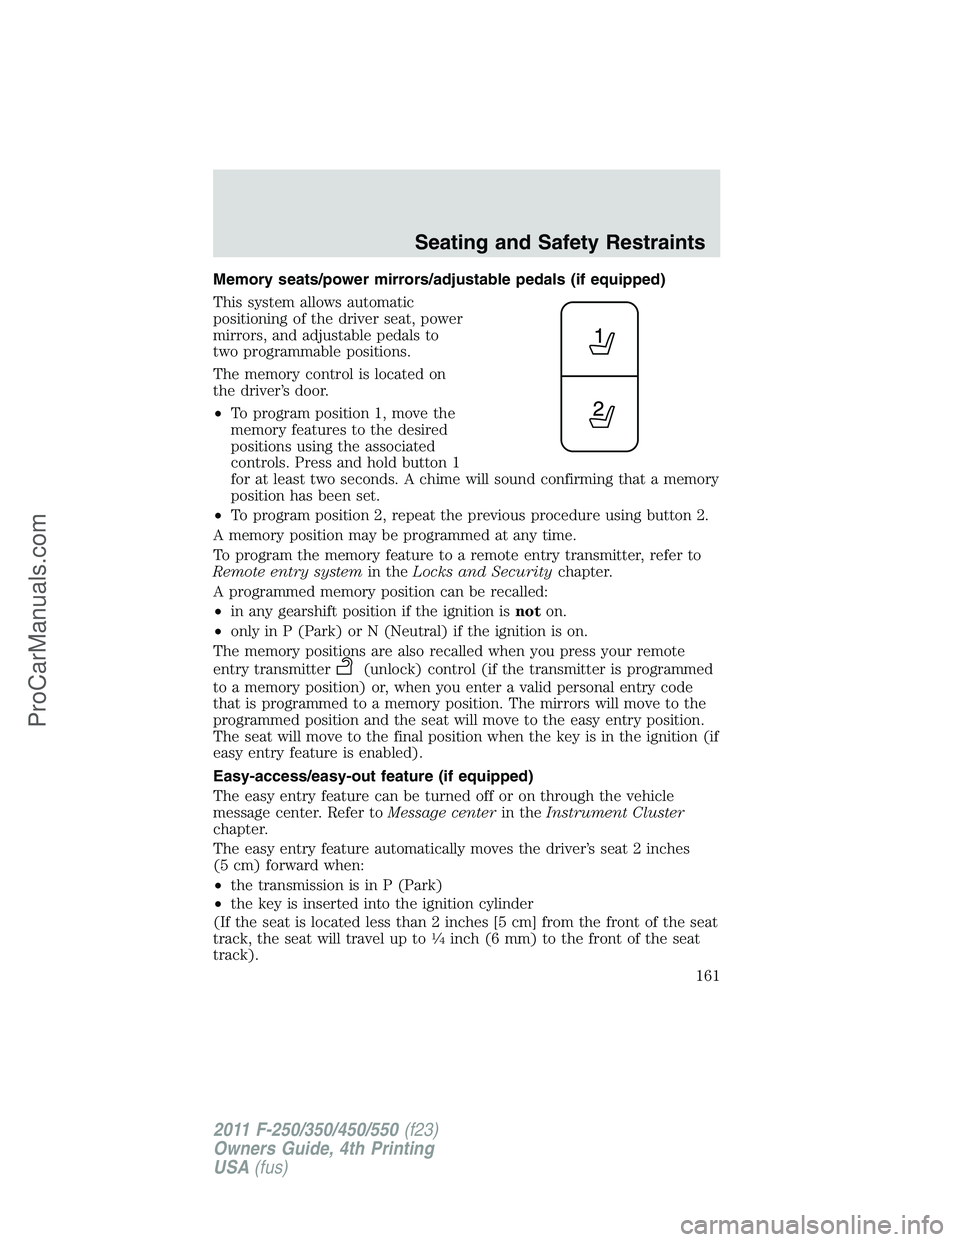
The memory control is located on
the driver’s door.
•To program position 1, move the
memory features to the desired
positions using the associated
controls. Press and hold button 1
for at least two seconds. A chime will sound confirming that a memory
position has been set.
•To program position 2, repeat the previous procedure using button 2.
A memory position may be programmed at any time.
To program the memory feature to a remote entry transmitter, refer to
Remote entry systemin theLocks and Securitychapter.
A programmed memory position can be recalled:
•in any gearshift position if the ignition isnoton.
•only in P (Park) or N (Neutral) if the ignition is on.
The memory positions are also recalled when you press your remote
entry transmitter
(unlock) control (if the transmitter is programmed
to a memory position) or, when you enter a valid personal entry code
that is programmed to a memory position. The mirrors will move to the
programmed position and the seat will move to the easy entry position.
The seat will move to the final position when the key is in the ignition (if
easy entry feature is enabled).
Easy-access/easy-out feature (if equipped)
The easy entry feature can be turned off or on through the vehicle
message center. Refer toMessage centerin theInstrument Cluster
chapter.
The easy entry feature automatically moves the driver’s seat 2 inches
(5 cm) forward when:
•the transmission is in P (Park)
•the key is inserted into the ignition cylinder
(If the seat is located less than 2 inches [5 cm] from the front of the seat
track, the seat will travel up to
1�4inch (6 mm) to the front of the seat
track).
Seating and Safety Restraints
161
2011 F-250/350/450/550(f23)
Owners Guide, 4th Printing
USA(fus)
ProCarManuals.com
Page 162 of 449
The easy out feature automatically moves the driver’s seat 2 inches
(5 cm) backward when:
•the transmission is in P (Park)
•the key is removed from the ignition cylinder
(If the seat is located less than 2 inches (5 cm) from the rear of the seat
track, the seat will travel up to
1�4inch (6 mm) to the rear of the seat
track).
If the memory setting is programmed through the remote transmitter,
upon unlocking the door via remote entry system, the seat position will
travel to the desired memory setting less 2 inches (5 cm). Once entering
the vehicle and inserting the key in the ignition while in P (Park), the
easy entry feature will move the seat an additional 2 inches (5 cm) to
the desired memory location. SeeLocks and Securityfor activating the
memory seat feature through the remote entry system.
REAR SEATS
Non-adjustable second-row head restraints
Your vehicle is equipped with second row head restraints that are
non-adjustable.
WARNING:To minimize the risk of neck injury in the event of a
crash, the driver and passenger occupants should not sit in
and/or operate the vehicle, until the head restraint is placed in its
proper position. The driver should never adjust the head restraint
while the vehicle is in motion.
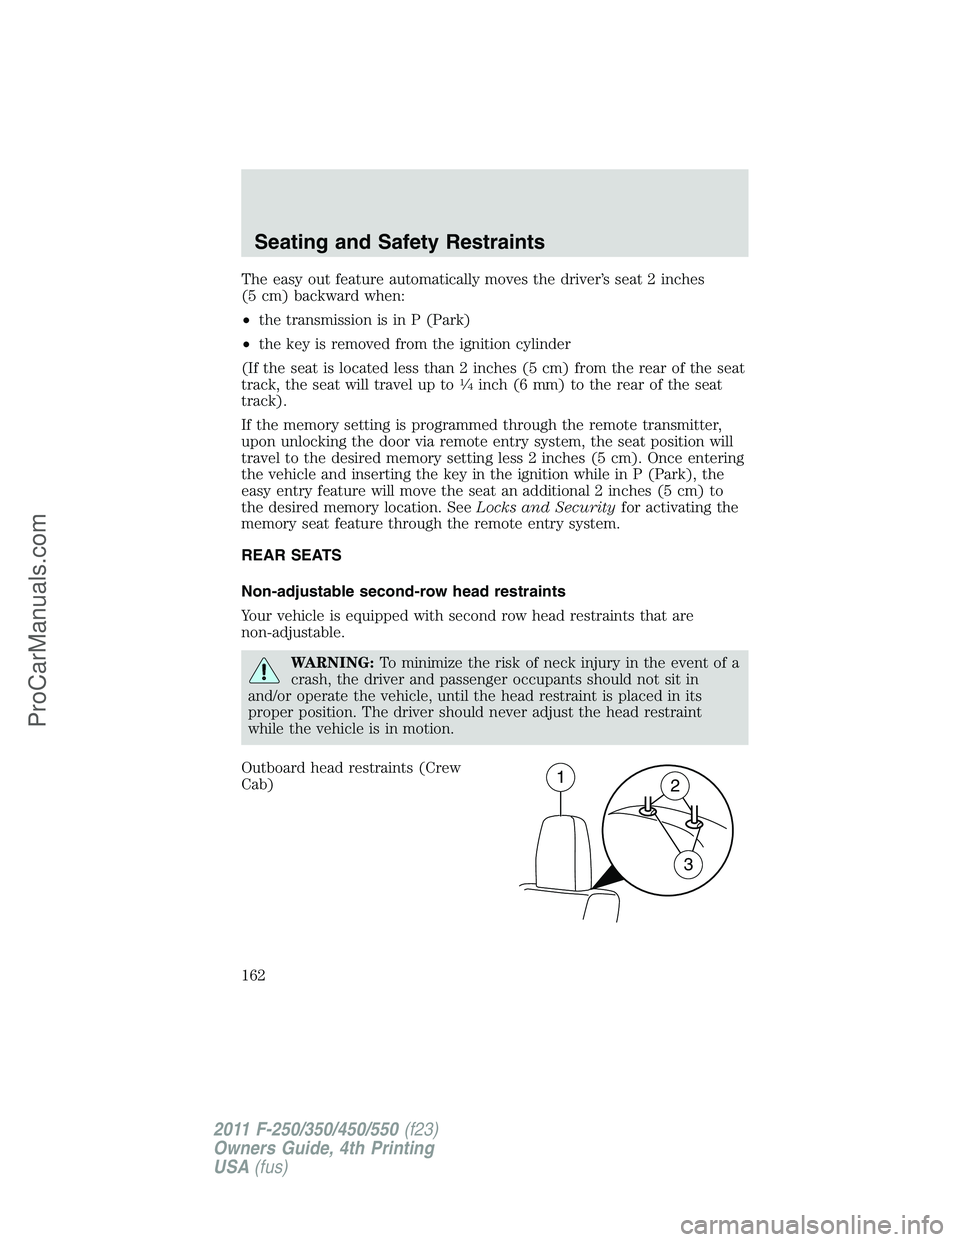
Outboard head restraints (Crew
Cab)
12
3
Seating and Safety Restraints
162
2011 F-250/350/450/550(f23)
Owners Guide, 4th Printing
USA(fus)
ProCarManuals.com
Page 258 of 449
•The TBC is equipped with a feature which reduces output at vehicle
speeds below 11 mph (18 km/h) so trailer and vehicle braking is not
jerky or harsh. This feature is only available when applying the brakes
using the vehicle’s brake pedal, not the TBC.
•The TBC interacts with the brake system of the vehicle, including
ABS, in order to reduce the likelihood of trailer wheel lock-up;
therefore, if these systems are not functioning properly, the TBC may
not function at full performance.
•Your vehicle’s brake system and the trailer brake system work
independently of each other; changing the GAIN setting on the TBC
does not affect the operation of your vehicle’s brakes whether a trailer
is attached or not.
•When the vehicle is turned off, the TBC output is disabled and the
display is shut down; turning the ignition from off to on awakens the
TBC module.
•The TBC is only a factory- or dealer-installed item; Ford is not
responsible for warranty or performance of the TBC due to misuse or
customer installation.
•Do not attempt removal of the TBC without consulting the
Workshop Manual; damage to the unit may result.
Trailer lamps
Trailer lamps are required on most towed vehicles. Make sure all running
lights, brake lights, turn signals and hazard lights are working. Contact
your authorized dealer or trailer rental agency for proper instructions
and equipment for hooking-up trailer lamps.
Driving while you tow
When towing a trailer:
•Consult your local motor vehicle laws for towing a trailer.
•Do not drive faster than 70 mph (113 km/h) during the first 500 miles
(800 km) of trailer towing and don’t make full-throttle starts.
•Turn off the speed control. The speed control may shut off
automatically when you are towing on long, steep grades.
•Activate the tow/haul feature to eliminate excessive transmission
shifting and assist in transmission cooling. For additional information,
refer toAutomatic transmission operationin theDrivingchapter.
•Allow more distance for stopping with a trailer attached; anticipate
stops and brake gradually.
Tires, Wheels and Loading
258
2011 F-250/350/450/550(f23)
Owners Guide, 4th Printing
USA(fus)
ProCarManuals.com
Page 284 of 449
AUTOMATIC TRANSMISSION OPERATION
Understanding the shift positions of the 5–speed automatic
transmission (if equipped)
This vehicle is equipped with an adaptive transmission shift strategy.
Adaptive transmission shift strategy offers the optimal transmission
operation and shift quality. When the vehicle’s battery has been
disconnected for any type of service or repair, the transmission will need
to relearn the normal shift strategy parameters, much like having to reset
your radio stations when your vehicle battery has been disconnected.
The adaptive transmission shift strategy allows the transmission to
relearn these operating parameters. This learning process could take
several transmission upshifts and downshifts; during this learning
process, slightly firmer shifts may occur. After this learning process,
normal shift feel and shift scheduling will resume.
P (Park)
This position locks the transmission and prevents the rear wheels from
turning.
To put your vehicle in gear:
•Start the engine
•Press the brake pedal
•Move the gearshift lever into the desired gear
To put your vehicle in P (Park):
•Come to a complete stop
•Move the gearshift lever and securely latch it in P (Park)
WARNING:Always set the parking brake fully and make sure
the gearshift is latched in P (Park). Turn the ignition to the off
position and remove the key whenever you leave your vehicle.
R (Reverse)
With the gearshift lever in R (Reverse), the vehicle will move backward.
Always come to a complete stop before shifting into and out of R
(Reverse).
Driving
284
2011 F-250/350/450/550(f23)
Owners Guide, 4th Printing
USA(fus)
ProCarManuals.com
Page 285 of 449
N (Neutral)
With the gearshift lever in N (Neutral), the vehicle can be started and is
free to roll. Hold the brake pedal down while in this position.
D (Overdrive) with Tow/Haul Off
D (Overdrive) with tow/haul off is the normal driving position for the
best fuel economy. The overdrive function allows automatic upshifts and
downshifts through gears one through five.
D (Overdrive) with Tow/Haul On
The tow/haul feature improves transmission operation when towing a
trailer or a heavy load. All transmission gear ranges are available when
using tow/haul.
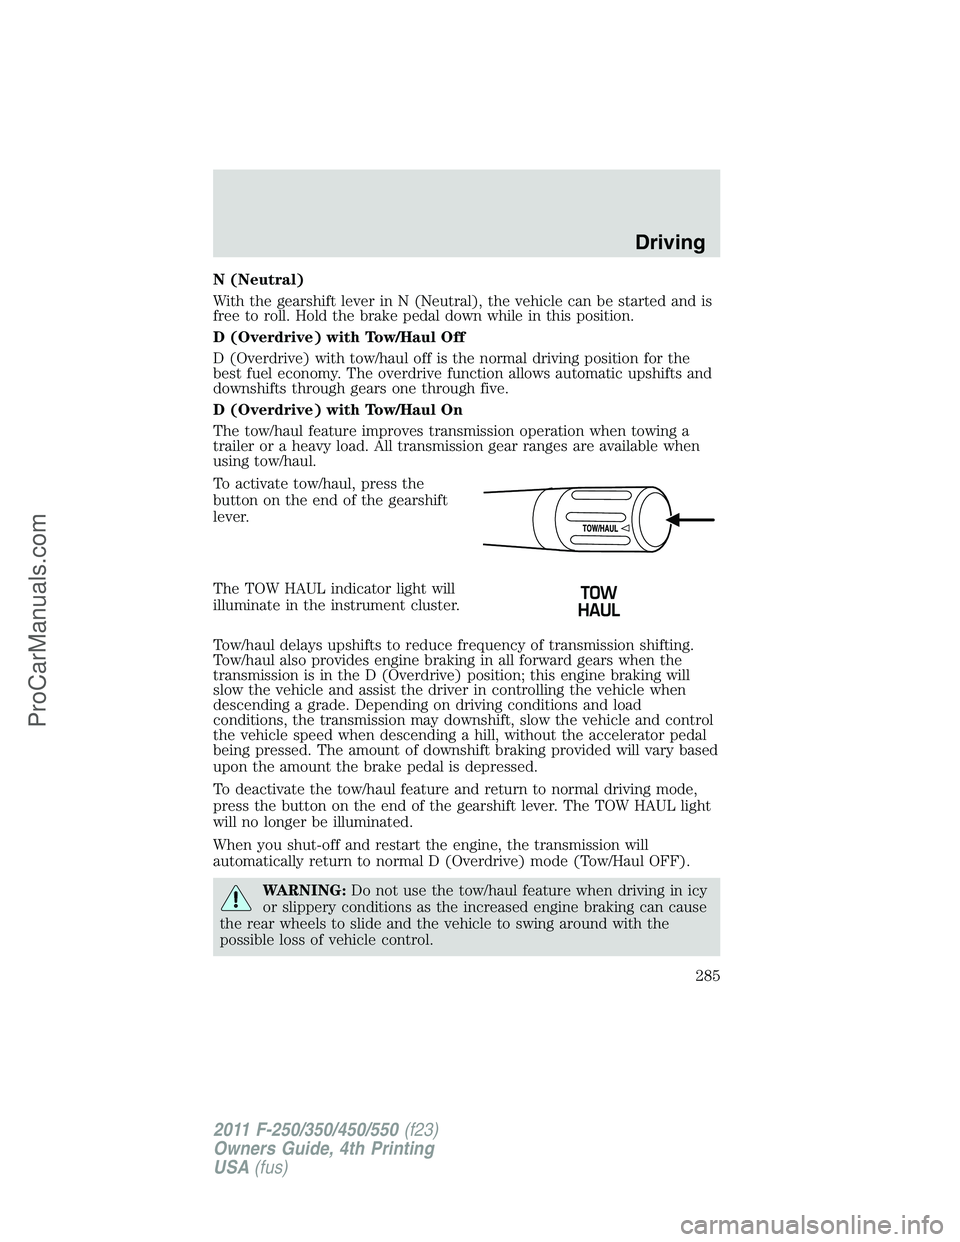
To activate tow/haul, press the
button on the end of the gearshift
lever.
The TOW HAUL indicator light will
illuminate in the instrument cluster.
Tow/haul delays upshifts to reduce frequency of transmission shifting.
Tow/haul also provides engine braking in all forward gears when the
transmission is in the D (Overdrive) position; this engine braking will
slow the vehicle and assist the driver in controlling the vehicle when
descending a grade. Depending on driving conditions and load
conditions, the transmission may downshift, slow the vehicle and control
the vehicle speed when descending a hill, without the accelerator pedal
being pressed. The amount of downshift braking provided will vary based
upon the amount the brake pedal is depressed.
To deactivate the tow/haul feature and return to normal driving mode,
press the button on the end of the gearshift lever. The TOW HAUL light
will no longer be illuminated.
When you shut-off and restart the engine, the transmission will
automatically return to normal D (Overdrive) mode (Tow/Haul OFF).
WARNING:Do not use the tow/haul feature when driving in icy
or slippery conditions as the increased engine braking can cause
the rear wheels to slide and the vehicle to swing around with the
possible loss of vehicle control.
Driving
285
2011 F-250/350/450/550(f23)
Owners Guide, 4th Printing
USA(fus)
ProCarManuals.com
Page 286 of 449
3 (Third)
Transmission starts and operates in third gear only.
Used for improved traction on slippery roads. Selecting 3 (Third)
provides engine braking.
2 (Second)
Use 2 (Second) to start-up on slippery roads or to provide additional
engine braking on downgrades.
1 (First)
•Provides maximum engine braking.
•Allows upshifts by moving gearshift lever.
•The transmission will not downshift into 1 (First) at high speeds; it
will downshift to a lower gear and then shift into 1 (First) when the
vehicle reaches slower speeds.
Forced downshifts
•Allowed in D (Overdrive) or D (Drive).
•Press the accelerator to the floor.
•Allows transmission to select an appropriate gear.
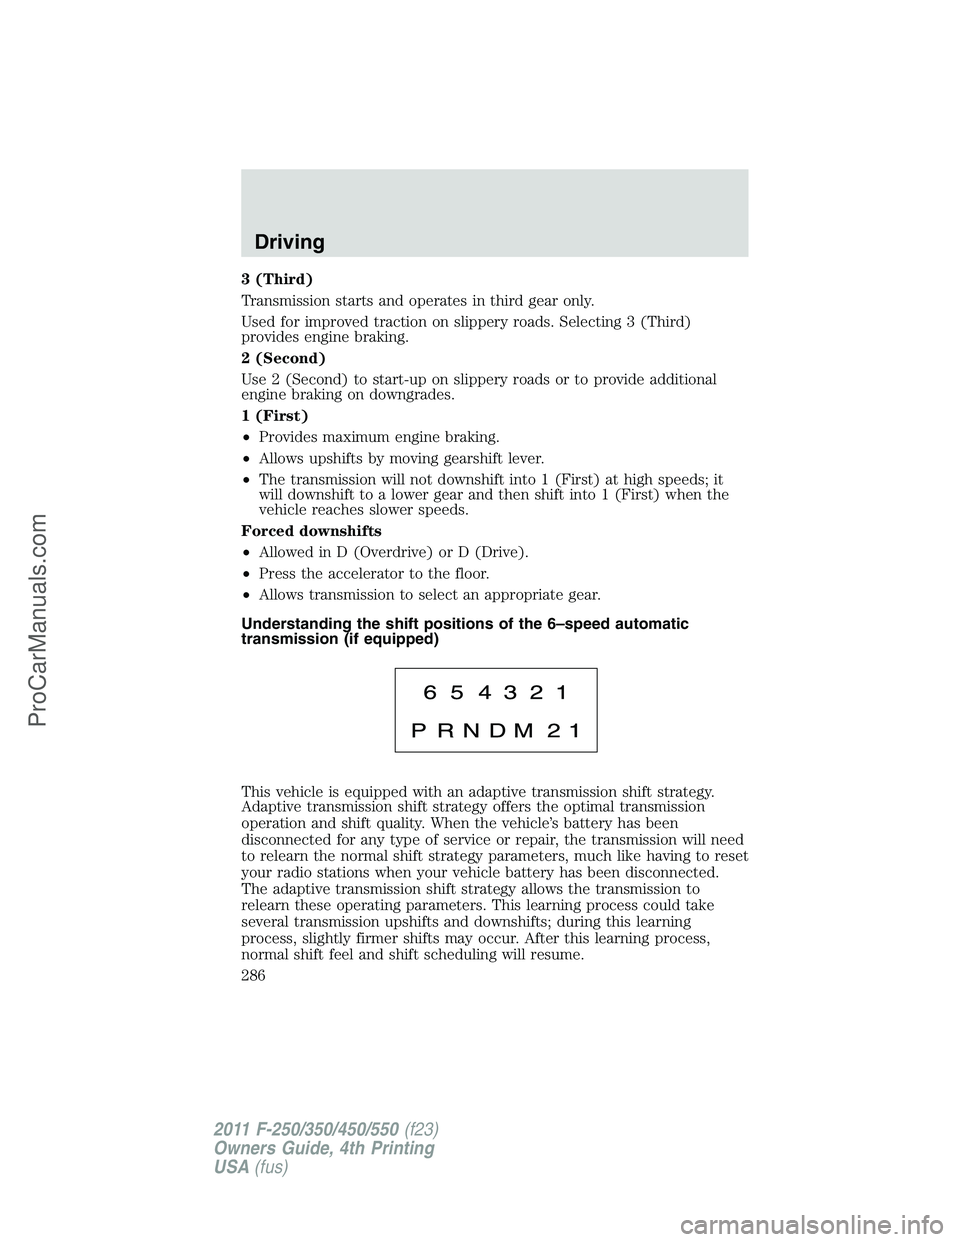
Understanding the shift positions of the 6–speed automatic
transmission (if equipped)
This vehicle is equipped with an adaptive transmission shift strategy.
Adaptive transmission shift strategy offers the optimal transmission
operation and shift quality. When the vehicle’s battery has been
disconnected for any type of service or repair, the transmission will need
to relearn the normal shift strategy parameters, much like having to reset
your radio stations when your vehicle battery has been disconnected.
The adaptive transmission shift strategy allows the transmission to
relearn these operating parameters. This learning process could take
several transmission upshifts and downshifts; during this learning
process, slightly firmer shifts may occur. After this learning process,
normal shift feel and shift scheduling will resume.
Driving
286
2011 F-250/350/450/550(f23)
Owners Guide, 4th Printing
USA(fus)
ProCarManuals.com
Page 287 of 449
P (Park)
This position locks the transmission and prevents the rear wheels from
turning.
To put your vehicle in gear:
1. Start the engine
2. Press the brake pedal
3. Move the gearshift lever into the desired gear
To put your vehicle in P (Park):
1. Come to a complete stop
2. Move the gearshift lever and securely latch it in P (Park)
WARNING:Always set the parking brake fully and make sure
the gearshift is latched in P (Park). Turn the ignition to the off
position and remove the key whenever you leave your vehicle.
R (Reverse)
With the gearshift lever in R (Reverse), the vehicle will move backward.
Always come to a complete stop before shifting into and out of R
(Reverse).
N (Neutral)
With the gearshift lever in N (Neutral), the vehicle can be started and is
free to roll. Hold the brake pedal down while in this position.
D (Overdrive) with Tow/Haul Off
D (Overdrive) with tow/haul off is the normal driving position for the
best fuel economy. The overdrive function allows automatic upshifts and
downshifts through gears one through six.
D (Overdrive) with Tow/Haul On
The tow/haul feature improves transmission operation when towing a
trailer or a heavy load. All transmission gear ranges are available when
using tow/haul.
Driving
287
2011 F-250/350/450/550(f23)
Owners Guide, 4th Printing
USA(fus)
ProCarManuals.com