open hood FORD F450 2010 Owners Manual
[x] Cancel search | Manufacturer: FORD, Model Year: 2010, Model line: F450, Model: FORD F450 2010Pages: 408, PDF Size: 5.46 MB
Page 110 of 408
To adjust the headlamps:
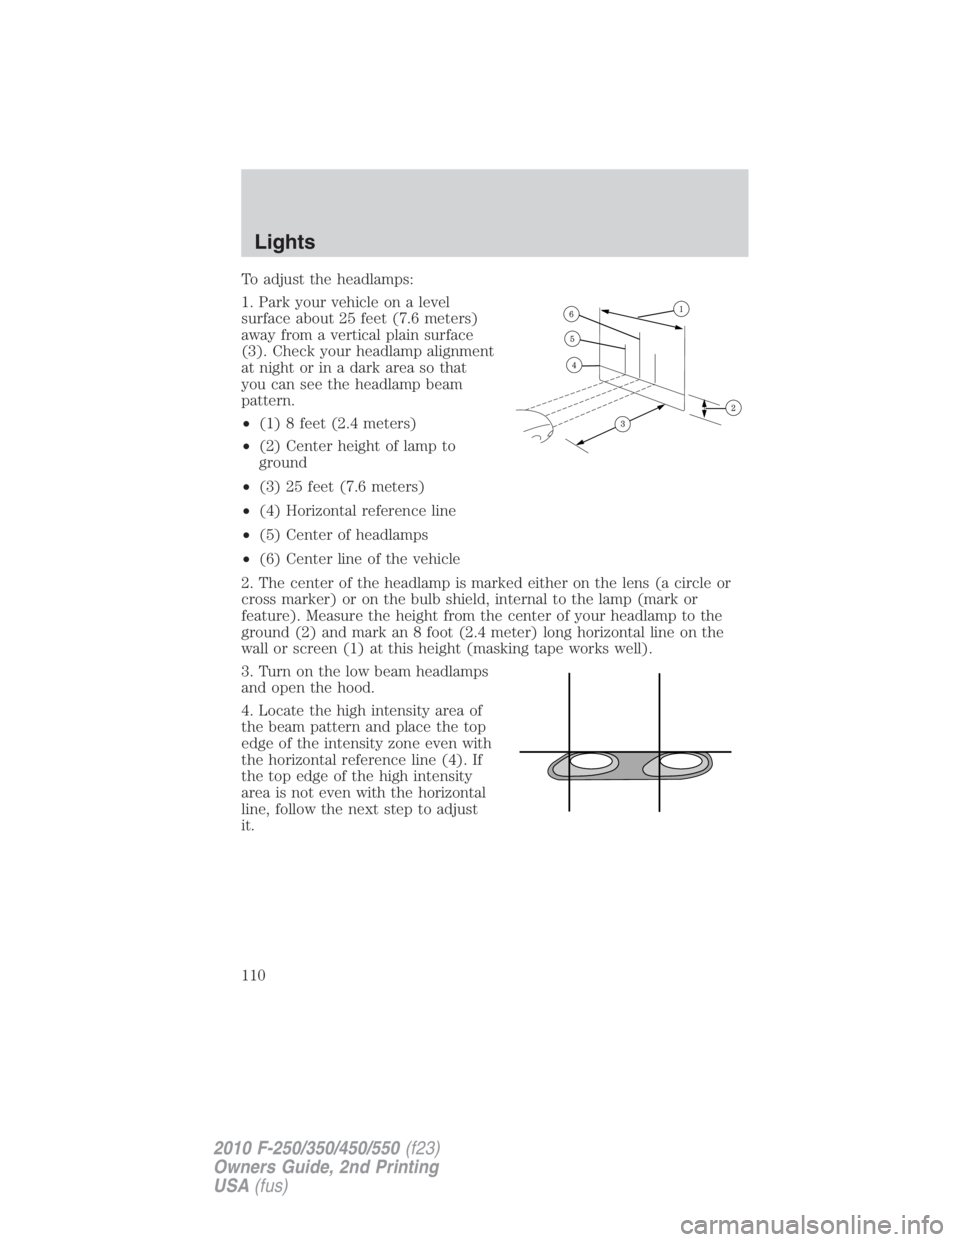
1. Park your vehicle on a level
surface about 25 feet (7.6 meters)
away from a vertical plain surface
(3). Check your headlamp alignment
at night or in a dark area so that
you can see the headlamp beam
pattern.
• (1) 8 feet (2.4 meters)
• (2) Center height of lamp to
ground
• (3) 25 feet (7.6 meters)
• (4) Horizontal reference line
• (5) Center of headlamps
• (6) Center line of the vehicle
2. The center of the headlamp is marked either on the lens (a circle or
cross marker) or on the bulb shield, internal to the lamp (mark or
feature). Measure the height from the center of your headlamp to the
ground (2) and mark an 8 foot (2.4 meter) long horizontal line on the
wall or screen (1) at this height (masking tape works well).
3. Turn on the low beam headlamps
and open the hood.
4. Locate the high intensity area of
the beam pattern and place the top
edge of the intensity zone even with
the horizontal reference line (4). If
the top edge of the high intensity
area is not even with the horizontal
line, follow the next step to adjust
it.Lights
110
2010 F-250/350/450/550 (f23)
Owners Guide, 2nd Printing
USA (fus)
Page 112 of 408
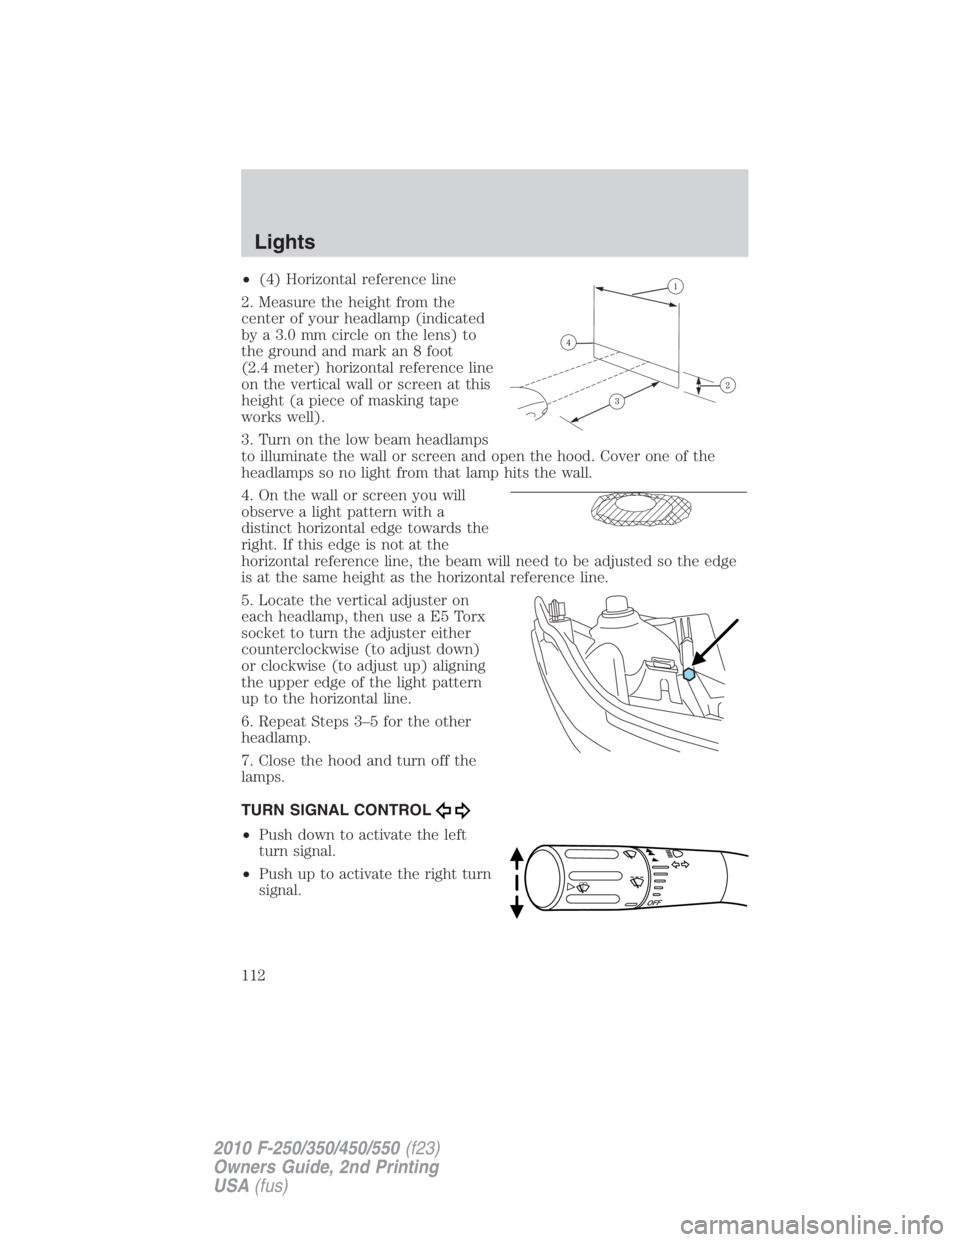
• (4) Horizontal reference line
2. Measure the height from the
center of your headlamp (indicated
by a 3.0 mm circle on the lens) to
the ground and mark an 8 foot
(2.4 meter) horizontal reference line
on the vertical wall or screen at this
height (a piece of masking tape
works well).
3. Turn on the low beam headlamps
to illuminate the wall or screen and open the hood. Cover one of the
headlamps so no light from that lamp hits the wall.
4. On the wall or screen you will
observe a light pattern with a
distinct horizontal edge towards the
right. If this edge is not at the
horizontal reference line, the beam will need to be adjusted so the edge
is at the same height as the horizontal reference line.
5. Locate the vertical adjuster on
each headlamp, then use a E5 Torx
socket to turn the adjuster either
counterclockwise (to adjust down)
or clockwise (to adjust up) aligning
the upper edge of the light pattern
up to the horizontal line.
6. Repeat Steps 3–5 for the other
headlamp.
7. Close the hood and turn off the
lamps.
TURN SIGNAL CONTROL
• Push down to activate the left
turn signal.
• Push up to activate the right turn
signal.Lights
112
2010 F-250/350/450/550 (f23)
Owners Guide, 2nd Printing
USA (fus)
Page 115 of 408
Replacing headlamp bulbs (aerodynamic)
1. Make sure that the headlamps are off, then open the hood.
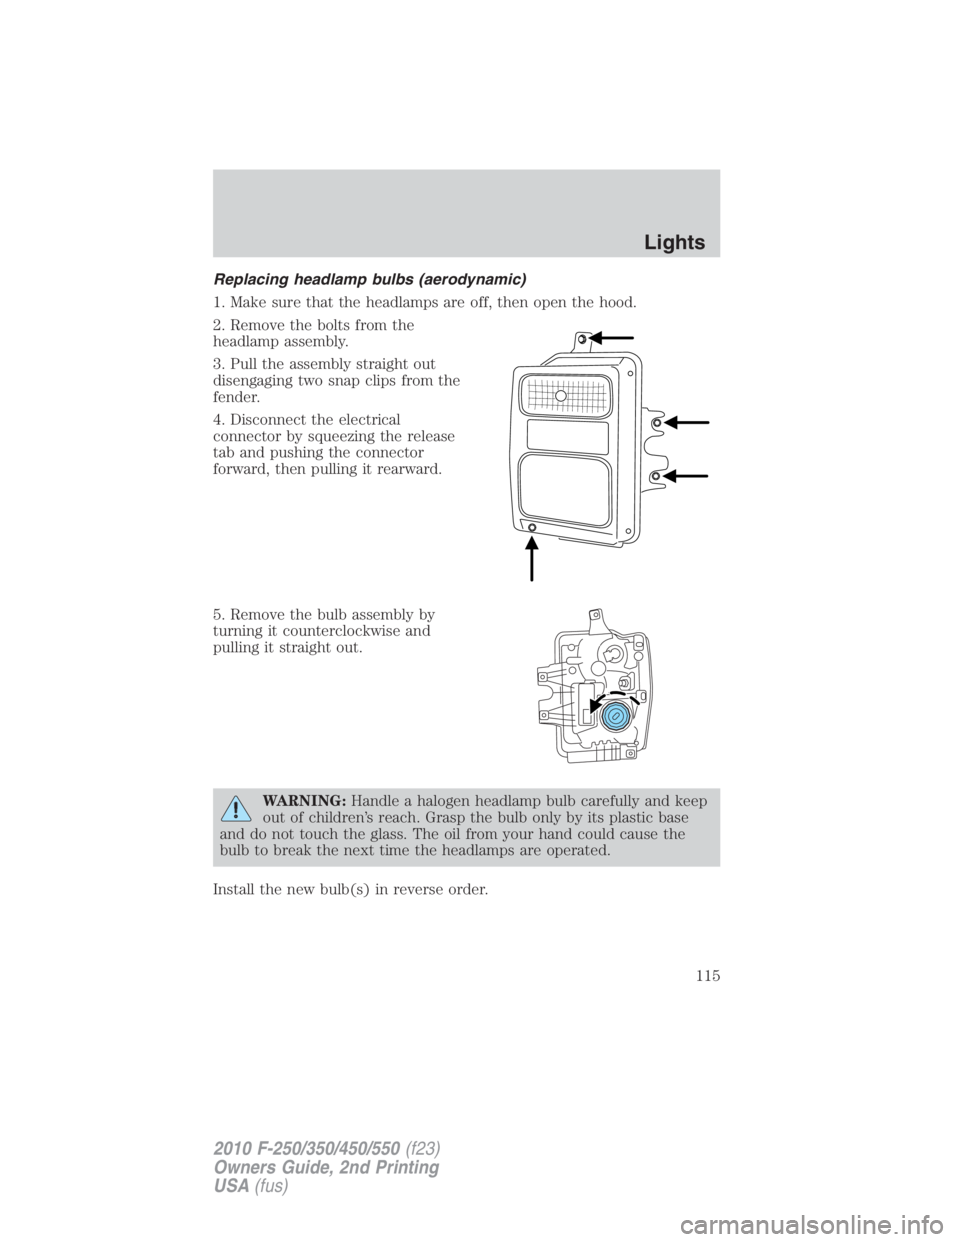
2. Remove the bolts from the
headlamp assembly.
3. Pull the assembly straight out
disengaging two snap clips from the
fender.
4. Disconnect the electrical
connector by squeezing the release
tab and pushing the connector
forward, then pulling it rearward.
5. Remove the bulb assembly by
turning it counterclockwise and
pulling it straight out.
WARNING: Handle a halogen headlamp bulb carefully and keep
out of children’s reach. Grasp the bulb only by its plastic base
and do not touch the glass. The oil from your hand could cause the
bulb to break the next time the headlamps are operated.
Install the new bulb(s) in reverse order. Lights
115
2010 F-250/350/450/550 (f23)
Owners Guide, 2nd Printing
USA (fus)
Page 116 of 408
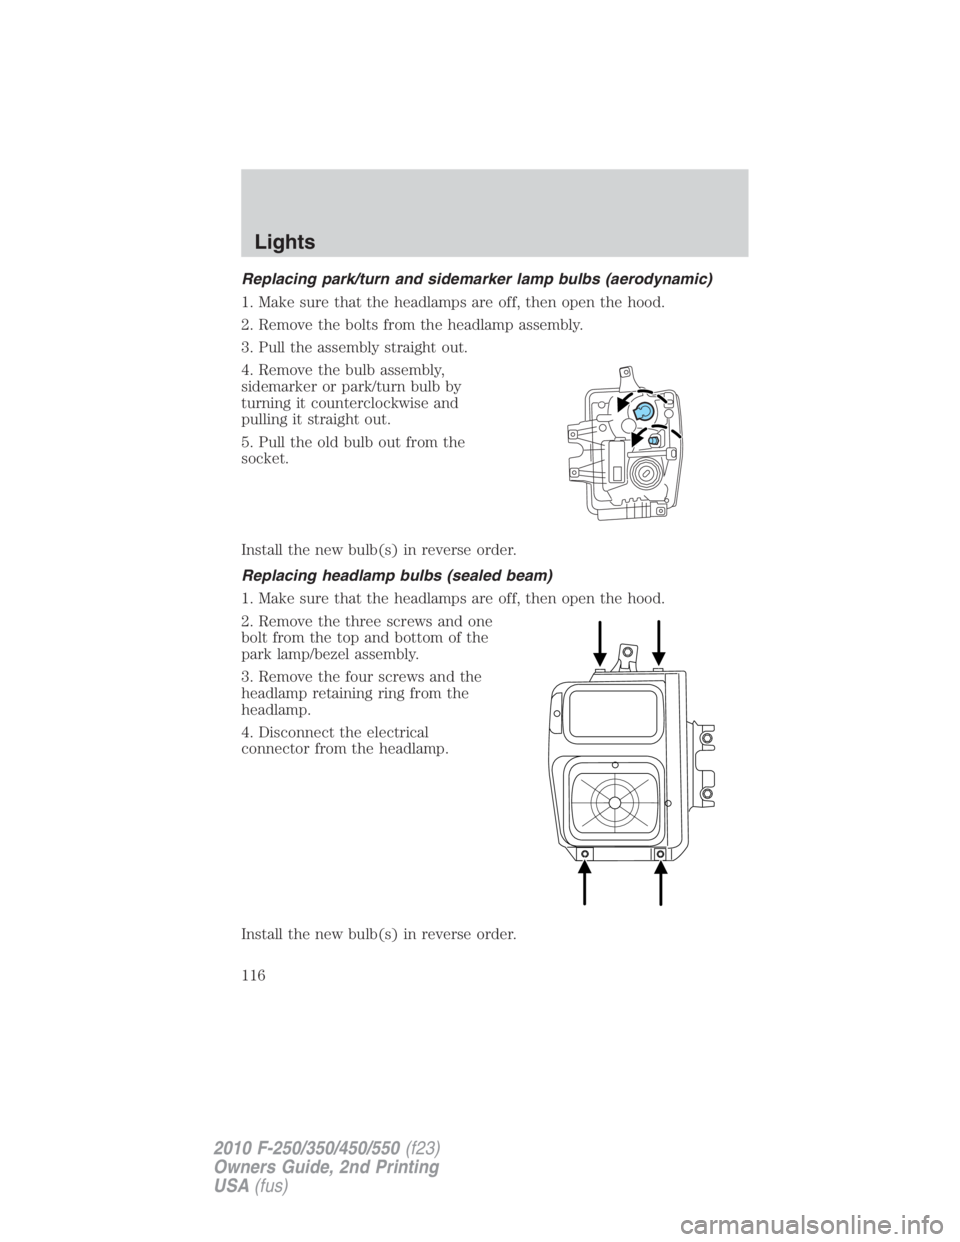
Replacing park/turn and sidemarker lamp bulbs (aerodynamic)
1. Make sure that the headlamps are off, then open the hood.
2. Remove the bolts from the headlamp assembly.
3. Pull the assembly straight out.
4. Remove the bulb assembly,
sidemarker or park/turn bulb by
turning it counterclockwise and
pulling it straight out.
5. Pull the old bulb out from the
socket.
Install the new bulb(s) in reverse order.
Replacing headlamp bulbs (sealed beam)
1. Make sure that the headlamps are off, then open the hood.
2. Remove the three screws and one
bolt from the top and bottom of the
park lamp/bezel assembly.
3. Remove the four screws and the
headlamp retaining ring from the
headlamp.
4. Disconnect the electrical
connector from the headlamp.
Install the new bulb(s) in reverse order.Lights
116
2010 F-250/350/450/550 (f23)
Owners Guide, 2nd Printing
USA (fus)
Page 117 of 408
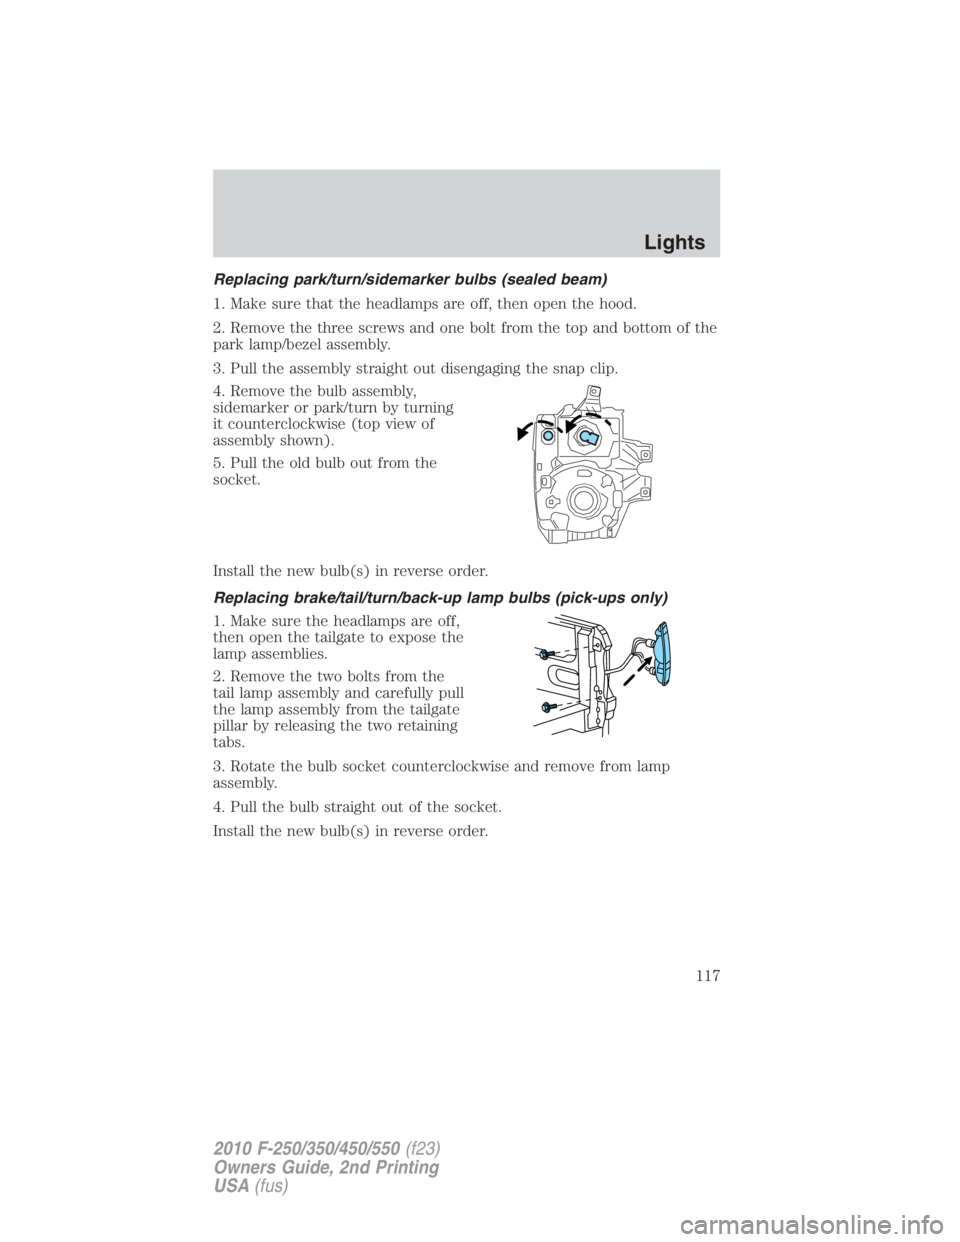
Replacing park/turn/sidemarker bulbs (sealed beam)
1. Make sure that the headlamps are off, then open the hood.
2. Remove the three screws and one bolt from the top and bottom of the
park lamp/bezel assembly.
3. Pull the assembly straight out disengaging the snap clip.
4. Remove the bulb assembly,
sidemarker or park/turn by turning
it counterclockwise (top view of
assembly shown).
5. Pull the old bulb out from the
socket.
Install the new bulb(s) in reverse order.
Replacing brake/tail/turn/back-up lamp bulbs (pick-ups only)
1. Make sure the headlamps are off,
then open the tailgate to expose the
lamp assemblies.
2. Remove the two bolts from the
tail lamp assembly and carefully pull
the lamp assembly from the tailgate
pillar by releasing the two retaining
tabs.
3. Rotate the bulb socket counterclockwise and remove from lamp
assembly.
4. Pull the bulb straight out of the socket.
Install the new bulb(s) in reverse order. Lights
117
2010 F-250/350/450/550 (f23)
Owners Guide, 2nd Printing
USA (fus)
Page 162 of 408

6. To program additional new unprogrammed key(s), repeat Steps 1
through 5.
If successful, the new coded key(s) will start the vehicle’s engine and the
theft indicator will illuminate for three seconds and then go out.
If not successful, the new coded key(s) will not start the vehicle’s engine
and the theft indicator will flash on and off and you may repeat Steps 1
through 5. If failure repeats, bring your vehicle to your authorized dealer
to have the new spare key(s) programmed.
PERIMETER ALARM SYSTEM (IF EQUIPPED)
The perimeter anti-theft system will warn you in the event of an
unauthorized entry to your vehicle.
If there is any potential perimeter anti-theft problem with your vehicle,
ensure ALL remote entry transmitters are taken to the authorized
dealer to aid in troubleshooting.
Arming the system
When armed, this system will respond if unauthorized entry is
attempted. When unauthorized entry occurs, the system will flash the
park/turn lamps and will sound the horn.
The system is ready to arm whenever the key is removed from the
ignition. Either of the following actions will prearm the alarm system:
• Press the control on the remote entry transmitter.
• Open a door and press the power door lock control to lock all the
doors, and then close the door.
• Press and hold the 7 • 8 and 9 • 0 controls on the keyless entry pad
at the same time to lock the doors (driver’s door must be closed).
There is a 20 second countdown when any of the above actions occur
before the vehicle becomes armed.
Each door and the hood is armed individually, and if any are open, they
must be closed before the open entry point can enter the 20 second
countdown.
The turn signal lamps will flash once when all doors and the hood are
closed indicating the vehicle is locked and entering the 20 second
countdown.Locks and Security
162
2010 F-250/350/450/550 (f23)
Owners Guide, 2nd Printing
USA (fus)
Page 163 of 408
Disarming the system
You can disarm the system by any of the following actions:
• Unlock the doors by pressing the control on your remote entry
transmitter.
• Turn the ignition to the on position with a programmed coded ignition
key.
Triggering the anti-theft system
The armed system will be triggered if any door or hood is opened
without using the key or the remote entry transmitter.
Locks and Security
163
2010 F-250/350/450/550 (f23)
Owners Guide, 2nd Printing
USA (fus)
Page 356 of 408
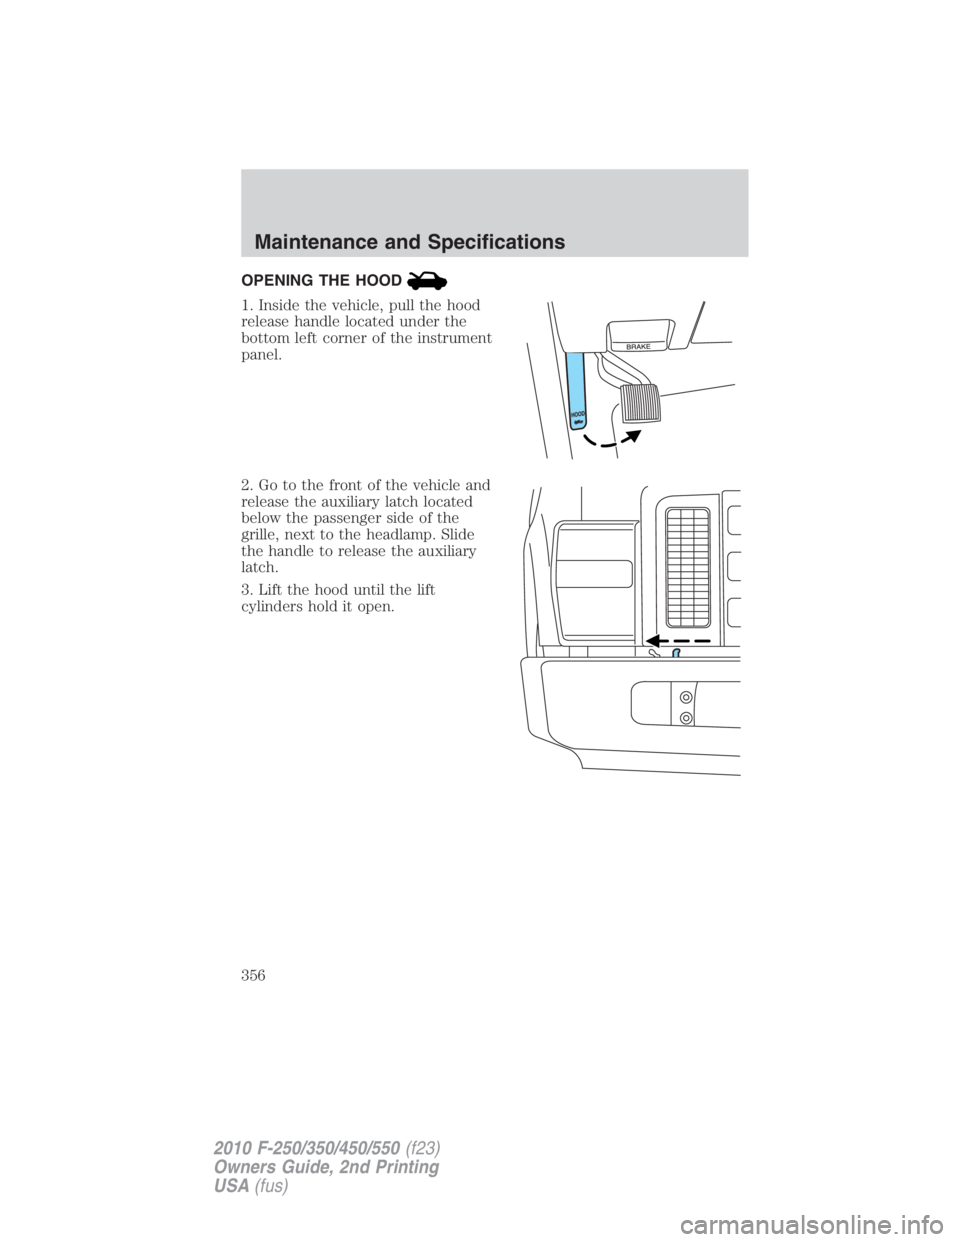
OPENING THE HOOD
1. Inside the vehicle, pull the hood
release handle located under the
bottom left corner of the instrument
panel.
2. Go to the front of the vehicle and
release the auxiliary latch located
below the passenger side of the
grille, next to the headlamp. Slide
the handle to release the auxiliary
latch.
3. Lift the hood until the lift
cylinders hold it open.Maintenance and Specifications
356
2010 F-250/350/450/550 (f23)
Owners Guide, 2nd Printing
USA (fus)
Page 360 of 408
To prolong the life of the wiper blades, it is highly recommended to
scrape off the ice on the windshield before turning on the wipers. The
layer of ice has many sharp edges and can damage the micro edge of the
wiper rubber element.
ENGINE OIL
Checking the engine oil
Refer to the scheduled maintenance information for the appropriate
intervals for checking the engine oil.
1. Make sure the vehicle is on level ground.
2. Turn the engine off and wait 15 minutes for the oil to drain into the
oil pan.
3. Set the parking brake and ensure the gearshift is securely latched in P
(Park) (automatic transmission) or 1 (First) (manual transmission).
4. Open the hood. Protect yourself from engine heat.
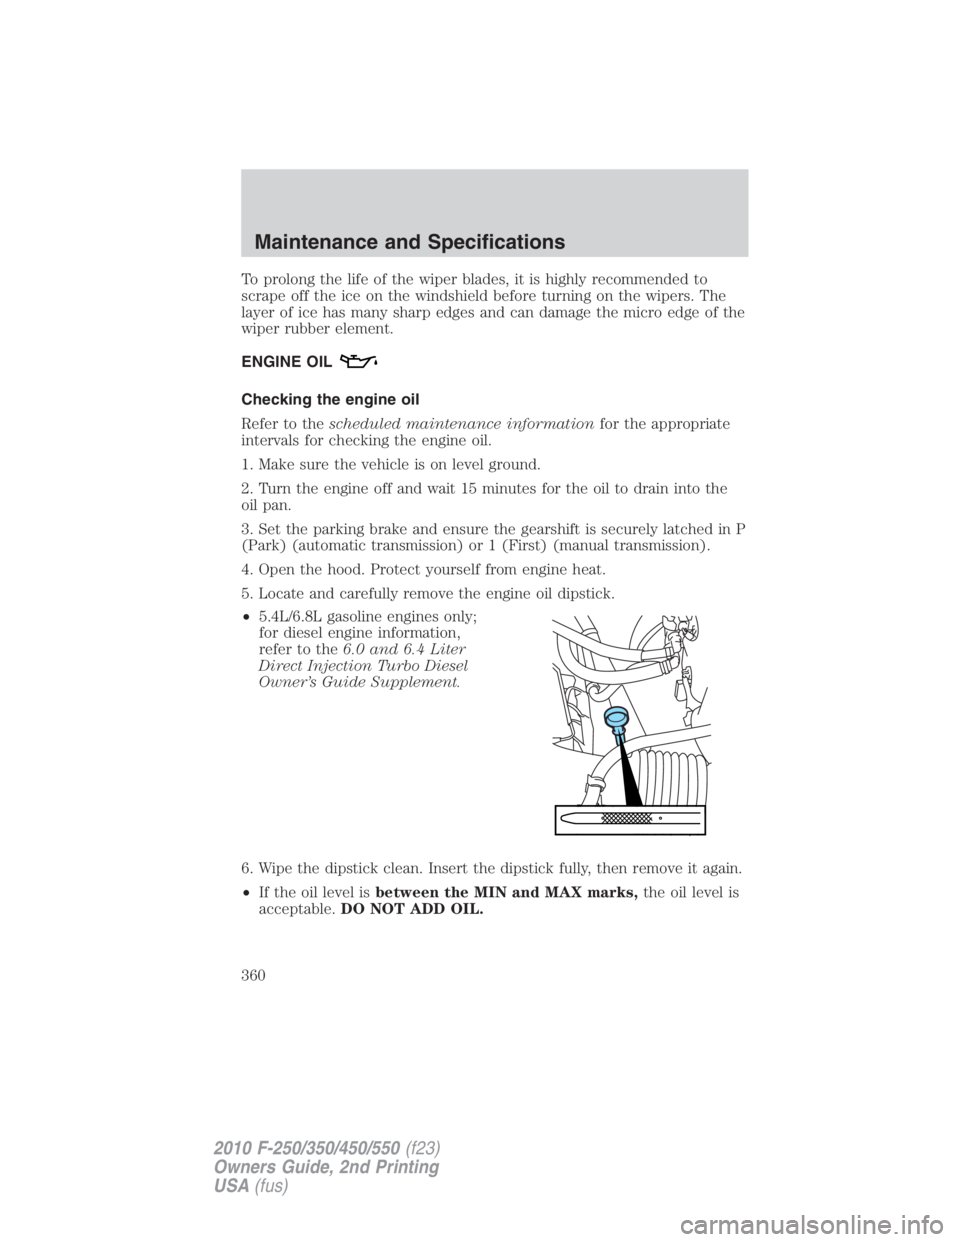
5. Locate and carefully remove the engine oil dipstick.
• 5.4L/6.8L gasoline engines only;
for diesel engine information,
refer to the 6.0 and 6.4 Liter
Direct Injection Turbo Diesel
Owner’s Guide Supplement.
6. Wipe the dipstick clean. Insert the dipstick fully, then remove it again.
• If the oil level is between the MIN and MAX marks, the oil level is
acceptable. DO NOT ADD OIL.Maintenance and Specifications
360
2010 F-250/350/450/550 (f23)
Owners Guide, 2nd Printing
USA (fus)