display FORD F450 2012 Manual PDF
[x] Cancel search | Manufacturer: FORD, Model Year: 2012, Model line: F450, Model: FORD F450 2012Pages: 448, PDF Size: 6.01 MB
Page 293 of 448
Understanding your SelectShift Automatic™ transmission (SST)
gearshift lever
This vehicle is equipped with a SelectShift Automatic™ transmission
(SST) gearshift lever. The SST is an automatic transmission with the
ability for the driver to change gears up or down (without a clutch) as
desired.
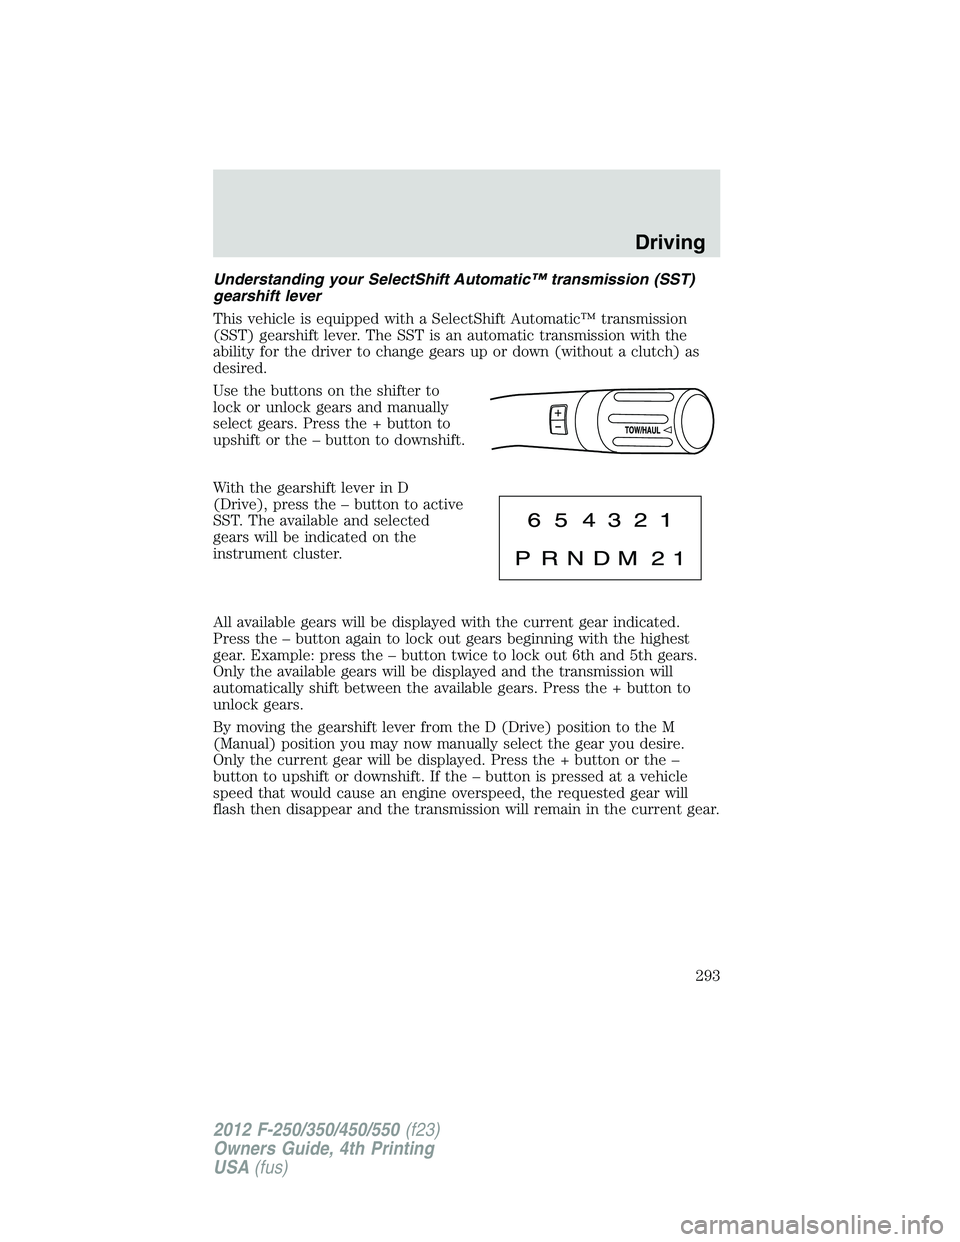
Use the buttons on the shifter to
lock or unlock gears and manually
select gears. Press the + button to
upshift or the – button to downshift.
With the gearshift lever in D
(Drive), press the – button to active
SST. The available and selected
gears will be indicated on the
instrument cluster.
All available gears will be displayed with the current gear indicated.
Press the – button again to lock out gears beginning with the highest
gear. Example: press the – button twice to lock out 6th and 5th gears.
Only the available gears will be displayed and the transmission will
automatically shift between the available gears. Press the + button to
unlock gears.
By moving the gearshift lever from the D (Drive) position to the M
(Manual) position you may now manually select the gear you desire.
Only the current gear will be displayed. Press the + button or the –
button to upshift or downshift. If the – button is pressed at a vehicle
speed that would cause an engine overspeed, the requested gear will
flash then disappear and the transmission will remain in the current gear. Driving
293
2012 F-250/350/450/550 (f23)
Owners Guide, 4th Printing
USA (fus)
Page 297 of 448
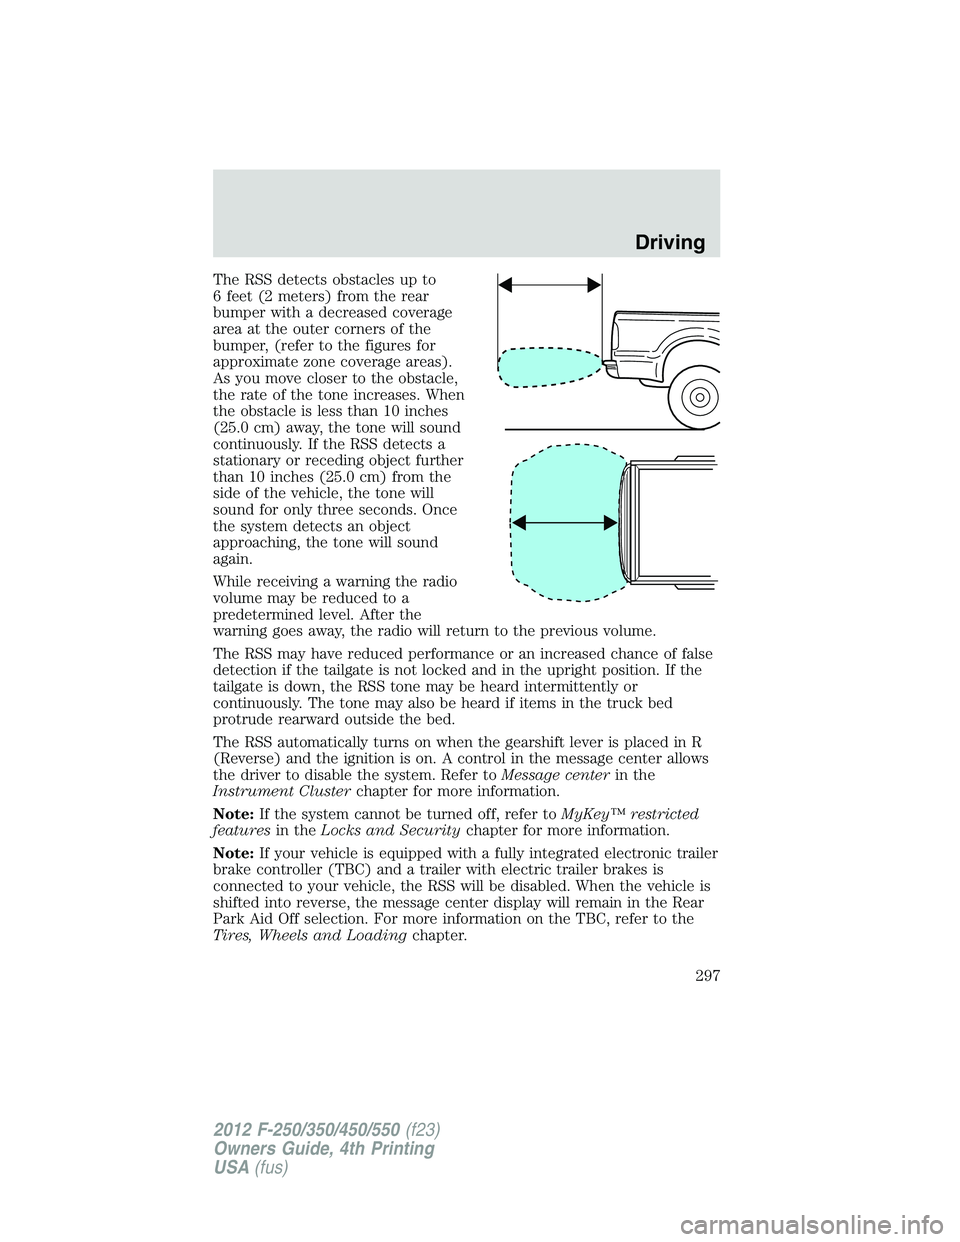
The RSS detects obstacles up to
6 feet (2 meters) from the rear
bumper with a decreased coverage
area at the outer corners of the
bumper, (refer to the figures for
approximate zone coverage areas).
As you move closer to the obstacle,
the rate of the tone increases. When
the obstacle is less than 10 inches
(25.0 cm) away, the tone will sound
continuously. If the RSS detects a
stationary or receding object further
than 10 inches (25.0 cm) from the
side of the vehicle, the tone will
sound for only three seconds. Once
the system detects an object
approaching, the tone will sound
again.
While receiving a warning the radio
volume may be reduced to a
predetermined level. After the
warning goes away, the radio will return to the previous volume.
The RSS may have reduced performance or an increased chance of false
detection if the tailgate is not locked and in the upright position. If the
tailgate is down, the RSS tone may be heard intermittently or
continuously. The tone may also be heard if items in the truck bed
protrude rearward outside the bed.
The RSS automatically turns on when the gearshift lever is placed in R
(Reverse) and the ignition is on. A control in the message center allows
the driver to disable the system. Refer to Message center in the
Instrument Cluster chapter for more information.
Note: If the system cannot be turned off, refer to MyKey™ restricted
features in the Locks and Security chapter for more information.
Note: If your vehicle is equipped with a fully integrated electronic trailer
brake controller (TBC) and a trailer with electric trailer brakes is
connected to your vehicle, the RSS will be disabled. When the vehicle is
shifted into reverse, the message center display will remain in the Rear
Park Aid Off selection. For more information on the TBC, refer to the
Tires, Wheels and Loading chapter. Driving
297
2012 F-250/350/450/550 (f23)
Owners Guide, 4th Printing
USA (fus)
Page 298 of 448
Keep the RSS sensors (located on the rear bumper/fascia) free
from snow, ice and large accumulations of dirt (do not clean the
sensors with sharp objects). If the sensors are covered, it will
affect the accuracy of the RSS.
If your vehicle sustains damage to the rear bumper/fascia, leaving
it misaligned or bent, the sensing zone may be altered causing
inaccurate measurement of obstacles or false alarms.
REARVIEW CAMERA SYSTEM (IF EQUIPPED)
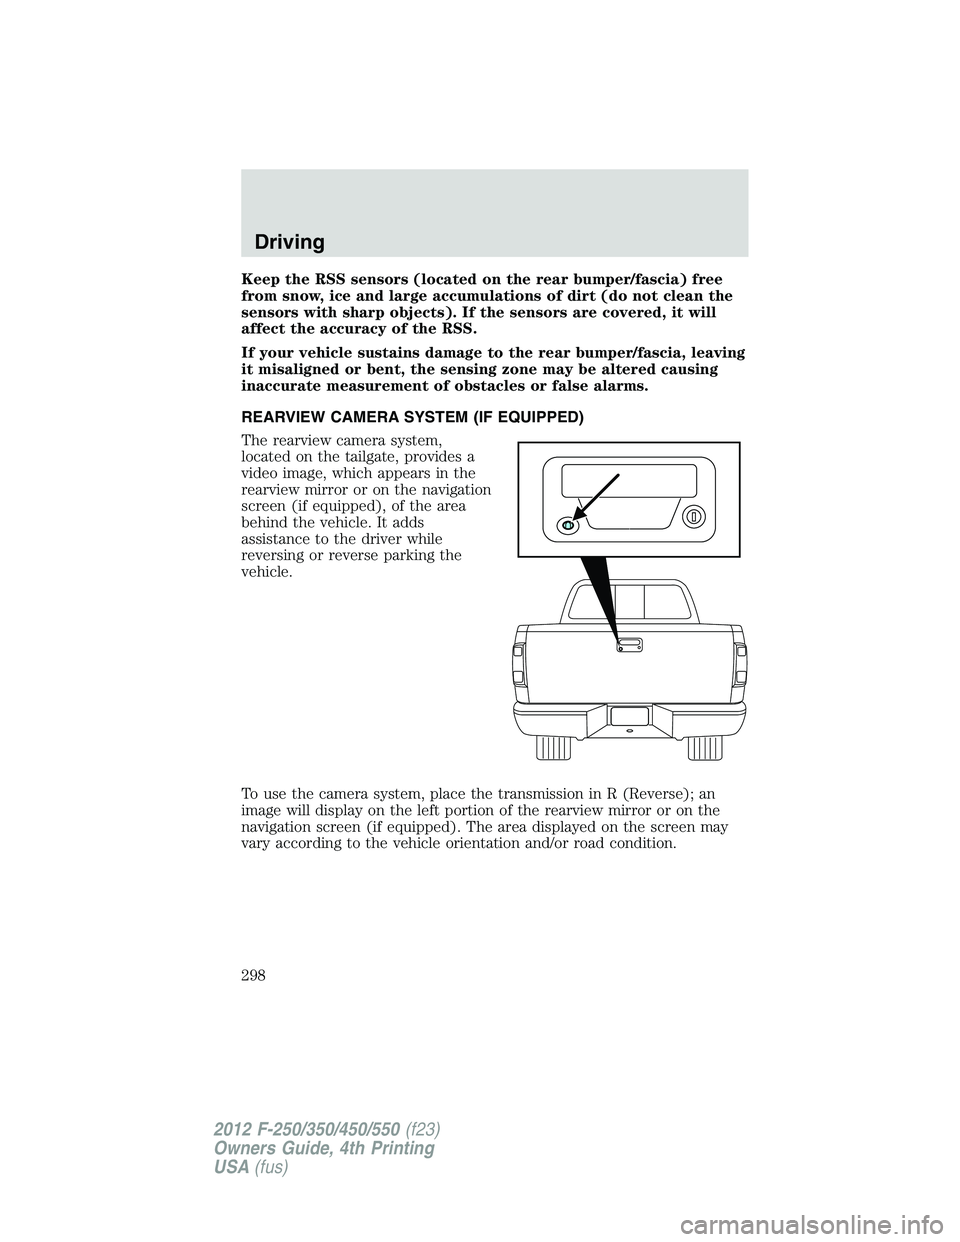
The rearview camera system,
located on the tailgate, provides a
video image, which appears in the
rearview mirror or on the navigation
screen (if equipped), of the area
behind the vehicle. It adds
assistance to the driver while
reversing or reverse parking the
vehicle.
To use the camera system, place the transmission in R (Reverse); an
image will display on the left portion of the rearview mirror or on the
navigation screen (if equipped). The area displayed on the screen may
vary according to the vehicle orientation and/or road condition.Driving
298
2012 F-250/350/450/550 (f23)
Owners Guide, 4th Printing
USA (fus)
Page 299 of 448
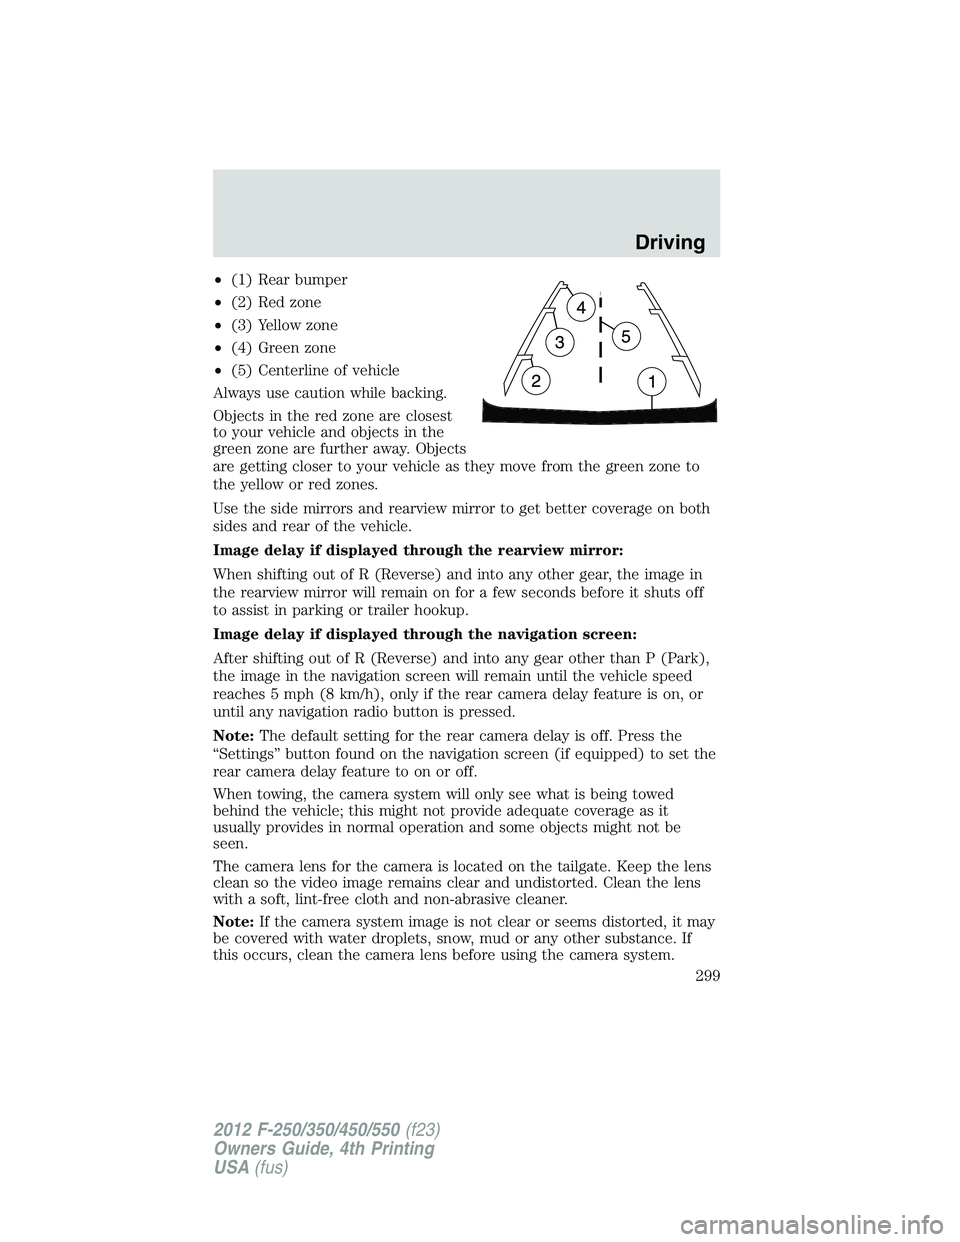
• (1) Rear bumper
• (2) Red zone
• (3) Yellow zone
• (4) Green zone
• (5) Centerline of vehicle
Always use caution while backing.
Objects in the red zone are closest
to your vehicle and objects in the
green zone are further away. Objects
are getting closer to your vehicle as they move from the green zone to
the yellow or red zones.
Use the side mirrors and rearview mirror to get better coverage on both
sides and rear of the vehicle.
Image delay if displayed through the rearview mirror:
When shifting out of R (Reverse) and into any other gear, the image in
the rearview mirror will remain on for a few seconds before it shuts off
to assist in parking or trailer hookup.
Image delay if displayed through the navigation screen:
After shifting out of R (Reverse) and into any gear other than P (Park),
the image in the navigation screen will remain until the vehicle speed
reaches 5 mph (8 km/h), only if the rear camera delay feature is on, or
until any navigation radio button is pressed.
Note: The default setting for the rear camera delay is off. Press the
“Settings” button found on the navigation screen (if equipped) to set the
rear camera delay feature to on or off.
When towing, the camera system will only see what is being towed
behind the vehicle; this might not provide adequate coverage as it
usually provides in normal operation and some objects might not be
seen.
The camera lens for the camera is located on the tailgate. Keep the lens
clean so the video image remains clear and undistorted. Clean the lens
with a soft, lint-free cloth and non-abrasive cleaner.
Note: If the camera system image is not clear or seems distorted, it may
be covered with water droplets, snow, mud or any other substance. If
this occurs, clean the camera lens before using the camera system. Driving
299
2012 F-250/350/450/550 (f23)
Owners Guide, 4th Printing
USA (fus)
Page 302 of 448
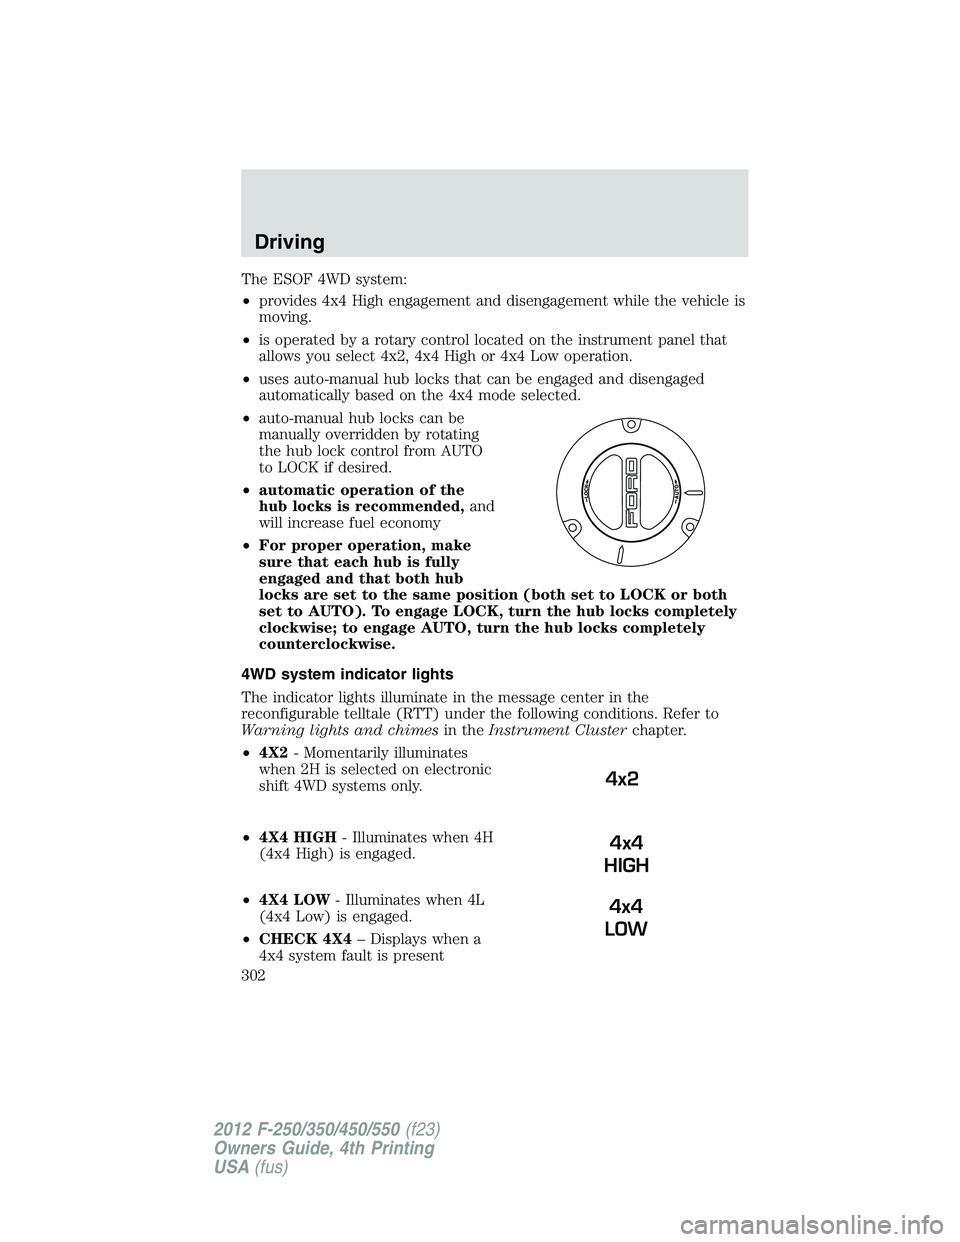
The ESOF 4WD system:
• provides 4x4 High engagement and disengagement while the vehicle is
moving.
• is operated by a rotary control located on the instrument panel that
allows you select 4x2, 4x4 High or 4x4 Low operation.
• uses auto-manual hub locks that can be engaged and disengaged
automatically based on the 4x4 mode selected.
• auto-manual hub locks can be
manually overridden by rotating
the hub lock control from AUTO
to LOCK if desired.
• automatic operation of the
hub locks is recommended, and
will increase fuel economy
• For proper operation, make
sure that each hub is fully
engaged and that both hub
locks are set to the same position (both set to LOCK or both
set to AUTO). To engage LOCK, turn the hub locks completely
clockwise; to engage AUTO, turn the hub locks completely
counterclockwise.
4WD system indicator lights
The indicator lights illuminate in the message center in the
reconfigurable telltale (RTT) under the following conditions. Refer to
Warning lights and chimes in the Instrument Cluster chapter.
• 4X2 - Momentarily illuminates
when 2H is selected on electronic
shift 4WD systems only.
• 4X4 HIGH - Illuminates when 4H
(4x4 High) is engaged.
• 4X4 LOW - Illuminates when 4L
(4x4 Low) is engaged.
• CHECK 4X4 – Displays when a
4x4 system fault is present 4x2
4x4
HIGH
4x4
LOWDriving
302
2012 F-250/350/450/550 (f23)
Owners Guide, 4th Printing
USA (fus)
Page 306 of 448
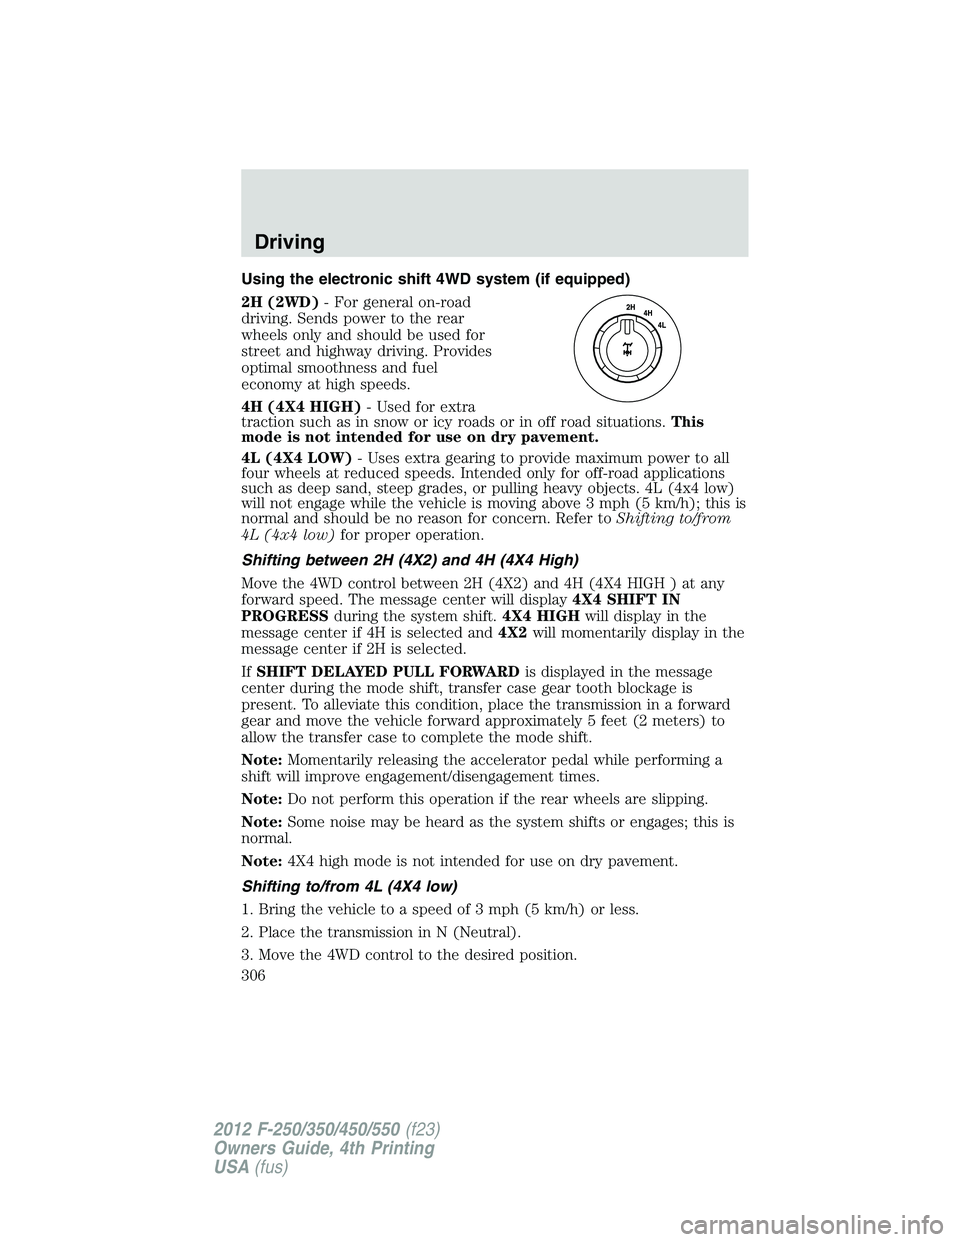
Using the electronic shift 4WD system (if equipped)
2H (2WD) - For general on-road
driving. Sends power to the rear
wheels only and should be used for
street and highway driving. Provides
optimal smoothness and fuel
economy at high speeds.
4H (4X4 HIGH) - Used for extra
traction such as in snow or icy roads or in off road situations. This
mode is not intended for use on dry pavement.
4L (4X4 LOW) - Uses extra gearing to provide maximum power to all
four wheels at reduced speeds. Intended only for off-road applications
such as deep sand, steep grades, or pulling heavy objects. 4L (4x4 low)
will not engage while the vehicle is moving above 3 mph (5 km/h); this is
normal and should be no reason for concern. Refer to Shifting to/from
4L (4x4 low) for proper operation.
Shifting between 2H (4X2) and 4H (4X4 High)
Move the 4WD control between 2H (4X2) and 4H (4X4 HIGH ) at any
forward speed. The message center will display 4X4 SHIFT IN
PROGRESS during the system shift. 4X4 HIGH will display in the
message center if 4H is selected and 4X2 will momentarily display in the
message center if 2H is selected.
If SHIFT DELAYED PULL FORWARD is displayed in the message
center during the mode shift, transfer case gear tooth blockage is
present. To alleviate this condition, place the transmission in a forward
gear and move the vehicle forward approximately 5 feet (2 meters) to
allow the transfer case to complete the mode shift.
Note: Momentarily releasing the accelerator pedal while performing a
shift will improve engagement/disengagement times.
Note: Do not perform this operation if the rear wheels are slipping.
Note: Some noise may be heard as the system shifts or engages; this is
normal.
Note: 4X4 high mode is not intended for use on dry pavement.
Shifting to/from 4L (4X4 low)
1. Bring the vehicle to a speed of 3 mph (5 km/h) or less.
2. Place the transmission in N (Neutral).
3. Move the 4WD control to the desired position.Driving
306
2012 F-250/350/450/550 (f23)
Owners Guide, 4th Printing
USA (fus)
Page 307 of 448
The message center will display 4X4 SHIFT IN PROGRESS during the
shift. The message center will then display the system mode selected. If
any of the above shift conditions are not met, the shift will not occur and
the message center will display information guiding the driver through
the proper shifting procedures.
If SHIFT DELAYED PULL FORWARD is displayed in the message
center, transfer case gear tooth blockage is present. To alleviate this
condition, place the transmission in a forward gear, move the vehicle
forward approximately 5 feet (1.5 m), and shift the transmission back to
neutral to allow the transfer case to complete the range shift.
Note: Some noise may be heard as the system shifts or engages; this is
normal.
Note: 4x4 low mode is not intended for use on dry pavement.
Driving off-road with truck and utility vehicles
4WD vehicles are specially equipped for driving on sand, snow, mud and
rough terrain and have operating characteristics that are somewhat
different from conventional vehicles, both on and off the road.
Your vehicle may be equipped with a long front air dam that may become
damaged (due to reduced ground clearance) when taking your vehicle
off-road. This air dam can either be removed or a shorter air dam can be
purchased from your authorized dealer. In either case, if the air dam is
to be removed (or replaced) before going off-road, refer to the
Workshop Manual for the procedure or have your authorized dealer
perform the work for you.
How your vehicle differs from other vehicles
Truck and utility vehicles can differ from some other vehicles. Your
vehicle may be higher to allow it to travel over rough terrain without
getting hung up or damaging underbody components.
The differences that make your vehicle so versatile also make it handle
differently than an ordinary passenger car.
Maintain steering wheel control at all times, especially in rough terrain.
Since sudden changes in terrain can result in abrupt steering wheel
motion, make sure you grip the steering wheel from the outside. Do not
grip the spokes.
Drive cautiously to avoid vehicle damage from concealed objects such as
rocks and stumps. Driving
307
2012 F-250/350/450/550 (f23)
Owners Guide, 4th Printing
USA (fus)