overheating FORD F450 SUPER DUTY 2017 Owners Manual
[x] Cancel search | Manufacturer: FORD, Model Year: 2017, Model line: F450 SUPER DUTY, Model: FORD F450 SUPER DUTY 2017Pages: 642, PDF Size: 12.35 MB
Page 101 of 642
To adjust your mirrors, make sure youswitch your vehicle on (with the ignition inaccessory mode or the engine running) andthen press the adjustment control toposition the mirrors.
Note:Moving the mirrors 10 or more timeswithin one minute, or repeated folding,unfolding and telescoping of the mirrorswhile holding the control down during fulltravel, may disable the system to protectthe motors from overheating. Waitapproximately three minutes with thevehicle running, and up to 10 minutes withthe vehicle off, for the system to reset andfor function to return to normal.
Loose Mirror
If your power-folding mirrors are manuallyfolded, they may not work properly evenafter you re-position them. You need toreset them if:
•The mirrors vibrate when you drive.
•The mirrors feel loose.
•The mirrors do not stay in the folded orunfolded position.
•One of the mirrors is not in its normaldriving position.
To reset the power-fold feature, use thepower-folding mirror control to fold andunfold the mirrors. You may hear a loudnoise as you reset the power-foldingmirrors. This sound is normal. Repeat thisprocess as needed each time the mirrorsare manually folded.
Heated Exterior Mirrors (If Equipped)
See Heated Windows and Mirrors (page150).
Memory Mirrors (If Equipped)
You can save and recall the mirrorpositions through the memory function.See Memory Function (page 157).
Direction Indicator Mirrors (If Equipped)
While the vehicle is running, theforward-facing portion of the appropriatemirror housing blinks when you switch onthe direction indicator.
Puddle Lamps (If Equipped)
The lamps on the bottom part of the mirrorhousing light when you use yourtransmitter to unlock the doors or whenyou open a door.
Clearance Lamps (If Equipped)
The lower, outer part of the mirror housingslight when you switch the headlamps orparking lamps on.
Spot Lamps (If Equipped)
The area lights are on the forward-facingportion of the mirror housing. You canswitch them on and off by using thecontrols located on the instrument panel.See Lighting (page 86).
Trailer Towing Camera System (If
Equipped)
See Rear View Camera (page 232).
Blind Spot Information System (If
Equipped)
See Blind Spot Information System(page 249).
INTERIOR MIRROR
WARNING
Do not adjust the mirror when yourvehicle is moving.
98
Super Duty (TFE) Canada/United States of America, enUSA, Edition date: 201710, Second Printing
Windows and Mirrors
Page 169 of 642
3.Press and hold the function button youwant to program for 2 seconds, thenrelease. Repeat this step. Dependingon your brand of garage door opener,you may need to repeat this sequencea third time.
Gate Operator / CanadianProgramming
Canadian radio-frequency laws requiretransmitter signals to “time-out” (or quit)after several seconds of transmission –which may not be long enough forHomeLink to pick up the signal duringprogramming. Similar to this Canadian law,some U.S. gate operators are designed to“time-out” in the same manner.
Note:If programming a garage door openeror gate operator, it is advised to unplug thedevice during the “cycling” process toprevent possible overheating.
1.Press and release,every two seconds,your hand-held transmitter until theHomeLink indicator light changes to arapidly blinking or continuously on light.
2. Release the hand-held transmitterbutton.
3. Continue programing HomeLink. SeeIn-Vehicle Programming, Step 4.
Erasing the Function Button Codes
Note:You cannot erase individual buttons.
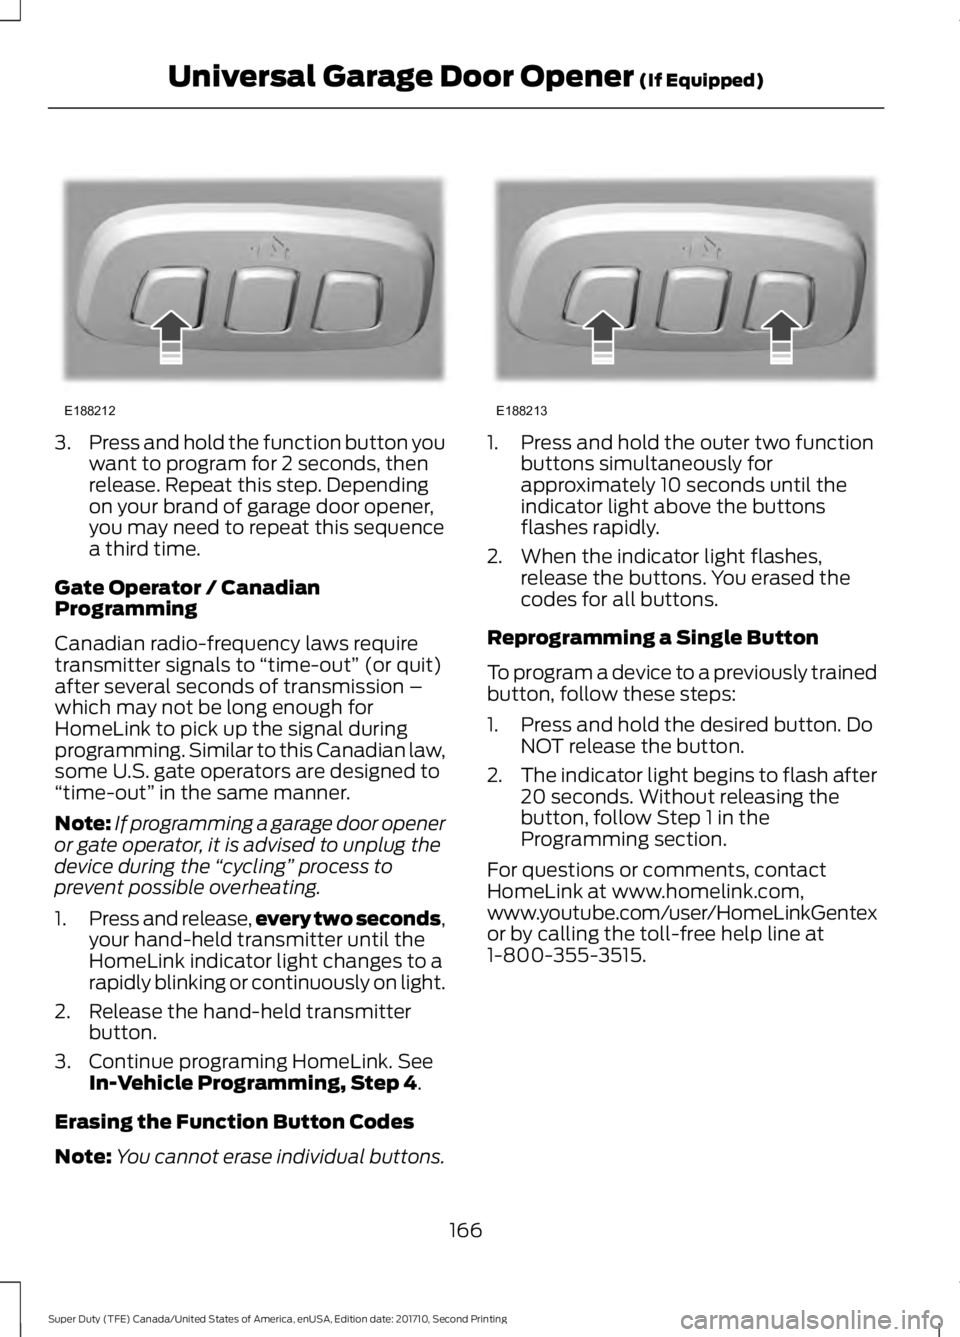
1. Press and hold the outer two functionbuttons simultaneously forapproximately 10 seconds until theindicator light above the buttonsflashes rapidly.
2. When the indicator light flashes,release the buttons. You erased thecodes for all buttons.
Reprogramming a Single Button
To program a device to a previously trainedbutton, follow these steps:
1. Press and hold the desired button. DoNOT release the button.
2.The indicator light begins to flash after20 seconds. Without releasing thebutton, follow Step 1 in theProgramming section.
For questions or comments, contactHomeLink at www.homelink.com,www.youtube.com/user/HomeLinkGentexor by calling the toll-free help line at1-800-355-3515.
166
Super Duty (TFE) Canada/United States of America, enUSA, Edition date: 201710, Second Printing
Universal Garage Door Opener (If Equipped)E188212 E188213
Page 188 of 642
Switching Between E85 andGasoline
We do not recommend repeatedlyalternating between E85 and gasoline. Ifyou switch from using E85 to gasoline, orfrom gasoline to E85, add as much fuel aspossible, at least half a tank. Drive yourvehicle immediately for a minimum of 5 mi(8 km) to allow it to adapt to the changein ethanol concentration. If you use E85exclusively, we recommend that you fillthe fuel tank with regular unleadedgasoline at each scheduled oil change.
FUEL QUALITY - DIESEL
Fuel Requirements - Choosing TheRight Fuel: Vehicles OperatedWhere Ultra Low Sulfur Diesel FuelIs Required (UnitedStates/Canada/Puerto Rico/U.S.Virgin Islands And Other Locales)
You should use Ultra-Low Sulfur Dieselfuel (also known as ULSD) designated asnumber 1-D or 2-D with a maximum of15-ppm sulfur in your diesel vehicle. Youmay operate your vehicle on diesel fuelscontaining up to 20% biodiesel, alsoknown as B20. These fuels should meetthe ASTM D975 diesel or the ASTM D7467B6-B20 biodiesel industry specifications.Outside of North America, use fuelsmeeting EN590 or equivalent local marketstandard.
Note:The vehicle Warranty does not coverdamage caused by using an improper typeof fuel or fuel additive.
Note:Do not blend used engine oil withdiesel fuel under any circumstances.Blending used oil with the fuel willsignificantly increase your vehicle’s exhaustemissions and reduce engine life due toincreased internal wear.
Using low sulfur diesel fuel(16-500 ppm) or high sulfurdiesel fuel (greater than 500ppm) in your diesel engine will causecertain emission components tomalfunction which may also cause theservice engine soon light to illuminateindicating an emissions-related concern.
Diesel fuel is adjusted seasonally for coldtemperature. For best results attemperatures below 19°F (-7°C), it isrecommended to use a diesel fuel whichhas been seasonally adjusted for theambient conditions.
Fuel Requirements - Choosing TheRight Fuel: Vehicles OperatedWhere Ultra Low Sulfur Diesel FuelIs Not Required
For the engine to operate reliably onlow-sulfur or high-sulfur diesel fuel, theengine must be a factory built high-sulfurengine (available as a dealer order optionfor select markets) or an ultra low sulfurdiesel fuel configured engine that has beenretrofitted for high-sulfur diesel fuel usingFord Motor Company dealer service parts.Failure to use retrofit components otherthan those available through yourauthorized dealer will result in coolantsystem damage, engine overheating,selective catalyst reduction system ordiesel particulate filter damage andpossible base engine damage.
Use only a diesel engine configured for usewith high sulfur diesel fuel in markets withdiesel fuel that has sulfur content greaterthan 15 ppm. Using low sulfur diesel fuel(16–500 ppm) or high sulfur diesel fuel(greater than 500 ppm) in a diesel enginedesigned to use only Ultra Low SulfurDiesel fuel may result in damage to engineemission control devices and theaftertreatment system, potentiallyrendering the vehicle inoperable.
185
Super Duty (TFE) Canada/United States of America, enUSA, Edition date: 201710, Second Printing
Fuel and Refueling
Page 219 of 642
After driving through mud, clean off residuestuck to rotating driveshafts and tires.Excess mud stuck on tires and rotatingdriveshafts can cause an imbalance thatcould damage drive components.
Water
If you must drive through high water, driveslowly. Traction or brake capability maybe limited.
When driving through water, determine thedepth and avoid water higher than thebottom of the hubs. If the ignition systemgets wet, your vehicle may stall.
Once through water, always try the brakes.Wet brakes do not stop your vehicle aseffectively as dry brakes. Drying can beimproved by applying light pressure to thebrake pedal while moving slowly.
Note:Driving through deep water maydamage the transmission. If the front or rearaxle is submerged in water, the axlelubricant and power transfer unit lubricantshould be checked and changed ifnecessary.
Driving on Hilly or Sloping Terrain
Although natural obstacles may make itnecessary to travel diagonally up or downa hill or steep incline, you should alwaystry to drive straight up or straight down.
Note:Avoid turning on steep slopes or hills.A danger lies in losing traction, slippingsideways and possible vehicle roll over.Whenever driving on a hill, determinebeforehand the route you will use. Do notdrive over the crest of a hill without seeingwhat conditions are on the other side. Donot drive in reverse over a hill without theaid of an observer.
When climbing a steep slope or hill, startin a lower gear rather than downshifting toa lower gear from a higher gear once theascent has started. This reduces strain onthe engine and the possibility of stalling.
If your vehicle stalls, do not try to turnaround because this could cause vehicleroll over. It is better to reverse back to asafe location.
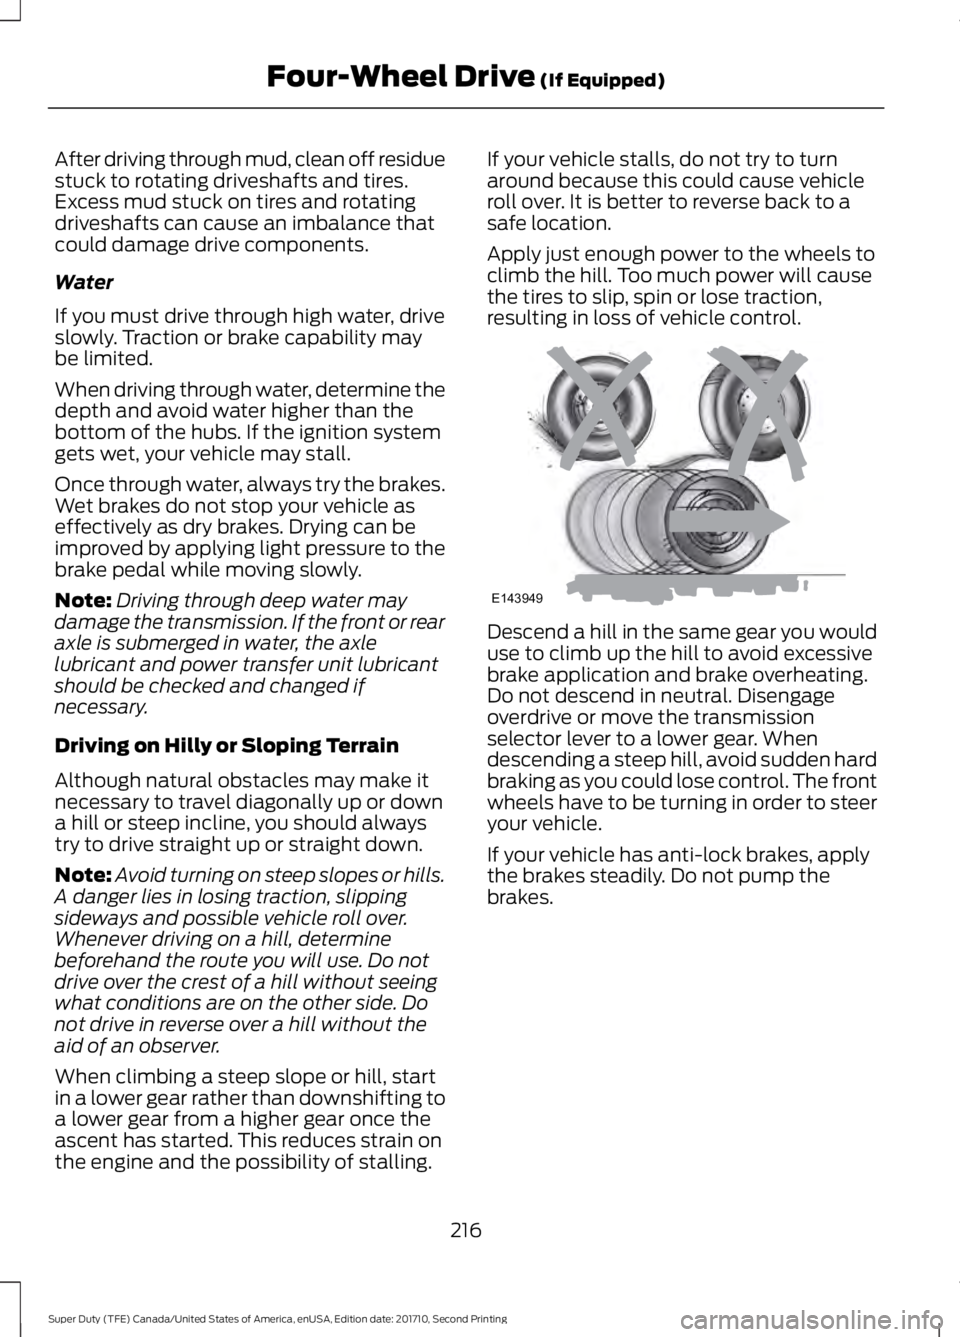
Apply just enough power to the wheels toclimb the hill. Too much power will causethe tires to slip, spin or lose traction,resulting in loss of vehicle control.
Descend a hill in the same gear you woulduse to climb up the hill to avoid excessivebrake application and brake overheating.Do not descend in neutral. Disengageoverdrive or move the transmissionselector lever to a lower gear. Whendescending a steep hill, avoid sudden hardbraking as you could lose control. The frontwheels have to be turning in order to steeryour vehicle.
If your vehicle has anti-lock brakes, applythe brakes steadily. Do not pump thebrakes.
216
Super Duty (TFE) Canada/United States of America, enUSA, Edition date: 201710, Second Printing
Four-Wheel Drive (If Equipped)E143949
Page 247 of 642
Low Speed AutomaticCancellation
The system does not function at vehiclespeeds below 12.4 mph (20 km/h). Anaudible alarm sounds and the automaticbraking releases if the vehicle drops belowthis speed.
Hilly Condition and Trailer TowUsage
Note:An audible alarm sounds and thesystem shuts down if it applies brakes foran extended period of time. This allows thebrakes to cool. The system functionsnormally again when the brakes havecooled.
Note:When towing with adaptive cruisecontrol, turn on Tow/Haul Mode and DieselEngine Brake.
Select a lower gear when the system isactive in situations such as prolongeddownhill driving on steep grades, forexample in mountainous areas. Thesystem needs additional engine braking inthese situations to reduce the load on thevehicle’s regular brake system to preventit from overheating.
Switching the System Off
Note:The set speed memory erases whenyou switch off the system.
Press and release OFF or switch off theignition.
Detection Issues
WARNING
On rare occasions, detection issuescan occur due to the roadinfrastructures, for example bridges,tunnels and safety barriers. In these cases,the system may brake late orunexpectedly. At all times, you areresponsible for controlling your vehicle,supervising the system and intervening, ifrequired.
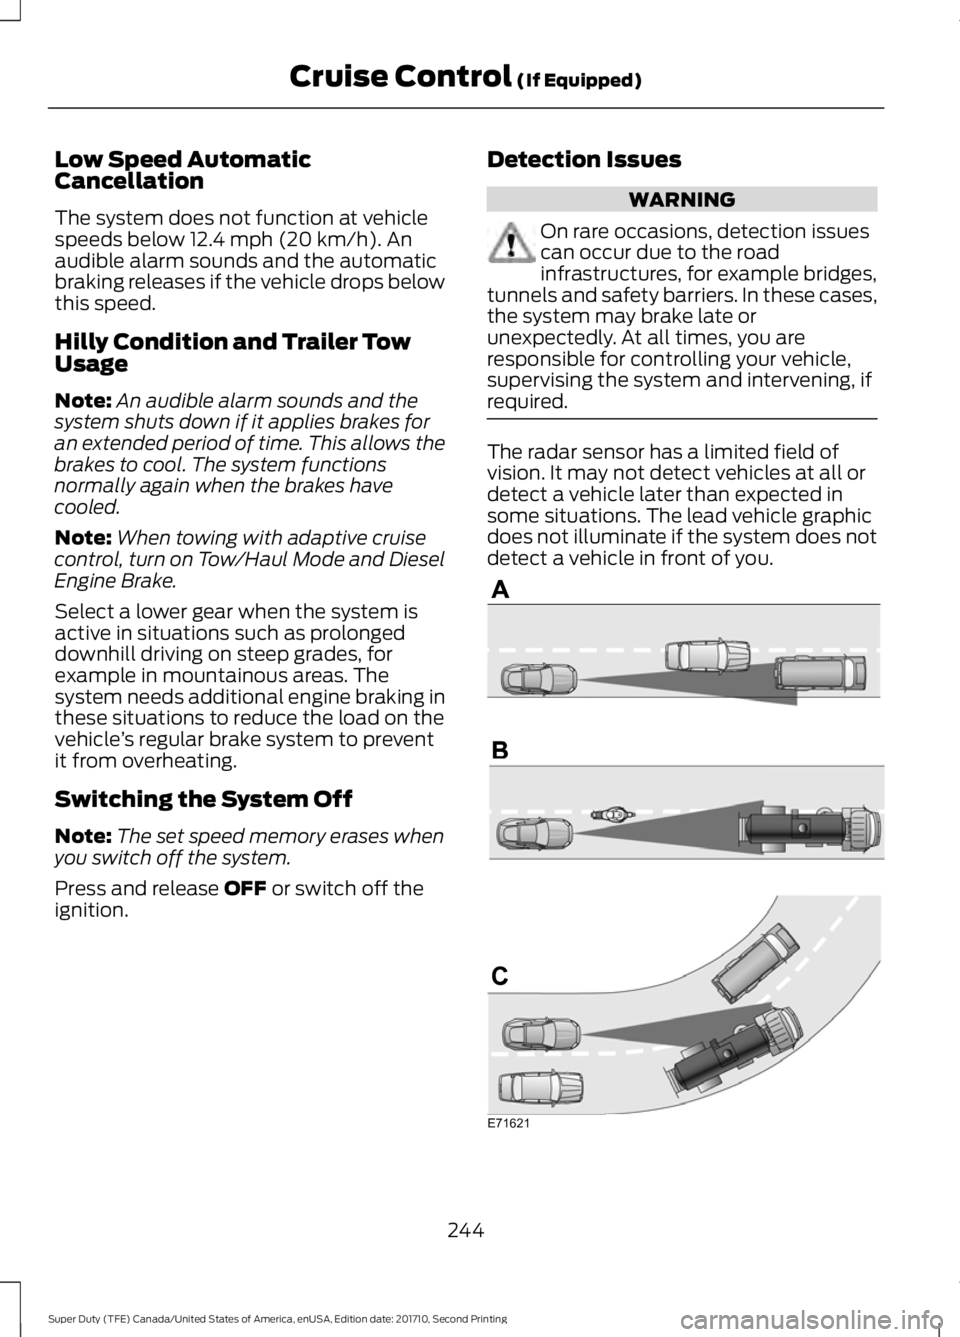
The radar sensor has a limited field ofvision. It may not detect vehicles at all ordetect a vehicle later than expected insome situations. The lead vehicle graphicdoes not illuminate if the system does notdetect a vehicle in front of you.
244
Super Duty (TFE) Canada/United States of America, enUSA, Edition date: 201710, Second Printing
Cruise Control (If Equipped)E71621
Page 260 of 642
If the power steering system breaks down(or if the engine is turned off), you cansteer the vehicle manually, but it takesmore effort.
If the steering wanders or pulls, check for:
•an improperly inflated tire
•uneven tire wear
•loose or worn suspension components
•loose or worn steering components
•improper vehicle alignment
If any steering components are serviced orreplaced, install new fasteners (many arecoated with thread adhesive or haveprevailing torque features which may notbe re-used). Never re-use a bolt or nut.Torque fasteners to specifications.
A high crown in the road or high crosswindsmay also make the steering seem towander or pull.
Adaptive Steering (If Equipped)
WARNING
The adaptive steering system hasdiagnostic checks that continuouslymonitor the system. If a fault isdetected a message displays in theinformation display. Stop your vehicle assoon as it is safe to do so. This warningmessage may clear if the fault is no longerpresent. If an adaptive steering systemwarning message appears each time youstart your vehicle, have the systemchecked as soon as possible.
The adaptive steering system continuallychanges the steering ratio with changes tovehicle speed, optimizing the steeringresponse in all conditions. The system alsochanges when you switch on thetransmission tow/haul feature. When youselect the tow/haul button, the adaptivesteering system reduces vehicle sensitivityto steering inputs at higher vehicle speeds,while maintaining the ease of parking andmaneuverability at low speeds.
Note:The adaptive steering system isdesigned with a locking device. With thelock engaged, the adaptive steering systemremains mechanically locked at a fixedsteering ratio. You may also notice a clickwhen you switch the vehicle on or after youswitch it off, as the lock disengages orengages.
Note:If your vehicle loses electrical poweror detects a fault when you are driving, thesystem automatically shuts down and youretain normal steering function with a fixedsteering ratio. During this time it is possiblethat the steering wheel may not be straightwhen the vehicle is driving straight ahead.In addition, the driver may notice that thesteering wheel angle required to steer thevehicle may be different.
Note:During parking maneuvers, theadaptive steering system balances the driverwork load for various steering wheel inputsand vehicle loading conditions. Underextreme operating conditions the systemlocking device may engage. This strategyprevents overheating and permanentdamage to the adaptive steering system.Typical steering and driving maneuversallow the system to cool and return tonormal operation.
257
Super Duty (TFE) Canada/United States of America, enUSA, Edition date: 201710, Second Printing
Driving Aids
Page 336 of 642
It is very important to use predilutedcoolant meeting the correct specificationin order to avoid plugging the smallpassageways in the engine cooling system.See Capacities and Specifications(page 422). Incorrect prediluted coolantuse can cause damage not covered by thevehicle Warranty.
If the coolant level is at or below theminimum mark, add prediluted coolantimmediately.
To top up the coolant level do thefollowing:
1. Unscrew the cap slowly. Any pressureescapes as you unscrew the cap.
2. Add prediluted coolant meeting thecorrect specification. See Capacitiesand Specifications (page 415).
3. Add enough prediluted coolant toreach the correct level.
4.Replace the coolant reservoir cap, turnit clockwise until you feel a strongresistance.
5. Check the coolant level in the coolantreservoir the next few times you driveyour vehicle.
Note:During normal vehicle operation, thecoolant may change color from orange topink or light red. As long as the coolant isclear and uncontaminated, this color changedoes not indicate the coolant has degradednor does it require the coolant to be drained,the system to be flushed, or the coolant tobe replaced.
Do not mix different colors or types ofprediluted coolant in your vehicle. Mixingof prediluted coolant or using an incorrectprediluted coolant may harm the engineor cooling system components and maynot be covered by the vehicle Warranty.
In case of emergency, you can add a largeamount of water without predilutedcoolant in order to reach a vehicle servicelocation. On arrival do the following:
1. Drain the cooling system.
2. Chemically clean the cooling system.We recommend Motorcraft PremiumCooling System Flush.
3. Refill with prediluted coolant as soonas possible.
Water alone, without prediluted coolant,can cause engine damage from corrosion,overheating or freezing.
Do not use the following as a coolantsubstitute:
•Alcohol.
•Methanol.
•Brine.
•Any coolant mixed with alcohol ormethanol antifreeze.
Alcohol and other liquids can cause enginedamage from overheating or freezing.
Do not add extra inhibitors or additives tothe coolant. These can be harmful andcompromise the corrosion protection ofthe coolant.
Recycled Coolant
We do not recommend the use of recycledcoolant as an approved recycling processis not yet available.
Dispose of used engine coolant in anappropriate manner. Follow yourcommunity’s regulations and standardsfor recycling and disposing of automotivefluids.
333
Super Duty (TFE) Canada/United States of America, enUSA, Edition date: 201710, Second Printing
Maintenance
Page 338 of 642
1. Pull off the road as soon as safelypossible and switch the engine off.
2. If you are a member of a roadsideassistance program, we recommendthat you contact your roadsideassistance service provider.
3. If this is not possible, wait a shortperiod for the engine to cool.
4. Check the coolant level. If the coolantlevel is at or below the minimum mark,add prediluted coolant immediately.
5. When the engine temperature cools,you can re-start the engine. Have yourvehicle checked as soon as possible tominimize engine damage.
Note:Driving your vehicle without repairincreases the chance of engine damage.
Engine Coolant TemperatureManagement (If Equipped)
WARNING
To reduce the risk of crash and injury,be prepared that the vehicle speedmay reduce and the vehicle may notbe able to accelerate with full power untilthe coolant temperature reduces.
If you tow a trailer with your vehicle, theengine may temporarily reach higher atemperature during severe operatingconditions, for example ascending a longor steep grade in high ambienttemperatures.
At this time, you may notice the coolanttemperature gauge moves toward the redzone and a message may appear in theinformation display.
You may notice a reduction in vehiclespeed caused by reduced engine power.In order to manage the engine coolanttemperature. Your vehicle may enter thismode if certain high-temperature andhigh-load conditions take place. Theamount of speed reduction depends onvehicle loading, grade and ambienttemperature. If this occurs, there is no needto pull off the road. You can continue todrive your vehicle.
The air conditioning may automaticallyturn on and off during severe operatingconditions to protect the engine fromoverheating. When the coolanttemperature decreases to the normaloperating temperature, the air conditioningturns on.
If the coolant temperature gauge movesfully into the red zone, or if the coolanttemperature warning or service enginesoon messages appear in your informationdisplay, do the following:
1. Pull off the road as soon as safelypossible and shift the transmission intopark (P).
2. Leave the engine running until thecoolant temperature gauge needlereturns to the normal position. Afterseveral minutes, if the temperaturedoes not drop, follow the remainingsteps.
3.Switch the engine off and wait for it tocool. Check the coolant level.
4. If the coolant level is at or below theminimum mark, add prediluted coolantimmediately.
5. If the coolant level is normal, restartthe engine and continue.
335
Super Duty (TFE) Canada/United States of America, enUSA, Edition date: 201710, Second Printing
Maintenance
Page 340 of 642
For vehicles with overflow coolant systemswith a non-pressurized cap on the coolantrecovery system, add coolant to thecoolant recovery reservoir when the engineis cool. Add prediluted coolant to themaximum level. For all vehicles which havea coolant degas system with a pressurizedcap, or if it is necessary to remove thecoolant pressure relief cap on the radiator,follow these steps to add engine coolant:
1. Turn the engine off and let it cool.
2. Unscrew the cap slowly. Any pressureescapes as you unscrew the cap.
3. Fill the coolant reservoir slowly withprediluted engine coolant to within theminimum and maximum range on theengine coolant reservoir. If youremoved the radiator cap in anoverflow system, fill the radiator untilthe coolant is visible and the radiatoris almost full. If coolant is added tobring the level within the minimum andmaximum range when the engine is notcold, the system may remain underfilled.
4.Replace the coolant reservoir cap, turnit clockwise until you feel a strongresistance.
5. Check the coolant level in the coolantreservoir the next few times you driveyour vehicle. If necessary, add enoughprediluted engine coolant to bring thecoolant level to the proper level.
Note:If prediluted coolant is not available,use the approved antifreeze concentratediluting it to 50/50 with distilled water. SeeCapacities and Specifications (page 427).Using water that has not been deionizedmay contribute to deposit formation,corrosion or plugging of the small coolingsystem passageways.
If you have to add more than 1.1 qt (1 L) ofengine coolant per month, have yourvehicle checked as soon as possible.Operating an engine with a low level ofcoolant can result in engine overheatingand possible engine damage.
Note:During normal vehicle operation, thecoolant may change color from orange topink or light red. As long as the coolant isclear and uncontaminated, this color changedoes not indicate the coolant has degradednor does it require the coolant to be drained,the system to be flushed, or the coolant tobe replaced.
Note:In case of emergency, you can add alarge amount of water without coolant inorder to reach a vehicle service location.Water alone, without coolant, can causeengine damage from corrosion, overheatingor freezing. When you reach a servicelocation, you must have the cooling systemdrained, flushed and refilled using thecorrect specification prediluted coolant orantifreeze concentrate. See Capacities andSpecifications (page 427).
Do not use the following as a coolantsubstitute:
•Alcohol.
•Methanol.
•Brine.
•Any coolant mixed with alcohol ormethanol antifreeze.
Alcohol and other liquids can cause enginedamage from overheating or freezing.
Do not add extra inhibitors or non-specifiedadditives to the coolant. These can beharmful and compromise the corrosionprotection of the coolant.
337
Super Duty (TFE) Canada/United States of America, enUSA, Edition date: 201710, Second Printing
Maintenance
Page 345 of 642
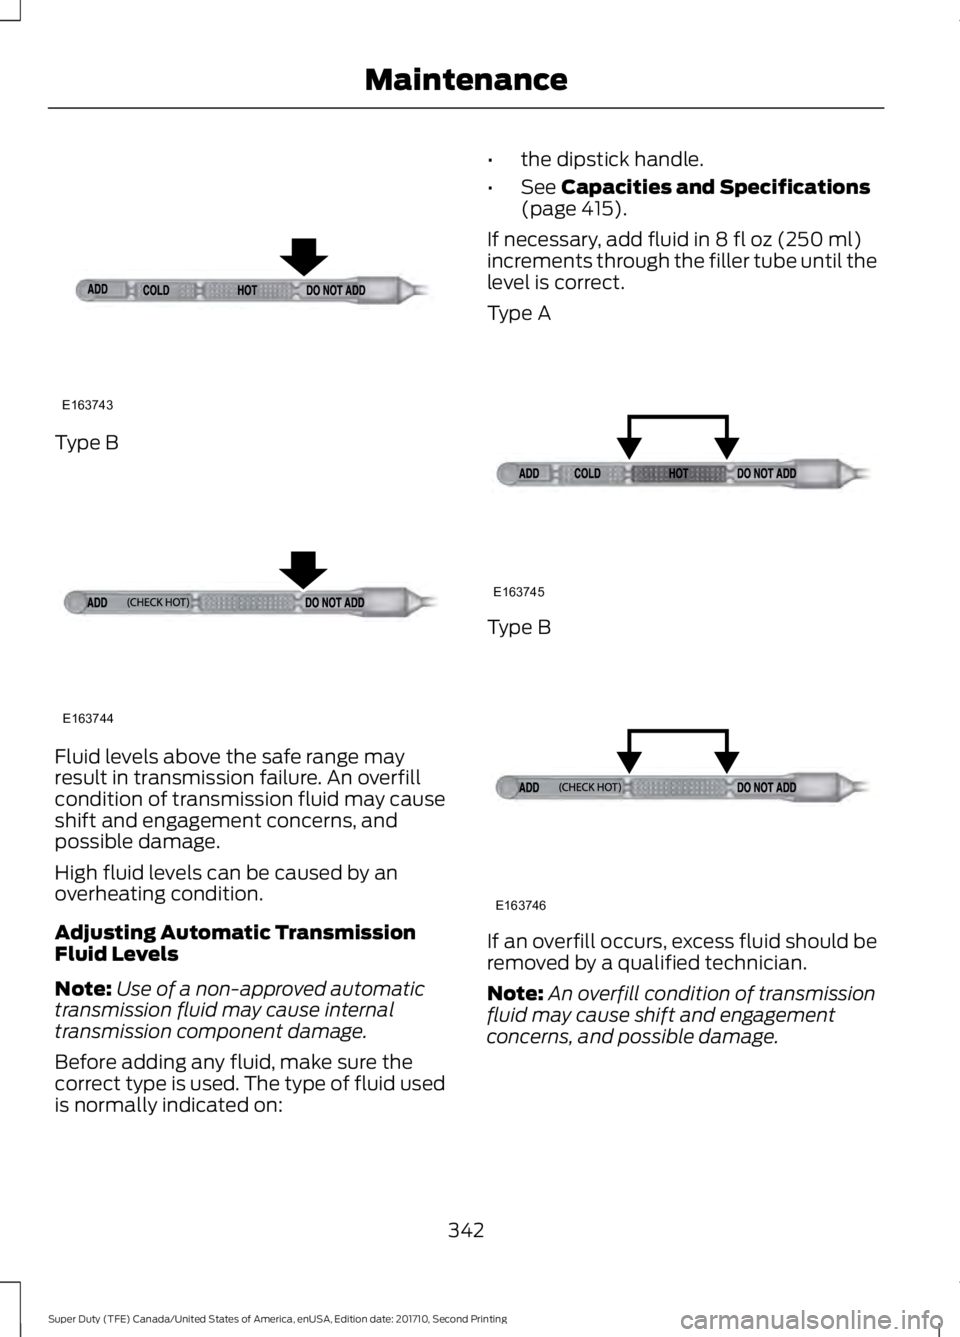
Type B
Fluid levels above the safe range mayresult in transmission failure. An overfillcondition of transmission fluid may causeshift and engagement concerns, andpossible damage.
High fluid levels can be caused by anoverheating condition.
Adjusting Automatic TransmissionFluid Levels
Note:Use of a non-approved automatictransmission fluid may cause internaltransmission component damage.
Before adding any fluid, make sure thecorrect type is used. The type of fluid usedis normally indicated on:
•the dipstick handle.
•See Capacities and Specifications(page 415).
If necessary, add fluid in 8 fl oz (250 ml)increments through the filler tube until thelevel is correct.
Type A
Type B
If an overfill occurs, excess fluid should beremoved by a qualified technician.
Note:An overfill condition of transmissionfluid may cause shift and engagementconcerns, and possible damage.
342
Super Duty (TFE) Canada/United States of America, enUSA, Edition date: 201710, Second Printing
MaintenanceE163743 E163744 E163745 E163746