battery FORD F450 SUPER DUTY 2019 User Guide
[x] Cancel search | Manufacturer: FORD, Model Year: 2019, Model line: F450 SUPER DUTY, Model: FORD F450 SUPER DUTY 2019Pages: 666, PDF Size: 11.55 MB
Page 74 of 666
When you lock your vehicle using the
power door lock control (with the door
open, vehicle in park and ignition off), your
vehicle searches for an intelligent access
key in the passenger compartment after
you close the door. If your vehicle finds a
key, all of the doors immediately unlock.
In order to override the smart unlock
feature and intentionally lock the
intelligent access key inside your vehicle,
you can lock your vehicle after all doors
are closed by using the keyless entry
keypad, pressing the lock button on
another intelligent access key or touching
the locking area on the handle with another
intelligent access key in your hand.
When you open one of the front doors and
lock your vehicle using the power door lock
control, all doors lock then unlock if the
ignition is on.
Autolock (If Equipped)
Autolock locks all the doors when:
• All doors are closed.
• The ignition is on.
• You shift into any gear putting your
vehicle in motion.
• Your vehicle reaches a speed greater
than
12 mph (20 km/h).
Autolock repeats when:
• You open then close any door while the
ignition is on and your vehicle speed is
9 mph (15 km/h)
or lower.
• Your vehicle reaches a speed greater
than
12 mph (20 km/h). Autounlock
Autounlock unlocks all the doors when:
•
Your vehicle comes to a stop and you
switch the ignition off or to the
accessory position.
• You open the driver door within 10
minutes of switching the ignition off or
to accessory.
Note: The doors do not autounlock if you
electronically lock your vehicle after you
switch the ignition off and before you open
the driver door.
Enabling or Disabling Autounlock
You can enable or disable the autounlock
feature in the information display or an
authorized dealer can do it for you. See
General Information
(page 112).
Illuminated Entry
The interior lamps and select exterior
lamps illuminate when you unlock the
doors with the remote entry system.
The illuminated entry system turns off the
lights if:
• The ignition is on.
• You press the remote control lock
button.
• After 25 seconds of illumination.
The dome lamp does not turn on if the
control is set to the off position.
The lights do not turn off if:
• You switch them on with the dimmer
control.
• Any door is open.
Battery Saver
The battery saver turns off the interior
lamps 10 minutes after you switch the
ignition off, or 10 minutes after you exit the
vehicle.
71
Super Duty (TFE) Canada/United States of America, enUSA, Edition date: 201804, Fourth-Printing Doors and Locks
Page 75 of 666
Accessory Mode Battery Saver for
Intelligent Access Keys (If Equipped)
If you leave the ignition on after leaving
your vehicle, it turns off 30 minutes after
you close all of the doors.
KEYLESS ENTRY (IF EQUIPPED)
SECURICODE™ KEYLESS ENTRY
KEYPAD
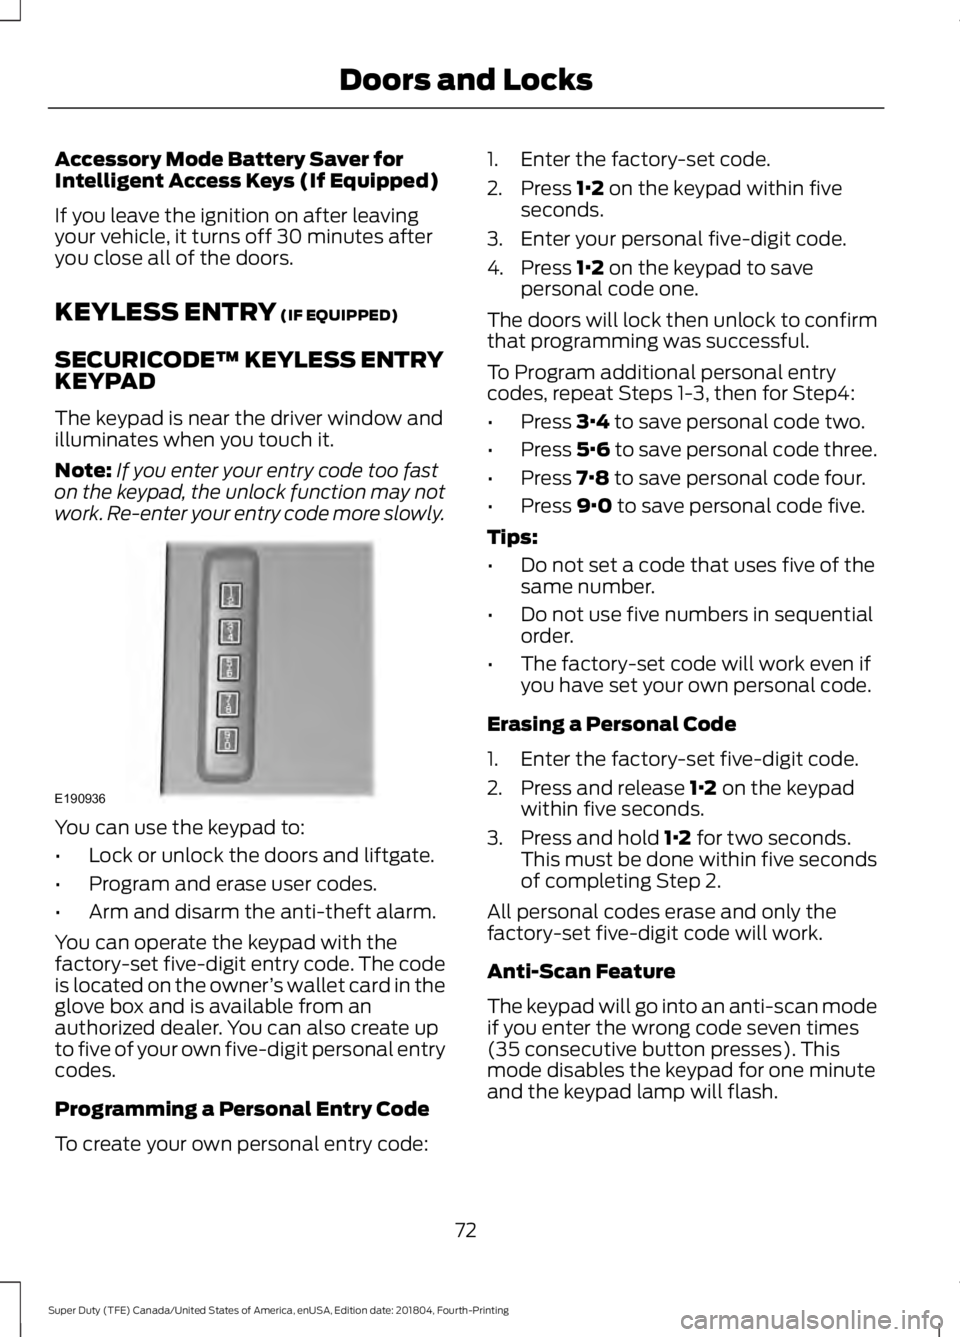
The keypad is near the driver window and
illuminates when you touch it.
Note: If you enter your entry code too fast
on the keypad, the unlock function may not
work. Re-enter your entry code more slowly. You can use the keypad to:
•
Lock or unlock the doors and liftgate.
• Program and erase user codes.
• Arm and disarm the anti-theft alarm.
You can operate the keypad with the
factory-set five-digit entry code. The code
is located on the owner ’s wallet card in the
glove box and is available from an
authorized dealer. You can also create up
to five of your own five-digit personal entry
codes.
Programming a Personal Entry Code
To create your own personal entry code: 1. Enter the factory-set code.
2. Press
1·2 on the keypad within five
seconds.
3. Enter your personal five-digit code.
4. Press
1·2 on the keypad to save
personal code one.
The doors will lock then unlock to confirm
that programming was successful.
To Program additional personal entry
codes, repeat Steps 1-3, then for Step4:
• Press
3·4 to save personal code two.
• Press
5·6 to save personal code three.
• Press
7·8 to save personal code four.
• Press
9·0 to save personal code five.
Tips:
• Do not set a code that uses five of the
same number.
• Do not use five numbers in sequential
order.
• The factory-set code will work even if
you have set your own personal code.
Erasing a Personal Code
1. Enter the factory-set five-digit code.
2. Press and release
1·2 on the keypad
within five seconds.
3. Press and hold
1·2 for two seconds.
This must be done within five seconds
of completing Step 2.
All personal codes erase and only the
factory-set five-digit code will work.
Anti-Scan Feature
The keypad will go into an anti-scan mode
if you enter the wrong code seven times
(35 consecutive button presses). This
mode disables the keypad for one minute
and the keypad lamp will flash.
72
Super Duty (TFE) Canada/United States of America, enUSA, Edition date: 201804, Fourth-Printing Doors and LocksE190936
Page 100 of 666
POWER WINDOWS (IF EQUIPPED)
WARNING:
Do not leave children
unattended in your vehicle and do not
let them play with the power windows.
They may seriously injure themselves. WARNING:
When closing the
power windows, you should verify they
are free of obstructions and make sure
that children and pets are not in the
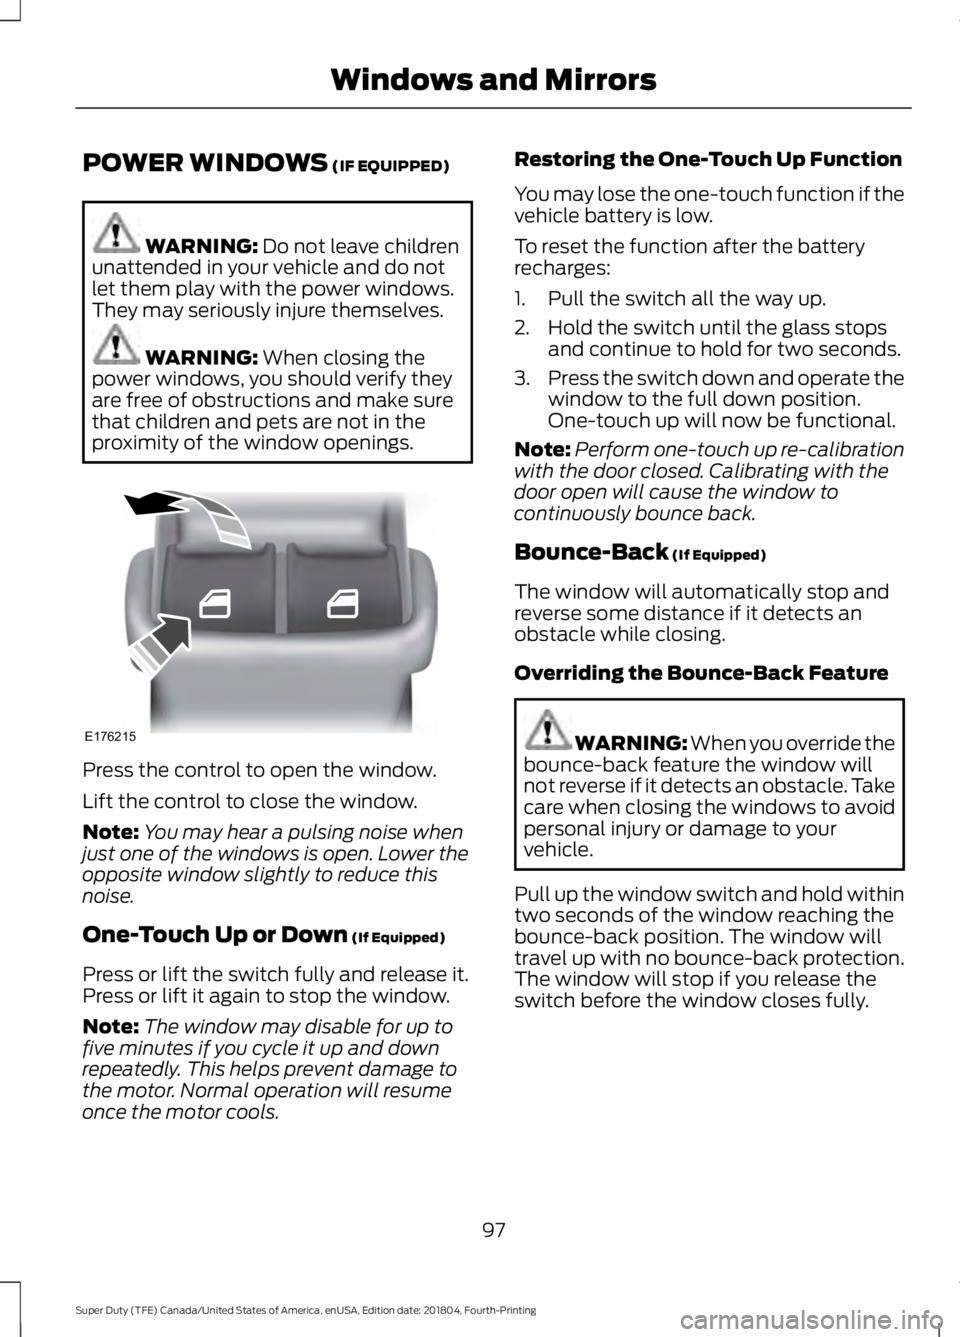
proximity of the window openings. Press the control to open the window.
Lift the control to close the window.
Note:
You may hear a pulsing noise when
just one of the windows is open. Lower the
opposite window slightly to reduce this
noise.
One-Touch Up or Down
(If Equipped)
Press or lift the switch fully and release it.
Press or lift it again to stop the window.
Note: The window may disable for up to
five minutes if you cycle it up and down
repeatedly. This helps prevent damage to
the motor. Normal operation will resume
once the motor cools. Restoring the One-Touch Up Function
You may lose the one-touch function if the
vehicle battery is low.
To reset the function after the battery
recharges:
1. Pull the switch all the way up.
2. Hold the switch until the glass stops
and continue to hold for two seconds.
3. Press the switch down and operate the
window to the full down position.
One-touch up will now be functional.
Note: Perform one-touch up re-calibration
with the door closed. Calibrating with the
door open will cause the window to
continuously bounce back.
Bounce-Back
(If Equipped)
The window will automatically stop and
reverse some distance if it detects an
obstacle while closing.
Overriding the Bounce-Back Feature WARNING: When you override the
bounce-back feature the window will
not reverse if it detects an obstacle. Take
care when closing the windows to avoid
personal injury or damage to your
vehicle.
Pull up the window switch and hold within
two seconds of the window reaching the
bounce-back position. The window will
travel up with no bounce-back protection.
The window will stop if you release the
switch before the window closes fully.
97
Super Duty (TFE) Canada/United States of America, enUSA, Edition date: 201804, Fourth-Printing Windows and MirrorsE176215
Page 111 of 666
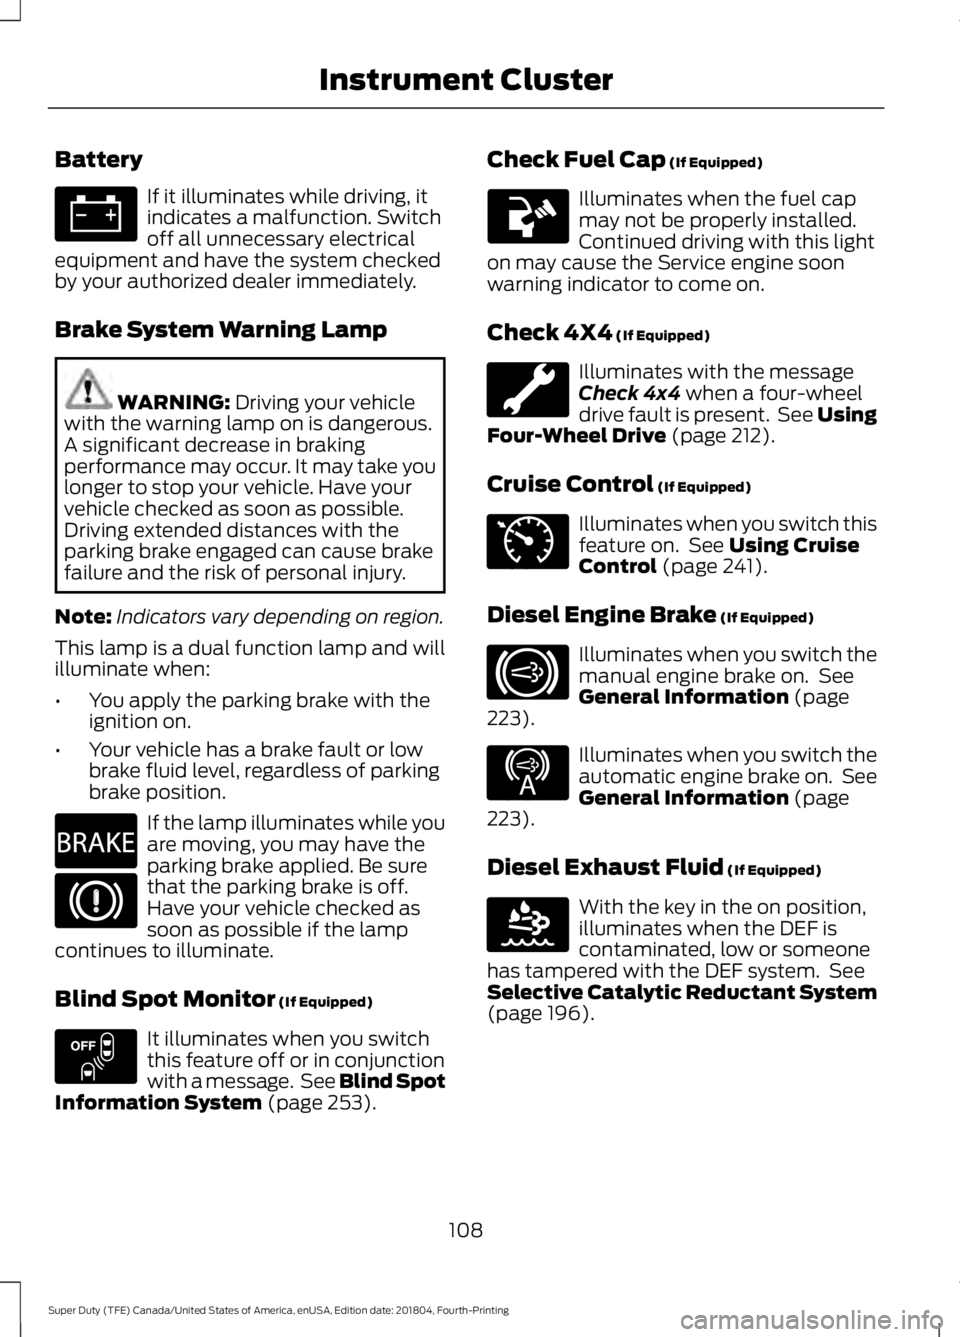
Battery
If it illuminates while driving, it
indicates a malfunction. Switch
off all unnecessary electrical
equipment and have the system checked
by your authorized dealer immediately.
Brake System Warning Lamp WARNING: Driving your vehicle
with the warning lamp on is dangerous.
A significant decrease in braking
performance may occur. It may take you
longer to stop your vehicle. Have your
vehicle checked as soon as possible.
Driving extended distances with the
parking brake engaged can cause brake
failure and the risk of personal injury.
Note: Indicators vary depending on region.
This lamp is a dual function lamp and will
illuminate when:
• You apply the parking brake with the
ignition on.
• Your vehicle has a brake fault or low
brake fluid level, regardless of parking
brake position. If the lamp illuminates while you
are moving, you may have the
parking brake applied. Be sure
that the parking brake is off.
Have your vehicle checked as
soon as possible if the lamp
continues to illuminate.
Blind Spot Monitor
(If Equipped) It illuminates when you switch
this feature off or in conjunction
with a message. See Blind Spot
Information System
(page 253). Check Fuel Cap
(If Equipped) Illuminates when the fuel cap
may not be properly installed.
Continued driving with this light
on may cause the Service engine soon
warning indicator to come on.
Check 4X4
(If Equipped) Illuminates with the message
Check 4x4
when a four-wheel
drive fault is present. See Using
Four-Wheel Drive (page 212).
Cruise Control
(If Equipped) Illuminates when you switch this
feature on. See
Using Cruise
Control (page 241).
Diesel Engine Brake
(If Equipped) Illuminates when you switch the
manual engine brake on. See
General Information
(page
223). Illuminates when you switch the
automatic engine brake on. See
General Information
(page
223).
Diesel Exhaust Fluid
(If Equipped) With the key in the on position,
illuminates when the DEF is
contaminated, low or someone
has tampered with the DEF system. See
Selective Catalytic Reductant System
(page
196).
108
Super Duty (TFE) Canada/United States of America, enUSA, Edition date: 201804, Fourth-Printing Instrument Cluster E270480 E151262 E71340 E171217 E234452 E163176
Page 135 of 666
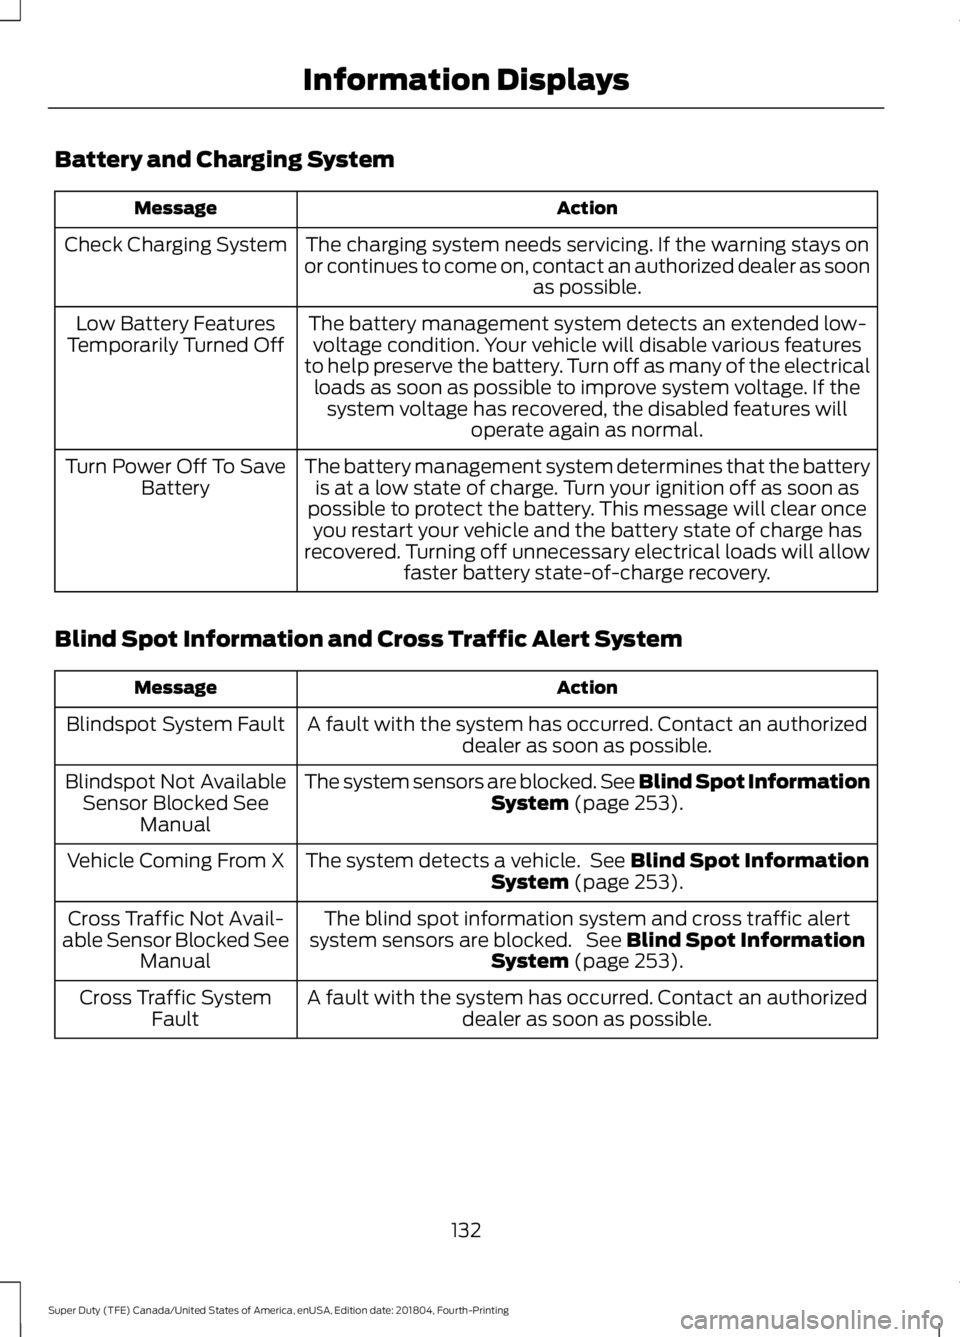
Battery and Charging System
Action
Message
The charging system needs servicing. If the warning stays on
or continues to come on, contact an authorized dealer as soon as possible.
Check Charging System
The battery management system detects an extended low-voltage condition. Your vehicle will disable various features
to help preserve the battery. Turn off as many of the electrical loads as soon as possible to improve system voltage. If the system voltage has recovered, the disabled features will operate again as normal.
Low Battery Features
Temporarily Turned Off
The battery management system determines that the batteryis at a low state of charge. Turn your ignition off as soon as
possible to protect the battery. This message will clear once you restart your vehicle and the battery state of charge has
recovered. Turning off unnecessary electrical loads will allow faster battery state-of-charge recovery.
Turn Power Off To Save
Battery
Blind Spot Information and Cross Traffic Alert System Action
Message
A fault with the system has occurred. Contact an authorizeddealer as soon as possible.
Blindspot System Fault
The system sensors are blocked. See Blind Spot InformationSystem (page 253).
Blindspot Not Available
Sensor Blocked See Manual
The system detects a vehicle. See
Blind Spot Information
System (page 253).
Vehicle Coming From X
The blind spot information system and cross traffic alert
system sensors are blocked. See
Blind Spot Information
System (page 253).
Cross Traffic Not Avail-
able Sensor Blocked See Manual
A fault with the system has occurred. Contact an authorizeddealer as soon as possible.
Cross Traffic System
Fault
132
Super Duty (TFE) Canada/United States of America, enUSA, Edition date: 201804, Fourth-Printing Information Displays
Page 146 of 666
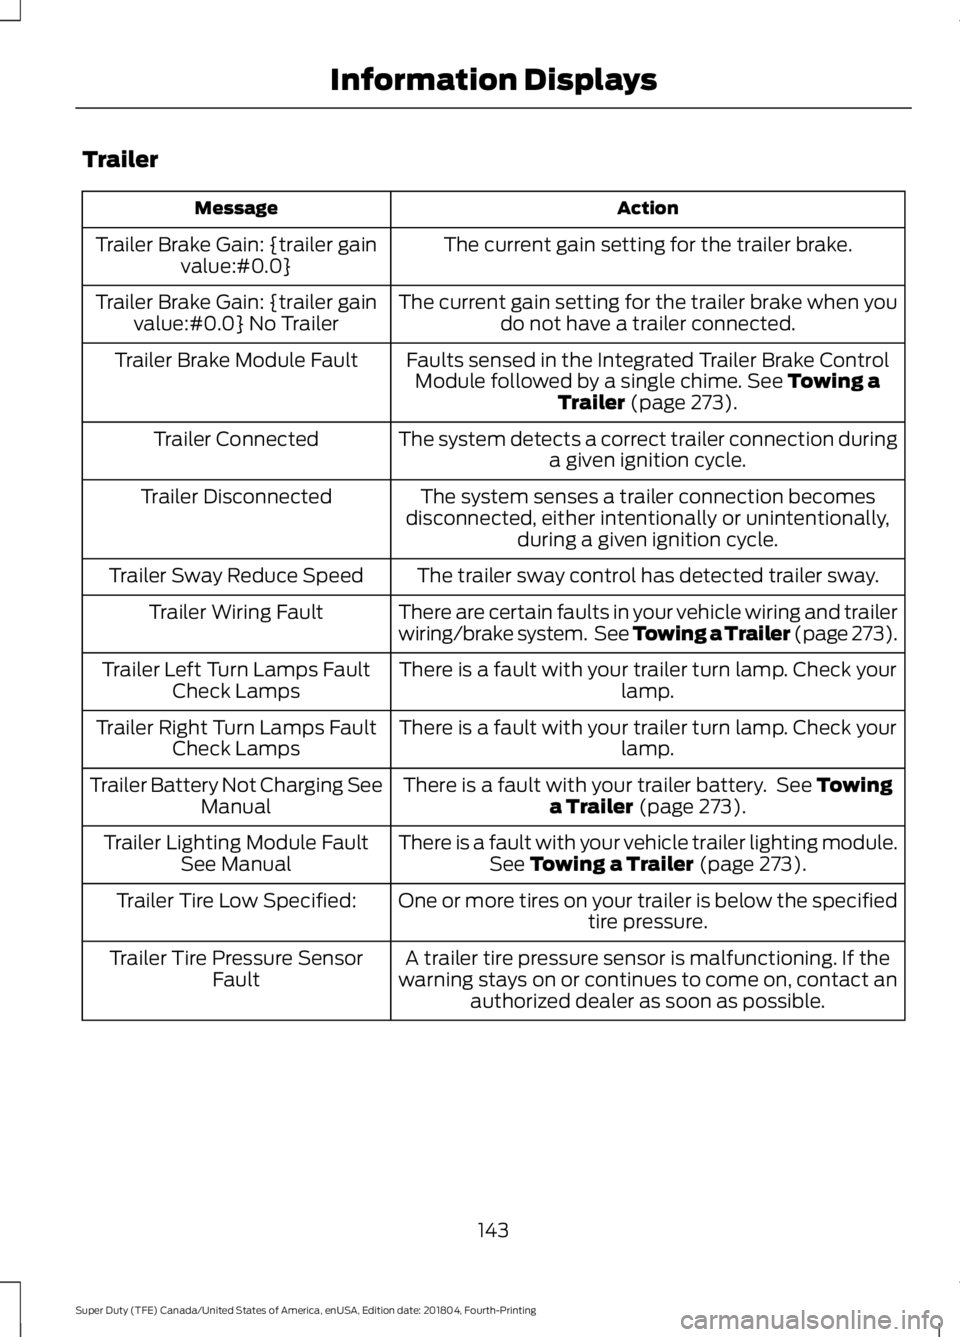
Trailer
Action
Message
The current gain setting for the trailer brake.
Trailer Brake Gain: {trailer gain
value:#0.0}
The current gain setting for the trailer brake when youdo not have a trailer connected.
Trailer Brake Gain: {trailer gain
value:#0.0} No Trailer
Faults sensed in the Integrated Trailer Brake ControlModule followed by a single chime. See Towing a
Trailer (page 273).
Trailer Brake Module Fault
The system detects a correct trailer connection duringa given ignition cycle.
Trailer Connected
The system senses a trailer connection becomes
disconnected, either intentionally or unintentionally, during a given ignition cycle.
Trailer Disconnected
The trailer sway control has detected trailer sway.
Trailer Sway Reduce Speed
There are certain faults in your vehicle wiring and trailer
wiring/brake system. See Towing a Trailer
(page 273).
Trailer Wiring Fault
There is a fault with your trailer turn lamp. Check yourlamp.
Trailer Left Turn Lamps Fault
Check Lamps
There is a fault with your trailer turn lamp. Check yourlamp.
Trailer Right Turn Lamps Fault
Check Lamps
There is a fault with your trailer battery. See
Towing
a Trailer (page 273).
Trailer Battery Not Charging See
Manual
There is a fault with your vehicle trailer lighting module.See
Towing a Trailer (page 273).
Trailer Lighting Module Fault
See Manual
One or more tires on your trailer is below the specifiedtire pressure.
Trailer Tire Low Specified:
A trailer tire pressure sensor is malfunctioning. If the
warning stays on or continues to come on, contact an authorized dealer as soon as possible.
Trailer Tire Pressure Sensor
Fault
143
Super Duty (TFE) Canada/United States of America, enUSA, Edition date: 201804, Fourth-Printing Information Displays
Page 167 of 666
UNIVERSAL GARAGE DOOR
OPENER
HomeLink Wireless Control
System
WARNING: Do not use the system
with any garage door opener that does
not have the safety stop and reverse
feature as required by U.S. Federal
Safety Standards (this includes any
garage door opener manufactured
before April 1, 1982). A garage door
opener which cannot detect an object,
signaling the door to stop and reverse,
does not meet current federal safety
standards. Using a garage door opener
without these features increases the risk
of serious injury or death.
Note: Make sure that the garage door and
security device are free from obstruction
when you are programming. Do not program
the system with the vehicle in the garage.
Note: Make sure you keep the original
remote control transmitter for use in other
vehicles as well as for future system
programming.
Note: We recommend that upon the sale
or lease termination of your vehicle, you
erase the programmed function buttons for
security reasons. See Erasing the Function
Button Codes
later in this section.
Note: You can program a maximum of
three devices. To change or replace any of
the three devices after it has been initially
programmed, you must first erase the
current settings. See Erasing the Function
Button Codes
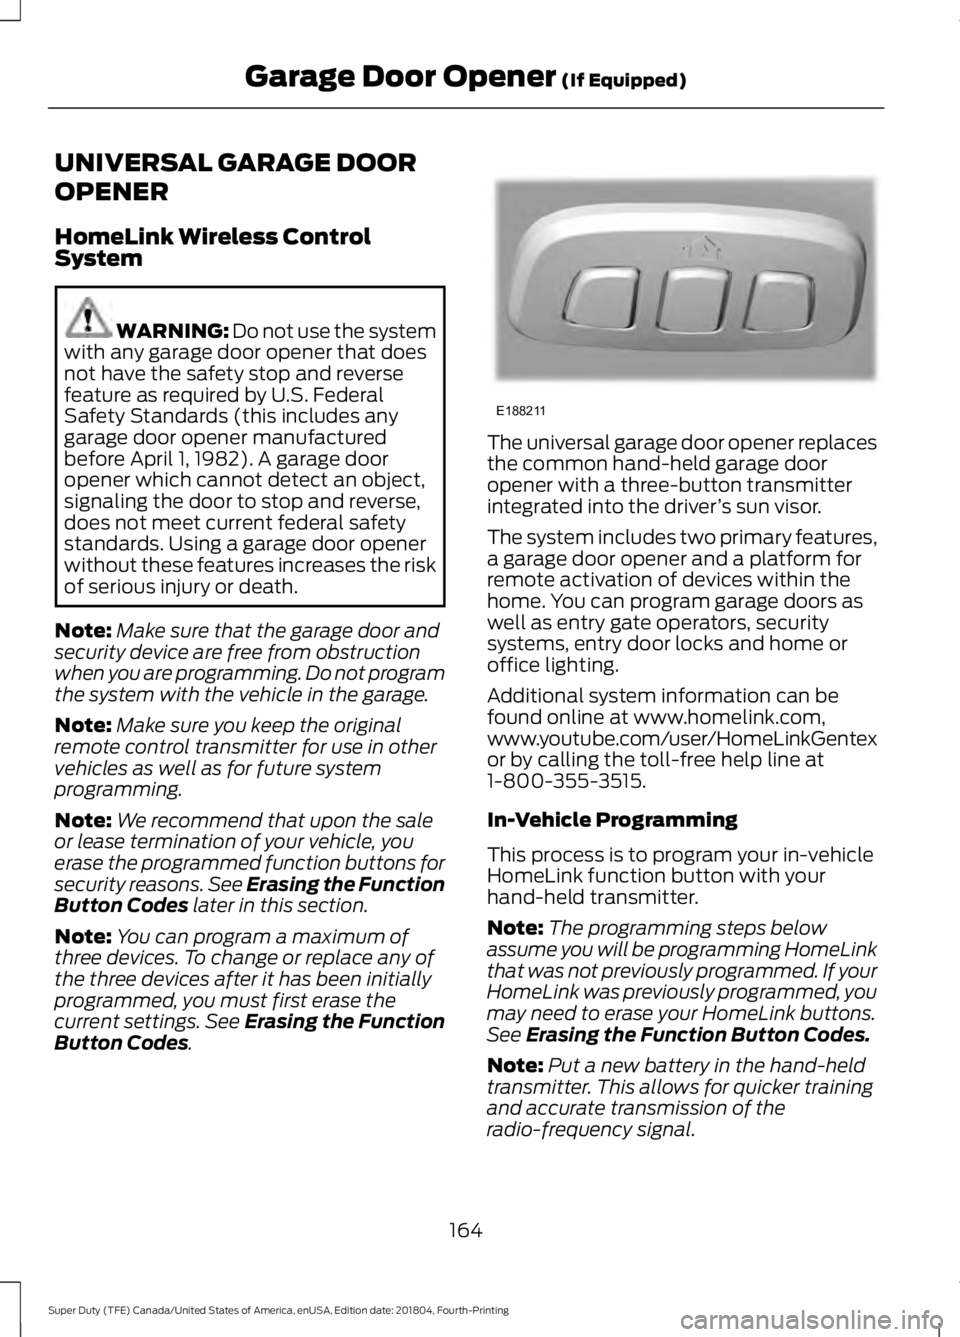
. The universal garage door opener replaces
the common hand-held garage door
opener with a three-button transmitter
integrated into the driver
’s sun visor.
The system includes two primary features,
a garage door opener and a platform for
remote activation of devices within the
home. You can program garage doors as
well as entry gate operators, security
systems, entry door locks and home or
office lighting.
Additional system information can be
found online at www.homelink.com,
www.youtube.com/user/HomeLinkGentex
or by calling the toll-free help line at
1-800-355-3515.
In-Vehicle Programming
This process is to program your in-vehicle
HomeLink function button with your
hand-held transmitter.
Note: The programming steps below
assume you will be programming HomeLink
that was not previously programmed. If your
HomeLink was previously programmed, you
may need to erase your HomeLink buttons.
See Erasing the Function Button Codes.
Note: Put a new battery in the hand-held
transmitter. This allows for quicker training
and accurate transmission of the
radio-frequency signal.
164
Super Duty (TFE) Canada/United States of America, enUSA, Edition date: 201804, Fourth-Printing Garage Door Opener
(If Equipped)E188211
Page 171 of 666
12 V DC Power Point
WARNING: Do not plug optional
electrical accessories into the cigar
lighter socket. Incorrect use of the cigar
lighter can cause damage not covered
by the vehicle warranty, and can result
in fire or serious injury.
Note: When you switch the ignition on, you
can use the socket to power
12 V appliances
with a maximum current rating of 20 A20
amps.
Note: Do not plug in any device that
supplies power to the vehicle through the
power points, this may result in damage to
vehicle systems.
Note: Do not hang any accessory from the
accessory plug.
Note: Do not use the power point over the
vehicle capacity of 12 V DC 240 W or a fuse
may blow.
Note: Always keep the power point caps
closed when not in use.
Do not insert objects other than an
accessory plug into the power point. This
damages the power point and may blow
the fuse.
Run the vehicle for full capacity use of the
power point.
To prevent the battery from running out of
charge:
• Do not use the power point longer than
necessary when the engine is off.
• Do not leave devices plugged in
overnight or when you park your vehicle
for extended periods. 110 V 400 Watt AC Power Point
(If
Equipped) WARNING: Do not keep electrical
devices plugged in the power point
whenever the device is not in use. Do not
use any extension cord with the 110 volt
AC power point, since it will defeat the
safety protection design. Doing so may
cause the power point to overload due
to powering multiple devices that can
reach beyond the 400 watt load limit
and could result in fire or serious injury.
Note: This feature works only when you
have the ignition switched on.
Note: This feature has a maximum output
of 400 watts when the vehicle is in park (P).
Note: While in drive (D), the maximum
outlet output is 300 watts.
Note: When powering electric devices that
require more than 10 watts in vehicles
equipped with keyless start, the engine must
remain running. If the engine is turned off or
you switch the ignition to accessory mode,
plugged in devices will not be charged.
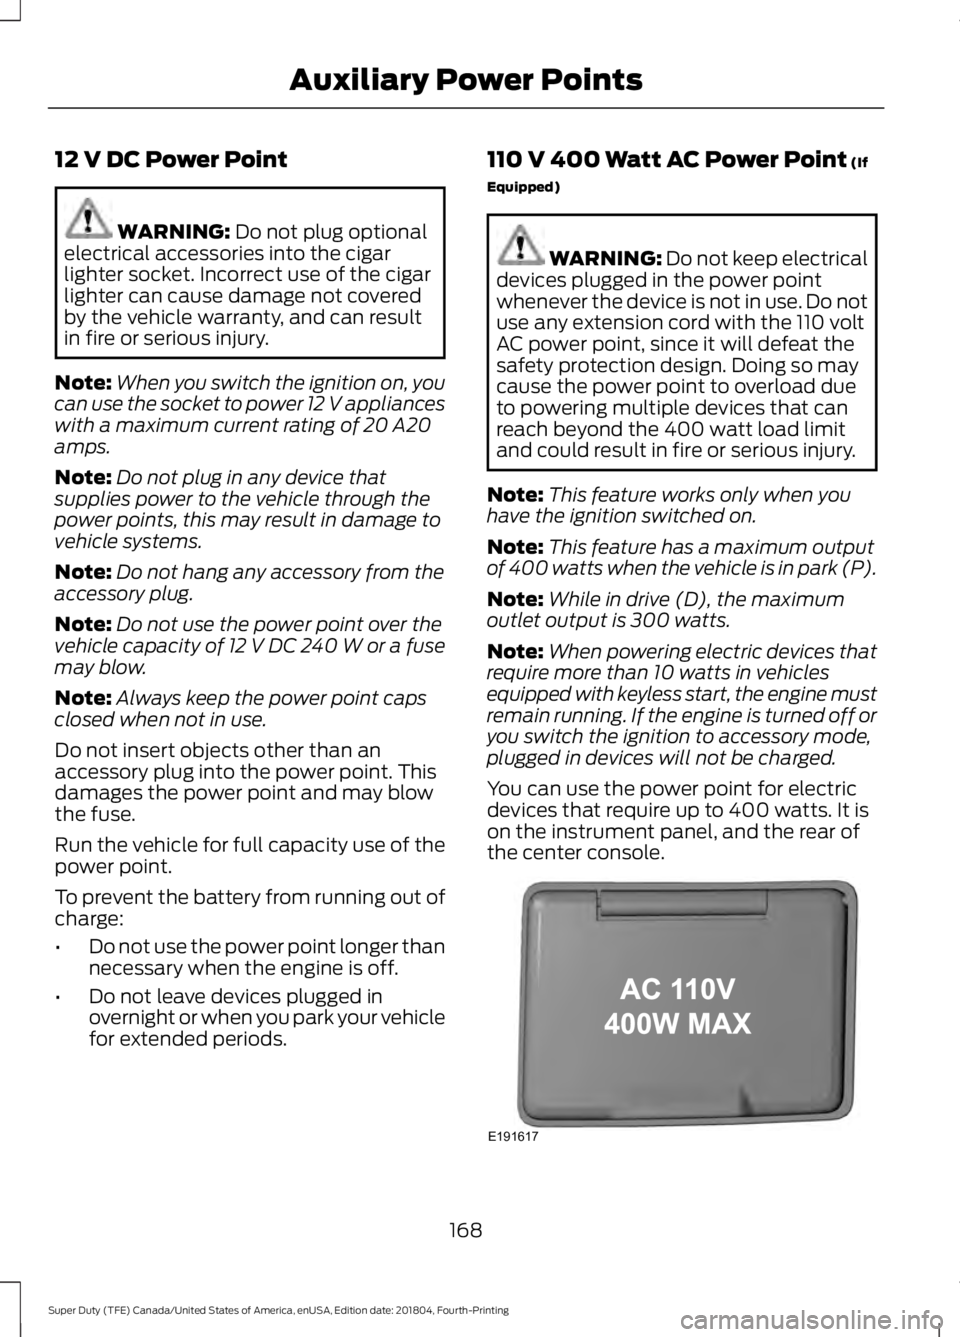
You can use the power point for electric
devices that require up to 400 watts. It is
on the instrument panel, and the rear of
the center console. 168
Super Duty (TFE) Canada/United States of America, enUSA, Edition date: 201804, Fourth-Printing Auxiliary Power PointsE191617
Page 176 of 666
GENERAL INFORMATION
WARNING: Extended idling at high
engine speeds can produce very high
temperatures in the engine and exhaust
system, creating the risk of fire or other
damage. WARNING: Do not park, idle or
drive your vehicle on dry grass or other
dry ground cover. The emission system
heats up the engine compartment and
exhaust system, creating the risk of fire. WARNING: Do not start the engine
in a closed garage or in other enclosed
areas. Exhaust fumes can be toxic.
Always open the garage door before you
start the engine. WARNING:
Exhaust leaks may
result in entry of harmful and potentially
lethal fumes into the passenger
compartment. If you smell exhaust
fumes inside your vehicle, have your
vehicle inspected immediately. Do not
drive if you smell exhaust fumes.
If you disconnect the battery, your vehicle
may exhibit some unusual driving
characteristics for approximately
5.0 mi
(8 km) after you reconnect it. This is
because the engine management system
must realign itself with the engine. You can
disregard any unusual driving
characteristics during this period.
The powertrain control system meets all
Canadian interference-causing equipment
standard requirements regulating the
impulse electrical field or radio noise. When you start the engine, avoid pressing
the accelerator pedal before and during
operation. Only use the accelerator pedal
when you have difficulty starting the
engine.
If your vehicle is operated in a heavy snow
storm or blowing snow conditions, the
engine air induction may become partially
clogged with snow and ice. If this occurs,
the engine may experience a significant
reduction in power output. At the earliest
opportunity, clear all the snow and ice
away from the air induction inlet.
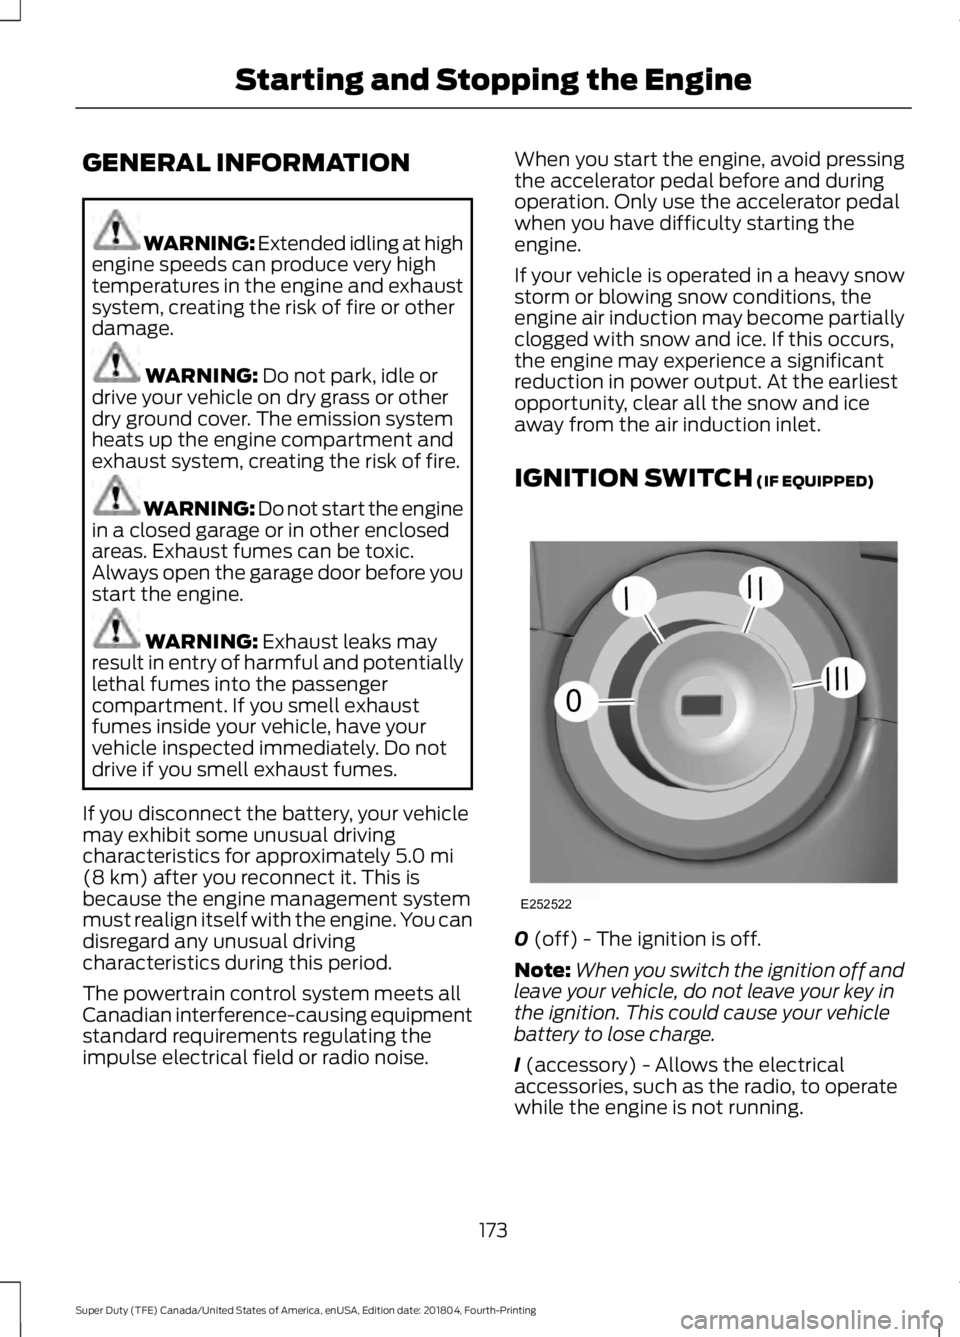
IGNITION SWITCH
(IF EQUIPPED)
0
(off) - The ignition is off.
Note: When you switch the ignition off and
leave your vehicle, do not leave your key in
the ignition. This could cause your vehicle
battery to lose charge.
I
(accessory) - Allows the electrical
accessories, such as the radio, to operate
while the engine is not running.
173
Super Duty (TFE) Canada/United States of America, enUSA, Edition date: 201804, Fourth-Printing Starting and Stopping the EngineE252522
0
///
///
Page 177 of 666
Note:
Do not leave the ignition key in this
position for too long. This could cause your
vehicle battery to lose charge.
II (on) - All electrical circuits are
operational and the warning lamps and
indicators illuminate.
III
(start) - Cranks the engine.
KEYLESS STARTING
Note: The keyless starting system may not
function if the key is close to metal objects
or electronic devices such as cellular
phones.
Note: A valid key must be located inside
your vehicle to switch the ignition on and
start the engine.
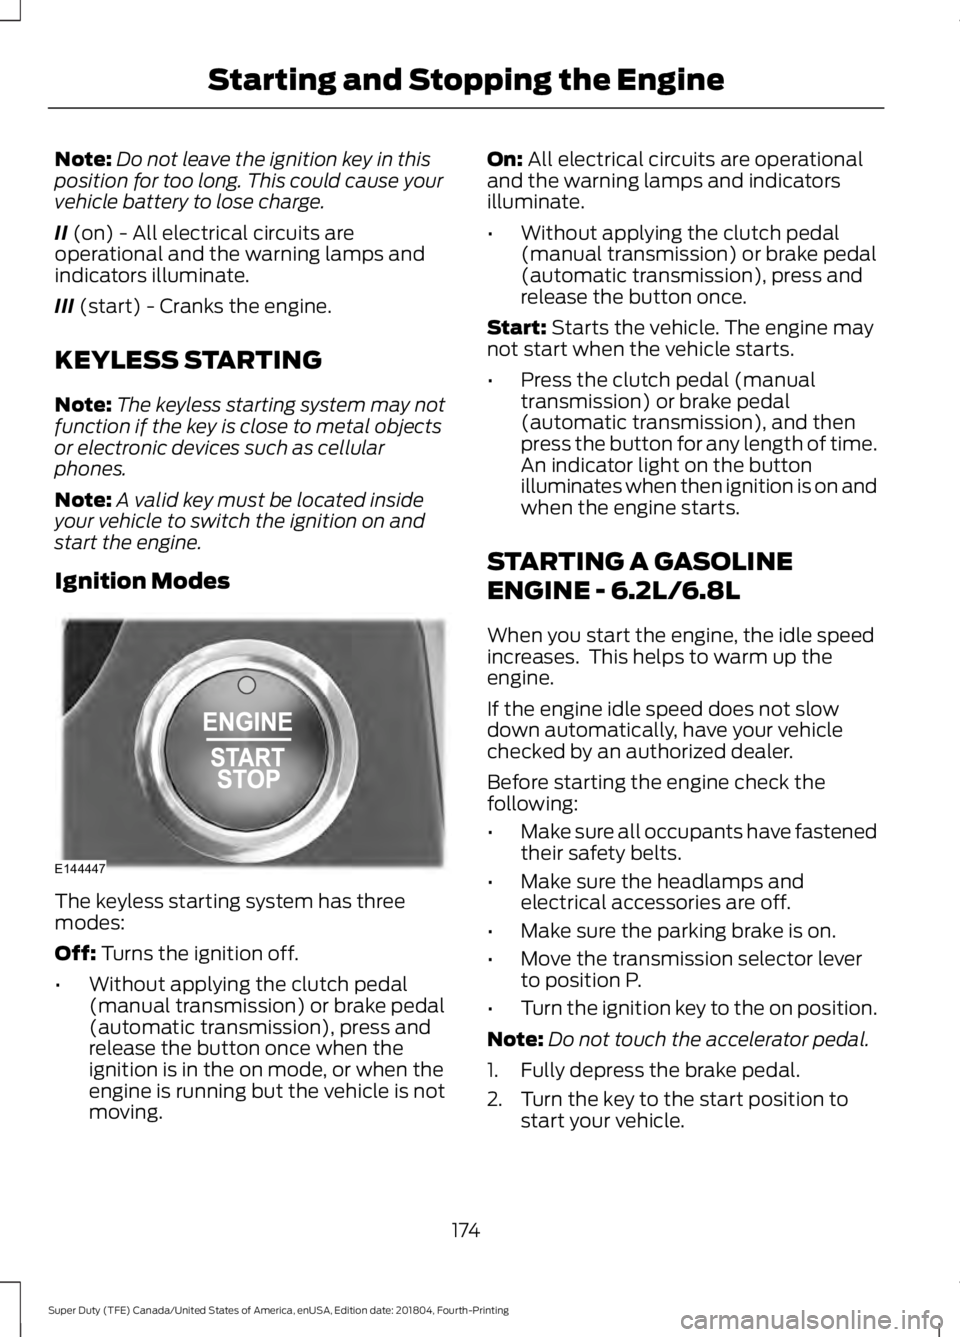
Ignition Modes The keyless starting system has three
modes:
Off:
Turns the ignition off.
• Without applying the clutch pedal
(manual transmission) or brake pedal
(automatic transmission), press and
release the button once when the
ignition is in the on mode, or when the
engine is running but the vehicle is not
moving. On:
All electrical circuits are operational
and the warning lamps and indicators
illuminate.
• Without applying the clutch pedal
(manual transmission) or brake pedal
(automatic transmission), press and
release the button once.
Start:
Starts the vehicle. The engine may
not start when the vehicle starts.
• Press the clutch pedal (manual
transmission) or brake pedal
(automatic transmission), and then
press the button for any length of time.
An indicator light on the button
illuminates when then ignition is on and
when the engine starts.
STARTING A GASOLINE
ENGINE - 6.2L/6.8L
When you start the engine, the idle speed
increases. This helps to warm up the
engine.
If the engine idle speed does not slow
down automatically, have your vehicle
checked by an authorized dealer.
Before starting the engine check the
following:
• Make sure all occupants have fastened
their safety belts.
• Make sure the headlamps and
electrical accessories are off.
• Make sure the parking brake is on.
• Move the transmission selector lever
to position P.
• Turn the ignition key to the on position.
Note: Do not touch the accelerator pedal.
1. Fully depress the brake pedal.
2. Turn the key to the start position to start your vehicle.
174
Super Duty (TFE) Canada/United States of America, enUSA, Edition date: 201804, Fourth-Printing Starting and Stopping the EngineE144447