buttons FORD F450 SUPER DUTY 2020 User Guide
[x] Cancel search | Manufacturer: FORD, Model Year: 2020, Model line: F450 SUPER DUTY, Model: FORD F450 SUPER DUTY 2020Pages: 633, PDF Size: 9.18 MB
Page 210 of 633
AUTOMATIC TRANSMISSION
WARNING: Apply the parking
brake, shift into park (P), switch the
ignition off and remove the key before
you leave your vehicle. Failure to follow
this instruction could result in personal
injury or death. WARNING:
When your vehicle is
stationary, keep the brake pedal fully
pressed when shifting gears. Failure to
follow this instruction could result in
personal injury, death or property
damage.
Note: You may not be able to shift out of
park (P) unless the intelligent access key is
inside your vehicle.
Understanding the Shift Positions
of Your Automatic Transmission
(If Equipped)
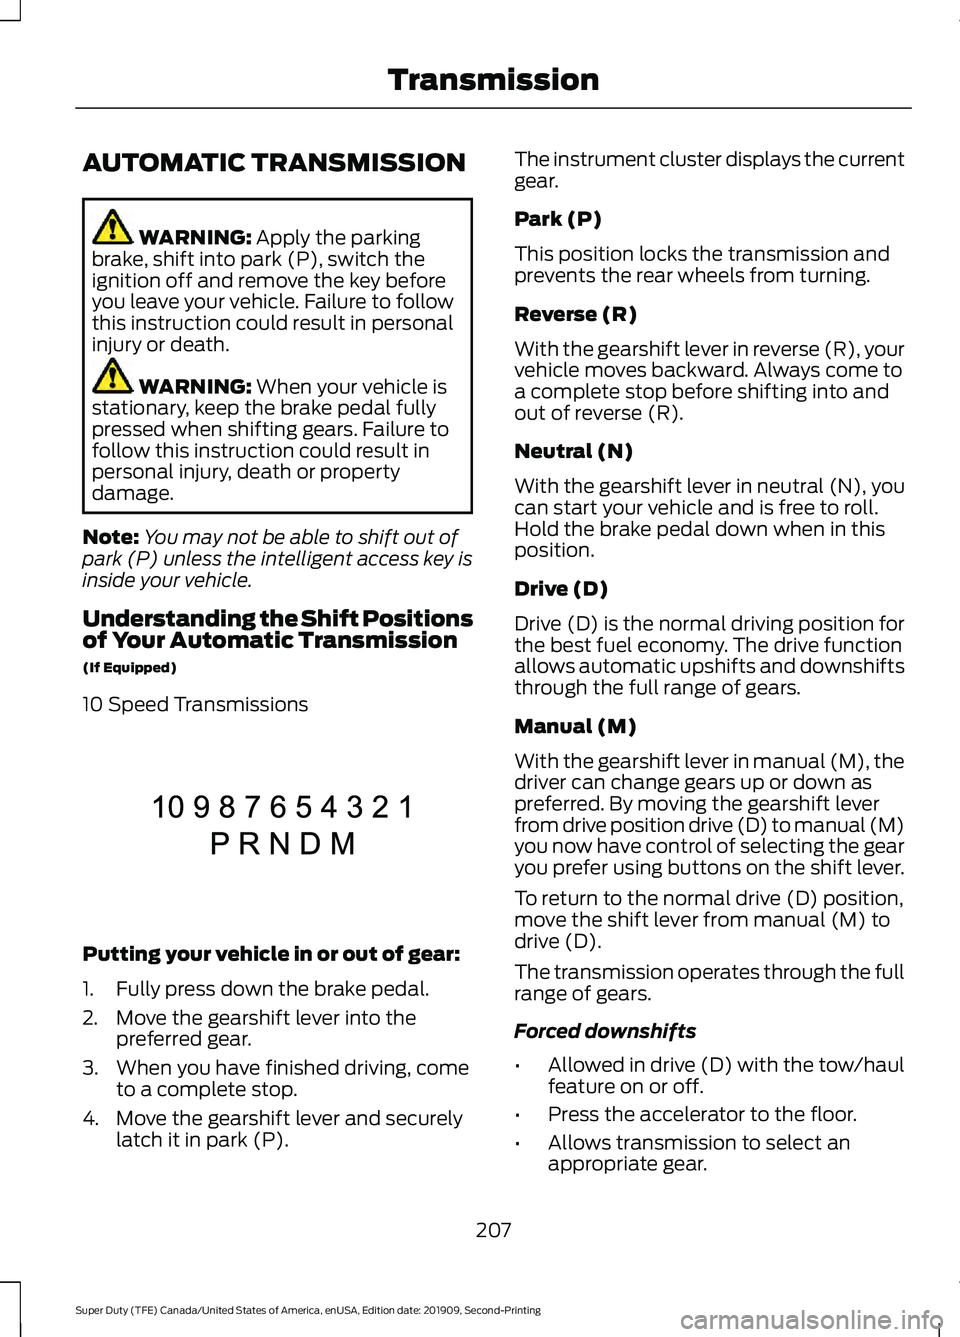
10 Speed Transmissions Putting your vehicle in or out of gear:
1. Fully press down the brake pedal.
2. Move the gearshift lever into the
preferred gear.
3. When you have finished driving, come to a complete stop.
4. Move the gearshift lever and securely latch it in park (P). The instrument cluster displays the current
gear.
Park (P)
This position locks the transmission and
prevents the rear wheels from turning.
Reverse (R)
With the gearshift lever in reverse (R), your
vehicle moves backward. Always come to
a complete stop before shifting into and
out of reverse (R).
Neutral (N)
With the gearshift lever in neutral (N), you
can start your vehicle and is free to roll.
Hold the brake pedal down when in this
position.
Drive (D)
Drive (D) is the normal driving position for
the best fuel economy. The drive function
allows automatic upshifts and downshifts
through the full range of gears.
Manual (M)
With the gearshift lever in manual (M), the
driver can change gears up or down as
preferred. By moving the gearshift lever
from drive position drive (D) to manual (M)
you now have control of selecting the gear
you prefer using buttons on the shift lever.
To return to the normal drive (D) position,
move the shift lever from manual (M) to
drive (D).
The transmission operates through the full
range of gears.
Forced downshifts
•
Allowed in drive (D) with the tow/haul
feature on or off.
• Press the accelerator to the floor.
• Allows transmission to select an
appropriate gear.
207
Super Duty (TFE) Canada/United States of America, enUSA, Edition date: 201909, Second-Printing TransmissionE308145
Page 211 of 633
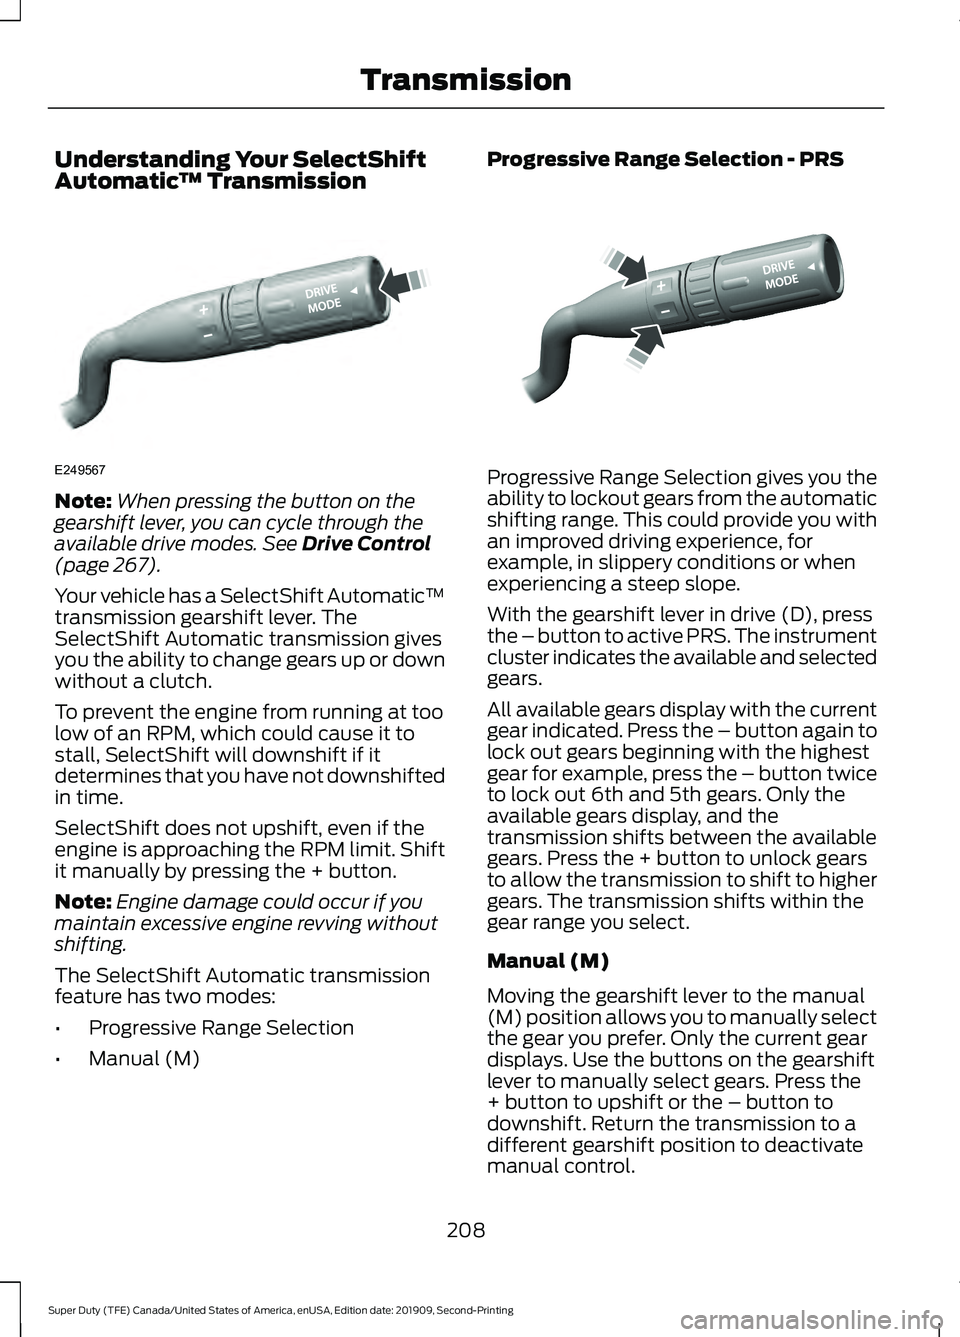
Understanding Your SelectShift
Automatic
™ TransmissionNote:
When pressing the button on the
gearshift lever, you can cycle through the
available drive modes. See Drive Control
(page 267).
Your vehicle has a SelectShift Automatic ™
transmission gearshift lever. The
SelectShift Automatic transmission gives
you the ability to change gears up or down
without a clutch.
To prevent the engine from running at too
low of an RPM, which could cause it to
stall, SelectShift will downshift if it
determines that you have not downshifted
in time.
SelectShift does not upshift, even if the
engine is approaching the RPM limit. Shift
it manually by pressing the + button.
Note: Engine damage could occur if you
maintain excessive engine revving without
shifting.
The SelectShift Automatic transmission
feature has two modes:
• Progressive Range Selection
• Manual (M) Progressive Range Selection - PRS
Progressive Range Selection gives you the
ability to lockout gears from the automatic
shifting range. This could provide you with
an improved driving experience, for
example, in slippery conditions or when
experiencing a steep slope.
With the gearshift lever in drive (D), press
the – button to active PRS. The instrument
cluster indicates the available and selected
gears.
All available gears display with the current
gear indicated. Press the – button again to
lock out gears beginning with the highest
gear for example, press the – button twice
to lock out 6th and 5th gears. Only the
available gears display, and the
transmission shifts between the available
gears. Press the + button to unlock gears
to allow the transmission to shift to higher
gears. The transmission shifts within the
gear range you select.
Manual (M)
Moving the gearshift lever to the manual
(M) position allows you to manually select
the gear you prefer. Only the current gear
displays. Use the buttons on the gearshift
lever to manually select gears. Press the
+ button to upshift or the – button to
downshift. Return the transmission to a
different gearshift position to deactivate
manual control.
208
Super Duty (TFE) Canada/United States of America, enUSA, Edition date: 201909, Second-Printing TransmissionE249567 E312894
Page 233 of 633
WHAT IS TRAIL CONTROL
WARNING: The system does not
control speed in low traction conditions
or extremely steep slopes. The system
is designed to be an aid and does not
relieve you of your responsibility to drive
with due care and attention. Failure to
follow this instruction could result in
personal injury. WARNING:
The system does not
replace the parking brake. When you
leave your vehicle, always apply the
parking brake and shift the transmission
into park (P) for automatic transmission
or first gear for manual transmission.
Trail control lets you focus on steering
during low-speed and off-road use by
controlling your vehicle's acceleration and
braking.
You can use trail control under the
following speeds:
• 20 mph (31 km/h)
in two-wheel or
four-wheel drive high range.
• 10 mph (15 km/h)
in four-wheel drive
low range.
• 5 mph (8 km/h)
in reverse (R).
You may hear a noise from the anti-lock
brake system pump motor when you use
the system. This is normal.
SWITCHING TRAIL CONTROL
ON AND OFF Press the button.
The system switches off if you press the
button again or exceed 42 mph (68 km/h). SETTING THE TRAIL CONTROL
SPEED
Note:
The buttons are located on the
steering wheel.
Drive to your preferred speed. Press button to increase the set
current speed.
Press button to decrease the set
current speed.
Note: The indicator changes color.
You can adjust the set speed in small or
large increments. Press the toggle button
upward or downward once to adjust the
set speed in small increments. Press and
hold the toggle button upward or
downward to adjust the set speed in large
increments.
You can also adjust the set speed by
braking.
Note: Pressing the brake pedal does not
switch off the system.
CANCELING THE SET SPEED Press the button.
TRAIL CONTROL INDICATORS 230
Super Duty (TFE) Canada/United States of America, enUSA, Edition date: 201909, Second-Printing Trail Control
(If Equipped)E272858 E265298 E272858
Page 259 of 633

Setting up a Blind Spot Trailer
Trailer length
A
Trailer width
B
Trailer hitch ball
C
You can set-up any trailer to work with the
Blind Spot Information System with Trailer
Tow through the instrument cluster menu.
See General Information (page 112).
While setting up a trailer, a sequence of
screens appear asking for trailer
information. The Blind Spot Information
System with Trailer Tow specific screens
are described below:
• Select type of trailer screen -
Conventional, fifth wheel or gooseneck.
The Blind Spot Information System with
Trailer Tow only supports conventional
trailers. If fifth wheel or gooseneck is
selected, the system automatically turns
off.
• Do you want to set up BLIS with trailer
screen?
If no, the Blind Spot Information System
turns off.
If yes, the menu goes to the next screen.
• Is the width less than
9 ft (2.7 m) and
length less than 33 ft (10.1 m)?
If no, the Blind Spot Information System
turns off.
If yes, the menu goes to the next screen.
• Trailer width measurement: The width of the trailer is measured at the
front of the trailer. It is not measured at the
widest point of the trailer. The maximum
width at the front of the trailer that the
Blind Spot Information System with Trailer
Tow can support is
8.5 ft (2.6 m).
Note: You do not need to enter an exact
trailer width measurement; just measure
that it is
8.5 ft (2.6 m) or less.
• Trailer length measurement:
The trailer length is the distance between
the trailer hitch ball and the rear of the
trailer. The maximum length that the Blind
Spot Information System with Trailer Tow
can support is
33 ft (10.1 m).
• Enter length of trailer:
The default setting is
18 ft (5.5 m).
Toggling up or down using the menu
buttons will increase/decrease the
measurement by
3 ft (1 m). Select the
length so that the value is equal to or
within
3 ft (1 m) of the actual measured
length. For example, if the actual measured
length is
25 ft (7.6 m), then toggle the
length in the menu to 27 ft (8.2 m). When
the length has been entered, the Blind Spot
Information System with Trailer Tow setup
is saved.
If you do not set up a Blind Spot Trailer, a
warning appears in the instrument cluster
when a trailer is connected stating that the
system has been turned off due to a trailer
connect.
Note: If the trailer is actually a bike rack or
cargo rack with electrical lighting, then the
length will be
3 ft (1 m). Cross Traffic Alert
will remain on for trailers 3 ft (1 m) or less.
Note: Proper measurement and
measurement entry is required for Blind
Spot Information System with Trailer Tow
to function as designed.
256
Super Duty (TFE) Canada/United States of America, enUSA, Edition date: 201909, Second-Printing Driving AidsE225008
Page 308 of 633
Electric brakes and manual, automatic or
surge-type trailer brakes are safe if you
install them properly and adjust them to
the manufacturer's specifications. The
trailer brakes must meet local and federal
regulations.
The rating for the tow vehicle's braking
system operation is at the gross vehicle
weight rating, not the gross combined
weight rating.
Separate functioning brake systems
are required for safe control of towed
vehicles and trailers weighing more
than 1500 lb (680 kg) when loaded.
Integrated Trailer Brake Controller
(If Equipped)
WARNING: The anti-lock brake
system does not control the trailer
brakes. WARNING:
Use the integrated
trailer brake controller to properly adjust
the trailer brakes and check all
connections before towing a trailer.
Failure to follow this instruction could
result in the loss of control of your
vehicle, personal injury or death.
Note: The integrated Ford brake controller
is compatible with trailers equipped with
electric-actuated drum brakes and
electric-over hydraulic brake systems.
Note: The integrated Ford brake controller
does not control hydraulic surge-style
brakes. When used properly, the trailer brake
controller assists in smooth and effective
trailer braking by powering the trailer
’s
electric or electric-over-hydraulic brakes
with a proportional output based on the
towing vehicle ’s brake pressure.
You can adjust the amount of initial trailer
brake output by selecting one of three
settings through the message center.
Ford has tested the trailer brake controller
to be compatible with several major
brands of electric-over-hydraulic trailer
brakes. Contact an authorized dealer for
information on which brands you can use.
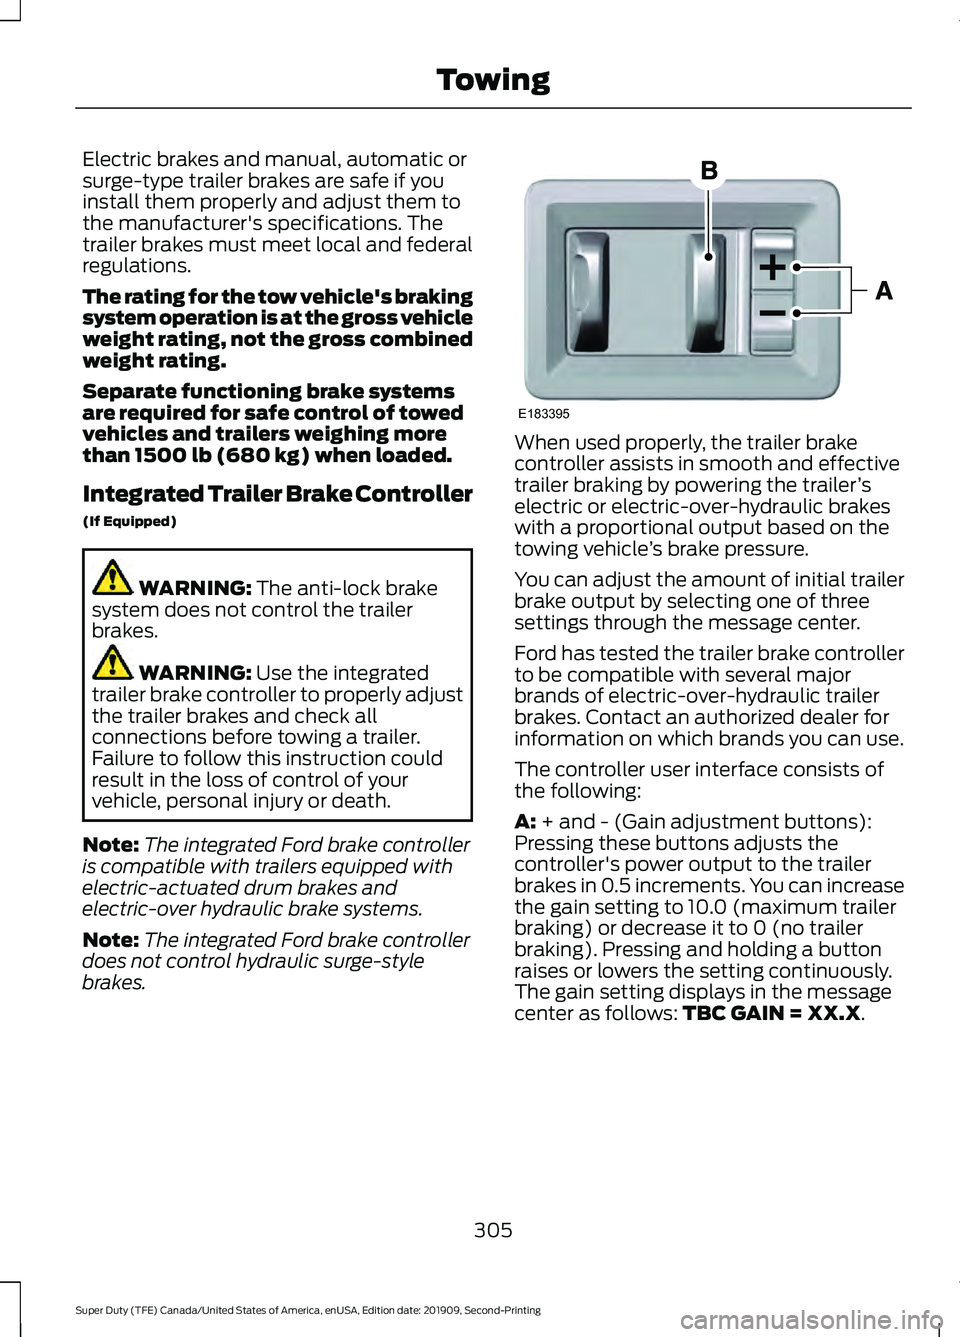
The controller user interface consists of
the following:
A:
+ and - (Gain adjustment buttons):
Pressing these buttons adjusts the
controller's power output to the trailer
brakes in 0.5 increments. You can increase
the gain setting to 10.0 (maximum trailer
braking) or decrease it to 0 (no trailer
braking). Pressing and holding a button
raises or lowers the setting continuously.
The gain setting displays in the message
center as follows:
TBC GAIN = XX.X.
305
Super Duty (TFE) Canada/United States of America, enUSA, Edition date: 201909, Second-Printing TowingE183395
Page 309 of 633
B: Manual control lever: Slide the control
lever to the left to switch on the trailer's
electric brakes independent of the tow
vehicle's. See the following Procedure for
adjusting gain section for instructions on
proper use of this feature. If you use the
manual control while the brake is also
applied, the greater of the two inputs
determines the power sent to the trailer
brakes.
• Stop lamps: Using the manual control
lever lights both the trailer brake lamps
and your vehicle brake lamps.
Trailer brake control messages appear in
the information display as follows:
• TBC GAIN = XX.X NO TRAILER:
Shows the current gain setting.
• TBC GAIN = XX.X OUTPUT=/ / / /
/ /
: Displays when braking. The bars
indicate the amount of power going to
the trailer brakes.
• TRAILER CONNECTED:
Displays
when the system senses a correct
trailer wiring connection.
• TRAILER DISCONNECTED: Displays
when the system senses a trailer
disconnection.
Procedure for Setting Trailer Brake
Controller Effort
Choose either the electric option for trailers
with electromagnetic drum brakes, or the
electric over hydraulic option for trailers
with these brake systems.
Trailer Brake Effort Setting
The trailer brake controller allows the user
to customize how aggressively the trailer
brakes engage. The default value is the low
setting and is the recommended setting
for most trailers. If your trailer's brakes
require more initial voltage, or if you prefer
more aggressive trailer braking, then select
either the medium or the high setting. Procedure for Setting Trailer Brake
Controller Mode
Choose the low, medium or high setting
for the required initial trailer brake output.
Procedure for Adjusting Gain
Note:
Only perform this procedure in a
traffic-free environment at speeds of
approximately
20– 25 mph (30–40 km/h).
The gain setting adjusts the trailer brake
controller for the specific towing condition.
You should change the setting as towing
conditions change. Changes to towing
conditions include trailer load, vehicle load,
road conditions and weather.
The gain should be set to provide the
maximum trailer braking assistance while
making sure the trailer wheels do not lock
when using the brakes. Locked trailer
wheels may lead to trailer instability.
1. Make sure the trailer brakes are in good
working condition, functioning normally
and properly adjusted. See your trailer
dealer if necessary.
2. Hook up the trailer and make the electrical connections according to the
trailer manufacturer's instructions.
3. When you plug in a trailer with electric or electric-over-hydraulic brakes, a
confirmation message appears in the
information display.
4. Use the gain adjustment (+ and -) buttons to increase or decrease the
gain setting to the desired starting
point. A gain setting of 6.0 is a good
starting point for heavier loads.
5. In a traffic-free environment, tow the trailer on a dry, level surface at a speed
of
20– 25 mph (30–40 km/h) and
squeeze the manual control lever
completely.
306
Super Duty (TFE) Canada/United States of America, enUSA, Edition date: 201909, Second-Printing Towing
Page 482 of 633
Note:
Some features, such as satellite
radio, may not be available in your location.
Check with an authorized dealer.
Note: The touchscreen system controls
most of the audio features.
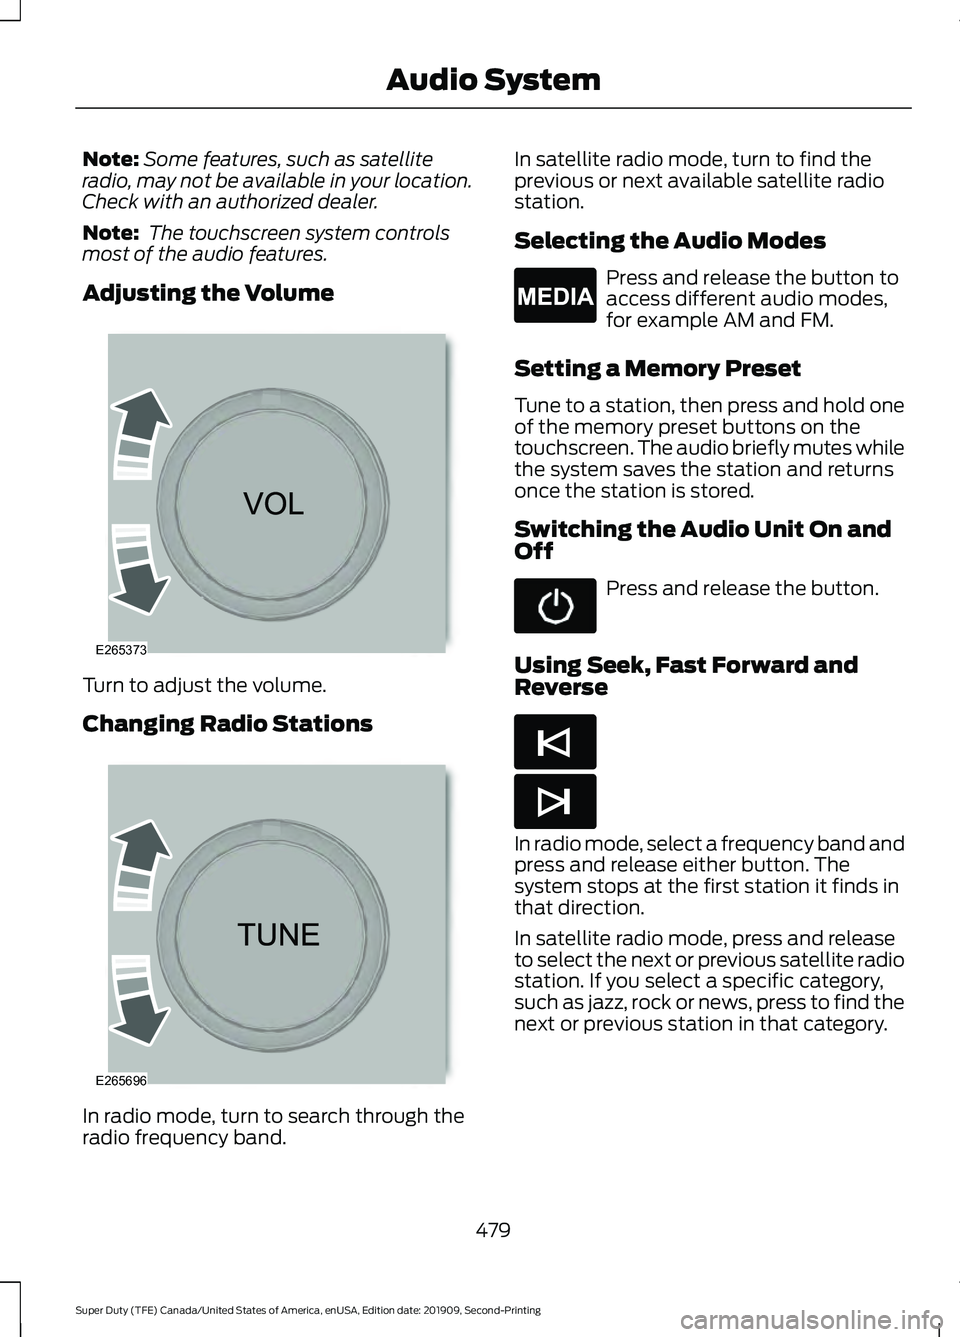
Adjusting the Volume Turn to adjust the volume.
Changing Radio Stations
In radio mode, turn to search through the
radio frequency band. In satellite radio mode, turn to find the
previous or next available satellite radio
station.
Selecting the Audio Modes Press and release the button to
access different audio modes,
for example AM and FM.
Setting a Memory Preset
Tune to a station, then press and hold one
of the memory preset buttons on the
touchscreen. The audio briefly mutes while
the system saves the station and returns
once the station is stored.
Switching the Audio Unit On and
Off Press and release the button.
Using Seek, Fast Forward and
Reverse In radio mode, select a frequency band and
press and release either button. The
system stops at the first station it finds in
that direction.
In satellite radio mode, press and release
to select the next or previous satellite radio
station. If you select a specific category,
such as jazz, rock or news, press to find the
next or previous station in that category.
479
Super Duty (TFE) Canada/United States of America, enUSA, Edition date: 201909, Second-Printing Audio SystemE265373 E265696 E265035 E265045 E265044
Page 483 of 633
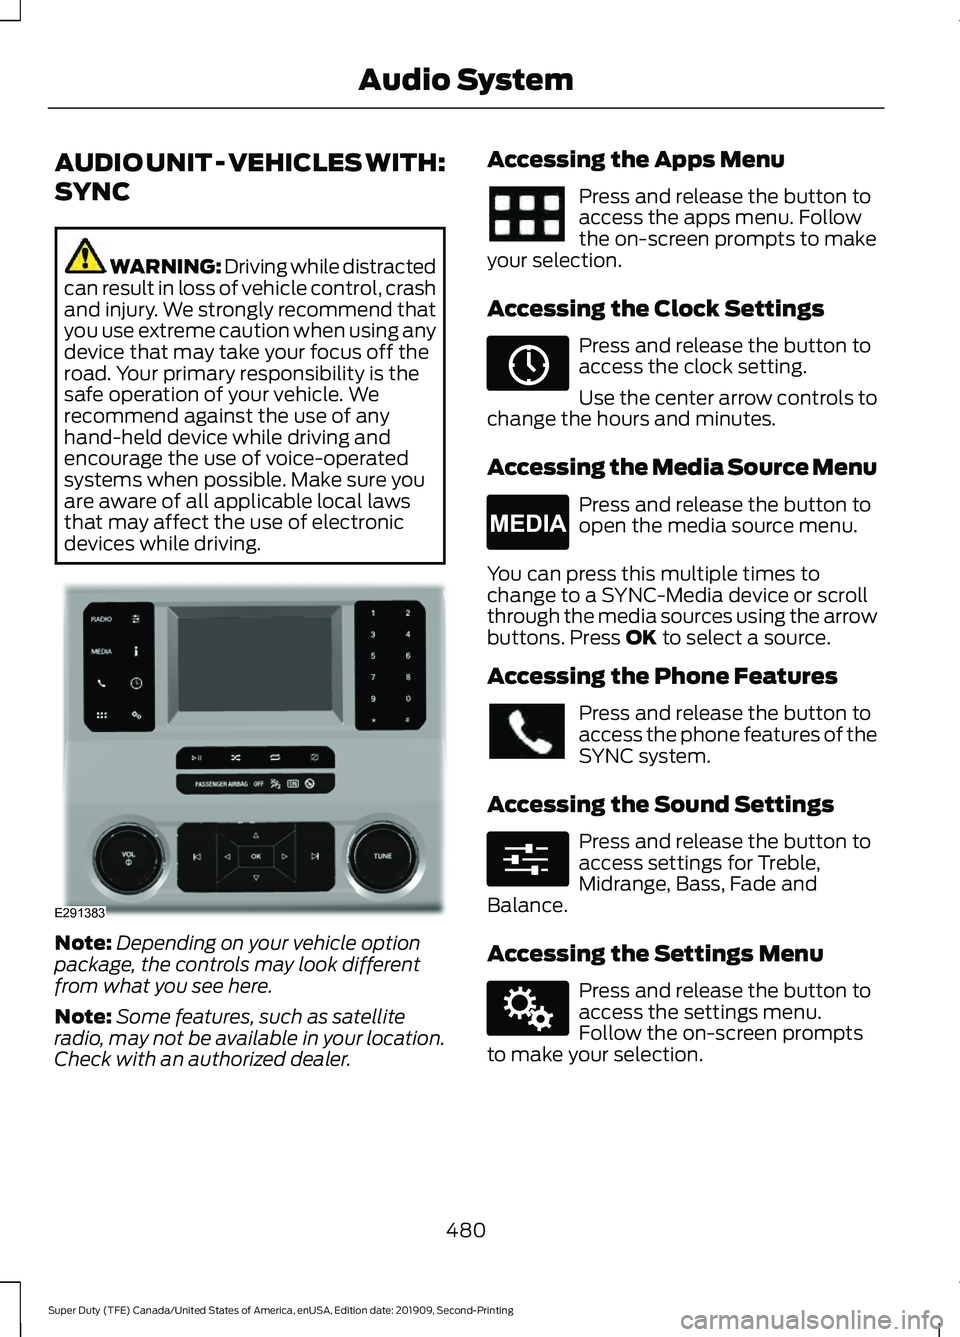
AUDIO UNIT - VEHICLES WITH:
SYNC
WARNING: Driving while distracted
can result in loss of vehicle control, crash
and injury. We strongly recommend that
you use extreme caution when using any
device that may take your focus off the
road. Your primary responsibility is the
safe operation of your vehicle. We
recommend against the use of any
hand-held device while driving and
encourage the use of voice-operated
systems when possible. Make sure you
are aware of all applicable local laws
that may affect the use of electronic
devices while driving. Note:
Depending on your vehicle option
package, the controls may look different
from what you see here.
Note: Some features, such as satellite
radio, may not be available in your location.
Check with an authorized dealer. Accessing the Apps Menu Press and release the button to
access the apps menu. Follow
the on-screen prompts to make
your selection.
Accessing the Clock Settings Press and release the button to
access the clock setting.
Use the center arrow controls to
change the hours and minutes.
Accessing the Media Source Menu Press and release the button to
open the media source menu.
You can press this multiple times to
change to a SYNC-Media device or scroll
through the media sources using the arrow
buttons. Press OK to select a source.
Accessing the Phone Features Press and release the button to
access the phone features of the
SYNC system.
Accessing the Sound Settings Press and release the button to
access settings for Treble,
Midrange, Bass, Fade and
Balance.
Accessing the Settings Menu Press and release the button to
access the settings menu.
Follow the on-screen prompts
to make your selection.
480
Super Duty (TFE) Canada/United States of America, enUSA, Edition date: 201909, Second-Printing Audio SystemE291383 E265036 E265035 E280315 E142607
Page 485 of 633
Using the Display Control
Use the up and down arrow buttons to
select the various settings. When you make
your selection, press the left and right
arrow buttons to change the settings.
Press and release to confirm a
selection.
Press and release the function buttons
below the display to select different
functions of the audio system depending
on which mode you are in.
Using the Number Block
In radio mode, store and recall your favorite
radio stations. To store a favorite station,
press and hold until the sound returns. In
phone mode, enter a phone number.
Using Seek, Fast Forward and
Reverse In radio mode, select a frequency band and
press and release either button. The
system stops at the first station it finds in
that direction.
In satellite radio mode, press and release
to select the next or previous satellite radio
station. If you select a specific category,
such as jazz, rock or news, press to find the
next or previous station in that category.
DIGITAL RADIO (IF EQUIPPED)
Note: HD Radio broadcasts are not
available in all markets. HD Radio technology is the digital
evolution of analog AM/FM radio. Your
system has a special receiver that allows
it to receive digital broadcasts, where
available, in addition to the analog
broadcasts, it already receives. Digital
broadcasts provide a better sound quality
than analog broadcasts with free,
crystal-clear audio and no static or
distortion. For more information, and a
guide to available stations and
programming, please visit
www.hdradio.com.
When HD Radio is on and you tune to a
station broadcasting HD Radio technology,
you may notice the HD Radio logo on your
screen. When this logo is available, you
may also see Title and Artist fields
on-screen.
The multicast indicator appears in FM
mode, only, if the current station is
broadcasting multiple digital broadcasts.
The highlighted numbers signify available
digital channels where new or different
content is available. HD1 signifies the main
programming status and is available in
analog and digital broadcasts. Other
multicast stations, HD2 through HD7, are
only available digitally.
When HD Radio broadcasts are active, you
can access the following functions:
•
Memory presets
allow you to save an
active channel as a memory preset.
Touch and hold a memory preset slot
until the sound returns. There is a brief
mute while the radio saves the station.
Sound returns when finished. When
switching to an HD2 or HD3 memory
preset, the sound mutes before the
digital audio plays, because the system
has to reacquire the digital signal.
Note: As with any saved radio station, you
cannot access the saved station if your
vehicle is outside the station ’s reception
area.
482
Super Duty (TFE) Canada/United States of America, enUSA, Edition date: 201909, Second-Printing Audio SystemE265041 E265045 E265044
Page 495 of 633
__ is a dynamic listing, meaning that it
could be the name of anything, such as a
contact or phone number.
Phone Controls
Use the phone buttons on your steering
wheel to answer, reject, or hang up a call.
Accessing Features through the
Phone Menu
You can access your call history,
phonebook, sent text messages, as well
as access phone and system settings.
1. Press the PHONE button to enter the
phone menu.
2. Scroll through the menu to view contacts, text messages, and the
phone dialer.
SYNC™ APPLICATIONS AND
SERVICES
• 911 Assist: Can alert 911 in the event of
an emergency.
• SYNC AppLink: Allows you to connect
to and use certain applications (if your
phone is compatible).
These features may require activation.
Available AppLink enabled apps vary by
market.
911 Assist WARNING:
Unless the 911 Assist
setting is set on before a crash, the
system will not dial for help which could
delay response time, potentially
increasing the risk of serious injury or
death after a crash. WARNING:
Do not wait for 911
Assist to make an emergency call if you
can do it yourself. Dial emergency
services immediately to avoid delayed
response time which could increase the
risk of serious injury or death after a
crash. If you do not hear 911 Assist within
five seconds of the crash, the system or
phone may be damaged or
non-functional. WARNING:
Always place your
phone in a secure location in your vehicle
so it does not become a projectile or get
damaged in a crash. Failure to do so may
cause serious injury to someone or
damage the phone which could prevent
911 Assist from working properly.
Note: The SYNC 911 Assist feature must be
set on before the incident.
Note: The SYNC 911 Assist feature only
operates in the U.S., Canada or in a territory
in which 911 is the emergency number.
Note: Before setting this feature on, make
sure that you read the 911 Assist Privacy
Notice later in this section for important
information.
Note: If any user switches 911 Assist to on
or off, that setting applies for all paired
phones. If 911 Assist is switched off, either
a voice message plays or a display message
or an icon comes on when your vehicle is
started and after a previously paired phone
connects.
Note: Every phone operates differently.
While SYNC 911 Assist works with most
cellular phones, some may have trouble
using this feature.
492
Super Duty (TFE) Canada/United States of America, enUSA, Edition date: 201909, Second-Printing SYNC™
(If Equipped)